Yet another stellar example of animation and sound design from the dream team of Buck and Antfood. A big round of applause is in order for Daniel Oeffinger and Rasmus Bak for their design and animation in this fantastically absurd piece!
Even if you always design websites from scratch, it’s wise to take a look at the many inspirational ways that other designers have made templates their own. For instance, many of the available WordPress templates are impressive, to begin with, but they take on new life with the right touch. Let’s take a look at […]
Create an 850 x 630 pxNew Document. You can, of course, use another size for your PSD file,but you have to proportionally adjust all the sizes used in this tutorial.
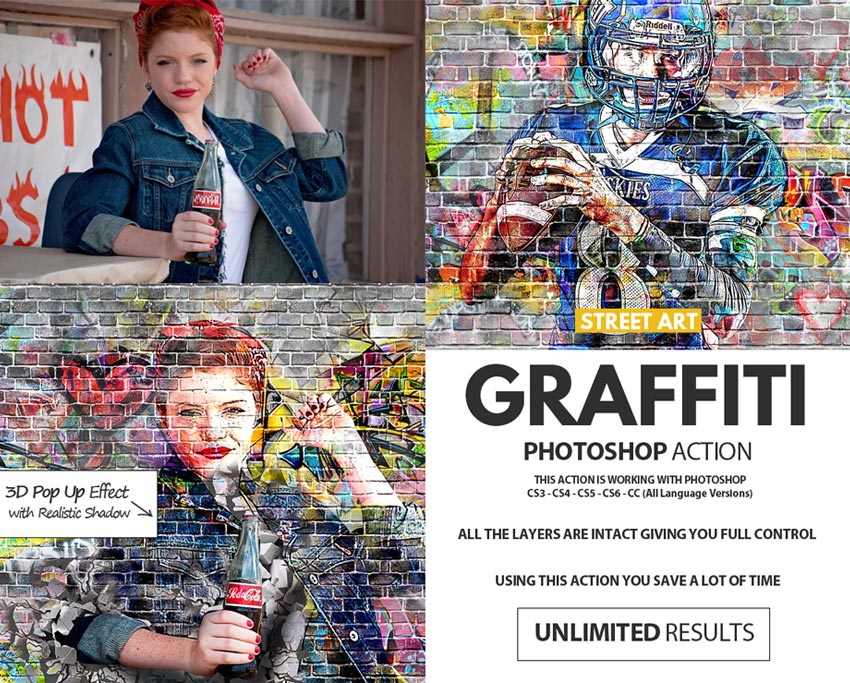
Add the Brick Wall in a New Layer. Resize the image if needed according to your canvas size.
2. How to Add the Graffiti Art
Step 1
In a New Layer, add the Graffiti Wall texture. Resize the image if needed according to your canvas size.
Step 2
Click the second icon at the bottom of the Layers panel to add a Layer Mask to the Graffiti Wall layer.
Set the Foreground Color to #000000 and pick the Brush Tool. Use the Grunge Brush to paint inside the mask to hide some of the graffiti effect and to reveal the brick wall.
3. How to Create the Graffiti Portrait Effect
Step 1
Add the Man Portrait in a New Layer. Use the Magic Wand Tool to select the background of this image. Set the Tolerance to 10 and check Contiguous. Keep the Shift key pressed to make multiple selections. Press Delete to remove the selected background.
Press Control-D to deselect.
Step 2
Press Control-J to Duplicate the Man Portrait layer twice, and call the new layers Man Portrait 1 and Man Portrait 2. Hide the two newly created layers. Clicking the eye icon next to any layer on the Layers panel will hide/show the layer.
Step 3
Return to the Man Portrait layer and add a Stroke layer style of 4 px, Position center, Color#000000.
Step 4
Go to Filter > Artistic > Cutout and choose the Number of Levels 8, Edge Simplicity 0 and Edge Fidelity 3.
Step 5
Go to Layer > New Adjustment Layer > Posterize and set the Levels to 5. Click on the third button from the left to add this adjustment as a Clipping Mask for the layer below.
Step 6
Go to Layer > New Adjustment Layer > Brightness/Contrast and set the Brightness to 117 and the Contrast to -50. Click on the third button from the left to add this adjustment as a Clipping Mask for the layer below.
Step 7
Go to Layer > New Adjustment Layer > Hue/Saturation and set the Hue to 129 and the Saturation to 100. Click on the third button from the left to add this adjustment as a Clipping Mask for the layer below.
Pick the Brush Tool and use the Grunge Brush to paint inside the Hue/Saturation Mask using the color #000000 to reveal the original color below.
Step 8
Create a New Layer. Copy and paste the Graffiti Wall image in this layer. Right-click on the layer and choose Create Clipping Mask.
Change the Blend Mode of the Graffiti Effect layer to Lighter Color.
Click the second icon at the bottom of the Layers panel to add a Layer Mask to the Graffiti Effect layer. Pick the Brush Tool and use the Grunge Brush to paint inside the Layer Mask using color #000000 to hide some details.
Step 9
Click the eye icon next to Man Portrait 1 layer to show the layer. Set the Foreground Color to #000000 and the Background Color to #ffffff.
Step 10
Go to Filter > Sketch > Photocopy and set the Detail to 3 and the Darkness to 50.
Step 11
Go to Filter > Artistic > Cutout and set the Number of Levels to 3, Edge Simplicity to 3 and Edge Fidelity to 3.
Step 12
Go to Image > Adjustments > Levels and set the Input Levels.
Step 13
Set the Blend Mode of the Man Portrait 1 to Multiply.
If you want, you can repeat the same process but with different settings for the Man Portrait 2 layer, but this step is optional.
4. How to Create the Brick Effect
Step 1
Press Shift-Control-N to create a New Layer above all the other layers.
Press Shift-Control-Alt-E to Merge all the visible layers. Call this layer Brick Effect.
Step 2
Add a Layer Mask to the Brick Effect layer.
Step 3
Go to Image > Trim and trim the canvas based on transparent pixels.
Step 4
Go to Brick Wall layer and make a selection using the Rectangular Marquee Tool. Press Control-C to make a Copy of the selection.
Step 5
Go back to the Brick Effect layer and on the Channels tab click on the eye icon next to the Brick Effect Mask to make it visible. Press Control-V to Paste the selection in this mask.
Step 6
Return to the Layers tab and press Control-D to Deselect. Also click on the Brick Effect Layer Thumbnail.
Step 7
Open the Layer Style Window of the Brick Effect layer and add a Bevel and Emboss.
Congratulations! You’re Done!
In this tutorial, you’ve learned how to create a graffiti effect in Photoshop from scratch using brushes and textures. I hope you’ve enjoyed this tutorial.
In
this new tutorial you will learn how to draw a colorful salad on a
plate, but let’s choose a different angle because that means more fun.
At the beginning, we will create a simple plate, and after that it’s
time to get creative in arranging the ingredients of this salad:
rocket leaves, pieces of red and yellow peppers, onion rings, tasty
slices of tomatoes, radishes, and black olives. At the end, it’s all
about the shadows in order to give it a more realistic look. Let’s
start the fun!
If
you are hungry for more food icons or vector icons in general, then
run over to GraphicRiver and you’ll surely find what are you looking
for there.
1. How
to Create a New Document
Launch Illustrator and
go to File
> New to
open a blank document. Type a name for your file, set up the
dimensions, and then select Pixels as Units and RGB as Color
Mode.
Make sure that Align
New Objects to Pixel Grid is
not checked.
Next,
go to Edit
> Preferences > General and
set the Keyboard
Increment to 1
px and
while there, go to Units to
make sure they are set as in the following image. I usually work with
these settings, and they will help you throughout the drawing process.
2. How
to Draw a Simple Plate
Step
1
Let’s
start with an ellipse about 610 x 75 pxFilled with the Linear Gradient shown (1). Next, draw another ellipse slightly bigger only
at the bottom and send it behind the first (2).
Step
2
To
create the center of the plate, draw a new ellipse about 480 x 58 px (1). Now, select the first ellipse and Copy and Paste in Place
(Shift-Control-V) in order to make a copy of it (2). While this copy
(the black ellipse) and the red ellipse stay selected, press Intersect in the Pathfinder panel. Fill the new shape with the Linear Gradient shown (3).
Step
3
Grab
the Pen Tool (P) and draw a shape like the one below. The important part is
the curve at the bottom which is a bit lower than the rest of the
ellipses and creates the thin border. Use the Gradient shown and then
send this shape behind everything.
Step
4
Next,
draw the bottom of the plate like in the following image. Use the Gradient shown and then send this shape behind everything.
Step
5
Draw
another shape like earlier, where the bottom curve is a bit lower than
the rest of the plate, in order to create a darker thin border (1).
Continue
with the last ellipse at the bottom of the plate about 280 x 58 pxFilled with the Linear Gradient shown, and then send it behind
everything (2).
Step
6
To
add a highlight on the bottom of the plate, draw a very thin shape
with the Pen Tool (P) following the bottom edge, and Fill it with the Linear Gradient shown.
Step
7
Now,
follow the outer edge of the plate and draw two new thin shapes as
shown. After that, the plate is ready, and you can see the final result
in the image below (3).
3. How to Draw the Rocket Leaf (Arugula)
It’s
time to draw the components of this tasty salad, and the first
ingredient is rocket, also known as arugula. Take the Pen Tool (P) and draw a leaf shape similar to the one below. Once you are happy with the shape, Fill it with the Linear Gradient shown (1).
Next,
draw a thin shape through the middle of the leaf and Fill it with the Gradient
shown (2).
That’s
it! The leaf is ready. Group (Control-G) the two shapes and name the
group “rocket”.
4. How
to Draw the Onion Ring
Step
1
Use
the Ellipse Tool (L) to draw two shapes and arrange them as shown in the
next image (1). The size is not important because you will scale all of the ingredients later anyway. While the two ellipses stay
selected, go to Object > Compound Path > Make (Control-8) and Fill the resulting shape with a pale purple (2).
Select
the ring and then Copy and Paste in Back (Control-B) to make a copy
of it. Move this copy 2-3 px downwards with the help of the Down
Arrow key on your keyboard (3).
Select the original ring again and
then Copy and Paste in Place (Shift-Control-V) to make another copy
of it. Having this new copy of the ring selected along with the black
ring, press Minus Front in the Pathfinder panel. Send the resulting
two shapes in the back (4) and Fill them with the two shades of
purple shown (5).
Step
2
The
onion ring is ready. You can create another version, but this is
optional. Just make a Copy of the onion ring and then use only two out of the
three shades of purple.
Group (Control-G) the shapes and name the groups “onion ring 1” and “onion ring 2”.
5. How
to Draw the Piece of Red Pepper
Step
1
Next
on the list of ingredients is the red pepper. Draw a shape similar to
the one below with the help of the Pen Tool (P) and
use red as the Fill color (1). While this shape stays selected, go to Object > Transform > Scale, type 105% in the Scale field, and
then hit Copy. As a result, you will get a slightly bigger shape. Use
a darker shade of red to Fill it and send it behind the first (2).
Grab
the Pen Tool (P) again and draw a new shape in front of the two Filled with a lighter shade of red (3). Fix the ends of the pepper if
necessary and alignthe points with the Direct Selection Tool (A).
The piece of red pepper is ready now (4).
Step
2
This
step is optional, but if you want more color in your salad, you can
create a piece of yellow pepper. Simply make a Copy of the red
pepper and replace the Fill colors.
Group
(Control-G) the shapes and name the groups “red pepper” and
“yellow pepper”.
6. How
to Draw the Slice of Tomato
Step
1
Use
the Pen Tool (P) to draw the tomato slice and Fill it with a dark
shade of red. While the shape stays selected, add a New Fill in the Appearance panel above the first and use an orangey-red color. Select this Fill attribute, go to Effect > Distort & Transform >
Transform and apply the settings shown. As a result, you will get the
darker edge at the bottom of the slice.
Step
2
Next,
draw a similar but smaller shape on top and Fill it with red. Add a New Fill below the first and use a darker shade of orange. With this
Fill attribute selected in the Appearance panel, go to Effect >
Distort & Transform > Transform and apply a 1 px Vertical
Move.
Step
3
Take
the Pen Tool (P) again and draw a shape like the one in the next image, Filled
with dark orange (1). Continue with a similar shape but slightly
smaller, filled with white. Set the Blending Mode to Soft Light (2).
You can see the result in the image below (3).
Step
4
For
the seed of the tomato, you need two tear-drop shapes. Fill the
bigger one with dark orange and the smaller one with yellow. Group
(Control-G) the two shapes and Multiply to obtain more seeds; then Rotate and arrange them on the tomato slice.
Step
5
Now,
draw a curved path next to the bottom edge of the slice (1). Give it
a 5 pt red Stroke; then go to Effect > Blur > Gaussian Blur and
apply a Radius of 2 px. Reduce the Opacity to 70% (2).
Select
the slice shape and then Copy and Paste in Place (Shift-Control-V) in
order to make a copy of it in front of everything. Set this copy to
stroke-none and fill-none. Now, select the curved path along with the
copy of the slice and go to Object > Clipping Mask > Make
(Control-7). Name the resulting group “tomato slice” and you are
done (3). You can see the final result in the image below (4).
7. How
to Draw the Slice of Radish
Use
the Pen Tool (P) to draw the slice shape, and after that, draw a
similar shape but bigger only at the bottom in the back (2).
Select
the blue shape and then Copy and Paste in Place (Shift-Control-V) to
make a copy of it in front of everything. Having this copy selected
along with the orange shape, press Minus Front in the Pathfinder
panel. As a result, you will get the shape at the bottom as the skin
of the radish (3). Fill the two shapes with the Radial Gradients
shown, Group (Control-G) them, and the slice of radish is ready (4).
8. How
to Draw the Black Olive
The
olive is pretty easy, and you only need two shapes: a 50 x 38 px
ellipse (1) and the highlight shape on the upper left side (2). Fill
them with the Radial Gradients shown; then Group (Control-G) them, and
you can see the final result in the image below (3).
9. How
to Compose the Salad
Step
1
First,
select the “plate” group and Rotate it as shown in the following
image to make things more interesting. And now, it’s finally time to
compose the delicious salad. Grab the “rocket” group and make a
few copies. Arrange them as shown below, or you can put your
creativity to the test.
There
are plenty of shadows in this salad, and you can choose to add them at
the end once you see the final picture, but that might be a bit
overwhelming because there are so many components involved. In order
to make things easier to understand, I will show you the settings
for the Drop Shadow effect as we go along. The settings are slightly
different from step to step because they depend on the position of
each ingredient.
Some
of the ingredients don’t even need a shadow. From the three rocket
leaves in the image below, only one has the Drop Shadow effect
applied because the other two will be covered with the rest of the
ingredients by the end so it’s not really necessary.
Step
2
Next,
grab the “red pepper” group and move it on the plate. Apply the Drop Shadow effect to create a shadow. The same thing goes for the
“yellow pepper” group.
It
looks weird for the moment, but at the end we’ll use a Mask to hide
the ingredients that go over the edge of the plate.
Step
3
Duplicate and arrange more rocket leaves. For the leaves that are up in the
air, you don’t need to apply the Drop Shadow effect because the
shadow should exist only on the plate and not outside and around the
plate.
Step
4
Next,
put an olive on the plate and apply the Drop Shadow effect.
Also, put
an onion ring and a yellow pepper on the left side but without the
shadow this time, because they go over the edge of the plate. We will
create more detailed shadows later in the tutorial for ingredients
like these.
Step
5
Following
the technique explained in the previous steps, place more leaves and
other ingredients on your plate.
Step
6
Arrange
another piece of red pepper, another slice of tomato, more olives and
another copy of the onion ring plus a bunch of leaves in between and
on top, as many as you want.
In
the image below, you can see the Drop Shadow settings for the onion
ring on the right side and for the rocket leaf on top of it.
Don’t
add a shadow under the slices of tomato because we’ll take care of that
later in the tutorial.
Step
7
It’s
time to arrange a few radish slices. Scale them so they are not the
same size because that is more natural. Add more leaves on top and
start to go upwards with the ingredients.
Step
8
Add
another piece of yellow pepper and another slice of tomato up in the
air between the leaves. The
last two ingredients are the red pepper and another onion ring.
10. How
to Add Shadows Between the Ingredients
Step
1
If
you are happy with your salad and the position of each ingredient, you
can now add more detailed shadows between them for a realistic
look.
Focus
on the slices of tomato and draw a path following the bottom edge,
one for each slice that you have. Give them a 3 pt black Stroke and
then apply a 3 px Gaussian Blur. After you are done, send each path
right behind the corresponding slice of tomato.
Step
2
Now,
focus on the ingredients that are up in the air and especially on the
areas where they overlap because you need a shadow there. Take your
time, zoom in as much as you need, and draw a small path where two
ingredients are overlapping following their contour, but don’t go over
the edges (into the white background). You can see a few examples in
the close-ups. The more paths you draw, the more detailed and
realistic your salad will be.
Select
a 2 pt black Stroke for all these paths and apply a 2 px Gaussian
Blur. Some of them are at 100% Opacity, and some of them are at 75%
Opacity, depending on the area and the colors. Don’t forget to move
each path between the two ingredients that are overlapping in the Layers panel because the correct order is very important in this case.
11. How
to Clean Up the Edge of the Plate
Step
1
Select
the ellipse from the inside of the plate and then Copy and Paste in
Place (Shift-Control-V) in order to make a copy of it in front of
everything (1). Grab the Scissors Tool (C) and click on the two end
points of this copy to cut the shape in two and keep only the half in
front (2). Use the Pen Tool (P) to close this path and create a new
shape around the salad (3).
Step
2
Set
the shape from the previous step to Stroke–None and Fill-None. Now,
select all the ingredients of the salad along with this shape and go to Object >
Clipping Mask > Make (Control-7). Now, the front side of the plate
is clean, as it should be.
Step
3
If
you want to add a leaf that goes over the edge of the plate for a
more realistic look then now is the time to do it, outside the mask.
Arrange it in the desired place and then apply the Drop Shadow
effect.
12. How
to Add Highlights on the Salad
Focus
on one of the tomato slices and draw two short paths as shown in the next
image. Stroke them with the Black Blend Art Brush from another
tutorial of mine dedicated to Blending Brushes and how useful they are: How to Create a Set of
Multi-Use Blend Brushes. I use these brushes all the time to add
highlights and details in my drawings. Set the color as
indicated and set the Stroke Weight to 0.75 pt. Keep the bigger path at 100% Opacity but for the shorter path reduce the Opacity to 50% to
make it more discreet.
Do
the same thing for the rest of the tomatoes to make them shinier.
You can also do this for the other ingredients if you want but for
me, this was enough.
13. How
to Create the Shadow Under the Plate
Step
1
Use
the Pen Tool (P) to draw a shape like in the next image on a New Layer behind the plate, and give it a white Fill. Continue with a
similar but smaller shape Filled with light gray and set it to 75%
Opacity.
Step
2
Draw
another ellipse under the bottom of the plate and Fill it with gray.
The last ellipse is much smaller and filled with a darker gray.
Step
3
While
the four shapes stay selected, go to Object > Blend > Blend
Options and choose 50 Specified Steps. Hit OK; then go back to Object
> Blend > Make (Alt-Control-B).
Set
the resulting blend group to Blending Mode Multiply and reduce the Opacity to 75%, but this depends on the color of your background.
Congratulations!
You’re Done
The colorful salad on the plate is ready now. Grab a fork!
Let
me know if you enjoyed this tutorial, and don’t forget to share an
image of your recreation with us if you decide to have fun with it. I would love to see it.
In this tutorial, I’ll show you how to create a color dust explosion effect on any photo. At the end of the tutorial, you’ll have an action which will automate the entire process with a single click.
I’ll try to explain everything in much detail so that everyone can follow along, even if this is your first time with Photoshop.
First, open the photo on which you want to work. To open your photo, go to File > Open, choose your photo, and click Open. Now, before we get started, we need to check a few things:
Your photo should be in RGB Color mode and 8 Bits/Channel. To check this, go to Image > Mode.
Your photo should be the Background layer. If it is not, go to Layer > New > Background from Layer.
Click the fly-out list of the Layers panel and click Panel Options….Make sure that both Use Default Masks on Fill Layers and Add „copy” to Copied Layers and Groups are checked.
Step 2
The effect works best with images of size 2500–4000 px width. If your image is smaller, increase it by going to Image > Image Size. You can always reduce it to your original size after the effect has been applied.
2. How to Load the Brushes
Step 1
Go to Edit > Presets > Preset Manager… In the Preset Manager window, select Preset Type: Brushes and click Load…
Browse and select the Color Dust Brushes.atn file that came with the downloadable attachment. Then, click Done.
Step 2
Press B on the keyboard to select the Brush Tool. Make sure both Opacity and Flow are set to 100%.
3. How to Make the Effect Area Layers
Add a New Layer above the Background layer. Name the new layer subject.
Now, make a Selection around your main subject. You can also choose the Brush Tool (B) and brush over your photo using a Hard Round Brush.
4. How to Start Recording the Action
Step 1
Now, let’s start preparing the base for our action. We’ll put it in a separate set for easier management.
Go to Window > Actions or press F9 on the keyboard to open up the Actions panel. Then, click the Create new set icon, name the set Color Dust Photoshop Action, and click OK. We’ll place the action inside this set.
Step 2
Click the Create new action icon and name it Color Dust.
Click Record to start recording all the subsequent steps in Photoshop.
From this point onwards, everything you do will be recorded, so please be careful and keep an eye on the Actions panel. If you make a mistake, click the Stop playing/recording icon, and Delete the unnecessary step from the Color Dust action. Then click the Begin recording icon again to continue. The last thing you’d want is to have a messy action filled with unwanted steps.
5. How to Create the Background
Step 1
Select the Background layer, and hide the subjectlayer by toggling the eyeball icon off. Then, press D on the keyboard to reset swatches.
Step 2
Go to Layer > New Fill Layer > Solid Color… Name it BG Color, enter the hex color code #ffffff, and click OK.
Step 3
Press Control-G to add the BG Color layer in a new Group. Then, go to Layer > Rename Group… and rename the group Color Dust. We’ll add all our further layers into this group to keep everything organized.
Step 4
Select the subject layer, right-click on the layer thumbnail, and select Select Pixels. Then select the Background layer and press Control-J to Copy the selection into a New Layer.
Create a New Layer, rename it Base Image, and drag it above the BG Color layer (inside the Color Dust group).
Step 5
Create a New Layer and name it temp-sub.
Again, select the subject layer, right-click on the layer thumbnail, and select Select Pixels. Go to Select > Modify > Smooth…, enter Sample Radius: 50 pixels and click OK.
Then, select the temp-sub layer and press Alt-Delete or to Fill the selection with the Foreground Color.
Press Control-D to deselect the current selection.
Hide the temp-sub layer by toggling the eyeball icon off.
6. How to Create the Emitter Guide Layers
Step 1
Select the Base Image layer. Create a New Layer and name it emitter-1.
Select the temp-sub layer, right-click on the layer thumbnail, and select Select Pixels.
Select the emitter-1 layer. Press M on the keyboard to select the Rectangular Marquee Tool. Then, right-click on the image and select Make Work Path…. Enter Tolerance: 3.0 pixels and click OK.
Step 2
Press B on the keyboard to select the Brush Tool. Expand the brush selector drop-down menu and select the br-color-dust-emitter-1 brush. Make sure both the Opacity and Flow are set to 100%.
Step 3
Press P on the keyboard to select the Pen Tool.
Then, right-click on the image and select Stroke Path… Make sure Simulate Pressure is not checked. Click OK.
Again, right-click on the image with the Pen Tool and select Delete Path.
Step 4
Now, your image should look like below.
Hide the emitter-1 layer by toggling the eyeball icon off.
Step 5
Create a New Layer and name it emitter-2.
Select the temp-sub layer, right-click on the layer thumbnail, and select Select Pixels.
Select the emitter-2 layer and go to Select > Transform Selection.
Keep Reference point location at Center, enter Width: 50%, Height: 1%, and click the Tick button on the top toolbar or press Enter to confirm.
Step 6
Press M on the keyboard to select the Rectangular Marquee Tool. Then, right-click on the image and select Make Work Path…. Enter Tolerance: 3.0 pixels and click OK.
Press B on the keyboard to select the Brush Tool. Expand the brush selector drop-down menu and select the br-color-dust-emitter-2 brush. Make sure both the Opacity and Flow are set to 100%.
Step 7
Now Stroke the path with the selected brush. Your image should look like below.
Hide the emitter-2 layer by toggling the eyeball icon off.
Step 8
Create a New Layer and name it emitter-3.
Select the temp-sub layer, right-click on the layer thumbnail, and select Select Pixels.
Select the emitter-3 layer and go to Select > Transform Selection. Keep Reference point location at Top-Right, enter Width: 40%, Height: 40%, and click the Tick button on the top toolbar or press Enter to confirm.
Again, go to Select > Transform Selection.
Keep Reference point location at Bottom-Left, enter Width: 1%, Height: 1%, and click the Tick button on the top toolbar or press Enterto confirm.
Step 9
Make a path from the selection and Stroke it with the selected brush. Your image should look like below.
Hide the emitter-3 layer by toggling the eyeball icon off.
Step 10
Create a New Layer and name it emitter-4.
Select the temp-sub layer, right-click on the layer thumbnail, and select Select Pixels.
Select the emitter-4 layer and go to Select > Transform Selection.
Keep Reference point location at Bottom-Left, enter Width: 30%, Height: 30%, and click the Tick button on the top toolbar or press Enter to confirm.
Again, go to Select > Transform Selection.
Keep Reference point location at Top-Right, enter Width: 1%, Height: 1%, and click the Tick button on the top toolbar or press Enter to confirm.
Step 11
Make a path from the selection and Stroke it with the selected brush. Your image should look like below.
Hide the emitter-4 layer by toggling the eyeball icon off.
Step 12
Create a New Layer and name it emitter-5.
Select the temp-sub layer, right-click on the layer thumbnail, and select Select Pixels.
Select the emitter-5 layer and go to Select > Transform Selection.
Keep Reference point location at Bottom-Right, enter Width: 30%, Height: 30%, and click the Tick button on the top toolbar or press Enterto confirm.
Again, go to Select > Transform Selection.
Keep Reference point location at Top-Left, enter Width: 1%, Height: 1%, and click the Tick button on the top toolbar or press Enterto confirm.
Step 13
Make a path from the selection and Stroke it with the selected brush. Your image should look like below.
Hide the emitter-5 layer by toggling the eyeball icon off.
Step 14
Create a New Layer and name it emitter-6.
Select the temp-sub layer, right-click on the layer thumbnail, and select Select Pixels.
Select the emitter-6 layer and go to Select > Transform Selection.
Keep Reference point location at Top-Left, enter Width: 40%, Height: 40%, and click the Tick button on the top toolbar or press Enter to confirm.
Again, go to Select > Transform Selection.
Keep Reference point location at Bottom-Right, enter Width: 1%, Height: 1%, and click the Tick button on the top toolbar or press Enterto confirm.
Step 15
Again, make a path from the selection and Stroke it with the selected brush. Your image should look like below.
Hide the emitter-6 layer by toggling the eyeball icon off.
Step 16
Select the emitter-1 layer. Hold Shift and select the emitter-6 layer. Press Control-J to Duplicate all selected layers.
Show the emitter-1 copy, emitter-2 copy, emitter-3 copy, emitter-4 copy, emitter-5 copy and emitter-6 copy by toggling the eyeball icons on.
Step 17
Press Control-E to Merge the selected layers. Go to Layer > Rename Layer… and rename it emitter-7.
Now, your image should look like below.
Hide the emitter-7 layer by toggling the eyeball icon off.
7. How to Create the Background Color Dust
Step 1
Select the BG Color layer.
Go to Layer > New Fill Layer > Solid Color…. Name it BG Fill Dust 1, enter the hex color code #000000, and click OK.
Step 2
Go to Layer > Layer Mask > Delete.
Again, go to Layer > Layer Mask > Hide All.
Now, go to Layer > Layer Mask > Unlink.
Step 3
Press B on the keyboard to select the Brush Tool. Expand the brush selector drop-down menu and select the br-color-dust-4c brush. Make sure both the Opacity and Flow are set to 100%.
Step 4
Select the emitter-7 layer, right-clickon the layer thumbnail, and select Select Pixels.
Step 5
Select the BG Fill Dust 1 layer icon. Then, select the layer mask (this is to make sure that the layer mask is always selected at this step).
Press D on the keyboard to reset swatches. Make sure your Foreground Color is white while the layer mask is selected.
Step 6
Press M on the keyboard to select the Rectangular Marquee Tool. Then, right-click on the image and select Make Work Path…. Enter Tolerance: 3.0 pixels and click OK.
Step 7
Press P on the keyboard to select the Pen Tool.
Then, right-click on the image and select Stroke Path…. Make sure Simulate Pressure is not checked. Click OK.
Again, right-click on the image with the Pen Tool and select Delete Path.
Step 8
Now, your image should look like below.
Step 9
Go to Layer > New Fill Layer > Solid Color…. Name it BG Fill Dust 2, enter the hex color code #000000, and click OK.
Step 10
Repeat Step 2 for the BG Fill Dust 2 layer.
Press B on the keyboard to select the Brush Tool. Expand the brush selector drop-down menu and select the br-color-dust-3d brush. Make sure both the Opacity and Flow are set to 100%.
Step 11
Select the emitter-7 layer, right-click on the layer thumbnail, and select Select Pixels.
Select the BG Fill Dust 2 layer icon. Then, select the layer mask (this is to make sure that the layer mask is always selected at this step).
Step 12
Then make a path from the selection and Stroke the path with the selected brush.
Now, your image should look like below.
Step 13
Go to Layer > New Fill Layer > Solid Color…. Name it BG Dust 1, enter the hex colour code #00ce7e, and click OK.
Step 14
Repeat Step 2 for the BG Dust 1 layer.
Press B on the keyboard to select the Brush Tool. Expand the brush selector drop-down menu and select the br-color-dust-1 brush. Make sure both the Opacity and Flow are set to 100%.
Step 15
Select the emitter-1 layer, right-click on the layer thumbnail, and select Select Pixels.
Select the BG Dust 1 layer icon. Then, select the layer mask (this is to make sure that the layer mask is always selected at this step).
Step 16
Then make a path from the selection and Stroke the path with the selected brush.
Now, your image should look like below.
Step 17
Go to Layer > New Fill Layer > Solid Color…. Name it BG Dust 1 Col 2, enter the hex colour code #0db9ea, and click OK.
Step 18
Repeat Step 2 for the BG Dust 1 Col 2 layer.
Go to Layer > Create Clipping Mask to add the BG Dust 1 Col 2 layer as a Clipping Mask to the BG Dust 1 layer.
Step 19
Press B on the keyboard to select the Brush Tool. Expand the brush selector drop-down menu and select the br-color-dust-4c brush. Make sure both the Opacity and Flow are set to 100%.
Select the emitter-7 layer, right-click on the layer thumbnail, and select Select Pixels.
Select the BG Dust 1 Col 2 layer icon. Then, select the layer mask (this is to make sure that the layer mask is always selected at this step).
Just like before, make a path from the selection and Stroke the path with the selected brush.
Press Control-I to Invert the layer mask color.
Now, your image should look like below.
Step 20
Go to Layer > New Fill Layer > Solid Color…. Name it BG Dust 2, enter the hex color code #ef16a5, and click OK.
Step 21
Repeat Step 2 for the BG Dust 2 layer.
Press B on the keyboard to select the Brush Tool. Expand the brush selector drop-down menu and select the br-color-dust-2 brush. Make sure both the Opacity and Flow are set to 100%.
Step 22
Select the emitter-3 layer, right-click on the layer thumbnail, and select Select Pixels.
Select the BG Dust 2 layer icon. Then, select the layer mask (this is to make sure that the layer mask is always selected at this step).
Then make a path from the selection and Stroke the path with the selected brush.
Now, your image should look like below.
Step 23
Go to Layer > New Fill Layer > Solid Color…. Name it BG Dust 3, enter the hex color code #ffea5a, and click OK.
Step 24
Repeat Step 2 for the BG Dust 3 layer.
Press B on the keyboard to select the Brush Tool. Expand the brush selector drop-down menu and select the br-color-dust-4a brush. Make sure both the Opacity and Flow are set to 100%.
Step 25
Select the emitter-3 layer, right-click on the layer thumbnail, and select Select Pixels.
Select the BG Dust 3 layer icon. Then, select the layer mask (this is to make sure that the layer mask is always selected at this step).
Then, make a path from the current selection. Press P on the keyboard to select the Pen Tool.
Then, right-click on the image and select Stroke Path…. Make sure Simulate Pressure is not checked. Click OK.
Again, right-clickon the image and select Stroke Path…. Make sure Simulate Pressure is not checked. Click OK.
Now, your image should look like below.
Step 26
Press B on the keyboard to select the Brush Tool. Expand the brush selector drop-down menu and select the br-color-dust-3d brush. Make sure both the Opacity and Flow are set to 100%.
Press P on the keyboard to select the Pen Tool.
Then,right-click on the image and select Stroke Path…. Make sure Simulate Pressure is not checked. Click OK.
Again,right-click on the image and select Stroke Path…. Make sure Simulate Pressure is not checked. Click OK.
Again, right-clickon the image and select Stroke Path…. Make sure Simulate Pressure is not checked. Click OK.
Now, right-click on the image with the Pen Tool and select Delete Path.
Now, your image should look like below.
Step 27
Select the emitter-4 layer, right-click on the layer thumbnail, and select Select Pixels.
Select the BG Dust 3 layer icon. Then, select the layer mask (this is to make sure that the layer mask is always selected at this step).
Then make a path from the current selection. Press P on the keyboard to select the Pen Tool.
Then, right-click on the image and select Stroke Path…. Make sure Simulate Pressure is not checked. Click OK.
Again,right-click on the image and select Stroke Path…. Make sure Simulate Pressure is not checked. Click OK.
Now, your image should look like below.
Step 28
Press B on the keyboard to select the Brush Tool. Expand the brush selector drop-down menu and select the br-color-dust-4a brush. Make sure both the Opacity and Flow are set to 100%.
Press P on the keyboard to select the Pen Tool.
Then, right-clickon the image and select Stroke Path…. Make sure Simulate Pressure is not checked. Click OK.
Again, right-clickon the image and select Stroke Path…. Make sure Simulate Pressure is not checked. Click OK.
Again, right-click on the image and select Stroke Path…. Make sure Simulate Pressure is not checked. Click OK.
Now,right-clickon the image with the Pen Tool and select Delete Path.
Now, your image should look like below.
Step 29
Go to Layer > New Fill Layer > Solid Color…. Name it BG Dust 4, enter the hex color code #0df0ed, and click OK.
Step 30
Repeat Step 2 for the BG Dust 4 layer.
Press B on the keyboard to select the Brush Tool. Expand the brush selector drop-down menu and select the br-color-dust-3c brush. Make sure both the Opacity and Flow are set to 100%.
Step 31
Select the emitter-5 layer, right-click on the layer thumbnail, and select Select Pixels.
Select the BG Dust 4 layer icon. Then, select the layer mask (this is to make sure that the layer mask is always selected at this step).
Then make a path from the selection and Stroke the path with the selected brush.
Now, your image should look like below.
Step 32
Go to Layer > New Fill Layer > Solid Color…. Name it BG Dust 5, enter the hex colour code #eb18a8, and click OK.
Step 33
Repeat Step 2 for the BG Dust 5 layer.
Press B on the keyboard to select the Brush Tool. Expand the brush selector drop-down menu and select the br-color-dust-4a brush. Make sure both the Opacity and Flow are set to 100%.
Select the emitter-2 layer,right-click on the layer thumbnail, and select Select Pixels.
Select the BG Dust 5 layer icon. Then, select the layer mask (this is to make sure that the layer mask is always selected at this step).
Then make a path from the selection and Stroke the path with the selected brush.
Change the Blending Mode of the layer to Darken.
Now, your image should look like below.
Step 34
Go to Layer > New Fill Layer > Solid Color…. Name it BG Dust 6, enter the hex color code #0db9ea, and click OK.
Step 35
Repeat Step 2 for the BG Dust 6 layer.
Press B on the keyboard to select the Brush Tool. Expand the brush selector drop-down menu and select the br-color-dust-3a brush. Make sure both the Opacity and Flow are set to 100%.
Select the emitter-4 layer, right-click on the layer thumbnail, and select Select Pixels.
Select the BG Dust 6 layer icon. Then, select the layer mask (this is to make sure that the layer mask is always selected at this step).
Then make a path from the selection and Stroke the path with the selected brush.
Now, your image should look like below.
Step 36
Press B on the keyboard to select the Brush Tool. Expand the brush selector drop-down menu and select the br-color-dust-3b brush. Make sure both the Opacity and Flow are set to 100%.
Select the emitter-6 layer, right-click on the layer thumbnail, and select Select Pixels.
Select the BG Dust 6 layer icon. Then, select the layer mask (this is to make sure that the layer mask is always selected at this step).
Then make a path from the selection and Stroke the path with the selected brush.
Now, your image should look like below.
Your BG Dust layers should look like below.
8. How to Create the Overlay Color Dust
Step 1
Select the Base Image layer.
Go to Layer > New Fill Layer > Solid Color…. Name it OL Dust 1, enter the hex color code #00ce7e, and click OK.
Step 2
Go to Layer > Layer Mask > Delete.
Again, go to Layer > Layer Mask > Hide All.
Now, go to Layer > Layer Mask > Unlink.
Step 3
Press B on the keyboard to select the Brush Tool. Expand the brush selector drop-down menu and select the br-color-dust-4b brush. Make sure both the Opacity and Flow are set to 100%.
Step 4
Select the temp-sub layer, right-click on the layer thumbnail, and select Select Pixels.
Step 5
Select the OL Dust 1 layer icon. Then, select the layer mask (this is to make sure that the layer mask is always selected at this step).
Press D on the keyboard to reset swatches. Make sure your Foreground Color is white while the layer mask is selected.
Step 6
Press M on the keyboard to select the Rectangular Marquee Tool. Then, right-click on the image and select Make Work Path…. Enter Tolerance: 3.0 pixels and click OK.
Step 7
Press P on the keyboard to select the Pen Tool.
Then, right-clickon the image and select Stroke Path…. Make sure Simulate Pressure is not checked. Click OK.
Again, right-clickon the image with the Pen Tool and select Delete Path.
Step 8
Now, your image should look like below.
Step 9
Go to Layer > New Fill Layer > Solid Color…. Name it OL Dust 2, enter the hex color code #eb18a8, and click OK.
Step 10
Repeat Step 2 for the OL Dust 2 layer.
Select the emitter-5 layer, right-clickon the layer thumbnail, and select Select Pixels.
Select the OL Dust 2 layer icon. Then, select the layer mask (this is to make sure that the layer mask is always selected at this step).
Then make a path from the selection and Stroke the path with the selected brush.
Now, your image should look like below.
Step 11
Go to Layer > New Fill Layer > Solid Color…. Name it OL Dust 3, enter the hex color code #0db9ea, and click OK.
Step 12
Repeat Step 2 for the OL Dust 3 layer.
Select the emitter-4 layer, right-click on the layer thumbnail, and select Select Pixels.
Select the OL Dust 3 layer icon. Then, select the layer mask (this is to make sure that the layer mask is always selected at this step).
Then make a path from the selection and Stroke the path with the selected brush.
Now, your image should look like below.
Step 13
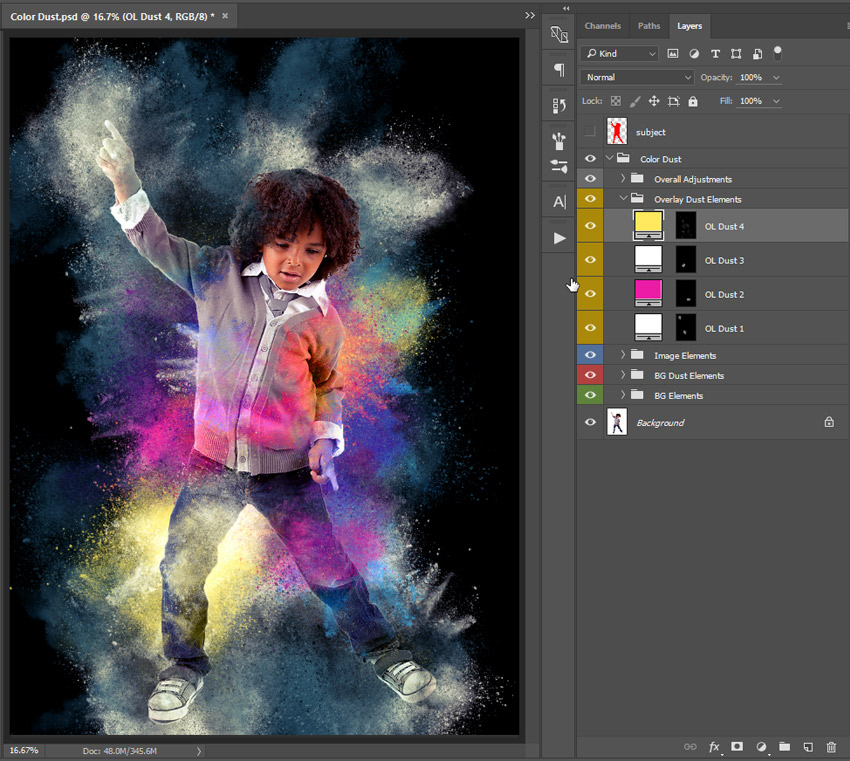
Go to Layer > New Fill Layer > Solid Color…. Name it OL Dust 4, enter the hex colour code #ffea5a, and click OK.
Step 14
Repeat Step 2 for the OL Dust 4 layer.
Press B on the keyboard to select the Brush Tool. Expand the brush selector drop-down menu and select the br-color-dust-5 brush. Make sure both the Opacity and Flow are set to 100%.
Step 15
Select the emitter-7 layer,right-click on the layer thumbnail, and select Select Pixels.
Select the OL Dust 4 layer icon. Then, select the layer mask (this is to make sure that the layer mask is always selected at this step).
Then make a path from the current selection.
Press P on the keyboard to select the Pen Tool.
Then, right-click on the image and select Stroke Path…. Make sure Simulate Pressure is not checked. Click OK.
Again, right-click on the image and select Stroke Path…. Make sure Simulate Pressure is not checked. Click OK.
Now, right-clickon the image with the Pen Tool and select Delete Path.
Now, your image should look like below.
Your layers structure should look like below.
9. How to Make Image Adjustments
Step 1
Select the Base Image layer and press Control-J to Duplicate it.
Go to Layer > Rename Layer… and rename it Overlay Image. Change the Blending Mode of the Overlay Image layer to Luminosity.
Go to Layer > Layer Mask > Hide All. Select the Base Image layer and go to Layer > Layer Mask > Reveal All.
Step 2
Select the emitter-7 layer, right-clickon the layer thumbnail, and select Select Pixels.
Press B on the keyboard to select the Brush Tool. Expand the brush selector drop-down menu and select the br-color-dust-3e brush. Make sure both the Opacity and Flow are set to 100%.
Step 3
Press M on the keyboard to select the Rectangular Marquee Tool. Then, right-click on the image and select Make Work Path…. Enter Tolerance: 3.0 pixels and click OK.
Select the layer thumbnail of the Base Image layer and then select its Layer Mask. This is to make sure that the layer mask always gets selected at this point.
Press D on the keyboard to reset swatches. Then, press X on the keyboard to switch swatches and set your Foreground Color as Black.
Press P on the keyboard to select the Pen Tool.
Then,right-click on the image and select Stroke Path…. Make sure Simulate Pressure is not checked. Click OK.
Again, right-clickon the image and select Stroke Path…. Make sure Simulate Pressure is not checked. Click OK.
Again, right-click on the image and select Stroke Path…. Make sure Simulate Pressure is not checked. Click OK.
Now, your image should look like below.
Step 4
Select the layer thumbnail of the Overlay Image layer and then select its layer mask. This is to make sure that the layer mask always gets selected at this point.
Press D on the keyboard to reset swatches and set your Foreground Color as White.
Press P on the keyboard to select the Pen Tool.
Then, right-click on the image and select Stroke Path…. Make sure Simulate Pressure is not checked. Click OK.
Again,right-click on the image and select Stroke Path…. Make sure Simulate Pressure is not checked. Click OK.
Now, right-click on the image and select Delete Path.
Your image and layers structure should look like below.
10. How to Make Additional Adjustments
Step 1
Select the OL Dust 4 layer.
Go to Layer > New Adjustment Layer > Levels… and name it Overall Levels.
Enter the following input levels – Shadow input level: 20 and Highlight input level: 245.
Step 2
Go to Layer > New Adjustment Layer > Curves… and name it Overall Curves.
Select the Blue channel and enter the following values.
Now, your image and layers structure should look like below.
11. How to Tidy Up Your Groups
In the next steps, we’ll organize the layers into logical groups and color code them for ease of use.
Step 1
Select the temp-sub layer. Hold Shift and select the emitter-1 layer.
Press Delete on the keyboard to delete all eight selected layers.
Step 2
Select the Overall Levels layer, hold Shift and select the Overall Curves layer.
Press Control-G to Group the layers. Go to Layer > Rename Group… and rename it as Overall Adjustments.
Right-click on the Overall Adjustments group and select Slot Color: Gray.
Step 3
Select the OL Dust 4 layer, hold Shift and select the OL Dust 1 layer.
Press Control-G to Group the layers. Go to Layer > Rename Group… and rename it as Overlay Dust Elements.
Right-clickon the Overlay Dust Elements group and select Slot Color: Yellow.
Step 4
Select the Overlay Image layer, hold Shift and select the Base Image layer.
Press Control-G to Group the layers. Go to Layer > Rename Group… and rename it as Image Elements.
Right-click on the Image Elements group and select Slot Color: Blue.
Step 5
Select the BG Dust 6 layer, hold Shift and select the BG Dust 1 layer.
Press Control-G to Group the layers. Go to Layer > Rename Group… and rename it BG Dust Elements.
Right-click on the BG Dust Elements group and select Slot Color: Red.
Step 6
Select the BG Fill Dust 2 layer, hold Shift and select the BG Color layer.
Press Control-G to Group the layers. Go to Layer > Rename Group… and rename it BG Elements.
Right-click on the BG Elements group and select Slot Color: Green.
12. How to Finish Recording the Action
Stop recording by clicking the Stop button.
13. How to Customize Your Result
Now, I’ll show you how to change the color of the dust elements.
Step 1
Double-click on the BG Color layer thumbnail and enter the hex color code #000000. Click OK.
Double-click on the BG Fill Dust 1 layer thumbnail and enter the hex color code #ffffff. Click OK.
Double-click on the BG Fill Dust 2 layer thumbnail and enter the hex color code #ffffff. Click OK.
Step 2
Double-click on the BG Dust 1 layer thumbnail and enter the hex color code #000000. Click OK.
Double-click on the BG Dust 1 Col 2 layer thumbnail and enter the hex color code #436c78. Click OK.
Double-click on the BG Dust 2 layer thumbnail and enter the hex color code #38b2ff. Click OK.
Double-click on the BG Dust 3 layer thumbnail and enter the hex color code #ffea5a. Click OK.
Double-click on the BG Dust 4 layer thumbnail and enter the hex color code #49b0ff. Click OK.
Double-click on the BG Dust 5 layer thumbnail and enter the hex color code #eb18a8. Click OK.
Double-click on the BG Dust 6 layer thumbnail and enter the hex color code #ffffff. Click OK.
Step 3
Double-click on the OL Dust 1 layer thumbnail and enter the hex color code #ffffff. Click OK.
Double-click on the OL Dust 2 layer thumbnail and enter the hex color code #eb18a8. Click OK.
Double-click on the OL Dust 3 layer thumbnail and enter the hex color code #ffffff. Click OK.
Double-click on the OL Dust 4 layer thumbnail and enter the hex color code #ffea5a. Click OK.
This is what we’ll get.
Feel free to experiment with different colors. You can also select the Layer mask of any color dust layer and press Control-T to bring up the Free Transform tool. Then, you can resize and rotate the elements.
Awesome, You’ve Done It!
Here is your final result!
You can now apply the effect onto any other image. Open the image, select Color Dust Photoshop Action, and click Play from the Actions panel.
Things to remember before playing the action:
Make sure that you have installed the Brush.
Make sure that the Brush Opacity and Flow are set to 100%, like step 2 – How to Load the Brushes.
Make sure you have created the subject layer, made a selection of your main subject and filled it with any color, just like Step 1 of 3 – How to Make the Effect Area Layers.
Make sure the width of the image is set between 2500-4000 pixels, like Step 2 of 1 – How to Set Up Your Document.
Make sure Use Default Masks on Fill Layers and Add „copy” to Copied Layers and Groups are checked under Panel Options…, like Step 1 of 1 – How to Set Up Your Document.
We have reached the end of the tutorial. Here you’ve learned how to
add a color dust explosion effect on any photo and also automate it in a
one-click Photoshop action.
I hope you’ve enjoyed this tutorial and found it helpful. Feel free to leave your comments below, and thanks for reading.
Thanks to the partnership with HomeAway, Leroy Merlin chose holiday homes with negative reviews and transformed them in new showrooms for its products helping hosts to rent them more easily. This way Leroy Merlin’s logo became a guarantee of quality and style.
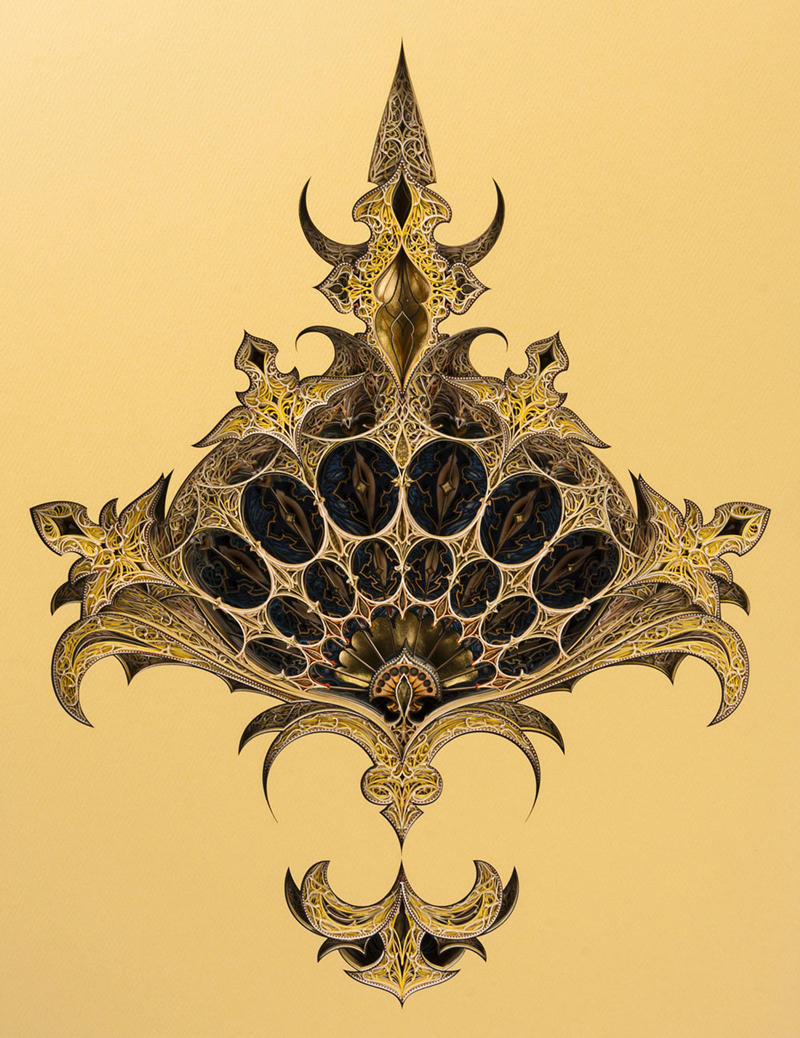
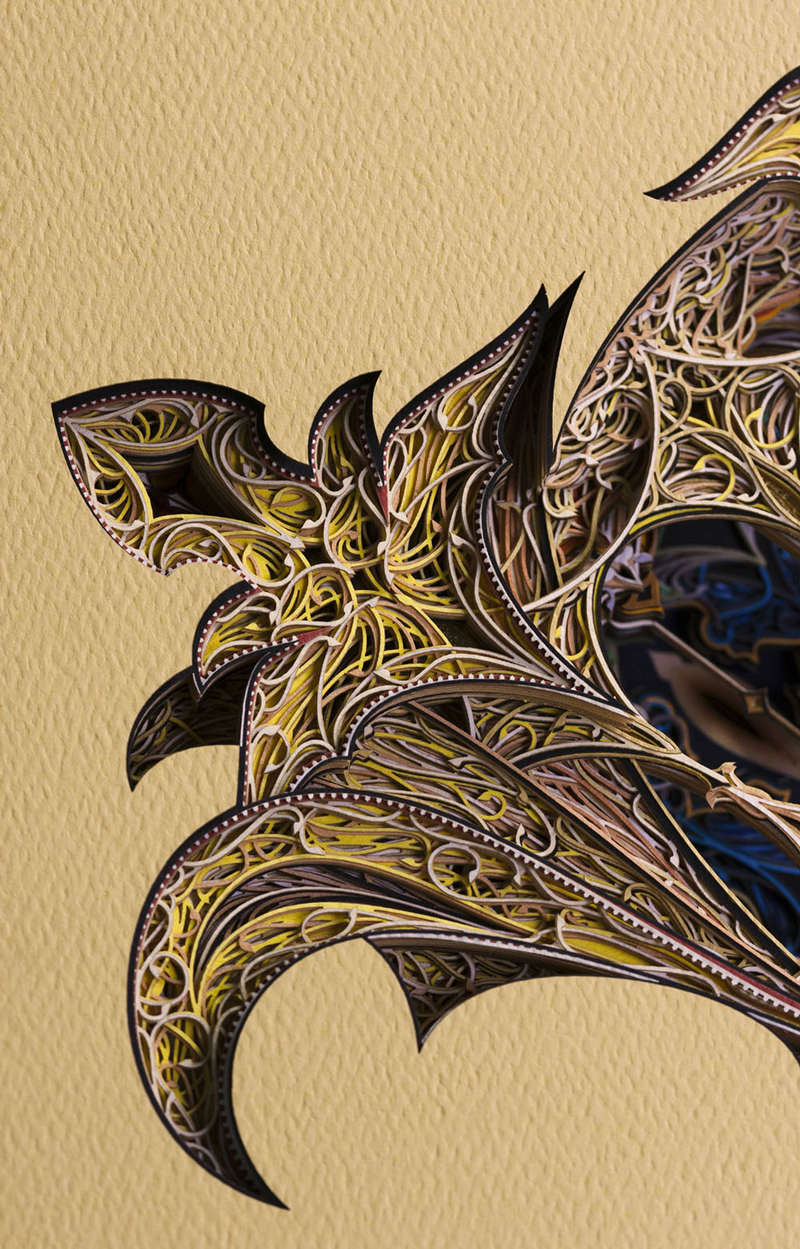
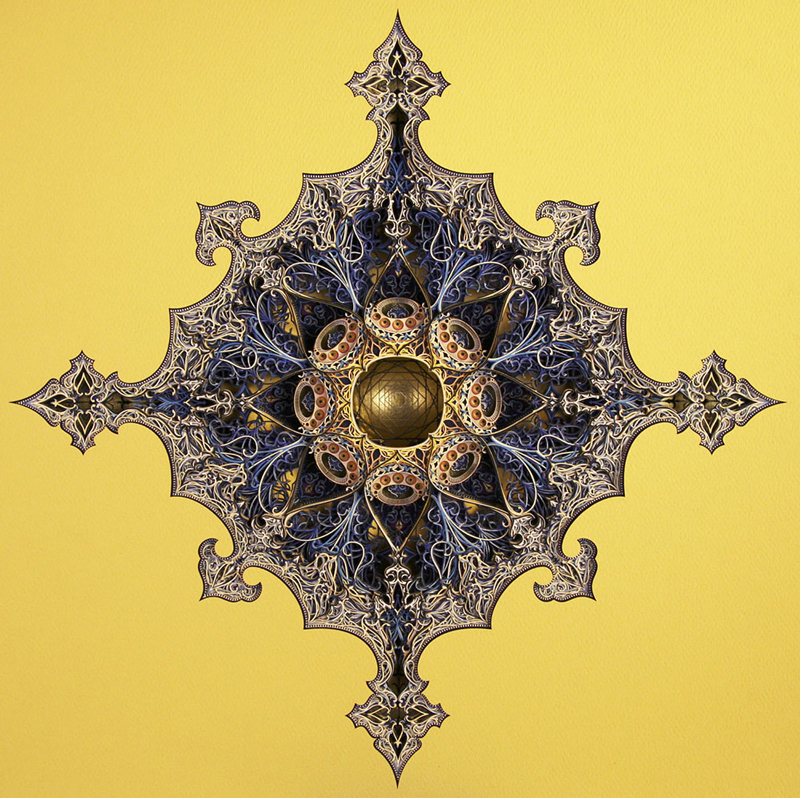
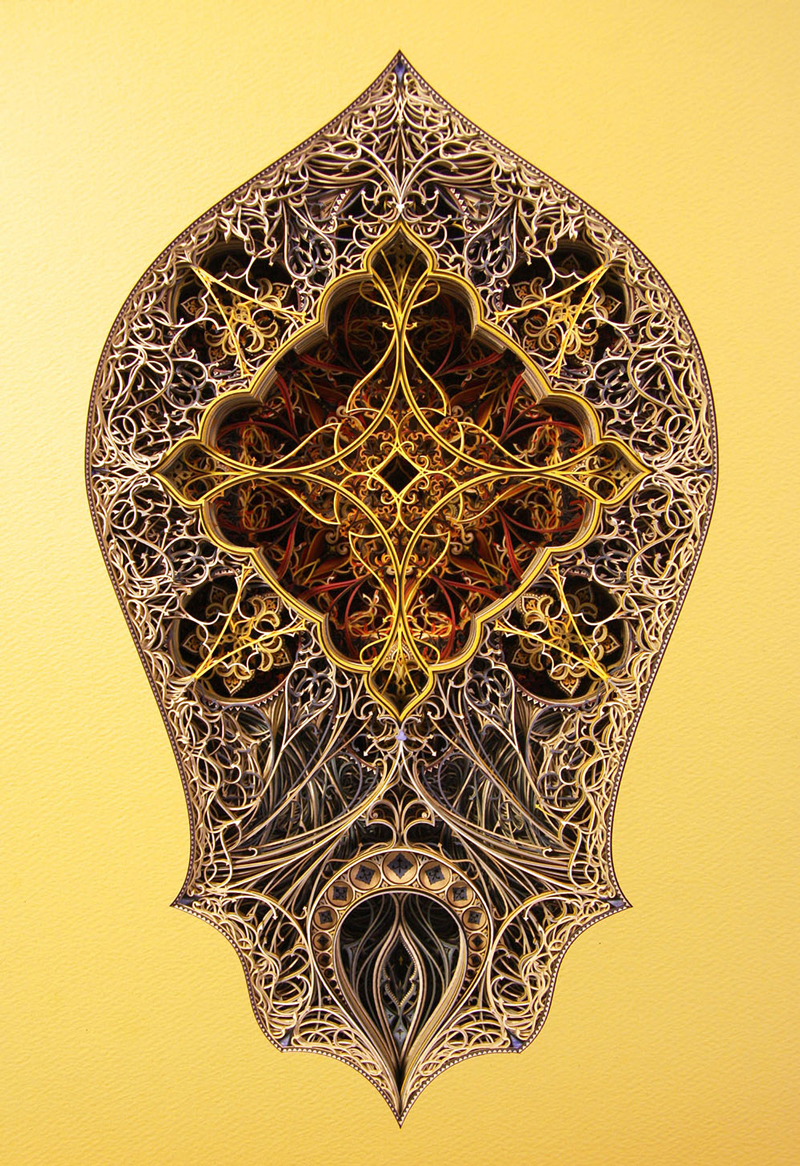
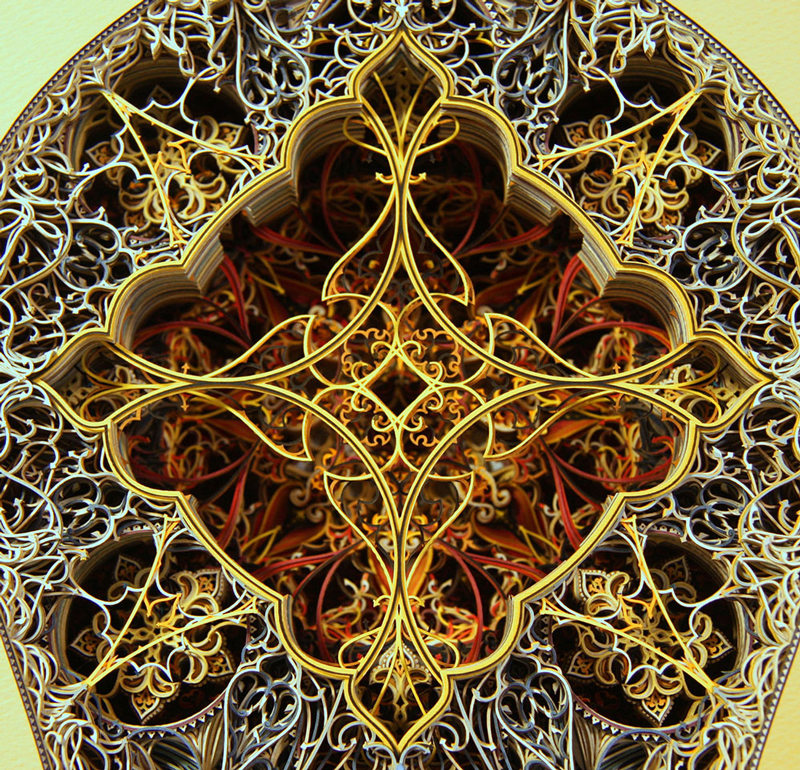
Inspired by Gothic and Islamic architectural patterns, Eric Standley’s layered laser-cutting are just stunning. The artist stacks cutted paper on top of each other to enter a third dimension.
You can see it everywhere: Heads buried in their mobile devices, completely oblivious to the world around them. Sitting in their cars, staring down while the light has already turned green, with their kid looking up at them forlornly, waiting to be pushed on the swing, or as you dive out of the way before getting barreled over on the footpath. We are utterly obsessed with our phones, often to the exclusion of everything else that is going on in the world. Time on mobile devices comprises 65% of all time spent consuming digital media. That’s a huge proportion, and it’s getting bigger. It’s no wonder that apps are such huge business, with legions of companies competing for all that attention. Today we’ll look at a few prominent ways in which app developers are vying for that decisive edge.
Augmented Reality (AR)
AR has been hot ever since Pokemon Go took the world by storm. Digital minds all over the world have since been experimenting with new and exciting ways to AR-infused apps to the marked. One app developer in Melbourne devised a way to assist travelers to get their luggage and to their gate in unfamiliar airports. Another company in New York devised a slick app that allows you to superimpose tattoo designs on your body through your phone’s camera so you can see what it will look like before taking the plunge. Whatever the application, the potential for this amazing technology is limited only by our imaginations.
Wearable Technology
Technologies that can be worn on the body have enormous power to integrate with mobile and desktop apps. Fitbit is a great example of this and has been a great success that has spawned numerous copycat products. Breakthrough technologies such as Apple Watch and Google Glass have underwhelmed commercially and in terms of winning hearts and minds. However, it is almost certainly just a matter of time in until someone gets the right recipe.
Instant Apps
It’s Murphy’s law of Apps. You download a seemingly amazing app that promises to be your next best friend, only to have it sit on your device unopened and unloved for months. Eventually, you delete it, casting it into digital oblivion. Then, the very next day you encounter precisely the situation in which you could have used the app, and you curse in frustration. Instant apps promise to change all this. Rather than clutter your device with a million apps that you rarely if ever use, instant apps can be accessed instantly from the Cloud, without downloading or installation.
Artificial Intelligence (AI)
AI is one of those controversial topics that is at once exciting and yet downright scary. The specter of machines that can learn how to think like us and take over the world might be the stuff of science fiction. However, with AI started to take over people’s jobs, predict our online behaviors and outsmart human hackers, it is clear that we need to think very carefully about how we use this sensitive technology. Like most things, there is plenty of opportunity to use it to better our lives. AI applications that understand how kids learn and tailor educational programs to their individual needs are just one way that we can harness AI to make a positive impact.
Internet of Things
Ever since Mark Zuckerberg announced that he would build an app to interface with the bot that pretty much controls his entire house, the world has realized that IoT is not just a catchy buzzword. We can expect to see the intersection between those ubiquitous icons on our phones and the things that we use every day continue to grow.
We’d love to hear what you think are some other exciting trends that will impact the mobile technology world!
Agregator najlepszych postów o designie, webdesignie, cssie i Internecie