Adding sparkles to photos can be a lot of fun when you want to change things up. Whether it’s personalizing your own greetings cards, making images of your kids more magical, or whether you just like sparkles, we’ll show you how to add sparkles to pictures in a fun and easy way.
What You’ll Learn in This Photoshop Action Tutorial
How to add glitter to a photo in Photoshop
How to add sparkles to a photo in an easy way
How to add sparkles to a photo using more editing options
How to create your own effect to put glitter on photos
Tutorial Assets
In this tutorial, I’ll be demonstrating Sparkle Photoshop Action by Sevenstyles, which you can find as part of Envato Elements’ great collection of Photoshop actions. If you’d like to follow the tutorial using the same images, you can download them for free here:
Before we jump into how to add glitter to a photo in Photoshop, it’s always wise to read the help document that comes with any action. The key points you’ll need to remember in order for the action to work properly are:
Make sure your image is in 8-bit RGB mode.
Create a layer named ’brush’ in lowercase, to brush over.
If you’re new to actions, you’ll first need to load the actions into Photoshop. Go to the Actions panel in Photoshop. If it’s not visible, select Window > Actions to display it. To install an action, download the ATN file, open the Actions panel in Photoshop, and select Load Actions from the dropdown. Navigate to the ATN file and select Load. The actions will then be available for you to use.
Check out these useful resources if you have more questions:
How to Add Sparkles to a Photo: The Super Simple Way
First, we’ll learn how to add sparkles to pictures the easiest way. Here’s our first example starting image:
Bird image I’ll use as our first example
When you’ve created your brush layer, brush over where you’d like the sparkles to appear to put glitter on photos. The colors you choose will be the color of the glitter (plus white), so I’ve chosen colors from the hummingbird’s plumage to complement it.
Brush on your image in the colors you want the glitter to be
I’ve included a couple of low-opacity patches behind the bird, so the glitter doesn’t just end with the hummingbird’s tail. Now we run the glitter action and see the result:
After the action has finished running, you’ll see glitter where your brush marks were
How to Add Sparkles to a Photo: The „Give it More Effort” Way
Next up, we’ll learn how to add sparkles to pictures following more editing options in Photoshop. We want to put glitter on photos and make something a bit more sophisticated. Here’s our starter:
This image of three dancers in black and white is an interesting one to try
This time, I’m going to try it on a black and white image because I think the colors will pop better. If you use a black and white photograph, you still need to make sure the image mode is set to RGB and not Greyscale.
To put glitter on photos, select colors that are darker than you want the glitter to be—pastels may look nice, but they’ll turn out mostly white.
I’ve brushed on three colors which should look nice together
Run the Glitter Action
The action is made up of many layers
You can see that the glitter action is made up of many layers, now grouped together appropriately to add the sparkle effect to the photo. By changing these, we can better control the effect of the action.
Make Adjustments
Reduce the smaller white speckles by reducing the opacity of Sparkles_Set 2. This will make it a little softer.
Reduce some of the particle options
Next, reduce the opacity of the Wide Glow layer. This will tone down the colors so that they’re not quite so garish.
Tone down the glow
You can reduce the Blur Base too—it’ll take some of the white glow out of the sparkles.
Finish Up
Finally, you’ll notice there’s a Black Tint layer. It’s set to 0% opacity, but you can increase that to take some of the white glow from around the edges. It’ll depend on the image you’re using as to whether you want to do that.
Increase Black Tint to darken edges
Make some contrast and brightness adjustments across your whole image, and you’re done! Now you know how to add glitter to a photo in Photoshop!
Finished Image
5 Cool Resources From Envato Elements
Want to sparkle up your projects? Check out these sparkle images and other resources that will help you achieve that sparkle effect on photos.
It’s not enough to add sparkles to a photo. Sometimes, you need a great font to match the vibe. Magic Sparkle is the right font to give that extra something to your sparkles image. The font is all upper-case and is great for logos, titles, packing, and more.
If you want to add sparkle to a photo but still keep a clean look, these Sparkle Light Icons are for you. Use them as bullets to highlight information or to create different patterns across your document or project. Color can be easily added by editing in Illustrator or Photoshop.
You might be wondering how to add sparkles to a picture background. With this sparkling waves background, you can add flair to presentations, party invitations, or photo editing. It includes nine unique images with different color schemes to use the best option to add a sparkle effect on photos.
When it comes to the question of how to add sparkles to pictures, there are many options. Add glitter to a photo by sparkling up your text. This glitter effect comes in three different colors that can easily be changed using Photoshop. This is a high-resolution file that’s great for large formats and print.
Now that you already know how to add sparkles to a picture, go bold and add a sparkle effect to a photo with these colorful glitter backgrounds and overlays. In this background and overlay pack, you’ll get ten different sparkle images to add glitter to a photo.
Try Making Your Own Sparkles
Have you heard of the KiraKira effect in Photoshop? This addictive effect started as an app to add sparkle to pictures, and it took Instagram by storm. Now you can also learn how to create your own KiraKira effect in Photoshop!
If you liked the tutorial on how to add sparkles to pictures, then I think you’ll like the idea of making your own glitter/sparkle effect. You can do it by following this great tutorial:
You can also see how to do your own sparkle effect in our video tutorial below. And don’t forget to check out our Envato Tuts+ YouTube channel to watch even more fantastic videos!
Discover More Awesome Sparkling Tutorials
Would you like more tutorials on how to add sparkles to pictures? Then you might like these, too:
In this tutorial, you’ll learn how to create a tribute to the original Alien movie poster, complete with an alien egg and a green glowing effect. To recreate the Alien 1979 poster, we’ll be using Adobe InDesign and a Photoshop glow effect to replicate the ominous atmosphere of the Alien film poster.
We’ll look at how to design a movie poster through effective use of layout, color, and movie fonts, to give the movie poster design depth and atmosphere.
Fan of video tutorials? Then you should check out this new video by Ashlee Harrell from the Envato Tuts+ YouTube channel to learn how to create this cool movie poster design from scratch:
Perhaps no sci-fi movie is more memorable or terrifying than Ridley Scott’s 1979 Alien. The crew of the spaceship Nostromo find themselves a very long way from home when they discover something sinister and deadly on a far-flung planet. As the crew members start to be picked off one by one, heroine Ripley must face the predatory alien alone on the deserted vessel.
In this tutorial I’ll show you how to use Adobe Photoshop to create an abstract, sci-fi portrait using a variety of photo manipulation techniques. First,…
The Alien movie poster is an iconic part of cinematic marketing history, with the ominous glowing alien egg over the infamous tagline, „In space no one can hear you scream.” Graphic artist Philip Gips, who also created designs for Rosemary’s Baby (1968) and Fatal Attraction (1987), created the Alien movie poster, which is the perfect visual interpretation of the brooding mood of the movie. The metal grating at the base of the poster makes a nod to the endless corridors of the ship, while the eerie glowing crack in the floating egg hints at something sinister to emerge.
In this tutorial, we’ll look at how to design a movie poster which pays tribute to Gips’s original Alien movie poster. By the end of the tutorial, you’ll have a poster design that you can print or share online.
What You’ll Need to Create the Alien Movie Poster
In this tutorial, you’ll learn how to create a tribute design to the Alien film poster, which includes classic sci-fi fonts, a moody color palette, and a Photoshop glowing effect. To design your Alien poster, you will need to download the following fonts, images, and textures.
You will also need access to Adobe InDesign and Adobe Photoshop. Once you have the fonts installed onto your computer and the images saved in an easy-to-find folder, you’re ready to get started!
How to Create the Alien Movie Poster
We’ll begin by setting up the Alien movie poster in Adobe InDesign, before moving to Photoshop to create our alien egg and explore how to add a glow effect in Photoshop. Then we’ll move back to InDesign to finish the Alien film poster.
1. How to Prepare the Alien Poster in Adobe InDesign
Step 1
Open InDesign and go to File > New > Document. Click on Print at the top of the window that opens.
To create the poster at a traditional One Sheet movie poster size, set the Width to 27 in and Height to 40 in.
Create a new One Sheet-sized document in Adobe InDesign.
Set the Margins to 1 in and add a Bleed of 0.25 in, before clicking Create.
Add a margin and bleed to your new document.
Step 2
Go to Window > Layers and click on Layer 1, renaming it Background. Use the Create new layer icon at the bottom of the panel to create a sequence of five more layers above this: Metal, Egg, Smoke, Type, and Paper Texture.
Lock all layers except Background, which we’ll work on first.
Lock all the layers in the new sequence, except for Background.
Then go to the Swatches panel (Window > Color > Swatches) and create three new CMYK swatches:
Deep Black: C=82 M=72 Y=62 K=91
Neon Yellow Green: C=33 M=0 Y=100 K=0
If you’re intending to share your poster online rather than print it, you can switch the Color Mode of these swatches to RGB, which will give your green a more neon appearance.
Create two new CMYK swatches to use on your poster artwork.
Step 3
On the Background layer, use the Rectangle Tool (M) to create a shape across the whole page, setting the Fill to Deep Black.
This deep black backdrop will make the perfect background for your poster.
Step 4
Unlock the Metal layer. Use the Ellipse Tool (L) to create a wide oval shape over the bottom third of the movie poster. Set the Fill to Neon Yellow Green.
Create a neon green oval at the bottom of the poster.
With the oval selected, go to Object > Effects > Transparency, setting the Mode to Hard Light.
Set the Blend Mode of the oval to Hard Light.
Click on Gradient Feather at the bottom of the left-hand menu and set the Type to Radial, allowing the gradient to become transparent towards the edges of the oval.
Add a radial Gradient Feather effect.
Finally, click on Directional Feather. Set the Bottom Feather Width to 8 in to allow the gradient to be stronger towards the top half of the oval.
Set the Directional Feather to bring the gradient towards the top of the oval.
Step 5
On the Metal layer, use the Rectangle Frame Tool (F) to draw an image frame across the bottom of the poster, extending it up to the halfway point of the oval behind.
File > Place, and choose the Textured metal geometry image, clicking Open, and Right-Click > Flip Vertical to allow the metal to appear to have a perspective disappearing towards the center of the oval.
Position the image at the bottom of the design.
With the image frame selected, return to Object > Effects > Gradient Feather. Set the Type to Linear and allow the metal image to fade towards the top, allowing some of the green glow to come through behind.
Fade the image towards the top to create a sense of perspective.
Then Edit > Copy, Edit > Paste in Place the image frame, creating a duplicate of the metal effect. Go to Object > Effects > Transparency, setting the Mode to Soft Light. This will bring through more contrast in the image, creating a dark, moody effect.
A Soft Light effect will create more contrast across the image.
2. How to Create Sci-Fi Typography on the Alien Movie Poster Design
Step 1
Working on the Type layer, use the Type Tool (T) to create a large text frame towards the top center of the poster artwork. Type in the movie title, setting the Font to MBF Atom, and 50 pt in size. Adjust the Font Color to [Paper]. For authentic Alien type, give the text a very generous Tracking of 6000.
Copy and Paste the text frame to build up the other sections of the headline, reducing the Font Size for ‘THE’.
Generous letter spacing (tracking) will give the movie title more impact.
Step 2
Create a second text frame further down the film poster, just at the top of the green oval. Type in the famous tagline, „In space no one can hear you scream.” Set the Font of this to Exensa Grotesk, Size 43 pt, with a Tracking of 30.
Set the famous tagline for the movie poster above the neon gradient.
3. How to Create an Alien Egg in Photoshop
Step 1
For now, File > Save your InDesign poster and minimize the window. We’ll come back to it momentarily. Open the Egg isolated image in Photoshop.
Duplicate the Background layer and remove the white background by choosing Select Subject from the top Control panel. Copy the selected egg onto a new layer and switch off or delete the layers below.
Create a new layer with the egg selection isolated from its background.
Step 2
File > Place the Elephant skin texture image on top of the egg.
The elephant skin will give the egg a leathery texture.
With the elephant skin layer selected in the Layers panel, hold Control or Alt and click on the egg layer below to restrict the texture to the egg shape alone.
Set the Blend mode of the elephant skin layer to Linear Burn.
Applying a Linear Burn effect brings through more green in the image.
Duplicate the elephant skin layer and set the Blendmode of this copy to Divide, bringing the Opacity down to around 60%.
Blend the texture further to bring through more contrast.
Give the egg a reptilian effect with a chameleon skin texture.
Alt/Control to attach this layer to the elephant skin layers and the egg layer below. Then switch the Blend mode to Lighter Color and bring the Opacity down to 24%.
Blend the chameleon skin texture onto the layers below.
Duplicate the chameleon skin layer and set the Blend mode of this copy to Subtract, bringing the Opacity down to 20%.
Blend the duplicate layer to create more depth.
Step 4
File > Place the Gecko scales texture on top of the existing layers. Allow it to cover the left half of the egg, as shown below.
A bumpy lizard texture will really add to the alien quality of the egg.
Duplicate this gecko scales layer, and Right-Click > Flip Horizontal. Line up the two layers exactly, to create a larger symmetrical image. Then select both layers in the Layers panel and Right-Click > Merge Layers.
Combine the two images to create one seamless texture.
Set the Blend mode of this merged layer to Subtract, with a 17% Opacity.
A Subtract blend effect will merge the texture seamlessly onto the egg.
Step 5
Now we’ve given the egg plenty of alien texture, we can bring in some 3D shine effects to make the egg appear a bit juicier.
Place one of the more oval-shaped PNG glass images from the Liquid glass texture pack over the top of the egg, and fit it roughly to the size.
Choose one of the liquid glass images which will fit the egg silhouette.
Set the Blend mode of this liquid glass layer to Screen.
Blend the glass image onto the egg.
Step 6
Use the Pen Tool (P) to trace around the edge of the egg on a new layer. Make sure the selection in the top Control panel is set to Shape, not Path.
Set the Fill of your shape to a dark gray-black from the Swatches panel.
Use the Pen Tool (P) to trace the shape of the egg.
Double-click on the black egg layer to open the Layer Style panel. Click on Inner Glow. With the color of the glow set to a gradient of white to transparent, from right to left, set the Blend mode to Screen and Opacity to 100%. Set the Technique to Softer, Choke to 17%, and Size to 70 px.
Click OK.
Create a gradient effect across the egg from the Layer Style panel.
Then adjust the Blend mode of the layer to Screen and the Opacity to 25%.
A Screen blend effect will finish this gradient effect.
4. How to Add a Glow Effect in Photoshop
Step 1
With your alien egg almost finished, it’s time to create a glowing crack in the egg to complete the alien effect. First, place all of your existing layers into a new folder, naming this Egg. Create a new folder above, called Neon.
Working on a new layer in the Neon folder, and ensuring the option in the top Control panel is set to ‘Shape’, use the Pen Tool (P) to draw a rough crack shape across the top part of the egg.
Draw a jagged crack shape across the top of the egg.
Set the Fill of this crack shape to a very pale neon yellow, R=243 G=255 B=104.
Give the crack shape an eerie yellow color.
Step 2
Double-click on the crack shape layer to open the Layer Style panel.
Click on Outer Glow and set the Blend Mode to Screen, with 100% Opacity. Add 14% Noise and adjust the Color of the glow to the same pale neon yellow as before.
Set the Spread to 7%, Size to 90 px, and Range to 47%.
Create a glow effect using the Layer Style panel.
Step 3
Duplicate the crack shape layer and double-click on this copied layer, returning to the Outer Glow options.
For this copy, adjust the Blend mode to Pin Light, Opacity to 65%, Noise to 14%, Spread to 20%, and Size to 250 px.
A Pin Light effect will maximize the Photoshop glow effect.
Step 4
Return to the original crack shape layer and set the Blend mode of this layer to Pin Light, with an 86% Opacity.
Return to the first crack shape layer to blend it.
Set the Blend Mode of the duplicated layer above to Pin Light and a 70% Opacity.
Blend each crack shape layer.
Step 5
To make the glowing crack ‘smoke’, File > Place one of the smoke PNG images (number 022) from the Isolated smoke steam bundle onto the Photoshop document. Position it over the right side of the crack.
Create a Color Fill layer above, setting the swatch of this to a pale neon green, R=218 G=255 B=104. Alt/Control to attach this to the smoke layer, tinting it green.
Create a new Color Fill layer to tint the smoke neon green.
Set the Blend mode of the smoke layer to Pin Light, with a 77% Opacity.
Blend the smoke onto the crack.
Duplicate the smoke layer, also allowing this to be tinted green. Position this over the left side of the crack, rotating if necessary to fit it along the edge of the crack.
Your Photoshop alien egg is finished! We will have to do some finishing touches in InDesign, but for now, File > Save your egg as a PSD file.
Duplicate the smoke layer.
Step 6
Before you leave Photoshop, open up one of the smoke PNG images from the Isolated smoke steam bundle in a separate Photoshop window.
Tint the smoke with a neon green swatch, R=243 G=255 B=104, and File > Save this as a PSD file. We’ll use this as an extra effect on our InDesign poster.
Prepare a separate green smoke image to use on your poster design.
5. How to Finish Your Alien Movie Poster in InDesign
Step 1
Let’s move back to Adobe InDesign to apply the finishing touches to our poster artwork.
Unlock the Egg layer, and File > Place your new alien egg PSD image onto the top part of the poster.
Allow the egg to float above the tagline.
Step 2
To blend the egg onto the poster background, we can do a few little tricks. First, with the egg image frame selected, go to Object > Effects > Transparency and bring the Opacity down just a little, to 93%.
A slight transparency will make the egg appear as a more seamless part of the overall poster design.
Then click on Inner Glow. Set the Mode to Multiply and a Deep Black color. With the Source set to Edge, set the Size to 1 in, Choke to 15%, and Noise to 9%.
A dark Inner Glow will give the impression of the egg emerging from the shadows.
Then add a Gradient Feather effect to the image, setting the Angle to around 50 degrees.
Angle the gradient to bring depth to the egg.
Step 3
To make the glow of the cracked egg really pop, we can enhance the vibrancy of the glow effect. Use the Pencil Tool (N) to trace along the line of the crack, and set the Stroke Width to something very thin, perhaps just 0.1 pt. Set the Stroke Color to [Paper].
Draw a thin traced line along the center of the crack.
With the drawn line selected, go to Object > Effects > Outer Glow. Set the Mode to Lighten, choose the Neon Yellow Green swatch for the Color, and set the Opacity to 100%. The Size should be 3.6, Noise 7%, and Spread46%.
A bright glow can be achieved by adding a Lighten effect at the center of the crack.
Step 4
To enhance the 3D quality of the egg, use the Ellipse Tool (L) to draw a wide oval over the bottom half of the egg, setting the Fill to [Paper].
A white oval can be drawn over the lower half of the egg.
With the oval selected, go to Object > Effects > Transparency. Set the Mode to Overlay and Opacity to 75%.
Blend the oval shape onto the egg to create a highlight.
Click on Gradient Feather and apply a Radial gradient, with the transparent part of the gradient at the outer edge of the oval.
Apply a radial gradient to the oval.
Step 5
Unlock the Smoke layer, and File > Place the isolated green smoke PSD image you prepared earlier, in Step 4.6.
Allow the smoke to appear as if overflowing the bottom edge of the crack on the egg.
The smoke should appear as if overflowing from the crack in the egg.
With the smoke image frame selected, go to Object > Effects > Transparency. Adjust the Mode to Hard Light and Opacity to 75%.
A Hard Light effect gives a strong neon effect to the smoke.
6. How to Add an Authentic Movie Poster Texture to Your Alien Poster Design
Step 1
As a final finishing touch, unlock the Paper Texture layer at the top of the layer sequence.
File > Place one of the paper textures (number 24) from the Folded paper texture bundle into a new image frame that extends across the whole poster.
Allow the paper texture to cover the whole poster design.
Step 2
Go to Object > Effects > Transparency. Adjust the Mode to Multiply and Opacity to 75%. Click OK.
Blend the paper texture onto the poster for an authentic vintage style.
You’ve finished working on your Alien film poster, and it’s looking suitably moody and ominous—great job! To export your poster as a printable PDF, go to File > Export and choose PDF (Print) from the Format options. In the dialogue box that opens, choose Press Quality from the Preset options, and include the Bleed in your export.
Alternatively, you can also File > Export your poster design as a JPEG or PNG image for sharing online.
You Finished the Alien Movie Poster!
In this tutorial, you’ve learned how to create an Alien movie poster, complete with a Photoshop glowing effect, eerie alien egg, and vintage-style poster layout. You can share your finished design online or on social media, or why not print out a large-scale version for your bedroom?
Your finished Alien movie poster, complete with an ominous glowing alien egg.
Top Resources From Envato Elements
Now that you’ve created a design featuring the Alien artwork, why not experiment with creating different sci-fi movie posters? Scroll down to discover futuristic fonts and resources from Envato Elements, as well as more useful poster design tutorials:
Alienator is a minimal display font with ligature breaks and thin lines, giving it a gravity-defying look. Use it to create subtle typography for sci-fi posters or medical branding.
Inspired by futuristic typography and techno music, MBF Manata is a wide display font with a retro personality. It looks fantastic teamed with neon palettes, which tap into its nightlife character.
Go for a font with a different slant with Modern Rebel, a striking display font that plays on futuristic angles. Use it for cyberpunk designs or dark mode website designs.
A rounded sci-fi font, Nanomaton is retro and simple. Use it to give character to corporate typography or science business branding. Or try it on reports or minimal website designs for some subtle futuristic styling.
If you love all things 1980s, MBF Space Habitat will be right up your street. With generous broad lettering and curved edges, it wouldn’t look out of place on a Terminator poster design.
Want to learn how to add effects to text? Here we’ll use a couple of layer styles and textures to create a bright, galaxy-inspired Photoshop text effect.
In this tutorial, I’ll show you how to create a sci-fi scene with planets, spaceships, and nebulae. You’ll learn how to create a space background from…
If you want to learn how to reset preferences in Photoshop, in this tutorial I’ll show you three methods for this: one for how to reset Photoshop preferences alone, one for how to reset Photoshop tools, and one for how to reset Photoshop to the default settings completely.
What You’ll Learn in This Tutorial
How to reset Photoshop preferences
How to reset Photoshop settings
How to make Photoshop reset to the default completely
How to reset Photoshop tools (separately and all at once)
How to reset Photoshop to the default settings without reinstalling it
This method should be used to reset the workspace—the placement and look of all the panels—as well as the keyboard shortcuts. It doesn’t affect the tool presets, brushes, or actions.
The easiest way to reset Photoshop preferences is to go to Edit > Preferences > General (Control-K). Click Reset Preferences on Quit.
Step 2
Confirm your choice, then restart Photoshop. Once it reopens, you’ll see the workspace back in its default state!
Step 3
If you’re wondering how to reset Photoshop preferences without opening it first, you can also use a quicker method. Attempt to open Photoshop the normal way, but then click and hold Control-Shift-Alt before the loading window even appears. Then you just need to click Yes to reset the Photoshop preferences right away.
2. How to Reset Tools in Photoshop
Step 1
What if you only want to reset the tools, not everything else? Let’s say you just want to get the default values in the tools back after you experimented with them a bit too much, for example. What can you do in such a case?
Select any tool. Click its icon in the upper bar, right next to the house icon.
Step 2
Click the gear icon.
Step 3
Now, if you only want to select this one tool, select Reset Tool. If you want to reset all of them, select Reset All Tools.
Step 4
Confirm your choice. Keep in mind that this action will not affect the rest of the workspace—just the tool settings.
3. How to Reset Photoshop to the Default Settings
OK, but what if you want to reset Photoshop completely? Put it back to the same state it would be in right after installation, but without wasting time reinstalling the whole thing? There’s a manual method for that!
You need to locate the folder containing all the Photoshop settings:
On Windows: C:\Users\<username>\AppData\Roaming\Adobe\Adobe Photoshop 2023
On Mac: Users/<username>/Library/Preferences/Adobe Photoshop 2023 Settings
ClosePhotoshop and delete everything in this folder. Once you reopen Photoshop, it will have that brand-new look again, with all the settings, tool presets, actions, brushes, and swatches back to the defaults. The only thing that you may need to remove manually later are the custom plugins, if you’ve installed any.
Good Job!
Now you know how to reset Photoshop preferences and how to reset Photoshop tools!
Explore More Photoshop Resources and Tutorials
If you found this tutorial on how to reset Photoshop settings useful, you may also be interested in other tutorials on our site:
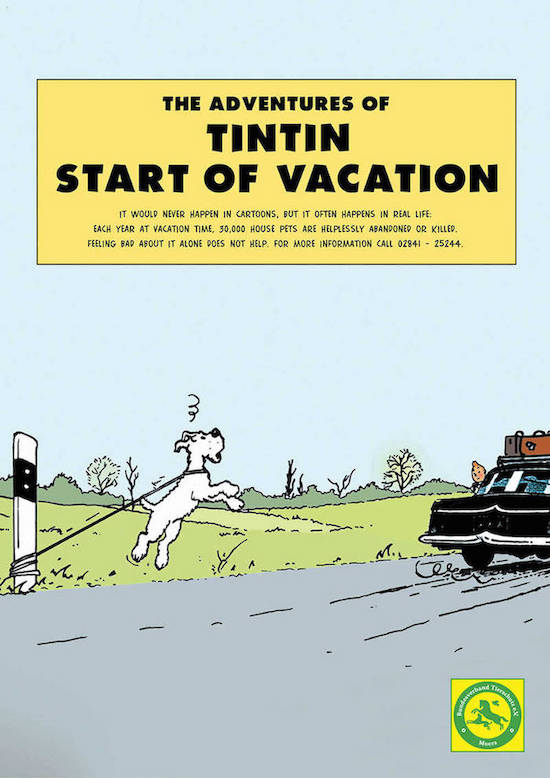
THE ORIGINAL? Bundesverband Tierschutz – 2006 Click the image to enlarge
Source : Adsoftheworld
Agency : H2E (Germany)
LESS ORIGINAL Awareness of animal abandonment – 2023 Click the image to enlarge
Source : Linkedin Marketing Inspiration
Agency : Honcho (United Kingdom)
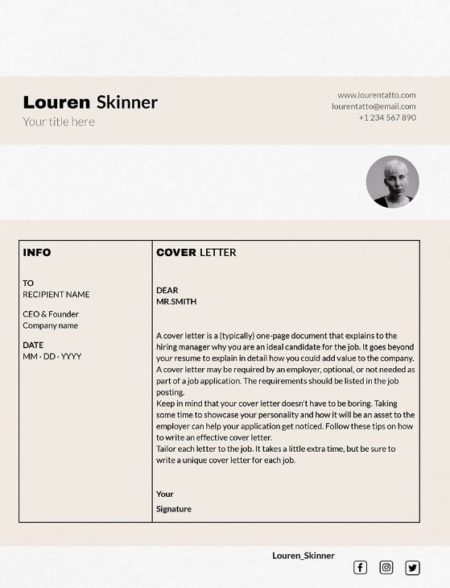
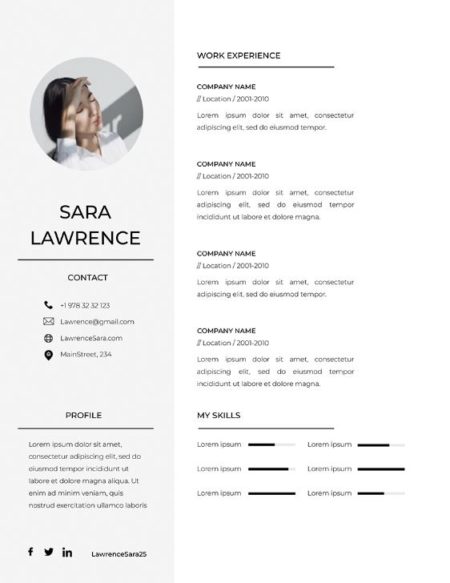
Are you looking for a custom template for your resume? Do you want an option specially created for your profession, or do you want a versatile preset? It doesn’t matter! We offer you to check the best, most modern, unique, and detailed job resume templates in Google Docs and Word! We have prepared a selection of stunning templates for various professions and adaptable options that will suit any position. Start using it now and find a new high-paying job easier and without wasting time creating a resume design!
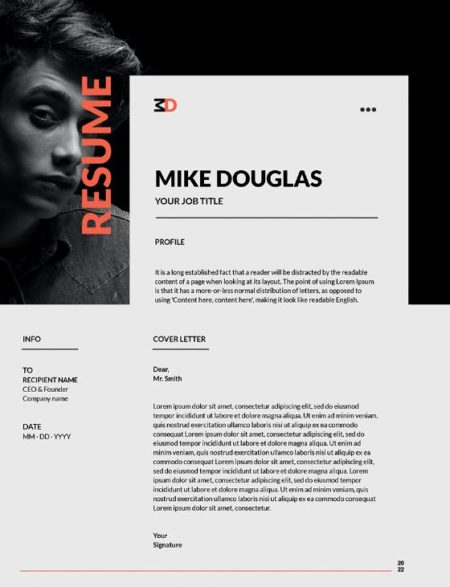
Free Fashion Model Dark Resume Template
Building a successful modeling career requires a great resume and portfolio design. However, creating a professional resume can be challenging, especially for those who are not designers. The free fashion model dark resume template offers a unique layout in dark colors and a matching design that can help models secure new contracts.
Free Nurse Light Grey Resume Template
Looking to start or advance your career as a nurse? Then you’ll need a standout resume and cover letter design. This design is a modern and stylish option that can help you land a job in any private or public clinic. With its ready-made two-page structure and cover letter design, you can easily add your information and customize the template to your liking.
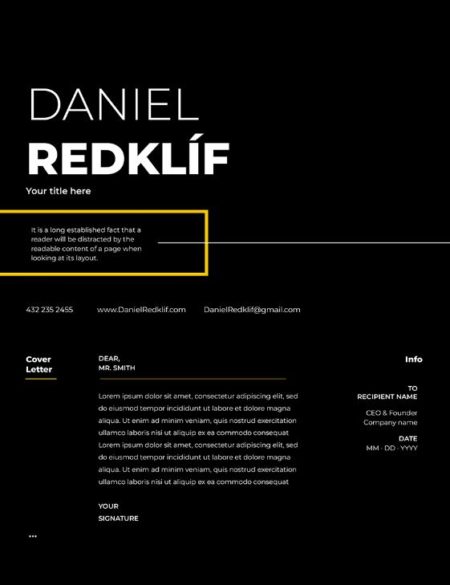
Free Actor Black Resume Design
If you are an actor and looking for new opportunities, this template is a great option for you. It allows you to create an impressive resume without any design experience. You can easily add your education, skills, and experience to the finished design and customize it according to your preferences. With this template, you can showcase your talents and stand out from the competition.
Free Artist Dark Resume
Looking for a new career in the arts? Consider this resume template available in Google Docs and Word. This professionally designed template is perfect for artists of all kinds, including those looking to act on the theater stage. With a sleek and modern design, the template is easy to customize and comes ready-made with all the necessary elements.
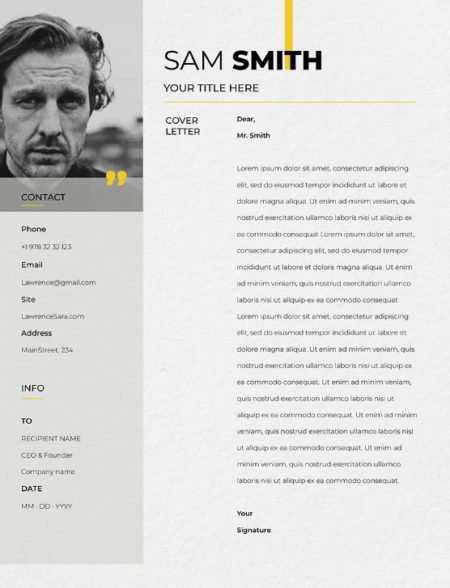
Free Job Light Grey Resume Template
Stand out from other job applicants with this unique and free template. It’s easy to access and use, with the option to work online or offline using popular text editors like Word and Google Docs. The template’s clean and modern design is sure to catch the attention of any potential employer.
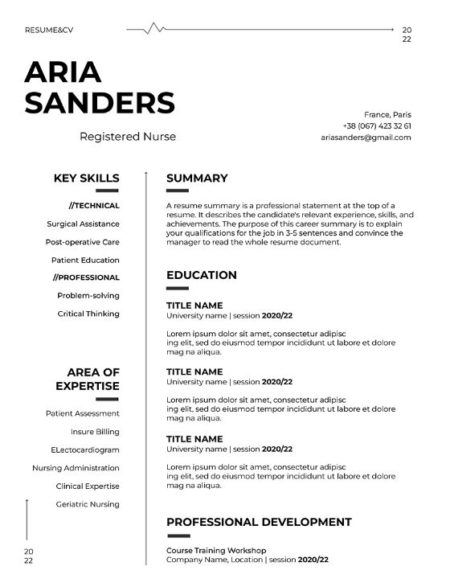
Free Registered Nurse White Resume Design
When applying for a nursing position, having a well-designed resume that highlights your skills and qualifications is crucial. That’s where the registered nurse resume template comes in. This unique template offers a simple yet elegant design with a white background that perfectly emphasizes all of your talents and experience.
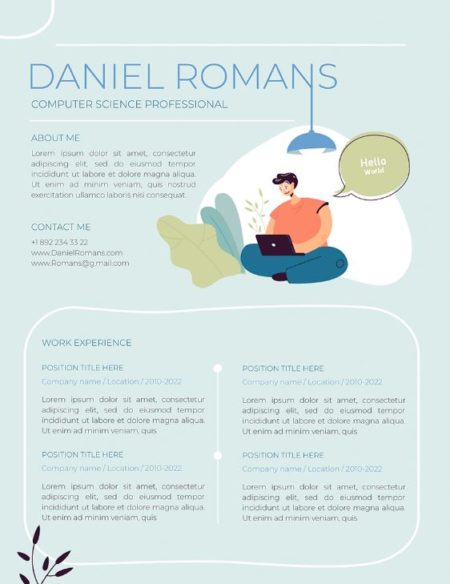
Free Computer Science Professional Light Green Resume Template
Are you a computer science professional looking for a job? Do you want to create a resume that stands out from the rest? Look no further than this option! This two-page resume and cover letter template is perfect for anyone who wants a polished and professional resume without the hassle of starting from scratch.
Free Dancer Colorful Resume Design
For dancers, the most important thing is their skills and experience, but having a visually appealing resume can make all the difference when applying for jobs. The free dancer’s colorful resume template is a great option for those looking to make a lasting impression. The unique and creative design is eye-catching and will help to showcase your individuality.
Free Actor Dark Resume Template
Finding the right acting project can be a challenging task. However, a well-written resume can make all the difference. This free template is an excellent choice for any aspiring actor. The template features a stylish design, a clear structure, and a unique background from professional developers that will make your resume stand out.
Free Designer Dark Grey Resume
Discovering high-paying design jobs can be a challenging task. Fortunately, there are resources available that can help. This template is a unique and user-friendly option that can help you secure your dream job. This customizable template features a sleek design with two colors – gray and black – that looks great on both digital and printed copies.
Free Executive Grey Resume Design
Take a look at the preview of this option, which boasts a one-of-a-kind design that will capture the attention of any potential employer. The template features a carefully chosen color scheme that complements your professional background, as well as a clear and easy-to-follow layout.
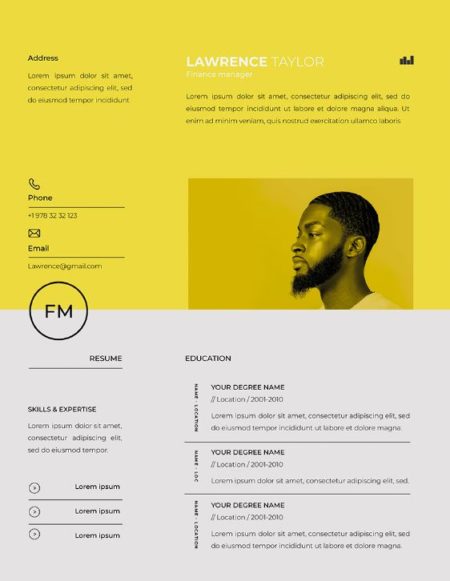
Free Finance Manager Yellow Resume
Are you on the lookout for a job as a financial manager? Check this resume template! With its vibrant colors and unique yellow background, it’s sure to make you stand out among other applicants. Plus, it’s fully customizable, so you can tailor it to your specific needs and preferences.
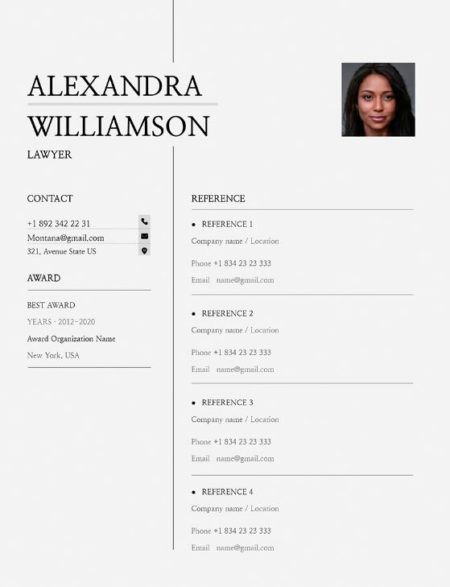
Free Lawyer Light Grey Resume Template
Whether you’re a seasoned legal professional or just starting, the right resume can make all the difference in landing your dream job. That’s where the lawyer’s light gray resume template comes in. This template offers a formal and no-nonsense design that’s suitable for all levels of experience.
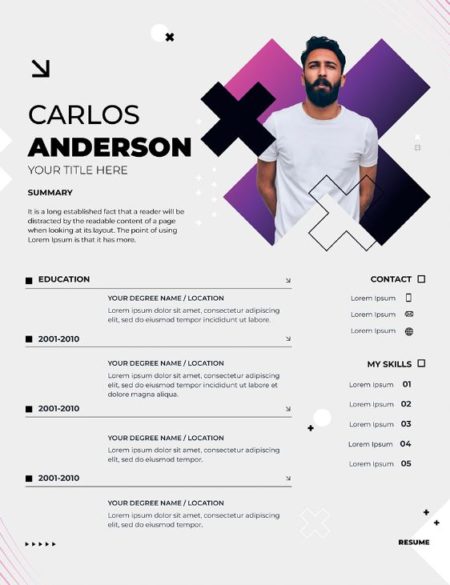
Free First Job Purple Resume Design
Finding a job without any prior experience in the field can be quite challenging. However, using a well-designed resume template can increase your chances of standing out from other candidates. This template is an excellent choice for those just starting.
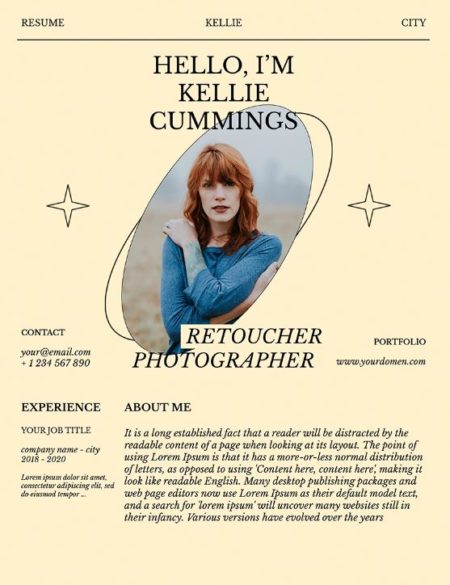
Free Photographer Yellow Resume
For photographers, having a visually appealing resume is crucial to stand out from the competition. This option is the perfect choice to showcase creativity and skills. The design is eye-catching, with a hand-drawn circle in the center to display a photo of the candidate. The yellow color scheme adds a vibrant touch, making the resume memorable.
Executive Assistant Resume Template
Looking for an executive assistant resume template that is both easy to use and visually appealing? You should consider using this executive assistant resume template for Google Docs! With resume requirements changing frequently, it can be difficult to know what information to include and how to present it. However, this template takes care of those worries for you.
Simple Corporate Resume Design
Are you struggling to grab the attention of hiring managers with your resume? If so, it might be time to try out a new template. This option is a great choice for anyone looking to stand out in a sea of applicants. With a modern design featuring pastel and green colors, this template is sure to catch the eye of potential employers.
Physician Assistant Resume Template
Are you a physician assistant struggling to stand out in a crowded job market? A well-designed resume can be the difference between getting hired or being overlooked by potential employers. This template features a sleek and modern layout, with all the important information conveniently divided into sections.
Grey Artist Resume
If you’re an artist looking for a new job, your resume is one of the most important documents you need. And to make sure it stands out from the competition, you should check out the free gray artist resume template. This template has a sleek and modern design with a gray background that will make your information pop.
Free Resume Template in Word
To ensure a favorable impression on recruiters, having an up-to-date resume that is well-designed and easy to read is essential. A modern resume template can help you achieve this. The template features an appealing format with appropriate margins and font sizes that are easy on the eyes.
Manager Resume Design in Google Docs
The free Google Docs template for a minimalist manager resume is designed to create a sense of harmony and rhythm throughout the document. The template aligns each section and maintains a consistent size for each block of information. The resume includes sections for personal information, work experience, skills, education, specialization, and contact details.
Professional White Resume
The Professional White Resume template in Google Docs is an excellent option for achieving any goal. Not only is it free, but it’s also fully customizable to meet your specific needs. This template features a clean and simple design, with a focus on readability and clarity.
Graphic Designer Resume Template in Google Docs
This template is not only perfect for graphic designers but also professionals in the marketing or design fields. It boasts a simple and minimalist style, featuring dividing lines, infographics, skill rating scales, first-level headings, main information blocks, and images of your hobbies.
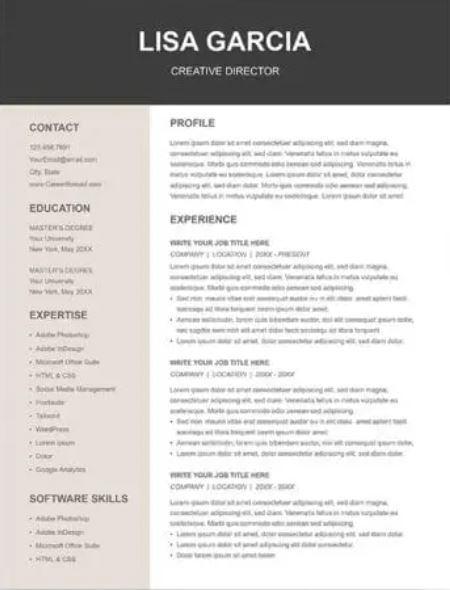
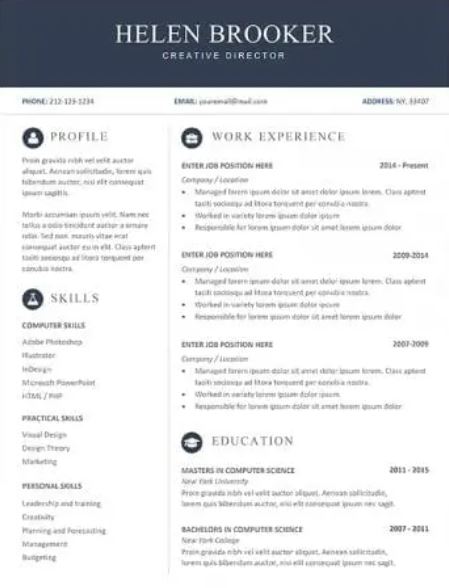
Grey Creative Director Resume Template
A well-crafted resume can make all the difference when it comes to landing a job. This is why it’s important to use a template that is both visually appealing and easy to read. This template boasts these and many other benefits. A formal, easy-to-understand design and structure will help create the right impression about your candidacy.
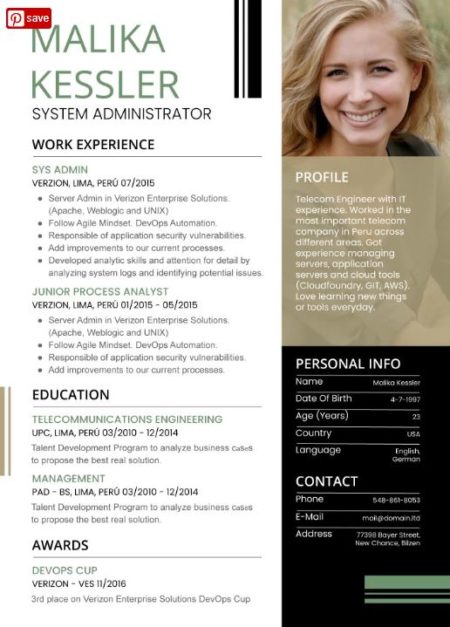
System Admin Resume Design
Looking for a resume template that will be perfect for a professional in the fields of engineering, technology, or a similar conservative profession? Check out the free minimalistic geometric linear design template. Its soft muted shades of graphite, green, and caramel colors give it a professional and modern look.
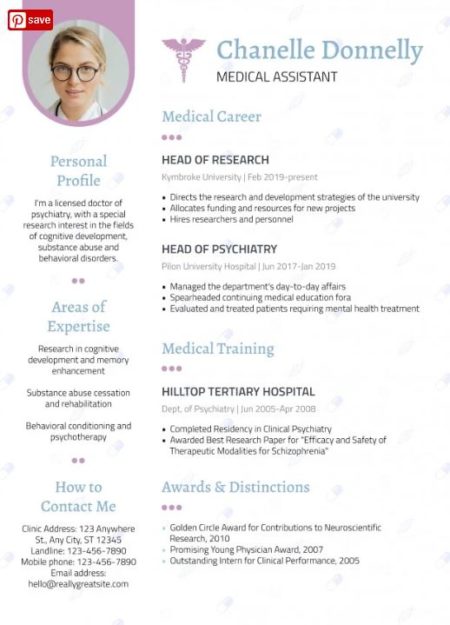
Medical Assistant Resume in Google Docs
If you want to grab the attention of potential employers and showcase your professionalism, this template is perfect for you! The layout is well-structured, with carefully designed sections that highlight your expertise, training, and achievements. You can include your photo, name, and contact information, along with a detailed description of your skills and experience.
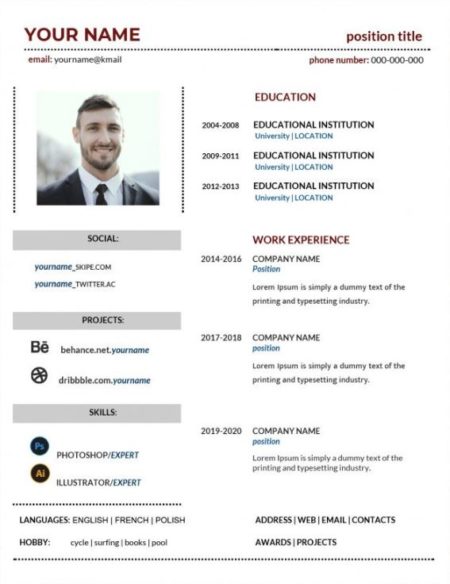
Versatile Job Resume Template in Google Docs
Are you looking for a job that you’ve been dreaming of and want to make a great impression on? Consider using this template, which is designed to highlight all of your strengths. This minimalist design is divided into various sections. The right side includes space for your name, contact details, projects, and skills, while the left side is dedicated to your education and work experience.
Navy Creative Director Resume
By using a modern resume format, individuals can ensure that the content of their resume stands out. The focus can be shifted to the valuable information that recruiters and employers are looking for. With this template, you can pay due attention to these aspects, and not spend time on design.
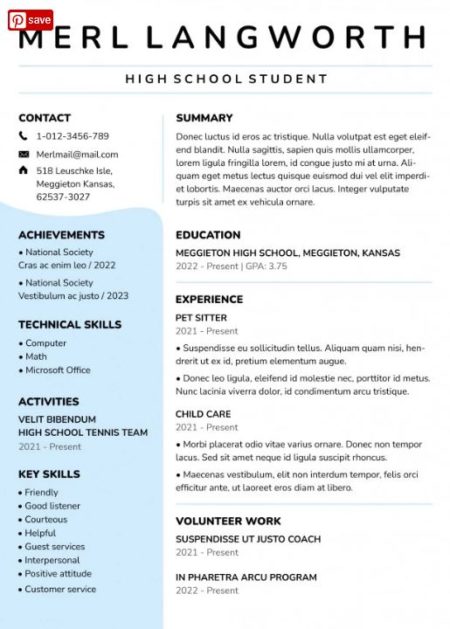
University Student Resume in Google Docs
With a sleek and contemporary design, this template offers a fresh and modern take on a traditional resume. Spanning three pages, it allows ample space to present structured and detailed information about your experience and qualifications. The left-hand column on each page provides a clear and organized space to include your name, contact information, key skills, technical skills, accomplishments, and activities.
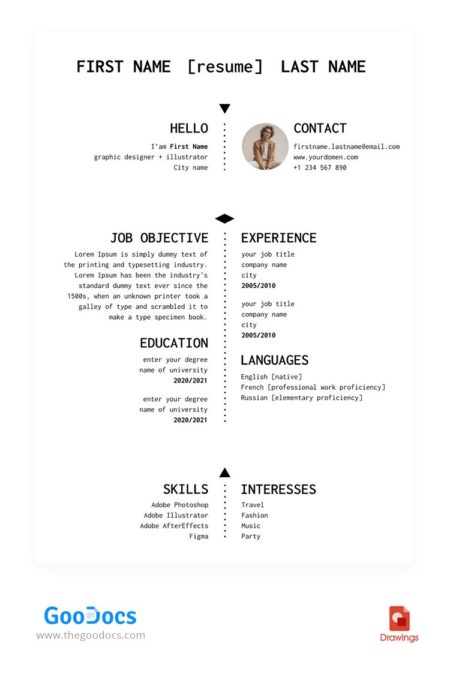
Simple Resume Template
A black-and-white resume template can sometimes be the best option for catching the eye of a potential employer. With this template, job seekers can showcase their skills and knowledge clearly and concisely. While the design may be simple, it does feature unique font styles that add a touch of personality to the resume.
Conclusion
How do you like our selection? We are sure that among the free resume templates in Google Docs and Word that we have collected in this article, you can find a suitable option. Now there is no point in wasting time and trying to create a form from scratch. These structured, easy-to-edit options are a great tool for an efficient job search. Choose the appropriate option, download the template, and start customizing! You can edit the template in Google Docs, Word, or other text editors.
THE ORIGINAL? Boutique Vocal – Singing School – 2016 “For those who music is pleasure”
Click the image to enlarge
Source : AdsSpots
Agency : Licuadora Group (Mexico)
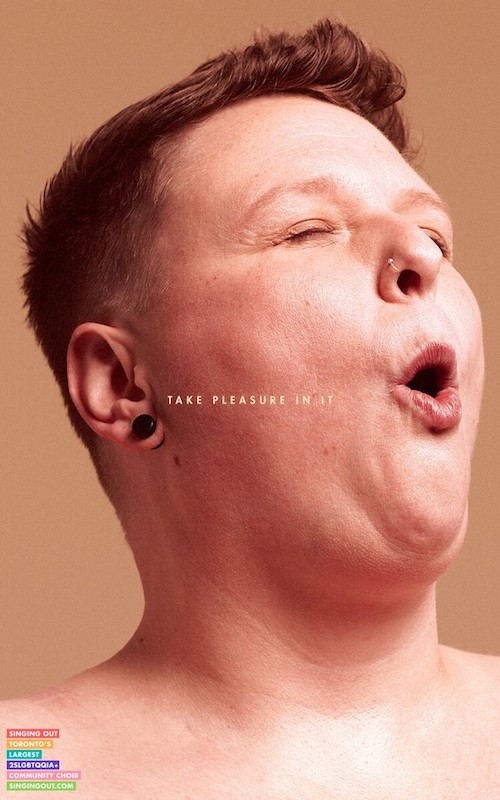
LESS ORIGINAL Singing Out LGBTQ Choir – 2023 “Take pleasure in it”
Click the image to enlarge
Source : VictorYves
Agency : Publicis (Canada)
Create mesmerizing visual art that ignites the imagination with the right tools! As a graphic designer, you must stay up-to-date with new technologies and diverse skills to succeed in the digital era. Luckily, there are plenty of useful tools at your disposal to bring your ideas to life. From traditional brushes to innovative electronic styluses, the constantly evolving world of graphic design tools offers something for every artist. Equip yourself with the best tools and hone your skills to produce captivating visuals guaranteed to stun any audience. Discover some of the top graphic design tools to consider below.
1. Affinity Designer
Upgrade your graphic design game without breaking the bank with Affinity Designer. This intuitive and affordable software offers a range of user-friendly design tools, comparable to Adobe Illustrator. Get full revision control with Affinity Designer’s advanced features, like a 1,000,000% zoom and version tracking up to 8,000 steps. Whether you’re new to design or working on a personal project, enjoy unlimited artboards and options for both raster and vector workspaces. Don’t settle for mediocre design tools – Affinity Designer offers everything you need at an affordable price.
2. Affinity Photo
Looking for a cost-effective alternative to Adobe Photoshop or Illustrator for touch-up jobs on existing images? Look no further than Affinity Photo. This powerful software works with both vector and raster images and offers a range of features including layer and filter creation, 360-degree image editing, panoramic stitching, and HDR merging. Plus, Affinity Photo supports non-destructive live filter layers and PSD files. Lightweight and user-friendly, this program also offers a generous 90-day free trial. With Affinity Photo, you can create stunning effects without breaking the bank.
When using graphic design tools, you should not forget about your safety. The Internet is a dangerous area. Without a VPN extension, you will be at risk. Given that graphic designers have a lot of sensitive data on their device, VeePN mobile is a necessary security measure. It can also be used to get access to any website, bypassing any prohibitions and restrictions. Anyone who cares about security, privacy, and anonymity on the Internet needs to download a VPN from a trusted developer.
3. Gravit Designer
Discover the all-in-one GNU image manipulation program and vector illustration software that surpasses traditional image editing. Gravit Designer delivers remarkable customization and user-friendliness through its HTML-based program, which is accessible on virtually any platform. Enjoy 500 MB of cloud storage with the free plan or upgrade for unlimited storage. Gravit Designer offers RGB color space, with HSB and CMYK options at the pro level. The pro version unlocks the ability to work with touch-enabled devices and offline. Plus, take advantage of exporting up to 300 dpi for superior print work. With Gravit Designer, the pro version even lets you assign reviewer and approval roles.
4. Pixlr
Looking for a user-friendly image editing app that doesn’t require a degree in graphic design? Look no further than Pixlr. Available on both desktop and mobile devices, this app offers all the essential editing tools without overwhelming you with complicated features. Formerly a part of Autodesk, Pixlr is now on its own, but still boasts an ecosystem of complementary programs and supports various file formats including SVG and PSD. And with a free trial and free version, what’s not to love? Just be prepared to deal with some ads in the free version.
5. Crello
Looking for an all-in-one video editing app for your social media needs? Look no further than Crello! With tools for animation, photo and video editing, and even the ability to create brand kits and remove backgrounds, Crello has everything you need to take your marketing to the next level. Plus, with a free version that includes access to an unlimited image library and over 50,000 templates, and a premium plan that offers unlimited downloads, Crello is a versatile solution for any marketer.
6. PhotoScape
This handy tool has a basic set of drawing tools and a drag-and-drop interface, making it a breeze to resize or crop images. Plus, it offers batch editing functions to help streamline your work. Want even more features? Consider upgrading to PhotoScape X or PhotoScape Pro X for animation effects, filters, and frames, and merge to HDR options. All are available through the Microsoft or Apple Store for a one-time purchase.
7. Adobe Illustrator
Discover the ultimate vector graphics tool with Adobe Illustrator – the industry standard for professional logos, artwork, infographics, and icons. From a simple sketch to a high-quality scalable image, Illustrator’s mathematical formulas provide seamless resizing without loss of quality. Start your seven-day free trial with a credit card and experience the power of Illustrator to its fullest. Choose the monthly plan at $31.49 or the annual plan at $20.99 a month, both providing the tools to elevate your creativity. Although not the most user-friendly option, Illustrator offers endless possibilities to learn and grow in your graphic design journey.
8. Adobe Photoshop
Discover why Adobe Photoshop is the go-to choice for graphic designers everywhere. With a user-friendly interface and a vast array of image editing tools, it empowers beginners and pros alike. Plus, with a plethora of easy-to-follow tutorials, mastering this industry standard is a breeze. From canvas size to artistic filters, you have total control. Opt for the seven-day free trial of Photoshop and Adobe Lightroom, which also includes cloud storage of up to 100 GB and 1 TB, respectively. Additionally, explore extra benefits like the paint application, Adobe Fresco, and Adobe Spark’s storytelling program. Experience seamless collaboration between these robust programs and take your designs to the next level.
Conclusion
The digital age has brought with it a whole new world of graphic design tools and software. With so many options to choose from, finding the right program for your needs can be daunting. Fortunately, this list of the eight best image and video editing apps will help you find the perfect fit. From basic editors like Pixlr to professional-level programs like Adobe Photoshop, everyone will find an option that suits their needs.
Designers are known for their commitment to creation and innovation, often sacrificing their well-being in triumphs. Many trends have emerged to help these passionate individuals cope with stress, create a comfortable workspace, and take care of their physical wellness. From ergonomic chairs to virtual yoga classes, these products instill a sense of relaxation and comfort in the lives of designers. Focusing on well-being ensures a healthy body and provides mental clarity and a renewed sense of creativity. In this current era, a holistic approach towards well-being is greatly emphasized, and designers can find great solace in these products. Whether you’re a designer or artist or work in any creative field, these products benefit everyone.
6 Trending Products That Can Help The Overall Well-Being Of Designers
As designers, we spend hours sitting at our computer screens, often feeling drained and exhausted. Luckily, a few simple products can help improve our overall well-being. First on the list is an ergonomic office chair to support our posture and prevent discomfort or soreness. Another essential item is a pair of blue-light-blocking glasses to shield our eyes from the harmful effects of screen glare. For restless people, a standing desk converter can be a game-changer, allowing designers to stretch their legs while still working seamlessly. Also beneficial are noise-canceling headphones to block out any distractions and create a peaceful work environment. Finally, a hot cup of organic herbal tea can be an excellent method to relax during those hectic times. These are just a few of the many ways designers can prioritize their well-being in the workplace.
1. Ergonomic office chair
An ergonomic office chair is not just a regular piece of furniture but a crucial investment for designers and anyone who spends long hours behind a desk. The design of these chairs promotes better posture and provides ample support to the spine, neck, and shoulders. Every feature of the chair – including the height, armrests, and lumbar support – is adjustable to meet individual preferences and provide maximum comfort. The elevated comfort level and maintenance of good posture while sitting in an ergonomic chair can lead to increased productivity, improved focus, and a healthier work environment. Unsurprisingly, many companies are jumping on the ergonomic chair bandwagon and adopting them in their office spaces to ensure the well-being of their employees.
2. Blue-light-blocking glasses
With increasing time spent in front of laptop screens, taking care of our eyes is becoming more critical. Blue-light-blocking glasses are one of the latest solutions to this problem. Designed to filter out blue light emitted by electronic devices, they can relieve eye strain caused by prolonged screen time. As a result, these glasses have become increasingly popular among designers and individuals who want to protect their eyes from digital eye strain. With numerous stylish options available on the market, blue-light-blocking glasses are now a trendy accessory that can help improve overall eye well-being.
3. Standing desk converter
In the design world, sitting at a desk for hours on end can be a common occurrence. But what if there was a way to switch up that position throughout the day without sacrificing productivity? Enter the standing desk converter – a trending product that can make a massive difference in the overall well-being of designers. With a simple adjustment, designers can quickly switch from sitting to standing, allowing for increased movement and blood flow. Plus, the ability to customize the height can help achieve the perfect ergonomic position, reducing strain on the neck and shoulders. Opting for a standing desk converter is a small change that can bring significant benefits when caring for oneself in the workplace.
4. Delta 9 Gummies
Delta 9 Gummies are rapidly gaining popularity for their potential to boost the overall well-being of creative professionals. These chewy treats are infused with Delta 9, one of the many cannabinoids in the hemp plant. It is said to have a mild psychoactive effect, which can help improve focus, stimulate creativity, and uplift mood. The gummies offer an easy and discreet way to consume Tetrahydrocannabinol, making them an ideal option for designers who must stay on top of their game while juggling multiple projects. In addition to their potential benefits, Delta 9 Gummies from TRĒ House come in various flavors, which adds to their appeal. Whether you prefer sweet and tangy or fruity and sour, there’s one out there for you.
5. Noise-canceling headphones
In today’s fast-paced world, noise-canceling headphones have become a must-have gadget for designers. Their sleek design and advanced technology offer a way to tune out the distracting sounds of the exterior world and focus purely on the task. Whether designing a new logo or concept for a client or drafting up a rough sketch for a project, with noise-canceling headphones, designers can fully immerse themselves in their work. These headphones’ high-quality sound can enhance the overall listening experience and produce a more enjoyable work environment. It’s no wonder why noise-canceling headphones are one of the top trending products designers invest in to boost their productivity and create optimal working conditions.
6. Organic herbal tea blends
Organic herbal tea blends are quickly becoming famous for individuals seeking a natural way to enhance their overall well-being. These blends are made from plant-based ingredients with minimal processing, preserving their natural flavors and nutritional benefits. They can be tailored to suit everyone’s tastes and preferences, with combinations of herbs and spices that range from mint to chamomile. The calming effects of these teas make them an ideal option for designers who want to take a break and relax without relying on medication or pharmaceuticals. Sipping on a hot cup of organic herbal tea can be a refreshing and rejuvenating way to improve overall wellness.
Summing It Up!
In conclusion, investing in products that improve our well-being is crucial for designers who spend long hours sitting in front of a laptop screen. These products can enhance our overall health, cognitive ability, and productivity. From adjustable standing desks to ergonomic chairs, designers can choose various options that suit their preferences and needs. Proper lighting is also essential for our well-being, and a desk lamp that provides natural light similar to sunlight can improve our circadian rhythm and reduce eye strain. By prioritizing our well-being, we can flourish professionally and personally, efficiently achieving our goals.
As a product designer, you know every detail counts when creating an unforgettable experience. This is especially true when it comes to travel. From flights to road trips, exploring new places requires careful planning and thoughtfully chosen gear. Luckily, you have the skills to carefully select products that aren’t just functional, look great, and add to the overall experience. Whether it’s a stylish backpack for urban adventures or a rugged camera for off-the-beaten-path exploration, your options can make all the difference in ensuring your travels are comfortable and memorable.
Why Should A Designer Plan Their Travel Experience?
As a designer, planning your travel experience can make the difference between a successful and stressful trip. Researching and planning your journey’s details can help minimize the chances of unexpected surprises and setbacks. Carefully planning your transportation, accommodations, and itinerary can create a more enjoyable and relaxing experience. By knowing what to expect, you can free yourself from worrying about travel logistics and focus on the creative inspiration from exploring new places and cultures. In short, planning your trip can help maximize your creativity and productivity as a designer.
5 Essential Products Designers Can Carry For An Unforgettable Travel Experience
1. High-quality camera
As a designer, capturing the essence of a new city can be vital for inspiration and creativity. A high-quality camera can be the key to unlocking a new level of beauty in your travels. With features like manual controls, high resolution, and image stabilization, you can take breathtaking photos that will last a lifetime. Whether it’s a bustling market street or a peaceful countryside view, a top-notch camera can easily capture the perfect shot. Invest in a quality camera before your next adventure; you won’t be disappointed with the stunning results.
2. Portable charger
A portable charger is indispensable for any designer embarking on a memorable travel experience. The need to constantly stay connected, capture scenes with a camera phone, and use digital applications for inspiration make the necessity for a reliable portable charger all the more palpable. A dead phone or tablet battery could hinder a designer’s creative flow without one. This is where the portable charger comes in handy. An impressive battery life allows travelers to stay connected to the digital world while exploring and creating content. Today, a portable charger is a must-have item for designers seeking to make the most of their adventures.
3. Delta 8 Gummies
If you are a designer who enjoys traveling, you may look for new and exciting products to elevate your experience. Delta 8 gummies could be just the thing. These gummies are known for providing a unique blend of effects that can enhance your mood and offer a relaxing sensation. The flavor variations, including fruit and candy, make the experience even more enjoyable. Many people find these gummies an excellent way to unwind after a long day exploring the sights and sounds of a new place. With their discreet and portable packaging, Delta 8 gummies can easily fit into your luggage or backpack, ensuring you never miss out on trying them on your next adventure.
4. Travel-sized notebook and pen
A travel-sized notebook and pen are must-have accessories for designers looking to capture inspiration on the go. Whether jotting down ideas for a new project or simply recording observations from a new destination, this compact duo allows you to capture the fleeting moments that make a travel experience unforgettable. From the texture of a unique fabric to the colors of a sunset, these subtle details can spark creativity and serve as a source of inspiration long after your return home. And with size and weight that makes it easy to tuck into a bag or pocket, you’ll never miss the chance to record a new idea or perspective while on the road.
5. Comfortable and practical footwear
As a passionate traveler, you want to ensure your journey is as comfortable as possible. And what better way to do that than by wearing the right shoes? Comfortable footwear is one of the essential products designers can carry for an unforgettable travel experience. But comfort doesn’t have to mean sacrificing style. With many options available in the market, from slip-ons to sneakers, you can find something that fits your style while being easy on your feet. So, whether you plan on exploring the streets of Barcelona or walking to Machu Picchu, invest in a pair of shoes that will keep you comfortable and stylish throughout your travels.
Things A Designer Should Consider While Packing For Their Travel Experience
As a designer, it can be daunting to pack for a travel experience considering the equipment and materials required for various projects.
Considering the essential tools and supplies required to maintain productivity levels while traveling is crucial.
Additionally, designers should plan and research the destination to select appropriate outfit choices that are comfortable and professional.
One key consideration is to carry a small portable laptop or tablet that will allow you to keep in touch with clients online. This provides flexibility and ensures that you remain current with any project updates.
It is also vital to ensure your equipment and materials’ safety by packing them securely in shockproof bags or containers.
By thoroughly considering the necessary equipment, resources, and appropriate attire, designers can create a seamless and successful travel experience while maintaining productivity.
Summing It Up!
Designers can embark on unforgettable travel experiences with the right essential products. From portable chargers and multipurpose backpacks to noise-canceling headphones and reliable luggage, these items can enhance one’s travel experience, making it more comfortable, convenient, and stress-free. Traveling can broaden one’s perspective and serve as a source of inspiration. Therefore, essential products can help designers capture those meaningful moments and draw inspiration from their surroundings, whether exploring new cultures or admiring breathtaking landscapes. Ultimately, traveling with the right products can make a difference in one’s journey and create unforgettable memories.
Developing a fledgling business. Where to begin? No matter what your service or product, you’re going to need a vibrant and easily identifiable online presence. Even if you’ve budgeted for a storefront design that will turn heads and filter the crowds in from the streets, lack of proper attention to your online offering is like only firing up one of the plane’s engines and acting like there’s no possible way that things could be better. So. You’ll need some staff. Designers, programmers, writers? OK. That’s a start. But let’s begin thinking a bit more medium term. No matter how new your business, any failure to prepare for the near future will only serve to condemn you to a repetition of today’s processes and revenue. Let’s start planning for the next level…
Marketing agency support that delivers
You may not have the budget to hire an in-house marketing team with years of experience and bags of knowledge on how to dominate your niche. Even if you do have the budget, maintaining an in-house team has the potential to become a foolishly costly expense. What you need is a marketing agency. In exchange for a monthly fee, expert marketing staff will deliver unbeatable results in terms of driving traffic and revenue. Except, what if they don’t? Perhaps you’ve tried a marketing agency previously and found the outcomes to be little more than a drain on your budget. What you need is agency selection support from a highly motivated business mind with years of experience in choosing the right agency. Consider this service a sort of impartial TripAdvisor style review that can help you to navigate the options with huge rewards.
Invest in your staff
Your staff doesn’t become complacent at performing all tasks they were hired to do. They become pigeonholed. They become so specialized and irreplaceable at performing certain tasks within your business processes that it no longer makes sense to waste their time on anything but a few high-value tasks that they know how to do so well. The only problem is that this stagnates the workforce, preventing innovation. Invest in your staff to make sure that your workforce remains engaged with working practices, helping to develop new and possibly money-saving strategies that can be taught to new employees – which also gives an incentive for industry professionals to seek employment with your company.
Pay attention to the 20/60/20 rule
You may have heard of the 20/60/20 rule before, but if you have failed to implement the benefits of how the rule applies to your workforce, you are missing a trick. You see, the rule simply states that 20% of the workforce will support you, 60% are indifferent, and 20% are against your business direction. Each cross-section of your workforce must be handled appropriately in order to develop a fledgling business into a workplace that retains staff, instead of falling into the hire and fire spiral of despair. Take the time to understand the 20/60/20 rule and reap the benefits of appropriate employee management.


 What Are Photoshop Actions and How to Install Photoshop Actions
 Kirk Nelson20 Jan 2021
 How to Use Photoshop Actions
 Melody Nieves21 Oct 2020
 How to Install Photoshop Actions


 How to Glitterbomb a Photo in Adobe Photoshop (With an Action)
 Marie Gardiner31 Jul 2017
 How to Create a Sparkling Action in Adobe Photoshop
 Marko Kožokar18 Dec 2017
 How to Create an Easy Gold Glitter Text Effect in Adobe Photoshop
 Rose28 Oct 2021
 How to Create a Glitter Effect Photoshop Action
 How to Create a Sparkle Overlay in Photoshop
 Monika Zagrobelna10 Apr 2023
 How to Create a Glittering, Festive, 3D Text Effect in Adobe Photoshop
 How to Create a Quick Sparkling Diamonds Text Effect in Adobe Photoshop
 How to Create a Glittering Gold Thread Text Effect in Adobe Photoshop