How to Create a Glowing, Fireflies Photo Manipulation in Adobe Photoshop

Post pobrano z: How to Create a Glowing, Fireflies Photo Manipulation in Adobe Photoshop

Final product image
What You’ll Be Creating

Have you ever caught fireflies on a warm summer night?

When I was a kid we used to call them „lightning bugs.” I was always fascinated by how they would shine and glow against the sky, and loved releasing them back into the night.

So in this tutorial, I’ll show you how to create your own fireflies scene, using photo manipulation techniques and amazing tools in Adobe Photoshop.

Get inspired! Find more photos for your manipulations on Envato Market and Envato Elements.

Tutorial Assets

The following assets were used in the production of this tutorial:

Finding Inspiration

One of the best ways to stay inspired is to look for magic in everyday life. So for this manipulation, I’ll be creating a scene with a natural night feel using a collection of these stocks.

Stocks for photo manipulation

I typically gather references from various sources like Pinterest. But you can also prepare for the photo manipulation with a quick thumbnail sketch.

Mine was as simple as this little scribble below.

Thumnbail sketch

Let’s begin!

1. How to Remove an Object From a Photo

Step 1

Open the Grass stock in Adobe Photoshop.

Looks like we already have a furry friend in this picture! So we’ll have to remove the bunny from the photo to make room for the fireflies.

Grass stock

But first, let’s flip the image. Go to Edit > Transform > Flip Horizontal.

Flip the image

Step 2

Now crop the photo for a tighter composition.

Select the Crop Tool (C) and crop the image like below.

Feel free to adjust the overall image size to one similar to my final result at 2500 x 1932 pixels.

Crop the photo

Step 3

Let’s remove the rabbit!

Remove the rabbit
  1. Select the Rectangular Marquee Tool (M) and make a selection of some grass from the left side. Copy and Paste the selection onto a New Layer and rename it Rabbit.
  2. Flip the grass. Go to Edit > Transform > Flip Horizontal. Then place it over the bunny.
  3. Add a Layer Mask to this layer. Use a Soft Round Brush (B) (100% Opacity, 0% Hardness) to mask away the harsh edges of the square.

Tip: Feel free to take the masking as far as you need. This is just a quick way to remove the rabbit so we can move on.

2. How to Add the Glass Jars

Step 1

Now let’s work on the glass jar. We’ll need to remove it from the white background first so we can insert it into the composition.

Remove the white background
  1. Open your Glass Jar stock in Photoshop. Double-click the background layer to make it a normal one. 
  2. Use the Magic Wand Tool (W) to select the white background.
  3. Then hit the Delete key to remove it completely.

Step 2

Create a New Layer above the rabbit cover and Copy and Paste the jar onto the grass.

Use the Free Transform Tool (Control-T) to rotate the jar at a slight angle. It’s sitting on grass after all, so perhaps it’ll rest a little off center.

Paste the jar

If you’re using a jar stock similar to this one, then you’ll notice the inside is white just like the background. To make it more see-through like an actual glass jar, we’ll need to do the following steps.

First, select the Jar layer and hold Control-I to Invert it. This will turn it mostly black.

Invert the jar

Step 3

Create a New Group and place the Jar layer inside.

Set the Layer Blend Mode of the jar to Screen, and then hold Control-J to make several more duplicates for a total of three copies.

We had to invert the jar first so that we can apply an effect that makes it more see-through. Duplicating the screen layers helps us bring the jar back without blocking the grass behind it. Here’s the result below.

Duplicate the jar

Now select all the layers in the group and Right-click to Merge them together.

This will make the jar show up as black again, so make sure to set the Layer Blend Mode back to Screen.

Merge the group

Step 4

Continue to work on the jar.

Next, add a Layer Mask. Use a Hard Round Brush (B) (100% Opacity, 100% Hardness) to paint black onto the layer mask to remove the white reflection.

Then hold Control-J to duplicate this layer along with the new mask, setting the Opacity of the copy to 50%.

Remove the reflection

Now we have a clean glass jar that looks super realistic!

Step 5

Color correct the jar for more contrast and authenticity.

Create a New Layer above the Jar group. Right-click to set this layer as a Clipping Mask to the group.

Fill the layer with a pale pink color #b6a8b8 using the Paint Bucket Tool (G) before setting the Layer Blend Mode to Color Burn.

Color correct the jar

Step 6

Now paint shadow onto the jar. This step will help take away the harsh white lines.

Create a New Layer above the pink color fill and set it as a Clipping Mask to the Jar group as well.

Use a Soft Round Brush (B) (70-90% Opacity, 0% Hardness) to paint brown #262019 shadow all around the edges of the glass. Continue to paint more shadow on the bottom of the jar as well.

Layer the color as you go. Use the Eraser Tool (E) at any time to remove some shadow if it gets too heavy. Then set the Layer Blend Mode to Multiply.

Paint shadow onto the jar
Work your way around the jar with shadow, and if it gets too heavy, use the Eraser Tool (E).

Step 7

We’ve completed the first jar—great job!

Let’s add another.

To do this, select all the layers for the first jar (including the shadow and fill) and hold Control-J to duplicate them.

Now resize the second jar. While all the layers are still selected, hold Control-T to Free Transform the jar, resizing it to be much smaller in the back. Adjust the shadows and position as needed.

Duplicate the glass jar

Here’s the result so far.

Result after second jar

3. How to Add the Fireflies

Step 1

Now that our jars are set in place, we can start to add the fireflies.

Keep in mind that these aren’t real fireflies. I wasn’t able to find a stock of them flying so we’ll simply build our own.

First, download this 3D Fly stock at the right angle. A simple position like this one can be altered easily to make it look as if it’s flying.

Download the fly stock

Step 2

Copy and Paste the first fly onto a New Layer below both jar groups.

Free Transform (Control-T) to resize the fly, making it much smaller. Position the fly above the first jar.

To brighten the lighting on the fly, add a New Adjustment Layer of Curves above it and set it as a Clipping Mask to the fly layer. Adjust the curves for the RGB, Green and Blue Channels as follows. Then Merge the adjustment and fly layers together.

Add the first fly

Step 3

Create more flies!

With the merged layer selected, hold Control-J to create several more duplicates of the lightened fly; a total of about 10 copies should do.

Position each new fly around the jars. Rotate, Resize, or Flip them to make the scene more dynamic. Make sure a few are sitting on top of the jars or just flying above them.

Add more flies

Step 4

Add one last fly. You can use the same angle or try a new one if you’d like.

Copy and Paste the original fly stock onto a New Layer above the rest. This stock should have the original lighting. Go to Edit > Transform > Flip Horizontal to flip it.

This fly will be flying in from the right side. So Resize it to be larger than the rest. Then position it at a downward angle for a sense of depth of field.

Add the last fly

Step 5

To enforce the depth of field, blur the right fly.

Select the layer and go to Filter > Blur > Gaussian Blur, adding a Radius of 25 pixels.

Blur the fly

Step 6

Now that all the flies are in place, we can cover the bottom of the jars with grass so that they fit perfectly into the ground.

Use the Rectangular Marquee Tool (M) to make a selection of the grass underneath the jars. Copy and Paste two copies of the grass onto two New Layers. Position each piece of grass over the bottom of a jar, and then Merge the layers together.

Cover the bottom of the jars with grass

Refine the grass! Add a Layer Mask to mask away the harsh edges with a Soft Round Brush (B).

4. How to Finish the Fireflies Manipulation

Almost finished! Great work so far.

In order to get to the final stages of this manipulation, we still need to paint bright yellow glow onto the fireflies. Then we’ll bring the entire composition together with more shadow and light adjustments.

Step 1

Copy and Paste the Starry Sky stock onto a New Layer above the rest.

Set the Layer Blend Mode to Screen and the Opacity to 87%.

This layer will instantly add a flurry of stars to the scene. Adjust the intensity with a simple Layer Mask.

Add a starry sky

Step 2

Change the color scheme with a few Adjustment Layers.

To change the scene from day to night:

Add a New Adjustment Layer of Color Lookup. Set the 3DLUT File to NightfromDay.CUBE.

Then set the Layer Blend Mode to Hard Light and the Opacity to 73%.

Add a color lookup adjustment

Step 3

Next, add a New Adjustment Layer of Gradient Map.

Set the color to dark red #270209 to red #d90f31, and then set the Layer Blend Mode to Linear Dodge (Add).

Lower the Opacity to 30%.

Add a gradient map adjustment

Step 4

Continue adjusting the colors.

Add another New Adjustment Layer of Color Lookup.

Set the 3DLUT File to Candelight.CUBE and the Opacity to 71%.

Add a color lookup adjustment

Then follow up with another New Adjustment Layer of Gradient Map.

Set the color to the Blue, Yellow, and Pink preset, and then lower the Opacity to 30% and change the Layer Blend Mode to Hue.

Add a gradient map adustment

Step 5

Almost there!

Since the colors are right on track, we can now experiment with more shadow. Let’s create a slight vignette effect to draw more attention to the jars and fireflies.

Create a New Layer set to Multiply above the rest. Use a Soft Round Brush (70% Opacity, 0% Hardness) to paint brown #403a2c all around the edges of the composition.

Bring some of the brown into the grass to tie it all together.

Create a vignette effect

Step 6

Brighten up the scene with some light!

Create a New Layer above the rest. Use a Soft Round Brush (0% Hardness, 70% Opacity) to paint yellow #b8b660 onto the ends of each fly.

Paint glow onto the flies

Then create another New Layer above the previous one and set it to Overlay.

Now paint glow around the jars, flies and grass with a much brighter yellow #f7cb57.

Adjust the Layer Opacity as needed.

Paint glow onto the scene

Step 7

Let’s finish up with a few more color adjustments.

Start with a New Adjustment Layer of Selective Color.

Adjust the values for the Reds, Yellows, Neutrals, Whites, and Blacks to the following.

Add a selective color adjustment

Then create a New Adjustment layer of Color Balance.

Set the values for the Shadows, Midtones, and Highlights to the following.

Add a color balance layer

Here’s the result. We’ve added a lot more warmth and color intensity.

Result after color balance

Step 8

To punch up the colors even more, create two New Layers and set them both to Overlay.

Use the Paint Bucket Tool (G) to fill the first layer with teal #2afbd1. Adjust the Opacity to 15%. Then fill the second layer with yellow #fbae2a. Set the Opacity to 40%.

Here’s the result.

Result after overlay layers

Step 9

Our final details will help bring everything together for this manipulation. Use a Hard Round Brush to paint yellow #dcc95e highlights on the grass surrounding the glass jars.

A few highlighted strokes goes a long way, so feel free to experiment with this step!

Paint highlights on the grass

That’s it! Check out the final result below!

All Done! Great Job!

Relive your most nostalgic memories with a fun photo manipulation! In
this tutorial, we learned how to create an entire firefly scene from scratch using beautiful stocks and 3D assets. Feel free to find similar stocks on your own to customize this manipulation with more details.

I hope you’ve enjoyed this tutorial! How’d you do? Share your comments and results below.

For more photo manipulation tutorials like this one, check out these links:

Fireflies photo manipulation Photoshop tutorial by Melody Nieves

How to Create a Glowing, Fireflies Photo Manipulation in Adobe Photoshop

Post pobrano z: How to Create a Glowing, Fireflies Photo Manipulation in Adobe Photoshop

Final product image
What You’ll Be Creating

Have you ever caught fireflies on a warm summer night?

When I was a kid we used to call them „lightning bugs.” I was always fascinated by how they would shine and glow against the sky, and loved releasing them back into the night.

So in this tutorial, I’ll show you how to create your own fireflies scene, using photo manipulation techniques and amazing tools in Adobe Photoshop.

Get inspired! Find more photos for your manipulations on Envato Market and Envato Elements.

Tutorial Assets

The following assets were used in the production of this tutorial:

Finding Inspiration

One of the best ways to stay inspired is to look for magic in everyday life. So for this manipulation, I’ll be creating a scene with a natural night feel using a collection of these stocks.

Stocks for photo manipulation

I typically gather references from various sources like Pinterest. But you can also prepare for the photo manipulation with a quick thumbnail sketch.

Mine was as simple as this little scribble below.

Thumnbail sketch

Let’s begin!

1. How to Remove an Object From a Photo

Step 1

Open the Grass stock in Adobe Photoshop.

Looks like we already have a furry friend in this picture! So we’ll have to remove the bunny from the photo to make room for the fireflies.

Grass stock

But first, let’s flip the image. Go to Edit > Transform > Flip Horizontal.

Flip the image

Step 2

Now crop the photo for a tighter composition.

Select the Crop Tool (C) and crop the image like below.

Feel free to adjust the overall image size to one similar to my final result at 2500 x 1932 pixels.

Crop the photo

Step 3

Let’s remove the rabbit!

Remove the rabbit
  1. Select the Rectangular Marquee Tool (M) and make a selection of some grass from the left side. Copy and Paste the selection onto a New Layer and rename it Rabbit.
  2. Flip the grass. Go to Edit > Transform > Flip Horizontal. Then place it over the bunny.
  3. Add a Layer Mask to this layer. Use a Soft Round Brush (B) (100% Opacity, 0% Hardness) to mask away the harsh edges of the square.

Tip: Feel free to take the masking as far as you need. This is just a quick way to remove the rabbit so we can move on.

2. How to Add the Glass Jars

Step 1

Now let’s work on the glass jar. We’ll need to remove it from the white background first so we can insert it into the composition.

Remove the white background
  1. Open your Glass Jar stock in Photoshop. Double-click the background layer to make it a normal one. 
  2. Use the Magic Wand Tool (W) to select the white background.
  3. Then hit the Delete key to remove it completely.

Step 2

Create a New Layer above the rabbit cover and Copy and Paste the jar onto the grass.

Use the Free Transform Tool (Control-T) to rotate the jar at a slight angle. It’s sitting on grass after all, so perhaps it’ll rest a little off center.

Paste the jar

If you’re using a jar stock similar to this one, then you’ll notice the inside is white just like the background. To make it more see-through like an actual glass jar, we’ll need to do the following steps.

First, select the Jar layer and hold Control-I to Invert it. This will turn it mostly black.

Invert the jar

Step 3

Create a New Group and place the Jar layer inside.

Set the Layer Blend Mode of the jar to Screen, and then hold Control-J to make several more duplicates for a total of three copies.

We had to invert the jar first so that we can apply an effect that makes it more see-through. Duplicating the screen layers helps us bring the jar back without blocking the grass behind it. Here’s the result below.

Duplicate the jar

Now select all the layers in the group and Right-click to Merge them together.

This will make the jar show up as black again, so make sure to set the Layer Blend Mode back to Screen.

Merge the group

Step 4

Continue to work on the jar.

Next, add a Layer Mask. Use a Hard Round Brush (B) (100% Opacity, 100% Hardness) to paint black onto the layer mask to remove the white reflection.

Then hold Control-J to duplicate this layer along with the new mask, setting the Opacity of the copy to 50%.

Remove the reflection

Now we have a clean glass jar that looks super realistic!

Step 5

Color correct the jar for more contrast and authenticity.

Create a New Layer above the Jar group. Right-click to set this layer as a Clipping Mask to the group.

Fill the layer with a pale pink color #b6a8b8 using the Paint Bucket Tool (G) before setting the Layer Blend Mode to Color Burn.

Color correct the jar

Step 6

Now paint shadow onto the jar. This step will help take away the harsh white lines.

Create a New Layer above the pink color fill and set it as a Clipping Mask to the Jar group as well.

Use a Soft Round Brush (B) (70-90% Opacity, 0% Hardness) to paint brown #262019 shadow all around the edges of the glass. Continue to paint more shadow on the bottom of the jar as well.

Layer the color as you go. Use the Eraser Tool (E) at any time to remove some shadow if it gets too heavy. Then set the Layer Blend Mode to Multiply.

Paint shadow onto the jar
Work your way around the jar with shadow, and if it gets too heavy, use the Eraser Tool (E).

Step 7

We’ve completed the first jar—great job!

Let’s add another.

To do this, select all the layers for the first jar (including the shadow and fill) and hold Control-J to duplicate them.

Now resize the second jar. While all the layers are still selected, hold Control-T to Free Transform the jar, resizing it to be much smaller in the back. Adjust the shadows and position as needed.

Duplicate the glass jar

Here’s the result so far.

Result after second jar

3. How to Add the Fireflies

Step 1

Now that our jars are set in place, we can start to add the fireflies.

Keep in mind that these aren’t real fireflies. I wasn’t able to find a stock of them flying so we’ll simply build our own.

First, download this 3D Fly stock at the right angle. A simple position like this one can be altered easily to make it look as if it’s flying.

Download the fly stock

Step 2

Copy and Paste the first fly onto a New Layer below both jar groups.

Free Transform (Control-T) to resize the fly, making it much smaller. Position the fly above the first jar.

To brighten the lighting on the fly, add a New Adjustment Layer of Curves above it and set it as a Clipping Mask to the fly layer. Adjust the curves for the RGB, Green and Blue Channels as follows. Then Merge the adjustment and fly layers together.

Add the first fly

Step 3

Create more flies!

With the merged layer selected, hold Control-J to create several more duplicates of the lightened fly; a total of about 10 copies should do.

Position each new fly around the jars. Rotate, Resize, or Flip them to make the scene more dynamic. Make sure a few are sitting on top of the jars or just flying above them.

Add more flies

Step 4

Add one last fly. You can use the same angle or try a new one if you’d like.

Copy and Paste the original fly stock onto a New Layer above the rest. This stock should have the original lighting. Go to Edit > Transform > Flip Horizontal to flip it.

This fly will be flying in from the right side. So Resize it to be larger than the rest. Then position it at a downward angle for a sense of depth of field.

Add the last fly

Step 5

To enforce the depth of field, blur the right fly.

Select the layer and go to Filter > Blur > Gaussian Blur, adding a Radius of 25 pixels.

Blur the fly

Step 6

Now that all the flies are in place, we can cover the bottom of the jars with grass so that they fit perfectly into the ground.

Use the Rectangular Marquee Tool (M) to make a selection of the grass underneath the jars. Copy and Paste two copies of the grass onto two New Layers. Position each piece of grass over the bottom of a jar, and then Merge the layers together.

Cover the bottom of the jars with grass

Refine the grass! Add a Layer Mask to mask away the harsh edges with a Soft Round Brush (B).

4. How to Finish the Fireflies Manipulation

Almost finished! Great work so far.

In order to get to the final stages of this manipulation, we still need to paint bright yellow glow onto the fireflies. Then we’ll bring the entire composition together with more shadow and light adjustments.

Step 1

Copy and Paste the Starry Sky stock onto a New Layer above the rest.

Set the Layer Blend Mode to Screen and the Opacity to 87%.

This layer will instantly add a flurry of stars to the scene. Adjust the intensity with a simple Layer Mask.

Add a starry sky

Step 2

Change the color scheme with a few Adjustment Layers.

To change the scene from day to night:

Add a New Adjustment Layer of Color Lookup. Set the 3DLUT File to NightfromDay.CUBE.

Then set the Layer Blend Mode to Hard Light and the Opacity to 73%.

Add a color lookup adjustment

Step 3

Next, add a New Adjustment Layer of Gradient Map.

Set the color to dark red #270209 to red #d90f31, and then set the Layer Blend Mode to Linear Dodge (Add).

Lower the Opacity to 30%.

Add a gradient map adjustment

Step 4

Continue adjusting the colors.

Add another New Adjustment Layer of Color Lookup.

Set the 3DLUT File to Candelight.CUBE and the Opacity to 71%.

Add a color lookup adjustment

Then follow up with another New Adjustment Layer of Gradient Map.

Set the color to the Blue, Yellow, and Pink preset, and then lower the Opacity to 30% and change the Layer Blend Mode to Hue.

Add a gradient map adustment

Step 5

Almost there!

Since the colors are right on track, we can now experiment with more shadow. Let’s create a slight vignette effect to draw more attention to the jars and fireflies.

Create a New Layer set to Multiply above the rest. Use a Soft Round Brush (70% Opacity, 0% Hardness) to paint brown #403a2c all around the edges of the composition.

Bring some of the brown into the grass to tie it all together.

Create a vignette effect

Step 6

Brighten up the scene with some light!

Create a New Layer above the rest. Use a Soft Round Brush (0% Hardness, 70% Opacity) to paint yellow #b8b660 onto the ends of each fly.

Paint glow onto the flies

Then create another New Layer above the previous one and set it to Overlay.

Now paint glow around the jars, flies and grass with a much brighter yellow #f7cb57.

Adjust the Layer Opacity as needed.

Paint glow onto the scene

Step 7

Let’s finish up with a few more color adjustments.

Start with a New Adjustment Layer of Selective Color.

Adjust the values for the Reds, Yellows, Neutrals, Whites, and Blacks to the following.

Add a selective color adjustment

Then create a New Adjustment layer of Color Balance.

Set the values for the Shadows, Midtones, and Highlights to the following.

Add a color balance layer

Here’s the result. We’ve added a lot more warmth and color intensity.

Result after color balance

Step 8

To punch up the colors even more, create two New Layers and set them both to Overlay.

Use the Paint Bucket Tool (G) to fill the first layer with teal #2afbd1. Adjust the Opacity to 15%. Then fill the second layer with yellow #fbae2a. Set the Opacity to 40%.

Here’s the result.

Result after overlay layers

Step 9

Our final details will help bring everything together for this manipulation. Use a Hard Round Brush to paint yellow #dcc95e highlights on the grass surrounding the glass jars.

A few highlighted strokes goes a long way, so feel free to experiment with this step!

Paint highlights on the grass

That’s it! Check out the final result below!

All Done! Great Job!

Relive your most nostalgic memories with a fun photo manipulation! In
this tutorial, we learned how to create an entire firefly scene from scratch using beautiful stocks and 3D assets. Feel free to find similar stocks on your own to customize this manipulation with more details.

I hope you’ve enjoyed this tutorial! How’d you do? Share your comments and results below.

For more photo manipulation tutorials like this one, check out these links:

Fireflies photo manipulation Photoshop tutorial by Melody Nieves

How to Create a Quick Pelican in Adobe Illustrator

Post pobrano z: How to Create a Quick Pelican in Adobe Illustrator

Final product image
What You’ll Be Creating

This tutorial is quick and not hard. It’s adapted for beginners, so you’ll be able to finish it and get a result easily. If you still have questions, feel free to ask them in the comments below and I’ll help you. You don’t need to buy or download anything additional to create this illustration as we’ll make it from scratch. That’s why I recommend my tutorials, because all you need to have is Adobe Illustrator!

But in case you want a completed image, for example some vector characters or a photo of a pelican, check out GraphicRiver or PhotoDune

1. How to Create the Pelican

Step 1

After you’ve opened your Adobe Illustrator and created a new document with 850 px Width and Height, let’s start. First, delete the stroke color and set the fill color to R=247, G=163, B=40. We’ll create the beak. Hit the Ellipse Tool (L) and draw a small vertical ellipse.

Hit the Direct Selection Tool (A), select its left anchor point, and move it to the left using the Left Arrow on your keyboard. Keep moving it until it starts to look like the beak of a pelican.

Again, using the Direct Selection Tool (A), select its right anchor point and move it to the right using the Right Arrow on your keyboard. But make sure to move it not too far. Set it aside as it’s the first upper part of the beak.

how to create the upper part of the beak

Step 2

Let’s create the second, bottom part of the beak. Using the Ellipse Tool (L), create a long horizontal ellipse with the fill color R=224, G=139, B=25.

While keeping it selected, go to Effect > Warp > Arc Lower and enter the options shown below in the new dialogue window that will pop up. 

  • Bend: 50%
  • Horizontal Distortion: 0%
  • Vertical Distortion: 0%

Then, press OK. Very important: expand the shape (Object > Expand Appearance). If you don’t, and you decide to rotate the shape, it will turn into a weird, unexpected shape.

how to create the bottom part of the beak

Step 3

Put the two beak parts together: the first one over the second.

To add the head, create an ellipse (R=247, G=228, B=203) using the Ellipse Tool (L). Make sure the head stays behind the first part of the beak and in front of the second.

Finally, add the eye. As the eye has to be an even circle, hold the Shift key while creating the ellipse. The fill color for the eye is R=124, G=71, B=50, and now we need the stroke color at R=247, G=228, B=203.

how to create the head and eye

Step 4

Now we are going to create the neck. Delete the fill color and set the stroke color to the same fill color as you had for the eye. Then, go to the Stroke panel (Window > Stroke) and increase the stroke Weight. It depends on the size of your pelican, so you need to adjust it by yourself. Be sure to check Round Cap.

Grab the Line Segment Tool (/) and draw a long line that comes from the head of the pelican. Notice that the line is rotated a bit to the right, so you need to drag it a little bit diagonally.

While keeping the neck selected, go to Effect > Distort & Transform > Twist. Set the Twist Angle to 70°. Press OK. Expand the shape (Object > Expand Appearance).

how to create the neck

Step 5

Let’s create the body for our pelican. First, draw a horizontal ellipse using the same fill color as the head. To take the fill color from the head, use the Eyedropper Tool (I): simply select the ellipse you created for the body and then, using the Eyedropper Tool (I), click on the head.

While keeping the body selected, go to Effect > Warp > Arc Upper. Enter the options you see below:

  • Bend: 30%
  • Horizontal Distortion: 40%
  • Vertical Distortion: 0%
how to create the body

Step 6

The last thing we need to create for the pelican is his tail. Draw a tiny ellipse, and using the Anchor Point Tool (Shift-C), click on its right anchor point, which will become sharp.

While keeping the body selected, go to Effect > Warp > Arc. Enter the options you see below. Then expand the shape.

how to create the tail

Step 7

Place the tail where it should be.

Create a copy of the tail and place it close to the first one. The pelican is ready!

how to place the tail on the body

2. How to Create the Background

Step 1

Grab the Rectangle Tool (M) and click on your artboard. In the new dialogue window, enter 850 px Width and Height, and press OK. Change the fill color to R=51, G=65, B=84. This will be our background.

how to create the background

Step 2

Place the pelican on the background. It is better to group the pelican (right-click > Group) in order to move it more easily.

how to place the pelican on the background

Step 3

Change the fill color to R=31, G=45, B=61 and draw a circle. Remember to hold the Shift button while creating it.

continue creating the background

Step 4

In this step, we are going to create the waves. Delete the fill color and set the stroke color to something light—it doesn’t matter. Make sure that Round Cap is checked on the Stroke panel.

Take the Arc Tool and draw an arc while holding the Shift button in order to have an even arc.

Again, while holding the Shift button, rotate the arc 45 degrees. The Shift button helps to rotate it by exactly 45 degrees.

Now comes the very precise work. Zoom in on your arc and, while holding the Shift and Alt keys, move this arc to the right. While moving, you will see that the Alt key created a copy of the arc, and the Shift key helps to move it straight. Be sure you moved the new copy close so the two arcs are connected. If you see that the arcs are not connected, you shouldn’t adjust the copy by trying to connect two arcs—just delete the copy and create a new one. I’ll explain why later on.

So now you have two arcs connected to each other. After that, press Control-D a few times until you have a line of arcs. As the Control-D combination repeats your last movement, your last movement should be creating a copy of the arc and not adjusting this copy trying to connect them.

Select the line from arc and go to Object > Path > Joint. All your arcs should be connected now.

We have still not completed the waves, as the line of arcs will be used as a cutter later on.

how to create the waves

Step 5

Select the dark blue circle behind the pelican, and create a copy in front (Control-C, Control-F). Cut the copy off (Control-X) and place it in front of the pelican (Control-F). Change the fill color of the circle to R=97, G=182, B=219.

Put the line made of arcs on the light blue circle. Be sure the arcs are behind the boundaries of the circle on both ends.

While keeping the light blue circle and the arcs selected, press the Divide button on the Pathfinder panel (Window > Pathfinder). Your line should disappear, but the light blue circle should now include two parts. Ungroup the light blue circle (right-click > Ungroup) and delete the upper part. The bottom part of it is the water. And that’s actually it!

continue creating the waves

Awesome Work, You’re Done!

I hope you enjoyed going through this tutorial with me. Make sure to leave your results in the comments section below as it is interesting for me to see your creations. See you next time!

final

And if you are here because you like birds, please check these tutorials that show you how to create birds:

How to Create a Quick Pelican in Adobe Illustrator

Post pobrano z: How to Create a Quick Pelican in Adobe Illustrator

Final product image
What You’ll Be Creating

This tutorial is quick and not hard. It’s adapted for beginners, so you’ll be able to finish it and get a result easily. If you still have questions, feel free to ask them in the comments below and I’ll help you. You don’t need to buy or download anything additional to create this illustration as we’ll make it from scratch. That’s why I recommend my tutorials, because all you need to have is Adobe Illustrator!

But in case you want a completed image, for example some vector characters or a photo of a pelican, check out GraphicRiver or PhotoDune

1. How to Create the Pelican

Step 1

After you’ve opened your Adobe Illustrator and created a new document with 850 px Width and Height, let’s start. First, delete the stroke color and set the fill color to R=247, G=163, B=40. We’ll create the beak. Hit the Ellipse Tool (L) and draw a small vertical ellipse.

Hit the Direct Selection Tool (A), select its left anchor point, and move it to the left using the Left Arrow on your keyboard. Keep moving it until it starts to look like the beak of a pelican.

Again, using the Direct Selection Tool (A), select its right anchor point and move it to the right using the Right Arrow on your keyboard. But make sure to move it not too far. Set it aside as it’s the first upper part of the beak.

how to create the upper part of the beak

Step 2

Let’s create the second, bottom part of the beak. Using the Ellipse Tool (L), create a long horizontal ellipse with the fill color R=224, G=139, B=25.

While keeping it selected, go to Effect > Warp > Arc Lower and enter the options shown below in the new dialogue window that will pop up. 

  • Bend: 50%
  • Horizontal Distortion: 0%
  • Vertical Distortion: 0%

Then, press OK. Very important: expand the shape (Object > Expand Appearance). If you don’t, and you decide to rotate the shape, it will turn into a weird, unexpected shape.

how to create the bottom part of the beak

Step 3

Put the two beak parts together: the first one over the second.

To add the head, create an ellipse (R=247, G=228, B=203) using the Ellipse Tool (L). Make sure the head stays behind the first part of the beak and in front of the second.

Finally, add the eye. As the eye has to be an even circle, hold the Shift key while creating the ellipse. The fill color for the eye is R=124, G=71, B=50, and now we need the stroke color at R=247, G=228, B=203.

how to create the head and eye

Step 4

Now we are going to create the neck. Delete the fill color and set the stroke color to the same fill color as you had for the eye. Then, go to the Stroke panel (Window > Stroke) and increase the stroke Weight. It depends on the size of your pelican, so you need to adjust it by yourself. Be sure to check Round Cap.

Grab the Line Segment Tool (/) and draw a long line that comes from the head of the pelican. Notice that the line is rotated a bit to the right, so you need to drag it a little bit diagonally.

While keeping the neck selected, go to Effect > Distort & Transform > Twist. Set the Twist Angle to 70°. Press OK. Expand the shape (Object > Expand Appearance).

how to create the neck

Step 5

Let’s create the body for our pelican. First, draw a horizontal ellipse using the same fill color as the head. To take the fill color from the head, use the Eyedropper Tool (I): simply select the ellipse you created for the body and then, using the Eyedropper Tool (I), click on the head.

While keeping the body selected, go to Effect > Warp > Arc Upper. Enter the options you see below:

  • Bend: 30%
  • Horizontal Distortion: 40%
  • Vertical Distortion: 0%
how to create the body

Step 6

The last thing we need to create for the pelican is his tail. Draw a tiny ellipse, and using the Anchor Point Tool (Shift-C), click on its right anchor point, which will become sharp.

While keeping the body selected, go to Effect > Warp > Arc. Enter the options you see below. Then expand the shape.

how to create the tail

Step 7

Place the tail where it should be.

Create a copy of the tail and place it close to the first one. The pelican is ready!

how to place the tail on the body

2. How to Create the Background

Step 1

Grab the Rectangle Tool (M) and click on your artboard. In the new dialogue window, enter 850 px Width and Height, and press OK. Change the fill color to R=51, G=65, B=84. This will be our background.

how to create the background

Step 2

Place the pelican on the background. It is better to group the pelican (right-click > Group) in order to move it more easily.

how to place the pelican on the background

Step 3

Change the fill color to R=31, G=45, B=61 and draw a circle. Remember to hold the Shift button while creating it.

continue creating the background

Step 4

In this step, we are going to create the waves. Delete the fill color and set the stroke color to something light—it doesn’t matter. Make sure that Round Cap is checked on the Stroke panel.

Take the Arc Tool and draw an arc while holding the Shift button in order to have an even arc.

Again, while holding the Shift button, rotate the arc 45 degrees. The Shift button helps to rotate it by exactly 45 degrees.

Now comes the very precise work. Zoom in on your arc and, while holding the Shift and Alt keys, move this arc to the right. While moving, you will see that the Alt key created a copy of the arc, and the Shift key helps to move it straight. Be sure you moved the new copy close so the two arcs are connected. If you see that the arcs are not connected, you shouldn’t adjust the copy by trying to connect two arcs—just delete the copy and create a new one. I’ll explain why later on.

So now you have two arcs connected to each other. After that, press Control-D a few times until you have a line of arcs. As the Control-D combination repeats your last movement, your last movement should be creating a copy of the arc and not adjusting this copy trying to connect them.

Select the line from arc and go to Object > Path > Joint. All your arcs should be connected now.

We have still not completed the waves, as the line of arcs will be used as a cutter later on.

how to create the waves

Step 5

Select the dark blue circle behind the pelican, and create a copy in front (Control-C, Control-F). Cut the copy off (Control-X) and place it in front of the pelican (Control-F). Change the fill color of the circle to R=97, G=182, B=219.

Put the line made of arcs on the light blue circle. Be sure the arcs are behind the boundaries of the circle on both ends.

While keeping the light blue circle and the arcs selected, press the Divide button on the Pathfinder panel (Window > Pathfinder). Your line should disappear, but the light blue circle should now include two parts. Ungroup the light blue circle (right-click > Ungroup) and delete the upper part. The bottom part of it is the water. And that’s actually it!

continue creating the waves

Awesome Work, You’re Done!

I hope you enjoyed going through this tutorial with me. Make sure to leave your results in the comments section below as it is interesting for me to see your creations. See you next time!

final

And if you are here because you like birds, please check these tutorials that show you how to create birds:

How to Create a Quick Pelican in Adobe Illustrator

Post pobrano z: How to Create a Quick Pelican in Adobe Illustrator

Final product image
What You’ll Be Creating

This tutorial is quick and not hard. It’s adapted for beginners, so you’ll be able to finish it and get a result easily. If you still have questions, feel free to ask them in the comments below and I’ll help you. You don’t need to buy or download anything additional to create this illustration as we’ll make it from scratch. That’s why I recommend my tutorials, because all you need to have is Adobe Illustrator!

But in case you want a completed image, for example some vector characters or a photo of a pelican, check out GraphicRiver or PhotoDune

1. How to Create the Pelican

Step 1

After you’ve opened your Adobe Illustrator and created a new document with 850 px Width and Height, let’s start. First, delete the stroke color and set the fill color to R=247, G=163, B=40. We’ll create the beak. Hit the Ellipse Tool (L) and draw a small vertical ellipse.

Hit the Direct Selection Tool (A), select its left anchor point, and move it to the left using the Left Arrow on your keyboard. Keep moving it until it starts to look like the beak of a pelican.

Again, using the Direct Selection Tool (A), select its right anchor point and move it to the right using the Right Arrow on your keyboard. But make sure to move it not too far. Set it aside as it’s the first upper part of the beak.

how to create the upper part of the beak

Step 2

Let’s create the second, bottom part of the beak. Using the Ellipse Tool (L), create a long horizontal ellipse with the fill color R=224, G=139, B=25.

While keeping it selected, go to Effect > Warp > Arc Lower and enter the options shown below in the new dialogue window that will pop up. 

  • Bend: 50%
  • Horizontal Distortion: 0%
  • Vertical Distortion: 0%

Then, press OK. Very important: expand the shape (Object > Expand Appearance). If you don’t, and you decide to rotate the shape, it will turn into a weird, unexpected shape.

how to create the bottom part of the beak

Step 3

Put the two beak parts together: the first one over the second.

To add the head, create an ellipse (R=247, G=228, B=203) using the Ellipse Tool (L). Make sure the head stays behind the first part of the beak and in front of the second.

Finally, add the eye. As the eye has to be an even circle, hold the Shift key while creating the ellipse. The fill color for the eye is R=124, G=71, B=50, and now we need the stroke color at R=247, G=228, B=203.

how to create the head and eye

Step 4

Now we are going to create the neck. Delete the fill color and set the stroke color to the same fill color as you had for the eye. Then, go to the Stroke panel (Window > Stroke) and increase the stroke Weight. It depends on the size of your pelican, so you need to adjust it by yourself. Be sure to check Round Cap.

Grab the Line Segment Tool (/) and draw a long line that comes from the head of the pelican. Notice that the line is rotated a bit to the right, so you need to drag it a little bit diagonally.

While keeping the neck selected, go to Effect > Distort & Transform > Twist. Set the Twist Angle to 70°. Press OK. Expand the shape (Object > Expand Appearance).

how to create the neck

Step 5

Let’s create the body for our pelican. First, draw a horizontal ellipse using the same fill color as the head. To take the fill color from the head, use the Eyedropper Tool (I): simply select the ellipse you created for the body and then, using the Eyedropper Tool (I), click on the head.

While keeping the body selected, go to Effect > Warp > Arc Upper. Enter the options you see below:

  • Bend: 30%
  • Horizontal Distortion: 40%
  • Vertical Distortion: 0%
how to create the body

Step 6

The last thing we need to create for the pelican is his tail. Draw a tiny ellipse, and using the Anchor Point Tool (Shift-C), click on its right anchor point, which will become sharp.

While keeping the body selected, go to Effect > Warp > Arc. Enter the options you see below. Then expand the shape.

how to create the tail

Step 7

Place the tail where it should be.

Create a copy of the tail and place it close to the first one. The pelican is ready!

how to place the tail on the body

2. How to Create the Background

Step 1

Grab the Rectangle Tool (M) and click on your artboard. In the new dialogue window, enter 850 px Width and Height, and press OK. Change the fill color to R=51, G=65, B=84. This will be our background.

how to create the background

Step 2

Place the pelican on the background. It is better to group the pelican (right-click > Group) in order to move it more easily.

how to place the pelican on the background

Step 3

Change the fill color to R=31, G=45, B=61 and draw a circle. Remember to hold the Shift button while creating it.

continue creating the background

Step 4

In this step, we are going to create the waves. Delete the fill color and set the stroke color to something light—it doesn’t matter. Make sure that Round Cap is checked on the Stroke panel.

Take the Arc Tool and draw an arc while holding the Shift button in order to have an even arc.

Again, while holding the Shift button, rotate the arc 45 degrees. The Shift button helps to rotate it by exactly 45 degrees.

Now comes the very precise work. Zoom in on your arc and, while holding the Shift and Alt keys, move this arc to the right. While moving, you will see that the Alt key created a copy of the arc, and the Shift key helps to move it straight. Be sure you moved the new copy close so the two arcs are connected. If you see that the arcs are not connected, you shouldn’t adjust the copy by trying to connect two arcs—just delete the copy and create a new one. I’ll explain why later on.

So now you have two arcs connected to each other. After that, press Control-D a few times until you have a line of arcs. As the Control-D combination repeats your last movement, your last movement should be creating a copy of the arc and not adjusting this copy trying to connect them.

Select the line from arc and go to Object > Path > Joint. All your arcs should be connected now.

We have still not completed the waves, as the line of arcs will be used as a cutter later on.

how to create the waves

Step 5

Select the dark blue circle behind the pelican, and create a copy in front (Control-C, Control-F). Cut the copy off (Control-X) and place it in front of the pelican (Control-F). Change the fill color of the circle to R=97, G=182, B=219.

Put the line made of arcs on the light blue circle. Be sure the arcs are behind the boundaries of the circle on both ends.

While keeping the light blue circle and the arcs selected, press the Divide button on the Pathfinder panel (Window > Pathfinder). Your line should disappear, but the light blue circle should now include two parts. Ungroup the light blue circle (right-click > Ungroup) and delete the upper part. The bottom part of it is the water. And that’s actually it!

continue creating the waves

Awesome Work, You’re Done!

I hope you enjoyed going through this tutorial with me. Make sure to leave your results in the comments section below as it is interesting for me to see your creations. See you next time!

final

And if you are here because you like birds, please check these tutorials that show you how to create birds:

How to Create a Quick Pelican in Adobe Illustrator

Post pobrano z: How to Create a Quick Pelican in Adobe Illustrator

Final product image
What You’ll Be Creating

This tutorial is quick and not hard. It’s adapted for beginners, so you’ll be able to finish it and get a result easily. If you still have questions, feel free to ask them in the comments below and I’ll help you. You don’t need to buy or download anything additional to create this illustration as we’ll make it from scratch. That’s why I recommend my tutorials, because all you need to have is Adobe Illustrator!

But in case you want a completed image, for example some vector characters or a photo of a pelican, check out GraphicRiver or PhotoDune

1. How to Create the Pelican

Step 1

After you’ve opened your Adobe Illustrator and created a new document with 850 px Width and Height, let’s start. First, delete the stroke color and set the fill color to R=247, G=163, B=40. We’ll create the beak. Hit the Ellipse Tool (L) and draw a small vertical ellipse.

Hit the Direct Selection Tool (A), select its left anchor point, and move it to the left using the Left Arrow on your keyboard. Keep moving it until it starts to look like the beak of a pelican.

Again, using the Direct Selection Tool (A), select its right anchor point and move it to the right using the Right Arrow on your keyboard. But make sure to move it not too far. Set it aside as it’s the first upper part of the beak.

how to create the upper part of the beak

Step 2

Let’s create the second, bottom part of the beak. Using the Ellipse Tool (L), create a long horizontal ellipse with the fill color R=224, G=139, B=25.

While keeping it selected, go to Effect > Warp > Arc Lower and enter the options shown below in the new dialogue window that will pop up. 

  • Bend: 50%
  • Horizontal Distortion: 0%
  • Vertical Distortion: 0%

Then, press OK. Very important: expand the shape (Object > Expand Appearance). If you don’t, and you decide to rotate the shape, it will turn into a weird, unexpected shape.

how to create the bottom part of the beak

Step 3

Put the two beak parts together: the first one over the second.

To add the head, create an ellipse (R=247, G=228, B=203) using the Ellipse Tool (L). Make sure the head stays behind the first part of the beak and in front of the second.

Finally, add the eye. As the eye has to be an even circle, hold the Shift key while creating the ellipse. The fill color for the eye is R=124, G=71, B=50, and now we need the stroke color at R=247, G=228, B=203.

how to create the head and eye

Step 4

Now we are going to create the neck. Delete the fill color and set the stroke color to the same fill color as you had for the eye. Then, go to the Stroke panel (Window > Stroke) and increase the stroke Weight. It depends on the size of your pelican, so you need to adjust it by yourself. Be sure to check Round Cap.

Grab the Line Segment Tool (/) and draw a long line that comes from the head of the pelican. Notice that the line is rotated a bit to the right, so you need to drag it a little bit diagonally.

While keeping the neck selected, go to Effect > Distort & Transform > Twist. Set the Twist Angle to 70°. Press OK. Expand the shape (Object > Expand Appearance).

how to create the neck

Step 5

Let’s create the body for our pelican. First, draw a horizontal ellipse using the same fill color as the head. To take the fill color from the head, use the Eyedropper Tool (I): simply select the ellipse you created for the body and then, using the Eyedropper Tool (I), click on the head.

While keeping the body selected, go to Effect > Warp > Arc Upper. Enter the options you see below:

  • Bend: 30%
  • Horizontal Distortion: 40%
  • Vertical Distortion: 0%
how to create the body

Step 6

The last thing we need to create for the pelican is his tail. Draw a tiny ellipse, and using the Anchor Point Tool (Shift-C), click on its right anchor point, which will become sharp.

While keeping the body selected, go to Effect > Warp > Arc. Enter the options you see below. Then expand the shape.

how to create the tail

Step 7

Place the tail where it should be.

Create a copy of the tail and place it close to the first one. The pelican is ready!

how to place the tail on the body

2. How to Create the Background

Step 1

Grab the Rectangle Tool (M) and click on your artboard. In the new dialogue window, enter 850 px Width and Height, and press OK. Change the fill color to R=51, G=65, B=84. This will be our background.

how to create the background

Step 2

Place the pelican on the background. It is better to group the pelican (right-click > Group) in order to move it more easily.

how to place the pelican on the background

Step 3

Change the fill color to R=31, G=45, B=61 and draw a circle. Remember to hold the Shift button while creating it.

continue creating the background

Step 4

In this step, we are going to create the waves. Delete the fill color and set the stroke color to something light—it doesn’t matter. Make sure that Round Cap is checked on the Stroke panel.

Take the Arc Tool and draw an arc while holding the Shift button in order to have an even arc.

Again, while holding the Shift button, rotate the arc 45 degrees. The Shift button helps to rotate it by exactly 45 degrees.

Now comes the very precise work. Zoom in on your arc and, while holding the Shift and Alt keys, move this arc to the right. While moving, you will see that the Alt key created a copy of the arc, and the Shift key helps to move it straight. Be sure you moved the new copy close so the two arcs are connected. If you see that the arcs are not connected, you shouldn’t adjust the copy by trying to connect two arcs—just delete the copy and create a new one. I’ll explain why later on.

So now you have two arcs connected to each other. After that, press Control-D a few times until you have a line of arcs. As the Control-D combination repeats your last movement, your last movement should be creating a copy of the arc and not adjusting this copy trying to connect them.

Select the line from arc and go to Object > Path > Joint. All your arcs should be connected now.

We have still not completed the waves, as the line of arcs will be used as a cutter later on.

how to create the waves

Step 5

Select the dark blue circle behind the pelican, and create a copy in front (Control-C, Control-F). Cut the copy off (Control-X) and place it in front of the pelican (Control-F). Change the fill color of the circle to R=97, G=182, B=219.

Put the line made of arcs on the light blue circle. Be sure the arcs are behind the boundaries of the circle on both ends.

While keeping the light blue circle and the arcs selected, press the Divide button on the Pathfinder panel (Window > Pathfinder). Your line should disappear, but the light blue circle should now include two parts. Ungroup the light blue circle (right-click > Ungroup) and delete the upper part. The bottom part of it is the water. And that’s actually it!

continue creating the waves

Awesome Work, You’re Done!

I hope you enjoyed going through this tutorial with me. Make sure to leave your results in the comments section below as it is interesting for me to see your creations. See you next time!

final

And if you are here because you like birds, please check these tutorials that show you how to create birds:

Designing the perfect business card for your startup

Post pobrano z: Designing the perfect business card for your startup

A great business card should convey the overall motto and images of your business. It is a not an easy task considering the fact that an average business card only measures 2 inches in width and 3.5 inches in length. It is inconsiderate to have the thought that your business card will portray the entirety of your business. However, what it can do is portray a professional image of your business which the other person will remember.

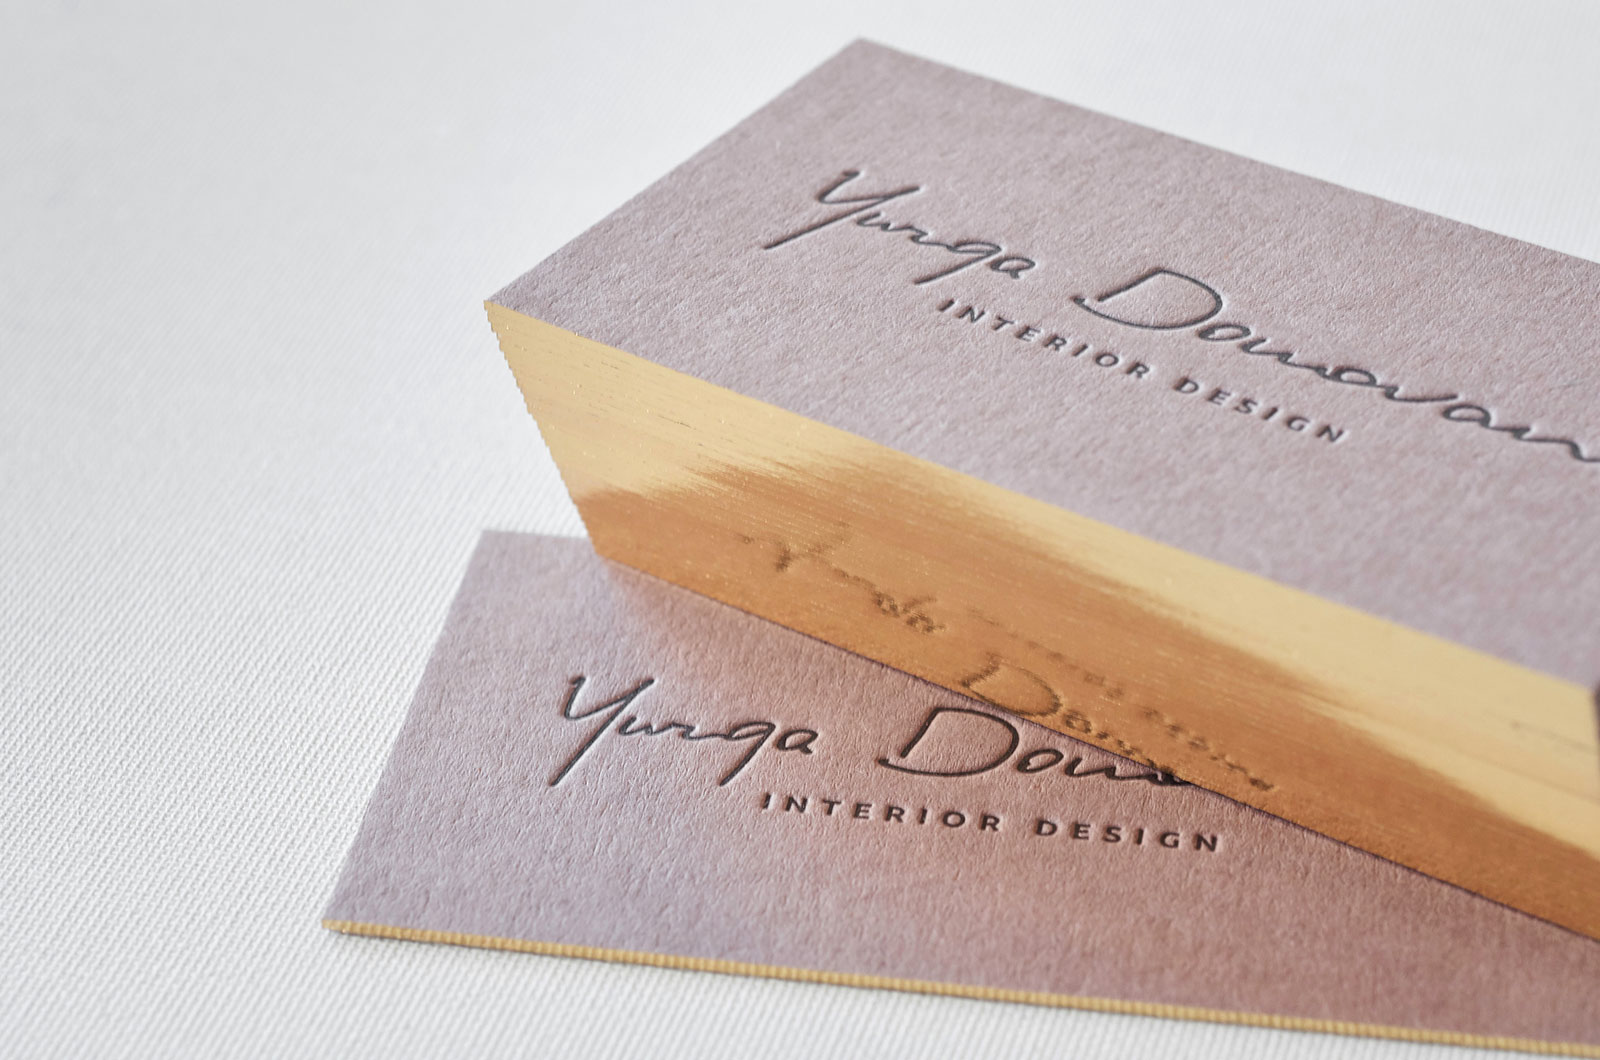
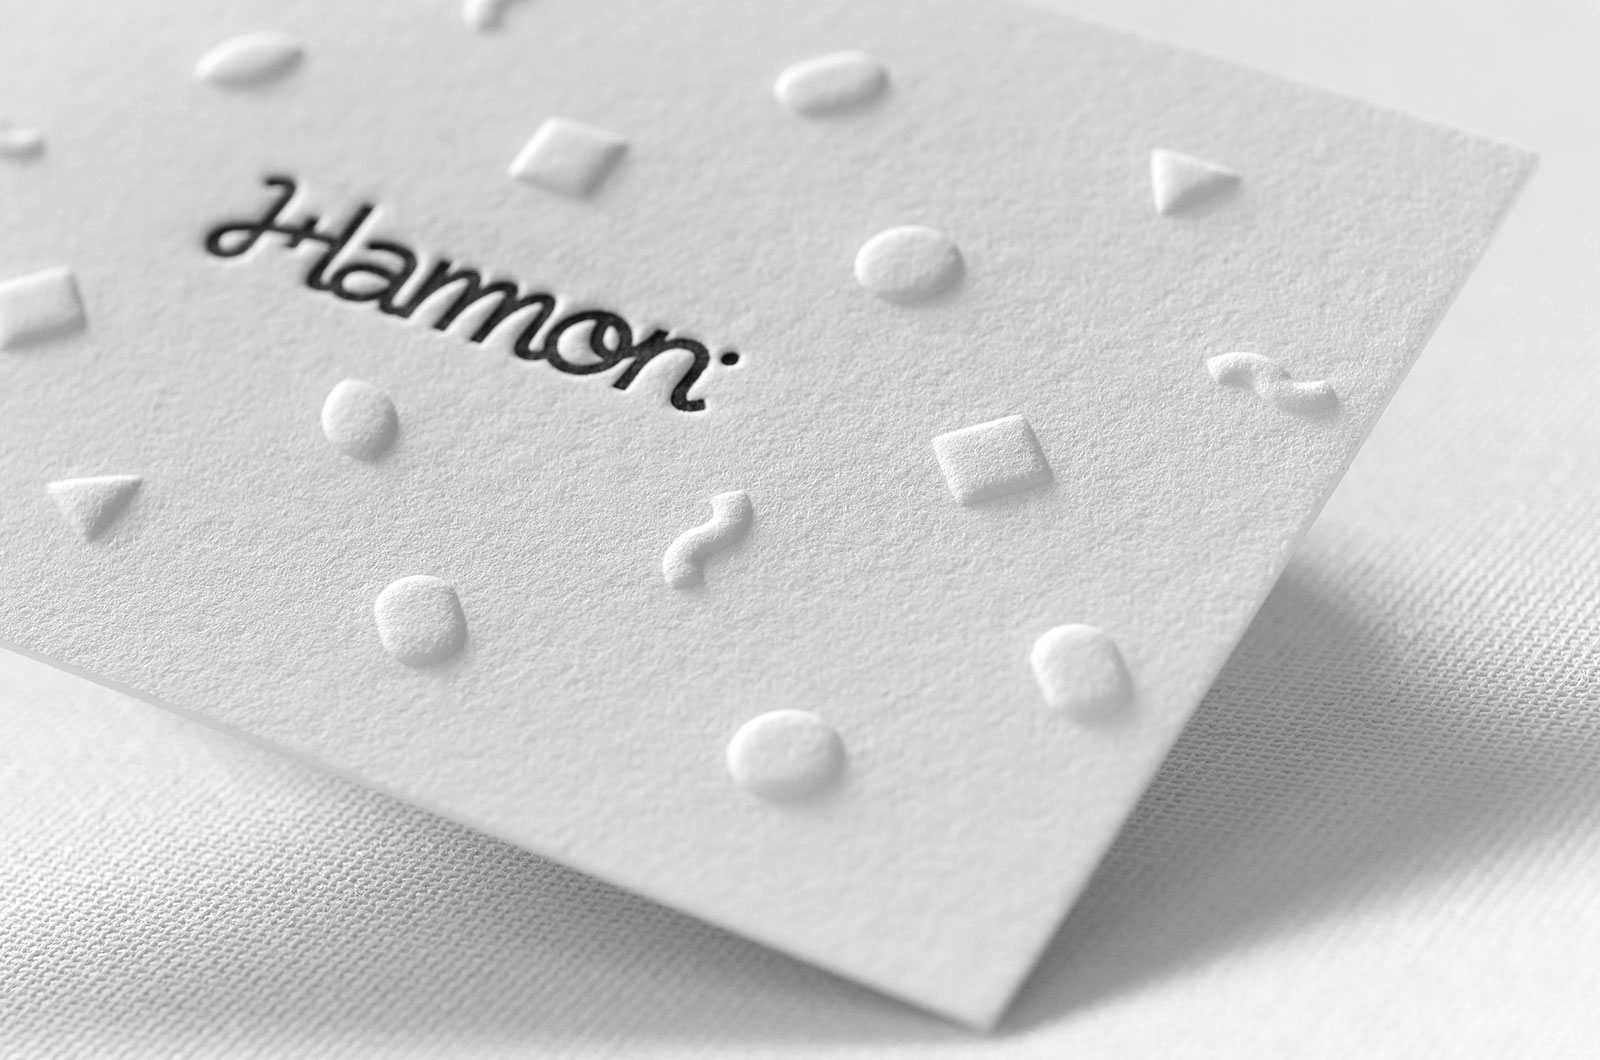
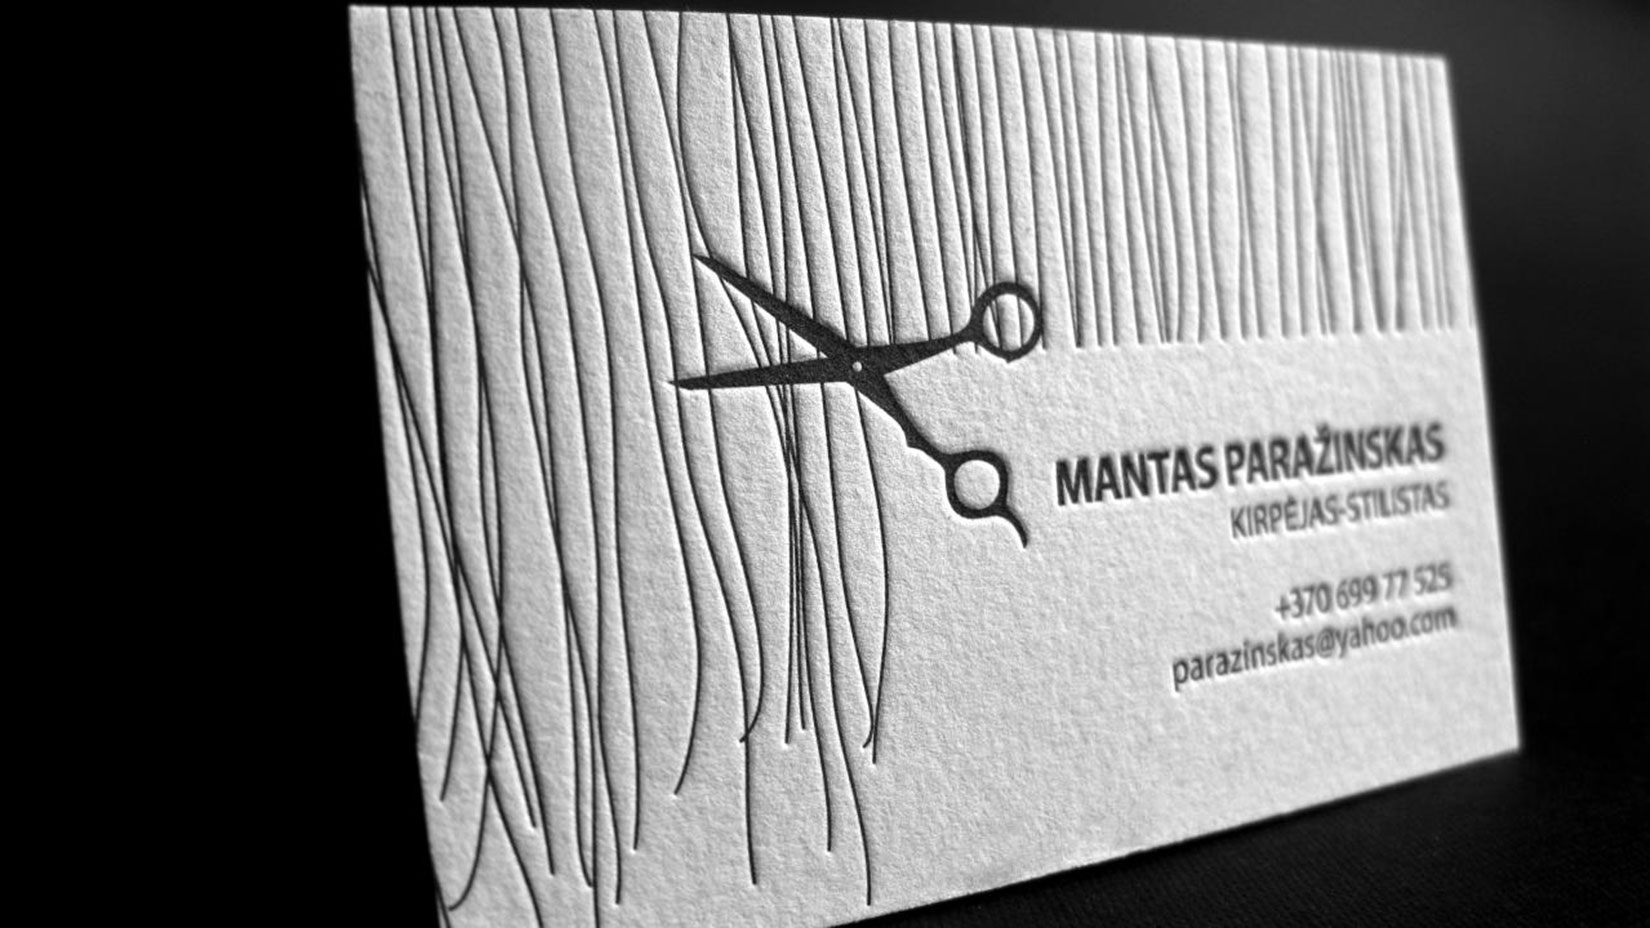
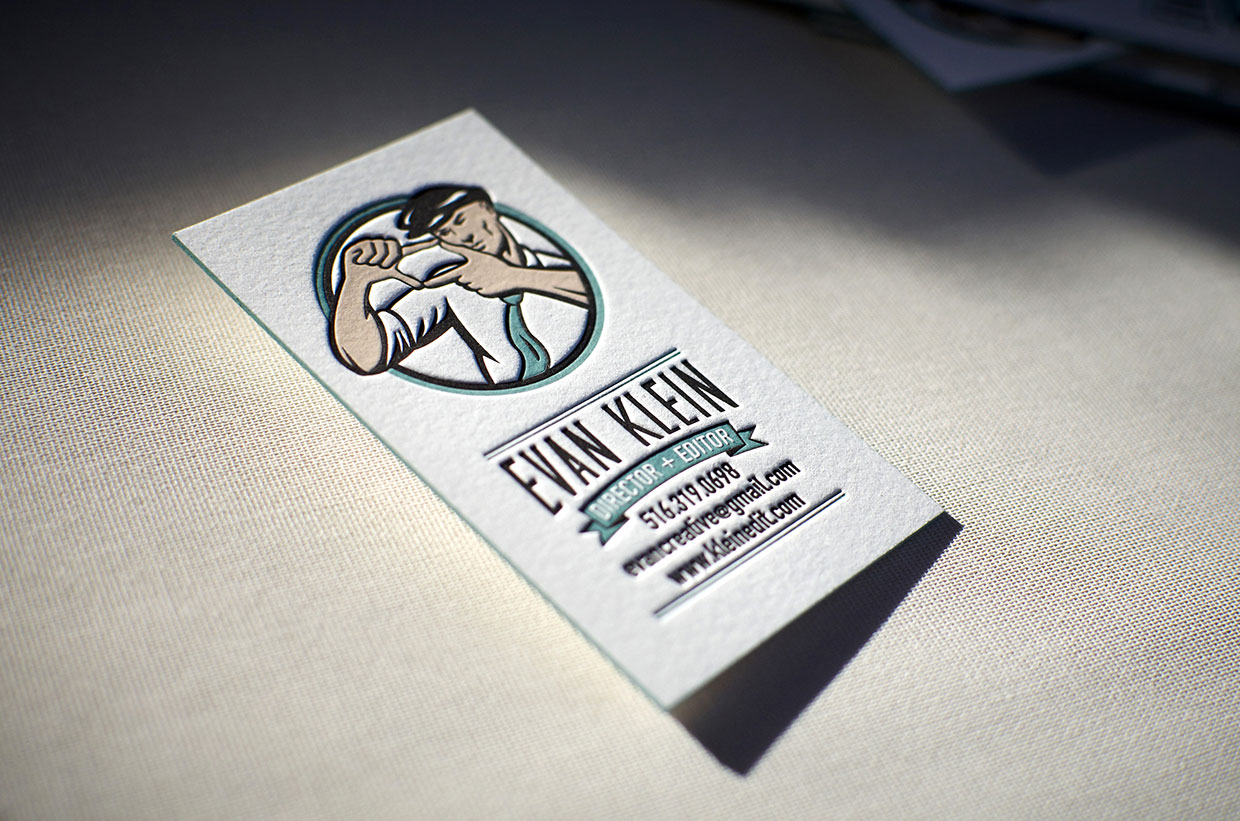
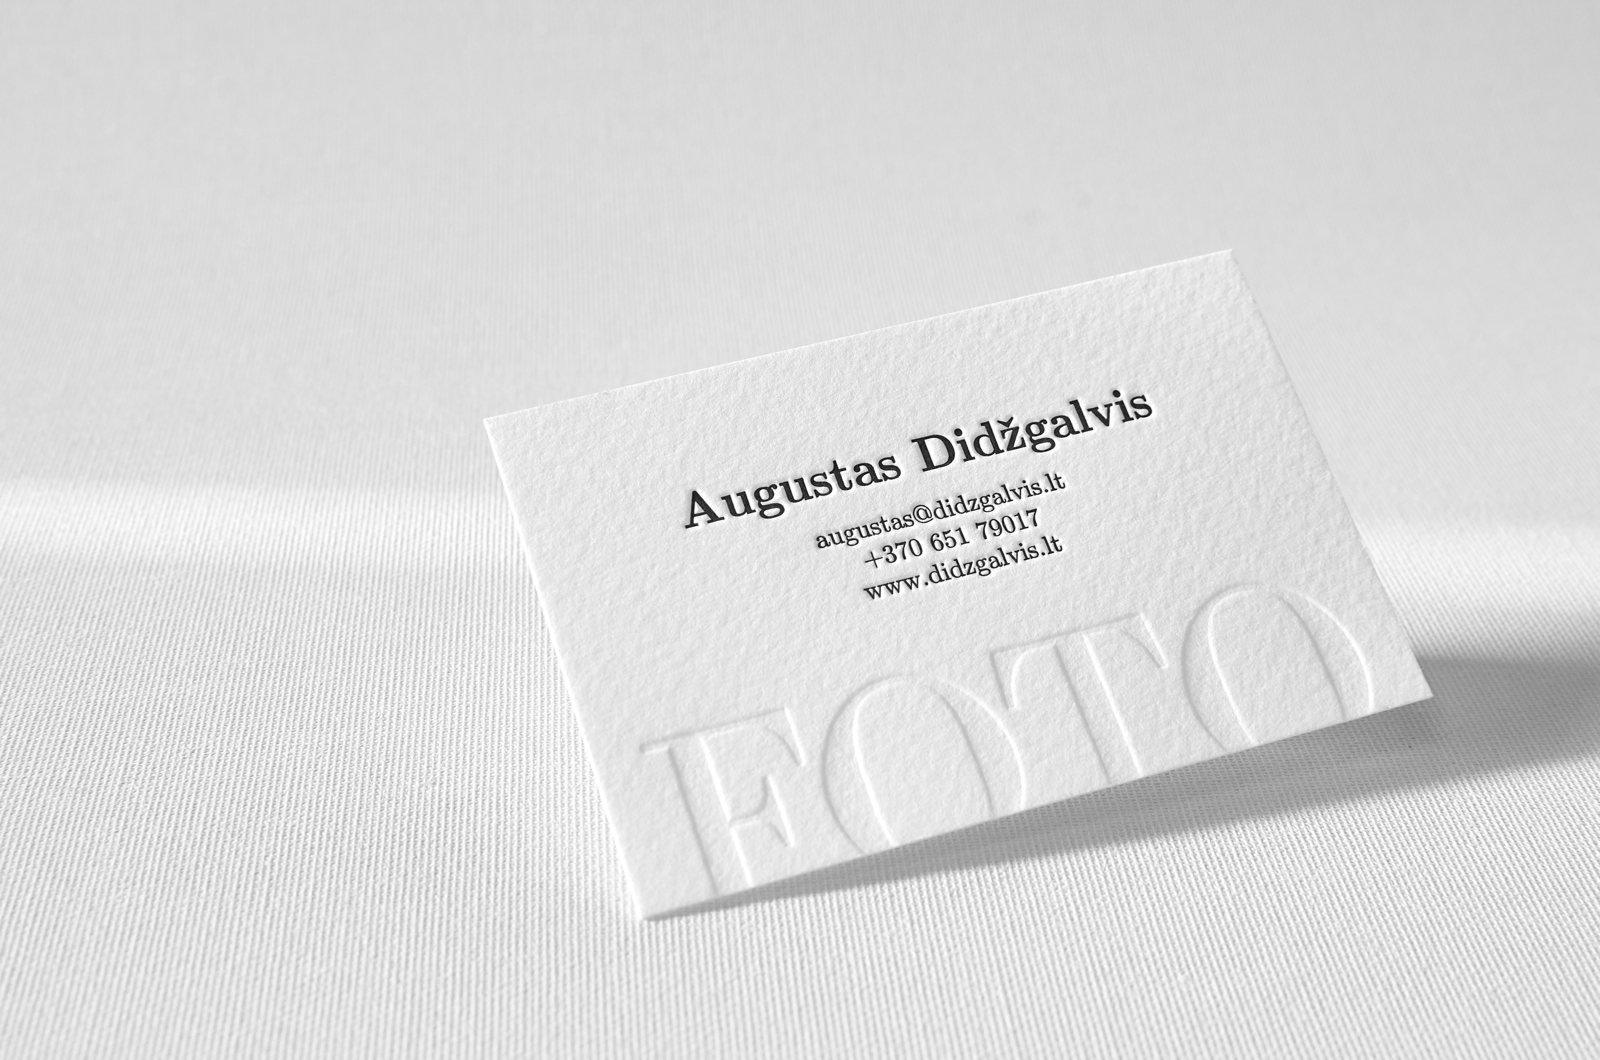
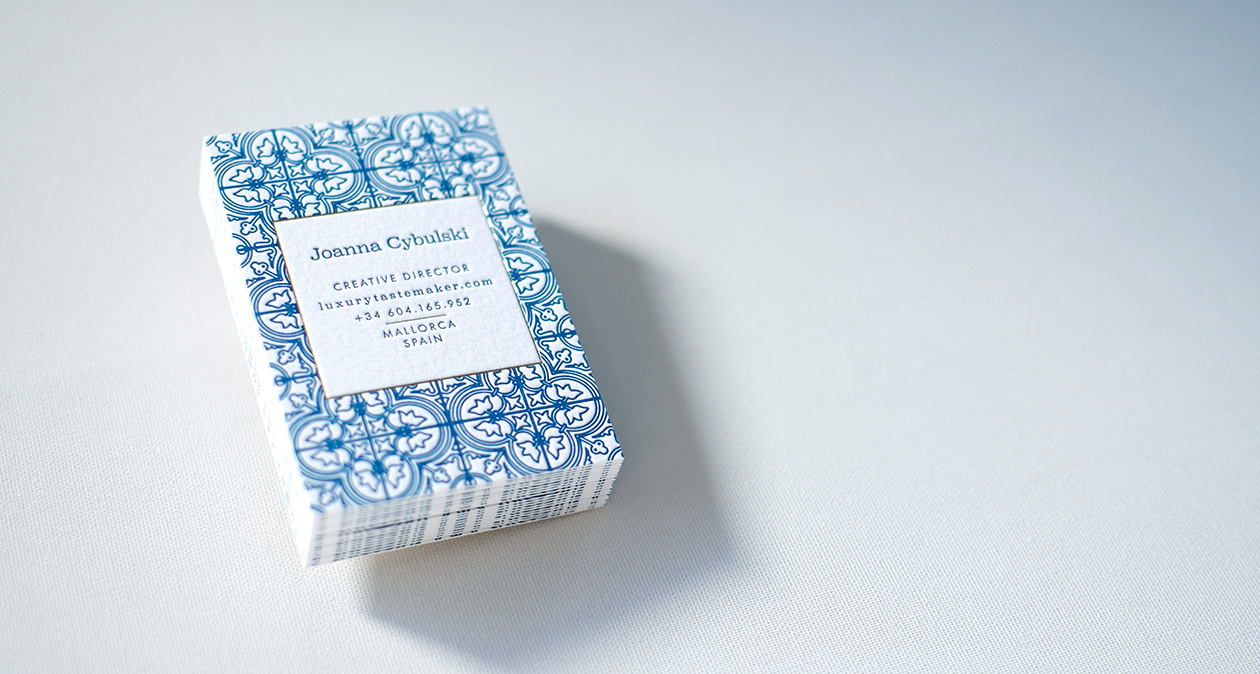
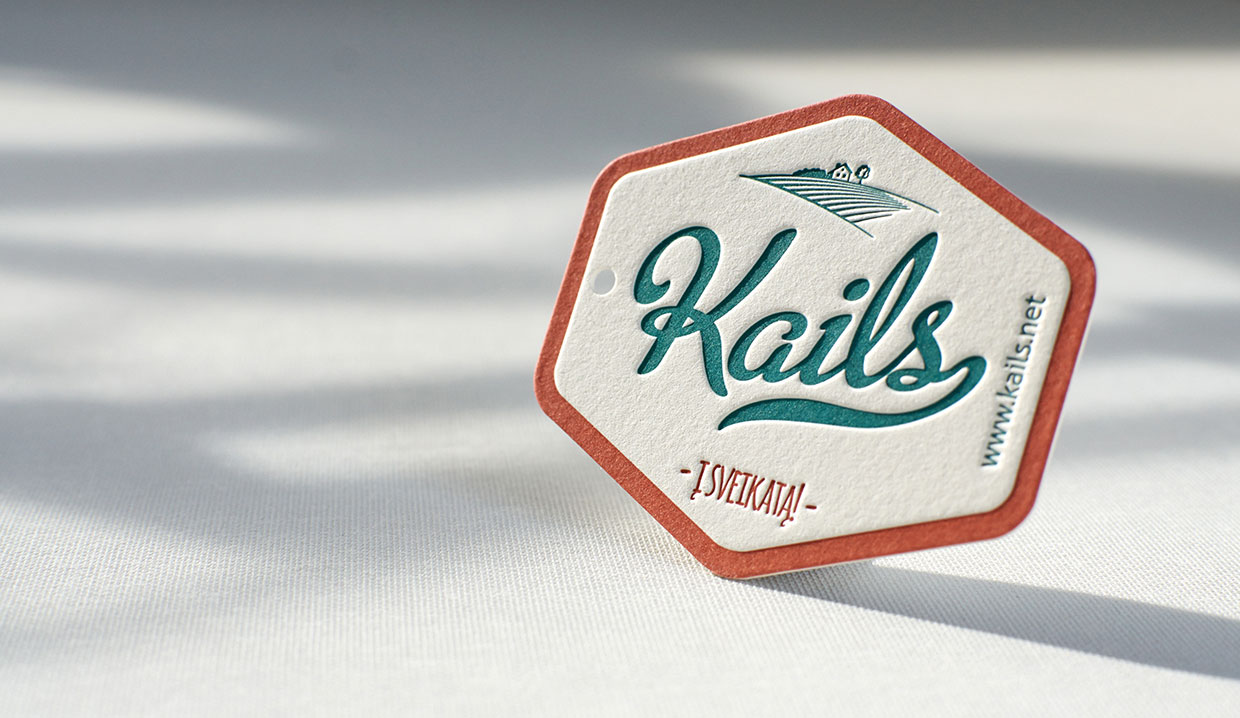
Business cards come in all forms and sizes starting from normal ones to letterpress business cards.

You need to consider a lot of factors before deciding on the design of your business card. These factors include colour, text and typography to name a few. And all of these factors should perfectly align in order to reflect a professional image of your business.

While designing your business card, it is important to use common sense. For example, if you are a business selling children products, the best bet will be to use bright colours and quirky designs. You can consider the typography to be written in child script for the design to stand out even more.

Another example to consider- suppose you are the proprietor of a financial advisory firm. When designing your business card, you should keep in mind that it should reflect the two most important aspects of your business, which are professionalism and integrity. Go for a simple black-gold or a white-beige business card design to successfully reflect the same.

While professional designers always suggest that an entrepreneur shouldn’t design their own business card, most small and cash-strapped business owners are left with few other choices. But don’t lose hope, keep the below-mentioned tips in mind, and you will be all set.

Keep your logo as the basis

Make your business logo the biggest element in your business card. By making it big, you will not attract the attention of your readers on to it, but also utilise the space which would otherwise remain empty.

KISS- Keep it Simple, Stupid!

Professionalism is best reflected when the design is simple yet unique and convenient. Keeping the entire layout of your business card simple, will ease the eyes of your readers and only attract their attention to the important details of your company. Don’t cramp too much information into your business card.

Include the essentials

The most important aspect of having a business card is to portray essential information about your company or organisation. Include your name, designation, company name, email address and phone number. Keep the font size bigger than the rest of the card and also make them bold to stand out even more. Although there is no standard arrangement on how to portray this information, it is best practice to put your name, designation, email address and then the phone number.

Make it readable

Being excessively creative with your design can take you to a whole different tangent. While in the flow, make sure to keep the entire font very readable. People don’t have the time to stretch their eyes and invest a lot of time into figuring out what you have written.

Stick to one or two colours

While some creative prefer keeping the colour scheme as a rainbow, it is usually not a good choice. First, it makes the card look unprofessional and moreover the cost of printing them will be very high. The more the number of colours the more will be the price of the overall card.

Try different papers and printing techniques

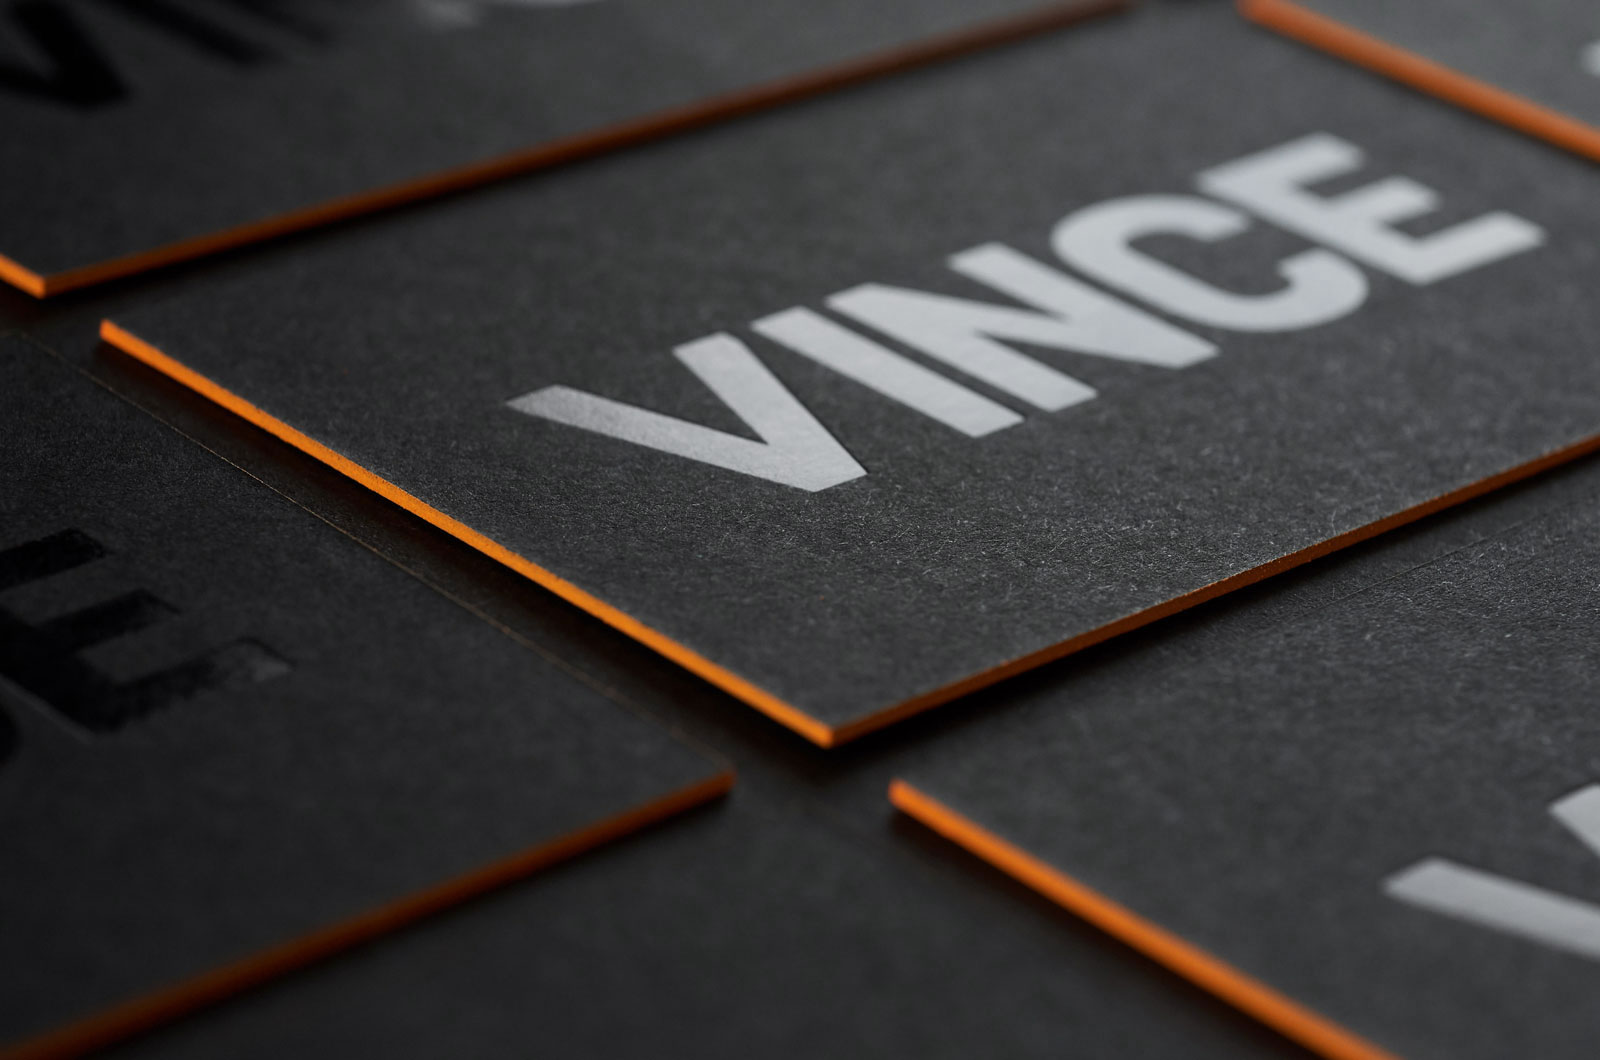
If you are in the creative industry, or a person who is very creative, you can surely out the various papers available in the market. Starting from pure cotton paper to recycled kraft or even corrugated cardboard, there are a lot of choices to choose from. Combining few different printing techniques like letterpress and hot foiling or engraving and silkscreen you can get really impressive results.

Break the norm

While traditional cards are surely more common, business cards in non-traditional shapes like oval, cuboidal or even round are super attention grabbers. Not only does the shape stand out and with the above-mentioned designs, they will look good to both you and the receiver. Designing a business card is fairly easy, and owning one will surely make you look more professional in the eyes of your business associates. Check out for more beautiful business cards samples on Elegante Press portfolio.