Archiwum miesiąca: grudzień 2018

Best of 2018: 20+ Online Flyer Maker Template Designs
Post pobrano z: Best of 2018: 20+ Online Flyer Maker Template Designs
Whether you need to promote the opening of your new store, an upcoming sale, a sporting event, or your booth at an expo, flyers are a versatile and cost-effective way to successfully target your ideal audience.
Flyers, sometimes called leaflets, inserts, or circulars depending on how they’re used, are a single unfolded 8.5” x 11” or A4 size sheet of paper with a beautiful graphic and a very simple message printed on one side. They’re a great way for individuals and small to medium sized businesses to promote products, services and events without breaking the bank.
Too often, though, individuals or businesses have no idea where to begin when it comes to producing great flyers, so they adopt an ‘anything goes’ approach to their flyer design. This inevitably leads to flyers that are so poorly designed that potential clients don’t even notice them or in some cases are actually turned off by them. When creating your flyers, it is important to remember that most people form judgements in just a few seconds, so you really need to get the design right if you want your flyer to be effective.
5 Key Elements of Effective Flyer Design
But what does getting it right entail? For your flyer to be most effective, it needs to apply the AIDA principle. That means it needs to:
- Catch your potential customer’s attention.
- Pique their interest so they continue reading beyond the headline.
- Create a desire for the product or service you’re offering.
- Persuade them to take the action you want them to take, such as show up at your sale or attend your concert.

To apply the AIDA principle, there are five key elements your flyer design should include:
- Your Target Audience. You should have a clear picture of your ideal client/customer and what kind of lifestyle they have. Knowing who you are targeting with your flyer will influence the design elements and language you use in your flyer. So before you begin your flyer design, be clear about who you’re targeting.
- A Bold Headline. Your flyer’s headline needs to be the first thing that your target audience will see, so it’s got to catch their attention with its colour, size, and message. At first glance, it should tell your audience what your flyer is about and entice them to keep reading.
- Compelling Graphics. The photos, illustrations, shapes, lines and colours you use in your flyer aren’t just about creating a pretty flyer; they all have a function. They should tie in with your business brand and accurately represent the type of service or product you offer. They should also appeal to your target audience and create an emotional response in them.
- A Call to Action. Every flyer needs a call to action line. This is a message that makes the reader want to act, like ‘Get your ticket today’, ‘Contact us’, ‘Enter to win’, ‘Buy now’, etc. A call to action lets your readers know how to act on what they have been reading.
- Your Contact Information. Contact info like your website, email address, phone number, etc. are critical pieces of information for every flyer. After all, if you don’t add your contact info, how will your potential client/customer know where to find you to access the product, service or event you’re promoting?

These are the five basic elements every flyer needs to have in order to be effective, so think through them carefully before you begin to design your flyer. Now, the next thing you need to consider is how to put these elements together to create the best design.
Use an Online Flyer Maker
Anyone can use the elements I’ve discussed above to create a great flyer, but let’s face it, if you’re just starting out or you don’t have a design background, it can be quite challenging to know just how to put all these elements together so they add up to one terrific flyer.
One way to ensure that you get the design aspect of creating your flyer right is to use a flyer maker online, like this flyer designer app by Placeit.
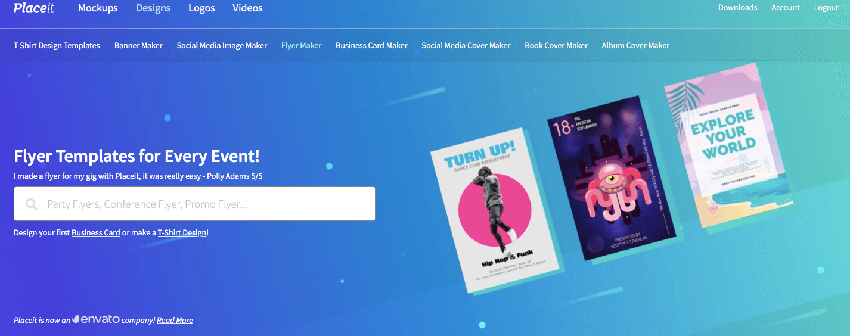
The Flyer Creator is a terrific app that puts hundreds of cheap flyer design templates at your disposal so that you can easily make gorgeous flyers for any occasion. Let me show you how.
How to Use Flyer Design Templates
Let’s say you want to create the perfect flyer to advertise a Christmas Bazaar in December. All you need to do is follow these simple steps to have your own special logo ready in minutes.
1. Navigate to the Flyer Designer App at Placeit and sign up to the service for free.
2. Type the kind of flyer you want to make in the search bar and hit enter or peruse the grid of available flyer design templates.
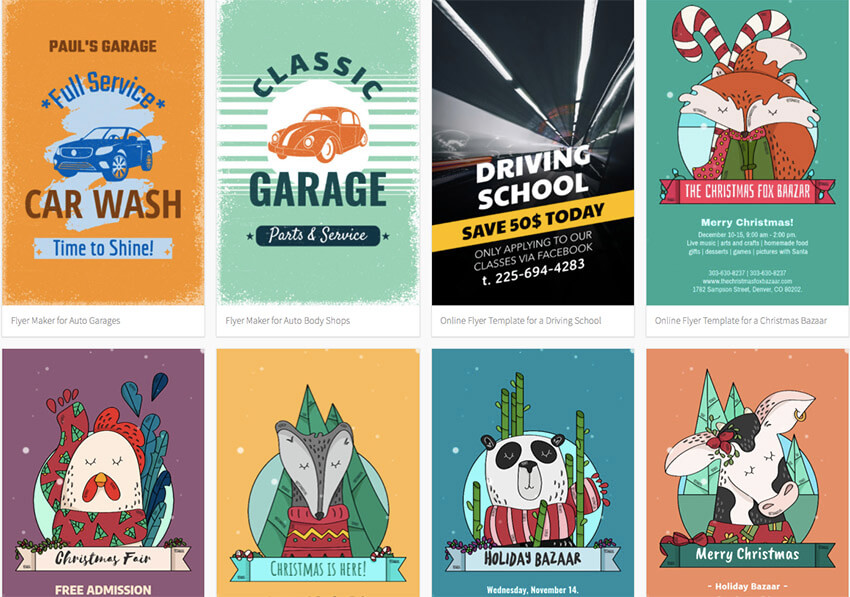
3. When you see a flyer design template that you like and that is appropriate for your purpose, double click on it. This will open up the online flyer maker.
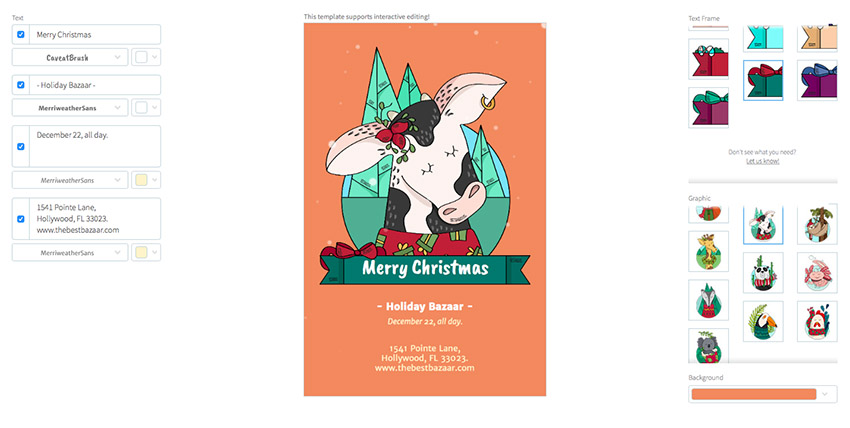
4. You can now customise your flyer maker template as much or as little as you like. Starting with the controls on the left and working your way down from the top, you can add your text and change the font style and colour to match your brand. I changed Merry Christmas to Christmas Bazaar as my headline to grab my target audience’s attention. I added the call to action, ‘Bring the Whole Family’. I changed the date, time and address for the bazaar so people could know when to come and where to find me, and I made the fonts white and off-white.

5. Moving to the controls on the right and working from the top, you can change the text frame, the animal graphic you use, and the colour of your background. I changed the colour of the text frame to one that was a bit more vibrant, and I changed the background to a lovely plum colour that’s consistent with my imaginary business brand identity, but I kept the cow image because after trying a number of the other animals available, I decided the cow image was the exact note of playfulness I wanted to communicate.

6. Scrolling down the page, you have two additional options. If you get stuck while you’re customising your design, you can try one of the presets on offer. They are all different versions of the flyer maker template you choose, and they can help you see how your template would look with different settings applied.

7. Alternatively, just below the presets, you can see your selected colours and text applied to different flyer design templates for more design inspiration.

8. Best of all, as you create your flyer design online, you can make use of Placeit’s state-of-the-art mockup tool at the bottom of the page, which shows your flyer in a range of real-life scenarios.


9. Once you’re satisfied with your design, hit the download button at the top of the screen and download your design for a small fee. So now you know that if you’re looking for cheap flyer design templates, you’ve come to the right place.
Alternatively, if you regularly need to create flyers, posters, social media banners, etc., then the monthly plan may be the best deal for you.
20 Best Flyer Design Templates
Now that you know how easy it is to use Placeit’s flyer designer app, these 20 best flyer design templates will get you even more excited about creating your own flyer.
1. Holiday Flyer Maker for a Christmas Bake Sale
Create an enticing flyer for your next bake sale with this great flyer maker template. Use the stock photos provided or upload your own photos of your terrific cakes and cookies. You’ll find loads of icons to choose from to identify your sale for Christmas or other times of the year.

2. Flyer Maker for a Women’s Fitness Club
If you want an eye-catching flyer to promote the launch of your women’s fitness club, this flyer is just thing to attract the clients you want. The template uses dynamic geometric shapes (which can be colour customised to reflect your brand) to frame fantastic images of female bodies in motion. Add your text and logo, and with very little effort, you’ve created an excellent flyer.

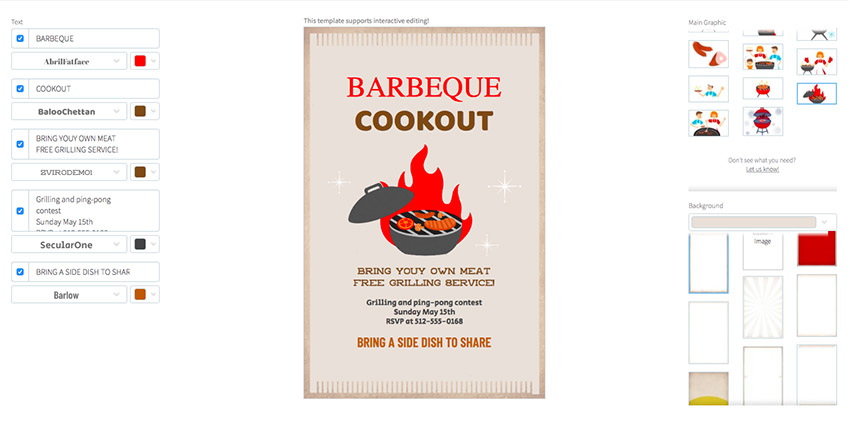
3. Online Flyer Maker for a Cookout
Having a barbecue? Spread the word and get people excited about attending with this great flyer maker template. The template offers loads of fabulous illustrations and a great selection of backgrounds to suit a wide variety of tastes.
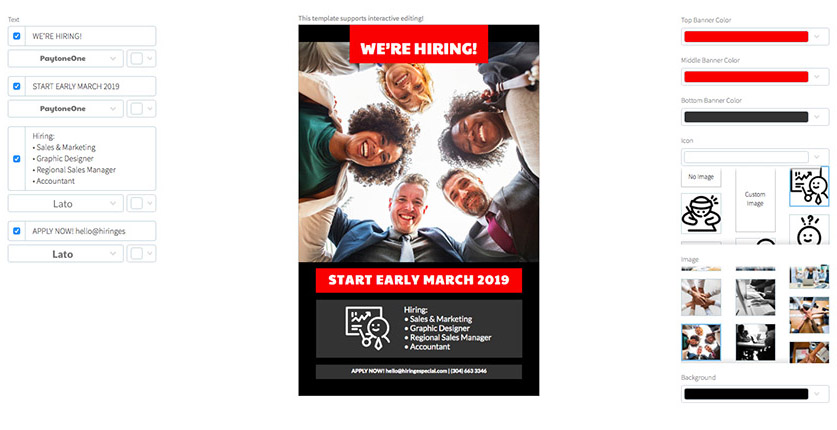
4. Recruitment Flyer Template for an HR Firm
If you’re looking for a flyer maker with photo feature for your company’s next recruitment drive, look no further than this template for HR firms. The template offers a great selection of photos representing the kind of diversity you’d expect in a workplace, but if none of the photos quite suits your target audience, you can of course upload your own.
5. Flyer Maker for Home Remodeling Companies
Looking for some flyer design inspiration for creating a beautiful interior design flyer? This template is designed specifically for home remodelling companies. It’s super easy to customise: just enter your information in the flyer creator, choose a photo to feature on your flyer, select your colour scheme, and you’re ready to download and print.

6. Flyer Maker for Winter Sales
The winter sale flyer has a simple, clean design that uses a background of solid colours and geometric shapes under bold text to arrest the eye. If you’re interested in creating a sales flyer in a modern minimalist flyer style, this is it.

7. Flyer Maker for a Catering Service Company
If you’re creating a flyer for a catering service, this stylish catering service flyer design template is a great choice. You can show off your own work by uploading your own photos or use the wide range of stock photos provided. Next, customise the flyer with your choice of fonts and colours, and you’re done.

8. Online Flyer Template for House Renovations
Another terrific flyer design template for home renovators, this template uses interesting shapes to highlight photos of interiors and then move the reader’s eye to the header text.

9. Flyer Creator for Plumbers
Plumbers will love this flyer design template and its presets, which feature terrific illustrations in great colours, all related to plumbing. Enter your business details and use as is, or customise it with the wide range of fonts, colours and illustrations available.

10. Auto Work Shop Flyer Maker
Use this auto workshop flyer template to design the perfect flyers for mechanic workshops. Choose a background image or upload one of your own, type in your information, and you’re ready to download your professional automotive flyer!

11. Tech Shop Online Flyer Maker
Promote your tech repair shop with this flyer maker template. The template has a terrific collection of technology images that would be useful for a phone repair shop, a computer technician, tech studio, and more. Customise the flyer and spread the word on your latest promotions, services, products, and deals.

12. Garden Care Flyer Maker
Show off your landscaping work and start bringing in more business with this super garden care flyer design template. With this template, you can upload photos of your own work which will sit under a simple banner that highlights key pieces of information about the business.

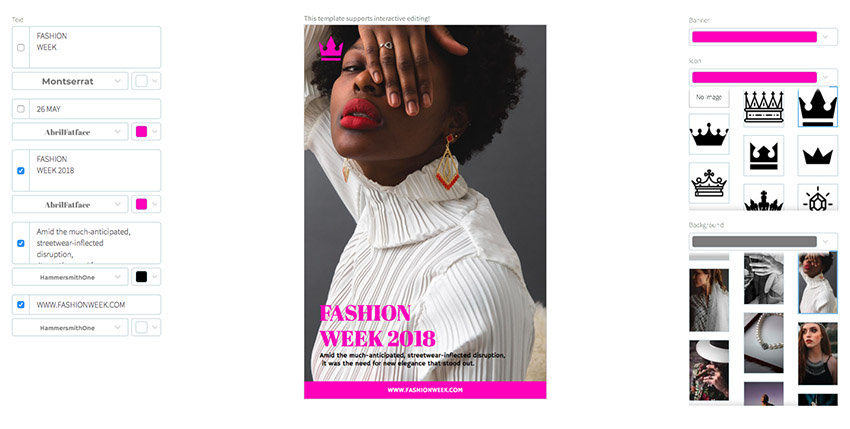
13. Fashion Week Online Flyer Maker
Fashion is a billion-dollar industry. Use this fashion week flyer design template to create an awesome flyer to draw the crowd to your next fashion show and make sure you’re getting your share of the profits.
14. Simple Flyer Maker for Photographers
Photographers, sit up and take notice! This elegant flyer design template is for you. It features a patterned and coloured background to which you can add header, secondary and/or tertiary text, a selection of beautiful drawings of cameras, and a collection of clever camera-related logos. Every feature is customisable.

15. Online Flyer Maker for Medical Labs
Create a flyer design online for your medical lab, hospital, doctor’s office, or dental clinic using this flyer design template. The template features tons of medical images and icons like laboratory flasks, bandages, ambulances, and stethoscopes, which you can use to create your own unique flyer design.

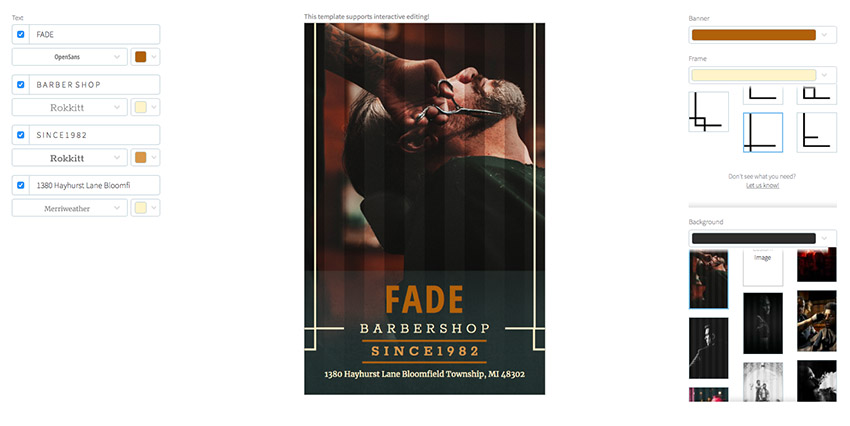
16. Barber Shop Flyer Maker with Color Image
Looking for flyer design ideas to create the best flyer for a barber shop? Look no further than this barber shop flyer template. Thanks to this well-thought-out template with gorgeous photos, you’ll have your own terrific flyers customised in no time.
17. Online Flyer Maker for Meditation Classes
If you looking for cheap flyer design templates to help you create a flyer for your upcoming meditation class, this online flyer is a great choice. Just enter your class info, select calming colours and one of the wonderful photos, and you’re all set.

18. Landscape Flyer Template for Japan Style Garden
If you’ve been searching for just the right template to reflects the elegant simplicity of a Japanese garden, this flyer template for a Japan Style Garden will make you very happy. With its minimalist style and delicate floral illustration, you’ll have a hard time sticking to just creating one flyer.

19. Flyer Generator for Painting Company
Paint. Luscious paint. This flyer template uses the sheen and drip pattern of wet paint over gorgeous photos to stop viewers in their tracks and lure then into reading more. Now that’s an effective flyer template.

20. Flyer Maker for Conferences With Images of Natural Phenomenon

Climate change is one of the most pressing issues of our time, so if you’re trying to create a flyer to advertise a conference on climate-related issues, it stands to reason that you need a flyer with some gravitas. This flyer design template for conferences won’t disappoint. With great images and the ability to customise colours and fonts as needed, you’ll create a template worthy of its subject.
More Terrific Flyer Design Templates
I couldn’t end this post on the 20 best online flyer template designs without also mentioning the hundreds of awesome flyer templates to be found over at Envato Elements. These templates are more suitable for those who have some knowledge of Adobe Photoshop and Illustrator. If that’s you then head on over to Elements and take a look at their offering.
One of the things that makes Elements so incredible is that for one affordable price you can download as many of these flyer templates as you like. And not just flyer templates. Once you sign up, you also get access to thousands of other creative graphics and templates to use as often as you like. Sweet deal, right?

Anyway, here are a few of my favourite flyer templates.
Corporate Flyer Template
This elegant template is downloadable as a layered psd file. The file is fully customisable. You can edit the text with the text tool and resize all shapes without sacrificing quality.

All Season Fashion Sale Flyer
Looking for a fashion-themed flyer that you can use to promote your sales in any season? The All Season Fashion Sale Flyer is the answer. It contains four flyers, each representing one of the four seasons. The flyers are downloadable as both psd and ai files and are fully customisable. A help file is provided.

DSGN Series 4 Poster / Flyer Template
Use this stylish modern template to create a flyer for your next event. The file doubles as a poster, so to use it as a poster you just need to scale it to size. The layered files come in psd and ai versions and are fully editable.

Choose Your Flyer Design Template Today
That’s my list of the best flyer design templates of 2018, so check them out and let me know which one you used. But remember, there are many more terrific online flyer makers at both Placeit and Envato Elements than I had the space here to add, so definitely check out both sites and let me know in the comments if you’ve found a new favourite that’s not on my list.

5 Quick Facts about VPS Hosting
Post pobrano z: 5 Quick Facts about VPS Hosting
Virtual Private Server (or VPS) hosting is one of the most commonly used hosting services for websites. It uses virtualization technique to deliver seemingly dedicated resources, despite having multiple users accessing the hardware simultaneously.
Unlike shared hosting, a VPS provides a stable and secure solution for your business. It’s widely popular because it’s more cost-effective than renting a whole ‘dedicated’ server. VPS hosting is a great option if you experience medium-level traffic that passes the limits of a shared hosting but still do not require resources of a dedicated server.
Good value VPS plans often provide more choice than just a single hosting plan. For example, top companies like KnownHost offer more than one plan so as to match individual business needs, allowing you to scale your website smoothly whenever you require more resources.
Here are five quick facts about VPS hosting that you probably didn’t know:
1. You can get a VPS solution that perfectly fits your business needs
When it comes to web hosting, there’s nothing good about one-size-fits-all. Top hosting companies understand that no business is similar to another – regarding needs, customers, budget and so on. So they avail different plans to match the diverse needs and preferences. What this means is that you get the opportunity to choose a plan that resonates with you, and to scale, or downgrade whenever you need to.
2. There are three categories of web hosting
In addition to VPS hosting, there is also shared hosting and dedicated server hosting. Shared hosting lets you, along with other users to have an account under one operating system; dedicated hosting, on the other hand, allows you to use the server alone. VPS hosting is somewhat in the middle of dedicated and shared hosting. Keep in mind that all these hosting options present their own set of pros and cons; so, you might want to do a thorough research upfront, before settling for one that matches your business goals, or speaks to someone on the hosting sales team to help find the perfect fit.
3. VPS is often the most convenient web hosting option
Shared and dedicated hosting have incredible benefits, however, VPS hosting is often the most convenient one because it provides more freedom than the shared hosting, and is more affordable than the dedicated one. If you are just getting started with your business, or still can’t justify the expense of fully dedicated, then VPS hosting could be just what you need.
4. VPS hosting is perfect for companies of all sizes
You can still take advantage of the VPS hosting irrespective of whether your business is big or small, startup or established. If yours is a small or startup business, you will love the fair price of VPS hosting and the freedom that comes with it, and if it’s large, you will also enjoy the high-end power of top-of-the-range VPS plans (including the benefits of not having to buy and maintain your own servers).
5. VPS hosting is flexible
As your business grows, you can seamlessly upgrade from one plan to another, flexing the resources allocated to perfectly match your needs – without committing to excessive expense, all without downtime, changing IP’s or the headaches account upgrades used to entail in the days of old.
Now is a great time to propel your company forward with powerful managed VPS hosting.
Feature Image by Thomas Kvistholt
Best of 2018: 20+ Online Flyer Maker Template Designs
Post pobrano z: Best of 2018: 20+ Online Flyer Maker Template Designs
Whether you need to promote the opening of your new store, an upcoming sale, a sporting event, or your booth at an expo, flyers are a versatile and cost-effective way to successfully target your ideal audience.
Flyers, sometimes called leaflets, inserts, or circulars depending on how they’re used, are a single unfolded 8.5” x 11” or A4 size sheet of paper with a beautiful graphic and a very simple message printed on one side. They’re a great way for individuals and small to medium sized businesses to promote products, services and events without breaking the bank.
Too often, though, individuals or businesses have no idea where to begin when it comes to producing great flyers, so they adopt an ‘anything goes’ approach to their flyer design. This inevitably leads to flyers that are so poorly designed that potential clients don’t even notice them or in some cases are actually turned off by them. When creating your flyers, it is important to remember that most people form judgements in just a few seconds, so you really need to get the design right if you want your flyer to be effective.
5 Key Elements of Effective Flyer Design
But what does getting it right entail? For your flyer to be most effective, it needs to apply the AIDA principle. That means it needs to:
- Catch your potential customer’s attention.
- Pique their interest so they continue reading beyond the headline.
- Create a desire for the product or service you’re offering.
- Persuade them to take the action you want them to take, such as show up at your sale or attend your concert.
To apply the AIDA principle, there are five key elements your flyer design should include:
- Your Target Audience. You should have a clear picture of your ideal client/customer and what kind of lifestyle they have. Knowing who you are targeting with your flyer will influence the design elements and language you use in your flyer. So before you begin your flyer design, be clear about who you’re targeting.
- A Bold Headline. Your flyer’s headline needs to be the first thing that your target audience will see, so it’s got to catch their attention with its colour, size, and message. At first glance, it should tell your audience what your flyer is about and entice them to keep reading.
- Compelling Graphics. The photos, illustrations, shapes, lines and colours you use in your flyer aren’t just about creating a pretty flyer; they all have a function. They should tie in with your business brand and accurately represent the type of service or product you offer. They should also appeal to your target audience and create an emotional response in them.
- A Call to Action. Every flyer needs a call to action line. This is a message that makes the reader want to act, like ‘Get your ticket today’, ‘Contact us’, ‘Enter to win’, ‘Buy now’, etc. A call to action lets your readers know how to act on what they have been reading.
- Your Contact Information. Contact info like your website, email address, phone number, etc. are critical pieces of information for every flyer. After all, if you don’t add your contact info, how will your potential client/customer know where to find you to access the product, service or event you’re promoting?
These are the five basic elements every flyer needs to have in order to be effective, so think through them carefully before you begin to design your flyer. Now, the next thing you need to consider is how to put these elements together to create the best design.
Use an Online Flyer Maker
Anyone can use the elements I’ve discussed above to create a great flyer, but let’s face it, if you’re just starting out or you don’t have a design background, it can be quite challenging to know just how to put all these elements together so they add up to one terrific flyer.
One way to ensure that you get the design aspect of creating your flyer right is to use a flyer maker online, like this flyer designer app by Placeit.
The Flyer Creator is a terrific app that puts hundreds of cheap flyer design templates at your disposal so that you can easily make gorgeous flyers for any occasion. Let me show you how.
How to Use Flyer Design Templates
Let’s say you want to create the perfect flyer to advertise a Christmas Bazaar in December. All you need to do is follow these simple steps to have your own special logo ready in minutes.
1. Navigate to the Flyer Designer App at Placeit and sign up to the service for free.
2. Type the kind of flyer you want to make in the search bar and hit enter or peruse the grid of available flyer design templates.
3. When you see a flyer design template that you like and that is appropriate for your purpose, double click on it. This will open up the online flyer maker.
4. You can now customise your flyer maker template as much or as little as you like. Starting with the controls on the left and working your way down from the top, you can add your text and change the font style and colour to match your brand. I changed Merry Christmas to Christmas Bazaar as my headline to grab my target audience’s attention. I added the call to action, ‘Bring the Whole Family’. I changed the date, time and address for the bazaar so people could know when to come and where to find me, and I made the fonts white and off-white.
5. Moving to the controls on the right and working from the top, you can change the text frame, the animal graphic you use, and the colour of your background. I changed the colour of the text frame to one that was a bit more vibrant, and I changed the background to a lovely plum colour that’s consistent with my imaginary business brand identity, but I kept the cow image because after trying a number of the other animals available, I decided the cow image was the exact note of playfulness I wanted to communicate.
6. Scrolling down the page, you have two additional options. If you get stuck while you’re customising your design, you can try one of the presets on offer. They are all different versions of the flyer maker template you choose, and they can help you see how your template would look with different settings applied.
7. Alternatively, just below the presets, you can see your selected colours and text applied to different flyer design templates for more design inspiration.
8. Best of all, as you create your flyer design online, you can make use of Placeit’s state-of-the-art mockup tool at the bottom of the page, which shows your flyer in a range of real-life scenarios.
9. Once you’re satisfied with your design, hit the download button at the top of the screen and download your design for a small fee. So now you know that if you’re looking for cheap flyer design templates, you’ve come to the right place.
Alternatively, if you regularly need to create flyers, posters, social media banners, etc., then the monthly plan may be the best deal for you.
20 Best Flyer Design Templates
Now that you know how easy it is to use Placeit’s flyer designer app, these 20 best flyer design templates will get you even more excited about creating your own flyer.
1. Holiday Flyer Maker for a Christmas Bake Sale
Create an enticing flyer for your next bake sale with this great flyer maker template. Use the stock photos provided or upload your own photos of your terrific cakes and cookies. You’ll find loads of icons to choose from to identify your sale for Christmas or other times of the year.
2. Flyer Maker for a Women’s Fitness Club
If you want an eye-catching flyer to promote the launch of your women’s fitness club, this flyer is just thing to attract the clients you want. The template uses dynamic geometric shapes (which can be colour customised to reflect your brand) to frame fantastic images of female bodies in motion. Add your text and logo, and with very little effort, you’ve created an excellent flyer.
3. Online Flyer Maker for a Cookout
Having a barbecue? Spread the word and get people excited about attending with this great flyer maker template. The template offers loads of fabulous illustrations and a great selection of backgrounds to suit a wide variety of tastes.
4. Recruitment Flyer Template for an HR Firm
If you’re looking for a flyer maker with photo feature for your company’s next recruitment drive, look no further than this template for HR firms. The template offers a great selection of photos representing the kind of diversity you’d expect in a workplace, but if none of the photos quite suits your target audience, you can of course upload your own.
5. Flyer Maker for Home Remodeling Companies
Looking for some flyer design inspiration for creating a beautiful interior design flyer? This template is designed specifically for home remodelling companies. It’s super easy to customise: just enter your information in the flyer creator, choose a photo to feature on your flyer, select your colour scheme, and you’re ready to download and print.
6. Flyer Maker for Winter Sales
The winter sale flyer has a simple, clean design that uses a background of solid colours and geometric shapes under bold text to arrest the eye. If you’re interested in creating a sales flyer in a modern minimalist flyer style, this is it.
7. Flyer Maker for a Catering Service Company
If you’re creating a flyer for a catering service, this stylish catering service flyer design template is a great choice. You can show off your own work by uploading your own photos or use the wide range of stock photos provided. Next, customise the flyer with your choice of fonts and colours, and you’re done.
8. Online Flyer Template for House Renovations
Another terrific flyer design template for home renovators, this template uses interesting shapes to highlight photos of interiors and then move the reader’s eye to the header text.
9. Flyer Creator for Plumbers
Plumbers will love this flyer design template and its presets, which feature terrific illustrations in great colours, all related to plumbing. Enter your business details and use as is, or customise it with the wide range of fonts, colours and illustrations available.
10. Auto Work Shop Flyer Maker
Use this auto workshop flyer template to design the perfect flyers for mechanic workshops. Choose a background image or upload one of your own, type in your information, and you’re ready to download your professional automotive flyer!
11. Tech Shop Online Flyer Maker
Promote your tech repair shop with this flyer maker template. The template has a terrific collection of technology images that would be useful for a phone repair shop, a computer technician, tech studio, and more. Customise the flyer and spread the word on your latest promotions, services, products, and deals.
12. Garden Care Flyer Maker
Show off your landscaping work and start bringing in more business with this super garden care flyer design template. With this template, you can upload photos of your own work which will sit under a simple banner that highlights key pieces of information about the business.
13. Fashion Week Online Flyer Maker
Fashion is a billion-dollar industry. Use this fashion week flyer design template to create an awesome flyer to draw the crowd to your next fashion show and make sure you’re getting your share of the profits.
14. Simple Flyer Maker for Photographers
Photographers, sit up and take notice! This elegant flyer design template is for you. It features a patterned and coloured background to which you can add header, secondary and/or tertiary text, a selection of beautiful drawings of cameras, and a collection of clever camera-related logos. Every feature is customisable.
15. Online Flyer Maker for Medical Labs
Create a flyer design online for your medical lab, hospital, doctor’s office, or dental clinic using this flyer design template. The template features tons of medical images and icons like laboratory flasks, bandages, ambulances, and stethoscopes, which you can use to create your own unique flyer design.
16. Barber Shop Flyer Maker with Color Image
Looking for flyer design ideas to create the best flyer for a barber shop? Look no further than this barber shop flyer template. Thanks to this well-thought-out template with gorgeous photos, you’ll have your own terrific flyers customised in no time.
17. Online Flyer Maker for Meditation Classes
If you looking for cheap flyer design templates to help you create a flyer for your upcoming meditation class, this online flyer is a great choice. Just enter your class info, select calming colours and one of the wonderful photos, and you’re all set.
18. Landscape Flyer Template for Japan Style Garden
If you’ve been searching for just the right template to reflects the elegant simplicity of a Japanese garden, this flyer template for a Japan Style Garden will make you very happy. With its minimalist style and delicate floral illustration, you’ll have a hard time sticking to just creating one flyer.
19. Flyer Generator for Painting Company
Paint. Luscious paint. This flyer template uses the sheen and drip pattern of wet paint over gorgeous photos to stop viewers in their tracks and lure then into reading more. Now that’s an effective flyer template.
20. Flyer Maker for Conferences With Images of Natural Phenomenon
Climate change is one of the most pressing issues of our time, so if you’re trying to create a flyer to advertise a conference on climate-related issues, it stands to reason that you need a flyer with some gravitas. This flyer design template for conferences won’t disappoint. With great images and the ability to customise colours and fonts as needed, you’ll create a template worthy of its subject.
More Terrific Flyer Design Templates
I couldn’t end this post on the 20 best online flyer template designs without also mentioning the hundreds of awesome flyer templates to be found over at Envato Elements. These templates are more suitable for those who have some knowledge of Adobe Photoshop and Illustrator. If that’s you then head on over to Elements and take a look at their offering.
One of the things that makes Elements so incredible is that for one affordable price you can download as many of these flyer templates as you like. And not just flyer templates. Once you sign up, you also get access to thousands of other creative graphics and templates to use as often as you like. Sweet deal, right?
Anyway, here are a few of my favourite flyer templates.
Corporate Flyer Template
This elegant template is downloadable as a layered psd file. The file is fully customisable. You can edit the text with the text tool and resize all shapes without sacrificing quality.
All Season Fashion Sale Flyer
Looking for a fashion-themed flyer that you can use to promote your sales in any season? The All Season Fashion Sale Flyer is the answer. It contains four flyers, each representing one of the four seasons. The flyers are downloadable as both psd and ai files and are fully customisable. A help file is provided.
DSGN Series 4 Poster / Flyer Template
Use this stylish modern template to create a flyer for your next event. The file doubles as a poster, so to use it as a poster you just need to scale it to size. The layered files come in psd and ai versions and are fully editable.
Choose Your Flyer Design Template Today
That’s my list of the best flyer design templates of 2018, so check them out and let me know which one you used. But remember, there are many more terrific online flyer makers at both Placeit and Envato Elements than I had the space here to add, so definitely check out both sites and let me know in the comments if you’ve found a new favourite that’s not on my list.
Best of 2018: 20+ Online Flyer Maker Template Designs
Post pobrano z: Best of 2018: 20+ Online Flyer Maker Template Designs
Whether you need to promote the opening of your new store, an upcoming sale, a sporting event, or your booth at an expo, flyers are a versatile and cost-effective way to successfully target your ideal audience.
Flyers, sometimes called leaflets, inserts, or circulars depending on how they’re used, are a single unfolded 8.5” x 11” or A4 size sheet of paper with a beautiful graphic and a very simple message printed on one side. They’re a great way for individuals and small to medium sized businesses to promote products, services and events without breaking the bank.
Too often, though, individuals or businesses have no idea where to begin when it comes to producing great flyers, so they adopt an ‘anything goes’ approach to their flyer design. This inevitably leads to flyers that are so poorly designed that potential clients don’t even notice them or in some cases are actually turned off by them. When creating your flyers, it is important to remember that most people form judgements in just a few seconds, so you really need to get the design right if you want your flyer to be effective.
5 Key Elements of Effective Flyer Design
But what does getting it right entail? For your flyer to be most effective, it needs to apply the AIDA principle. That means it needs to:
- Catch your potential customer’s attention.
- Pique their interest so they continue reading beyond the headline.
- Create a desire for the product or service you’re offering.
- Persuade them to take the action you want them to take, such as show up at your sale or attend your concert.
To apply the AIDA principle, there are five key elements your flyer design should include:
- Your Target Audience. You should have a clear picture of your ideal client/customer and what kind of lifestyle they have. Knowing who you are targeting with your flyer will influence the design elements and language you use in your flyer. So before you begin your flyer design, be clear about who you’re targeting.
- A Bold Headline. Your flyer’s headline needs to be the first thing that your target audience will see, so it’s got to catch their attention with its colour, size, and message. At first glance, it should tell your audience what your flyer is about and entice them to keep reading.
- Compelling Graphics. The photos, illustrations, shapes, lines and colours you use in your flyer aren’t just about creating a pretty flyer; they all have a function. They should tie in with your business brand and accurately represent the type of service or product you offer. They should also appeal to your target audience and create an emotional response in them.
- A Call to Action. Every flyer needs a call to action line. This is a message that makes the reader want to act, like ‘Get your ticket today’, ‘Contact us’, ‘Enter to win’, ‘Buy now’, etc. A call to action lets your readers know how to act on what they have been reading.
- Your Contact Information. Contact info like your website, email address, phone number, etc. are critical pieces of information for every flyer. After all, if you don’t add your contact info, how will your potential client/customer know where to find you to access the product, service or event you’re promoting?
These are the five basic elements every flyer needs to have in order to be effective, so think through them carefully before you begin to design your flyer. Now, the next thing you need to consider is how to put these elements together to create the best design.
Use an Online Flyer Maker
Anyone can use the elements I’ve discussed above to create a great flyer, but let’s face it, if you’re just starting out or you don’t have a design background, it can be quite challenging to know just how to put all these elements together so they add up to one terrific flyer.
One way to ensure that you get the design aspect of creating your flyer right is to use a flyer maker online, like this flyer designer app by Placeit.
The Flyer Creator is a terrific app that puts hundreds of cheap flyer design templates at your disposal so that you can easily make gorgeous flyers for any occasion. Let me show you how.
How to Use Flyer Design Templates
Let’s say you want to create the perfect flyer to advertise a Christmas Bazaar in December. All you need to do is follow these simple steps to have your own special logo ready in minutes.
1. Navigate to the Flyer Designer App at Placeit and sign up to the service for free.
2. Type the kind of flyer you want to make in the search bar and hit enter or peruse the grid of available flyer design templates.
3. When you see a flyer design template that you like and that is appropriate for your purpose, double click on it. This will open up the online flyer maker.
4. You can now customise your flyer maker template as much or as little as you like. Starting with the controls on the left and working your way down from the top, you can add your text and change the font style and colour to match your brand. I changed Merry Christmas to Christmas Bazaar as my headline to grab my target audience’s attention. I added the call to action, ‘Bring the Whole Family’. I changed the date, time and address for the bazaar so people could know when to come and where to find me, and I made the fonts white and off-white.
5. Moving to the controls on the right and working from the top, you can change the text frame, the animal graphic you use, and the colour of your background. I changed the colour of the text frame to one that was a bit more vibrant, and I changed the background to a lovely plum colour that’s consistent with my imaginary business brand identity, but I kept the cow image because after trying a number of the other animals available, I decided the cow image was the exact note of playfulness I wanted to communicate.
6. Scrolling down the page, you have two additional options. If you get stuck while you’re customising your design, you can try one of the presets on offer. They are all different versions of the flyer maker template you choose, and they can help you see how your template would look with different settings applied.
7. Alternatively, just below the presets, you can see your selected colours and text applied to different flyer design templates for more design inspiration.
8. Best of all, as you create your flyer design online, you can make use of Placeit’s state-of-the-art mockup tool at the bottom of the page, which shows your flyer in a range of real-life scenarios.
9. Once you’re satisfied with your design, hit the download button at the top of the screen and download your design for a small fee. So now you know that if you’re looking for cheap flyer design templates, you’ve come to the right place.
Alternatively, if you regularly need to create flyers, posters, social media banners, etc., then the monthly plan may be the best deal for you.
20 Best Flyer Design Templates
Now that you know how easy it is to use Placeit’s flyer designer app, these 20 best flyer design templates will get you even more excited about creating your own flyer.
1. Holiday Flyer Maker for a Christmas Bake Sale
Create an enticing flyer for your next bake sale with this great flyer maker template. Use the stock photos provided or upload your own photos of your terrific cakes and cookies. You’ll find loads of icons to choose from to identify your sale for Christmas or other times of the year.
2. Flyer Maker for a Women’s Fitness Club
If you want an eye-catching flyer to promote the launch of your women’s fitness club, this flyer is just thing to attract the clients you want. The template uses dynamic geometric shapes (which can be colour customised to reflect your brand) to frame fantastic images of female bodies in motion. Add your text and logo, and with very little effort, you’ve created an excellent flyer.
3. Online Flyer Maker for a Cookout
Having a barbecue? Spread the word and get people excited about attending with this great flyer maker template. The template offers loads of fabulous illustrations and a great selection of backgrounds to suit a wide variety of tastes.
4. Recruitment Flyer Template for an HR Firm
If you’re looking for a flyer maker with photo feature for your company’s next recruitment drive, look no further than this template for HR firms. The template offers a great selection of photos representing the kind of diversity you’d expect in a workplace, but if none of the photos quite suits your target audience, you can of course upload your own.
5. Flyer Maker for Home Remodeling Companies
Looking for some flyer design inspiration for creating a beautiful interior design flyer? This template is designed specifically for home remodelling companies. It’s super easy to customise: just enter your information in the flyer creator, choose a photo to feature on your flyer, select your colour scheme, and you’re ready to download and print.
6. Flyer Maker for Winter Sales
The winter sale flyer has a simple, clean design that uses a background of solid colours and geometric shapes under bold text to arrest the eye. If you’re interested in creating a sales flyer in a modern minimalist flyer style, this is it.
7. Flyer Maker for a Catering Service Company
If you’re creating a flyer for a catering service, this stylish catering service flyer design template is a great choice. You can show off your own work by uploading your own photos or use the wide range of stock photos provided. Next, customise the flyer with your choice of fonts and colours, and you’re done.
8. Online Flyer Template for House Renovations
Another terrific flyer design template for home renovators, this template uses interesting shapes to highlight photos of interiors and then move the reader’s eye to the header text.
9. Flyer Creator for Plumbers
Plumbers will love this flyer design template and its presets, which feature terrific illustrations in great colours, all related to plumbing. Enter your business details and use as is, or customise it with the wide range of fonts, colours and illustrations available.
10. Auto Work Shop Flyer Maker
Use this auto workshop flyer template to design the perfect flyers for mechanic workshops. Choose a background image or upload one of your own, type in your information, and you’re ready to download your professional automotive flyer!
11. Tech Shop Online Flyer Maker
Promote your tech repair shop with this flyer maker template. The template has a terrific collection of technology images that would be useful for a phone repair shop, a computer technician, tech studio, and more. Customise the flyer and spread the word on your latest promotions, services, products, and deals.
12. Garden Care Flyer Maker
Show off your landscaping work and start bringing in more business with this super garden care flyer design template. With this template, you can upload photos of your own work which will sit under a simple banner that highlights key pieces of information about the business.
13. Fashion Week Online Flyer Maker
Fashion is a billion-dollar industry. Use this fashion week flyer design template to create an awesome flyer to draw the crowd to your next fashion show and make sure you’re getting your share of the profits.
14. Simple Flyer Maker for Photographers
Photographers, sit up and take notice! This elegant flyer design template is for you. It features a patterned and coloured background to which you can add header, secondary and/or tertiary text, a selection of beautiful drawings of cameras, and a collection of clever camera-related logos. Every feature is customisable.
15. Online Flyer Maker for Medical Labs
Create a flyer design online for your medical lab, hospital, doctor’s office, or dental clinic using this flyer design template. The template features tons of medical images and icons like laboratory flasks, bandages, ambulances, and stethoscopes, which you can use to create your own unique flyer design.
16. Barber Shop Flyer Maker with Color Image
Looking for flyer design ideas to create the best flyer for a barber shop? Look no further than this barber shop flyer template. Thanks to this well-thought-out template with gorgeous photos, you’ll have your own terrific flyers customised in no time.
17. Online Flyer Maker for Meditation Classes
If you looking for cheap flyer design templates to help you create a flyer for your upcoming meditation class, this online flyer is a great choice. Just enter your class info, select calming colours and one of the wonderful photos, and you’re all set.
18. Landscape Flyer Template for Japan Style Garden
If you’ve been searching for just the right template to reflects the elegant simplicity of a Japanese garden, this flyer template for a Japan Style Garden will make you very happy. With its minimalist style and delicate floral illustration, you’ll have a hard time sticking to just creating one flyer.
19. Flyer Generator for Painting Company
Paint. Luscious paint. This flyer template uses the sheen and drip pattern of wet paint over gorgeous photos to stop viewers in their tracks and lure then into reading more. Now that’s an effective flyer template.
20. Flyer Maker for Conferences With Images of Natural Phenomenon
Climate change is one of the most pressing issues of our time, so if you’re trying to create a flyer to advertise a conference on climate-related issues, it stands to reason that you need a flyer with some gravitas. This flyer design template for conferences won’t disappoint. With great images and the ability to customise colours and fonts as needed, you’ll create a template worthy of its subject.
More Terrific Flyer Design Templates
I couldn’t end this post on the 20 best online flyer template designs without also mentioning the hundreds of awesome flyer templates to be found over at Envato Elements. These templates are more suitable for those who have some knowledge of Adobe Photoshop and Illustrator. If that’s you then head on over to Elements and take a look at their offering.
One of the things that makes Elements so incredible is that for one affordable price you can download as many of these flyer templates as you like. And not just flyer templates. Once you sign up, you also get access to thousands of other creative graphics and templates to use as often as you like. Sweet deal, right?
Anyway, here are a few of my favourite flyer templates.
Corporate Flyer Template
This elegant template is downloadable as a layered psd file. The file is fully customisable. You can edit the text with the text tool and resize all shapes without sacrificing quality.
All Season Fashion Sale Flyer
Looking for a fashion-themed flyer that you can use to promote your sales in any season? The All Season Fashion Sale Flyer is the answer. It contains four flyers, each representing one of the four seasons. The flyers are downloadable as both psd and ai files and are fully customisable. A help file is provided.
DSGN Series 4 Poster / Flyer Template
Use this stylish modern template to create a flyer for your next event. The file doubles as a poster, so to use it as a poster you just need to scale it to size. The layered files come in psd and ai versions and are fully editable.
Choose Your Flyer Design Template Today
That’s my list of the best flyer design templates of 2018, so check them out and let me know which one you used. But remember, there are many more terrific online flyer makers at both Placeit and Envato Elements than I had the space here to add, so definitely check out both sites and let me know in the comments if you’ve found a new favourite that’s not on my list.
Best of 2018: 20+ Online Flyer Maker Template Designs
Post pobrano z: Best of 2018: 20+ Online Flyer Maker Template Designs
Whether you need to promote the opening of your new store, an upcoming sale, a sporting event, or your booth at an expo, flyers are a versatile and cost-effective way to successfully target your ideal audience.
Flyers, sometimes called leaflets, inserts, or circulars depending on how they’re used, are a single unfolded 8.5” x 11” or A4 size sheet of paper with a beautiful graphic and a very simple message printed on one side. They’re a great way for individuals and small to medium sized businesses to promote products, services and events without breaking the bank.
Too often, though, individuals or businesses have no idea where to begin when it comes to producing great flyers, so they adopt an ‘anything goes’ approach to their flyer design. This inevitably leads to flyers that are so poorly designed that potential clients don’t even notice them or in some cases are actually turned off by them. When creating your flyers, it is important to remember that most people form judgements in just a few seconds, so you really need to get the design right if you want your flyer to be effective.
5 Key Elements of Effective Flyer Design
But what does getting it right entail? For your flyer to be most effective, it needs to apply the AIDA principle. That means it needs to:
- Catch your potential customer’s attention.
- Pique their interest so they continue reading beyond the headline.
- Create a desire for the product or service you’re offering.
- Persuade them to take the action you want them to take, such as show up at your sale or attend your concert.
To apply the AIDA principle, there are five key elements your flyer design should include:
- Your Target Audience. You should have a clear picture of your ideal client/customer and what kind of lifestyle they have. Knowing who you are targeting with your flyer will influence the design elements and language you use in your flyer. So before you begin your flyer design, be clear about who you’re targeting.
- A Bold Headline. Your flyer’s headline needs to be the first thing that your target audience will see, so it’s got to catch their attention with its colour, size, and message. At first glance, it should tell your audience what your flyer is about and entice them to keep reading.
- Compelling Graphics. The photos, illustrations, shapes, lines and colours you use in your flyer aren’t just about creating a pretty flyer; they all have a function. They should tie in with your business brand and accurately represent the type of service or product you offer. They should also appeal to your target audience and create an emotional response in them.
- A Call to Action. Every flyer needs a call to action line. This is a message that makes the reader want to act, like ‘Get your ticket today’, ‘Contact us’, ‘Enter to win’, ‘Buy now’, etc. A call to action lets your readers know how to act on what they have been reading.
- Your Contact Information. Contact info like your website, email address, phone number, etc. are critical pieces of information for every flyer. After all, if you don’t add your contact info, how will your potential client/customer know where to find you to access the product, service or event you’re promoting?
These are the five basic elements every flyer needs to have in order to be effective, so think through them carefully before you begin to design your flyer. Now, the next thing you need to consider is how to put these elements together to create the best design.
Use an Online Flyer Maker
Anyone can use the elements I’ve discussed above to create a great flyer, but let’s face it, if you’re just starting out or you don’t have a design background, it can be quite challenging to know just how to put all these elements together so they add up to one terrific flyer.
One way to ensure that you get the design aspect of creating your flyer right is to use a flyer maker online, like this flyer designer app by Placeit.
The Flyer Creator is a terrific app that puts hundreds of cheap flyer design templates at your disposal so that you can easily make gorgeous flyers for any occasion. Let me show you how.
How to Use Flyer Design Templates
Let’s say you want to create the perfect flyer to advertise a Christmas Bazaar in December. All you need to do is follow these simple steps to have your own special logo ready in minutes.
1. Navigate to the Flyer Designer App at Placeit and sign up to the service for free.
2. Type the kind of flyer you want to make in the search bar and hit enter or peruse the grid of available flyer design templates.
3. When you see a flyer design template that you like and that is appropriate for your purpose, double click on it. This will open up the online flyer maker.
4. You can now customise your flyer maker template as much or as little as you like. Starting with the controls on the left and working your way down from the top, you can add your text and change the font style and colour to match your brand. I changed Merry Christmas to Christmas Bazaar as my headline to grab my target audience’s attention. I added the call to action, ‘Bring the Whole Family’. I changed the date, time and address for the bazaar so people could know when to come and where to find me, and I made the fonts white and off-white.
5. Moving to the controls on the right and working from the top, you can change the text frame, the animal graphic you use, and the colour of your background. I changed the colour of the text frame to one that was a bit more vibrant, and I changed the background to a lovely plum colour that’s consistent with my imaginary business brand identity, but I kept the cow image because after trying a number of the other animals available, I decided the cow image was the exact note of playfulness I wanted to communicate.
6. Scrolling down the page, you have two additional options. If you get stuck while you’re customising your design, you can try one of the presets on offer. They are all different versions of the flyer maker template you choose, and they can help you see how your template would look with different settings applied.
7. Alternatively, just below the presets, you can see your selected colours and text applied to different flyer design templates for more design inspiration.
8. Best of all, as you create your flyer design online, you can make use of Placeit’s state-of-the-art mockup tool at the bottom of the page, which shows your flyer in a range of real-life scenarios.
9. Once you’re satisfied with your design, hit the download button at the top of the screen and download your design for a small fee. So now you know that if you’re looking for cheap flyer design templates, you’ve come to the right place.
Alternatively, if you regularly need to create flyers, posters, social media banners, etc., then the monthly plan may be the best deal for you.
20 Best Flyer Design Templates
Now that you know how easy it is to use Placeit’s flyer designer app, these 20 best flyer design templates will get you even more excited about creating your own flyer.
1. Holiday Flyer Maker for a Christmas Bake Sale
Create an enticing flyer for your next bake sale with this great flyer maker template. Use the stock photos provided or upload your own photos of your terrific cakes and cookies. You’ll find loads of icons to choose from to identify your sale for Christmas or other times of the year.
2. Flyer Maker for a Women’s Fitness Club
If you want an eye-catching flyer to promote the launch of your women’s fitness club, this flyer is just thing to attract the clients you want. The template uses dynamic geometric shapes (which can be colour customised to reflect your brand) to frame fantastic images of female bodies in motion. Add your text and logo, and with very little effort, you’ve created an excellent flyer.
3. Online Flyer Maker for a Cookout
Having a barbecue? Spread the word and get people excited about attending with this great flyer maker template. The template offers loads of fabulous illustrations and a great selection of backgrounds to suit a wide variety of tastes.
4. Recruitment Flyer Template for an HR Firm
If you’re looking for a flyer maker with photo feature for your company’s next recruitment drive, look no further than this template for HR firms. The template offers a great selection of photos representing the kind of diversity you’d expect in a workplace, but if none of the photos quite suits your target audience, you can of course upload your own.
5. Flyer Maker for Home Remodeling Companies
Looking for some flyer design inspiration for creating a beautiful interior design flyer? This template is designed specifically for home remodelling companies. It’s super easy to customise: just enter your information in the flyer creator, choose a photo to feature on your flyer, select your colour scheme, and you’re ready to download and print.
6. Flyer Maker for Winter Sales
The winter sale flyer has a simple, clean design that uses a background of solid colours and geometric shapes under bold text to arrest the eye. If you’re interested in creating a sales flyer in a modern minimalist flyer style, this is it.
7. Flyer Maker for a Catering Service Company
If you’re creating a flyer for a catering service, this stylish catering service flyer design template is a great choice. You can show off your own work by uploading your own photos or use the wide range of stock photos provided. Next, customise the flyer with your choice of fonts and colours, and you’re done.
8. Online Flyer Template for House Renovations
Another terrific flyer design template for home renovators, this template uses interesting shapes to highlight photos of interiors and then move the reader’s eye to the header text.
9. Flyer Creator for Plumbers
Plumbers will love this flyer design template and its presets, which feature terrific illustrations in great colours, all related to plumbing. Enter your business details and use as is, or customise it with the wide range of fonts, colours and illustrations available.
10. Auto Work Shop Flyer Maker
Use this auto workshop flyer template to design the perfect flyers for mechanic workshops. Choose a background image or upload one of your own, type in your information, and you’re ready to download your professional automotive flyer!
11. Tech Shop Online Flyer Maker
Promote your tech repair shop with this flyer maker template. The template has a terrific collection of technology images that would be useful for a phone repair shop, a computer technician, tech studio, and more. Customise the flyer and spread the word on your latest promotions, services, products, and deals.
12. Garden Care Flyer Maker
Show off your landscaping work and start bringing in more business with this super garden care flyer design template. With this template, you can upload photos of your own work which will sit under a simple banner that highlights key pieces of information about the business.
13. Fashion Week Online Flyer Maker
Fashion is a billion-dollar industry. Use this fashion week flyer design template to create an awesome flyer to draw the crowd to your next fashion show and make sure you’re getting your share of the profits.
14. Simple Flyer Maker for Photographers
Photographers, sit up and take notice! This elegant flyer design template is for you. It features a patterned and coloured background to which you can add header, secondary and/or tertiary text, a selection of beautiful drawings of cameras, and a collection of clever camera-related logos. Every feature is customisable.
15. Online Flyer Maker for Medical Labs
Create a flyer design online for your medical lab, hospital, doctor’s office, or dental clinic using this flyer design template. The template features tons of medical images and icons like laboratory flasks, bandages, ambulances, and stethoscopes, which you can use to create your own unique flyer design.
16. Barber Shop Flyer Maker with Color Image
Looking for flyer design ideas to create the best flyer for a barber shop? Look no further than this barber shop flyer template. Thanks to this well-thought-out template with gorgeous photos, you’ll have your own terrific flyers customised in no time.
17. Online Flyer Maker for Meditation Classes
If you looking for cheap flyer design templates to help you create a flyer for your upcoming meditation class, this online flyer is a great choice. Just enter your class info, select calming colours and one of the wonderful photos, and you’re all set.
18. Landscape Flyer Template for Japan Style Garden
If you’ve been searching for just the right template to reflects the elegant simplicity of a Japanese garden, this flyer template for a Japan Style Garden will make you very happy. With its minimalist style and delicate floral illustration, you’ll have a hard time sticking to just creating one flyer.
19. Flyer Generator for Painting Company
Paint. Luscious paint. This flyer template uses the sheen and drip pattern of wet paint over gorgeous photos to stop viewers in their tracks and lure then into reading more. Now that’s an effective flyer template.
20. Flyer Maker for Conferences With Images of Natural Phenomenon
Climate change is one of the most pressing issues of our time, so if you’re trying to create a flyer to advertise a conference on climate-related issues, it stands to reason that you need a flyer with some gravitas. This flyer design template for conferences won’t disappoint. With great images and the ability to customise colours and fonts as needed, you’ll create a template worthy of its subject.
More Terrific Flyer Design Templates
I couldn’t end this post on the 20 best online flyer template designs without also mentioning the hundreds of awesome flyer templates to be found over at Envato Elements. These templates are more suitable for those who have some knowledge of Adobe Photoshop and Illustrator. If that’s you then head on over to Elements and take a look at their offering.
One of the things that makes Elements so incredible is that for one affordable price you can download as many of these flyer templates as you like. And not just flyer templates. Once you sign up, you also get access to thousands of other creative graphics and templates to use as often as you like. Sweet deal, right?
Anyway, here are a few of my favourite flyer templates.
Corporate Flyer Template
This elegant template is downloadable as a layered psd file. The file is fully customisable. You can edit the text with the text tool and resize all shapes without sacrificing quality.
All Season Fashion Sale Flyer
Looking for a fashion-themed flyer that you can use to promote your sales in any season? The All Season Fashion Sale Flyer is the answer. It contains four flyers, each representing one of the four seasons. The flyers are downloadable as both psd and ai files and are fully customisable. A help file is provided.
DSGN Series 4 Poster / Flyer Template
Use this stylish modern template to create a flyer for your next event. The file doubles as a poster, so to use it as a poster you just need to scale it to size. The layered files come in psd and ai versions and are fully editable.
Choose Your Flyer Design Template Today
That’s my list of the best flyer design templates of 2018, so check them out and let me know which one you used. But remember, there are many more terrific online flyer makers at both Placeit and Envato Elements than I had the space here to add, so definitely check out both sites and let me know in the comments if you’ve found a new favourite that’s not on my list.
How to Create a Winter Animation With CrazyTalk Animator 3
Post pobrano z: How to Create a Winter Animation With CrazyTalk Animator 3
If you want to animate characters you’ve created in Photoshop, there’s a very simple way to do it. CrazyTalk Animator 3 is a program designed specifically to work with assets created in Photoshop. It detects the layers and attaches bones to them, to make them ready for animation.
In this tutorial, I’ll show you how to create a simple animated scene with a dog pulling a sled. I’ll show you how to animate the dog, how to attach the sled to it, how to move the background to give the illusion of motion, and how to add falling snow.
If you like CTA 3, you must check out Cartoon Animator 4 WIP.
1. How to Prepare the Characters in Photoshop
Step 1
Let’s start with the dog. Create its head out of simple shapes, using the characteristic „chibi” style. Make the head big, the muzzle small, and the eyes big and full of expression. You can use any program you want for this, but make sure to keep the elements on separate layers.

Step 2
Create the torso. It must be simple, too, like a bean. Add the bushy tail, a fluffy neck, and a harness.

Step 3
Add two pairs of legs.

Step 4
The kid should be created the same way, keeping the illustration as simple as possible. Use quiet colors that look good together

Step 5
Create a simple sled with presents. If you want to make the presents prettier, you can cover them with a pattern.

Step 6
We’ll need something to attach the dog to the sled. Create a very simple strap with a golden circle on one end, just like these on the harness.

Step 7
Our scene needs a background. Keep it simple, too—just a sky with some clouds, some snow, and trees.

Step 8
Create some falling snow. You can make it with a brush or a pattern. Keep the background transparent.

2. How to Add Animation Bones in Photoshop
Step 1
We have all the assets, so now we need to prepare them for animation. Each of the dog’s body parts needs to be on a separate layer. What counts as a body part?
- Each paw, separately
- Front leg: forearm, arm
- Back leg: „foot” without paw, calf, thigh
- Torso
- Tail
- Neck
- Head without ears, nose, eyes, eyebrows, mouth
- Nose
- The white of the eye, separately for each eye
- The iris, separately for each eye
- Nose
- The ears, separately
- The eyebrows, separately
Placing the elements of the face on separate layers makes it possible to animate them to create facial expressions. If you don’t need to do that, feel free to merge the whole head.


Step 2
Download the file with sample projects. Open the folder and go to 01_Templates > Quadruped_Template. Drag the layers from this file to your file with the dog. Replace the body parts of the template with the body parts of your dog, as shown below:

This part is only necessary if you want to be able to animate the facial expressions. If not, just place the merged head layer in the Head folder.

Step 3
Open the RL_Bone_Quadruped folder. Each body part has a separate folder here, with special markings for the bones. Drag them to their proper place, treating them like joints.
After you’re done, do the same with the RL_TalkingHead > HeadBone marks, this time simply showing where the facial elements are.

Step 4
The file with the sled and the kid will be much simpler. Create just three layers: for the sled merged with the kid’s body, the bow of the present, and the kid’s head.

Step 5
As for the background, keep the sky, the snow layers, and the shadow in separate files. Make the snow layer much wider than the scene.


3. How to Add Photoshop Characters to CrazyTalk Animator 3
Step 1
Open CrazyTalk Animator 3. Click Create G3 Free Bone Actor and select your file with the dog.

Step 2
The layers in the templates might have a different order than intended. Fix it now—go to Layer Manager…

… and rearrange the layers until it all looks good again.

Step 3
When you’re done, go back to Stage Mode.

Step 4
Add the sled file the same way. You’ll notice that there are no bones on this character, but instead each layer has a „handle”. That’s all we need! Let’s just place these handles in more appropriate places. Click Bone Editor…

… and drag the handles to where the „joints” should be.

You can use the Preview function to see if it works properly.

Step 5
Go back to Stage Mode. Resize both characters and place them as they are supposed to be.

Step 6
We need one more „character” here—the strap. We’re going to add it with another method. Go to Content Manager > Actor > Character > 3_G3 Spine and drag Spine Dummy into the scene.

Step 7
With the dummy selected, go into Composer Mode (first button), and then click Launch to External PSD Editor. Select Photoshop and export the image.
This option can be used to modify your character even if it’s already animated!

Step 8
You’ll notice that this dummy has its own images and bones, just like the dog’s template—just much simpler. Replace the image with your previous image of the strap. Resize it to fit the bones. When you’re done, just save the file to export it back to CTA3.


Step 9
When you go back to CTA3, the strap will be there already, with the bones added to a proper picture. Go back to Stage Mode.

Step 10
Place the strap where it was supposed to be.

4. How to Animate Characters in CrazyTalk Animator 3
Step 1
With all of our characters present, we can finally start animating! Select the dog, and then go to Content Manager > Animation > Motion > 2_G3 Animals > Dog > Move, and click Run(2L). A simple running animation will be added to your dog.

Step 2
Click Show Timeline, and then click Motion to see the animation on the timeline. You can drag the marker to see the motion along the frames.

Step 3
The dog is animated, but the strap isn’t, so it doesn’t look convincing now. Let’s fix it. Select the strap and open its Motion layer. Click 2D Motion Key Editor.

Step 4
Drag the marker to see where the dog’s body is the highest, and then place the strap there by dragging and rotating the bones. Then go farther, searching for the lowest point, and do the same. Run through the whole animation and adjust the strap until it moves along with the dog.

Step 5
Let’s animate the sled a little, too. Open its Motion layer and rotate the head and the bow every few frames, to create a natural rocking motion.


Step 6
All right, so our characters are animated now, but it’s a very short animation. We can make it longer by copying the animations for all layers, but it’s a little tricky. First, go to the dog layer and click Collect Clip.

Step 7
Select all the frames with the animation.

Step 8
Right-click the selection and select Add to Action Menu.

Step 9
Give the action a name.

Step 10
Drag the marker to the end of the animation.

Step 11
Right-click the dog and select Action menu > [your action].

Step 12
The animation will be added to the timeline. Do the same with the other characters, turning their multiple keyframes into a neat animation bar that can be easily selected. Then, select all three bars, copy them, and paste right after they end. Paste as many times as you need to create a longer animation.
When you’re done, don’t forget to drag the red marker to the end of the animation. This will help you navigate between the first and the last frame.

5. How to Animate Background in CrazyTalk Animator 3
Step 1
Let’s add the rest of the scene now. First, drag the image with the sky and clouds, and select Background. It will automatically fill the scene.

Step 2
Drag the snow layers now, this time selecting Prop.

Step 3
Go into 3D View. Move the snow in the third dimension, to create some distance between them.


Step 4
Go back to the 2D View and resize the snow to fill the scene, but with a big part of both layers going outside of it, too.

Step 5
Add a shadow to the scene, under the characters and behind them.

Step 6
Let’s animate the snow now to create an illusion of motion. Go to the first frame and place the right side of the first snow layer on the right side of the scene.

Step 7
Go to the last frame, and drag the snow to the left side of the scene. The longer the snow’s layer, the faster it will move.
Do the same with the snow in the back. To create an illusion of depth, make it move slower—make the layer shorter.

Step 8
Let’s add the snow now. Drag it to the program as a Prop, and then move it in 3D View behind the first layer of snow. Animate it by changing the position between the first and the last layer.

Step 9
Add the snow again. This time, make it larger and place it right in the front. Make it move faster and slightly to the side.

Step 10
Look at the whole animation now and see what else you can do to improve it. I decided to move the background some more, add a tree for a sense of scale, and add more dynamism to the falling snow. If you’re satisfied with the result, go to Render > Render Video, adjust the settings, and click Export.

Good Job!
Do you want to learn more about CrazyTalk Animator 3? We have more tutorials about this program!
 CrazyTalk AnimatorHow to Create an Animated Character with Photoshop and CrazyTalk Animator 3Monika Zagrobelna
 CrazyTalk AnimatorHow to Create an Animation for YouTube in CrazyTalk Animator 3Monika Zagrobelna
 CrazyTalk AnimatorHow to Create a Comic Animation in CrazyTalk Animator 3Monika Zagrobelna

How to Create a Winter Animation With CrazyTalk Animator 3
Post pobrano z: How to Create a Winter Animation With CrazyTalk Animator 3
If you want to animate characters you’ve created in Photoshop, there’s a very simple way to do it. CrazyTalk Animator 3 is a program designed specifically to work with assets created in Photoshop. It detects the layers and attaches bones to them, to make them ready for animation.
In this tutorial, I’ll show you how to create a simple animated scene with a dog pulling a sled. I’ll show you how to animate the dog, how to attach the sled to it, how to move the background to give the illusion of motion, and how to add falling snow.
If you like CTA 3, you must check out Cartoon Animator 4 WIP.
1. How to Prepare the Characters in Photoshop
Step 1
Let’s start with the dog. Create its head out of simple shapes, using the characteristic „chibi” style. Make the head big, the muzzle small, and the eyes big and full of expression. You can use any program you want for this, but make sure to keep the elements on separate layers.
Step 2
Create the torso. It must be simple, too, like a bean. Add the bushy tail, a fluffy neck, and a harness.
Step 3
Add two pairs of legs.
Step 4
The kid should be created the same way, keeping the illustration as simple as possible. Use quiet colors that look good together
Step 5
Create a simple sled with presents. If you want to make the presents prettier, you can cover them with a pattern.
Step 6
We’ll need something to attach the dog to the sled. Create a very simple strap with a golden circle on one end, just like these on the harness.
Step 7
Our scene needs a background. Keep it simple, too—just a sky with some clouds, some snow, and trees.
Step 8
Create some falling snow. You can make it with a brush or a pattern. Keep the background transparent.
2. How to Add Animation Bones in Photoshop
Step 1
We have all the assets, so now we need to prepare them for animation. Each of the dog’s body parts needs to be on a separate layer. What counts as a body part?
- Each paw, separately
- Front leg: forearm, arm
- Back leg: „foot” without paw, calf, thigh
- Torso
- Tail
- Neck
- Head without ears, nose, eyes, eyebrows, mouth
- Nose
- The white of the eye, separately for each eye
- The iris, separately for each eye
- Nose
- The ears, separately
- The eyebrows, separately
Placing the elements of the face on separate layers makes it possible to animate them to create facial expressions. If you don’t need to do that, feel free to merge the whole head.
Step 2
Download the file with sample projects. Open the folder and go to 01_Templates > Quadruped_Template. Drag the layers from this file to your file with the dog. Replace the body parts of the template with the body parts of your dog, as shown below:
This part is only necessary if you want to be able to animate the facial expressions. If not, just place the merged head layer in the Head folder.
Step 3
Open the RL_Bone_Quadruped folder. Each body part has a separate folder here, with special markings for the bones. Drag them to their proper place, treating them like joints.
After you’re done, do the same with the RL_TalkingHead > HeadBone marks, this time simply showing where the facial elements are.
Step 4
The file with the sled and the kid will be much simpler. Create just three layers: for the sled merged with the kid’s body, the bow of the present, and the kid’s head.
Step 5
As for the background, keep the sky, the snow layers, and the shadow in separate files. Make the snow layer much wider than the scene.
3. How to Add Photoshop Characters to CrazyTalk Animator 3
Step 1
Open CrazyTalk Animator 3. Click Create G3 Free Bone Actor and select your file with the dog.
Step 2
The layers in the templates might have a different order than intended. Fix it now—go to Layer Manager…
… and rearrange the layers until it all looks good again.
Step 3
When you’re done, go back to Stage Mode.
Step 4
Add the sled file the same way. You’ll notice that there are no bones on this character, but instead each layer has a „handle”. That’s all we need! Let’s just place these handles in more appropriate places. Click Bone Editor…
… and drag the handles to where the „joints” should be.
You can use the Preview function to see if it works properly.
Step 5
Go back to Stage Mode. Resize both characters and place them as they are supposed to be.
Step 6
We need one more „character” here—the strap. We’re going to add it with another method. Go to Content Manager > Actor > Character > 3_G3 Spine and drag Spine Dummy into the scene.
Step 7
With the dummy selected, go into Composer Mode (first button), and then click Launch to External PSD Editor. Select Photoshop and export the image.
This option can be used to modify your character even if it’s already animated!
Step 8
You’ll notice that this dummy has its own images and bones, just like the dog’s template—just much simpler. Replace the image with your previous image of the strap. Resize it to fit the bones. When you’re done, just save the file to export it back to CTA3.
Step 9
When you go back to CTA3, the strap will be there already, with the bones added to a proper picture. Go back to Stage Mode.
Step 10
Place the strap where it was supposed to be.
4. How to Animate Characters in CrazyTalk Animator 3
Step 1
With all of our characters present, we can finally start animating! Select the dog, and then go to Content Manager > Animation > Motion > 2_G3 Animals > Dog > Move, and click Run(2L). A simple running animation will be added to your dog.
Step 2
Click Show Timeline, and then click Motion to see the animation on the timeline. You can drag the marker to see the motion along the frames.
Step 3
The dog is animated, but the strap isn’t, so it doesn’t look convincing now. Let’s fix it. Select the strap and open its Motion layer. Click 2D Motion Key Editor.
Step 4
Drag the marker to see where the dog’s body is the highest, and then place the strap there by dragging and rotating the bones. Then go farther, searching for the lowest point, and do the same. Run through the whole animation and adjust the strap until it moves along with the dog.
Step 5
Let’s animate the sled a little, too. Open its Motion layer and rotate the head and the bow every few frames, to create a natural rocking motion.
Step 6
All right, so our characters are animated now, but it’s a very short animation. We can make it longer by copying the animations for all layers, but it’s a little tricky. First, go to the dog layer and click Collect Clip.
Step 7
Select all the frames with the animation.
Step 8
Right-click the selection and select Add to Action Menu.
Step 9
Give the action a name.
Step 10
Drag the marker to the end of the animation.
Step 11
Right-click the dog and select Action menu > [your action].
Step 12
The animation will be added to the timeline. Do the same with the other characters, turning their multiple keyframes into a neat animation bar that can be easily selected. Then, select all three bars, copy them, and paste right after they end. Paste as many times as you need to create a longer animation.
When you’re done, don’t forget to drag the red marker to the end of the animation. This will help you navigate between the first and the last frame.
5. How to Animate Background in CrazyTalk Animator 3
Step 1
Let’s add the rest of the scene now. First, drag the image with the sky and clouds, and select Background. It will automatically fill the scene.
Step 2
Drag the snow layers now, this time selecting Prop.
Step 3
Go into 3D View. Move the snow in the third dimension, to create some distance between them.
Step 4
Go back to the 2D View and resize the snow to fill the scene, but with a big part of both layers going outside of it, too.
Step 5
Add a shadow to the scene, under the characters and behind them.
Step 6
Let’s animate the snow now to create an illusion of motion. Go to the first frame and place the right side of the first snow layer on the right side of the scene.
Step 7
Go to the last frame, and drag the snow to the left side of the scene. The longer the snow’s layer, the faster it will move.
Do the same with the snow in the back. To create an illusion of depth, make it move slower—make the layer shorter.
Step 8
Let’s add the snow now. Drag it to the program as a Prop, and then move it in 3D View behind the first layer of snow. Animate it by changing the position between the first and the last layer.
Step 9
Add the snow again. This time, make it larger and place it right in the front. Make it move faster and slightly to the side.
Step 10
Look at the whole animation now and see what else you can do to improve it. I decided to move the background some more, add a tree for a sense of scale, and add more dynamism to the falling snow. If you’re satisfied with the result, go to Render > Render Video, adjust the settings, and click Export.
Good Job!
Do you want to learn more about CrazyTalk Animator 3? We have more tutorials about this program!
-
CrazyTalk AnimatorHow to Create an Animated Character with Photoshop and CrazyTalk Animator 3Monika Zagrobelna
-
CrazyTalk AnimatorHow to Create an Animation for YouTube in CrazyTalk Animator 3Monika Zagrobelna
-
CrazyTalk AnimatorHow to Create a Comic Animation in CrazyTalk Animator 3Monika Zagrobelna
How to Create a Winter Animation With CrazyTalk Animator 3
Post pobrano z: How to Create a Winter Animation With CrazyTalk Animator 3
If you want to animate characters you’ve created in Photoshop, there’s a very simple way to do it. CrazyTalk Animator 3 is a program designed specifically to work with assets created in Photoshop. It detects the layers and attaches bones to them, to make them ready for animation.
In this tutorial, I’ll show you how to create a simple animated scene with a dog pulling a sled. I’ll show you how to animate the dog, how to attach the sled to it, how to move the background to give the illusion of motion, and how to add falling snow.
If you like CTA 3, you must check out Cartoon Animator 4 WIP.
1. How to Prepare the Characters in Photoshop
Step 1
Let’s start with the dog. Create its head out of simple shapes, using the characteristic „chibi” style. Make the head big, the muzzle small, and the eyes big and full of expression. You can use any program you want for this, but make sure to keep the elements on separate layers.
Step 2
Create the torso. It must be simple, too, like a bean. Add the bushy tail, a fluffy neck, and a harness.
Step 3
Add two pairs of legs.
Step 4
The kid should be created the same way, keeping the illustration as simple as possible. Use quiet colors that look good together
Step 5
Create a simple sled with presents. If you want to make the presents prettier, you can cover them with a pattern.
Step 6
We’ll need something to attach the dog to the sled. Create a very simple strap with a golden circle on one end, just like these on the harness.
Step 7
Our scene needs a background. Keep it simple, too—just a sky with some clouds, some snow, and trees.
Step 8
Create some falling snow. You can make it with a brush or a pattern. Keep the background transparent.
2. How to Add Animation Bones in Photoshop
Step 1
We have all the assets, so now we need to prepare them for animation. Each of the dog’s body parts needs to be on a separate layer. What counts as a body part?
- Each paw, separately
- Front leg: forearm, arm
- Back leg: „foot” without paw, calf, thigh
- Torso
- Tail
- Neck
- Head without ears, nose, eyes, eyebrows, mouth
- Nose
- The white of the eye, separately for each eye
- The iris, separately for each eye
- Nose
- The ears, separately
- The eyebrows, separately
Placing the elements of the face on separate layers makes it possible to animate them to create facial expressions. If you don’t need to do that, feel free to merge the whole head.
Step 2
Download the file with sample projects. Open the folder and go to 01_Templates > Quadruped_Template. Drag the layers from this file to your file with the dog. Replace the body parts of the template with the body parts of your dog, as shown below:
This part is only necessary if you want to be able to animate the facial expressions. If not, just place the merged head layer in the Head folder.
Step 3
Open the RL_Bone_Quadruped folder. Each body part has a separate folder here, with special markings for the bones. Drag them to their proper place, treating them like joints.
After you’re done, do the same with the RL_TalkingHead > HeadBone marks, this time simply showing where the facial elements are.
Step 4
The file with the sled and the kid will be much simpler. Create just three layers: for the sled merged with the kid’s body, the bow of the present, and the kid’s head.
Step 5
As for the background, keep the sky, the snow layers, and the shadow in separate files. Make the snow layer much wider than the scene.
3. How to Add Photoshop Characters to CrazyTalk Animator 3
Step 1
Open CrazyTalk Animator 3. Click Create G3 Free Bone Actor and select your file with the dog.
Step 2
The layers in the templates might have a different order than intended. Fix it now—go to Layer Manager…
… and rearrange the layers until it all looks good again.
Step 3
When you’re done, go back to Stage Mode.
Step 4
Add the sled file the same way. You’ll notice that there are no bones on this character, but instead each layer has a „handle”. That’s all we need! Let’s just place these handles in more appropriate places. Click Bone Editor…
… and drag the handles to where the „joints” should be.
You can use the Preview function to see if it works properly.
Step 5
Go back to Stage Mode. Resize both characters and place them as they are supposed to be.
Step 6
We need one more „character” here—the strap. We’re going to add it with another method. Go to Content Manager > Actor > Character > 3_G3 Spine and drag Spine Dummy into the scene.
Step 7
With the dummy selected, go into Composer Mode (first button), and then click Launch to External PSD Editor. Select Photoshop and export the image.
This option can be used to modify your character even if it’s already animated!
Step 8
You’ll notice that this dummy has its own images and bones, just like the dog’s template—just much simpler. Replace the image with your previous image of the strap. Resize it to fit the bones. When you’re done, just save the file to export it back to CTA3.
Step 9
When you go back to CTA3, the strap will be there already, with the bones added to a proper picture. Go back to Stage Mode.
Step 10
Place the strap where it was supposed to be.
4. How to Animate Characters in CrazyTalk Animator 3
Step 1
With all of our characters present, we can finally start animating! Select the dog, and then go to Content Manager > Animation > Motion > 2_G3 Animals > Dog > Move, and click Run(2L). A simple running animation will be added to your dog.
Step 2
Click Show Timeline, and then click Motion to see the animation on the timeline. You can drag the marker to see the motion along the frames.
Step 3
The dog is animated, but the strap isn’t, so it doesn’t look convincing now. Let’s fix it. Select the strap and open its Motion layer. Click 2D Motion Key Editor.
Step 4
Drag the marker to see where the dog’s body is the highest, and then place the strap there by dragging and rotating the bones. Then go farther, searching for the lowest point, and do the same. Run through the whole animation and adjust the strap until it moves along with the dog.
Step 5
Let’s animate the sled a little, too. Open its Motion layer and rotate the head and the bow every few frames, to create a natural rocking motion.
Step 6
All right, so our characters are animated now, but it’s a very short animation. We can make it longer by copying the animations for all layers, but it’s a little tricky. First, go to the dog layer and click Collect Clip.
Step 7
Select all the frames with the animation.
Step 8
Right-click the selection and select Add to Action Menu.
Step 9
Give the action a name.
Step 10
Drag the marker to the end of the animation.
Step 11
Right-click the dog and select Action menu > [your action].
Step 12
The animation will be added to the timeline. Do the same with the other characters, turning their multiple keyframes into a neat animation bar that can be easily selected. Then, select all three bars, copy them, and paste right after they end. Paste as many times as you need to create a longer animation.
When you’re done, don’t forget to drag the red marker to the end of the animation. This will help you navigate between the first and the last frame.
5. How to Animate Background in CrazyTalk Animator 3
Step 1
Let’s add the rest of the scene now. First, drag the image with the sky and clouds, and select Background. It will automatically fill the scene.
Step 2
Drag the snow layers now, this time selecting Prop.
Step 3
Go into 3D View. Move the snow in the third dimension, to create some distance between them.
Step 4
Go back to the 2D View and resize the snow to fill the scene, but with a big part of both layers going outside of it, too.
Step 5
Add a shadow to the scene, under the characters and behind them.
Step 6
Let’s animate the snow now to create an illusion of motion. Go to the first frame and place the right side of the first snow layer on the right side of the scene.
Step 7
Go to the last frame, and drag the snow to the left side of the scene. The longer the snow’s layer, the faster it will move.
Do the same with the snow in the back. To create an illusion of depth, make it move slower—make the layer shorter.
Step 8
Let’s add the snow now. Drag it to the program as a Prop, and then move it in 3D View behind the first layer of snow. Animate it by changing the position between the first and the last layer.
Step 9
Add the snow again. This time, make it larger and place it right in the front. Make it move faster and slightly to the side.
Step 10
Look at the whole animation now and see what else you can do to improve it. I decided to move the background some more, add a tree for a sense of scale, and add more dynamism to the falling snow. If you’re satisfied with the result, go to Render > Render Video, adjust the settings, and click Export.
Good Job!
Do you want to learn more about CrazyTalk Animator 3? We have more tutorials about this program!
-
CrazyTalk AnimatorHow to Create an Animated Character with Photoshop and CrazyTalk Animator 3Monika Zagrobelna
-
CrazyTalk AnimatorHow to Create an Animation for YouTube in CrazyTalk Animator 3Monika Zagrobelna
-
CrazyTalk AnimatorHow to Create a Comic Animation in CrazyTalk Animator 3Monika Zagrobelna
How to Create a Winter Animation With CrazyTalk Animator 3
Post pobrano z: How to Create a Winter Animation With CrazyTalk Animator 3
If you want to animate characters you’ve created in Photoshop, there’s a very simple way to do it. CrazyTalk Animator 3 is a program designed specifically to work with assets created in Photoshop. It detects the layers and attaches bones to them, to make them ready for animation.
In this tutorial, I’ll show you how to create a simple animated scene with a dog pulling a sled. I’ll show you how to animate the dog, how to attach the sled to it, how to move the background to give the illusion of motion, and how to add falling snow.
If you like CTA 3, you must check out Cartoon Animator 4 WIP.
1. How to Prepare the Characters in Photoshop
Step 1
Let’s start with the dog. Create its head out of simple shapes, using the characteristic „chibi” style. Make the head big, the muzzle small, and the eyes big and full of expression. You can use any program you want for this, but make sure to keep the elements on separate layers.
Step 2
Create the torso. It must be simple, too, like a bean. Add the bushy tail, a fluffy neck, and a harness.
Step 3
Add two pairs of legs.
Step 4
The kid should be created the same way, keeping the illustration as simple as possible. Use quiet colors that look good together
Step 5
Create a simple sled with presents. If you want to make the presents prettier, you can cover them with a pattern.
Step 6
We’ll need something to attach the dog to the sled. Create a very simple strap with a golden circle on one end, just like these on the harness.
Step 7
Our scene needs a background. Keep it simple, too—just a sky with some clouds, some snow, and trees.
Step 8
Create some falling snow. You can make it with a brush or a pattern. Keep the background transparent.
2. How to Add Animation Bones in Photoshop
Step 1
We have all the assets, so now we need to prepare them for animation. Each of the dog’s body parts needs to be on a separate layer. What counts as a body part?
- Each paw, separately
- Front leg: forearm, arm
- Back leg: „foot” without paw, calf, thigh
- Torso
- Tail
- Neck
- Head without ears, nose, eyes, eyebrows, mouth
- Nose
- The white of the eye, separately for each eye
- The iris, separately for each eye
- Nose
- The ears, separately
- The eyebrows, separately
Placing the elements of the face on separate layers makes it possible to animate them to create facial expressions. If you don’t need to do that, feel free to merge the whole head.
Step 2
Download the file with sample projects. Open the folder and go to 01_Templates > Quadruped_Template. Drag the layers from this file to your file with the dog. Replace the body parts of the template with the body parts of your dog, as shown below:
This part is only necessary if you want to be able to animate the facial expressions. If not, just place the merged head layer in the Head folder.
Step 3
Open the RL_Bone_Quadruped folder. Each body part has a separate folder here, with special markings for the bones. Drag them to their proper place, treating them like joints.
After you’re done, do the same with the RL_TalkingHead > HeadBone marks, this time simply showing where the facial elements are.
Step 4
The file with the sled and the kid will be much simpler. Create just three layers: for the sled merged with the kid’s body, the bow of the present, and the kid’s head.
Step 5
As for the background, keep the sky, the snow layers, and the shadow in separate files. Make the snow layer much wider than the scene.
3. How to Add Photoshop Characters to CrazyTalk Animator 3
Step 1
Open CrazyTalk Animator 3. Click Create G3 Free Bone Actor and select your file with the dog.
Step 2
The layers in the templates might have a different order than intended. Fix it now—go to Layer Manager…
… and rearrange the layers until it all looks good again.
Step 3
When you’re done, go back to Stage Mode.
Step 4
Add the sled file the same way. You’ll notice that there are no bones on this character, but instead each layer has a „handle”. That’s all we need! Let’s just place these handles in more appropriate places. Click Bone Editor…
… and drag the handles to where the „joints” should be.
You can use the Preview function to see if it works properly.
Step 5
Go back to Stage Mode. Resize both characters and place them as they are supposed to be.
Step 6
We need one more „character” here—the strap. We’re going to add it with another method. Go to Content Manager > Actor > Character > 3_G3 Spine and drag Spine Dummy into the scene.
Step 7
With the dummy selected, go into Composer Mode (first button), and then click Launch to External PSD Editor. Select Photoshop and export the image.
This option can be used to modify your character even if it’s already animated!
Step 8
You’ll notice that this dummy has its own images and bones, just like the dog’s template—just much simpler. Replace the image with your previous image of the strap. Resize it to fit the bones. When you’re done, just save the file to export it back to CTA3.
Step 9
When you go back to CTA3, the strap will be there already, with the bones added to a proper picture. Go back to Stage Mode.
Step 10
Place the strap where it was supposed to be.
4. How to Animate Characters in CrazyTalk Animator 3
Step 1
With all of our characters present, we can finally start animating! Select the dog, and then go to Content Manager > Animation > Motion > 2_G3 Animals > Dog > Move, and click Run(2L). A simple running animation will be added to your dog.
Step 2
Click Show Timeline, and then click Motion to see the animation on the timeline. You can drag the marker to see the motion along the frames.
Step 3
The dog is animated, but the strap isn’t, so it doesn’t look convincing now. Let’s fix it. Select the strap and open its Motion layer. Click 2D Motion Key Editor.
Step 4
Drag the marker to see where the dog’s body is the highest, and then place the strap there by dragging and rotating the bones. Then go farther, searching for the lowest point, and do the same. Run through the whole animation and adjust the strap until it moves along with the dog.
Step 5
Let’s animate the sled a little, too. Open its Motion layer and rotate the head and the bow every few frames, to create a natural rocking motion.
Step 6
All right, so our characters are animated now, but it’s a very short animation. We can make it longer by copying the animations for all layers, but it’s a little tricky. First, go to the dog layer and click Collect Clip.
Step 7
Select all the frames with the animation.
Step 8
Right-click the selection and select Add to Action Menu.
Step 9
Give the action a name.
Step 10
Drag the marker to the end of the animation.
Step 11
Right-click the dog and select Action menu > [your action].
Step 12
The animation will be added to the timeline. Do the same with the other characters, turning their multiple keyframes into a neat animation bar that can be easily selected. Then, select all three bars, copy them, and paste right after they end. Paste as many times as you need to create a longer animation.
When you’re done, don’t forget to drag the red marker to the end of the animation. This will help you navigate between the first and the last frame.
5. How to Animate Background in CrazyTalk Animator 3
Step 1
Let’s add the rest of the scene now. First, drag the image with the sky and clouds, and select Background. It will automatically fill the scene.
Step 2
Drag the snow layers now, this time selecting Prop.
Step 3
Go into 3D View. Move the snow in the third dimension, to create some distance between them.
Step 4
Go back to the 2D View and resize the snow to fill the scene, but with a big part of both layers going outside of it, too.
Step 5
Add a shadow to the scene, under the characters and behind them.
Step 6
Let’s animate the snow now to create an illusion of motion. Go to the first frame and place the right side of the first snow layer on the right side of the scene.
Step 7
Go to the last frame, and drag the snow to the left side of the scene. The longer the snow’s layer, the faster it will move.
Do the same with the snow in the back. To create an illusion of depth, make it move slower—make the layer shorter.
Step 8
Let’s add the snow now. Drag it to the program as a Prop, and then move it in 3D View behind the first layer of snow. Animate it by changing the position between the first and the last layer.
Step 9
Add the snow again. This time, make it larger and place it right in the front. Make it move faster and slightly to the side.
Step 10
Look at the whole animation now and see what else you can do to improve it. I decided to move the background some more, add a tree for a sense of scale, and add more dynamism to the falling snow. If you’re satisfied with the result, go to Render > Render Video, adjust the settings, and click Export.
Good Job!
Do you want to learn more about CrazyTalk Animator 3? We have more tutorials about this program!
-
CrazyTalk AnimatorHow to Create an Animated Character with Photoshop and CrazyTalk Animator 3Monika Zagrobelna
-
CrazyTalk AnimatorHow to Create an Animation for YouTube in CrazyTalk Animator 3Monika Zagrobelna
-
CrazyTalk AnimatorHow to Create a Comic Animation in CrazyTalk Animator 3Monika Zagrobelna