WordPress is the most commonly used content management platform. According to recent statistics, WordPress is used by 59.7% of all websites created with a CMS. The popularity of the platform will continue to grow even in the future. As popular as it is, the platform is also a major hacker target. It is therefore important to be equipped with the right plugins to tackle the threat of hackers. The following are the 10 best WordPress plugins to improve your security.
1. Jetpack
Jetpack is one of the most popular and oldest security plugins on the platform. This plugin is simple to use and it is one of the first items recommended for installation. The plugin is comprehensive and it includes various modules that make the website more robust. It has spam protection capabilities, speed boosting tools and monitoring features too. The plugin is also provided in cost-effective plans.
2. WP fail2ban
Brute force attacks are far too common on the WordPress platform. This plugin is the go-to choice to counter these threats. WP fail2ban comes with various degrees of preventing brute force attacks. You can choose between hard or soft blocks according to how you perceive the level of threat. The plugin also allows integration with online proxy servers and it has the capability to prevent spam comments.
3. Wordfence Security
Experts in the cybersecurity realm often point out that simplicity and power is the key to a good plugin. According to GoBestVPN, most of the tools that users look for are those that are easy to work with. Wordfence Security is one such tool that comes with a firewall suit, capability to scan malware and comment-filtering capabilities. All these features are bundled in an easy to use the tool.
4. Sucuri Security
Sucuri Security is a plugin that offers a wide variety of services to WordPress users. This tool is known for its provision of SSL certificate plans, customer support services and instant notifications on website security status. Sucuri Security is available in two plans, each of which has a different set of features. The tool has various free features which can give the user an idea of how efficiently it works to boost security.
5. iThemes Security
iThemes Security is a comprehensive tool that provides users the core security features. This tool has the ability to give details on the status of installed software, password safety, and plugin vulnerabilities. As a tool that is focused on general security issues, users can enjoy features like brute force protection, file change detection and enforcement of multiple authentication processes.
6. All In One WP Security & Firewall
As its name suggests, this tool provides users with multiple security features in a single package. Some of the features that users can enjoy include user-blocking tools, security backups, website security analysis, and capability to block forced logins. All these features come as a free package since the tool does not have any priced plans at all.
7. SecuPress
SecuPress is one of the recent plugins to hit the market. This tool has grown in popularity because of its strong focus on security analysis and reports. You can be able to protect your URL login details so that bots cannot find it. The tool is also capable of detecting vulnerable plugins and themes. It is available as a freemium option.
8. Google Authenticator
Google Authenticator is widely used across WordPress sites. This is because it provides a two-factor authentication that increases the security of the website. The login area is thus made robust from all attacks. The tool also gives users options to choose between the authentication methods.
9. VaultPress
VaultPress is a paid tool that comes with a wide range of features. This tool is popularly known for its backup systems. The tool also comes with useful insights about the status of the security on the website. Other than that, users can enjoy using the well-designed dashboard that improves its usability.
10. BulletProof Security
Finally, BulletProof Security is a plugin that comes with a comprehensive list of features. The plugin has malware scanning capabilities, login security and monitoring, database analysis and backups, anti-hacking tools and so much more. This tool is not exactly great for beginners because it has a complex interface. For advanced developers though, it is one of the best security tools on the market.
WordPress is the most commonly used content management platform. According to recent statistics, WordPress is used by 59.7% of all websites created with a CMS. The popularity of the platform will continue to grow even in the future. As popular as it is, the platform is also a major hacker target. It is therefore important to be equipped with the right plugins to tackle the threat of hackers. The following are the 10 best WordPress plugins to improve your security.
1. Jetpack
Jetpack is one of the most popular and oldest security plugins on the platform. This plugin is simple to use and it is one of the first items recommended for installation. The plugin is comprehensive and it includes various modules that make the website more robust. It has spam protection capabilities, speed boosting tools and monitoring features too. The plugin is also provided in cost-effective plans.
2. WP fail2ban
Brute force attacks are far too common on the WordPress platform. This plugin is the go-to choice to counter these threats. WP fail2ban comes with various degrees of preventing brute force attacks. You can choose between hard or soft blocks according to how you perceive the level of threat. The plugin also allows integration with online proxy servers and it has the capability to prevent spam comments.
3. Wordfence Security
Experts in the cybersecurity realm often point out that simplicity and power is the key to a good plugin. According to GoBestVPN, most of the tools that users look for are those that are easy to work with. Wordfence Security is one such tool that comes with a firewall suit, capability to scan malware and comment-filtering capabilities. All these features are bundled in an easy to use the tool.
4. Sucuri Security
Sucuri Security is a plugin that offers a wide variety of services to WordPress users. This tool is known for its provision of SSL certificate plans, customer support services and instant notifications on website security status. Sucuri Security is available in two plans, each of which has a different set of features. The tool has various free features which can give the user an idea of how efficiently it works to boost security.
5. iThemes Security
iThemes Security is a comprehensive tool that provides users the core security features. This tool has the ability to give details on the status of installed software, password safety, and plugin vulnerabilities. As a tool that is focused on general security issues, users can enjoy features like brute force protection, file change detection and enforcement of multiple authentication processes.
6. All In One WP Security & Firewall
As its name suggests, this tool provides users with multiple security features in a single package. Some of the features that users can enjoy include user-blocking tools, security backups, website security analysis, and capability to block forced logins. All these features come as a free package since the tool does not have any priced plans at all.
7. SecuPress
SecuPress is one of the recent plugins to hit the market. This tool has grown in popularity because of its strong focus on security analysis and reports. You can be able to protect your URL login details so that bots cannot find it. The tool is also capable of detecting vulnerable plugins and themes. It is available as a freemium option.
8. Google Authenticator
Google Authenticator is widely used across WordPress sites. This is because it provides a two-factor authentication that increases the security of the website. The login area is thus made robust from all attacks. The tool also gives users options to choose between the authentication methods.
9. VaultPress
VaultPress is a paid tool that comes with a wide range of features. This tool is popularly known for its backup systems. The tool also comes with useful insights about the status of the security on the website. Other than that, users can enjoy using the well-designed dashboard that improves its usability.
10. BulletProof Security
Finally, BulletProof Security is a plugin that comes with a comprehensive list of features. The plugin has malware scanning capabilities, login security and monitoring, database analysis and backups, anti-hacking tools and so much more. This tool is not exactly great for beginners because it has a complex interface. For advanced developers though, it is one of the best security tools on the market.
India is planning to achieve 50 gigawatt (GW) of production from renewable energy by 2028, in order to get to its goal of 40 per cent of electricity generation from non-fossil fuels by 2030, Ministry of New and Renewable Energy secretary, Anand Kumar said at the India-Norway Business Summit 2019 in New Delhi.
Of this 500 GW, 350 GW would come from solar, 140 GW wind, and the remaining generation capacity would come from small hydro and biomass power.
“This figure excludes large hydro. If we take large hydro into account the figure will grow to 560 GW to 575 GW. To reach this figure we have to bid out 30 GW of solar energy and 10 GW of wind energy every year,” Kumar said.
He added that India’s requirement for electricity generation capacity may reach 840 GW by 2030 if the country’s Gross Domestic Product (GDP) grows at a rate of 6.5 per cent.
“Out of 840 GW, we plan to install a little more than 500 GW in renewables. We have installed 75 GW renewable energy capacity in the country and another 46 GW is under various stages of installations,” added Kumar.
A challenge I faced in building an image „emojifier” was that I needed to change the color spaces of values obtained using getImageData() from RGB to HSL. I used arrays of emojis arranged by brightness and saturation, and they were HSL-based for the best matches of average pixel colors with the emojis.
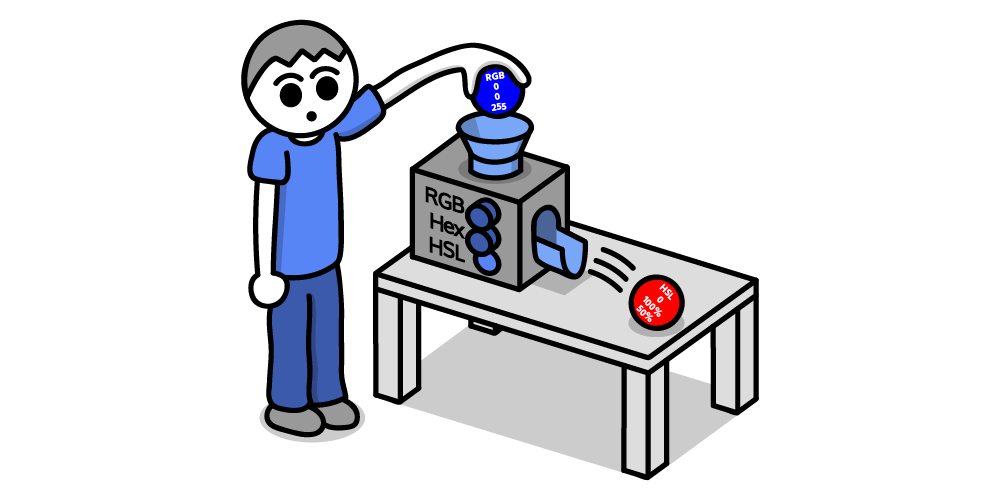
In this article, we’ll study functions that will be useful for converting both opaque and alpha-enabled color values. Modern browsers currently support the color spaces RGB(A), hex, and HSL(A). The functions and notations for these are rgb(), rgba(), #rgb/#rrggbb, #rgba/#rrggbbaa, hsl(), and hsla(). Browsers have always supported built-in names like aliceblue as well.
Along the way, we’ll encounter use of some color syntaxes provided by a new Level 4 of the CSS Colors Module. For example, we now have hex with alpha as we mentioned (#rgba/#rrggbbaa) and RGB and HSL syntaxes no longer require commas (values like rgb(255 0 0) and hsl(240 100% 50%) became legal!).
Browser support for CSS Colors Level 4 isn’t universal as of this writing, so don’t expect new color syntaxes to work in Microsoft browsers or Safari if trying them in CSS.
RGB to Hex
Converting RGB to hex is merely a change of radices. We convert the red, green, and blue values from decimal to hexadecimal using toString(16). After prepending 0s to single digits and under, we can concatenate them and # to a single return statement.
function RGBToHex(r,g,b) {
  r = r.toString(16);
  g = g.toString(16);
  b = b.toString(16);

  if (r.length == 1)
    r = "0" + r;
  if (g.length == 1)
    g = "0" + g;
  if (b.length == 1)
    b = "0" + b;

  return "#" + r + g + b;
}
RGB in String
Alternatively, we can use a single string argument with the red, green and blue separated by commas or spaces (e.g. "rgb(255,25,2)", "rgb(255 25 2)"). Substring to eliminate rgb(, split what’s left by the ), then split that result’s first item by whichever the separator (sep) is. r, g, and b shall become local variables now. Then we use + before the split strings to convert them back to numbers before obtaining the hex values.
function RGBToHex(rgb) {
  // Choose correct separator
  let sep = rgb.indexOf(",") > -1 ? "," : " ";
  // Turn "rgb(r,g,b)" into [r,g,b]
  rgb = rgb.substr(4).split(")")[0].split(sep);

  let r = (+rgb[0]).toString(16),
      g = (+rgb[1]).toString(16),
      b = (+rgb[2]).toString(16);

  if (r.length == 1)
    r = "0" + r;
  if (g.length == 1)
    g = "0" + g;
  if (b.length == 1)
    b = "0" + b;

  return "#" + r + g + b;
}
In addition, we can allow strings with channel values as percentages by adding the loop after redefining rgb. It’ll strip the %s and turn what’s left into values out of 255.
function RGBToHex(rgb) {
  let sep = rgb.indexOf(",") > -1 ? "," : " ";
  rgb = rgb.substr(4).split(")")[0].split(sep);

  // Convert %s to 0–255
  for (let R in rgb) {
    let r = rgb[R];
    if (r.indexOf("%") > -1)
      rgb[R] = Math.round(r.substr(0,r.length - 1) / 100 * 255);
      /* Example:
      75% -> 191
      75/100 = 0.75, * 255 = 191.25 -> 191
      */
  }

  ...
}
Now we can supply values like either of these:
rgb(255,25,2)
rgb(255 25 2)
rgb(50%,30%,10%)
rgb(50% 30% 10%)
RGBA to Hex (#rrggbbaa)
Converting RGBA to hex with the #rgba or #rrggbbaa notation follows virtually the same process as the opaque counterpart. Since the alpha (a) is normally a value between 0 and 1, we need to multiply it by 255, round the result, then convert it to hexadecimal.
function RGBAToHexA(r,g,b,a) {
  r = r.toString(16);
  g = g.toString(16);
  b = b.toString(16);
  a = Math.round(a * 255).toString(16);

  if (r.length == 1)
    r = "0" + r;
  if (g.length == 1)
    g = "0" + g;
  if (b.length == 1)
    b = "0" + b;
  if (a.length == 1)
    a = "0" + a;

  return "#" + r + g + b + a;
}
To do this with one string (including with percentages), we can follow what we did earlier. Also note the extra step of splicing out a slash. Since CSS Colors Level 4 supports the syntax of rgba(r g b / a), this is where we allow it. Alpha values can now be percentages! This removes the 0-1-only shackles we used to have. Therefore, the for loop cycling through rgba shall include a part to wipe the % from the alpha without multiplying by 255 (when R is 3 for alpha). Soon we can use values like rgba(255 128 0 / 0.8) and rgba(100% 21% 100% / 30%)!
function RGBAToHexA(rgba) {
  let sep = rgba.indexOf(",") > -1 ? "," : " ";
  rgba = rgba.substr(5).split(")")[0].split(sep);

  // Strip the slash if using space-separated syntax
  if (rgba.indexOf("/") > -1)
    rgba.splice(3,1);

  for (let R in rgba) {
    let r = rgba[R];
    if (r.indexOf("%") > -1) {
      let p = r.substr(0,r.length - 1) / 100;

      if (R < 3) {
        rgba[R] = Math.round(p * 255);
      } else {
        rgba[R] = p;
      }
    }
  }
}
Then, where the channels are converted to hex, we adjust a to use an item of rgba[].
function RGBAToHexA(rgba) {
  ...

  let r = (+rgba[0]).toString(16),
      g = (+rgba[1]).toString(16),
      b = (+rgba[2]).toString(16),
      a = Math.round(+rgba[3] * 255).toString(16);

  if (r.length == 1)
    r = "0" + r;
  if (g.length == 1)
    g = "0" + g;
  if (b.length == 1)
    b = "0" + b;
  if (a.length == 1)
    a = "0" + a;

  return "#" + r + g + b + a;
}
Now the function supports the following:
rgba(255,25,2,0.5)
rgba(255 25 2 / 0.5)
rgba(50%,30%,10%,0.5)
rgba(50%,30%,10%,50%)
rgba(50% 30% 10% / 0.5)
rgba(50% 30% 10% / 50%)
Hex to RGB
We know that the length of hex values must either be 3 or 6 (plus #). In either case, we begin each red (r), green (g), and blue (b) value with "0x" to convert them to hex. If we provide a 3-digit value, we concatenate the same value twice for each channel. If it’s a 6-digit value, we concatenate the first two for red, next two for green, and last two for blue. To get the values for the final rgb() string, we prepend the variables with + to convert them from strings back to numbers, which will yield the decimals we need.
function hexToRGB(h) {
  let r = 0, g = 0, b = 0;

  // 3 digits
  if (h.length == 4) {
    r = "0x" + h[1] + h[1];
    g = "0x" + h[2] + h[2];
    b = "0x" + h[3] + h[3];

  // 6 digits
  } else if (h.length == 7) {
    r = "0x" + h[1] + h[2];
    g = "0x" + h[3] + h[4];
    b = "0x" + h[5] + h[6];
  }

  return "rgb("+ +r + "," + +g + "," + +b + ")";
}
Output RGB with %s
If we want to return rgb() using percentages, then we can modify the function to utilize an optional isPct parameter like so:
function hexToRGB(h,isPct) {
  let r = 0, g = 0, b = 0;
  isPct = isPct === true;

  if (h.length == 4) {
    r = "0x" + h[1] + h[1];
    g = "0x" + h[2] + h[2];
    b = "0x" + h[3] + h[3];

  } else if (h.length == 7) {
    r = "0x" + h[1] + h[2];
    g = "0x" + h[3] + h[4];
    b = "0x" + h[5] + h[6];
  }

  if (isPct) {
    r = +(r / 255 * 100).toFixed(1);
    g = +(g / 255 * 100).toFixed(1);
    b = +(b / 255 * 100).toFixed(1);
  }

  return "rgb(" + (isPct ? r + "%," + g + "%," + b + "%" : +r + "," + +g + "," + +b) + ")";
}
Under the last if statement, using +s will convert r, g, and b to numbers. Each toFixed(1) along with them will round the result to the nearest tenth. Additionally, we won’t have whole numbers with .0 or the decades old quirk that produces numbers like 0.30000000000000004. Therefore, in the return, we omitted the +s right before the first r, g, and b to prevent NaNs caused by the %s. Now we can use hexToRGB("#ff0",true) to get rgb(100%,100%,0%)!
Hex (#rrggbbaa) to RGBA
The procedure for hex values with alpha should again be similar with the last. We simply detect a 4- or 8-digit value (plus #) then convert the alpha and divide it by 255. To get more precise output but not long decimal numbers for alpha, we can use toFixed(3).
function hexAToRGBA(h) {
  let r = 0, g = 0, b = 0, a = 1;

  if (h.length == 5) {
    r = "0x" + h[1] + h[1];
    g = "0x" + h[2] + h[2];
    b = "0x" + h[3] + h[3];
    a = "0x" + h[4] + h[4];

  } else if (h.length == 9) {
    r = "0x" + h[1] + h[2];
    g = "0x" + h[3] + h[4];
    b = "0x" + h[5] + h[6];
    a = "0x" + h[7] + h[8];
  }
  a = +(a / 255).toFixed(3);

  return "rgba(" + +r + "," + +g + "," + +b + "," + a + ")";
}
Output RGBA with %s
For a version that outputs percentages, we can do what we did in hexToRGB()—switch r, g, and b to 0–100% when isPct is true.
function hexAToRGBA(h,isPct) {
  let r = 0, g = 0, b = 0, a = 1;
  isPct = isPct === true;

  // Handling of digits
  ...

  if (isPct) {
    r = +(r / 255 * 100).toFixed(1);
    g = +(g / 255 * 100).toFixed(1);
    b = +(b / 255 * 100).toFixed(1);
  }
  a = +(a / 255).toFixed(3);

  return "rgba(" + (isPct ? r + "%," + g + "%," + b + "%," + a : +r + "," + +g + "," + +b + "," + a) + ")";
}
Here’s a quick fix if the alpha ought to be a percentage, too: move the statement where a is redefined above the last if statement. Then in that statement, modify a to be like r, g, and b. When isPct is true, a must also gain the %.
function hexAToRGBA(h,isPct) {
  ...

  a = +(a / 255).toFixed(3);
  if (isPct) {
    r = +(r / 255 * 100).toFixed(1);
    g = +(g / 255 * 100).toFixed(1);
    b = +(b / 255 * 100).toFixed(1);
    a = +(a * 100).toFixed(1);
  }

  return "rgba(" + (isPct ? r + "%," + g + "%," + b + "%," + a + "%" : +r + "," + +g + "," + +b + "," + a) + ")";
}
When we enter #7f7fff80 now, we should get rgba(127,127,255,0.502) or rgba(49.8%,49.8%,100%,50.2%).
RGB to HSL
Obtaining HSL values from RGB or hex is a bit more challenging because there’s a larger formula involved. First, we must divide the red, green, and blue by 255 to use values between 0 and 1. Then we find the minimum and maximum of those values (cmin and cmax) as well as the difference between them (delta). We need that result as part of calculating the hue and saturation. Right after the delta, let’s initialize the hue (h), saturation (s), and lightness (l).
function RGBToHSL(r,g,b) {
  // Make r, g, and b fractions of 1
  r /= 255;
  g /= 255;
  b /= 255;

  // Find greatest and smallest channel values
  let cmin = Math.min(r,g,b),
      cmax = Math.max(r,g,b),
      delta = cmax - cmin,
      h = 0,
      s = 0,
      l = 0;
}
Next, we need to calculate the hue, which is to be determined by the greatest channel value in cmax (or if all channels are the same). If there is no difference between the channels, the hue will be 0. If cmax is the red, then the formula will be ((g - b) / delta) % 6. If green, then (b - r) / delta + 2. Then, if blue, (r - g) / delta + 4. Finally, multiply the result by 60 (to get the degree value) and round it. Since hues shouldn’t be negative, we add 360 to it, if needed.
function RGBToHSL(r,g,b) {
  ...
  // Calculate hue
  // No difference
  if (delta == 0)
    h = 0;
  // Red is max
  else if (cmax == r)
    h = ((g - b) / delta) % 6;
  // Green is max
  else if (cmax == g)
    h = (b - r) / delta + 2;
  // Blue is max
  else
    h = (r - g) / delta + 4;

  h = Math.round(h * 60);

  // Make negative hues positive behind 360°
  if (h < 0)
      h += 360;
}
All that’s left is the saturation and lightness. Let’s calculate the lightness before we do the saturation, as the saturation will depend on it. It’s the sum of the maximum and minimum channel values cut in half ((cmax + cmin) / 2). Then delta will determine what the saturation will be. If it’s 0 (no difference between cmax and cmin), then the saturation is automatically 0. Otherwise, it’ll be 1 minus the absolute value of twice the lightness minus 1 (1 - Math.abs(2 * l - 1)). Once we have these values, we must convert them to values out of 100%, so we multiply them by 100 and round to the nearest tenth. Now we can string together our hsl().
function RGBToHSL(r,g,b) {
  ...
  // Calculate lightness
  l = (cmax + cmin) / 2;

  // Calculate saturation
  s = delta == 0 ? 0 : delta / (1 - Math.abs(2 * l - 1));

  // Multiply l and s by 100
  s = +(s * 100).toFixed(1);
  l = +(l * 100).toFixed(1);

  return "hsl(" + h + "," + s + "%," + l + "%)";
}
RGB in String
For one string, split the argument by comma or space, strip the %s, and localize r, g, and b like we did before.
function RGBToHSL(rgb) {
  let sep = rgb.indexOf(",") > -1 ? "," : " ";
  rgb = rgb.substr(4).split(")")[0].split(sep);

  for (let R in rgb) {
    let r = rgb[R];
    if (r.indexOf("%") > -1)
      rgb[R] = Math.round(r.substr(0,r.length - 1) / 100 * 255);
  }

  // Make r, g, and b fractions of 1
  let r = rgb[0] / 255,
      g = rgb[1] / 255,
      b = rgb[2] / 255;

  ...
}
RGBA to HSLA
Compared to what we just did to convert RGB to HSL, the alpha counterpart will be basically nothing! We just reuse the code for RGB to HSL (the multi-argument version), leave a alone, and pass a to the returned HSLA. Keep in mind it should be between 0 and 1.
function RGBAToHSLA(r,g,b,a) {
  // Code for RGBToHSL(r,g,b) before return
  ...

  return "hsla(" + h + "," + s + "%," +l + "%," + a + ")";
}
RGBA in String
For string values, we apply the splitting and stripping logic again but use the fourth item in rgba for a. Remember the new rgba(r g b / a) syntax? We’re employing the acceptance of it as we did for RGBAToHexA(). Then the rest of the code is the normal RGB-to-HSL conversion.
function RGBAToHSLA(rgba) {
  let sep = rgba.indexOf(",") > -1 ? "," : " ";
  rgba = rgba.substr(5).split(")")[0].split(sep);

  // Strip the slash if using space-separated syntax
  if (rgba.indexOf("/") > -1)
    rgba.splice(3,1);

  for (let R in rgba) {
    let r = rgba[R];
    if (r.indexOf("%") > -1) {
      let p = r.substr(0,r.length - 1) / 100;

      if (R < 3) {
        rgba[R] = Math.round(p * 255);
      } else {
        rgba[R] = p;
      }
    }
  }

  // Make r, g, and b fractions of 1
  let r = rgba[0] / 255,
      g = rgba[1] / 255,
      b = rgba[2] / 255,
      a = rgba[3];

  // Rest of RGB-to-HSL logic
  ...
}
Wish to leave the alpha as is? Remove the else statement from the for loop.
for (let R in rgba) {
  let r = rgba[R];
  if (r.indexOf("%") > -1) {
    let p = r.substr(0,r.length - 1) / 100;

    if (R < 3) {
      rgba[R] = Math.round(p * 255);
    }
  }
}
HSL to RGB
It takes slightly less logic to convert HSL back to RGB than the opposite way. Since we’ll use a range of 0–100 for the saturation and lightness, the first step is to divide them by 100 to values between 0 and 1. Next, we find chroma (c), which is color intensity, so that’s (1 - Math.abs(2 * l - 1)) * s. Then we use x for the second largest component (first being chroma), the amount to add to each channel to match the lightness (m), and initialize r, g, b.
function HSLToRGB(h,s,l) {
  // Must be fractions of 1
  s /= 100;
  l /= 100;

  let c = (1 - Math.abs(2 * l - 1)) * s,
      x = c * (1 - Math.abs((h / 60) % 2 - 1)),
      m = l - c/2,
      r = 0,
      g = 0,
      b = 0;
}
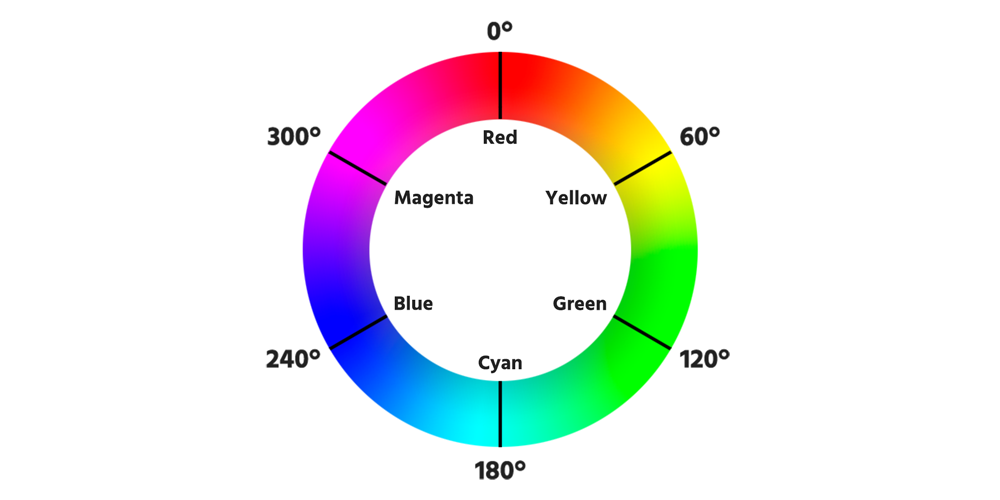
The hue will determine what the red, green, and blue should be depending on which 60° sector of the color wheel it lies.
The color wheel divided into 60° segments
Then c and x shall be assigned as shown below, leaving one channel at 0. To get the final RGB value, we add m to each channel, multiply it by 255, and round it.
function HSLToRGB(h,s,l) {
  ...

  if (0 <= h && h < 60) {
    r = c; g = x; b = 0;
  } else if (60 <= h && h < 120) {
    r = x; g = c; b = 0;
  } else if (120 <= h && h < 180) {
    r = 0; g = c; b = x;
  } else if (180 <= h && h < 240) {
    r = 0; g = x; b = c;
  } else if (240 <= h && h < 300) {
    r = x; g = 0; b = c;
  } else if (300 <= h && h < 360) {
    r = c; g = 0; b = x;
  }
  r = Math.round((r + m) * 255);
  g = Math.round((g + m) * 255);
  b = Math.round((b + m) * 255);

  return "rgb(" + r + "," + g + "," + b + ")";
}
HSL in String
For the single string version, we modify the first few statements basically the same way we did for RGBToHSL(r,g,b). Remove s /= 100; and l /= 100; and we’ll use the new statements to wipe the first 4 characters and the ) for our array of HSL values, then the %s from s and l before dividing them by 100.
function HSLToRGB(hsl) {
  let sep = hsl.indexOf(",") > -1 ? "," : " ";
  hsl = hsl.substr(4).split(")")[0].split(sep);

  let h = hsl[0],
      s = hsl[1].substr(0,hsl[1].length - 1) / 100,
      l = hsl[2].substr(0,hsl[2].length - 1) / 100;

  ...
}
The next handful of statements shall handle hues provided with a unit—degrees, radians, or turns. We multiply radians by 180/π and turns by 360. If the result ends up over 360, we compound modulus divide to keep it within the scope. All of this will happen before we deal with c, x, and m.
function HSLToRGB(hsl) {
  ...

  // Strip label and convert to degrees (if necessary)
  if (h.indexOf("deg") > -1)
    h = h.substr(0,h.length - 3);
  else if (h.indexOf("rad") > -1)
    h = Math.round(h.substr(0,h.length - 3) * (180 / Math.PI));
  else if (h.indexOf("turn") > -1)
    h = Math.round(h.substr(0,h.length - 4) * 360);
  // Keep hue fraction of 360 if ending up over
  if (h >= 360)
    h %= 360;

  // Conversion to RGB begins
  ...
}
After implementing the steps above, now the following can be safely used:
hsl(180 100% 50%)
hsl(180deg,100%,50%)
hsl(180deg 100% 50%)
hsl(3.14rad,100%,50%)
hsl(3.14rad 100% 50%)
hsl(0.5turn,100%,50%)
hsl(0.5turn 100% 50%)
Whew, that’s quite the flexibility!
Output RGB with %s
Similarly, we can modify this function to return percent values just like we did in hexToRGB().
function HSLToRGB(hsl,isPct) {
  let sep = hsl.indexOf(",") > -1 ? "," : " ";
  hsl = hsl.substr(4).split(")")[0].split(sep);
  isPct = isPct === true;

  ...

  if (isPct) {
    r = +(r / 255 * 100).toFixed(1);
    g = +(g / 255 * 100).toFixed(1);
    b = +(b / 255 * 100).toFixed(1);
  }

  return "rgb("+ (isPct ? r + "%," + g + "%," + b + "%" : +r + "," + +g + "," + +b) + ")";
}
HSLA to RGBA
Once again, handling alphas will be a no-brainer. We can reapply the code for the original HSLToRGB(h,s,l) and add a to the return.
function HSLAToRGBA(h,s,l,a) {
  // Code for HSLToRGB(h,s,l) before return
  ...

  return "rgba(" + r + "," + g + "," + b + "," + a + ")";
}
HSLA in String
Changing it to one argument, the way we’ll handle strings here will be not too much different than what we did earlier. A new HSLA syntax from Colors Level 4 uses (value value value / value) just like RGBA, so having the code to handle it, we’ll be able to plug in something like hsla(210 100% 50% / 0.5) here.
function HSLAToRGBA(hsla) {
  let sep = hsla.indexOf(",") > -1 ? "," : " ";
  hsla = hsla.substr(5).split(")")[0].split(sep);

  if (hsla.indexOf("/") > -1)
    hsla.splice(3,1);

  let h = hsla[0],
      s = hsla[1].substr(0,hsla[1].length - 1) / 100,
      l = hsla[2].substr(0,hsla[2].length - 1) / 100,
      a = hsla[3];

  if (h.indexOf("deg") > -1)
    h = h.substr(0,h.length - 3);
  else if (h.indexOf("rad") > -1)
    h = Math.round(h.substr(0,h.length - 3) * (180 / Math.PI));
  else if (h.indexOf("turn") > -1)
    h = Math.round(h.substr(0,h.length - 4) * 360);
  if (h >= 360)
    h %= 360;

  ...
}
Furthermore, these other combinations have become possible:
hsla(180,100%,50%,50%)
hsla(180 100% 50% / 50%)
hsla(180deg,100%,50%,0.5)
hsla(3.14rad,100%,50%,0.5)
hsla(0.5turn 100% 50% / 50%)
RGBA with %s
Then we can replicate the same logic for outputting percentages, including alpha. If the alpha should be a percentage (searched in pctFound), here’s how we can handle it:
If r, g, and b are to be converted to percentages, then a should be multiplied by 100, if not already a percentage. Otherwise, drop the %, and it’ll be added back in the return.
If r, g, and b should be left alone, then remove the % from a and divide a by 100.
function HSLAToRGBA(hsla,isPct) {
  // Code up to slash stripping
  ...

  isPct = isPct === true;

  // h, s, l, a defined to rounding of r, g, b
  ...

  let pctFound = a.indexOf("%") > -1;

  if (isPct) {
    r = +(r / 255 * 100).toFixed(1);
    g = +(g / 255 * 100).toFixed(1);
    b = +(b / 255 * 100).toFixed(1);
    if (!pctFound) {
      a *= 100;
    } else {
      a = a.substr(0,a.length - 1);
    }

  } else if (pctFound) {
    a = a.substr(0,a.length - 1) / 100;
  }

  return "rgba("+ (isPct ? r + "%," + g + "%," + b + "%," + a + "%" : +r + ","+ +g + "," + +b + "," + +a) + ")";
}
Hex to HSL
You might think this one and the next are crazier processes than the others, but they merely come in two parts with recycled logic. First, we convert the hex to RGB. That gives us the base 10s we need to convert to HSL.
function hexToHSL(H) {
  // Convert hex to RGB first
  let r = 0, g = 0, b = 0;
  if (H.length == 4) {
    r = "0x" + H[1] + H[1];
    g = "0x" + H[2] + H[2];
    b = "0x" + H[3] + H[3];
  } else if (H.length == 7) {
    r = "0x" + H[1] + H[2];
    g = "0x" + H[3] + H[4];
    b = "0x" + H[5] + H[6];
  }
  // Then to HSL
  r /= 255;
  g /= 255;
  b /= 255;
  let cmin = Math.min(r,g,b),
      cmax = Math.max(r,g,b),
      delta = cmax - cmin,
      h = 0,
      s = 0,
      l = 0;

  if (delta == 0)
    h = 0;
  else if (cmax == r)
    h = ((g - b) / delta) % 6;
  else if (cmax == g)
    h = (b - r) / delta + 2;
  else
    h = (r - g) / delta + 4;

  h = Math.round(h * 60);

  if (h < 0)
    h += 360;

  l = (cmax + cmin) / 2;
  s = delta == 0 ? 0 : delta / (1 - Math.abs(2 * l - 1));
  s = +(s * 100).toFixed(1);
  l = +(l * 100).toFixed(1);

  return "hsl(" + h + "," + s + "%," + l + "%)";
}
Hex (#rrggbbaa) to HSLA
There aren’t too many lines that change in this one. We’ll repeat what we recently did to get the alpha by converting the hex, but won’t divide it by 255 right away. First, we must get the hue, saturation, and lightness as we did in the other to-HSL functions. Then, before the ending return, we divide the alpha and set the decimal places.
function hexAToHSLA(H) {
  let r = 0, g = 0, b = 0, a = 1;

  if (H.length == 5) {
    r = "0x" + H[1] + H[1];
    g = "0x" + H[2] + H[2];
    b = "0x" + H[3] + H[3];
    a = "0x" + H[4] + H[4];
  } else if (H.length == 9) {
    r = "0x" + H[1] + H[2];
    g = "0x" + H[3] + H[4];
    b = "0x" + H[5] + H[6];
    a = "0x" + H[7] + H[8];
  }

  // Normal conversion to HSL
  ...

  a = (a / 255).toFixed(3);

  return "hsla("+ h + "," + s + "%," + l + "%," + a + ")";
}
HSL to Hex
This one starts as a conversion to RGB, but there’s an extra step to the Math.round()s of converting the RGB results to hex.
function HSLToHex(h,s,l) {
  s /= 100;
  l /= 100;

  let c = (1 - Math.abs(2 * l - 1)) * s,
      x = c * (1 - Math.abs((h / 60) % 2 - 1)),
      m = l - c/2,
      r = 0,
      g = 0,
      b = 0;

  if (0 <= h && h < 60) {
    r = c; g = x; b = 0;
  } else if (60 <= h && h < 120) {
    r = x; g = c; b = 0;
  } else if (120 <= h && h < 180) {
    r = 0; g = c; b = x;
  } else if (180 <= h && h < 240) {
    r = 0; g = x; b = c;
  } else if (240 <= h && h < 300) {
    r = x; g = 0; b = c;
  } else if (300 <= h && h < 360) {
    r = c; g = 0; b = x;
  }
  // Having obtained RGB, convert channels to hex
  r = Math.round((r + m) * 255).toString(16);
  g = Math.round((g + m) * 255).toString(16);
  b = Math.round((b + m) * 255).toString(16);

  // Prepend 0s, if necessary
  if (r.length == 1)
    r = "0" + r;
  if (g.length == 1)
    g = "0" + g;
  if (b.length == 1)
    b = "0" + b;

  return "#" + r + g + b;
}
HSL in String
Even the first few lines of this function will be like those in HSLToRGB() if we changed it to accept a single string. This is how we’ve been obtaining the hue, saturation, and lightness separately in the first place. Let’s not forget the step to remove the hue label and convert to degrees, too. All of this will be in place of s /= 100; and l /= 100;.
function HSLToHex(hsl) {
  let sep = hsl.indexOf(",") > -1 ? "," : " ";
  hsl = hsl.substr(4).split(")")[0].split(sep);

  let h = hsl[0],
      s = hsl[1].substr(0,hsl[1].length - 1) / 100,
      l = hsl[2].substr(0,hsl[2].length - 1) / 100;

  // Strip label and convert to degrees (if necessary)
  if (h.indexOf("deg") > -1)
    h = h.substr(0,h.length - 3);
  else if (h.indexOf("rad") > -1)
    h = Math.round(h.substr(0,h.length - 3) * (180 / Math.PI));
  else if (h.indexOf("turn") > -1)
    h = Math.round(h.substr(0,h.length - 4) * 360);
  if (h >= 360)
    h %= 360;

  ...
}
HSLA to Hex (#rrggbbaa)
Adding alpha to the mix, we convert a to hex and add a fourth if to prepend a 0, if necessary. You probably already familiar with this logic because we last used it in RGBAToHexA().
function HSLAToHexA(h,s,l,a) {
  // Repeat code from HSLToHex(h,s,l) until 3 `toString(16)`s
  ...

  a = Math.round(a * 255).toString(16);

  if (r.length == 1)
    r = "0" + r;
  if (g.length == 1)
    g = "0" + g;
  if (b.length == 1)
    b = "0" + b;
  if (a.length == 1)
    a = "0" + a;

  return "#" + r + g + b + a;
}
HSLA in String
Finally, the lines of the single argument version up to a = hsla[3] are no different than those of HSLAToRGBA().
function HSLAToHexA(hsla) {
  let sep = hsla.indexOf(",") > -1 ? "," : " ";
  hsla = hsla.substr(5).split(")")[0].split(sep);

  // Strip the slash
  if (hsla.indexOf("/") > -1)
    hsla.splice(3,1);

  let h = hsla[0],
      s = hsla[1].substr(0,hsla[1].length - 1) / 100,
      l = hsla[2].substr(0,hsla[2].length - 1) / 100,
      a = hsla[3];

  ...
}
Built-in Names
To convert a named color to RGB, hex, or HSL, you might consider turning this table of 140+ names and hex values into a massive object at the start. The truth is that we really don’t need one because here’s what we can do:
Create an element
Give it a text color
Obtain the value of that property
Remove the element
Return the stored color value, which will be in RGB by default
So, our function to get RGB will only be seven statements!
function nameToRGB(name) {
  // Create fake div
  let fakeDiv = document.createElement("div");
  fakeDiv.style.color = name;
  document.body.appendChild(fakeDiv);

  // Get color of div
  let cs = window.getComputedStyle(fakeDiv),
      pv = cs.getPropertyValue("color");

  // Remove div after obtaining desired color value
  document.body.removeChild(fakeDiv);

  return pv;
}
Let’s go even further. How about we change the output to hex instead?
function nameToHex(name) {
  // Get RGB from named color in temporary div
  let fakeDiv = document.createElement("div");
  fakeDiv.style.color = name;
  document.body.appendChild(fakeDiv);

  let cs = window.getComputedStyle(fakeDiv),
      pv = cs.getPropertyValue("color");

  document.body.removeChild(fakeDiv);

  // Code ripped from RGBToHex() (except pv is substringed)
  let rgb = pv.substr(4).split(")")[0].split(","),
      r = (+rgb[0]).toString(16),
      g = (+rgb[1]).toString(16),
      b = (+rgb[2]).toString(16);

  if (r.length == 1)
    r = "0" + r;
  if (g.length == 1)
    g = "0" + g;
  if (b.length == 1)
    b = "0" + b;

  return "#" + r + g + b;
}
Or, why not HSL? 😉
function nameToHSL(name) {
  let fakeDiv = document.createElement("div");
  fakeDiv.style.color = name;
  document.body.appendChild(fakeDiv);

  let cs = window.getComputedStyle(fakeDiv),
      pv = cs.getPropertyValue("color");

  document.body.removeChild(fakeDiv);

  // Code ripped from RGBToHSL() (except pv is substringed)
  let rgb = pv.substr(4).split(")")[0].split(","),
      r = rgb[0] / 255,
      g = rgb[1] / 255,
      b = rgb[2] / 255,
      cmin = Math.min(r,g,b),
      cmax = Math.max(r,g,b),
      delta = cmax - cmin,
      h = 0,
      s = 0,
      l = 0;

  if (delta == 0)
    h = 0;
  else if (cmax == r)
    h = ((g - b) / delta) % 6;
  else if (cmax == g)
    h = (b - r) / delta + 2;
  else
    h = (r - g) / delta + 4;

  h = Math.round(h * 60);

  if (h < 0)
    h += 360;

  l = (cmax + cmin) / 2;
  s = delta == 0 ? 0 : delta / (1 - Math.abs(2 * l - 1));
  s = +(s * 100).toFixed(1);
  l = +(l * 100).toFixed(1);

  return "hsl(" + h + "," + s + "%," + l + "%)";
}
In the long run, every conversion from a name becomes a conversion from RGB after cracking the name.
Validating Colors
In all these functions, there haven’t been any measures to prevent or correct ludicrous input (say hues over 360 or percentages over 100). If we’re only manipulating pixels on a <canvas> fetched using getImageData(), validation of color values isn’t necessary before converting because they’ll be correct no matter what. If we’re creating a color conversion tool where users supply the color, then validation would be much needed.
It’s easy to handle improper input for channels as separate arguments, like this for RGB:
// Correct red
if (r > 255)
  r = 255;
else if (r < 0)
  r = 0;
If validating a whole string, then a regular expression is needed. For instance, this is the RGBToHex() function given a validation step with an expression:
function RGBToHex(rgb) {
  // Expression for rgb() syntaxes
  let ex = /^rgb\((((((((1?[1-9]?\d)|10\d|(2[0-4]\d)|25[0-5]),\s?)){2}|((((1?[1-9]?\d)|10\d|(2[0-4]\d)|25[0-5])\s)){2})((1?[1-9]?\d)|10\d|(2[0-4]\d)|25[0-5]))|((((([1-9]?\d(\.\d+)?)|100|(\.\d+))%,\s?){2}|((([1-9]?\d(\.\d+)?)|100|(\.\d+))%\s){2})(([1-9]?\d(\.\d+)?)|100|(\.\d+))%))\)$/i;

  if (ex.test(rgb)) {
    // Logic to convert RGB to hex
    ...

  } else {
    // Something to do if color is invalid
  }
}
To test other types of values, below is a table of expressions to cover both opaque and alpha-enabled:
Looking at the expressions for RGB(A) and HSL(A), you probably have big eyes right now; these were made comprehensive enough to include most of the new syntaxes from CSS Colors Level 4. Hex, on the other hand, doesn’t need expressions as long as the others because of only digit counts. In a moment, we’ll dissect these and decipher the parts. Note that case-insensitive values (/i) pass all these.
Because rgb() accepts either all integers or all percentages, both cases are covered. In the outmost group, between the ^rgb\( and \)$, there are inner groups for both integers and percentages, all comma-spaces or spaces only as separators:
In the first half, we accept two instances of integers for red and green from 0–99 or 111-199 ((1?[1-9]?\d)), 100–109 (10\d), 200-249 ((2[0-4]\d)), or 250–255 (25[0-5]). We couldn’t simply do \d{1,3} because values like 03 or 017 and those greater than 255 shouldn’t be allowed. After that goes the comma and optional space (,\s?). On the other side of the |, after the first {2} (which indicates two instances of integers), we check for the same thing with space separators if the left side is false. Then for blue, the same should be accepted, but without a separator.
In the other half, acceptable values for percentages, including floats, should either be 0–99, explicitly 100 and not a float, or floats under 1 with the 0 dropped. Therefore, the segment here is (([1-9]?\d(\.\d+)?)|100|(\.\d+)), and it appears three times; twice with separator (,\s?){2}, %\s){2}), once without.
It is legal to use percentages without space separators (rgb(100%50%10%) for instance) in CSS, but the functions we wrote don’t support that. The same goes for rgba(100%50%10%/50%), hsl(40 100%50%), and hsla(40 100%50%/0.5). This could very well be a plus for code golfing and minification!
The next expression is very similar to the pervious, but three instances of integers (((((1?[1-9]?\d)|10\d|(2[0-4]\d)|25[0-5]),\s?){3})) or percentages ((((([1-9]?\d(\.\d+)?)|100|(\.\d+))%,\s?){3})), plus comma optional space are checked. Otherwise, it looks for the same thing but with space separators, plus a slash and space (\/\s) after the blue. Next to that is ((0?\.\d+)|[01]|(([1-9]?\d(\.\d+)?)|100|(\.\d+))%) where we accept floats with or without the first 0 ((0?\.\d+)), 0 or 1 ([01]) on the dot, or 0–100% ((([1-9]?\d(\.\d+)?)|100|(\.\d+))%).
For both hex—with and without alpha—instances of numbers or letters a–f ([\da-f]) are accepted. Then one or two instances of this are counted for either short or longhand values supplied (#rgb or #rrggbb). As an illustration, we have this same short pattern: /^#([\da-f]{n}){1,2}$/i. Simply change n to 3 or 4.
([12]?[1-9]?\d) covers 0–99, 110–199, and 210–299. [12]0\d covers 110–109 and 200–209. Then (3[0-5]\d) takes care of 300–359. The reason for this division of ranges is similar to that of integers in the rgb() syntax: ruling out zeros coming first and values greater than the maximum. Since hues can be floating point numbers, the first (\.\d+)? is for that.
Next to the | after the aforementioned segment of code, the second (\.\d+) is for floats without a leading zero.
Now let’s move up a level and decipher the next small chunk:
This contains the labels we can use for the hue—degrees, turns, or radians. We can include all or none of deg. Values in turn must be under 1. For radians, we can accept any float between 0–7. We do know, however, that one 360° turn is 2π, and it stops approximately at 6.28. You may think 6.3 and over shouldn’t be accepted. Because 2π is an irrational number, it would be too messy for this example to try to satisfy every decimal place provided by the JavaScript console. Besides, we have this snippet in our HSLTo_() functions as a second layer of security if hues 360° or over were to happen:
// Keep hue fraction of 360 if ending up over
if (h >= 360)
  h %= 360;
Now let’s move up a level and decipher the second chunk:
(,\s?(([1-9]?\d(\.\d+)?)|100|(\.\d+))%){2}
We’re counting two instances of comma-space-percentages for the saturation and lightness (space optional). In the group after the ,\s?, we test for values 0–99 with or without decimal points (([1-9]?\d(\.\d+)?)), exactly 100, or floats under 1 without the leading 0 ((\.\d+)).
The last part the HSL expression, before the ending (\)$/i), is a similar expression if spaces are the only separator:
(\s(([1-9]?\d(\.\d+)?)|100|(\.\d+))%){2}
\s is in the beginning instead of ,\s?. Then in the HSLA expression, this same chunk is inside another group with ,\s? after its {2}.
((,\s?(([1-9]?\d(\.\d+)?)|100|(\.\d+))%){2},\s?)
That counts the comma-space between the lightness and alpha. Then if we have spaces as separators, we need to check for a space-slash-space (\s\/\s) after counting two instances of space and a percentage.
((\s(([1-9]?\d(\.\d+)?)|100|(\.\d+))%){2}\s\/\s))
After that, we have this left to check the alpha value:
Matches for (0?\.\d+) include floats under 1 with or without the leading 0, 0 or 1 for [01], and 0–100%.
Conclusion
If your current challenge is to convert one color space to another, you now have some ideas on how to approach it. Because it would be tiresome to walk through converting every color space ever invented in one post, we discussed the most practical and browser-supported ones. If you’d like to go beyond supported color spaces (say CMYK, XYZ, or CIE L*a*b*), EasyRGB) provides an amazing set of code-ready formulas.
To see all the conversions demonstrated here, I’ve set up a CodePen demo that shows inputs and outputs in a table. You can try different colors in lines 2–10 and see the complete functions in the JavaScript panel.
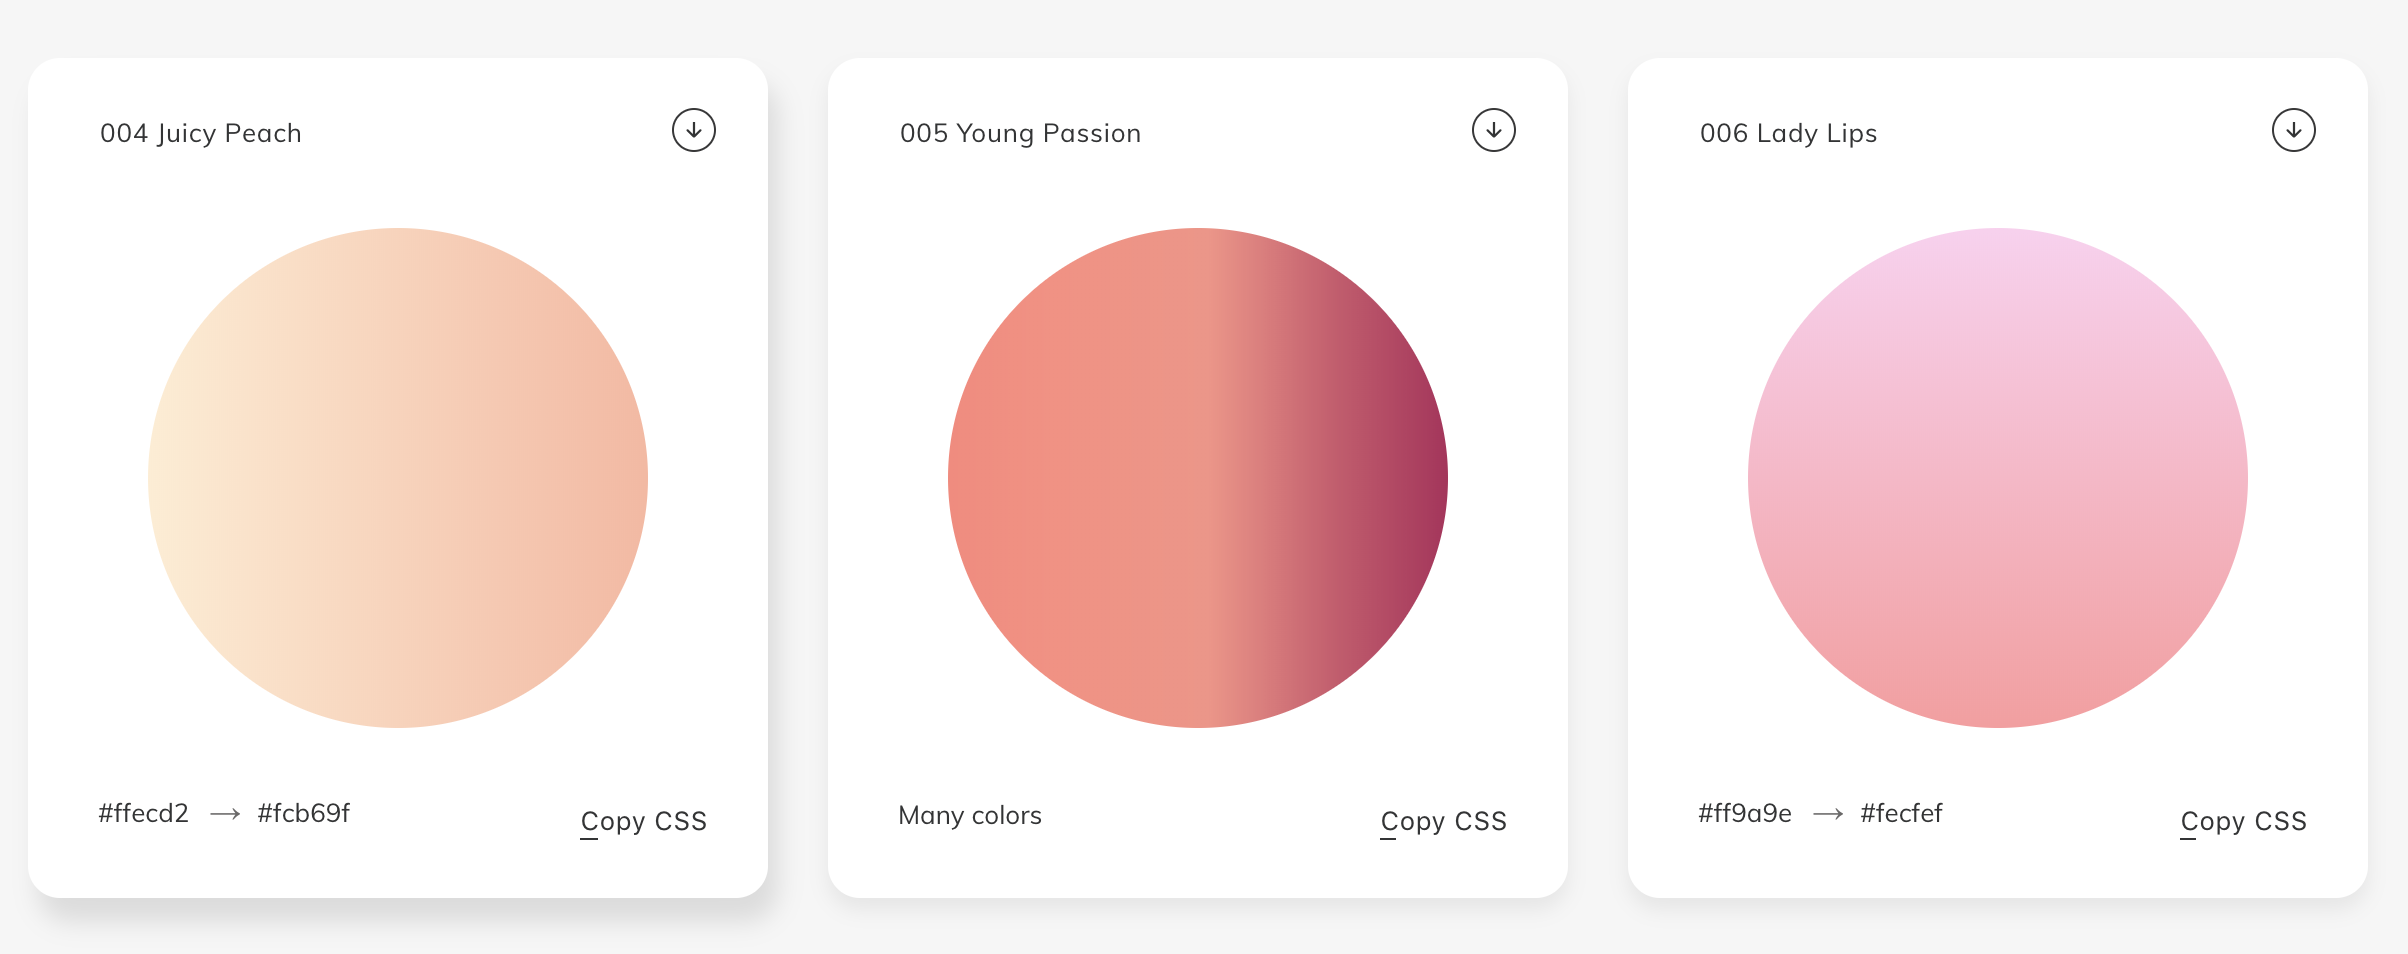
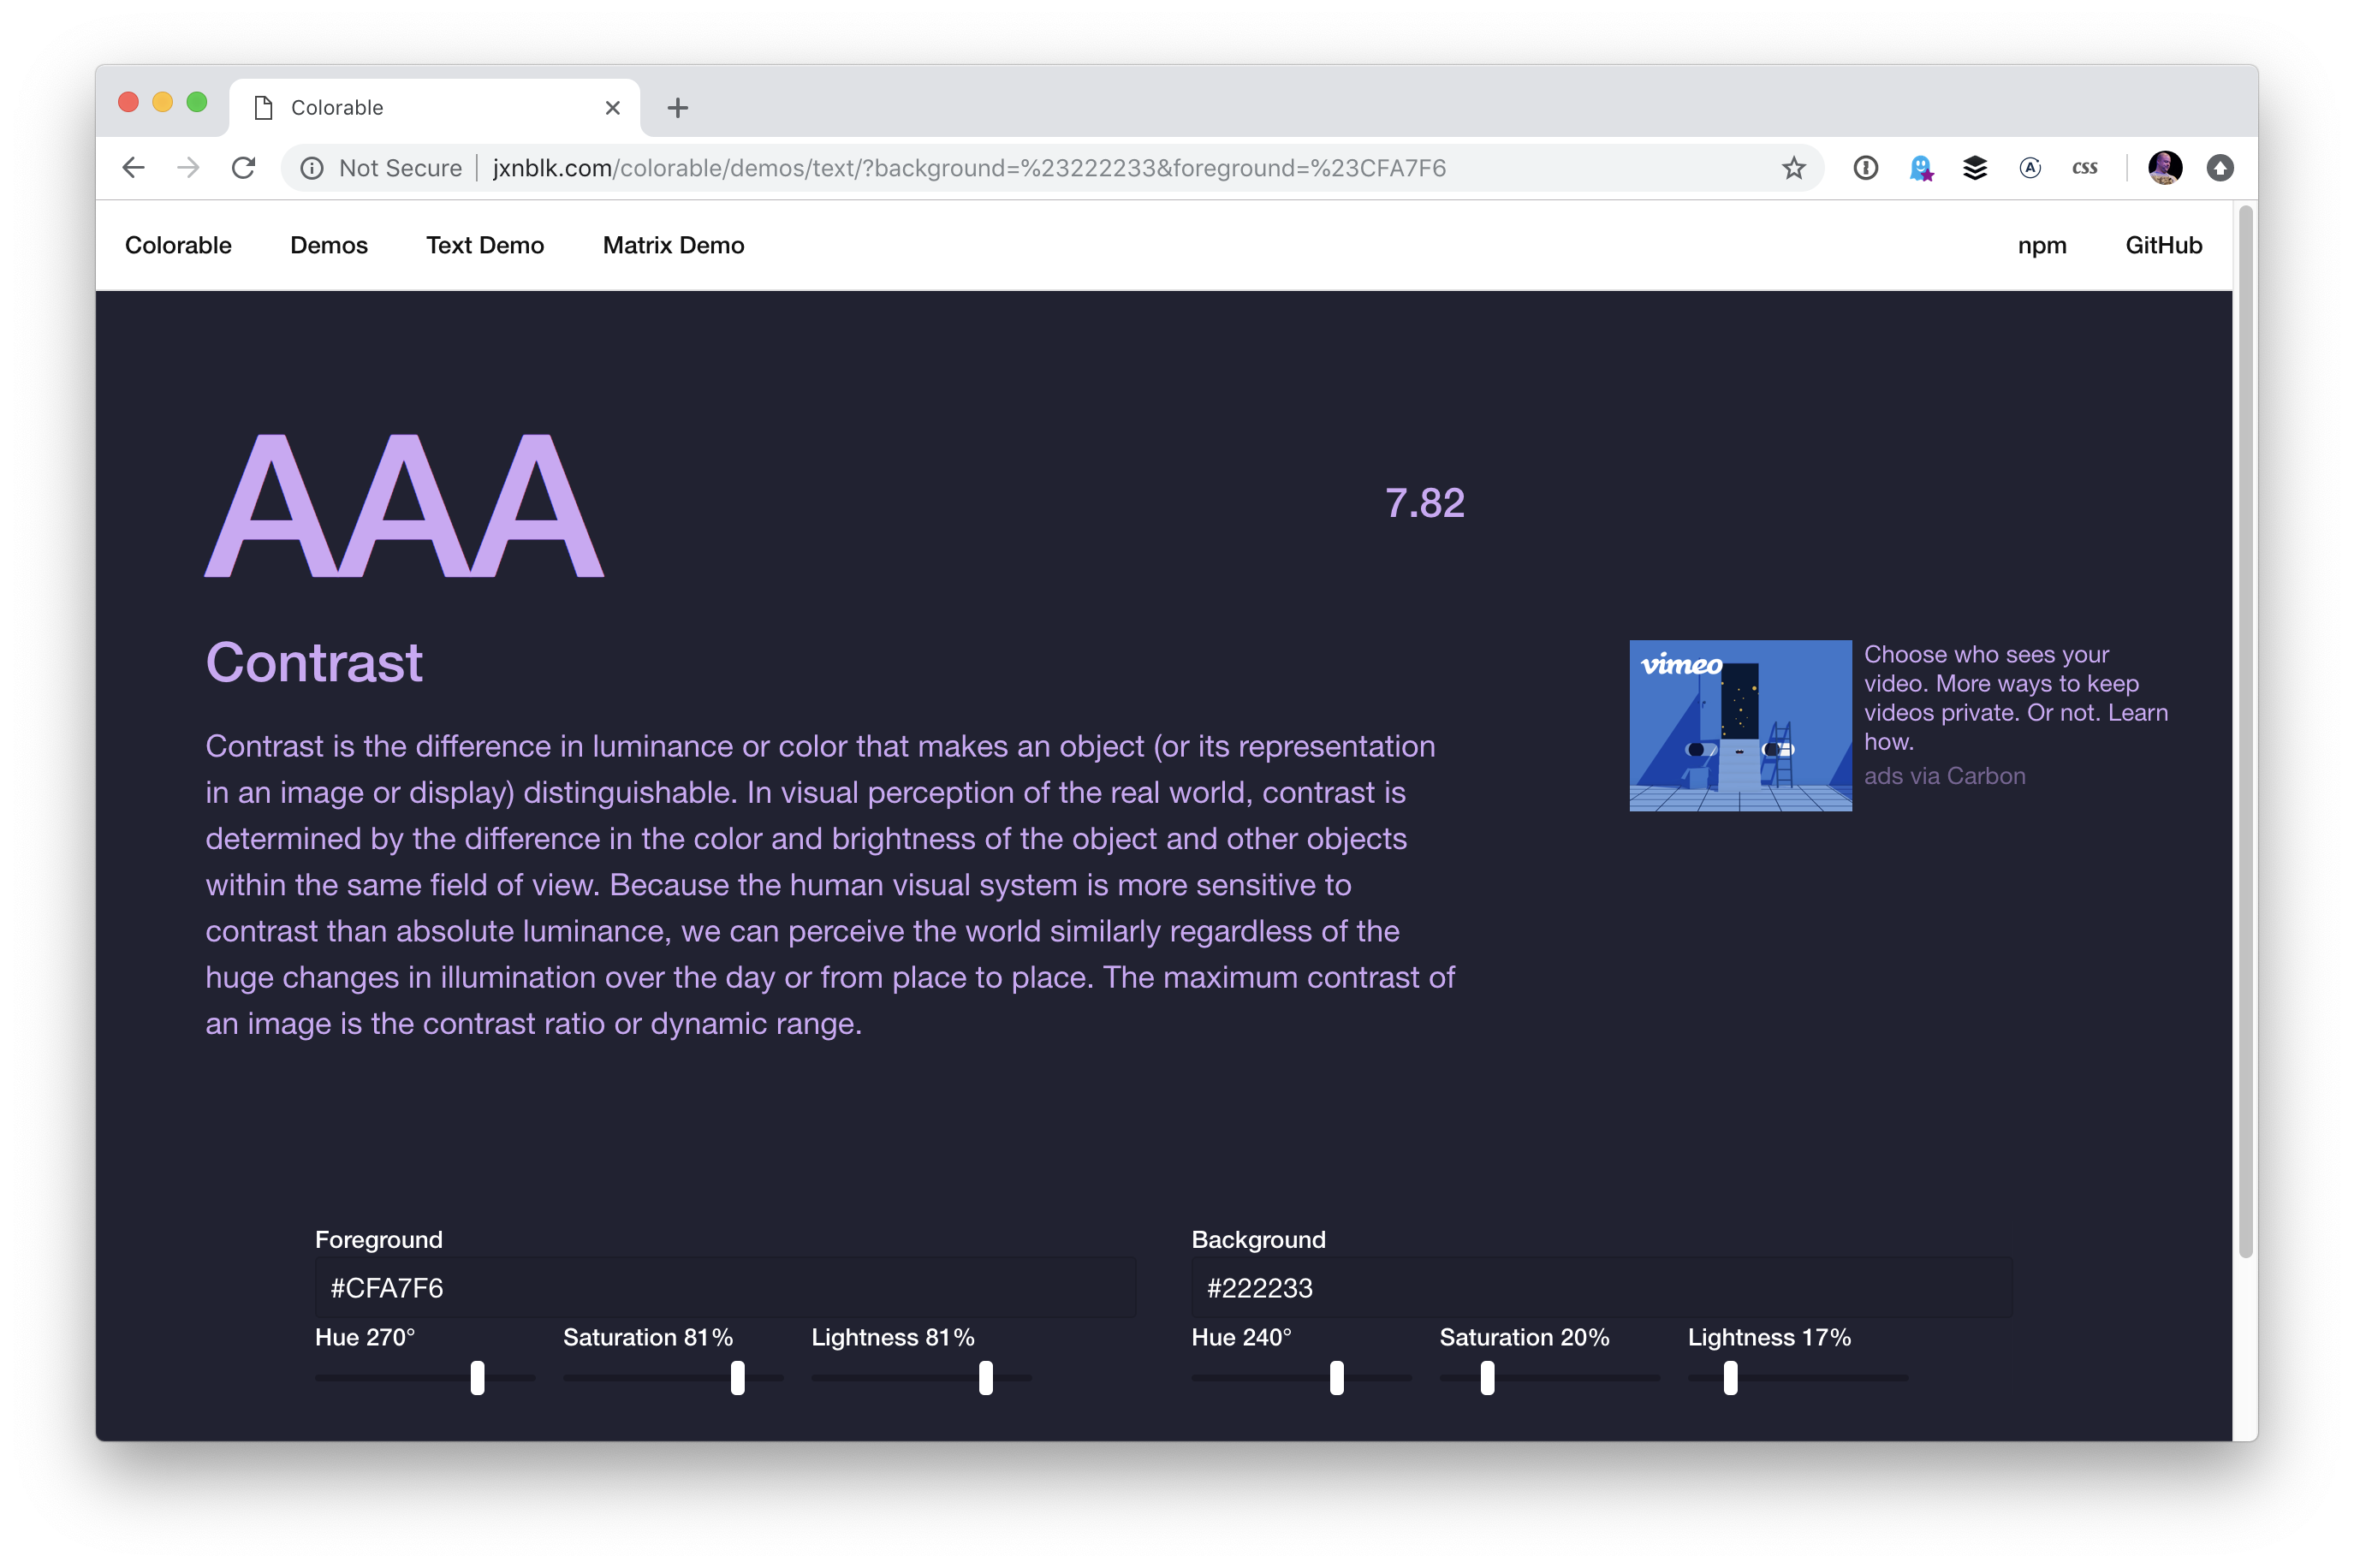
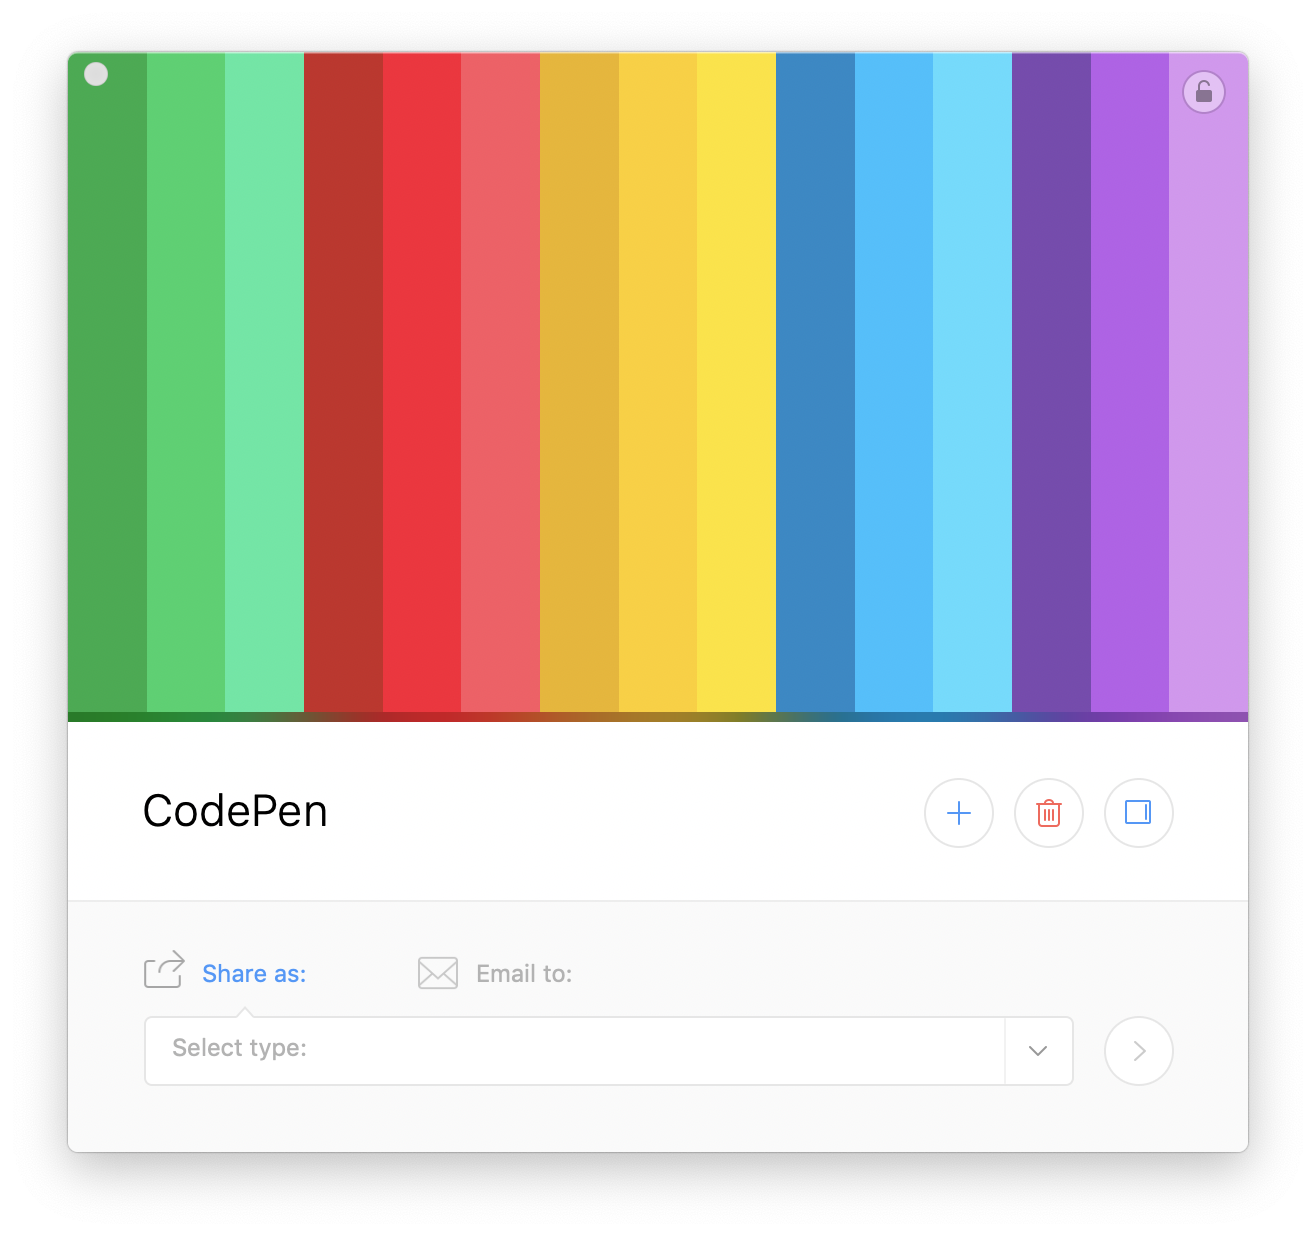
There are so many tools out there to help you pick colors. I totally get it! It’s hard! When colors are done well, it’s like magic. It adds a level of polish to a design that can really set it apart.
Let’s look at some, then talk about this idea some more.
Generating random colors won’t guarantee pleasing palettes, especially if a bunch of random colors are paired together. PleaseJS can help build color schemes that work together. You provide it a base color and other options (like what type of color scheme) and it spits out colors for you.
generates attractive colors by default. More specifically, randomColor produces bright colors with a reasonably high saturation. This makes randomColor particularly useful for data visualizations and generative art.
It doesn’t claim to make multiple colors part of a cohesive theme aside from passing in a base hue or luminosity.
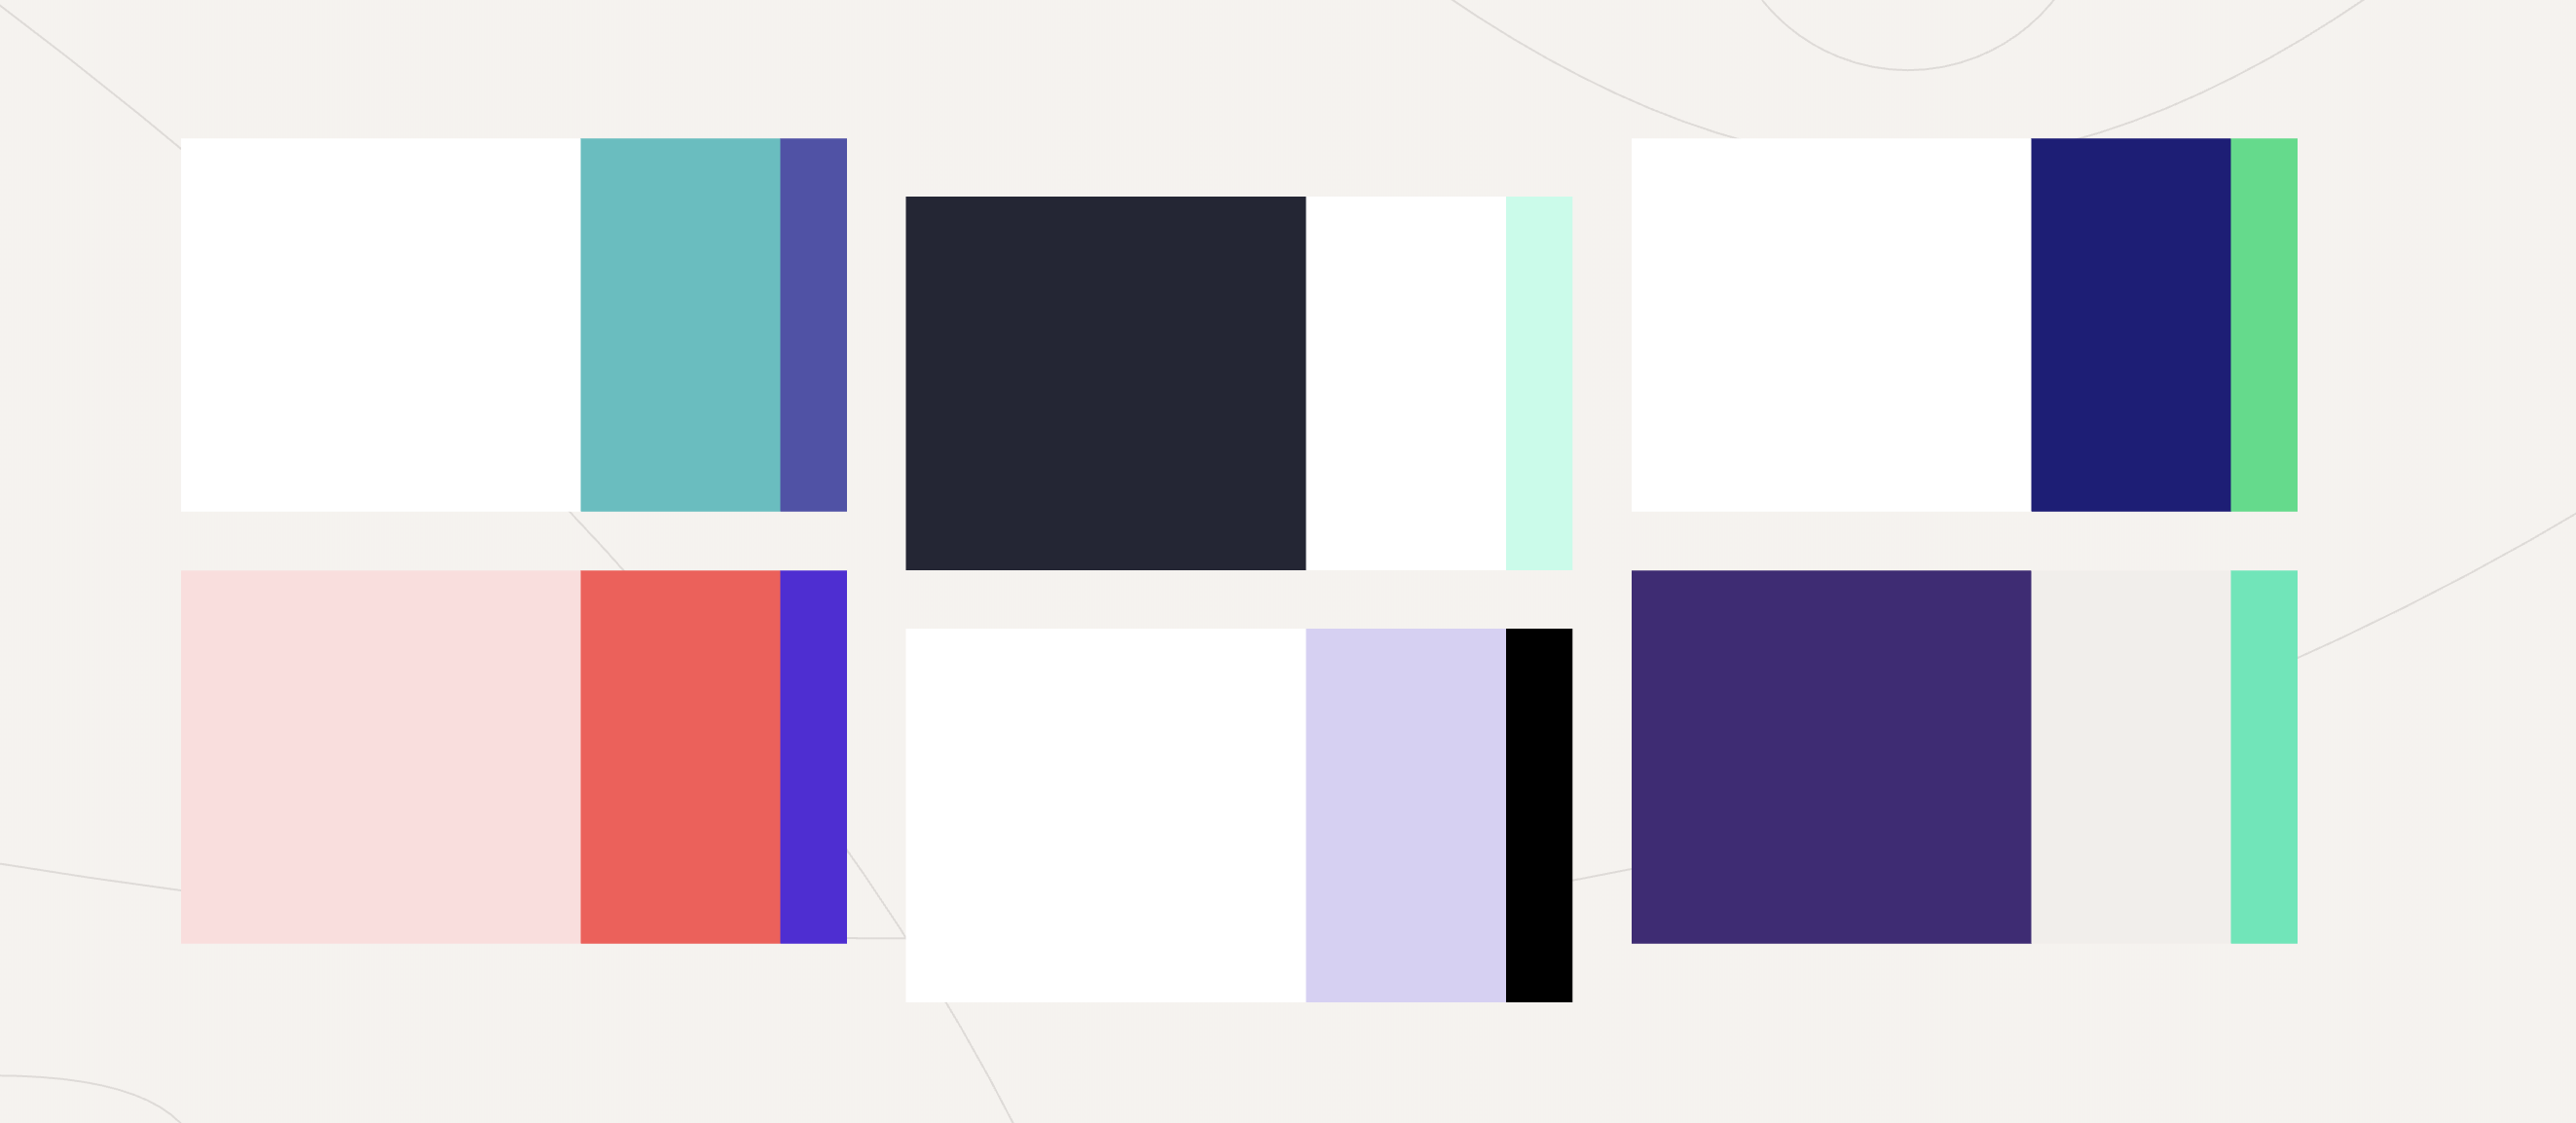
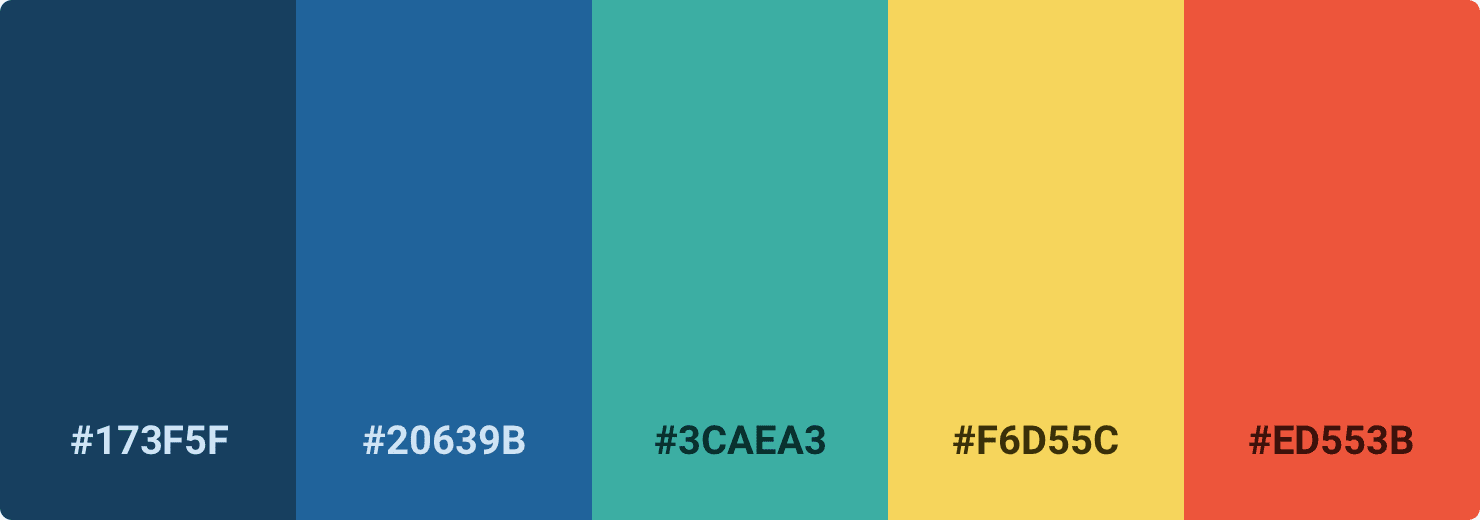
…they don’t exactly tell you how to use them. Steve Schoger makes a point of this, rather hilariously in a blog post. This is a perfectly lovely color palette:
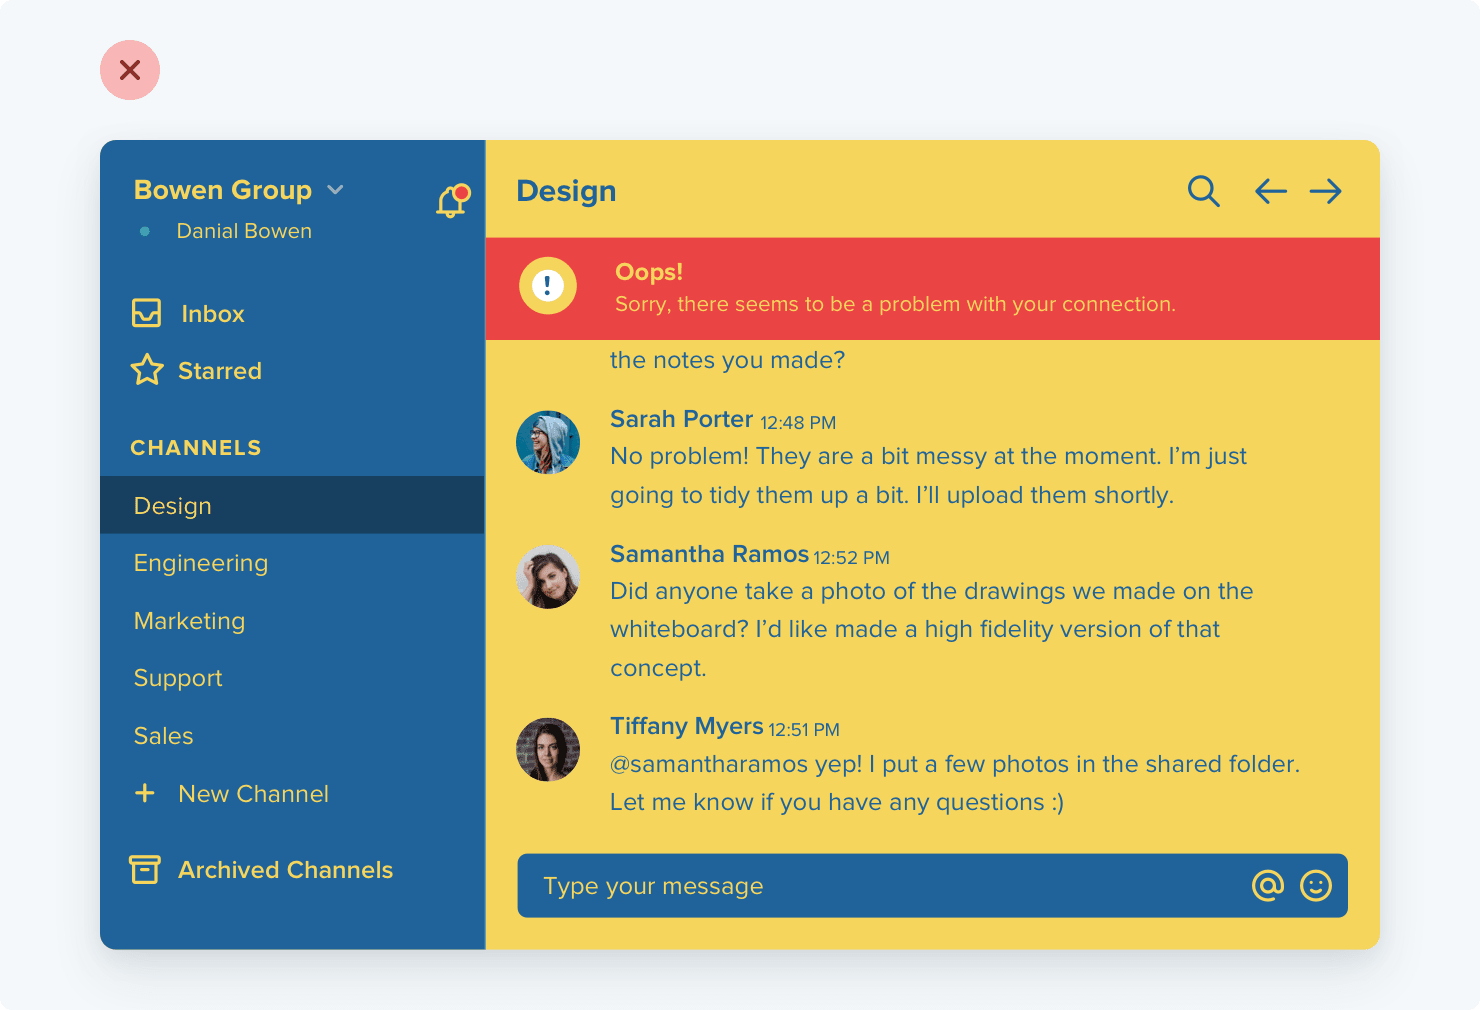
But if you just pick those colors and plop them onto a design, you could end up with something like this:
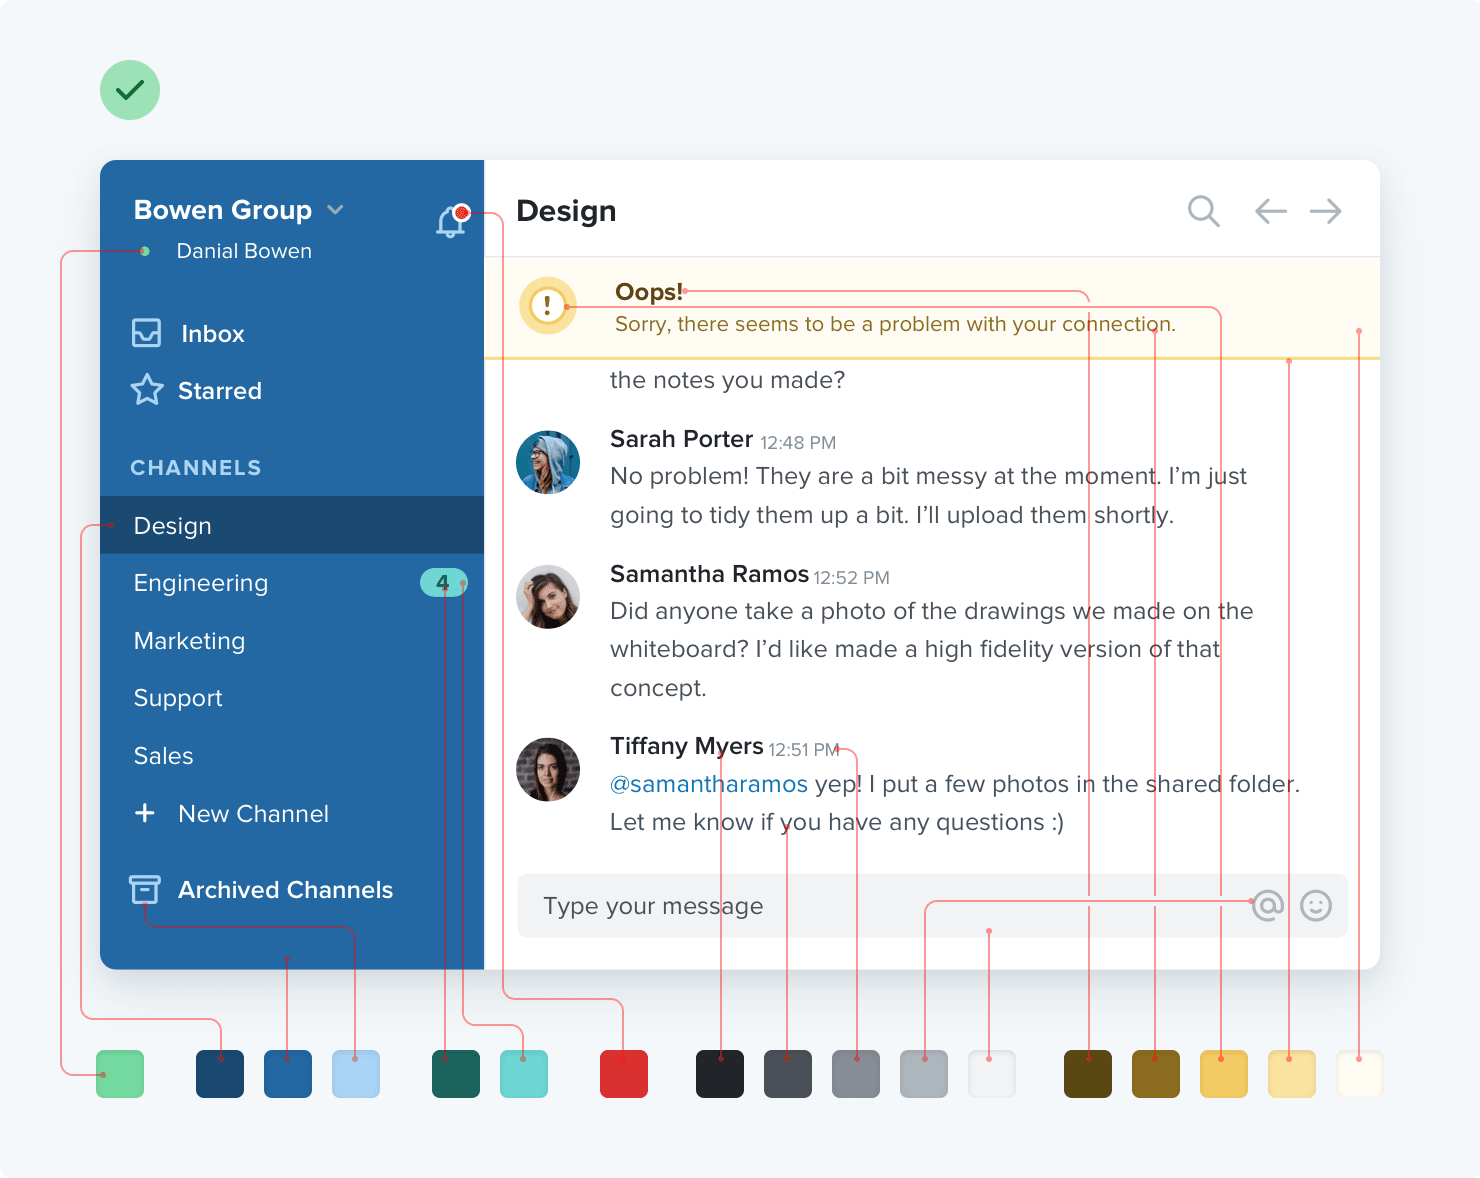
You might like that, but you’d be in the minority. It’s not a refined design that gets out of the way and would be nice to use every day. Color usage is a bit more complicated than plopping five nice colors into a design. It’s variations on those and using them in tasteful ways, like this:
There are so many tools out there to help you pick colors. I totally get it! It’s hard! When colors are done well, it’s like magic. It adds a level of polish to a design that can really set it apart.
Let’s look at some, then talk about this idea some more.
Generating random colors won’t guarantee pleasing palettes, especially if a bunch of random colors are paired together. PleaseJS can help build color schemes that work together. You provide it a base color and other options (like what type of color scheme) and it spits out colors for you.
generates attractive colors by default. More specifically, randomColor produces bright colors with a reasonably high saturation. This makes randomColor particularly useful for data visualizations and generative art.
It doesn’t claim to make multiple colors part of a cohesive theme aside from passing in a base hue or luminosity.
…they don’t exactly tell you how to use them. Steve Schoger makes a point of this, rather hilariously in a blog post. This is a perfectly lovely color palette:
But if you just pick those colors and plop them onto a design, you could end up with something like this:
You might like that, but you’d be in the minority. It’s not a refined design that gets out of the way and would be nice to use every day. Color usage is a bit more complicated than plopping five nice colors into a design. It’s variations on those and using them in tasteful ways, like this:
Masonry layout, on the web, is when items of an uneven size are laid out such that there aren’t uneven gaps. I would guess the term was coined (or at least popularized) for the web by David DeSandro because of his popular Masonry JavaScript library, which has been around since 2010.
JavaScript library. Nothing against JavaScript, but it’s understandable we might not want to lean on it for doing layout. Is there anything we can do in CSS directly these days? Sorta.
Flexbox can do vertical columns with ragged endings too
But it’s not quite as clever, because you’ll need to set a height of some kind to get it to wrap the columns. You’ll also have to be explicit about widths rather than having it decide columns for you.
But it’s doable and it does auto space the gaps if there is room.
If it’s just the uneven brick-like look you’re after, then horizontal masonry is way easier. You could probably even float stuff if you don’t care about the ragged edge. If you wanna keep it a block… flexbox with allowed flex-grow is the ticket.
CSS grid is very amazing and useful in a CSS developer’s everyday life, but it’s not really designed for masonry style layouts. CSS grid is about defining lines and placing things along those lines, where masonry is about letting elements end where they may, but still exerting some positional influence.
Balázs Sziklai has a nice example of auto-flowing grids that all stack together nicely, with pretty good horiziontal ordering:
But you can see how strict the lines are. There is a way though!
Grid + JavaScript-maniplated row spans
Andy Barefoot wrote up a great guide. The trick is setting up repeating grid rows that are fairly short, letting the elements fall into the grid horizontally as they may, then adjusting their heights to match the grid with some fairly light math to calculate how many rows they should span.
What people generally want is column-stacking (varied heights on elements), but with horizontal ordering. That last grid demo above handles it pretty well, but it’s not the only way.
Jesse Korzan tackled it with CSS columns. It needs JavaScript as well to get it done. In this case, it shifts the elements in the DOM to order them left-to-right while providing a horizontal stack using a CSS columns layout. This introduces a bit of an accessibility problem since the visual order (left-to-right) and source order (top-to-bottom) are super different & dash; though perhaps fixable with programmatic tabindex?
I’m a huge fan of CSS Grid and I use it on pretty much every project these days. However, there’s one part of it that makes things much more complicated than they really ought to be: the lack of subgrids. And in this post on the matter, Ken Bellows explains why they’d be so gosh darn useful:
But one thing still missing from the Level 1 spec is the ability to create a subgrid, a grid-item with its own grid that aligns in one or both dimensions with the parent grid. It was originally planned to be in Level 1, but the working group decided they needed more time to work out the details, so it was removed, and it will ship in CSS Grid Layout Module Level 2, which seems to be nearing completion.
There has been a lot of discussion over the last 2 years about the use cases for subgrid, how it should be implemented, and even some debate over whether you even need it. A lot of that discussion was centered around two other approaches that can handle many of the same problems as subgrid: nested grids and display: contents
I remember one of the very first websites I worked on was much like the demo that Ken uses as an example, but this was way back in 2012 and grid didn’t exist yet. Sadly, I had to write a lot more CSS than I felt was necessary to get elements in one div to line up with elements in another. Anyway, this article kinda riffs off of Rachel Andrew’s post about subgrid and what problems it would help solve which is definitely worth checking out, too.
Looking to get ahead of your competitors? Are you a designer whose client needs a quick template?In this tutorial, I’ll show you how to make a marketing brochure template in Adobe InDesign.
Marketing brochures are an essential tool to reach your audience. With many brochure templates out there, yours needs to stand out. Brochure design is one of those things that business can easily overlook, but designing something professional and eye-catching can create a positive impact.
In this tutorial, I’ll show you how to make a business brochure in InDesign. I’ll walk you through the main tools you need to create a vibrant template that can be used time and time again. Drag and drop images, easily add content, edit the color palette, and make your way to success!
What You Will Need
You’ll need access to Adobe InDesign and Adobe Illustrator. If you don’t have the software, you can download a trial from the Adobe website. You’ll also need the following:
In InDesign, go to File > New. Name the document Marketing Brochure Template. We will create an A4 brochure template.Set the file to the following dimensions:
Width to 21 cm
Height to 29.7 cm
Orientation to Portrait
Pages to 4
Check Facing Pages
Margins to 1.5 cm
Bleeds to 0.3 cm (it’s best to seek your professional printer’s preference)
Click Create.
Step 2
For this brochure design tutorial, we will work with two Layers. Organizing layers is an important practice when designing a template as it will make it easier to customize.
Bring up the Layers panel by going to Window > Layers. Double-click on Layer 1 and rename it Images/Vector. On the Layers panel main menu, select New Layer. Name it Copy. Click OK. This is where all of the text will go.
You can move between layers as we design the brochure. If you forget to do this, you can also move elements later on. Select an object, click and drag the square to the right, and move the elements in between the layers.
Step 3
Before we start with the design, let’s organize the color swatches. Head over to Window > Color > Swatches to expand the Swatches panel. Select the default swatches, and Right-Click > Delete Swatch.
Choose New Color Swatch button from the main menu. Add the following colors:
Yellow: C=0 M=20 Y=100 K=0
Red: C=0 M=90 Y=45 K=0
Purple: C=50 M=100 Y=30 K=45
Click Add after you input each color value. Click Done.
Step 4
Paragraph styles are a great tool when creating a template. We can set text styles, similar to the colors on the Swatches panel. This will allow us to create a cohesive look throughout the brochure template. It will also be faster to edit to specific brand guidelines. For this project, we will set styles for a cover title, cover tagline, title, subtitle, body copy, and pull quote.
Open up the Paragraph Styles panel by going to Windows > Styles > Paragraph Styles. From the main menu, select New Paragraph Style.
In the New Paragraph Style option window, set the Style Name to Cover Title. Select Basic Character Formats from the left side menu and use the following settings:
Font Family:Bw Modelica
Font Style:Medium Condensed
Size:30 pt
Leading: 36 pt
Select the Character Color option from the left menu. Set the color to purple. Click OK.
Perfect! Now let’s create a few more styles, and then we will be ready to format the text boxes. Use the following settings for the Cover Tagline:
Font Family:Bw Modelica
Font Style:Thin Condensed
Size:18 pt
Leading: Auto
Set the Character Color to red. Click OK.
Use the following settings for the Title:
Font Family:Bw Modelica
Font Style:Black Condensed
Size:24 pt
Leading:Auto
Set the Character Color to red. Click OK.
Use the following settings for the Subtitle:
Font Family:Bw Modelica
Font Style:Black Condensed
Size:10 pt
Leading:13 pt
Set the Character Color to red. Click OK.
Use the following settings for the Body Copy:
Font Family:Bw Modelica
Font Style:Regular Condensed
Size:10 pt
Leading:13 pt
Set the Character Color to black. Click OK.
Use the following settings for the Pull-quote:
Font Family:Bw Modelica
Font Style:Bold Condensed
Size:14 pt
Leading:Auto
Set the Character Color to purple. Click OK.
2. How to Place Images and Create Graphics
Step 1
From the Toolbar, select the Rectangle Tool (M). Click on the document to open the Rectangle option window. Set the Width and Height to 21.5 cm. Click OK.
Place the rectangle at the top of the page.
Step 2
Head over to the Toolbar and select the Add Anchor Point Tool (+). Add a point on the bottom side of the rectangle, about two-thirds of the way across from the left.
Using the Direct Selection Tool (A), select the point and move downwards — about 1.5cm. Use the X and Y location points from the Control panel. It doesn’t have to be exact, so feel free to add your spin.
On the Control panel, activate the Constrain Proportions for Scaling button. Set the Scale to 60%.
Step 4
Often, when using multiple images, there’s a chance they will have a different editing color style. To create a cohesive look, we can add a neutral layer over the top.
Duplicate the image by pressing Option and dragging. Using the Direct Selection Tool (A), delete the image in the frame. Set the color to black from the Swatches panel. Open the Effects panel. If you don’t have it active, head over to Windows > Effects. Set the Blend Mode to Saturation.
Step 5
We will build some graphics that can reinforce any brand’s guideline on the cover. Select the Rectangle Tool (M) from the Toolbar. Click on the document and set the Width to 15.5 cm and the Height to 1 cm.
Place the rectangle under the image. Make sure that the top right corner of the rectangle is aligned with the point we added on the frame of the image.
Step 6
Head over to the Control panel, and set the Rotation angle to -5 and the Shear angle to -5. The rectangle should be aligned to the angle of the image. You can also do it manually by using the Direct Selection Tool (A). Select the two points on either side of the rectangle and adjust as you need.
Using the Swatches panel, set the color to yellow.
Step 7
Duplicate the image by pressing Option and dragging the object. Right-click on the object and select Transform > Flip Horizontal. Place this new object next to the yellow stripe.
Using the Direct Selection Tool (A), select the top points on the right of the object and adjust them to meet the angle.
In this case, the image we are placing has four logos in it. Make the box smaller by dragging from one of the corners with the Selection Tool (V). This is great to enclose a single logo. Place the logo on the bottom left portion of the page.
To resize the frame, press Shift-Command and drag from one of the corners.
Step 9
On the Layers panel, select the Copy layer.
Add a brochure title with the Text Tool (T). Create a text box and add a headline and a tagline. Once you have the copy typed in, use the Paragraph Styles panel to format it. Set the title to the Cover Title style and the tagline to the Tagline style.
Head over to the Control panel while editing the text frame. Set the text to Align to the Right.
You can also edit the text further after using the styles. Using the Text Tool (T), select the second line of the title. Head over to the Control panel, and set the family to Black Condensed.
Step 10
On the Layers panel, select the Images layer.
Let’s work on the inside spread. Duplicate the graphics on the cover by pressing Command-C to Copy. Press Command-V to Paste in the inside pages. Place the graphic’s lowest point on the right-hand-side page. Use the Direct Selection Tool (A) to move the points towards the bleed.
Using the Swatches panel, set the first stripe color to red and the second one to yellow. Select both objects and press Command-L to Lock them in place.
Using the Direct Selection Tool (A), adjust the corners to hide behind the graphics we created.
3. How to Format Text Boxes
Step 1
On the Layers panel, select the Copy layer.
Using the Text Tool (T), create text boxes and add copy. Let’s start formatting the left-hand-side page.
Select the text box and press Command-B to open the Text Frame Options. Under the General tab, set the Column Number to 2. Click OK.
Using the Paragraph Styles panel, format the text with the Subtitle and Body Copy styles.
Select the title and the empty line underneath. Open the Paragraph panel—if you don’t have it open, head over to Window > Type & Tables > Paragraph. From the main menu, select Span Columns. Set the Span to All. Click OK.
Step 2
Using the Text Tool (T), create a text box to add a pull quote. After adding the text, select the text box and head over to the Swatches panel. Set the color to yellow. On the Paragraph Styles panel, format the text to the Pull-quote style.
Press Command-D to open the Text Frame Options. Under the General tab, set the Inset Spacing to 0.3 cm. Activate the Make all settings the same button.
Using the Pen Tool (P), create a triangle with its corner pointing to the left.
Step 3
We will be adding a round photo on this portion of the page. Using the Ellipse Tool (L), create a 9 cm diameter circle. Select the circle and press Command-D to Place an image within it. Select the Smiling young African female entrepreneur image. Click Open.
Head over to the Swatches panel, select the Stroke swatch and set the color to yellow.
Open the Text Wrap panel (Window > Text Wrap). Select the Wrap Around Object Shape button. Set the Offset to 1 cm.
Step 4
Create a text box on the opposite side of the page with the Text Tool (T). Cover half of the page with the text.Use the Paragraph Styles to format the copy.
Change the color of each icon by using the Swatches panel, selecting the purple color.
Place the icons on top of each other, with the bottom icon near the bottom margin. Select all three icons and head over to the Align panel (Window > Object & Layout > Align). Set the Align Horizontal Center button.
Step 6
Using the Ellipse Tool (L), create a circle around each icon. Start at the center of each icon and press Shift-Option and drag. This shortcut will help you start the circle from the center. To align the icon and the circle, use the Align panel. This time, select the Align Horizontal Center and Align Vertical Center buttons.
Using the Line Tool (\), draw a line connecting each circle. Set the stroke color to yellow on the Swatches panel. On the Control panel, set the Stroke Weight to 3 pt.
Step 7
Using the Text Tool (T), create a text box for each icon. Using the Paragraph Styles, format the text with the Subtitle and the Body Copy styles.
Step 8
Copy (Command-C) and paste (Command-V) the graphics used on the cover and inside spreads.
Press Command-D to Place the Woman’s hands working image. Place the image on the bottom portion of the back cover. Using the Direct Selection Tool (A), adjust each corner point of the frame to fit the graphic.
Duplicate the image by pressing Option and dragging. Using the Direct Selection Tool (A), delete the image. Set the color to black in the Swatches panel. On the Effects panel, set the Blend Mode to Saturation. Place the layer on top of the image. To move both objects to the back, press Shift-Command-[.
Step 9
Select the Rectangle Tool (M) from the Toolbar. Draw a rectangle to cover the top portion of the back cover. On the Swatches panel, set the Fill color to yellow. To move the object to the background, press Shift-Command-[. Lock the object by pressing Command-L.
Place a logo by pressing Command-D. Since the background is yellow, use the greyscale logo. The colors won’t interfere with the background. Place the logo in the top left corner of the brochure.
Select the Text Tool (T) from the Toolbar. Add a text box on the top right corner and add contact information. On the Paragraph Styles panel, select the Body Copy style.
To complete the back cover, adding a tagline could be beneficial. Add a text box in the center of the page. Set the style on the Paragraph Styles to Pull-quote.
4.How to Export a PDF File for Printing
Before exporting a file for printing, it is useful to take a look around the edges of each page. Make sure all the objects that are meant to bleed out of the image are touching the bleeds.
Step 1
To export the file, go to File > Export. Name the file Marketing Brochure Templateand choose Adobe PDF (Print) from the Format dropdown menu. Click Save.
Step 2
In the Export Adobe PDF window, set the Adobe PDF Preset to Press Quality.
On the left side of the panel, select Marks and Bleeds. Check All Printer’s Marks and Use Document Bleed Settings. Click Export. You will have a ready-to-print PDF file.
Great Job! You’ve Finished This Tutorial!
In this tutorial, you learned how to make a marketing brochure template in InDesign. You’ve learned the basic tools you need to create a successful marketing strategy. Today, you’ve learned to:
create a ready-to-print Adobe InDesign file
use the Layers panel
use the Paragraph Styles panel
use the Color Swatches panel
create multiple text columns using the Text Frame Options
Looking to get ahead of your competitors? Are you a designer whose client needs a quick template?In this tutorial, I’ll show you how to make a marketing brochure template in Adobe InDesign.
Marketing brochures are an essential tool to reach your audience. With many brochure templates out there, yours needs to stand out. Brochure design is one of those things that business can easily overlook, but designing something professional and eye-catching can create a positive impact.
In this tutorial, I’ll show you how to make a business brochure in InDesign. I’ll walk you through the main tools you need to create a vibrant template that can be used time and time again. Drag and drop images, easily add content, edit the color palette, and make your way to success!
What You Will Need
You’ll need access to Adobe InDesign and Adobe Illustrator. If you don’t have the software, you can download a trial from the Adobe website. You’ll also need the following:
In InDesign, go to File > New. Name the document Marketing Brochure Template. We will create an A4 brochure template.Set the file to the following dimensions:
Width to 21 cm
Height to 29.7 cm
Orientation to Portrait
Pages to 4
Check Facing Pages
Margins to 1.5 cm
Bleeds to 0.3 cm (it’s best to seek your professional printer’s preference)
Click Create.
Step 2
For this brochure design tutorial, we will work with two Layers. Organizing layers is an important practice when designing a template as it will make it easier to customize.
Bring up the Layers panel by going to Window > Layers. Double-click on Layer 1 and rename it Images/Vector. On the Layers panel main menu, select New Layer. Name it Copy. Click OK. This is where all of the text will go.
You can move between layers as we design the brochure. If you forget to do this, you can also move elements later on. Select an object, click and drag the square to the right, and move the elements in between the layers.
Step 3
Before we start with the design, let’s organize the color swatches. Head over to Window > Color > Swatches to expand the Swatches panel. Select the default swatches, and Right-Click > Delete Swatch.
Choose New Color Swatch button from the main menu. Add the following colors:
Yellow: C=0 M=20 Y=100 K=0
Red: C=0 M=90 Y=45 K=0
Purple: C=50 M=100 Y=30 K=45
Click Add after you input each color value. Click Done.
Step 4
Paragraph styles are a great tool when creating a template. We can set text styles, similar to the colors on the Swatches panel. This will allow us to create a cohesive look throughout the brochure template. It will also be faster to edit to specific brand guidelines. For this project, we will set styles for a cover title, cover tagline, title, subtitle, body copy, and pull quote.
Open up the Paragraph Styles panel by going to Windows > Styles > Paragraph Styles. From the main menu, select New Paragraph Style.
In the New Paragraph Style option window, set the Style Name to Cover Title. Select Basic Character Formats from the left side menu and use the following settings:
Font Family:Bw Modelica
Font Style:Medium Condensed
Size:30 pt
Leading: 36 pt
Select the Character Color option from the left menu. Set the color to purple. Click OK.
Perfect! Now let’s create a few more styles, and then we will be ready to format the text boxes. Use the following settings for the Cover Tagline:
Font Family:Bw Modelica
Font Style:Thin Condensed
Size:18 pt
Leading: Auto
Set the Character Color to red. Click OK.
Use the following settings for the Title:
Font Family:Bw Modelica
Font Style:Black Condensed
Size:24 pt
Leading:Auto
Set the Character Color to red. Click OK.
Use the following settings for the Subtitle:
Font Family:Bw Modelica
Font Style:Black Condensed
Size:10 pt
Leading:13 pt
Set the Character Color to red. Click OK.
Use the following settings for the Body Copy:
Font Family:Bw Modelica
Font Style:Regular Condensed
Size:10 pt
Leading:13 pt
Set the Character Color to black. Click OK.
Use the following settings for the Pull-quote:
Font Family:Bw Modelica
Font Style:Bold Condensed
Size:14 pt
Leading:Auto
Set the Character Color to purple. Click OK.
2. How to Place Images and Create Graphics
Step 1
From the Toolbar, select the Rectangle Tool (M). Click on the document to open the Rectangle option window. Set the Width and Height to 21.5 cm. Click OK.
Place the rectangle at the top of the page.
Step 2
Head over to the Toolbar and select the Add Anchor Point Tool (+). Add a point on the bottom side of the rectangle, about two-thirds of the way across from the left.
Using the Direct Selection Tool (A), select the point and move downwards — about 1.5cm. Use the X and Y location points from the Control panel. It doesn’t have to be exact, so feel free to add your spin.
On the Control panel, activate the Constrain Proportions for Scaling button. Set the Scale to 60%.
Step 4
Often, when using multiple images, there’s a chance they will have a different editing color style. To create a cohesive look, we can add a neutral layer over the top.
Duplicate the image by pressing Option and dragging. Using the Direct Selection Tool (A), delete the image in the frame. Set the color to black from the Swatches panel. Open the Effects panel. If you don’t have it active, head over to Windows > Effects. Set the Blend Mode to Saturation.
Step 5
We will build some graphics that can reinforce any brand’s guideline on the cover. Select the Rectangle Tool (M) from the Toolbar. Click on the document and set the Width to 15.5 cm and the Height to 1 cm.
Place the rectangle under the image. Make sure that the top right corner of the rectangle is aligned with the point we added on the frame of the image.
Step 6
Head over to the Control panel, and set the Rotation angle to -5 and the Shear angle to -5. The rectangle should be aligned to the angle of the image. You can also do it manually by using the Direct Selection Tool (A). Select the two points on either side of the rectangle and adjust as you need.
Using the Swatches panel, set the color to yellow.
Step 7
Duplicate the image by pressing Option and dragging the object. Right-click on the object and select Transform > Flip Horizontal. Place this new object next to the yellow stripe.
Using the Direct Selection Tool (A), select the top points on the right of the object and adjust them to meet the angle.
In this case, the image we are placing has four logos in it. Make the box smaller by dragging from one of the corners with the Selection Tool (V). This is great to enclose a single logo. Place the logo on the bottom left portion of the page.
To resize the frame, press Shift-Command and drag from one of the corners.
Step 9
On the Layers panel, select the Copy layer.
Add a brochure title with the Text Tool (T). Create a text box and add a headline and a tagline. Once you have the copy typed in, use the Paragraph Styles panel to format it. Set the title to the Cover Title style and the tagline to the Tagline style.
Head over to the Control panel while editing the text frame. Set the text to Align to the Right.
You can also edit the text further after using the styles. Using the Text Tool (T), select the second line of the title. Head over to the Control panel, and set the family to Black Condensed.
Step 10
On the Layers panel, select the Images layer.
Let’s work on the inside spread. Duplicate the graphics on the cover by pressing Command-C to Copy. Press Command-V to Paste in the inside pages. Place the graphic’s lowest point on the right-hand-side page. Use the Direct Selection Tool (A) to move the points towards the bleed.
Using the Swatches panel, set the first stripe color to red and the second one to yellow. Select both objects and press Command-L to Lock them in place.
Using the Direct Selection Tool (A), adjust the corners to hide behind the graphics we created.
3. How to Format Text Boxes
Step 1
On the Layers panel, select the Copy layer.
Using the Text Tool (T), create text boxes and add copy. Let’s start formatting the left-hand-side page.
Select the text box and press Command-B to open the Text Frame Options. Under the General tab, set the Column Number to 2. Click OK.
Using the Paragraph Styles panel, format the text with the Subtitle and Body Copy styles.
Select the title and the empty line underneath. Open the Paragraph panel—if you don’t have it open, head over to Window > Type & Tables > Paragraph. From the main menu, select Span Columns. Set the Span to All. Click OK.
Step 2
Using the Text Tool (T), create a text box to add a pull quote. After adding the text, select the text box and head over to the Swatches panel. Set the color to yellow. On the Paragraph Styles panel, format the text to the Pull-quote style.
Press Command-D to open the Text Frame Options. Under the General tab, set the Inset Spacing to 0.3 cm. Activate the Make all settings the same button.
Using the Pen Tool (P), create a triangle with its corner pointing to the left.
Step 3
We will be adding a round photo on this portion of the page. Using the Ellipse Tool (L), create a 9 cm diameter circle. Select the circle and press Command-D to Place an image within it. Select the Smiling young African female entrepreneur image. Click Open.
Head over to the Swatches panel, select the Stroke swatch and set the color to yellow.
Open the Text Wrap panel (Window > Text Wrap). Select the Wrap Around Object Shape button. Set the Offset to 1 cm.
Step 4
Create a text box on the opposite side of the page with the Text Tool (T). Cover half of the page with the text.Use the Paragraph Styles to format the copy.
Change the color of each icon by using the Swatches panel, selecting the purple color.
Place the icons on top of each other, with the bottom icon near the bottom margin. Select all three icons and head over to the Align panel (Window > Object & Layout > Align). Set the Align Horizontal Center button.
Step 6
Using the Ellipse Tool (L), create a circle around each icon. Start at the center of each icon and press Shift-Option and drag. This shortcut will help you start the circle from the center. To align the icon and the circle, use the Align panel. This time, select the Align Horizontal Center and Align Vertical Center buttons.
Using the Line Tool (\), draw a line connecting each circle. Set the stroke color to yellow on the Swatches panel. On the Control panel, set the Stroke Weight to 3 pt.
Step 7
Using the Text Tool (T), create a text box for each icon. Using the Paragraph Styles, format the text with the Subtitle and the Body Copy styles.
Step 8
Copy (Command-C) and paste (Command-V) the graphics used on the cover and inside spreads.
Press Command-D to Place the Woman’s hands working image. Place the image on the bottom portion of the back cover. Using the Direct Selection Tool (A), adjust each corner point of the frame to fit the graphic.
Duplicate the image by pressing Option and dragging. Using the Direct Selection Tool (A), delete the image. Set the color to black in the Swatches panel. On the Effects panel, set the Blend Mode to Saturation. Place the layer on top of the image. To move both objects to the back, press Shift-Command-[.
Step 9
Select the Rectangle Tool (M) from the Toolbar. Draw a rectangle to cover the top portion of the back cover. On the Swatches panel, set the Fill color to yellow. To move the object to the background, press Shift-Command-[. Lock the object by pressing Command-L.
Place a logo by pressing Command-D. Since the background is yellow, use the greyscale logo. The colors won’t interfere with the background. Place the logo in the top left corner of the brochure.
Select the Text Tool (T) from the Toolbar. Add a text box on the top right corner and add contact information. On the Paragraph Styles panel, select the Body Copy style.
To complete the back cover, adding a tagline could be beneficial. Add a text box in the center of the page. Set the style on the Paragraph Styles to Pull-quote.
4.How to Export a PDF File for Printing
Before exporting a file for printing, it is useful to take a look around the edges of each page. Make sure all the objects that are meant to bleed out of the image are touching the bleeds.
Step 1
To export the file, go to File > Export. Name the file Marketing Brochure Templateand choose Adobe PDF (Print) from the Format dropdown menu. Click Save.
Step 2
In the Export Adobe PDF window, set the Adobe PDF Preset to Press Quality.
On the left side of the panel, select Marks and Bleeds. Check All Printer’s Marks and Use Document Bleed Settings. Click Export. You will have a ready-to-print PDF file.
Great Job! You’ve Finished This Tutorial!
In this tutorial, you learned how to make a marketing brochure template in InDesign. You’ve learned the basic tools you need to create a successful marketing strategy. Today, you’ve learned to:
create a ready-to-print Adobe InDesign file
use the Layers panel
use the Paragraph Styles panel
use the Color Swatches panel
create multiple text columns using the Text Frame Options