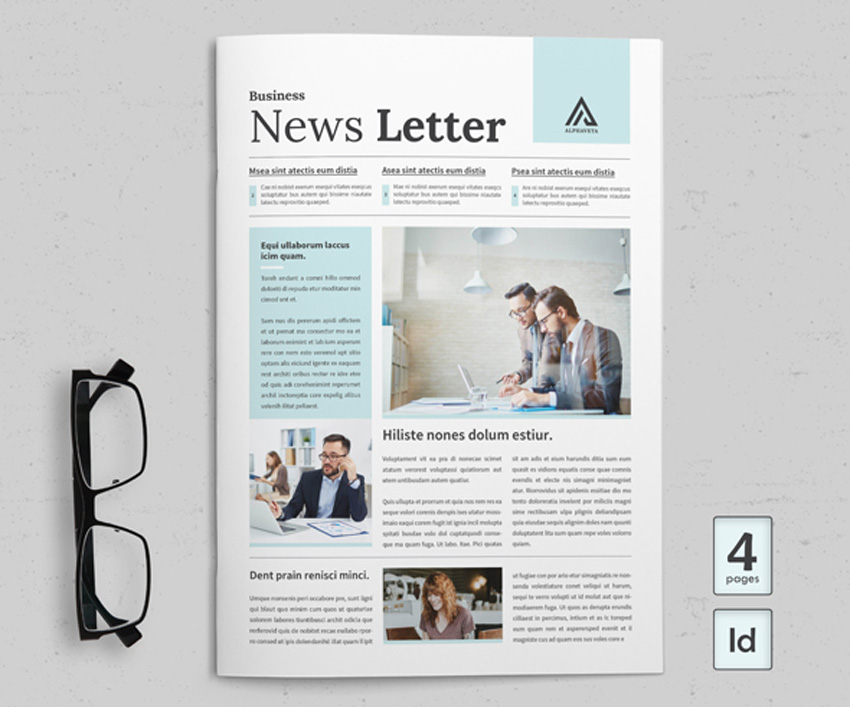
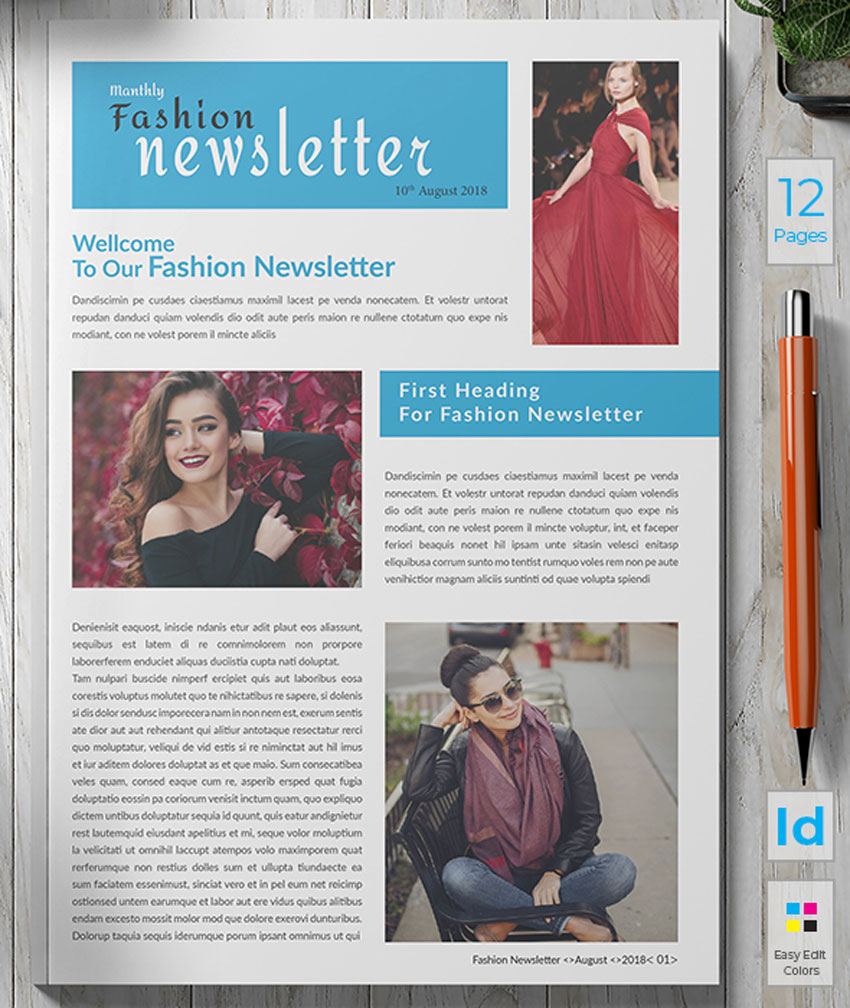
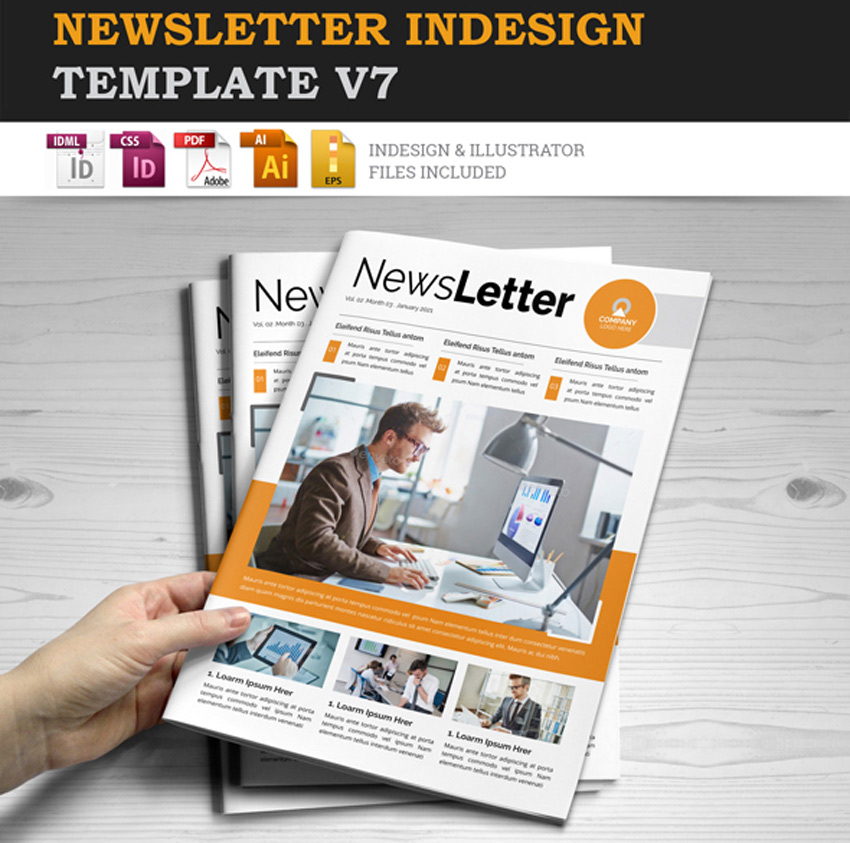
In this tutorial, you’ll learn how to create a four-page newsletter template. We’ll put this template together in no time, and you’ll be able to reuse it for your future projects.
Newsletter templates are great to communicate with your community and update them of the latest events. This clean, high-quality, professional newsletter will make the process much easier.
In this tutorial, you’ll learn how to create a newsletter template that will make it easier for you and any user to edit. You’ll be able to change anything from colors to fonts and images. We’ll create an asymmetrical layout for each page, which will set you apart from other normal newsletter templates. We’ll take a look at essential tools you need to know in InDesign that will help you in the future.
Download the assets and make sure the font is installed on your system before starting. When you are ready, we can dive in!
1.Setting Up Your Church Newsletter Template File
Step 1
In InDesign, go to File > New. In the New Document window, select the Print tab. Choose A4 from the Blank Document Presets. Name the document Church Newsletter Template. Customize the newsletter format with the following options:
Width to 21 cm
Height to 29.7 cm
Orientation to Portrait
Units to Centimeters
Pages to 4
Check Facing Pages
Columns to 6
Column Gutter to 0.5 cm
Margins: set the Top margin to 2 cm. Set the Bottom, Outside and Inside margin to 1 cm.
Bleeds to 0.3 cm (it’s best to seek your professional printer’s preference)
Click Create.
Step 2
For this church newsletter template, we will work with three Layers. Organizing layers is an important practice when designing a newsletter template as they will make it easier for users to edit.
Bring up the Layers panel by going to Window > Layers. Double-click on Layer 1 and rename it Background.
On the Layers panel main menu, select New Layer. Name it Images. Click OK.
Additionally, create a new layer named Copy. Click OK.
Step 3
Let’s add some color swatches to our newsletter design. Head over to Window > Color > Swatches to expand the Swatches panel. Choose New Color Swatch from the main menu. Set the Swatch Name and values to the following:
Sand: C=4 M=3 Y=4 K=0
Orange:C=0 M=75 Y=75 K=0
Purple:C=100 M=100 Y=20 K=15
Click Add and OK after you input each color value.
Step 4
For this newsletter tutorial, we’ll create a drop cap at the beginning of an article. Drop caps help emphasize the beginning of a story and let the reader know when they are starting a new article.
Head over to Window > Styles > Character Styles. On the Character Styles panel, add a new style and double-click to open the options window. In the Character Styles Options window, set the Style Name to Drop Cap. Use the following settings:
Font Family: Sentral
Font Style: Bold
Size: 9 pt
Select the Character Color option from the menu on the left side. Select the orange color. Click OK.
Step 5
For this newsletter design tutorial, we will create a list of Paragraph Styles that we will use to format the portfolio design template.
Head over to Window > Styles > Paragraph Styles to open the Paragraph Styles panel. On the main menu, select New Paragraph Style, setting the Style Name to Folio. Select the Basic Character Formats option from the left side menu. Use the following settings:
Font Family: Sentral
Font Style: Bold
Size: 8 pt
Tracking: 100
Click OK.
Create a New Paragraph Style, setting the Style Name to Drop Cap. Here, we’ll set the values for the copy as the drop cap style also covers the contents in the first paragraph. Set the Basic Character Formats option to the following:
Font Family: Sentral
Font Style: Regular
Size: 9 pt
Select the Indents and Spacing option from the menu on the left side. Set the Align to Grid option to All Lines (this will help keep each line of text at the same level).
Select Drop Caps and Nested Styles from the menu on the left side. Under Drop Caps, use the following settings:
Lines number to 4
Characters to 1
On the Character Style dropdown menu, select Drop Cap. Click OK.
Create a New Paragraph Style, setting the Style Name to Copy. Set the Basic Character Formats option to the following:
Font Family: Sentral
Font Style: Regular
Size: 9 pt
Select the Indents and Spacing option from the menu on the left side. Use the following settings:
Alignment to Left Justify
First Line Indent to 0.5
Align to Grid: All Lines (this will help keep each line of text at the same level)
Click OK.
Create a New Paragraph Style, setting the Style Name to Intro. Set the Basic Character Formats option to the following:
Font Family: Sentral
Font Style: Medium
Size: 15 pt
Leading: 17 pt
Tracking: -20
Select the Character Color option from the left side menu. Set the color to the orangeswatch. Click OK.
Create a New Paragraph Style, setting the Style Name to Headline. Set the Basic Character Formats option to the following:
Font Family: Sentral
Font Style: ExtraBold
Size: 39 pt
Leading: 40 pt
Tracking: -20
Select the Character Color option from the left side menu. Set the color to the purple swatch. Click OK.
Create a New Paragraph Style, setting the Style Name to Caption. Set the Basic Character Formats option to the following:
Font Family: Sentral
Font Style: Medium
Size: 8 pt
Leading: Auto
Tracking: -20
Select the Character Color option from the left side menu. Set the color to the orange swatch. Click OK.
Step 6
We’ll alter the baseline grids to fit our newsletter layout. Open the Preferences window by going to Indesign CC > Preferences > Grids. Under Baseline Grid, set the Start of the grid to 0 cm, and set the Relative to option to Top Margin and the Increment to 10.8 pt. Click OK.
To Show and Hide the baseline grid, press Option-Command-‘.
2.Setting Up Master Pages for Your Church Newsletter Template
Step 1
On the Layers panel, select the Copy layer.
Using the Text Tool (T), create a text frame in the top left corner of the left hand side newsletter design. Aim to start at 1 cm on the x-axis, using the Control panelto guide you.
To add a page number, right-click while in the text frame and select Insert Special Character > Markers > Current Page Number. The A symbolizes the page number.Add a space and bullet point by right-clicking on the frame and selecting Insert Special Character > Symbols > Bullet Character. In all caps, add the name of your company or church, followed by a bullet point and a section name.
Step 2
Using the Paragraph Styles, set the text frame to the Folio style.
Select the A and set the Font Style to Extra Bold. Change the color of Sectionon the Swatches panel to orange. This will help emphasize it.
Step 3
Using the Line Tool (/), create a horizontal line under the folio that goes from margin to margin on the newsletter layout.
On the Stroke panel (Window > Stroke), set the Weight to 0.5 pt.
Step 4
Select both items, the folio and the stroke. To Duplicate the items, press Option-Shift and drag towards the right page of the newsletter layout. By pressing Shift, you should be able to keep the x-axis alignment across the page.
Set the text frame to Align Right on the Control panel. We want this folio to mirror the one on the left side of the newsletter layout. The page number should be on the outside of the page. Swap the position of the page number with the section.
Step 5
On the Pages panel, drag the A-Master pages over pages 2-4 of the newsletter design. This will Apply this Master to those pages. Apply [None] to page 1.
3.Designing the Cover for Your Church Newsletter Template
Step 1
On the Layers panel, select the Background layer.
Using the Rectangle Tool (M), create a rectangle that measures 21.6 cm in Width and 6.5 cm in Height.
Using the Swatches panel, set the color to the Sand swatch.
Place the rectangle at the very top of the cover of the newsletter design.
Step 2
On the Layers panel, lock the Background layer and select the Copy layer.
Using the Text Tool (T), create a text box at the top of the page and add „Newsletter” as the content. With the Text Tool selected, head over to the Control panel and set the text to Align Center. Use the following settings:
Font Family: Sentral
Font Style: Extra Bold
Size: 75 pt
Tracking: -25
On the Swatches panel, set the color of the content to Purple.
Step 3
Using the Text Tool (T), create a second text frame under the title. Here, add the name of the church or company followed by a bullet point to make a clear separation. Add a date or issue number for the newsletter template.
With the Text Tool selected, head over to the Control panel and set the text to Align Center. Use the following settings:
Font Family: Sentral
Font Style: Extra Bold
Size: 12 pt
Tracking: 60
On the Swatches panel, set the color of the content to Orange.
Step 4
Using the Line Tool (/), create two strokes that extend from margin to margin. Place one stroke under „Newsletter”and the second stroke under the issue number.
Using the Stroke panel (Windows > Stroke), set the first stroke to 0.5 pt and the second stroke to 2 pt.
Step 5
Using the Text Tool (T), create a text frame under the last stroke. Press Command-B to open the Text Frame Options window. Here, set the Number of Columns to 5 and the Gutter to 0.5 cm. Click OK.
This text frame is a great opportunity to create a small table of contents. Add the number of the page, the section, and the title of the story so it is easy to find. While selecting the Text Tool (T), head over to the Control panel and use the following settings:
Font Family: Sentral
Font Style: Bold
Size: 8 pt
Feel free to use different font styles to create a hierarchy between the section titles and story titles inside the newsletter design. Using the Swatches panel, set the color of the page number and the section title to Orange. Use [Black] for the headlines.
Step 6
Using the Line Tool (/), create a vertical stroke between each column of the small table of contents. Use the gutter between each column on the newsletter layout as a guide to place the stroke.
On the Stroke panel, set the Weight to 0.75 pt and the Type to Dotted.
Step 7
To Place an image on the newsletter design, press Command-D. Navigate to the People reading in a circle and click Open.
Draw the image frame under the title and cover the width of the page.
Step 8
Using the Text Tool (T), create a text frame under the image. Use the columns we created at the beginning of the tutorial and extend the text frame to the fourth column.
Add a headline and use the Headline style from the Paragraph Styles panel to style the frame.
Open the Text Wrap panel (Window > Text Wrap) and select the text frame. Select the Wrap Around Bounding Box button and set the bottom Offset to 1 cm.
Step 9
Create a second text frame with the Text Tool (T). This time, make the width extend to the second column. Add an intro paragraph and use the Intro style from the Paragraph Styles panel to style the frame.
Place this frame at the bottom left of the cover page of the newsletter design.
Step 10
Create a text frame that covers the last four columns of the newsletter template cover. This frame is for the copy, and the headline won’t interfere as we used the Text Wrap panel to make room for it.
Add copy and set the first paragraph to the Drop Cap style from the Paragraph Style panel. Set the rest of the copy to the Copy style.
Step 11
To create a neat newsletter layout, add two strokes between the intro and text frames. Use the Line Tool (/) and set the Weight to 0.25 pt.
4.Designing the Interior of Your Church Newsletter Template
Step 1
Override the folio frame by pressing Shift-Command and clicking on the frame. Here, feel free to change the section name to fit the content on the page.
For this page, we’ll play with the six columns we created at the beginning of this tutorial. We’ll use multiple column widths to create asymmetrical layouts.
Using the Text Tool (T), create two text frames for the headline and intro. Use the Paragraph Styles panel to style both to the Headline and Intro styles.
Step 2
Place the Black middle aged man carrying his son image by pressing Command-D and clicking Open. Place it under the intro but aligned to the right margin. Use about four columns for the width of the image.
Step 3
While selecting the image, head over to the Text Wrap panel. Select the Wrap Around Bounding Box and set the Offset on all sides to 0.3 cm.
Step 4
Create a text frame under the intro. Extend the width to the third column and the length to the bottom of the page.
Create another text frame under the image. This time, leave a column between the two text frames and cover only the last two columns in width.
Add content and use the Paragraph Styles panel to style it. Use the Drop Cap and Copy styles.
Step 5
Using the Text Tool (T), add a text frame in the single column we left between the two copy text frames. Here, you’ll add a caption. Use the Paragraph Styles panel and select the Caption style.
Add two strokes between the columns with the Line Tool (/) to create a separation and polish the layout. Set the Weight of the strokes to 0.25 pt.
Step 6
Override the folio frame by pressing Shift-Command and clicking on the frame. Here, feel free to change the section name to fit the content on the page.
Using the Text Tool (T), create a text frame for the headline. Use the Paragraph Styles panel to style both to the Headline style. We’ll add an intro later.
Place the Man during a religious pilgrimage by pressing Command-D and clicking Open. Place the image under the headline, aligned to the left margin.
Make the image frame smaller than the actual image. For this, head over to the Control panel and set the Width to 10.8 cm and the Height to 9.3 cm.
While selecting the image, head over to the Text Wrap panel. Select the Wrap Around Bounding Box and set the Offset on all sides to 0.3 cm.
Step 7
Create a text frame that starts on the second column and extends to the right edge of the image. Here, add intro content and use the Intro style from the Paragraph Styles panel.
While selecting the frame, head over to the Text Wrap panel. Select the Wrap Around Bounding Box and set the Bottom Offset to 1 cm.
Step 8
Using the Text Tool (T), create a single text frame that starts on the second column and extends to the last column. As far as height goes, start under the headline and extend to the bottom margin.
While selecting the frame, press Command-B to open the Text Frame Options window. There, set the Number of Columns to 2 and the Gutter to 0.5 cm.
Add copy and use the Paragraph Styles panel to style the frame. Use the Drop Cap and Copy styles.
Step 9
Using the Text Tool (T), add a text frame in the single empty column on the very left side of the page. Here, you’ll add a caption. Use the Paragraph Styles panel and select the Caption style.
Add two strokes between the columns with the Line Tool (/) to create a separation and polish the layout. Set the Weight of the strokes to 0.25 pt.
5.Designing the Back Cover of Your InDesign Portfolio Template
Step 1
Using the Rectangle Tool (M), create a background on the whole page. Select the Sand swatch from the Swatches panel.
Override the folio frame by pressing Shift-Command and clicking on the frame. Here, feel free to change the section name to fit the content on the page.
Using the Text Tool (T), create two text frames for the headline and intro. This time, use only the first four columns for both frames. Use the Paragraph Styles panel to style both to the Headline and Intro styles.
Step 2
Place the African American male hands resting on an open bible image by pressing Command-D and clicking Open. Drag the image frame to take up the width of three columns. Place the image on the right side of the page and towards the bottom of the page, as shown in the image below.
While selecting the image, head over to the Text Wrap panel. Select the Wrap Around Bounding Box and set the Offset on all sides to 0.3 cm.
Step 3
Using the Text Tool (T), create a single text frame on the first three columns. Start the text frame at the same level as the image and extend to the bottom of the page.
Leave a column between this and create another text frame. This time, start the frame at the very top of the page and extend it to the bottom.
Add copy and use the Paragraph Styles panel to style the frame. Use the Drop Cap and Copy styles.
Step 4
Using the Text Tool (T), add a text frame in the single column we left on the very left side of the page. Here, you’ll add a caption. Use the Paragraph Styles panel and select the Caption style.
Add two strokes between the columns with the Line Tool (/) to create a separation and polish the layout. Set the Weight of the strokes to 0.25 pt.
6.How to Export a File for Printing
Before exporting a file for printing, it is useful to take a look around all the edges to make sure all the images and vectors bleeding out are touching the bleeds.
Step 1
To export the file, go to File > Export. Name the file Church Newsletter templateand choose Adobe PDF (Print) from the Format dropdown menu. Click Save.
Step 2
In the Export Adobe PDF window, set the Adobe PDF Preset to Press Quality.
On the left side of the panel, select Marks and Bleeds. Check All Printer’s Marks and Use Document Bleed Settings. Click Export. You will have a ready-to-print PDF file.
Great Job! You’ve Finished This Tutorial!
In this tutorial, you learned how to create a newsletter template. The essential tools you learned today will help you properly set up all your future InDesign templates. Today, you learned to:
set up a ready-to-print InDesign file
add Layers to keep your file organized
create Color Swatches that you can easily change
set up Paragraph Styles to help you format the template
In this tutorial, you’ll learn how to create a four-page newsletter template. We’ll put this template together in no time, and you’ll be able to reuse it for your future projects.
Newsletter templates are great to communicate with your community and update them of the latest events. This clean, high-quality, professional newsletter will make the process much easier.
In this tutorial, you’ll learn how to create a newsletter template that will make it easier for you and any user to edit. You’ll be able to change anything from colors to fonts and images. We’ll create an asymmetrical layout for each page, which will set you apart from other normal newsletter templates. We’ll take a look at essential tools you need to know in InDesign that will help you in the future.
Download the assets and make sure the font is installed on your system before starting. When you are ready, we can dive in!
1.Setting Up Your Church Newsletter Template File
Step 1
In InDesign, go to File > New. In the New Document window, select the Print tab. Choose A4 from the Blank Document Presets. Name the document Church Newsletter Template. Customize the newsletter format with the following options:
Width to 21 cm
Height to 29.7 cm
Orientation to Portrait
Units to Centimeters
Pages to 4
Check Facing Pages
Columns to 6
Column Gutter to 0.5 cm
Margins: set the Top margin to 2 cm. Set the Bottom, Outside and Inside margin to 1 cm.
Bleeds to 0.3 cm (it’s best to seek your professional printer’s preference)
Click Create.
Step 2
For this church newsletter template, we will work with three Layers. Organizing layers is an important practice when designing a newsletter template as they will make it easier for users to edit.
Bring up the Layers panel by going to Window > Layers. Double-click on Layer 1 and rename it Background.
On the Layers panel main menu, select New Layer. Name it Images. Click OK.
Additionally, create a new layer named Copy. Click OK.
Step 3
Let’s add some color swatches to our newsletter design. Head over to Window > Color > Swatches to expand the Swatches panel. Choose New Color Swatch from the main menu. Set the Swatch Name and values to the following:
Sand: C=4 M=3 Y=4 K=0
Orange:C=0 M=75 Y=75 K=0
Purple:C=100 M=100 Y=20 K=15
Click Add and OK after you input each color value.
Step 4
For this newsletter tutorial, we’ll create a drop cap at the beginning of an article. Drop caps help emphasize the beginning of a story and let the reader know when they are starting a new article.
Head over to Window > Styles > Character Styles. On the Character Styles panel, add a new style and double-click to open the options window. In the Character Styles Options window, set the Style Name to Drop Cap. Use the following settings:
Font Family: Sentral
Font Style: Bold
Size: 9 pt
Select the Character Color option from the menu on the left side. Select the orange color. Click OK.
Step 5
For this newsletter design tutorial, we will create a list of Paragraph Styles that we will use to format the portfolio design template.
Head over to Window > Styles > Paragraph Styles to open the Paragraph Styles panel. On the main menu, select New Paragraph Style, setting the Style Name to Folio. Select the Basic Character Formats option from the left side menu. Use the following settings:
Font Family: Sentral
Font Style: Bold
Size: 8 pt
Tracking: 100
Click OK.
Create a New Paragraph Style, setting the Style Name to Drop Cap. Here, we’ll set the values for the copy as the drop cap style also covers the contents in the first paragraph. Set the Basic Character Formats option to the following:
Font Family: Sentral
Font Style: Regular
Size: 9 pt
Select the Indents and Spacing option from the menu on the left side. Set the Align to Grid option to All Lines (this will help keep each line of text at the same level).
Select Drop Caps and Nested Styles from the menu on the left side. Under Drop Caps, use the following settings:
Lines number to 4
Characters to 1
On the Character Style dropdown menu, select Drop Cap. Click OK.
Create a New Paragraph Style, setting the Style Name to Copy. Set the Basic Character Formats option to the following:
Font Family: Sentral
Font Style: Regular
Size: 9 pt
Select the Indents and Spacing option from the menu on the left side. Use the following settings:
Alignment to Left Justify
First Line Indent to 0.5
Align to Grid: All Lines (this will help keep each line of text at the same level)
Click OK.
Create a New Paragraph Style, setting the Style Name to Intro. Set the Basic Character Formats option to the following:
Font Family: Sentral
Font Style: Medium
Size: 15 pt
Leading: 17 pt
Tracking: -20
Select the Character Color option from the left side menu. Set the color to the orangeswatch. Click OK.
Create a New Paragraph Style, setting the Style Name to Headline. Set the Basic Character Formats option to the following:
Font Family: Sentral
Font Style: ExtraBold
Size: 39 pt
Leading: 40 pt
Tracking: -20
Select the Character Color option from the left side menu. Set the color to the purple swatch. Click OK.
Create a New Paragraph Style, setting the Style Name to Caption. Set the Basic Character Formats option to the following:
Font Family: Sentral
Font Style: Medium
Size: 8 pt
Leading: Auto
Tracking: -20
Select the Character Color option from the left side menu. Set the color to the orange swatch. Click OK.
Step 6
We’ll alter the baseline grids to fit our newsletter layout. Open the Preferences window by going to Indesign CC > Preferences > Grids. Under Baseline Grid, set the Start of the grid to 0 cm, and set the Relative to option to Top Margin and the Increment to 10.8 pt. Click OK.
To Show and Hide the baseline grid, press Option-Command-‘.
2.Setting Up Master Pages for Your Church Newsletter Template
Step 1
On the Layers panel, select the Copy layer.
Using the Text Tool (T), create a text frame in the top left corner of the left hand side newsletter design. Aim to start at 1 cm on the x-axis, using the Control panelto guide you.
To add a page number, right-click while in the text frame and select Insert Special Character > Markers > Current Page Number. The A symbolizes the page number.Add a space and bullet point by right-clicking on the frame and selecting Insert Special Character > Symbols > Bullet Character. In all caps, add the name of your company or church, followed by a bullet point and a section name.
Step 2
Using the Paragraph Styles, set the text frame to the Folio style.
Select the A and set the Font Style to Extra Bold. Change the color of Sectionon the Swatches panel to orange. This will help emphasize it.
Step 3
Using the Line Tool (/), create a horizontal line under the folio that goes from margin to margin on the newsletter layout.
On the Stroke panel (Window > Stroke), set the Weight to 0.5 pt.
Step 4
Select both items, the folio and the stroke. To Duplicate the items, press Option-Shift and drag towards the right page of the newsletter layout. By pressing Shift, you should be able to keep the x-axis alignment across the page.
Set the text frame to Align Right on the Control panel. We want this folio to mirror the one on the left side of the newsletter layout. The page number should be on the outside of the page. Swap the position of the page number with the section.
Step 5
On the Pages panel, drag the A-Master pages over pages 2-4 of the newsletter design. This will Apply this Master to those pages. Apply [None] to page 1.
3.Designing the Cover for Your Church Newsletter Template
Step 1
On the Layers panel, select the Background layer.
Using the Rectangle Tool (M), create a rectangle that measures 21.6 cm in Width and 6.5 cm in Height.
Using the Swatches panel, set the color to the Sand swatch.
Place the rectangle at the very top of the cover of the newsletter design.
Step 2
On the Layers panel, lock the Background layer and select the Copy layer.
Using the Text Tool (T), create a text box at the top of the page and add „Newsletter” as the content. With the Text Tool selected, head over to the Control panel and set the text to Align Center. Use the following settings:
Font Family: Sentral
Font Style: Extra Bold
Size: 75 pt
Tracking: -25
On the Swatches panel, set the color of the content to Purple.
Step 3
Using the Text Tool (T), create a second text frame under the title. Here, add the name of the church or company followed by a bullet point to make a clear separation. Add a date or issue number for the newsletter template.
With the Text Tool selected, head over to the Control panel and set the text to Align Center. Use the following settings:
Font Family: Sentral
Font Style: Extra Bold
Size: 12 pt
Tracking: 60
On the Swatches panel, set the color of the content to Orange.
Step 4
Using the Line Tool (/), create two strokes that extend from margin to margin. Place one stroke under „Newsletter”and the second stroke under the issue number.
Using the Stroke panel (Windows > Stroke), set the first stroke to 0.5 pt and the second stroke to 2 pt.
Step 5
Using the Text Tool (T), create a text frame under the last stroke. Press Command-B to open the Text Frame Options window. Here, set the Number of Columns to 5 and the Gutter to 0.5 cm. Click OK.
This text frame is a great opportunity to create a small table of contents. Add the number of the page, the section, and the title of the story so it is easy to find. While selecting the Text Tool (T), head over to the Control panel and use the following settings:
Font Family: Sentral
Font Style: Bold
Size: 8 pt
Feel free to use different font styles to create a hierarchy between the section titles and story titles inside the newsletter design. Using the Swatches panel, set the color of the page number and the section title to Orange. Use [Black] for the headlines.
Step 6
Using the Line Tool (/), create a vertical stroke between each column of the small table of contents. Use the gutter between each column on the newsletter layout as a guide to place the stroke.
On the Stroke panel, set the Weight to 0.75 pt and the Type to Dotted.
Step 7
To Place an image on the newsletter design, press Command-D. Navigate to the People reading in a circle and click Open.
Draw the image frame under the title and cover the width of the page.
Step 8
Using the Text Tool (T), create a text frame under the image. Use the columns we created at the beginning of the tutorial and extend the text frame to the fourth column.
Add a headline and use the Headline style from the Paragraph Styles panel to style the frame.
Open the Text Wrap panel (Window > Text Wrap) and select the text frame. Select the Wrap Around Bounding Box button and set the bottom Offset to 1 cm.
Step 9
Create a second text frame with the Text Tool (T). This time, make the width extend to the second column. Add an intro paragraph and use the Intro style from the Paragraph Styles panel to style the frame.
Place this frame at the bottom left of the cover page of the newsletter design.
Step 10
Create a text frame that covers the last four columns of the newsletter template cover. This frame is for the copy, and the headline won’t interfere as we used the Text Wrap panel to make room for it.
Add copy and set the first paragraph to the Drop Cap style from the Paragraph Style panel. Set the rest of the copy to the Copy style.
Step 11
To create a neat newsletter layout, add two strokes between the intro and text frames. Use the Line Tool (/) and set the Weight to 0.25 pt.
4.Designing the Interior of Your Church Newsletter Template
Step 1
Override the folio frame by pressing Shift-Command and clicking on the frame. Here, feel free to change the section name to fit the content on the page.
For this page, we’ll play with the six columns we created at the beginning of this tutorial. We’ll use multiple column widths to create asymmetrical layouts.
Using the Text Tool (T), create two text frames for the headline and intro. Use the Paragraph Styles panel to style both to the Headline and Intro styles.
Step 2
Place the Black middle aged man carrying his son image by pressing Command-D and clicking Open. Place it under the intro but aligned to the right margin. Use about four columns for the width of the image.
Step 3
While selecting the image, head over to the Text Wrap panel. Select the Wrap Around Bounding Box and set the Offset on all sides to 0.3 cm.
Step 4
Create a text frame under the intro. Extend the width to the third column and the length to the bottom of the page.
Create another text frame under the image. This time, leave a column between the two text frames and cover only the last two columns in width.
Add content and use the Paragraph Styles panel to style it. Use the Drop Cap and Copy styles.
Step 5
Using the Text Tool (T), add a text frame in the single column we left between the two copy text frames. Here, you’ll add a caption. Use the Paragraph Styles panel and select the Caption style.
Add two strokes between the columns with the Line Tool (/) to create a separation and polish the layout. Set the Weight of the strokes to 0.25 pt.
Step 6
Override the folio frame by pressing Shift-Command and clicking on the frame. Here, feel free to change the section name to fit the content on the page.
Using the Text Tool (T), create a text frame for the headline. Use the Paragraph Styles panel to style both to the Headline style. We’ll add an intro later.
Place the Man during a religious pilgrimage by pressing Command-D and clicking Open. Place the image under the headline, aligned to the left margin.
Make the image frame smaller than the actual image. For this, head over to the Control panel and set the Width to 10.8 cm and the Height to 9.3 cm.
While selecting the image, head over to the Text Wrap panel. Select the Wrap Around Bounding Box and set the Offset on all sides to 0.3 cm.
Step 7
Create a text frame that starts on the second column and extends to the right edge of the image. Here, add intro content and use the Intro style from the Paragraph Styles panel.
While selecting the frame, head over to the Text Wrap panel. Select the Wrap Around Bounding Box and set the Bottom Offset to 1 cm.
Step 8
Using the Text Tool (T), create a single text frame that starts on the second column and extends to the last column. As far as height goes, start under the headline and extend to the bottom margin.
While selecting the frame, press Command-B to open the Text Frame Options window. There, set the Number of Columns to 2 and the Gutter to 0.5 cm.
Add copy and use the Paragraph Styles panel to style the frame. Use the Drop Cap and Copy styles.
Step 9
Using the Text Tool (T), add a text frame in the single empty column on the very left side of the page. Here, you’ll add a caption. Use the Paragraph Styles panel and select the Caption style.
Add two strokes between the columns with the Line Tool (/) to create a separation and polish the layout. Set the Weight of the strokes to 0.25 pt.
5.Designing the Back Cover of Your InDesign Portfolio Template
Step 1
Using the Rectangle Tool (M), create a background on the whole page. Select the Sand swatch from the Swatches panel.
Override the folio frame by pressing Shift-Command and clicking on the frame. Here, feel free to change the section name to fit the content on the page.
Using the Text Tool (T), create two text frames for the headline and intro. This time, use only the first four columns for both frames. Use the Paragraph Styles panel to style both to the Headline and Intro styles.
Step 2
Place the African American male hands resting on an open bible image by pressing Command-D and clicking Open. Drag the image frame to take up the width of three columns. Place the image on the right side of the page and towards the bottom of the page, as shown in the image below.
While selecting the image, head over to the Text Wrap panel. Select the Wrap Around Bounding Box and set the Offset on all sides to 0.3 cm.
Step 3
Using the Text Tool (T), create a single text frame on the first three columns. Start the text frame at the same level as the image and extend to the bottom of the page.
Leave a column between this and create another text frame. This time, start the frame at the very top of the page and extend it to the bottom.
Add copy and use the Paragraph Styles panel to style the frame. Use the Drop Cap and Copy styles.
Step 4
Using the Text Tool (T), add a text frame in the single column we left on the very left side of the page. Here, you’ll add a caption. Use the Paragraph Styles panel and select the Caption style.
Add two strokes between the columns with the Line Tool (/) to create a separation and polish the layout. Set the Weight of the strokes to 0.25 pt.
6.How to Export a File for Printing
Before exporting a file for printing, it is useful to take a look around all the edges to make sure all the images and vectors bleeding out are touching the bleeds.
Step 1
To export the file, go to File > Export. Name the file Church Newsletter templateand choose Adobe PDF (Print) from the Format dropdown menu. Click Save.
Step 2
In the Export Adobe PDF window, set the Adobe PDF Preset to Press Quality.
On the left side of the panel, select Marks and Bleeds. Check All Printer’s Marks and Use Document Bleed Settings. Click Export. You will have a ready-to-print PDF file.
Great Job! You’ve Finished This Tutorial!
In this tutorial, you learned how to create a newsletter template. The essential tools you learned today will help you properly set up all your future InDesign templates. Today, you learned to:
set up a ready-to-print InDesign file
add Layers to keep your file organized
create Color Swatches that you can easily change
set up Paragraph Styles to help you format the template
In this tutorial, you’ll learn how to create a four-page newsletter template. We’ll put this template together in no time, and you’ll be able to reuse it for your future projects.
Newsletter templates are great to communicate with your community and update them of the latest events. This clean, high-quality, professional newsletter will make the process much easier.
In this tutorial, you’ll learn how to create a newsletter template that will make it easier for you and any user to edit. You’ll be able to change anything from colors to fonts and images. We’ll create an asymmetrical layout for each page, which will set you apart from other normal newsletter templates. We’ll take a look at essential tools you need to know in InDesign that will help you in the future.
Download the assets and make sure the font is installed on your system before starting. When you are ready, we can dive in!
1.Setting Up Your Church Newsletter Template File
Step 1
In InDesign, go to File > New. In the New Document window, select the Print tab. Choose A4 from the Blank Document Presets. Name the document Church Newsletter Template. Customize the newsletter format with the following options:
Width to 21 cm
Height to 29.7 cm
Orientation to Portrait
Units to Centimeters
Pages to 4
Check Facing Pages
Columns to 6
Column Gutter to 0.5 cm
Margins: set the Top margin to 2 cm. Set the Bottom, Outside and Inside margin to 1 cm.
Bleeds to 0.3 cm (it’s best to seek your professional printer’s preference)
Click Create.
Step 2
For this church newsletter template, we will work with three Layers. Organizing layers is an important practice when designing a newsletter template as they will make it easier for users to edit.
Bring up the Layers panel by going to Window > Layers. Double-click on Layer 1 and rename it Background.
On the Layers panel main menu, select New Layer. Name it Images. Click OK.
Additionally, create a new layer named Copy. Click OK.
Step 3
Let’s add some color swatches to our newsletter design. Head over to Window > Color > Swatches to expand the Swatches panel. Choose New Color Swatch from the main menu. Set the Swatch Name and values to the following:
Sand: C=4 M=3 Y=4 K=0
Orange:C=0 M=75 Y=75 K=0
Purple:C=100 M=100 Y=20 K=15
Click Add and OK after you input each color value.
Step 4
For this newsletter tutorial, we’ll create a drop cap at the beginning of an article. Drop caps help emphasize the beginning of a story and let the reader know when they are starting a new article.
Head over to Window > Styles > Character Styles. On the Character Styles panel, add a new style and double-click to open the options window. In the Character Styles Options window, set the Style Name to Drop Cap. Use the following settings:
Font Family: Sentral
Font Style: Bold
Size: 9 pt
Select the Character Color option from the menu on the left side. Select the orange color. Click OK.
Step 5
For this newsletter design tutorial, we will create a list of Paragraph Styles that we will use to format the portfolio design template.
Head over to Window > Styles > Paragraph Styles to open the Paragraph Styles panel. On the main menu, select New Paragraph Style, setting the Style Name to Folio. Select the Basic Character Formats option from the left side menu. Use the following settings:
Font Family: Sentral
Font Style: Bold
Size: 8 pt
Tracking: 100
Click OK.
Create a New Paragraph Style, setting the Style Name to Drop Cap. Here, we’ll set the values for the copy as the drop cap style also covers the contents in the first paragraph. Set the Basic Character Formats option to the following:
Font Family: Sentral
Font Style: Regular
Size: 9 pt
Select the Indents and Spacing option from the menu on the left side. Set the Align to Grid option to All Lines (this will help keep each line of text at the same level).
Select Drop Caps and Nested Styles from the menu on the left side. Under Drop Caps, use the following settings:
Lines number to 4
Characters to 1
On the Character Style dropdown menu, select Drop Cap. Click OK.
Create a New Paragraph Style, setting the Style Name to Copy. Set the Basic Character Formats option to the following:
Font Family: Sentral
Font Style: Regular
Size: 9 pt
Select the Indents and Spacing option from the menu on the left side. Use the following settings:
Alignment to Left Justify
First Line Indent to 0.5
Align to Grid: All Lines (this will help keep each line of text at the same level)
Click OK.
Create a New Paragraph Style, setting the Style Name to Intro. Set the Basic Character Formats option to the following:
Font Family: Sentral
Font Style: Medium
Size: 15 pt
Leading: 17 pt
Tracking: -20
Select the Character Color option from the left side menu. Set the color to the orangeswatch. Click OK.
Create a New Paragraph Style, setting the Style Name to Headline. Set the Basic Character Formats option to the following:
Font Family: Sentral
Font Style: ExtraBold
Size: 39 pt
Leading: 40 pt
Tracking: -20
Select the Character Color option from the left side menu. Set the color to the purple swatch. Click OK.
Create a New Paragraph Style, setting the Style Name to Caption. Set the Basic Character Formats option to the following:
Font Family: Sentral
Font Style: Medium
Size: 8 pt
Leading: Auto
Tracking: -20
Select the Character Color option from the left side menu. Set the color to the orange swatch. Click OK.
Step 6
We’ll alter the baseline grids to fit our newsletter layout. Open the Preferences window by going to Indesign CC > Preferences > Grids. Under Baseline Grid, set the Start of the grid to 0 cm, and set the Relative to option to Top Margin and the Increment to 10.8 pt. Click OK.
To Show and Hide the baseline grid, press Option-Command-‘.
2.Setting Up Master Pages for Your Church Newsletter Template
Step 1
On the Layers panel, select the Copy layer.
Using the Text Tool (T), create a text frame in the top left corner of the left hand side newsletter design. Aim to start at 1 cm on the x-axis, using the Control panelto guide you.
To add a page number, right-click while in the text frame and select Insert Special Character > Markers > Current Page Number. The A symbolizes the page number.Add a space and bullet point by right-clicking on the frame and selecting Insert Special Character > Symbols > Bullet Character. In all caps, add the name of your company or church, followed by a bullet point and a section name.
Step 2
Using the Paragraph Styles, set the text frame to the Folio style.
Select the A and set the Font Style to Extra Bold. Change the color of Sectionon the Swatches panel to orange. This will help emphasize it.
Step 3
Using the Line Tool (/), create a horizontal line under the folio that goes from margin to margin on the newsletter layout.
On the Stroke panel (Window > Stroke), set the Weight to 0.5 pt.
Step 4
Select both items, the folio and the stroke. To Duplicate the items, press Option-Shift and drag towards the right page of the newsletter layout. By pressing Shift, you should be able to keep the x-axis alignment across the page.
Set the text frame to Align Right on the Control panel. We want this folio to mirror the one on the left side of the newsletter layout. The page number should be on the outside of the page. Swap the position of the page number with the section.
Step 5
On the Pages panel, drag the A-Master pages over pages 2-4 of the newsletter design. This will Apply this Master to those pages. Apply [None] to page 1.
3.Designing the Cover for Your Church Newsletter Template
Step 1
On the Layers panel, select the Background layer.
Using the Rectangle Tool (M), create a rectangle that measures 21.6 cm in Width and 6.5 cm in Height.
Using the Swatches panel, set the color to the Sand swatch.
Place the rectangle at the very top of the cover of the newsletter design.
Step 2
On the Layers panel, lock the Background layer and select the Copy layer.
Using the Text Tool (T), create a text box at the top of the page and add „Newsletter” as the content. With the Text Tool selected, head over to the Control panel and set the text to Align Center. Use the following settings:
Font Family: Sentral
Font Style: Extra Bold
Size: 75 pt
Tracking: -25
On the Swatches panel, set the color of the content to Purple.
Step 3
Using the Text Tool (T), create a second text frame under the title. Here, add the name of the church or company followed by a bullet point to make a clear separation. Add a date or issue number for the newsletter template.
With the Text Tool selected, head over to the Control panel and set the text to Align Center. Use the following settings:
Font Family: Sentral
Font Style: Extra Bold
Size: 12 pt
Tracking: 60
On the Swatches panel, set the color of the content to Orange.
Step 4
Using the Line Tool (/), create two strokes that extend from margin to margin. Place one stroke under „Newsletter”and the second stroke under the issue number.
Using the Stroke panel (Windows > Stroke), set the first stroke to 0.5 pt and the second stroke to 2 pt.
Step 5
Using the Text Tool (T), create a text frame under the last stroke. Press Command-B to open the Text Frame Options window. Here, set the Number of Columns to 5 and the Gutter to 0.5 cm. Click OK.
This text frame is a great opportunity to create a small table of contents. Add the number of the page, the section, and the title of the story so it is easy to find. While selecting the Text Tool (T), head over to the Control panel and use the following settings:
Font Family: Sentral
Font Style: Bold
Size: 8 pt
Feel free to use different font styles to create a hierarchy between the section titles and story titles inside the newsletter design. Using the Swatches panel, set the color of the page number and the section title to Orange. Use [Black] for the headlines.
Step 6
Using the Line Tool (/), create a vertical stroke between each column of the small table of contents. Use the gutter between each column on the newsletter layout as a guide to place the stroke.
On the Stroke panel, set the Weight to 0.75 pt and the Type to Dotted.
Step 7
To Place an image on the newsletter design, press Command-D. Navigate to the People reading in a circle and click Open.
Draw the image frame under the title and cover the width of the page.
Step 8
Using the Text Tool (T), create a text frame under the image. Use the columns we created at the beginning of the tutorial and extend the text frame to the fourth column.
Add a headline and use the Headline style from the Paragraph Styles panel to style the frame.
Open the Text Wrap panel (Window > Text Wrap) and select the text frame. Select the Wrap Around Bounding Box button and set the bottom Offset to 1 cm.
Step 9
Create a second text frame with the Text Tool (T). This time, make the width extend to the second column. Add an intro paragraph and use the Intro style from the Paragraph Styles panel to style the frame.
Place this frame at the bottom left of the cover page of the newsletter design.
Step 10
Create a text frame that covers the last four columns of the newsletter template cover. This frame is for the copy, and the headline won’t interfere as we used the Text Wrap panel to make room for it.
Add copy and set the first paragraph to the Drop Cap style from the Paragraph Style panel. Set the rest of the copy to the Copy style.
Step 11
To create a neat newsletter layout, add two strokes between the intro and text frames. Use the Line Tool (/) and set the Weight to 0.25 pt.
4.Designing the Interior of Your Church Newsletter Template
Step 1
Override the folio frame by pressing Shift-Command and clicking on the frame. Here, feel free to change the section name to fit the content on the page.
For this page, we’ll play with the six columns we created at the beginning of this tutorial. We’ll use multiple column widths to create asymmetrical layouts.
Using the Text Tool (T), create two text frames for the headline and intro. Use the Paragraph Styles panel to style both to the Headline and Intro styles.
Step 2
Place the Black middle aged man carrying his son image by pressing Command-D and clicking Open. Place it under the intro but aligned to the right margin. Use about four columns for the width of the image.
Step 3
While selecting the image, head over to the Text Wrap panel. Select the Wrap Around Bounding Box and set the Offset on all sides to 0.3 cm.
Step 4
Create a text frame under the intro. Extend the width to the third column and the length to the bottom of the page.
Create another text frame under the image. This time, leave a column between the two text frames and cover only the last two columns in width.
Add content and use the Paragraph Styles panel to style it. Use the Drop Cap and Copy styles.
Step 5
Using the Text Tool (T), add a text frame in the single column we left between the two copy text frames. Here, you’ll add a caption. Use the Paragraph Styles panel and select the Caption style.
Add two strokes between the columns with the Line Tool (/) to create a separation and polish the layout. Set the Weight of the strokes to 0.25 pt.
Step 6
Override the folio frame by pressing Shift-Command and clicking on the frame. Here, feel free to change the section name to fit the content on the page.
Using the Text Tool (T), create a text frame for the headline. Use the Paragraph Styles panel to style both to the Headline style. We’ll add an intro later.
Place the Man during a religious pilgrimage by pressing Command-D and clicking Open. Place the image under the headline, aligned to the left margin.
Make the image frame smaller than the actual image. For this, head over to the Control panel and set the Width to 10.8 cm and the Height to 9.3 cm.
While selecting the image, head over to the Text Wrap panel. Select the Wrap Around Bounding Box and set the Offset on all sides to 0.3 cm.
Step 7
Create a text frame that starts on the second column and extends to the right edge of the image. Here, add intro content and use the Intro style from the Paragraph Styles panel.
While selecting the frame, head over to the Text Wrap panel. Select the Wrap Around Bounding Box and set the Bottom Offset to 1 cm.
Step 8
Using the Text Tool (T), create a single text frame that starts on the second column and extends to the last column. As far as height goes, start under the headline and extend to the bottom margin.
While selecting the frame, press Command-B to open the Text Frame Options window. There, set the Number of Columns to 2 and the Gutter to 0.5 cm.
Add copy and use the Paragraph Styles panel to style the frame. Use the Drop Cap and Copy styles.
Step 9
Using the Text Tool (T), add a text frame in the single empty column on the very left side of the page. Here, you’ll add a caption. Use the Paragraph Styles panel and select the Caption style.
Add two strokes between the columns with the Line Tool (/) to create a separation and polish the layout. Set the Weight of the strokes to 0.25 pt.
5.Designing the Back Cover of Your InDesign Portfolio Template
Step 1
Using the Rectangle Tool (M), create a background on the whole page. Select the Sand swatch from the Swatches panel.
Override the folio frame by pressing Shift-Command and clicking on the frame. Here, feel free to change the section name to fit the content on the page.
Using the Text Tool (T), create two text frames for the headline and intro. This time, use only the first four columns for both frames. Use the Paragraph Styles panel to style both to the Headline and Intro styles.
Step 2
Place the African American male hands resting on an open bible image by pressing Command-D and clicking Open. Drag the image frame to take up the width of three columns. Place the image on the right side of the page and towards the bottom of the page, as shown in the image below.
While selecting the image, head over to the Text Wrap panel. Select the Wrap Around Bounding Box and set the Offset on all sides to 0.3 cm.
Step 3
Using the Text Tool (T), create a single text frame on the first three columns. Start the text frame at the same level as the image and extend to the bottom of the page.
Leave a column between this and create another text frame. This time, start the frame at the very top of the page and extend it to the bottom.
Add copy and use the Paragraph Styles panel to style the frame. Use the Drop Cap and Copy styles.
Step 4
Using the Text Tool (T), add a text frame in the single column we left on the very left side of the page. Here, you’ll add a caption. Use the Paragraph Styles panel and select the Caption style.
Add two strokes between the columns with the Line Tool (/) to create a separation and polish the layout. Set the Weight of the strokes to 0.25 pt.
6.How to Export a File for Printing
Before exporting a file for printing, it is useful to take a look around all the edges to make sure all the images and vectors bleeding out are touching the bleeds.
Step 1
To export the file, go to File > Export. Name the file Church Newsletter templateand choose Adobe PDF (Print) from the Format dropdown menu. Click Save.
Step 2
In the Export Adobe PDF window, set the Adobe PDF Preset to Press Quality.
On the left side of the panel, select Marks and Bleeds. Check All Printer’s Marks and Use Document Bleed Settings. Click Export. You will have a ready-to-print PDF file.
Great Job! You’ve Finished This Tutorial!
In this tutorial, you learned how to create a newsletter template. The essential tools you learned today will help you properly set up all your future InDesign templates. Today, you learned to:
set up a ready-to-print InDesign file
add Layers to keep your file organized
create Color Swatches that you can easily change
set up Paragraph Styles to help you format the template
In this tutorial, you’ll learn how to create a four-page newsletter template. We’ll put this template together in no time, and you’ll be able to reuse it for your future projects.
Newsletter templates are great to communicate with your community and update them of the latest events. This clean, high-quality, professional newsletter will make the process much easier.
In this tutorial, you’ll learn how to create a newsletter template that will make it easier for you and any user to edit. You’ll be able to change anything from colors to fonts and images. We’ll create an asymmetrical layout for each page, which will set you apart from other normal newsletter templates. We’ll take a look at essential tools you need to know in InDesign that will help you in the future.
Download the assets and make sure the font is installed on your system before starting. When you are ready, we can dive in!
1.Setting Up Your Church Newsletter Template File
Step 1
In InDesign, go to File > New. In the New Document window, select the Print tab. Choose A4 from the Blank Document Presets. Name the document Church Newsletter Template. Customize the newsletter format with the following options:
Width to 21 cm
Height to 29.7 cm
Orientation to Portrait
Units to Centimeters
Pages to 4
Check Facing Pages
Columns to 6
Column Gutter to 0.5 cm
Margins: set the Top margin to 2 cm. Set the Bottom, Outside and Inside margin to 1 cm.
Bleeds to 0.3 cm (it’s best to seek your professional printer’s preference)
Click Create.
Step 2
For this church newsletter template, we will work with three Layers. Organizing layers is an important practice when designing a newsletter template as they will make it easier for users to edit.
Bring up the Layers panel by going to Window > Layers. Double-click on Layer 1 and rename it Background.
On the Layers panel main menu, select New Layer. Name it Images. Click OK.
Additionally, create a new layer named Copy. Click OK.
Step 3
Let’s add some color swatches to our newsletter design. Head over to Window > Color > Swatches to expand the Swatches panel. Choose New Color Swatch from the main menu. Set the Swatch Name and values to the following:
Sand: C=4 M=3 Y=4 K=0
Orange:C=0 M=75 Y=75 K=0
Purple:C=100 M=100 Y=20 K=15
Click Add and OK after you input each color value.
Step 4
For this newsletter tutorial, we’ll create a drop cap at the beginning of an article. Drop caps help emphasize the beginning of a story and let the reader know when they are starting a new article.
Head over to Window > Styles > Character Styles. On the Character Styles panel, add a new style and double-click to open the options window. In the Character Styles Options window, set the Style Name to Drop Cap. Use the following settings:
Font Family: Sentral
Font Style: Bold
Size: 9 pt
Select the Character Color option from the menu on the left side. Select the orange color. Click OK.
Step 5
For this newsletter design tutorial, we will create a list of Paragraph Styles that we will use to format the portfolio design template.
Head over to Window > Styles > Paragraph Styles to open the Paragraph Styles panel. On the main menu, select New Paragraph Style, setting the Style Name to Folio. Select the Basic Character Formats option from the left side menu. Use the following settings:
Font Family: Sentral
Font Style: Bold
Size: 8 pt
Tracking: 100
Click OK.
Create a New Paragraph Style, setting the Style Name to Drop Cap. Here, we’ll set the values for the copy as the drop cap style also covers the contents in the first paragraph. Set the Basic Character Formats option to the following:
Font Family: Sentral
Font Style: Regular
Size: 9 pt
Select the Indents and Spacing option from the menu on the left side. Set the Align to Grid option to All Lines (this will help keep each line of text at the same level).
Select Drop Caps and Nested Styles from the menu on the left side. Under Drop Caps, use the following settings:
Lines number to 4
Characters to 1
On the Character Style dropdown menu, select Drop Cap. Click OK.
Create a New Paragraph Style, setting the Style Name to Copy. Set the Basic Character Formats option to the following:
Font Family: Sentral
Font Style: Regular
Size: 9 pt
Select the Indents and Spacing option from the menu on the left side. Use the following settings:
Alignment to Left Justify
First Line Indent to 0.5
Align to Grid: All Lines (this will help keep each line of text at the same level)
Click OK.
Create a New Paragraph Style, setting the Style Name to Intro. Set the Basic Character Formats option to the following:
Font Family: Sentral
Font Style: Medium
Size: 15 pt
Leading: 17 pt
Tracking: -20
Select the Character Color option from the left side menu. Set the color to the orangeswatch. Click OK.
Create a New Paragraph Style, setting the Style Name to Headline. Set the Basic Character Formats option to the following:
Font Family: Sentral
Font Style: ExtraBold
Size: 39 pt
Leading: 40 pt
Tracking: -20
Select the Character Color option from the left side menu. Set the color to the purple swatch. Click OK.
Create a New Paragraph Style, setting the Style Name to Caption. Set the Basic Character Formats option to the following:
Font Family: Sentral
Font Style: Medium
Size: 8 pt
Leading: Auto
Tracking: -20
Select the Character Color option from the left side menu. Set the color to the orange swatch. Click OK.
Step 6
We’ll alter the baseline grids to fit our newsletter layout. Open the Preferences window by going to Indesign CC > Preferences > Grids. Under Baseline Grid, set the Start of the grid to 0 cm, and set the Relative to option to Top Margin and the Increment to 10.8 pt. Click OK.
To Show and Hide the baseline grid, press Option-Command-‘.
2.Setting Up Master Pages for Your Church Newsletter Template
Step 1
On the Layers panel, select the Copy layer.
Using the Text Tool (T), create a text frame in the top left corner of the left hand side newsletter design. Aim to start at 1 cm on the x-axis, using the Control panelto guide you.
To add a page number, right-click while in the text frame and select Insert Special Character > Markers > Current Page Number. The A symbolizes the page number.Add a space and bullet point by right-clicking on the frame and selecting Insert Special Character > Symbols > Bullet Character. In all caps, add the name of your company or church, followed by a bullet point and a section name.
Step 2
Using the Paragraph Styles, set the text frame to the Folio style.
Select the A and set the Font Style to Extra Bold. Change the color of Sectionon the Swatches panel to orange. This will help emphasize it.
Step 3
Using the Line Tool (/), create a horizontal line under the folio that goes from margin to margin on the newsletter layout.
On the Stroke panel (Window > Stroke), set the Weight to 0.5 pt.
Step 4
Select both items, the folio and the stroke. To Duplicate the items, press Option-Shift and drag towards the right page of the newsletter layout. By pressing Shift, you should be able to keep the x-axis alignment across the page.
Set the text frame to Align Right on the Control panel. We want this folio to mirror the one on the left side of the newsletter layout. The page number should be on the outside of the page. Swap the position of the page number with the section.
Step 5
On the Pages panel, drag the A-Master pages over pages 2-4 of the newsletter design. This will Apply this Master to those pages. Apply [None] to page 1.
3.Designing the Cover for Your Church Newsletter Template
Step 1
On the Layers panel, select the Background layer.
Using the Rectangle Tool (M), create a rectangle that measures 21.6 cm in Width and 6.5 cm in Height.
Using the Swatches panel, set the color to the Sand swatch.
Place the rectangle at the very top of the cover of the newsletter design.
Step 2
On the Layers panel, lock the Background layer and select the Copy layer.
Using the Text Tool (T), create a text box at the top of the page and add „Newsletter” as the content. With the Text Tool selected, head over to the Control panel and set the text to Align Center. Use the following settings:
Font Family: Sentral
Font Style: Extra Bold
Size: 75 pt
Tracking: -25
On the Swatches panel, set the color of the content to Purple.
Step 3
Using the Text Tool (T), create a second text frame under the title. Here, add the name of the church or company followed by a bullet point to make a clear separation. Add a date or issue number for the newsletter template.
With the Text Tool selected, head over to the Control panel and set the text to Align Center. Use the following settings:
Font Family: Sentral
Font Style: Extra Bold
Size: 12 pt
Tracking: 60
On the Swatches panel, set the color of the content to Orange.
Step 4
Using the Line Tool (/), create two strokes that extend from margin to margin. Place one stroke under „Newsletter”and the second stroke under the issue number.
Using the Stroke panel (Windows > Stroke), set the first stroke to 0.5 pt and the second stroke to 2 pt.
Step 5
Using the Text Tool (T), create a text frame under the last stroke. Press Command-B to open the Text Frame Options window. Here, set the Number of Columns to 5 and the Gutter to 0.5 cm. Click OK.
This text frame is a great opportunity to create a small table of contents. Add the number of the page, the section, and the title of the story so it is easy to find. While selecting the Text Tool (T), head over to the Control panel and use the following settings:
Font Family: Sentral
Font Style: Bold
Size: 8 pt
Feel free to use different font styles to create a hierarchy between the section titles and story titles inside the newsletter design. Using the Swatches panel, set the color of the page number and the section title to Orange. Use [Black] for the headlines.
Step 6
Using the Line Tool (/), create a vertical stroke between each column of the small table of contents. Use the gutter between each column on the newsletter layout as a guide to place the stroke.
On the Stroke panel, set the Weight to 0.75 pt and the Type to Dotted.
Step 7
To Place an image on the newsletter design, press Command-D. Navigate to the People reading in a circle and click Open.
Draw the image frame under the title and cover the width of the page.
Step 8
Using the Text Tool (T), create a text frame under the image. Use the columns we created at the beginning of the tutorial and extend the text frame to the fourth column.
Add a headline and use the Headline style from the Paragraph Styles panel to style the frame.
Open the Text Wrap panel (Window > Text Wrap) and select the text frame. Select the Wrap Around Bounding Box button and set the bottom Offset to 1 cm.
Step 9
Create a second text frame with the Text Tool (T). This time, make the width extend to the second column. Add an intro paragraph and use the Intro style from the Paragraph Styles panel to style the frame.
Place this frame at the bottom left of the cover page of the newsletter design.
Step 10
Create a text frame that covers the last four columns of the newsletter template cover. This frame is for the copy, and the headline won’t interfere as we used the Text Wrap panel to make room for it.
Add copy and set the first paragraph to the Drop Cap style from the Paragraph Style panel. Set the rest of the copy to the Copy style.
Step 11
To create a neat newsletter layout, add two strokes between the intro and text frames. Use the Line Tool (/) and set the Weight to 0.25 pt.
4.Designing the Interior of Your Church Newsletter Template
Step 1
Override the folio frame by pressing Shift-Command and clicking on the frame. Here, feel free to change the section name to fit the content on the page.
For this page, we’ll play with the six columns we created at the beginning of this tutorial. We’ll use multiple column widths to create asymmetrical layouts.
Using the Text Tool (T), create two text frames for the headline and intro. Use the Paragraph Styles panel to style both to the Headline and Intro styles.
Step 2
Place the Black middle aged man carrying his son image by pressing Command-D and clicking Open. Place it under the intro but aligned to the right margin. Use about four columns for the width of the image.
Step 3
While selecting the image, head over to the Text Wrap panel. Select the Wrap Around Bounding Box and set the Offset on all sides to 0.3 cm.
Step 4
Create a text frame under the intro. Extend the width to the third column and the length to the bottom of the page.
Create another text frame under the image. This time, leave a column between the two text frames and cover only the last two columns in width.
Add content and use the Paragraph Styles panel to style it. Use the Drop Cap and Copy styles.
Step 5
Using the Text Tool (T), add a text frame in the single column we left between the two copy text frames. Here, you’ll add a caption. Use the Paragraph Styles panel and select the Caption style.
Add two strokes between the columns with the Line Tool (/) to create a separation and polish the layout. Set the Weight of the strokes to 0.25 pt.
Step 6
Override the folio frame by pressing Shift-Command and clicking on the frame. Here, feel free to change the section name to fit the content on the page.
Using the Text Tool (T), create a text frame for the headline. Use the Paragraph Styles panel to style both to the Headline style. We’ll add an intro later.
Place the Man during a religious pilgrimage by pressing Command-D and clicking Open. Place the image under the headline, aligned to the left margin.
Make the image frame smaller than the actual image. For this, head over to the Control panel and set the Width to 10.8 cm and the Height to 9.3 cm.
While selecting the image, head over to the Text Wrap panel. Select the Wrap Around Bounding Box and set the Offset on all sides to 0.3 cm.
Step 7
Create a text frame that starts on the second column and extends to the right edge of the image. Here, add intro content and use the Intro style from the Paragraph Styles panel.
While selecting the frame, head over to the Text Wrap panel. Select the Wrap Around Bounding Box and set the Bottom Offset to 1 cm.
Step 8
Using the Text Tool (T), create a single text frame that starts on the second column and extends to the last column. As far as height goes, start under the headline and extend to the bottom margin.
While selecting the frame, press Command-B to open the Text Frame Options window. There, set the Number of Columns to 2 and the Gutter to 0.5 cm.
Add copy and use the Paragraph Styles panel to style the frame. Use the Drop Cap and Copy styles.
Step 9
Using the Text Tool (T), add a text frame in the single empty column on the very left side of the page. Here, you’ll add a caption. Use the Paragraph Styles panel and select the Caption style.
Add two strokes between the columns with the Line Tool (/) to create a separation and polish the layout. Set the Weight of the strokes to 0.25 pt.
5.Designing the Back Cover of Your InDesign Portfolio Template
Step 1
Using the Rectangle Tool (M), create a background on the whole page. Select the Sand swatch from the Swatches panel.
Override the folio frame by pressing Shift-Command and clicking on the frame. Here, feel free to change the section name to fit the content on the page.
Using the Text Tool (T), create two text frames for the headline and intro. This time, use only the first four columns for both frames. Use the Paragraph Styles panel to style both to the Headline and Intro styles.
Step 2
Place the African American male hands resting on an open bible image by pressing Command-D and clicking Open. Drag the image frame to take up the width of three columns. Place the image on the right side of the page and towards the bottom of the page, as shown in the image below.
While selecting the image, head over to the Text Wrap panel. Select the Wrap Around Bounding Box and set the Offset on all sides to 0.3 cm.
Step 3
Using the Text Tool (T), create a single text frame on the first three columns. Start the text frame at the same level as the image and extend to the bottom of the page.
Leave a column between this and create another text frame. This time, start the frame at the very top of the page and extend it to the bottom.
Add copy and use the Paragraph Styles panel to style the frame. Use the Drop Cap and Copy styles.
Step 4
Using the Text Tool (T), add a text frame in the single column we left on the very left side of the page. Here, you’ll add a caption. Use the Paragraph Styles panel and select the Caption style.
Add two strokes between the columns with the Line Tool (/) to create a separation and polish the layout. Set the Weight of the strokes to 0.25 pt.
6.How to Export a File for Printing
Before exporting a file for printing, it is useful to take a look around all the edges to make sure all the images and vectors bleeding out are touching the bleeds.
Step 1
To export the file, go to File > Export. Name the file Church Newsletter templateand choose Adobe PDF (Print) from the Format dropdown menu. Click Save.
Step 2
In the Export Adobe PDF window, set the Adobe PDF Preset to Press Quality.
On the left side of the panel, select Marks and Bleeds. Check All Printer’s Marks and Use Document Bleed Settings. Click Export. You will have a ready-to-print PDF file.
Great Job! You’ve Finished This Tutorial!
In this tutorial, you learned how to create a newsletter template. The essential tools you learned today will help you properly set up all your future InDesign templates. Today, you learned to:
set up a ready-to-print InDesign file
add Layers to keep your file organized
create Color Swatches that you can easily change
set up Paragraph Styles to help you format the template
In this tutorial, you’ll learn how to create a four-page newsletter template. We’ll put this template together in no time, and you’ll be able to reuse it for your future projects.
Newsletter templates are great to communicate with your community and update them of the latest events. This clean, high-quality, professional newsletter will make the process much easier.
In this tutorial, you’ll learn how to create a newsletter template that will make it easier for you and any user to edit. You’ll be able to change anything from colors to fonts and images. We’ll create an asymmetrical layout for each page, which will set you apart from other normal newsletter templates. We’ll take a look at essential tools you need to know in InDesign that will help you in the future.
Download the assets and make sure the font is installed on your system before starting. When you are ready, we can dive in!
1.Setting Up Your Church Newsletter Template File
Step 1
In InDesign, go to File > New. In the New Document window, select the Print tab. Choose A4 from the Blank Document Presets. Name the document Church Newsletter Template. Customize the newsletter format with the following options:
Width to 21 cm
Height to 29.7 cm
Orientation to Portrait
Units to Centimeters
Pages to 4
Check Facing Pages
Columns to 6
Column Gutter to 0.5 cm
Margins: set the Top margin to 2 cm. Set the Bottom, Outside and Inside margin to 1 cm.
Bleeds to 0.3 cm (it’s best to seek your professional printer’s preference)
Click Create.
Step 2
For this church newsletter template, we will work with three Layers. Organizing layers is an important practice when designing a newsletter template as they will make it easier for users to edit.
Bring up the Layers panel by going to Window > Layers. Double-click on Layer 1 and rename it Background.
On the Layers panel main menu, select New Layer. Name it Images. Click OK.
Additionally, create a new layer named Copy. Click OK.
Step 3
Let’s add some color swatches to our newsletter design. Head over to Window > Color > Swatches to expand the Swatches panel. Choose New Color Swatch from the main menu. Set the Swatch Name and values to the following:
Sand: C=4 M=3 Y=4 K=0
Orange:C=0 M=75 Y=75 K=0
Purple:C=100 M=100 Y=20 K=15
Click Add and OK after you input each color value.
Step 4
For this newsletter tutorial, we’ll create a drop cap at the beginning of an article. Drop caps help emphasize the beginning of a story and let the reader know when they are starting a new article.
Head over to Window > Styles > Character Styles. On the Character Styles panel, add a new style and double-click to open the options window. In the Character Styles Options window, set the Style Name to Drop Cap. Use the following settings:
Font Family: Sentral
Font Style: Bold
Size: 9 pt
Select the Character Color option from the menu on the left side. Select the orange color. Click OK.
Step 5
For this newsletter design tutorial, we will create a list of Paragraph Styles that we will use to format the portfolio design template.
Head over to Window > Styles > Paragraph Styles to open the Paragraph Styles panel. On the main menu, select New Paragraph Style, setting the Style Name to Folio. Select the Basic Character Formats option from the left side menu. Use the following settings:
Font Family: Sentral
Font Style: Bold
Size: 8 pt
Tracking: 100
Click OK.
Create a New Paragraph Style, setting the Style Name to Drop Cap. Here, we’ll set the values for the copy as the drop cap style also covers the contents in the first paragraph. Set the Basic Character Formats option to the following:
Font Family: Sentral
Font Style: Regular
Size: 9 pt
Select the Indents and Spacing option from the menu on the left side. Set the Align to Grid option to All Lines (this will help keep each line of text at the same level).
Select Drop Caps and Nested Styles from the menu on the left side. Under Drop Caps, use the following settings:
Lines number to 4
Characters to 1
On the Character Style dropdown menu, select Drop Cap. Click OK.
Create a New Paragraph Style, setting the Style Name to Copy. Set the Basic Character Formats option to the following:
Font Family: Sentral
Font Style: Regular
Size: 9 pt
Select the Indents and Spacing option from the menu on the left side. Use the following settings:
Alignment to Left Justify
First Line Indent to 0.5
Align to Grid: All Lines (this will help keep each line of text at the same level)
Click OK.
Create a New Paragraph Style, setting the Style Name to Intro. Set the Basic Character Formats option to the following:
Font Family: Sentral
Font Style: Medium
Size: 15 pt
Leading: 17 pt
Tracking: -20
Select the Character Color option from the left side menu. Set the color to the orangeswatch. Click OK.
Create a New Paragraph Style, setting the Style Name to Headline. Set the Basic Character Formats option to the following:
Font Family: Sentral
Font Style: ExtraBold
Size: 39 pt
Leading: 40 pt
Tracking: -20
Select the Character Color option from the left side menu. Set the color to the purple swatch. Click OK.
Create a New Paragraph Style, setting the Style Name to Caption. Set the Basic Character Formats option to the following:
Font Family: Sentral
Font Style: Medium
Size: 8 pt
Leading: Auto
Tracking: -20
Select the Character Color option from the left side menu. Set the color to the orange swatch. Click OK.
Step 6
We’ll alter the baseline grids to fit our newsletter layout. Open the Preferences window by going to Indesign CC > Preferences > Grids. Under Baseline Grid, set the Start of the grid to 0 cm, and set the Relative to option to Top Margin and the Increment to 10.8 pt. Click OK.
To Show and Hide the baseline grid, press Option-Command-‘.
2.Setting Up Master Pages for Your Church Newsletter Template
Step 1
On the Layers panel, select the Copy layer.
Using the Text Tool (T), create a text frame in the top left corner of the left hand side newsletter design. Aim to start at 1 cm on the x-axis, using the Control panelto guide you.
To add a page number, right-click while in the text frame and select Insert Special Character > Markers > Current Page Number. The A symbolizes the page number.Add a space and bullet point by right-clicking on the frame and selecting Insert Special Character > Symbols > Bullet Character. In all caps, add the name of your company or church, followed by a bullet point and a section name.
Step 2
Using the Paragraph Styles, set the text frame to the Folio style.
Select the A and set the Font Style to Extra Bold. Change the color of Sectionon the Swatches panel to orange. This will help emphasize it.
Step 3
Using the Line Tool (/), create a horizontal line under the folio that goes from margin to margin on the newsletter layout.
On the Stroke panel (Window > Stroke), set the Weight to 0.5 pt.
Step 4
Select both items, the folio and the stroke. To Duplicate the items, press Option-Shift and drag towards the right page of the newsletter layout. By pressing Shift, you should be able to keep the x-axis alignment across the page.
Set the text frame to Align Right on the Control panel. We want this folio to mirror the one on the left side of the newsletter layout. The page number should be on the outside of the page. Swap the position of the page number with the section.
Step 5
On the Pages panel, drag the A-Master pages over pages 2-4 of the newsletter design. This will Apply this Master to those pages. Apply [None] to page 1.
3.Designing the Cover for Your Church Newsletter Template
Step 1
On the Layers panel, select the Background layer.
Using the Rectangle Tool (M), create a rectangle that measures 21.6 cm in Width and 6.5 cm in Height.
Using the Swatches panel, set the color to the Sand swatch.
Place the rectangle at the very top of the cover of the newsletter design.
Step 2
On the Layers panel, lock the Background layer and select the Copy layer.
Using the Text Tool (T), create a text box at the top of the page and add „Newsletter” as the content. With the Text Tool selected, head over to the Control panel and set the text to Align Center. Use the following settings:
Font Family: Sentral
Font Style: Extra Bold
Size: 75 pt
Tracking: -25
On the Swatches panel, set the color of the content to Purple.
Step 3
Using the Text Tool (T), create a second text frame under the title. Here, add the name of the church or company followed by a bullet point to make a clear separation. Add a date or issue number for the newsletter template.
With the Text Tool selected, head over to the Control panel and set the text to Align Center. Use the following settings:
Font Family: Sentral
Font Style: Extra Bold
Size: 12 pt
Tracking: 60
On the Swatches panel, set the color of the content to Orange.
Step 4
Using the Line Tool (/), create two strokes that extend from margin to margin. Place one stroke under „Newsletter”and the second stroke under the issue number.
Using the Stroke panel (Windows > Stroke), set the first stroke to 0.5 pt and the second stroke to 2 pt.
Step 5
Using the Text Tool (T), create a text frame under the last stroke. Press Command-B to open the Text Frame Options window. Here, set the Number of Columns to 5 and the Gutter to 0.5 cm. Click OK.
This text frame is a great opportunity to create a small table of contents. Add the number of the page, the section, and the title of the story so it is easy to find. While selecting the Text Tool (T), head over to the Control panel and use the following settings:
Font Family: Sentral
Font Style: Bold
Size: 8 pt
Feel free to use different font styles to create a hierarchy between the section titles and story titles inside the newsletter design. Using the Swatches panel, set the color of the page number and the section title to Orange. Use [Black] for the headlines.
Step 6
Using the Line Tool (/), create a vertical stroke between each column of the small table of contents. Use the gutter between each column on the newsletter layout as a guide to place the stroke.
On the Stroke panel, set the Weight to 0.75 pt and the Type to Dotted.
Step 7
To Place an image on the newsletter design, press Command-D. Navigate to the People reading in a circle and click Open.
Draw the image frame under the title and cover the width of the page.
Step 8
Using the Text Tool (T), create a text frame under the image. Use the columns we created at the beginning of the tutorial and extend the text frame to the fourth column.
Add a headline and use the Headline style from the Paragraph Styles panel to style the frame.
Open the Text Wrap panel (Window > Text Wrap) and select the text frame. Select the Wrap Around Bounding Box button and set the bottom Offset to 1 cm.
Step 9
Create a second text frame with the Text Tool (T). This time, make the width extend to the second column. Add an intro paragraph and use the Intro style from the Paragraph Styles panel to style the frame.
Place this frame at the bottom left of the cover page of the newsletter design.
Step 10
Create a text frame that covers the last four columns of the newsletter template cover. This frame is for the copy, and the headline won’t interfere as we used the Text Wrap panel to make room for it.
Add copy and set the first paragraph to the Drop Cap style from the Paragraph Style panel. Set the rest of the copy to the Copy style.
Step 11
To create a neat newsletter layout, add two strokes between the intro and text frames. Use the Line Tool (/) and set the Weight to 0.25 pt.
4.Designing the Interior of Your Church Newsletter Template
Step 1
Override the folio frame by pressing Shift-Command and clicking on the frame. Here, feel free to change the section name to fit the content on the page.
For this page, we’ll play with the six columns we created at the beginning of this tutorial. We’ll use multiple column widths to create asymmetrical layouts.
Using the Text Tool (T), create two text frames for the headline and intro. Use the Paragraph Styles panel to style both to the Headline and Intro styles.
Step 2
Place the Black middle aged man carrying his son image by pressing Command-D and clicking Open. Place it under the intro but aligned to the right margin. Use about four columns for the width of the image.
Step 3
While selecting the image, head over to the Text Wrap panel. Select the Wrap Around Bounding Box and set the Offset on all sides to 0.3 cm.
Step 4
Create a text frame under the intro. Extend the width to the third column and the length to the bottom of the page.
Create another text frame under the image. This time, leave a column between the two text frames and cover only the last two columns in width.
Add content and use the Paragraph Styles panel to style it. Use the Drop Cap and Copy styles.
Step 5
Using the Text Tool (T), add a text frame in the single column we left between the two copy text frames. Here, you’ll add a caption. Use the Paragraph Styles panel and select the Caption style.
Add two strokes between the columns with the Line Tool (/) to create a separation and polish the layout. Set the Weight of the strokes to 0.25 pt.
Step 6
Override the folio frame by pressing Shift-Command and clicking on the frame. Here, feel free to change the section name to fit the content on the page.
Using the Text Tool (T), create a text frame for the headline. Use the Paragraph Styles panel to style both to the Headline style. We’ll add an intro later.
Place the Man during a religious pilgrimage by pressing Command-D and clicking Open. Place the image under the headline, aligned to the left margin.
Make the image frame smaller than the actual image. For this, head over to the Control panel and set the Width to 10.8 cm and the Height to 9.3 cm.
While selecting the image, head over to the Text Wrap panel. Select the Wrap Around Bounding Box and set the Offset on all sides to 0.3 cm.
Step 7
Create a text frame that starts on the second column and extends to the right edge of the image. Here, add intro content and use the Intro style from the Paragraph Styles panel.
While selecting the frame, head over to the Text Wrap panel. Select the Wrap Around Bounding Box and set the Bottom Offset to 1 cm.
Step 8
Using the Text Tool (T), create a single text frame that starts on the second column and extends to the last column. As far as height goes, start under the headline and extend to the bottom margin.
While selecting the frame, press Command-B to open the Text Frame Options window. There, set the Number of Columns to 2 and the Gutter to 0.5 cm.
Add copy and use the Paragraph Styles panel to style the frame. Use the Drop Cap and Copy styles.
Step 9
Using the Text Tool (T), add a text frame in the single empty column on the very left side of the page. Here, you’ll add a caption. Use the Paragraph Styles panel and select the Caption style.
Add two strokes between the columns with the Line Tool (/) to create a separation and polish the layout. Set the Weight of the strokes to 0.25 pt.
5.Designing the Back Cover of Your InDesign Portfolio Template
Step 1
Using the Rectangle Tool (M), create a background on the whole page. Select the Sand swatch from the Swatches panel.
Override the folio frame by pressing Shift-Command and clicking on the frame. Here, feel free to change the section name to fit the content on the page.
Using the Text Tool (T), create two text frames for the headline and intro. This time, use only the first four columns for both frames. Use the Paragraph Styles panel to style both to the Headline and Intro styles.
Step 2
Place the African American male hands resting on an open bible image by pressing Command-D and clicking Open. Drag the image frame to take up the width of three columns. Place the image on the right side of the page and towards the bottom of the page, as shown in the image below.
While selecting the image, head over to the Text Wrap panel. Select the Wrap Around Bounding Box and set the Offset on all sides to 0.3 cm.
Step 3
Using the Text Tool (T), create a single text frame on the first three columns. Start the text frame at the same level as the image and extend to the bottom of the page.
Leave a column between this and create another text frame. This time, start the frame at the very top of the page and extend it to the bottom.
Add copy and use the Paragraph Styles panel to style the frame. Use the Drop Cap and Copy styles.
Step 4
Using the Text Tool (T), add a text frame in the single column we left on the very left side of the page. Here, you’ll add a caption. Use the Paragraph Styles panel and select the Caption style.
Add two strokes between the columns with the Line Tool (/) to create a separation and polish the layout. Set the Weight of the strokes to 0.25 pt.
6.How to Export a File for Printing
Before exporting a file for printing, it is useful to take a look around all the edges to make sure all the images and vectors bleeding out are touching the bleeds.
Step 1
To export the file, go to File > Export. Name the file Church Newsletter templateand choose Adobe PDF (Print) from the Format dropdown menu. Click Save.
Step 2
In the Export Adobe PDF window, set the Adobe PDF Preset to Press Quality.
On the left side of the panel, select Marks and Bleeds. Check All Printer’s Marks and Use Document Bleed Settings. Click Export. You will have a ready-to-print PDF file.
Great Job! You’ve Finished This Tutorial!
In this tutorial, you learned how to create a newsletter template. The essential tools you learned today will help you properly set up all your future InDesign templates. Today, you learned to:
set up a ready-to-print InDesign file
add Layers to keep your file organized
create Color Swatches that you can easily change
set up Paragraph Styles to help you format the template
In this tutorial, you’ll learn how to create a four-page newsletter template. We’ll put this template together in no time, and you’ll be able to reuse it for your future projects.
Newsletter templates are great to communicate with your community and update them of the latest events. This clean, high-quality, professional newsletter will make the process much easier.
In this tutorial, you’ll learn how to create a newsletter template that will make it easier for you and any user to edit. You’ll be able to change anything from colors to fonts and images. We’ll create an asymmetrical layout for each page, which will set you apart from other normal newsletter templates. We’ll take a look at essential tools you need to know in InDesign that will help you in the future.
Download the assets and make sure the font is installed on your system before starting. When you are ready, we can dive in!
1.Setting Up Your Church Newsletter Template File
Step 1
In InDesign, go to File > New. In the New Document window, select the Print tab. Choose A4 from the Blank Document Presets. Name the document Church Newsletter Template. Customize the newsletter format with the following options:
Width to 21 cm
Height to 29.7 cm
Orientation to Portrait
Units to Centimeters
Pages to 4
Check Facing Pages
Columns to 6
Column Gutter to 0.5 cm
Margins: set the Top margin to 2 cm. Set the Bottom, Outside and Inside margin to 1 cm.
Bleeds to 0.3 cm (it’s best to seek your professional printer’s preference)
Click Create.
Step 2
For this church newsletter template, we will work with three Layers. Organizing layers is an important practice when designing a newsletter template as they will make it easier for users to edit.
Bring up the Layers panel by going to Window > Layers. Double-click on Layer 1 and rename it Background.
On the Layers panel main menu, select New Layer. Name it Images. Click OK.
Additionally, create a new layer named Copy. Click OK.
Step 3
Let’s add some color swatches to our newsletter design. Head over to Window > Color > Swatches to expand the Swatches panel. Choose New Color Swatch from the main menu. Set the Swatch Name and values to the following:
Sand: C=4 M=3 Y=4 K=0
Orange:C=0 M=75 Y=75 K=0
Purple:C=100 M=100 Y=20 K=15
Click Add and OK after you input each color value.
Step 4
For this newsletter tutorial, we’ll create a drop cap at the beginning of an article. Drop caps help emphasize the beginning of a story and let the reader know when they are starting a new article.
Head over to Window > Styles > Character Styles. On the Character Styles panel, add a new style and double-click to open the options window. In the Character Styles Options window, set the Style Name to Drop Cap. Use the following settings:
Font Family: Sentral
Font Style: Bold
Size: 9 pt
Select the Character Color option from the menu on the left side. Select the orange color. Click OK.
Step 5
For this newsletter design tutorial, we will create a list of Paragraph Styles that we will use to format the portfolio design template.
Head over to Window > Styles > Paragraph Styles to open the Paragraph Styles panel. On the main menu, select New Paragraph Style, setting the Style Name to Folio. Select the Basic Character Formats option from the left side menu. Use the following settings:
Font Family: Sentral
Font Style: Bold
Size: 8 pt
Tracking: 100
Click OK.
Create a New Paragraph Style, setting the Style Name to Drop Cap. Here, we’ll set the values for the copy as the drop cap style also covers the contents in the first paragraph. Set the Basic Character Formats option to the following:
Font Family: Sentral
Font Style: Regular
Size: 9 pt
Select the Indents and Spacing option from the menu on the left side. Set the Align to Grid option to All Lines (this will help keep each line of text at the same level).
Select Drop Caps and Nested Styles from the menu on the left side. Under Drop Caps, use the following settings:
Lines number to 4
Characters to 1
On the Character Style dropdown menu, select Drop Cap. Click OK.
Create a New Paragraph Style, setting the Style Name to Copy. Set the Basic Character Formats option to the following:
Font Family: Sentral
Font Style: Regular
Size: 9 pt
Select the Indents and Spacing option from the menu on the left side. Use the following settings:
Alignment to Left Justify
First Line Indent to 0.5
Align to Grid: All Lines (this will help keep each line of text at the same level)
Click OK.
Create a New Paragraph Style, setting the Style Name to Intro. Set the Basic Character Formats option to the following:
Font Family: Sentral
Font Style: Medium
Size: 15 pt
Leading: 17 pt
Tracking: -20
Select the Character Color option from the left side menu. Set the color to the orangeswatch. Click OK.
Create a New Paragraph Style, setting the Style Name to Headline. Set the Basic Character Formats option to the following:
Font Family: Sentral
Font Style: ExtraBold
Size: 39 pt
Leading: 40 pt
Tracking: -20
Select the Character Color option from the left side menu. Set the color to the purple swatch. Click OK.
Create a New Paragraph Style, setting the Style Name to Caption. Set the Basic Character Formats option to the following:
Font Family: Sentral
Font Style: Medium
Size: 8 pt
Leading: Auto
Tracking: -20
Select the Character Color option from the left side menu. Set the color to the orange swatch. Click OK.
Step 6
We’ll alter the baseline grids to fit our newsletter layout. Open the Preferences window by going to Indesign CC > Preferences > Grids. Under Baseline Grid, set the Start of the grid to 0 cm, and set the Relative to option to Top Margin and the Increment to 10.8 pt. Click OK.
To Show and Hide the baseline grid, press Option-Command-‘.
2.Setting Up Master Pages for Your Church Newsletter Template
Step 1
On the Layers panel, select the Copy layer.
Using the Text Tool (T), create a text frame in the top left corner of the left hand side newsletter design. Aim to start at 1 cm on the x-axis, using the Control panelto guide you.
To add a page number, right-click while in the text frame and select Insert Special Character > Markers > Current Page Number. The A symbolizes the page number.Add a space and bullet point by right-clicking on the frame and selecting Insert Special Character > Symbols > Bullet Character. In all caps, add the name of your company or church, followed by a bullet point and a section name.
Step 2
Using the Paragraph Styles, set the text frame to the Folio style.
Select the A and set the Font Style to Extra Bold. Change the color of Sectionon the Swatches panel to orange. This will help emphasize it.
Step 3
Using the Line Tool (/), create a horizontal line under the folio that goes from margin to margin on the newsletter layout.
On the Stroke panel (Window > Stroke), set the Weight to 0.5 pt.
Step 4
Select both items, the folio and the stroke. To Duplicate the items, press Option-Shift and drag towards the right page of the newsletter layout. By pressing Shift, you should be able to keep the x-axis alignment across the page.
Set the text frame to Align Right on the Control panel. We want this folio to mirror the one on the left side of the newsletter layout. The page number should be on the outside of the page. Swap the position of the page number with the section.
Step 5
On the Pages panel, drag the A-Master pages over pages 2-4 of the newsletter design. This will Apply this Master to those pages. Apply [None] to page 1.
3.Designing the Cover for Your Church Newsletter Template
Step 1
On the Layers panel, select the Background layer.
Using the Rectangle Tool (M), create a rectangle that measures 21.6 cm in Width and 6.5 cm in Height.
Using the Swatches panel, set the color to the Sand swatch.
Place the rectangle at the very top of the cover of the newsletter design.
Step 2
On the Layers panel, lock the Background layer and select the Copy layer.
Using the Text Tool (T), create a text box at the top of the page and add „Newsletter” as the content. With the Text Tool selected, head over to the Control panel and set the text to Align Center. Use the following settings:
Font Family: Sentral
Font Style: Extra Bold
Size: 75 pt
Tracking: -25
On the Swatches panel, set the color of the content to Purple.
Step 3
Using the Text Tool (T), create a second text frame under the title. Here, add the name of the church or company followed by a bullet point to make a clear separation. Add a date or issue number for the newsletter template.
With the Text Tool selected, head over to the Control panel and set the text to Align Center. Use the following settings:
Font Family: Sentral
Font Style: Extra Bold
Size: 12 pt
Tracking: 60
On the Swatches panel, set the color of the content to Orange.
Step 4
Using the Line Tool (/), create two strokes that extend from margin to margin. Place one stroke under „Newsletter”and the second stroke under the issue number.
Using the Stroke panel (Windows > Stroke), set the first stroke to 0.5 pt and the second stroke to 2 pt.
Step 5
Using the Text Tool (T), create a text frame under the last stroke. Press Command-B to open the Text Frame Options window. Here, set the Number of Columns to 5 and the Gutter to 0.5 cm. Click OK.
This text frame is a great opportunity to create a small table of contents. Add the number of the page, the section, and the title of the story so it is easy to find. While selecting the Text Tool (T), head over to the Control panel and use the following settings:
Font Family: Sentral
Font Style: Bold
Size: 8 pt
Feel free to use different font styles to create a hierarchy between the section titles and story titles inside the newsletter design. Using the Swatches panel, set the color of the page number and the section title to Orange. Use [Black] for the headlines.
Step 6
Using the Line Tool (/), create a vertical stroke between each column of the small table of contents. Use the gutter between each column on the newsletter layout as a guide to place the stroke.
On the Stroke panel, set the Weight to 0.75 pt and the Type to Dotted.
Step 7
To Place an image on the newsletter design, press Command-D. Navigate to the People reading in a circle and click Open.
Draw the image frame under the title and cover the width of the page.
Step 8
Using the Text Tool (T), create a text frame under the image. Use the columns we created at the beginning of the tutorial and extend the text frame to the fourth column.
Add a headline and use the Headline style from the Paragraph Styles panel to style the frame.
Open the Text Wrap panel (Window > Text Wrap) and select the text frame. Select the Wrap Around Bounding Box button and set the bottom Offset to 1 cm.
Step 9
Create a second text frame with the Text Tool (T). This time, make the width extend to the second column. Add an intro paragraph and use the Intro style from the Paragraph Styles panel to style the frame.
Place this frame at the bottom left of the cover page of the newsletter design.
Step 10
Create a text frame that covers the last four columns of the newsletter template cover. This frame is for the copy, and the headline won’t interfere as we used the Text Wrap panel to make room for it.
Add copy and set the first paragraph to the Drop Cap style from the Paragraph Style panel. Set the rest of the copy to the Copy style.
Step 11
To create a neat newsletter layout, add two strokes between the intro and text frames. Use the Line Tool (/) and set the Weight to 0.25 pt.
4.Designing the Interior of Your Church Newsletter Template
Step 1
Override the folio frame by pressing Shift-Command and clicking on the frame. Here, feel free to change the section name to fit the content on the page.
For this page, we’ll play with the six columns we created at the beginning of this tutorial. We’ll use multiple column widths to create asymmetrical layouts.
Using the Text Tool (T), create two text frames for the headline and intro. Use the Paragraph Styles panel to style both to the Headline and Intro styles.
Step 2
Place the Black middle aged man carrying his son image by pressing Command-D and clicking Open. Place it under the intro but aligned to the right margin. Use about four columns for the width of the image.
Step 3
While selecting the image, head over to the Text Wrap panel. Select the Wrap Around Bounding Box and set the Offset on all sides to 0.3 cm.
Step 4
Create a text frame under the intro. Extend the width to the third column and the length to the bottom of the page.
Create another text frame under the image. This time, leave a column between the two text frames and cover only the last two columns in width.
Add content and use the Paragraph Styles panel to style it. Use the Drop Cap and Copy styles.
Step 5
Using the Text Tool (T), add a text frame in the single column we left between the two copy text frames. Here, you’ll add a caption. Use the Paragraph Styles panel and select the Caption style.
Add two strokes between the columns with the Line Tool (/) to create a separation and polish the layout. Set the Weight of the strokes to 0.25 pt.
Step 6
Override the folio frame by pressing Shift-Command and clicking on the frame. Here, feel free to change the section name to fit the content on the page.
Using the Text Tool (T), create a text frame for the headline. Use the Paragraph Styles panel to style both to the Headline style. We’ll add an intro later.
Place the Man during a religious pilgrimage by pressing Command-D and clicking Open. Place the image under the headline, aligned to the left margin.
Make the image frame smaller than the actual image. For this, head over to the Control panel and set the Width to 10.8 cm and the Height to 9.3 cm.
While selecting the image, head over to the Text Wrap panel. Select the Wrap Around Bounding Box and set the Offset on all sides to 0.3 cm.
Step 7
Create a text frame that starts on the second column and extends to the right edge of the image. Here, add intro content and use the Intro style from the Paragraph Styles panel.
While selecting the frame, head over to the Text Wrap panel. Select the Wrap Around Bounding Box and set the Bottom Offset to 1 cm.
Step 8
Using the Text Tool (T), create a single text frame that starts on the second column and extends to the last column. As far as height goes, start under the headline and extend to the bottom margin.
While selecting the frame, press Command-B to open the Text Frame Options window. There, set the Number of Columns to 2 and the Gutter to 0.5 cm.
Add copy and use the Paragraph Styles panel to style the frame. Use the Drop Cap and Copy styles.
Step 9
Using the Text Tool (T), add a text frame in the single empty column on the very left side of the page. Here, you’ll add a caption. Use the Paragraph Styles panel and select the Caption style.
Add two strokes between the columns with the Line Tool (/) to create a separation and polish the layout. Set the Weight of the strokes to 0.25 pt.
5.Designing the Back Cover of Your InDesign Portfolio Template
Step 1
Using the Rectangle Tool (M), create a background on the whole page. Select the Sand swatch from the Swatches panel.
Override the folio frame by pressing Shift-Command and clicking on the frame. Here, feel free to change the section name to fit the content on the page.
Using the Text Tool (T), create two text frames for the headline and intro. This time, use only the first four columns for both frames. Use the Paragraph Styles panel to style both to the Headline and Intro styles.
Step 2
Place the African American male hands resting on an open bible image by pressing Command-D and clicking Open. Drag the image frame to take up the width of three columns. Place the image on the right side of the page and towards the bottom of the page, as shown in the image below.
While selecting the image, head over to the Text Wrap panel. Select the Wrap Around Bounding Box and set the Offset on all sides to 0.3 cm.
Step 3
Using the Text Tool (T), create a single text frame on the first three columns. Start the text frame at the same level as the image and extend to the bottom of the page.
Leave a column between this and create another text frame. This time, start the frame at the very top of the page and extend it to the bottom.
Add copy and use the Paragraph Styles panel to style the frame. Use the Drop Cap and Copy styles.
Step 4
Using the Text Tool (T), add a text frame in the single column we left on the very left side of the page. Here, you’ll add a caption. Use the Paragraph Styles panel and select the Caption style.
Add two strokes between the columns with the Line Tool (/) to create a separation and polish the layout. Set the Weight of the strokes to 0.25 pt.
6.How to Export a File for Printing
Before exporting a file for printing, it is useful to take a look around all the edges to make sure all the images and vectors bleeding out are touching the bleeds.
Step 1
To export the file, go to File > Export. Name the file Church Newsletter templateand choose Adobe PDF (Print) from the Format dropdown menu. Click Save.
Step 2
In the Export Adobe PDF window, set the Adobe PDF Preset to Press Quality.
On the left side of the panel, select Marks and Bleeds. Check All Printer’s Marks and Use Document Bleed Settings. Click Export. You will have a ready-to-print PDF file.
Great Job! You’ve Finished This Tutorial!
In this tutorial, you learned how to create a newsletter template. The essential tools you learned today will help you properly set up all your future InDesign templates. Today, you learned to:
set up a ready-to-print InDesign file
add Layers to keep your file organized
create Color Swatches that you can easily change
set up Paragraph Styles to help you format the template
In this tutorial, you’ll learn how to create a four-page newsletter template. We’ll put this template together in no time, and you’ll be able to reuse it for your future projects.
Newsletter templates are great to communicate with your community and update them of the latest events. This clean, high-quality, professional newsletter will make the process much easier.
In this tutorial, you’ll learn how to create a newsletter template that will make it easier for you and any user to edit. You’ll be able to change anything from colors to fonts and images. We’ll create an asymmetrical layout for each page, which will set you apart from other normal newsletter templates. We’ll take a look at essential tools you need to know in InDesign that will help you in the future.
Download the assets and make sure the font is installed on your system before starting. When you are ready, we can dive in!
1.Setting Up Your Church Newsletter Template File
Step 1
In InDesign, go to File > New. In the New Document window, select the Print tab. Choose A4 from the Blank Document Presets. Name the document Church Newsletter Template. Customize the newsletter format with the following options:
Width to 21 cm
Height to 29.7 cm
Orientation to Portrait
Units to Centimeters
Pages to 4
Check Facing Pages
Columns to 6
Column Gutter to 0.5 cm
Margins: set the Top margin to 2 cm. Set the Bottom, Outside and Inside margin to 1 cm.
Bleeds to 0.3 cm (it’s best to seek your professional printer’s preference)
Click Create.
Step 2
For this church newsletter template, we will work with three Layers. Organizing layers is an important practice when designing a newsletter template as they will make it easier for users to edit.
Bring up the Layers panel by going to Window > Layers. Double-click on Layer 1 and rename it Background.
On the Layers panel main menu, select New Layer. Name it Images. Click OK.
Additionally, create a new layer named Copy. Click OK.
Step 3
Let’s add some color swatches to our newsletter design. Head over to Window > Color > Swatches to expand the Swatches panel. Choose New Color Swatch from the main menu. Set the Swatch Name and values to the following:
Sand: C=4 M=3 Y=4 K=0
Orange:C=0 M=75 Y=75 K=0
Purple:C=100 M=100 Y=20 K=15
Click Add and OK after you input each color value.
Step 4
For this newsletter tutorial, we’ll create a drop cap at the beginning of an article. Drop caps help emphasize the beginning of a story and let the reader know when they are starting a new article.
Head over to Window > Styles > Character Styles. On the Character Styles panel, add a new style and double-click to open the options window. In the Character Styles Options window, set the Style Name to Drop Cap. Use the following settings:
Font Family: Sentral
Font Style: Bold
Size: 9 pt
Select the Character Color option from the menu on the left side. Select the orange color. Click OK.
Step 5
For this newsletter design tutorial, we will create a list of Paragraph Styles that we will use to format the portfolio design template.
Head over to Window > Styles > Paragraph Styles to open the Paragraph Styles panel. On the main menu, select New Paragraph Style, setting the Style Name to Folio. Select the Basic Character Formats option from the left side menu. Use the following settings:
Font Family: Sentral
Font Style: Bold
Size: 8 pt
Tracking: 100
Click OK.
Create a New Paragraph Style, setting the Style Name to Drop Cap. Here, we’ll set the values for the copy as the drop cap style also covers the contents in the first paragraph. Set the Basic Character Formats option to the following:
Font Family: Sentral
Font Style: Regular
Size: 9 pt
Select the Indents and Spacing option from the menu on the left side. Set the Align to Grid option to All Lines (this will help keep each line of text at the same level).
Select Drop Caps and Nested Styles from the menu on the left side. Under Drop Caps, use the following settings:
Lines number to 4
Characters to 1
On the Character Style dropdown menu, select Drop Cap. Click OK.
Create a New Paragraph Style, setting the Style Name to Copy. Set the Basic Character Formats option to the following:
Font Family: Sentral
Font Style: Regular
Size: 9 pt
Select the Indents and Spacing option from the menu on the left side. Use the following settings:
Alignment to Left Justify
First Line Indent to 0.5
Align to Grid: All Lines (this will help keep each line of text at the same level)
Click OK.
Create a New Paragraph Style, setting the Style Name to Intro. Set the Basic Character Formats option to the following:
Font Family: Sentral
Font Style: Medium
Size: 15 pt
Leading: 17 pt
Tracking: -20
Select the Character Color option from the left side menu. Set the color to the orangeswatch. Click OK.
Create a New Paragraph Style, setting the Style Name to Headline. Set the Basic Character Formats option to the following:
Font Family: Sentral
Font Style: ExtraBold
Size: 39 pt
Leading: 40 pt
Tracking: -20
Select the Character Color option from the left side menu. Set the color to the purple swatch. Click OK.
Create a New Paragraph Style, setting the Style Name to Caption. Set the Basic Character Formats option to the following:
Font Family: Sentral
Font Style: Medium
Size: 8 pt
Leading: Auto
Tracking: -20
Select the Character Color option from the left side menu. Set the color to the orange swatch. Click OK.
Step 6
We’ll alter the baseline grids to fit our newsletter layout. Open the Preferences window by going to Indesign CC > Preferences > Grids. Under Baseline Grid, set the Start of the grid to 0 cm, and set the Relative to option to Top Margin and the Increment to 10.8 pt. Click OK.
To Show and Hide the baseline grid, press Option-Command-‘.
2.Setting Up Master Pages for Your Church Newsletter Template
Step 1
On the Layers panel, select the Copy layer.
Using the Text Tool (T), create a text frame in the top left corner of the left hand side newsletter design. Aim to start at 1 cm on the x-axis, using the Control panelto guide you.
To add a page number, right-click while in the text frame and select Insert Special Character > Markers > Current Page Number. The A symbolizes the page number.Add a space and bullet point by right-clicking on the frame and selecting Insert Special Character > Symbols > Bullet Character. In all caps, add the name of your company or church, followed by a bullet point and a section name.
Step 2
Using the Paragraph Styles, set the text frame to the Folio style.
Select the A and set the Font Style to Extra Bold. Change the color of Sectionon the Swatches panel to orange. This will help emphasize it.
Step 3
Using the Line Tool (/), create a horizontal line under the folio that goes from margin to margin on the newsletter layout.
On the Stroke panel (Window > Stroke), set the Weight to 0.5 pt.
Step 4
Select both items, the folio and the stroke. To Duplicate the items, press Option-Shift and drag towards the right page of the newsletter layout. By pressing Shift, you should be able to keep the x-axis alignment across the page.
Set the text frame to Align Right on the Control panel. We want this folio to mirror the one on the left side of the newsletter layout. The page number should be on the outside of the page. Swap the position of the page number with the section.
Step 5
On the Pages panel, drag the A-Master pages over pages 2-4 of the newsletter design. This will Apply this Master to those pages. Apply [None] to page 1.
3.Designing the Cover for Your Church Newsletter Template
Step 1
On the Layers panel, select the Background layer.
Using the Rectangle Tool (M), create a rectangle that measures 21.6 cm in Width and 6.5 cm in Height.
Using the Swatches panel, set the color to the Sand swatch.
Place the rectangle at the very top of the cover of the newsletter design.
Step 2
On the Layers panel, lock the Background layer and select the Copy layer.
Using the Text Tool (T), create a text box at the top of the page and add „Newsletter” as the content. With the Text Tool selected, head over to the Control panel and set the text to Align Center. Use the following settings:
Font Family: Sentral
Font Style: Extra Bold
Size: 75 pt
Tracking: -25
On the Swatches panel, set the color of the content to Purple.
Step 3
Using the Text Tool (T), create a second text frame under the title. Here, add the name of the church or company followed by a bullet point to make a clear separation. Add a date or issue number for the newsletter template.
With the Text Tool selected, head over to the Control panel and set the text to Align Center. Use the following settings:
Font Family: Sentral
Font Style: Extra Bold
Size: 12 pt
Tracking: 60
On the Swatches panel, set the color of the content to Orange.
Step 4
Using the Line Tool (/), create two strokes that extend from margin to margin. Place one stroke under „Newsletter”and the second stroke under the issue number.
Using the Stroke panel (Windows > Stroke), set the first stroke to 0.5 pt and the second stroke to 2 pt.
Step 5
Using the Text Tool (T), create a text frame under the last stroke. Press Command-B to open the Text Frame Options window. Here, set the Number of Columns to 5 and the Gutter to 0.5 cm. Click OK.
This text frame is a great opportunity to create a small table of contents. Add the number of the page, the section, and the title of the story so it is easy to find. While selecting the Text Tool (T), head over to the Control panel and use the following settings:
Font Family: Sentral
Font Style: Bold
Size: 8 pt
Feel free to use different font styles to create a hierarchy between the section titles and story titles inside the newsletter design. Using the Swatches panel, set the color of the page number and the section title to Orange. Use [Black] for the headlines.
Step 6
Using the Line Tool (/), create a vertical stroke between each column of the small table of contents. Use the gutter between each column on the newsletter layout as a guide to place the stroke.
On the Stroke panel, set the Weight to 0.75 pt and the Type to Dotted.
Step 7
To Place an image on the newsletter design, press Command-D. Navigate to the People reading in a circle and click Open.
Draw the image frame under the title and cover the width of the page.
Step 8
Using the Text Tool (T), create a text frame under the image. Use the columns we created at the beginning of the tutorial and extend the text frame to the fourth column.
Add a headline and use the Headline style from the Paragraph Styles panel to style the frame.
Open the Text Wrap panel (Window > Text Wrap) and select the text frame. Select the Wrap Around Bounding Box button and set the bottom Offset to 1 cm.
Step 9
Create a second text frame with the Text Tool (T). This time, make the width extend to the second column. Add an intro paragraph and use the Intro style from the Paragraph Styles panel to style the frame.
Place this frame at the bottom left of the cover page of the newsletter design.
Step 10
Create a text frame that covers the last four columns of the newsletter template cover. This frame is for the copy, and the headline won’t interfere as we used the Text Wrap panel to make room for it.
Add copy and set the first paragraph to the Drop Cap style from the Paragraph Style panel. Set the rest of the copy to the Copy style.
Step 11
To create a neat newsletter layout, add two strokes between the intro and text frames. Use the Line Tool (/) and set the Weight to 0.25 pt.
4.Designing the Interior of Your Church Newsletter Template
Step 1
Override the folio frame by pressing Shift-Command and clicking on the frame. Here, feel free to change the section name to fit the content on the page.
For this page, we’ll play with the six columns we created at the beginning of this tutorial. We’ll use multiple column widths to create asymmetrical layouts.
Using the Text Tool (T), create two text frames for the headline and intro. Use the Paragraph Styles panel to style both to the Headline and Intro styles.
Step 2
Place the Black middle aged man carrying his son image by pressing Command-D and clicking Open. Place it under the intro but aligned to the right margin. Use about four columns for the width of the image.
Step 3
While selecting the image, head over to the Text Wrap panel. Select the Wrap Around Bounding Box and set the Offset on all sides to 0.3 cm.
Step 4
Create a text frame under the intro. Extend the width to the third column and the length to the bottom of the page.
Create another text frame under the image. This time, leave a column between the two text frames and cover only the last two columns in width.
Add content and use the Paragraph Styles panel to style it. Use the Drop Cap and Copy styles.
Step 5
Using the Text Tool (T), add a text frame in the single column we left between the two copy text frames. Here, you’ll add a caption. Use the Paragraph Styles panel and select the Caption style.
Add two strokes between the columns with the Line Tool (/) to create a separation and polish the layout. Set the Weight of the strokes to 0.25 pt.
Step 6
Override the folio frame by pressing Shift-Command and clicking on the frame. Here, feel free to change the section name to fit the content on the page.
Using the Text Tool (T), create a text frame for the headline. Use the Paragraph Styles panel to style both to the Headline style. We’ll add an intro later.
Place the Man during a religious pilgrimage by pressing Command-D and clicking Open. Place the image under the headline, aligned to the left margin.
Make the image frame smaller than the actual image. For this, head over to the Control panel and set the Width to 10.8 cm and the Height to 9.3 cm.
While selecting the image, head over to the Text Wrap panel. Select the Wrap Around Bounding Box and set the Offset on all sides to 0.3 cm.
Step 7
Create a text frame that starts on the second column and extends to the right edge of the image. Here, add intro content and use the Intro style from the Paragraph Styles panel.
While selecting the frame, head over to the Text Wrap panel. Select the Wrap Around Bounding Box and set the Bottom Offset to 1 cm.
Step 8
Using the Text Tool (T), create a single text frame that starts on the second column and extends to the last column. As far as height goes, start under the headline and extend to the bottom margin.
While selecting the frame, press Command-B to open the Text Frame Options window. There, set the Number of Columns to 2 and the Gutter to 0.5 cm.
Add copy and use the Paragraph Styles panel to style the frame. Use the Drop Cap and Copy styles.
Step 9
Using the Text Tool (T), add a text frame in the single empty column on the very left side of the page. Here, you’ll add a caption. Use the Paragraph Styles panel and select the Caption style.
Add two strokes between the columns with the Line Tool (/) to create a separation and polish the layout. Set the Weight of the strokes to 0.25 pt.
5.Designing the Back Cover of Your InDesign Portfolio Template
Step 1
Using the Rectangle Tool (M), create a background on the whole page. Select the Sand swatch from the Swatches panel.
Override the folio frame by pressing Shift-Command and clicking on the frame. Here, feel free to change the section name to fit the content on the page.
Using the Text Tool (T), create two text frames for the headline and intro. This time, use only the first four columns for both frames. Use the Paragraph Styles panel to style both to the Headline and Intro styles.
Step 2
Place the African American male hands resting on an open bible image by pressing Command-D and clicking Open. Drag the image frame to take up the width of three columns. Place the image on the right side of the page and towards the bottom of the page, as shown in the image below.
While selecting the image, head over to the Text Wrap panel. Select the Wrap Around Bounding Box and set the Offset on all sides to 0.3 cm.
Step 3
Using the Text Tool (T), create a single text frame on the first three columns. Start the text frame at the same level as the image and extend to the bottom of the page.
Leave a column between this and create another text frame. This time, start the frame at the very top of the page and extend it to the bottom.
Add copy and use the Paragraph Styles panel to style the frame. Use the Drop Cap and Copy styles.
Step 4
Using the Text Tool (T), add a text frame in the single column we left on the very left side of the page. Here, you’ll add a caption. Use the Paragraph Styles panel and select the Caption style.
Add two strokes between the columns with the Line Tool (/) to create a separation and polish the layout. Set the Weight of the strokes to 0.25 pt.
6.How to Export a File for Printing
Before exporting a file for printing, it is useful to take a look around all the edges to make sure all the images and vectors bleeding out are touching the bleeds.
Step 1
To export the file, go to File > Export. Name the file Church Newsletter templateand choose Adobe PDF (Print) from the Format dropdown menu. Click Save.
Step 2
In the Export Adobe PDF window, set the Adobe PDF Preset to Press Quality.
On the left side of the panel, select Marks and Bleeds. Check All Printer’s Marks and Use Document Bleed Settings. Click Export. You will have a ready-to-print PDF file.
Great Job! You’ve Finished This Tutorial!
In this tutorial, you learned how to create a newsletter template. The essential tools you learned today will help you properly set up all your future InDesign templates. Today, you learned to:
set up a ready-to-print InDesign file
add Layers to keep your file organized
create Color Swatches that you can easily change
set up Paragraph Styles to help you format the template
Thinking of starting your own newsletter? Discover a few goodies from this list of premium templates.
33 Best InDesign Newsletter Templates
Newsletters are one of the best ways to get your readers to take notice! And high-quality, professional newsletter templates are finally here to make the process much easier!
Get started with a monthly newsletter today! To help you begin, we’re bringing you another amazing selection of incredible InDesign newsletter templates from Envato Elements and Envato Market.
Whether you need a newsletter for your business, employees or student activities, these templates have been exclusively designed for those familiar with Adobe InDesign.
Just jump right in to update these files with your monthly projects or memos. Not familiar with InDesign? Tackle the basics with this lesson from Grace Fussell.
Create a winning combination to draw readers in! Our first business newsletter is this stylish look from GrizzlyDesign. It features a total of 10 various color combinations along with 12 uniquely created pages. Try it out for your first newsletter today!
Help the world know more about important information in their local community. This next InDesign newsletter template is great for those who work in law and business. It features a complete branding package along with several different print layouts like bifolds, trifolds, and more.
Connect to your audience by being a part of their daily routine! This next newsletter template is perfect for creatives and entrepreneurs. It can be used for nearly any type of industry and fits eight total pages into one stylish combination. Check it out!
Not sure where to begin? Get inspired by your local newspapers for a uniquely designed newsletter. This clean template is fully editable and saves valuable time. It’s also best suited for InDesign versions CS4 and above.
Let one special color pop out on your extraordinary newsletter. This blue newsletter template is simple and easy to use. Customize it fast with your brand or favorite colors for a bold new look. Included within this download is everything you need to get started.
Keep your partners updated on the latest company news with this newsletter template. This design features a basic business theme with well-organized layers and so much more. Get access to free fonts and various color combinations all in one download.
Make a fashion statement with this sharp bi-fold newsletter. Easily update the smart object placeholders with professional images of your products and inventory. You’ll also get a hold of an extra bonus pack of icons along with this download.
Need a good corporate newsletter? Then check out this striking and modern design. This template features an eight-paged layout with bleed guides and well-organized layers. An additional help file is also included for more instructions.
Is your goal to have a career in fashion? Then share your favorite tips and trends with this stylish newsletter template. Great for fashion photographers and curators, this template features 16 pages of custom layouts we know you’ll enjoy! Add it to your collection today!
Highlight the latest discoveries in your industry with this next awesome template. This newsletter template is simple and easy to use. Just open it up with Adobe InDesign to get started right away. Included in this download are master pages, free fonts, and more!
Need
a corporate newsletter that is straight to the point? Perhaps this next design
is right up your alley. This corporate newsletter will be a phenomenal
addition to any business or organization. A minimum version of Adobe
InDesign CS4 is required to edit this template.
Our last business template will definitely make your
company shine. This template features a fully editable and flexible
design that is ready for all your company highlights and bullet points. Get
access to eight unique pages along with free fonts and more.
School InDesign Newsletter Templates
Highlight your school activities with a monthly newsletter. Here is our next list of favorites to add to your arsenal.
Show off your creativity with a striking cover. This newsletter template is great for creatives and artists. It features a soft color scheme you can easily customize to fit your school or company brand. Enjoy a clean and trendy design for under $10.
Need a multipurpose template that’s great for many projects? Then check out this next awesome template. This colorful design features four InDesign files packed with all the assets you need for a custom newsletter. Mix and match the styles you like for a bold new appearance!
Get to know more about your local school’s activities with this student newsletter. This professional design features a calming blue color theme with strong typography and geometric elements. Organize it to fit your needs with Adobe InDesign.
What stories will you tell? The Aingtea newsletter template is both striking and efficient. It features a smart, clean design with plenty of room for large photos and text. Enjoy the well-layered documents with editable features like smart objects and more to cover your needs.
What are all the fun and exciting things happening on campus? Make sure to share them with your peers with this exciting newsletter. This multipurpose template is well designed with column layouts and more. Enjoy 12 unique pages for your student newsletter.
Multipurpose InDesign newsletter templates are perfect for students to design. This next newsletter template allows you to curate your favorite visual stories into one incredible cover. Check out this file to get access to eight custom pages along with a unique master set. Try it out!
Simple InDesign Newsletter Templates
Looking for a simple, minimalist aesthetic? This next list of newsletter templates features effortless designs with very little upkeep. Though some Adobe InDesign experience is needed, you definitely won’t need to be an expert!
Keep things simple with this chic and sophisticated newsletter template. This elegant design features soft, calming colors and a balance of geometric and text elements. And since everything is fully editable, you’ll be able to customize this template as soon as you download it.
Or shake things up with this next newsletter design. This template features a sleek, minimalist vibe that dedicates the cover to all your important headlines. Designed with a grid-based layout, this template contains 12 unique pages and so much more.
Keeping your fans, friends or followers updated has gotten a whole lot easier. This newsletter template features a simple style that is easy to customize fast. Some of the features included in this design are four custom pages, automatic numbering, and editable graphics.
Create a refreshing, new experience with your newsletter. This next design is modern and professional. It includes plenty of room for your big headlines along with extra fun details to keep your readers interested. Have fun updating this template with Adobe InDesign.
Running a fashion newsletter? Update your fans monthly with a stunning new template. Inspired by the latest trends in newspaper design, this template is fully organized with editable layers, graphics and text. Add it to your collection today!
Do you have a great idea for a big headline? Write it down on this next newsletter template. This multipurpose design is modern and unique. It features large, angular photos that are sliced with bold color effects and text. Celebrate your great news with this fun template.
Celebrate your favorite moments in history or pop culture with this simple newsletter template. Although the images in the preview aren’t included, you’ll be able to update these areas fast with your own exclusive work. Enjoy fully editable files and a quick help guide.
Minimalism never fails when it comes to great design. And this next newsletter template shows us why. It features a stunning, clean aesthetic with plenty of room for important visuals. Highlight your brand just like the one below with a striking, two-toned color effect.
Feature important news about your industry. This stunning newsletter template includes eight pages packed into one easy-to-edit file. Update the text, graphics and photos with the latest versions of Adobe InDesign. Add it to your creative arsenal!
Keep your dreams alive with an exciting newsletter. This template is the perfect layout for bloggers, photographers, and more. Inspired by various creative industries, this template includes 10 pages available at a standard A4 size. Check it out!
Launch a monthly newsletter with beautiful visual imagery. This next Aingtea template is best suited for striking graphics and photos. Keep your readers updated with 12 custom pages along with easily editable colors, text, and more. Add it to your collection!
Share your discoveries with the world. This medical newsletter is a great starter design for students and businesses. It includes print-ready files that can be printed as soon as you need them. Update them fast with the latest versions of Adobe InDesign.
Want more options for your newsletter? Then check out this next fantastic design. This newsletter template features three color variations that are all available in a standard A4 size. It also includes additional formats like editable Illustrator files for more help.
Thinking of launching a corporate e-newsletter? Download this customizable template to get started right away. It was made with Adobe InDesign and features and additional PDF for more helpful information. Add it to your creative tools today!
Inspired by the Sunday newspaper? Get the look you’re going for with this incredible template. Business-friendly and efficient, this template features a clean, minimal layout with well-organized layers. Get access to master pages, color swatches and more, all in one download!
More InDesign Newsletter Templates
Newsletters are a fantastic way of reaching out to the community. So highlight the things that matter most in your next issue. I hope this list has inspired you to dive into your next creative project with ease.
Want more InDesign templates? Check out these articles for more inspiration:
Tried any of these assets? Let us know! Tell us your favorites in the comments below.
This
has been a selection of premium resources perfect for the avid creator.
For more creative newsletter templates, check out Envato Market and Envato Elements, or enlist the help of our talented designers at Envato Studio. Happy creating!
Thinking of starting your own newsletter? Discover a few goodies from this list of premium templates.
33 Best InDesign Newsletter Templates
Newsletters are one of the best ways to get your readers to take notice! And high-quality, professional newsletter templates are finally here to make the process much easier!
Get started with a monthly newsletter today! To help you begin, we’re bringing you another amazing selection of incredible InDesign newsletter templates from Envato Elements and Envato Market.
Whether you need a newsletter for your business, employees or student activities, these templates have been exclusively designed for those familiar with Adobe InDesign.
Just jump right in to update these files with your monthly projects or memos. Not familiar with InDesign? Tackle the basics with this lesson from Grace Fussell.
Create a winning combination to draw readers in! Our first business newsletter is this stylish look from GrizzlyDesign. It features a total of 10 various color combinations along with 12 uniquely created pages. Try it out for your first newsletter today!
Help the world know more about important information in their local community. This next InDesign newsletter template is great for those who work in law and business. It features a complete branding package along with several different print layouts like bifolds, trifolds, and more.
Connect to your audience by being a part of their daily routine! This next newsletter template is perfect for creatives and entrepreneurs. It can be used for nearly any type of industry and fits eight total pages into one stylish combination. Check it out!
Not sure where to begin? Get inspired by your local newspapers for a uniquely designed newsletter. This clean template is fully editable and saves valuable time. It’s also best suited for InDesign versions CS4 and above.
Let one special color pop out on your extraordinary newsletter. This blue newsletter template is simple and easy to use. Customize it fast with your brand or favorite colors for a bold new look. Included within this download is everything you need to get started.
Keep your partners updated on the latest company news with this newsletter template. This design features a basic business theme with well-organized layers and so much more. Get access to free fonts and various color combinations all in one download.
Make a fashion statement with this sharp bi-fold newsletter. Easily update the smart object placeholders with professional images of your products and inventory. You’ll also get a hold of an extra bonus pack of icons along with this download.
Need a good corporate newsletter? Then check out this striking and modern design. This template features an eight-paged layout with bleed guides and well-organized layers. An additional help file is also included for more instructions.
Is your goal to have a career in fashion? Then share your favorite tips and trends with this stylish newsletter template. Great for fashion photographers and curators, this template features 16 pages of custom layouts we know you’ll enjoy! Add it to your collection today!
Highlight the latest discoveries in your industry with this next awesome template. This newsletter template is simple and easy to use. Just open it up with Adobe InDesign to get started right away. Included in this download are master pages, free fonts, and more!
Need
a corporate newsletter that is straight to the point? Perhaps this next design
is right up your alley. This corporate newsletter will be a phenomenal
addition to any business or organization. A minimum version of Adobe
InDesign CS4 is required to edit this template.
Our last business template will definitely make your
company shine. This template features a fully editable and flexible
design that is ready for all your company highlights and bullet points. Get
access to eight unique pages along with free fonts and more.
School InDesign Newsletter Templates
Highlight your school activities with a monthly newsletter. Here is our next list of favorites to add to your arsenal.
Show off your creativity with a striking cover. This newsletter template is great for creatives and artists. It features a soft color scheme you can easily customize to fit your school or company brand. Enjoy a clean and trendy design for under $10.
Need a multipurpose template that’s great for many projects? Then check out this next awesome template. This colorful design features four InDesign files packed with all the assets you need for a custom newsletter. Mix and match the styles you like for a bold new appearance!
Get to know more about your local school’s activities with this student newsletter. This professional design features a calming blue color theme with strong typography and geometric elements. Organize it to fit your needs with Adobe InDesign.
What stories will you tell? The Aingtea newsletter template is both striking and efficient. It features a smart, clean design with plenty of room for large photos and text. Enjoy the well-layered documents with editable features like smart objects and more to cover your needs.
What are all the fun and exciting things happening on campus? Make sure to share them with your peers with this exciting newsletter. This multipurpose template is well designed with column layouts and more. Enjoy 12 unique pages for your student newsletter.
Multipurpose InDesign newsletter templates are perfect for students to design. This next newsletter template allows you to curate your favorite visual stories into one incredible cover. Check out this file to get access to eight custom pages along with a unique master set. Try it out!
Simple InDesign Newsletter Templates
Looking for a simple, minimalist aesthetic? This next list of newsletter templates features effortless designs with very little upkeep. Though some Adobe InDesign experience is needed, you definitely won’t need to be an expert!
Keep things simple with this chic and sophisticated newsletter template. This elegant design features soft, calming colors and a balance of geometric and text elements. And since everything is fully editable, you’ll be able to customize this template as soon as you download it.
Or shake things up with this next newsletter design. This template features a sleek, minimalist vibe that dedicates the cover to all your important headlines. Designed with a grid-based layout, this template contains 12 unique pages and so much more.
Keeping your fans, friends or followers updated has gotten a whole lot easier. This newsletter template features a simple style that is easy to customize fast. Some of the features included in this design are four custom pages, automatic numbering, and editable graphics.
Create a refreshing, new experience with your newsletter. This next design is modern and professional. It includes plenty of room for your big headlines along with extra fun details to keep your readers interested. Have fun updating this template with Adobe InDesign.
Running a fashion newsletter? Update your fans monthly with a stunning new template. Inspired by the latest trends in newspaper design, this template is fully organized with editable layers, graphics and text. Add it to your collection today!
Do you have a great idea for a big headline? Write it down on this next newsletter template. This multipurpose design is modern and unique. It features large, angular photos that are sliced with bold color effects and text. Celebrate your great news with this fun template.
Celebrate your favorite moments in history or pop culture with this simple newsletter template. Although the images in the preview aren’t included, you’ll be able to update these areas fast with your own exclusive work. Enjoy fully editable files and a quick help guide.
Minimalism never fails when it comes to great design. And this next newsletter template shows us why. It features a stunning, clean aesthetic with plenty of room for important visuals. Highlight your brand just like the one below with a striking, two-toned color effect.
Feature important news about your industry. This stunning newsletter template includes eight pages packed into one easy-to-edit file. Update the text, graphics and photos with the latest versions of Adobe InDesign. Add it to your creative arsenal!
Keep your dreams alive with an exciting newsletter. This template is the perfect layout for bloggers, photographers, and more. Inspired by various creative industries, this template includes 10 pages available at a standard A4 size. Check it out!
Launch a monthly newsletter with beautiful visual imagery. This next Aingtea template is best suited for striking graphics and photos. Keep your readers updated with 12 custom pages along with easily editable colors, text, and more. Add it to your collection!
Share your discoveries with the world. This medical newsletter is a great starter design for students and businesses. It includes print-ready files that can be printed as soon as you need them. Update them fast with the latest versions of Adobe InDesign.
Want more options for your newsletter? Then check out this next fantastic design. This newsletter template features three color variations that are all available in a standard A4 size. It also includes additional formats like editable Illustrator files for more help.
Thinking of launching a corporate e-newsletter? Download this customizable template to get started right away. It was made with Adobe InDesign and features and additional PDF for more helpful information. Add it to your creative tools today!
Inspired by the Sunday newspaper? Get the look you’re going for with this incredible template. Business-friendly and efficient, this template features a clean, minimal layout with well-organized layers. Get access to master pages, color swatches and more, all in one download!
More InDesign Newsletter Templates
Newsletters are a fantastic way of reaching out to the community. So highlight the things that matter most in your next issue. I hope this list has inspired you to dive into your next creative project with ease.
Want more InDesign templates? Check out these articles for more inspiration:
Tried any of these assets? Let us know! Tell us your favorites in the comments below.
This
has been a selection of premium resources perfect for the avid creator.
For more creative newsletter templates, check out Envato Market and Envato Elements, or enlist the help of our talented designers at Envato Studio. Happy creating!
Agregator najlepszych postów o designie, webdesignie, cssie i Internecie