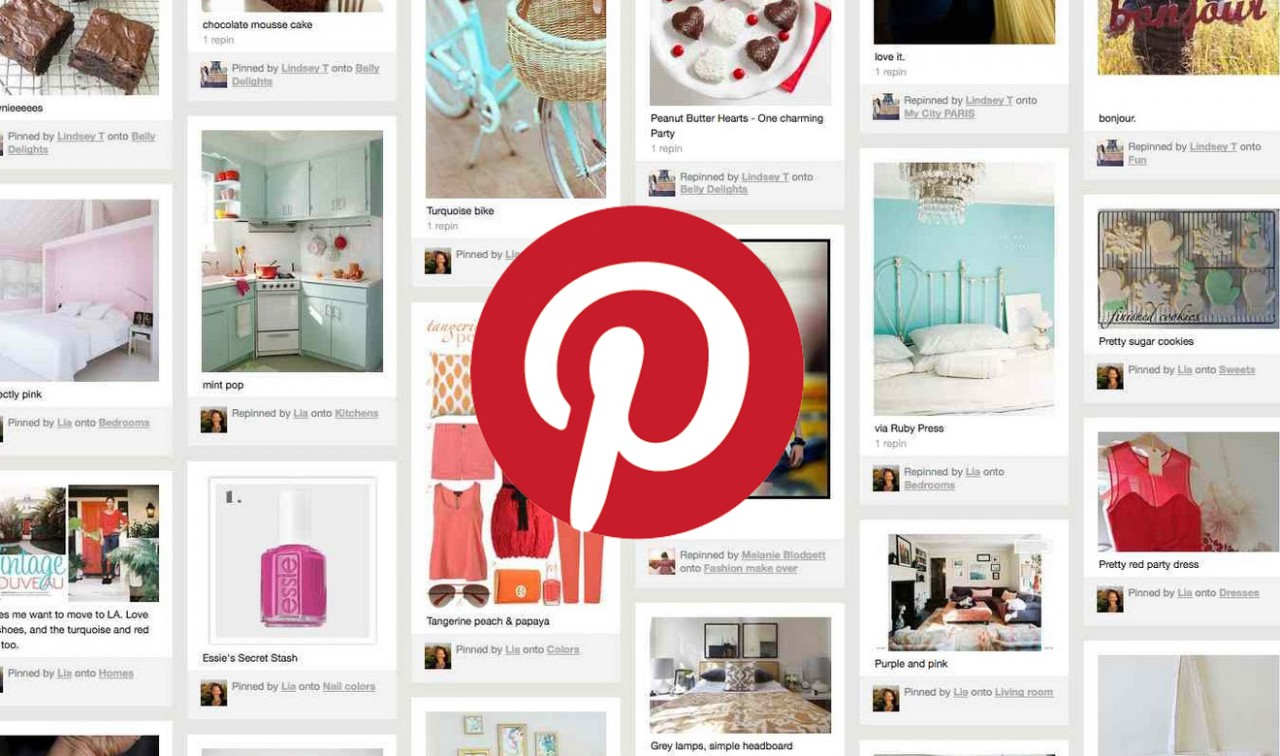
You should never miss the opportunity to develop your business. So if your business niche is suitable for promotion on Pinterest, give it a try! Pinterest is a social network that has just begun to enter our market and has already gathered a huge audience around it. This is a service designed for sharing photos between different users. Taking into account the prospects of Pinterest SEO, US marketers are already working on incorporating their products on Pinterest.
A feature of this social network with 50 million users is the vast majority of women among them (about 70%). This leaves a certain imprint on all the content generated here — it is more emotional than the same materials on other sites. So if you are ready to develop your business in this direction, here are some tips that will make it happen
Pinterest Promotion Tips
The social network has recently improved the image search algorithm, making it more detailed and accuracy sensitive. Now users can better navigate the site, and the changes made help in customizing pages for search engine promotion. Here are a few things you can do so that a user lands on your board. Since Pinterest is pushing deeper into adds, you should use this opportunity for your business.
1. Optimize Profile
For high-quality optimization, you should use the company name as your Pinterest display name. Pay special attention to profile description; write a readable, keyword-saturated text about the features of the services/ products offered. You should not be afraid of over spam here — Pinterest is not punishing it yet.
2. Verify Your Site
It is important to have a link to your website in search results of this social network. You can confirm the link using the settings of the Enterprise and Sites in the profile settings.
3. Install Pinterest Buttons
Use Pinterest social buttons on all pages where they make sense. Attracting users through your site and providing the ability to add your images directly to the pages will significantly increase the interest of visitors to your product.
4. Create Good Descriptions
You should not write a long SEO text for a description. Relevance, readability, and quality are important here. Just make a nice description that will be interesting to users and will include keywords. Also, do not use hashtags. They are absolutely useless on Pinterest and only overload images with unnecessary information.
5. Configure Rich Pins
Rich Pins are very similar to rich snippets in search engines. They allow you to take the necessary information from the site and display it on Pinterest. Depending on their type, they display the cost, availability of goods, phone numbers, as well as geotags. Pages with such information are ranked higher, which increases the number of clicks. The use of rich pins is also useful for promotion on Google. All Pinterest pages are indexed, and rich snippets are formed from descriptions and additional information go to the search engine.
6. Check Page Links
It sometimes happens that links below images redirect visitors to the 404 error. This can lead to a downgrade of the profile as a whole because users will simply remove their pins from your images. Therefore, we strongly recommend that you carefully monitor such problems. And if any of your products are out of stock, simply optimize the page by adding similar products that are in stock.
Conclusions
Pinterest is a new and interesting niche that has not yet been mastered by businesses. So you can get good positions and also promote your company to a wide community here. SEO tactics for Pinterest are very simple and logical. Follow the above recommendations and check how it works.
You should never miss the opportunity to develop your business. So if your business niche is suitable for promotion on Pinterest, give it a try! Pinterest is a social network that has just begun to enter our market and has already gathered a huge audience around it. This is a service designed for sharing photos between different users. Taking into account the prospects of Pinterest SEO, US marketers are already working on incorporating their products on Pinterest.
A feature of this social network with 50 million users is the vast majority of women among them (about 70%). This leaves a certain imprint on all the content generated here — it is more emotional than the same materials on other sites. So if you are ready to develop your business in this direction, here are some tips that will make it happen
Pinterest Promotion Tips
The social network has recently improved the image search algorithm, making it more detailed and accuracy sensitive. Now users can better navigate the site, and the changes made help in customizing pages for search engine promotion. Here are a few things you can do so that a user lands on your board. Since Pinterest is pushing deeper into adds, you should use this opportunity for your business.
1. Optimize Profile
For high-quality optimization, you should use the company name as your Pinterest display name. Pay special attention to profile description; write a readable, keyword-saturated text about the features of the services/ products offered. You should not be afraid of over spam here — Pinterest is not punishing it yet.
2. Verify Your Site
It is important to have a link to your website in search results of this social network. You can confirm the link using the settings of the Enterprise and Sites in the profile settings.
3. Install Pinterest Buttons
Use Pinterest social buttons on all pages where they make sense. Attracting users through your site and providing the ability to add your images directly to the pages will significantly increase the interest of visitors to your product.
4. Create Good Descriptions
You should not write a long SEO text for a description. Relevance, readability, and quality are important here. Just make a nice description that will be interesting to users and will include keywords. Also, do not use hashtags. They are absolutely useless on Pinterest and only overload images with unnecessary information.
5. Configure Rich Pins
Rich Pins are very similar to rich snippets in search engines. They allow you to take the necessary information from the site and display it on Pinterest. Depending on their type, they display the cost, availability of goods, phone numbers, as well as geotags. Pages with such information are ranked higher, which increases the number of clicks. The use of rich pins is also useful for promotion on Google. All Pinterest pages are indexed, and rich snippets are formed from descriptions and additional information go to the search engine.
6. Check Page Links
It sometimes happens that links below images redirect visitors to the 404 error. This can lead to a downgrade of the profile as a whole because users will simply remove their pins from your images. Therefore, we strongly recommend that you carefully monitor such problems. And if any of your products are out of stock, simply optimize the page by adding similar products that are in stock.
Conclusions
Pinterest is a new and interesting niche that has not yet been mastered by businesses. So you can get good positions and also promote your company to a wide community here. SEO tactics for Pinterest are very simple and logical. Follow the above recommendations and check how it works.
Here’s the plan! We’re going to build a styled select element. Not just the outside, but the inside too. Total styling control. Plus we’re going to make it accessible. We’re not going to try to replicate everything that the browser does by default with a native <select> element. We’re going to literally use a <select> element when any assistive tech is used. But when a mouse is being used, we’ll show the styled version and make it function as a select element.
That’s what I mean by “hybrid” selects: they are both a native <select> and a styled alternate select in one design pattern.
Custom selects (left) are often used in place of native selects (right) for aesthetics and design consistency.
Select, dropdown, navigation, menu… the name matters
While doing the research for this article, I thought about many names that get tossed around when talking about selects, the most common of which are “dropdown” and “menu.” There are two types of naming mistakes we could make: giving the same name to different things, or giving different names to the same thing. A select can suffer from both mistakes.
Before we move ahead, let me try to add clarity around using “dropdown” as a term. Here’s how I define the meaning of dropdown:
Dropdown: An interactive component that consists of a button that shows and hides a list of items, typically on mouse hover, click or tap. The list is not visible by default until the interaction starts. The list usually displays a block of content (i.e. options) on top of other content.
A lot of interfaces can look like a dropdown. But simply calling an element a “dropdown” is like using “fish” to describe an animal. What type of fish it is? A clownfish is not the same as a shark. The same goes for dropdowns.
Like there are different types of fish in the sea, there are different types of components that we might be talking about when we toss the word “dropdown” around:
Menu: A list of commands or actions that the user can perform within the page content.
Navigation: A list of links used for navigating through a website.
Select: A form control (<select>) that displays a list of options for the user to select within a form.
Deciding what type of dropdown we’re talking about can be a foggy task. Here are some examples from around the web that match how I would classify those three different types. This is based on my research and sometimes, when I can’t find a proper answer, intuition based on my experience.
Dropdown-land: Five scenarios where different dropdowns are used across the internet. Read the table below for a detailed description.
Diagram Label
Scenario
Dropdown Type
1
The dropdown expects a selected option to be submitted within a form context (e.g. Select Age)
Select
2
The dropdown does not need an active option (e.g. A list of actions: copy, paste and cut)
Menu
3
The selected option influences the content. (e.g. sorting list)
Menu or Select (more about it later)
4
The dropdown contains links to other pages. (e.g. A “meganav” with websites links)
The dropdown has content that is not a list. (e.g. a date picker)
Something else that should not be called dropdown
Not everyone perceives and interacts with the internet in the same way. Naming user interfaces and defining design patterns is a fundamental process, though one with a lot of room for personal interpretation. All of that variation is what drives the population of dropdown-land.
There is a dropdown type that is clearly a menu. Its usage is a hot topic in conversations about accessibility. I won’t talk much about it here, but let me just reinforce that the <menu> element is deprecated and no longer recommended. And here’s a detailed explanation about inclusive menus and menus buttons, including why ARIA menu role should not be used for site navigation.
We haven’t even touched on other elements that fall into a rather gray area that makes classifying dropdowns even murkier because of a lack of practical uses cases from the WCAG community.
Uff… that was a lot. Let’s forget about this dropdown-land mess and focus exclusively on the dropdown type that is clearly a <select> element.
Let’s talk about <select>
Styling form controls is an interesting journey. As MDN puts it, there’s the good, the bad, and the ugly. Good is stuff like <form> which is just a block-level element to style. Bad is stuff like checkboxes, which can be done but is somewhat cumbersome. <select> is definitely in ugly terrain.
I could finish the article right here with “Don’t use <select>, period.” But let’s face reality: a select is still our best solution in a number of circumstances. That might include scenarios where we’re working with a list that contains a lot of options, layouts that are tight on space, or simply a lack of time or budget to design and implement a great custom interactive component from scratch.
Custom <select> requirements
When we make the decision to create a custom select — even if it’s just a “simple” one — these are the requirements we generally have to work with:
There is a button that contains the current selected option.
Clicking the box toggles the visibility of the options list (also called listbox).
Clicking an option in the listbox updates the selected value. The button text changes and the listbox is closed.
Clicking outside the component closes the listbox.
The trigger contains a small triangle icon pointing downward to indicate there are options.
Something like this:
CodePen Embed Fallback
Some of you may be thinking this works and is good to go. But wait… does it work for everyone? Not everyone uses a mouse (or touch screen). Plus, a native <select> element comes with more features we get for free and aren’t included in those requirements, such as:
The checked option is perceivable for all users regardless of their visual abilities.
The component can interact with a keyboard in a predictable way across all browsers (e.g. using arrow keys to navigate, Enter to select, Esc to cancel, etc.).
Assistive technologies (e.g. screen readers) announce the element clearly to users, including its role, name and state.
The listbox position is adjusted. (i.e. does not get cut off of the screen).
The element respects the user’s operating system preferences (e.g high contrast, color scheme, motion, etc.).
This is where the majority of the custom selects fail in some way. Take a look at some of the major UI components libraries. I won’t mention any because the web is ephemeral, but go give it a try. You’ll likely notice that the select component in one framework behaves differently from another.
Here are additional characteristics to watch for:
Is a listbox option immediately activated on focus when navigating with a keyboard?
Can you use Enter and/or Space to select an option?
Does the Tab key jump go to the next option in the listbox, or jump to the next form control?
What happens when you reach the last option in the listbox using arrow keys? Does it simply stay at the last item, does it go back to the first option, or worst of all, does focus move to the next form control?
Is it possible to jump directly to the last item in the listbox using the Page Down key?
Is it possible to scroll through the listbox items if there are more than what is currently in view?
This is a small sample of the features included in a native <select> element.
Once we decide to create our own custom select, we are forcing people to use it in a certain way that may not be what they expect.
But it gets worse. Even the native <select>behaves differently across browsers and screen readers. Once we decide to create our own custom select, we are forcing people to use it in a certain way that may not be what they expect. That’s a dangerous decision and it’s in those details where the devil lives.
Building a “hybrid” select
When we build a simple custom select, we are making a trade-off without noticing it. Specifically, we sacrifice functionality to aesthetics. It should be the other way around.
What if we instead deliver a native select by default and replace it with a more aesthetically pleasing one if possible? That’s where the “hybrid” select idea comes into action. It’s “hybrid” because it consists of two selects, showing the appropriate one at the right moment:
A native select, visible and accessible by default
A custom select, hidden until it’s safe to be interacted with a mouse
Let’s start with markup. First, we’ll add a native <select> with <option> items before the custom selector for this to work. (I’ll explain why in just a bit.)
Any form control must have a descriptive label. We could use <label>, but that would focus the native select when the label is clicked. To prevent that behavior, we’ll use a <span> and connect it to the select using aria-labelledby.
Finally, we need to tell Assistive Technologies to ignore the custom select, using aria-hidden="true". That way, only the native select is announced by them, no matter what.
This takes us to styling, where we not only make things look pretty, but where we handle the switch from one select to the other. We need just a few new declarations to make all the magic happen.
First, both native and custom selects must have the same width and height. This ensures people don’t see major differences in the layout when a switch happens.
There are two selects, but only one can dictate the space that holds them. The other needs to be absolutely positioned to take it out of the document flow. Let’s do that to the custom select because it’s the “replacement” that’s used only if it can be. We’ll hide it by default so it can’t be reached by anyone just yet.
Here comes the “funny” part. We need to detect if someone is using a device where hover is part of the primary input, like a computer with a mouse. While we typically think of media queries for responsive breakpoints or checking feature support, we can use it to detect hover support too using @media query (hover :hover), which is supported by all major browsers. So, let’s use it to show the custom select only on devices that have hover:
Great, but what about people who use a keyboard to navigate even in devices that have hover? What we’ll do is hide the custom select when the native select is in focus. We can reach for an adjacent Sibling combinatioron (+). When the native select is in focus, hide the custom select next to it in the DOM order. (This is why the native select should be placed before the custom one.)
That’s it! The trick to switch between both selects is done! There are other CSS ways to do it, of course, but this works nicely.
Last, we need a sprinkle of JavaScript. Let’s add some event listeners:
One for click events that trigger the custom select to open and reveal the options
One to sync both selects values. When one select value is changed, the other select value updates as well
One for basic keyboard navigation controls, like navigation with Up and Down keys, selecting options with the Enter or Space keys, and closing the select with Esc
CodePen Embed Fallback
Usability testing
I conducted a very small usability test where I asked a few people with disabilities to try the hybrid select component. The following devices and tools were tested using the latest versions of Chrome (81), Firefox (76) and Safari (13):
Desktop device using mouse only
Desktop device using keyboard only
VoiceOver on MacOS using keyboard
NVDA on Windows using keyboard
VoiceOver on iPhone and iPad using Safari
All these tests worked as expected, but I believe this could have even more usability tests with more diverse people and tools. If you have access to other devices or tools — such as JAWS, Dragon, etc. — please tell me how the test goes.
An issue was found during testing. Specifically, the issue was with the VoiceOver setting “Mouse pointers: Moves Voice Over cursor.” If the user opens the select with a mouse, the custom select will be opened (instead of the native) and the user won’t experience the native select.
What I most like about this approach is how it uses the best of both worlds without compromising the core functionality:
Users on mobile and tablets get the native select, which generally offers a better user experience than a custom select, including performance benefits.
Keyboard users get to interact with the native select the way they would expect.
Assistive Technologies can interact with the native select like normal.
Mouse users get to interact with the enhanced custom select.
This approach provides essential native functionality for everyone without the extra huge code effort to implement all the native features.
Don’t get me wrong. This technique is not a one-size-fits-all solution. It may work for simple selects but probably won’t work for cases that involve complex interactions. In those cases, we’d need to use ARIA and JavaScript to complement the gaps and create a truly accessible custom select.
A note about selects that look like menus
Let’s take a look back at the third Dropdown-land scenario. If you recall, it’s a dropdown that always has a checked option (e.g. sorting some content). I classified it in the gray area, as either a menu or a select.
Here’s my line of thought: Years ago, this type of dropdown was implemented mostly using a native <select>. Nowadays, it is common to see it implemented from scratch with custom styles (accessible or not). What we end up with is a select element that looks like a menu.
A <select> is a type of menu. Both have similar semantics and behavior, especially in a scenario that involves a list of options where one is always checked. Now, let me mention the WCAG 3.2.2 On Input (Level A) criterion:
Changing the setting of any user interface component should not automatically cause a change of context unless the user has been advised of the behavior before using the component.
Let’s put this in practice. Imagine a sortable list of students. Visually, it may be obvious that sorting is immediate, but that’s not necessarily true for everyone. So, when using <select>, we risk failing the WCAG guideline because the page content changed, and ignificantly re-arranging the content of a page is considered a change of context.
To ensure the criterion success, we must warn the user about the action before they interact with the element, or include a <button> immediately after the select to confirm the change.
<label for="sortStudents">
  Sort students
  <!-- Warn the user about the change when a confirmation button is not present. -->
  <span class="visually-hidden">(Immediate effect upon selection)</span>
</label>
<select id="sortStudents"> ... </select>
That said, using a <select> or building a custom menu are both good approaches when it comes to simple menus that change the page content. Just remember that your decision will dictate the amount of work required to make the component fully accessible. This is a scenario where the hybrid select approach could be used.
Final words
This whole idea started as an innocent CSS trick but, after all of this research, I was reminded once more that creating unique experiences without compromising accessibility is not an easy task.
Building truly accessible select components (or any kind of dropdown) is harder than it looks. WCAG provides excellent guidance and best practices, but without specific examples and diverse practical uses cases, the guidelines are mostly aspirational. That’s not to mention the fact that ARIA support is tepid and that native <select> elements look and behave differently across browsers.
The “hybrid” select is just another attempt to create a good looking select while getting as many native features as possible. Don’t look at this technique experiment as an excuse to downplay accessibility, but rather as an attempt to serve both worlds. If you have the resources, time and the needed skills, please do it right and make sure to test it with different users before shipping your component to the world.
P.S. Remember to use a proper name when making a “dropdown” component. 😉
There are some neat interactive demos in here from Thiru Manikandan. There are a couple of very tricky things with z-index that never fail to confuse. In addition to things like requiring positioning and source order, the trickiest are the stacking contexts and parent/child relationships. z-index isn’t a flat playing field. Even if you put z-index: 2147483644¹ on an element, it’s possible nothing will happen because that element might be inside a parent element with its own stacking context and a lower z-index than a sibling or some higher-up level DOM element.
Just three shy of the maximum 2147483647. LOLZ. Hat tip to Dan Danney who mentioned seeing that in the wild recently.
In this Affinity Publisher tutorial, you’ll learn how to create a tear-off flyer template. This flyer is quick and easy to create, and you can easily adapt it with your own choice of images and fonts. You’ll learn how to create a cool flyer with tear-off tabs—a bonus free tear-off flyer template is also included.
This flyer template is for a US Letter-sized flyer with tear-off tabs, perfect for advertising business services or local events in your neighborhood. You’ll pick up tips on how to create a catchy flyer, using impactful colours, graphics, and photos to create a compelling tear-off flyer.
This tear-off flyer tutorial comes complete with a downloadable free tear-off flyer template for both Adobe InDesign and Affinity Publisher, allowing you to quickly create your own flyer with tear-off tabs.
Follow the steps below to get to grips with Affinity Publisher, pick up key print design skills, and learn how to make a good flyer from scratch.
What You’ll Learn in This Affinity Publisher Flyer Tutorial
How to make a blank tear-off flyer template and good flyer design, complete with stylish typography and colours.
How to create layers and colour swatches and then format text for your tear-off flyer in Affinity Publisher.
How to create a flyer template with tear-off tabs, set up to a standard US Letter format.
How to make a flyer template with an adaptable layout that can be customised with your own images and fonts.
Looking for more Affinity Publisher templates and blank tear-off flyer templates? Don’t miss the wide selection of flyer templates on Envato Elements.
What You’ll Need to Create Your Tear-Off Flyer Template
Let’s get started with how to make a tear-off flyer in Affinity Publisher. In this tutorial, we’ll be using Affinity Publisher to create our tear-off flyer template, and we’ll dip into Affinity Photo to edit the photo to place into the Affinity Publisher template. If you’re an InDesign user, you can download the InDesign flyer template.
As well as access to Publisher, you’ll also need to download the following fonts and images from Envato Elements to recreate the tear-off flyer design pictured here:
1. How to Set Up Your Blank Tear-Off Flyer Template in Affinity Publisher
Step 1
Open Publisher, and go to File > New.
Select Print from the options along the top of the window. Set the Page width to 11 in and Page height to 8.5 in. Deselect Facing Pages under the Pages section.
Step 2
From the Margins options, set a margin width of 0.5 in for all sides of the page except the Bottom, which you can set to 2.75 in. Add a Bleed width of 0.25 in.
Then click Create.
Step 3
Double-click on Page 1 in the Pages panel to go to the main page of your document.
Go to the Layers panel (View > Studio > Layers), click on the Add Layer button at the bottom-right of the panel, and rename Layer 1 as Background.
Click on the Add Layer button again. Name this second layer Text Behind. Repeat to create two more layers: Images and Text in Front.
Select all the layers except Background and lock them by clicking the padlock icon at top-right.
Step 4
Go to the Swatches panel (View > Studio > Swatches) and choose Add Global Colour from the drop-down menu at top-right.
Name the swatch Off-White and set the levels below to C=3 M=1 Y=4 K=0. Then click Add.
Repeat to create five more swatches:
Dark Yellow: C=4 M=44 Y=90 K=0
Medium Yellow: C=0 M=35 Y=81 K=0
Pale Yellow: C=0 M=28 Y=72 K=0
Purple: C=76 M=78 Y=0 K=0
Dark Purple: C=92 M=100 Y=7 K=2
2. How to Add Colour and Text to Your Tear-Off Flyer Template
Step 1
Working on the Background layer, select the Rectangle Tool (M) from the Tools panel and drag across the whole of the page, extending the edges up to the bleed.
From the Swatches panel, set the Fill Colour to Medium Yellow.
Step 2
Lock the Background layer and unlock the layer above, Text Behind.
Select the Frame Text Tool (T) and drag across the left side of the page to create a small text frame.
Type in the description text (e.g. „Ellie’s Friendly / Dog Walking / Service”), and from the Character and Paragraph panels (View > Studio > Character), set the Font to Lumber, All Caps, and Align Center.
Set the Font Colour to Off-White and Dark Purple.
You can add more text below the heading (such as „30% Off / Your First Walk / With the Code Below”), set in Lumber, All Caps, Align Center, and an Off-White Font Colour.
Step 3
Switch to the Pen Tool (P) and, holding Shift, click twice to create a straight vertical line below the bottom text frame.
From the Swatches panel, set the Stroke Colour to Off-White.
From the Stroke panel (View > Studio > Stroke), set the Width of the line to 2.5 pt. From the End drop-down menu, choose Simple to apply an arrowhead to the stroke.
To the right of the End arrow option, increase the percentage to 225% to enlarge the arrowhead.
Step 4
Open up the set of EPS animal icons in a vector program, such as Affinity Designer or Adobe Illustrator, and identify the paw icon. You can either use this as an outlined icon, or fill the paw with solid colour, as I’ve done here. In the vector program, Edit > Copy the paw icon.
Back in Publisher, and still working on the Text Behind layer, Edit > Paste the icon onto the page. Adjust the colour to Pale Yellow, and position it towards the top right of the layout.
Paste more paw icons, grouping them across the page to create a trail effect, setting the colour of some to Pale Yellow and others to Dark Yellow, to contrast against the background.
Step 5
Switch to the Pen Tool (P) and use this to draw a loose, wavy line across the top-left corner of the page. To create curves, hold the mouse down while you click. You can tidy up the curve afterwards by using the Node Tool (A) to select individual anchor points.
Make sure the line has no colour, from the Swatches panel.
Choose the Artistic Text Tool (T) from the Tools panel. Hover over the far left edge of the line and click to transform the line into a text path.
Type in introductory text (e.g. „did someone say…”). Highlight the text and set the Font to Southern, with an Off-White Font Colour.
Step 6
Select the Frame Text Tool (T) and create a larger text frame below the curved line, for a main title (e.g. „Walkies”). Rotate the frame slightly anti-clockwise.
Set the Font to Southern and the Font Colour to Dark Purple. You can make the text appear jauntier by highlighting individual letters and adjusting the Baseline value from the Positioning and Transform options in the Character panel.
For this design, I’ve also added a question mark in a separate text frame.
3. How to Remove the Background From a Photo in Affinity Photo
Step 1
Before we can use the photo we’ve chosen for our tear-off flyer design, we’ll need to remove the background.
Open the photo in Affinity Photo, before duplicating and switching off the visibility of the Background layer.
Go to Select > Select Sampled Colour, and click on the white background.
In the Select Sampled Colour window, adjust the Tolerance slider until all of the background colour is selected. Then click Apply.
Step 2
Delete the selection to remove the background, before saving the file as an afphoto file.
Step 3
Back in Affinity Publisher, use the Picture Frame Rectangle Tool (F) to create an image frame on the Images layer, towards the right side of the page, above the bottom margin.
File > Place, choosing the edited photo and opening it. Double-click inside the frame to select the image and scale it if needed.
4. How to Add a Tear-Off Section to Your Flyer Template
Step 1
Working on the Images layer, use the Rectangle Tool (M) to create a shape across the bottom margin area.
Set the Fill Colour to Dark Purple.
Step 2
Use guides pulled out from the left-hand ruler (View > Show Rulers) to divide the page into sections. You can divide the width of the page (8.5 in) into as many sections as you want—these will form the tear-off parts of your flyer.
Step 3
Use the Pen Tool (P) to create a vertical line over the first guide, setting the Stroke Colour to Medium Yellow.
From the Stroke panel, set the Style to Dash Line Style and the Width to 2.5 pt, and adjust the Dash options at the bottom of the panel to adjust the look of the dashed line.
Copy and Paste the line, moving each over a guide, to create a row of tear-off tabs.
Step 4
Use the Frame Text Tool (T) to create a text frame for the details on the tear-off tab, such as contact details.
Set the Font to Lumber, and vary the Font Colour between Off-White and Pale Yellow.
On the text frame, Right-Click > Transform > Rotate Left, and position the text frame centrally on the first tab.
Copy and Paste the text frame, positioning each pasted frame in its own tab.
5. How to Export Your Tear-Off Flyer for Print
Step 1
When you’ve finished working on your flyer, it’s time to export your artwork as a PDF, ready for sending to print.
Make sure to File > Save your work, before going to File > Export.
In the window that opens, choose PDF from the icon options at the top, and select PDF (press ready) from the Preset menu.
Make sure the Raster DPI is set to 300 and that the Include Bleed box is checked.
Then click Export.
Step 2
Name your file, select a folder to save it into, and then hit Save.
You can now send the exported PDF straight off to the printers!
Conclusion: Your Finished Tear-Off Flyer Template
Your tear-off flyer template with tear-off tabs is finished—great job!
In this tutorial, you’ve picked up a wide range of skills and techniques for how to make a good flyer and how to create a tear-off flyer in Affinity Publisher, from setting up a blank tear-off flyer template to creating colour swatches, placing images, and formatting typography to create a stylish and contemporary tear-off flyer design.
If you want to compare your tear-off flyer design with my own, make sure to download the completed Affinity Publisher template. The same tear-off flyer design is also available as an InDesign flyer template.
It’s quick and easy to customise your tear-off flyer design further by swapping in different colour swatches, fonts, and images, to create a completely unique tear-off flyer of your own.
Looking for more Affinity Publisher templates and InDesign flyer templates? Discover more flyer templates for tri-fold brochures, tear-off flyers and more over on Envato Elements.
Eager to develop your flyer design skills further? Don’t miss these Affinity Publisher and Affinity Photo flyer and print design tutorials:
Affinity Publisher templates can be a helpful addition to any print project, saving you both time and money. Let’s take a look at some awesome, Affinity…
In this tutorial, you’ll learn how to create a simple and stylish magazine spread using Affinity Publisher, the great-value and easy-to-use alternative to…
Adobe InDesign has long been the market leader in publishing software. But rival layout design programs are starting to make waves in the market, with…
Whether you are switching from Photoshop or this is your first editing software and you are new to learning photo effects, getting started in a program can…
In this Affinity Publisher tutorial, you’ll learn how to create a tear-off flyer template. This flyer is quick and easy to create, and you can easily adapt it with your own choice of images and fonts. You’ll learn how to create a cool flyer with tear-off tabs—a bonus free tear-off flyer template is also included.
This flyer template is for a US Letter-sized flyer with tear-off tabs, perfect for advertising business services or local events in your neighborhood. You’ll pick up tips on how to create a catchy flyer, using impactful colours, graphics, and photos to create a compelling tear-off flyer.
This tear-off flyer tutorial comes complete with a downloadable free tear-off flyer template for both Adobe InDesign and Affinity Publisher, allowing you to quickly create your own flyer with tear-off tabs.
Follow the steps below to get to grips with Affinity Publisher, pick up key print design skills, and learn how to make a good flyer from scratch.
What You’ll Learn in This Affinity Publisher Flyer Tutorial
How to make a blank tear-off flyer template and good flyer design, complete with stylish typography and colours.
How to create layers and colour swatches and then format text for your tear-off flyer in Affinity Publisher.
How to create a flyer template with tear-off tabs, set up to a standard US Letter format.
How to make a flyer template with an adaptable layout that can be customised with your own images and fonts.
Looking for more Affinity Publisher templates and blank tear-off flyer templates? Don’t miss the wide selection of flyer templates on Envato Elements.
What You’ll Need to Create Your Tear-Off Flyer Template
Let’s get started with how to make a tear-off flyer in Affinity Publisher. In this tutorial, we’ll be using Affinity Publisher to create our tear-off flyer template, and we’ll dip into Affinity Photo to edit the photo to place into the Affinity Publisher template. If you’re an InDesign user, you can download the InDesign flyer template.
As well as access to Publisher, you’ll also need to download the following fonts and images from Envato Elements to recreate the tear-off flyer design pictured here:
1. How to Set Up Your Blank Tear-Off Flyer Template in Affinity Publisher
Step 1
Open Publisher, and go to File > New.
Select Print from the options along the top of the window. Set the Page width to 11 in and Page height to 8.5 in. Deselect Facing Pages under the Pages section.
Step 2
From the Margins options, set a margin width of 0.5 in for all sides of the page except the Bottom, which you can set to 2.75 in. Add a Bleed width of 0.25 in.
Then click Create.
Step 3
Double-click on Page 1 in the Pages panel to go to the main page of your document.
Go to the Layers panel (View > Studio > Layers), click on the Add Layer button at the bottom-right of the panel, and rename Layer 1 as Background.
Click on the Add Layer button again. Name this second layer Text Behind. Repeat to create two more layers: Images and Text in Front.
Select all the layers except Background and lock them by clicking the padlock icon at top-right.
Step 4
Go to the Swatches panel (View > Studio > Swatches) and choose Add Global Colour from the drop-down menu at top-right.
Name the swatch Off-White and set the levels below to C=3 M=1 Y=4 K=0. Then click Add.
Repeat to create five more swatches:
Dark Yellow: C=4 M=44 Y=90 K=0
Medium Yellow: C=0 M=35 Y=81 K=0
Pale Yellow: C=0 M=28 Y=72 K=0
Purple: C=76 M=78 Y=0 K=0
Dark Purple: C=92 M=100 Y=7 K=2
2. How to Add Colour and Text to Your Tear-Off Flyer Template
Step 1
Working on the Background layer, select the Rectangle Tool (M) from the Tools panel and drag across the whole of the page, extending the edges up to the bleed.
From the Swatches panel, set the Fill Colour to Medium Yellow.
Step 2
Lock the Background layer and unlock the layer above, Text Behind.
Select the Frame Text Tool (T) and drag across the left side of the page to create a small text frame.
Type in the description text (e.g. „Ellie’s Friendly / Dog Walking / Service”), and from the Character and Paragraph panels (View > Studio > Character), set the Font to Lumber, All Caps, and Align Center.
Set the Font Colour to Off-White and Dark Purple.
You can add more text below the heading (such as „30% Off / Your First Walk / With the Code Below”), set in Lumber, All Caps, Align Center, and an Off-White Font Colour.
Step 3
Switch to the Pen Tool (P) and, holding Shift, click twice to create a straight vertical line below the bottom text frame.
From the Swatches panel, set the Stroke Colour to Off-White.
From the Stroke panel (View > Studio > Stroke), set the Width of the line to 2.5 pt. From the End drop-down menu, choose Simple to apply an arrowhead to the stroke.
To the right of the End arrow option, increase the percentage to 225% to enlarge the arrowhead.
Step 4
Open up the set of EPS animal icons in a vector program, such as Affinity Designer or Adobe Illustrator, and identify the paw icon. You can either use this as an outlined icon, or fill the paw with solid colour, as I’ve done here. In the vector program, Edit > Copy the paw icon.
Back in Publisher, and still working on the Text Behind layer, Edit > Paste the icon onto the page. Adjust the colour to Pale Yellow, and position it towards the top right of the layout.
Paste more paw icons, grouping them across the page to create a trail effect, setting the colour of some to Pale Yellow and others to Dark Yellow, to contrast against the background.
Step 5
Switch to the Pen Tool (P) and use this to draw a loose, wavy line across the top-left corner of the page. To create curves, hold the mouse down while you click. You can tidy up the curve afterwards by using the Node Tool (A) to select individual anchor points.
Make sure the line has no colour, from the Swatches panel.
Choose the Artistic Text Tool (T) from the Tools panel. Hover over the far left edge of the line and click to transform the line into a text path.
Type in introductory text (e.g. „did someone say…”). Highlight the text and set the Font to Southern, with an Off-White Font Colour.
Step 6
Select the Frame Text Tool (T) and create a larger text frame below the curved line, for a main title (e.g. „Walkies”). Rotate the frame slightly anti-clockwise.
Set the Font to Southern and the Font Colour to Dark Purple. You can make the text appear jauntier by highlighting individual letters and adjusting the Baseline value from the Positioning and Transform options in the Character panel.
For this design, I’ve also added a question mark in a separate text frame.
3. How to Remove the Background From a Photo in Affinity Photo
Step 1
Before we can use the photo we’ve chosen for our tear-off flyer design, we’ll need to remove the background.
Open the photo in Affinity Photo, before duplicating and switching off the visibility of the Background layer.
Go to Select > Select Sampled Colour, and click on the white background.
In the Select Sampled Colour window, adjust the Tolerance slider until all of the background colour is selected. Then click Apply.
Step 2
Delete the selection to remove the background, before saving the file as an afphoto file.
Step 3
Back in Affinity Publisher, use the Picture Frame Rectangle Tool (F) to create an image frame on the Images layer, towards the right side of the page, above the bottom margin.
File > Place, choosing the edited photo and opening it. Double-click inside the frame to select the image and scale it if needed.
4. How to Add a Tear-Off Section to Your Flyer Template
Step 1
Working on the Images layer, use the Rectangle Tool (M) to create a shape across the bottom margin area.
Set the Fill Colour to Dark Purple.
Step 2
Use guides pulled out from the left-hand ruler (View > Show Rulers) to divide the page into sections. You can divide the width of the page (8.5 in) into as many sections as you want—these will form the tear-off parts of your flyer.
Step 3
Use the Pen Tool (P) to create a vertical line over the first guide, setting the Stroke Colour to Medium Yellow.
From the Stroke panel, set the Style to Dash Line Style and the Width to 2.5 pt, and adjust the Dash options at the bottom of the panel to adjust the look of the dashed line.
Copy and Paste the line, moving each over a guide, to create a row of tear-off tabs.
Step 4
Use the Frame Text Tool (T) to create a text frame for the details on the tear-off tab, such as contact details.
Set the Font to Lumber, and vary the Font Colour between Off-White and Pale Yellow.
On the text frame, Right-Click > Transform > Rotate Left, and position the text frame centrally on the first tab.
Copy and Paste the text frame, positioning each pasted frame in its own tab.
5. How to Export Your Tear-Off Flyer for Print
Step 1
When you’ve finished working on your flyer, it’s time to export your artwork as a PDF, ready for sending to print.
Make sure to File > Save your work, before going to File > Export.
In the window that opens, choose PDF from the icon options at the top, and select PDF (press ready) from the Preset menu.
Make sure the Raster DPI is set to 300 and that the Include Bleed box is checked.
Then click Export.
Step 2
Name your file, select a folder to save it into, and then hit Save.
You can now send the exported PDF straight off to the printers!
Conclusion: Your Finished Tear-Off Flyer Template
Your tear-off flyer template with tear-off tabs is finished—great job!
In this tutorial, you’ve picked up a wide range of skills and techniques for how to make a good flyer and how to create a tear-off flyer in Affinity Publisher, from setting up a blank tear-off flyer template to creating colour swatches, placing images, and formatting typography to create a stylish and contemporary tear-off flyer design.
If you want to compare your tear-off flyer design with my own, make sure to download the completed Affinity Publisher template. The same tear-off flyer design is also available as an InDesign flyer template.
It’s quick and easy to customise your tear-off flyer design further by swapping in different colour swatches, fonts, and images, to create a completely unique tear-off flyer of your own.
Looking for more Affinity Publisher templates and InDesign flyer templates? Discover more flyer templates for tri-fold brochures, tear-off flyers and more over on Envato Elements.
Eager to develop your flyer design skills further? Don’t miss these Affinity Publisher and Affinity Photo flyer and print design tutorials:
Affinity Publisher templates can be a helpful addition to any print project, saving you both time and money. Let’s take a look at some awesome, Affinity…
In this tutorial, you’ll learn how to create a simple and stylish magazine spread using Affinity Publisher, the great-value and easy-to-use alternative to…
Adobe InDesign has long been the market leader in publishing software. But rival layout design programs are starting to make waves in the market, with…
Whether you are switching from Photoshop or this is your first editing software and you are new to learning photo effects, getting started in a program can…
In this Affinity Publisher tutorial, you’ll learn how to create a tear-off flyer template. This flyer is quick and easy to create, and you can easily adapt it with your own choice of images and fonts. You’ll learn how to create a cool flyer with tear-off tabs—a bonus free tear-off flyer template is also included.
This flyer template is for a US Letter-sized flyer with tear-off tabs, perfect for advertising business services or local events in your neighborhood. You’ll pick up tips on how to create a catchy flyer, using impactful colours, graphics, and photos to create a compelling tear-off flyer.
This tear-off flyer tutorial comes complete with a downloadable free tear-off flyer template for both Adobe InDesign and Affinity Publisher, allowing you to quickly create your own flyer with tear-off tabs.
Follow the steps below to get to grips with Affinity Publisher, pick up key print design skills, and learn how to make a good flyer from scratch.
What You’ll Learn in This Affinity Publisher Flyer Tutorial
How to make a blank tear-off flyer template and good flyer design, complete with stylish typography and colours.
How to create layers and colour swatches and then format text for your tear-off flyer in Affinity Publisher.
How to create a flyer template with tear-off tabs, set up to a standard US Letter format.
How to make a flyer template with an adaptable layout that can be customised with your own images and fonts.
Looking for more Affinity Publisher templates and blank tear-off flyer templates? Don’t miss the wide selection of flyer templates on Envato Elements.
What You’ll Need to Create Your Tear-Off Flyer Template
Let’s get started with how to make a tear-off flyer in Affinity Publisher. In this tutorial, we’ll be using Affinity Publisher to create our tear-off flyer template, and we’ll dip into Affinity Photo to edit the photo to place into the Affinity Publisher template. If you’re an InDesign user, you can download the InDesign flyer template.
As well as access to Publisher, you’ll also need to download the following fonts and images from Envato Elements to recreate the tear-off flyer design pictured here:
1. How to Set Up Your Blank Tear-Off Flyer Template in Affinity Publisher
Step 1
Open Publisher, and go to File > New.
Select Print from the options along the top of the window. Set the Page width to 11 in and Page height to 8.5 in. Deselect Facing Pages under the Pages section.
Step 2
From the Margins options, set a margin width of 0.5 in for all sides of the page except the Bottom, which you can set to 2.75 in. Add a Bleed width of 0.25 in.
Then click Create.
Step 3
Double-click on Page 1 in the Pages panel to go to the main page of your document.
Go to the Layers panel (View > Studio > Layers), click on the Add Layer button at the bottom-right of the panel, and rename Layer 1 as Background.
Click on the Add Layer button again. Name this second layer Text Behind. Repeat to create two more layers: Images and Text in Front.
Select all the layers except Background and lock them by clicking the padlock icon at top-right.
Step 4
Go to the Swatches panel (View > Studio > Swatches) and choose Add Global Colour from the drop-down menu at top-right.
Name the swatch Off-White and set the levels below to C=3 M=1 Y=4 K=0. Then click Add.
Repeat to create five more swatches:
Dark Yellow: C=4 M=44 Y=90 K=0
Medium Yellow: C=0 M=35 Y=81 K=0
Pale Yellow: C=0 M=28 Y=72 K=0
Purple: C=76 M=78 Y=0 K=0
Dark Purple: C=92 M=100 Y=7 K=2
2. How to Add Colour and Text to Your Tear-Off Flyer Template
Step 1
Working on the Background layer, select the Rectangle Tool (M) from the Tools panel and drag across the whole of the page, extending the edges up to the bleed.
From the Swatches panel, set the Fill Colour to Medium Yellow.
Step 2
Lock the Background layer and unlock the layer above, Text Behind.
Select the Frame Text Tool (T) and drag across the left side of the page to create a small text frame.
Type in the description text (e.g. „Ellie’s Friendly / Dog Walking / Service”), and from the Character and Paragraph panels (View > Studio > Character), set the Font to Lumber, All Caps, and Align Center.
Set the Font Colour to Off-White and Dark Purple.
You can add more text below the heading (such as „30% Off / Your First Walk / With the Code Below”), set in Lumber, All Caps, Align Center, and an Off-White Font Colour.
Step 3
Switch to the Pen Tool (P) and, holding Shift, click twice to create a straight vertical line below the bottom text frame.
From the Swatches panel, set the Stroke Colour to Off-White.
From the Stroke panel (View > Studio > Stroke), set the Width of the line to 2.5 pt. From the End drop-down menu, choose Simple to apply an arrowhead to the stroke.
To the right of the End arrow option, increase the percentage to 225% to enlarge the arrowhead.
Step 4
Open up the set of EPS animal icons in a vector program, such as Affinity Designer or Adobe Illustrator, and identify the paw icon. You can either use this as an outlined icon, or fill the paw with solid colour, as I’ve done here. In the vector program, Edit > Copy the paw icon.
Back in Publisher, and still working on the Text Behind layer, Edit > Paste the icon onto the page. Adjust the colour to Pale Yellow, and position it towards the top right of the layout.
Paste more paw icons, grouping them across the page to create a trail effect, setting the colour of some to Pale Yellow and others to Dark Yellow, to contrast against the background.
Step 5
Switch to the Pen Tool (P) and use this to draw a loose, wavy line across the top-left corner of the page. To create curves, hold the mouse down while you click. You can tidy up the curve afterwards by using the Node Tool (A) to select individual anchor points.
Make sure the line has no colour, from the Swatches panel.
Choose the Artistic Text Tool (T) from the Tools panel. Hover over the far left edge of the line and click to transform the line into a text path.
Type in introductory text (e.g. „did someone say…”). Highlight the text and set the Font to Southern, with an Off-White Font Colour.
Step 6
Select the Frame Text Tool (T) and create a larger text frame below the curved line, for a main title (e.g. „Walkies”). Rotate the frame slightly anti-clockwise.
Set the Font to Southern and the Font Colour to Dark Purple. You can make the text appear jauntier by highlighting individual letters and adjusting the Baseline value from the Positioning and Transform options in the Character panel.
For this design, I’ve also added a question mark in a separate text frame.
3. How to Remove the Background From a Photo in Affinity Photo
Step 1
Before we can use the photo we’ve chosen for our tear-off flyer design, we’ll need to remove the background.
Open the photo in Affinity Photo, before duplicating and switching off the visibility of the Background layer.
Go to Select > Select Sampled Colour, and click on the white background.
In the Select Sampled Colour window, adjust the Tolerance slider until all of the background colour is selected. Then click Apply.
Step 2
Delete the selection to remove the background, before saving the file as an afphoto file.
Step 3
Back in Affinity Publisher, use the Picture Frame Rectangle Tool (F) to create an image frame on the Images layer, towards the right side of the page, above the bottom margin.
File > Place, choosing the edited photo and opening it. Double-click inside the frame to select the image and scale it if needed.
4. How to Add a Tear-Off Section to Your Flyer Template
Step 1
Working on the Images layer, use the Rectangle Tool (M) to create a shape across the bottom margin area.
Set the Fill Colour to Dark Purple.
Step 2
Use guides pulled out from the left-hand ruler (View > Show Rulers) to divide the page into sections. You can divide the width of the page (8.5 in) into as many sections as you want—these will form the tear-off parts of your flyer.
Step 3
Use the Pen Tool (P) to create a vertical line over the first guide, setting the Stroke Colour to Medium Yellow.
From the Stroke panel, set the Style to Dash Line Style and the Width to 2.5 pt, and adjust the Dash options at the bottom of the panel to adjust the look of the dashed line.
Copy and Paste the line, moving each over a guide, to create a row of tear-off tabs.
Step 4
Use the Frame Text Tool (T) to create a text frame for the details on the tear-off tab, such as contact details.
Set the Font to Lumber, and vary the Font Colour between Off-White and Pale Yellow.
On the text frame, Right-Click > Transform > Rotate Left, and position the text frame centrally on the first tab.
Copy and Paste the text frame, positioning each pasted frame in its own tab.
5. How to Export Your Tear-Off Flyer for Print
Step 1
When you’ve finished working on your flyer, it’s time to export your artwork as a PDF, ready for sending to print.
Make sure to File > Save your work, before going to File > Export.
In the window that opens, choose PDF from the icon options at the top, and select PDF (press ready) from the Preset menu.
Make sure the Raster DPI is set to 300 and that the Include Bleed box is checked.
Then click Export.
Step 2
Name your file, select a folder to save it into, and then hit Save.
You can now send the exported PDF straight off to the printers!
Conclusion: Your Finished Tear-Off Flyer Template
Your tear-off flyer template with tear-off tabs is finished—great job!
In this tutorial, you’ve picked up a wide range of skills and techniques for how to make a good flyer and how to create a tear-off flyer in Affinity Publisher, from setting up a blank tear-off flyer template to creating colour swatches, placing images, and formatting typography to create a stylish and contemporary tear-off flyer design.
If you want to compare your tear-off flyer design with my own, make sure to download the completed Affinity Publisher template. The same tear-off flyer design is also available as an InDesign flyer template.
It’s quick and easy to customise your tear-off flyer design further by swapping in different colour swatches, fonts, and images, to create a completely unique tear-off flyer of your own.
Looking for more Affinity Publisher templates and InDesign flyer templates? Discover more flyer templates for tri-fold brochures, tear-off flyers and more over on Envato Elements.
Eager to develop your flyer design skills further? Don’t miss these Affinity Publisher and Affinity Photo flyer and print design tutorials:
Affinity Publisher templates can be a helpful addition to any print project, saving you both time and money. Let’s take a look at some awesome, Affinity…
In this tutorial, you’ll learn how to create a simple and stylish magazine spread using Affinity Publisher, the great-value and easy-to-use alternative to…
Adobe InDesign has long been the market leader in publishing software. But rival layout design programs are starting to make waves in the market, with…
Whether you are switching from Photoshop or this is your first editing software and you are new to learning photo effects, getting started in a program can…
In this Affinity Publisher tutorial, you’ll learn how to create a tear-off flyer template. This flyer is quick and easy to create, and you can easily adapt it with your own choice of images and fonts. You’ll learn how to create a cool flyer with tear-off tabs—a bonus free tear-off flyer template is also included.
This flyer template is for a US Letter-sized flyer with tear-off tabs, perfect for advertising business services or local events in your neighborhood. You’ll pick up tips on how to create a catchy flyer, using impactful colours, graphics, and photos to create a compelling tear-off flyer.
This tear-off flyer tutorial comes complete with a downloadable free tear-off flyer template for both Adobe InDesign and Affinity Publisher, allowing you to quickly create your own flyer with tear-off tabs.
Follow the steps below to get to grips with Affinity Publisher, pick up key print design skills, and learn how to make a good flyer from scratch.
What You’ll Learn in This Affinity Publisher Flyer Tutorial
How to make a blank tear-off flyer template and good flyer design, complete with stylish typography and colours.
How to create layers and colour swatches and then format text for your tear-off flyer in Affinity Publisher.
How to create a flyer template with tear-off tabs, set up to a standard US Letter format.
How to make a flyer template with an adaptable layout that can be customised with your own images and fonts.
Looking for more Affinity Publisher templates and blank tear-off flyer templates? Don’t miss the wide selection of flyer templates on Envato Elements.
What You’ll Need to Create Your Tear-Off Flyer Template
Let’s get started with how to make a tear-off flyer in Affinity Publisher. In this tutorial, we’ll be using Affinity Publisher to create our tear-off flyer template, and we’ll dip into Affinity Photo to edit the photo to place into the Affinity Publisher template. If you’re an InDesign user, you can download the InDesign flyer template.
As well as access to Publisher, you’ll also need to download the following fonts and images from Envato Elements to recreate the tear-off flyer design pictured here:
1. How to Set Up Your Blank Tear-Off Flyer Template in Affinity Publisher
Step 1
Open Publisher, and go to File > New.
Select Print from the options along the top of the window. Set the Page width to 11 in and Page height to 8.5 in. Deselect Facing Pages under the Pages section.
Step 2
From the Margins options, set a margin width of 0.5 in for all sides of the page except the Bottom, which you can set to 2.75 in. Add a Bleed width of 0.25 in.
Then click Create.
Step 3
Double-click on Page 1 in the Pages panel to go to the main page of your document.
Go to the Layers panel (View > Studio > Layers), click on the Add Layer button at the bottom-right of the panel, and rename Layer 1 as Background.
Click on the Add Layer button again. Name this second layer Text Behind. Repeat to create two more layers: Images and Text in Front.
Select all the layers except Background and lock them by clicking the padlock icon at top-right.
Step 4
Go to the Swatches panel (View > Studio > Swatches) and choose Add Global Colour from the drop-down menu at top-right.
Name the swatch Off-White and set the levels below to C=3 M=1 Y=4 K=0. Then click Add.
Repeat to create five more swatches:
Dark Yellow: C=4 M=44 Y=90 K=0
Medium Yellow: C=0 M=35 Y=81 K=0
Pale Yellow: C=0 M=28 Y=72 K=0
Purple: C=76 M=78 Y=0 K=0
Dark Purple: C=92 M=100 Y=7 K=2
2. How to Add Colour and Text to Your Tear-Off Flyer Template
Step 1
Working on the Background layer, select the Rectangle Tool (M) from the Tools panel and drag across the whole of the page, extending the edges up to the bleed.
From the Swatches panel, set the Fill Colour to Medium Yellow.
Step 2
Lock the Background layer and unlock the layer above, Text Behind.
Select the Frame Text Tool (T) and drag across the left side of the page to create a small text frame.
Type in the description text (e.g. „Ellie’s Friendly / Dog Walking / Service”), and from the Character and Paragraph panels (View > Studio > Character), set the Font to Lumber, All Caps, and Align Center.
Set the Font Colour to Off-White and Dark Purple.
You can add more text below the heading (such as „30% Off / Your First Walk / With the Code Below”), set in Lumber, All Caps, Align Center, and an Off-White Font Colour.
Step 3
Switch to the Pen Tool (P) and, holding Shift, click twice to create a straight vertical line below the bottom text frame.
From the Swatches panel, set the Stroke Colour to Off-White.
From the Stroke panel (View > Studio > Stroke), set the Width of the line to 2.5 pt. From the End drop-down menu, choose Simple to apply an arrowhead to the stroke.
To the right of the End arrow option, increase the percentage to 225% to enlarge the arrowhead.
Step 4
Open up the set of EPS animal icons in a vector program, such as Affinity Designer or Adobe Illustrator, and identify the paw icon. You can either use this as an outlined icon, or fill the paw with solid colour, as I’ve done here. In the vector program, Edit > Copy the paw icon.
Back in Publisher, and still working on the Text Behind layer, Edit > Paste the icon onto the page. Adjust the colour to Pale Yellow, and position it towards the top right of the layout.
Paste more paw icons, grouping them across the page to create a trail effect, setting the colour of some to Pale Yellow and others to Dark Yellow, to contrast against the background.
Step 5
Switch to the Pen Tool (P) and use this to draw a loose, wavy line across the top-left corner of the page. To create curves, hold the mouse down while you click. You can tidy up the curve afterwards by using the Node Tool (A) to select individual anchor points.
Make sure the line has no colour, from the Swatches panel.
Choose the Artistic Text Tool (T) from the Tools panel. Hover over the far left edge of the line and click to transform the line into a text path.
Type in introductory text (e.g. „did someone say…”). Highlight the text and set the Font to Southern, with an Off-White Font Colour.
Step 6
Select the Frame Text Tool (T) and create a larger text frame below the curved line, for a main title (e.g. „Walkies”). Rotate the frame slightly anti-clockwise.
Set the Font to Southern and the Font Colour to Dark Purple. You can make the text appear jauntier by highlighting individual letters and adjusting the Baseline value from the Positioning and Transform options in the Character panel.
For this design, I’ve also added a question mark in a separate text frame.
3. How to Remove the Background From a Photo in Affinity Photo
Step 1
Before we can use the photo we’ve chosen for our tear-off flyer design, we’ll need to remove the background.
Open the photo in Affinity Photo, before duplicating and switching off the visibility of the Background layer.
Go to Select > Select Sampled Colour, and click on the white background.
In the Select Sampled Colour window, adjust the Tolerance slider until all of the background colour is selected. Then click Apply.
Step 2
Delete the selection to remove the background, before saving the file as an afphoto file.
Step 3
Back in Affinity Publisher, use the Picture Frame Rectangle Tool (F) to create an image frame on the Images layer, towards the right side of the page, above the bottom margin.
File > Place, choosing the edited photo and opening it. Double-click inside the frame to select the image and scale it if needed.
4. How to Add a Tear-Off Section to Your Flyer Template
Step 1
Working on the Images layer, use the Rectangle Tool (M) to create a shape across the bottom margin area.
Set the Fill Colour to Dark Purple.
Step 2
Use guides pulled out from the left-hand ruler (View > Show Rulers) to divide the page into sections. You can divide the width of the page (8.5 in) into as many sections as you want—these will form the tear-off parts of your flyer.
Step 3
Use the Pen Tool (P) to create a vertical line over the first guide, setting the Stroke Colour to Medium Yellow.
From the Stroke panel, set the Style to Dash Line Style and the Width to 2.5 pt, and adjust the Dash options at the bottom of the panel to adjust the look of the dashed line.
Copy and Paste the line, moving each over a guide, to create a row of tear-off tabs.
Step 4
Use the Frame Text Tool (T) to create a text frame for the details on the tear-off tab, such as contact details.
Set the Font to Lumber, and vary the Font Colour between Off-White and Pale Yellow.
On the text frame, Right-Click > Transform > Rotate Left, and position the text frame centrally on the first tab.
Copy and Paste the text frame, positioning each pasted frame in its own tab.
5. How to Export Your Tear-Off Flyer for Print
Step 1
When you’ve finished working on your flyer, it’s time to export your artwork as a PDF, ready for sending to print.
Make sure to File > Save your work, before going to File > Export.
In the window that opens, choose PDF from the icon options at the top, and select PDF (press ready) from the Preset menu.
Make sure the Raster DPI is set to 300 and that the Include Bleed box is checked.
Then click Export.
Step 2
Name your file, select a folder to save it into, and then hit Save.
You can now send the exported PDF straight off to the printers!
Conclusion: Your Finished Tear-Off Flyer Template
Your tear-off flyer template with tear-off tabs is finished—great job!
In this tutorial, you’ve picked up a wide range of skills and techniques for how to make a good flyer and how to create a tear-off flyer in Affinity Publisher, from setting up a blank tear-off flyer template to creating colour swatches, placing images, and formatting typography to create a stylish and contemporary tear-off flyer design.
If you want to compare your tear-off flyer design with my own, make sure to download the completed Affinity Publisher template. The same tear-off flyer design is also available as an InDesign flyer template.
It’s quick and easy to customise your tear-off flyer design further by swapping in different colour swatches, fonts, and images, to create a completely unique tear-off flyer of your own.
Looking for more Affinity Publisher templates and InDesign flyer templates? Discover more flyer templates for tri-fold brochures, tear-off flyers and more over on Envato Elements.
Eager to develop your flyer design skills further? Don’t miss these Affinity Publisher and Affinity Photo flyer and print design tutorials:
Affinity Publisher templates can be a helpful addition to any print project, saving you both time and money. Let’s take a look at some awesome, Affinity…
In this tutorial, you’ll learn how to create a simple and stylish magazine spread using Affinity Publisher, the great-value and easy-to-use alternative to…
Adobe InDesign has long been the market leader in publishing software. But rival layout design programs are starting to make waves in the market, with…
Whether you are switching from Photoshop or this is your first editing software and you are new to learning photo effects, getting started in a program can…
In this Affinity Publisher tutorial, you’ll learn how to create a tear-off flyer template. This flyer is quick and easy to create, and you can easily adapt it with your own choice of images and fonts. You’ll learn how to create a cool flyer with tear-off tabs—a bonus free tear-off flyer template is also included.
This flyer template is for a US Letter-sized flyer with tear-off tabs, perfect for advertising business services or local events in your neighborhood. You’ll pick up tips on how to create a catchy flyer, using impactful colours, graphics, and photos to create a compelling tear-off flyer.
This tear-off flyer tutorial comes complete with a downloadable free tear-off flyer template for both Adobe InDesign and Affinity Publisher, allowing you to quickly create your own flyer with tear-off tabs.
Follow the steps below to get to grips with Affinity Publisher, pick up key print design skills, and learn how to make a good flyer from scratch.
What You’ll Learn in This Affinity Publisher Flyer Tutorial
How to make a blank tear-off flyer template and good flyer design, complete with stylish typography and colours.
How to create layers and colour swatches and then format text for your tear-off flyer in Affinity Publisher.
How to create a flyer template with tear-off tabs, set up to a standard US Letter format.
How to make a flyer template with an adaptable layout that can be customised with your own images and fonts.
Looking for more Affinity Publisher templates and blank tear-off flyer templates? Don’t miss the wide selection of flyer templates on Envato Elements.
What You’ll Need to Create Your Tear-Off Flyer Template
Let’s get started with how to make a tear-off flyer in Affinity Publisher. In this tutorial, we’ll be using Affinity Publisher to create our tear-off flyer template, and we’ll dip into Affinity Photo to edit the photo to place into the Affinity Publisher template. If you’re an InDesign user, you can download the InDesign flyer template.
As well as access to Publisher, you’ll also need to download the following fonts and images from Envato Elements to recreate the tear-off flyer design pictured here:
1. How to Set Up Your Blank Tear-Off Flyer Template in Affinity Publisher
Step 1
Open Publisher, and go to File > New.
Select Print from the options along the top of the window. Set the Page width to 11 in and Page height to 8.5 in. Deselect Facing Pages under the Pages section.
Step 2
From the Margins options, set a margin width of 0.5 in for all sides of the page except the Bottom, which you can set to 2.75 in. Add a Bleed width of 0.25 in.
Then click Create.
Step 3
Double-click on Page 1 in the Pages panel to go to the main page of your document.
Go to the Layers panel (View > Studio > Layers), click on the Add Layer button at the bottom-right of the panel, and rename Layer 1 as Background.
Click on the Add Layer button again. Name this second layer Text Behind. Repeat to create two more layers: Images and Text in Front.
Select all the layers except Background and lock them by clicking the padlock icon at top-right.
Step 4
Go to the Swatches panel (View > Studio > Swatches) and choose Add Global Colour from the drop-down menu at top-right.
Name the swatch Off-White and set the levels below to C=3 M=1 Y=4 K=0. Then click Add.
Repeat to create five more swatches:
Dark Yellow: C=4 M=44 Y=90 K=0
Medium Yellow: C=0 M=35 Y=81 K=0
Pale Yellow: C=0 M=28 Y=72 K=0
Purple: C=76 M=78 Y=0 K=0
Dark Purple: C=92 M=100 Y=7 K=2
2. How to Add Colour and Text to Your Tear-Off Flyer Template
Step 1
Working on the Background layer, select the Rectangle Tool (M) from the Tools panel and drag across the whole of the page, extending the edges up to the bleed.
From the Swatches panel, set the Fill Colour to Medium Yellow.
Step 2
Lock the Background layer and unlock the layer above, Text Behind.
Select the Frame Text Tool (T) and drag across the left side of the page to create a small text frame.
Type in the description text (e.g. „Ellie’s Friendly / Dog Walking / Service”), and from the Character and Paragraph panels (View > Studio > Character), set the Font to Lumber, All Caps, and Align Center.
Set the Font Colour to Off-White and Dark Purple.
You can add more text below the heading (such as „30% Off / Your First Walk / With the Code Below”), set in Lumber, All Caps, Align Center, and an Off-White Font Colour.
Step 3
Switch to the Pen Tool (P) and, holding Shift, click twice to create a straight vertical line below the bottom text frame.
From the Swatches panel, set the Stroke Colour to Off-White.
From the Stroke panel (View > Studio > Stroke), set the Width of the line to 2.5 pt. From the End drop-down menu, choose Simple to apply an arrowhead to the stroke.
To the right of the End arrow option, increase the percentage to 225% to enlarge the arrowhead.
Step 4
Open up the set of EPS animal icons in a vector program, such as Affinity Designer or Adobe Illustrator, and identify the paw icon. You can either use this as an outlined icon, or fill the paw with solid colour, as I’ve done here. In the vector program, Edit > Copy the paw icon.
Back in Publisher, and still working on the Text Behind layer, Edit > Paste the icon onto the page. Adjust the colour to Pale Yellow, and position it towards the top right of the layout.
Paste more paw icons, grouping them across the page to create a trail effect, setting the colour of some to Pale Yellow and others to Dark Yellow, to contrast against the background.
Step 5
Switch to the Pen Tool (P) and use this to draw a loose, wavy line across the top-left corner of the page. To create curves, hold the mouse down while you click. You can tidy up the curve afterwards by using the Node Tool (A) to select individual anchor points.
Make sure the line has no colour, from the Swatches panel.
Choose the Artistic Text Tool (T) from the Tools panel. Hover over the far left edge of the line and click to transform the line into a text path.
Type in introductory text (e.g. „did someone say…”). Highlight the text and set the Font to Southern, with an Off-White Font Colour.
Step 6
Select the Frame Text Tool (T) and create a larger text frame below the curved line, for a main title (e.g. „Walkies”). Rotate the frame slightly anti-clockwise.
Set the Font to Southern and the Font Colour to Dark Purple. You can make the text appear jauntier by highlighting individual letters and adjusting the Baseline value from the Positioning and Transform options in the Character panel.
For this design, I’ve also added a question mark in a separate text frame.
3. How to Remove the Background From a Photo in Affinity Photo
Step 1
Before we can use the photo we’ve chosen for our tear-off flyer design, we’ll need to remove the background.
Open the photo in Affinity Photo, before duplicating and switching off the visibility of the Background layer.
Go to Select > Select Sampled Colour, and click on the white background.
In the Select Sampled Colour window, adjust the Tolerance slider until all of the background colour is selected. Then click Apply.
Step 2
Delete the selection to remove the background, before saving the file as an afphoto file.
Step 3
Back in Affinity Publisher, use the Picture Frame Rectangle Tool (F) to create an image frame on the Images layer, towards the right side of the page, above the bottom margin.
File > Place, choosing the edited photo and opening it. Double-click inside the frame to select the image and scale it if needed.
4. How to Add a Tear-Off Section to Your Flyer Template
Step 1
Working on the Images layer, use the Rectangle Tool (M) to create a shape across the bottom margin area.
Set the Fill Colour to Dark Purple.
Step 2
Use guides pulled out from the left-hand ruler (View > Show Rulers) to divide the page into sections. You can divide the width of the page (8.5 in) into as many sections as you want—these will form the tear-off parts of your flyer.
Step 3
Use the Pen Tool (P) to create a vertical line over the first guide, setting the Stroke Colour to Medium Yellow.
From the Stroke panel, set the Style to Dash Line Style and the Width to 2.5 pt, and adjust the Dash options at the bottom of the panel to adjust the look of the dashed line.
Copy and Paste the line, moving each over a guide, to create a row of tear-off tabs.
Step 4
Use the Frame Text Tool (T) to create a text frame for the details on the tear-off tab, such as contact details.
Set the Font to Lumber, and vary the Font Colour between Off-White and Pale Yellow.
On the text frame, Right-Click > Transform > Rotate Left, and position the text frame centrally on the first tab.
Copy and Paste the text frame, positioning each pasted frame in its own tab.
5. How to Export Your Tear-Off Flyer for Print
Step 1
When you’ve finished working on your flyer, it’s time to export your artwork as a PDF, ready for sending to print.
Make sure to File > Save your work, before going to File > Export.
In the window that opens, choose PDF from the icon options at the top, and select PDF (press ready) from the Preset menu.
Make sure the Raster DPI is set to 300 and that the Include Bleed box is checked.
Then click Export.
Step 2
Name your file, select a folder to save it into, and then hit Save.
You can now send the exported PDF straight off to the printers!
Conclusion: Your Finished Tear-Off Flyer Template
Your tear-off flyer template with tear-off tabs is finished—great job!
In this tutorial, you’ve picked up a wide range of skills and techniques for how to make a good flyer and how to create a tear-off flyer in Affinity Publisher, from setting up a blank tear-off flyer template to creating colour swatches, placing images, and formatting typography to create a stylish and contemporary tear-off flyer design.
If you want to compare your tear-off flyer design with my own, make sure to download the completed Affinity Publisher template. The same tear-off flyer design is also available as an InDesign flyer template.
It’s quick and easy to customise your tear-off flyer design further by swapping in different colour swatches, fonts, and images, to create a completely unique tear-off flyer of your own.
Looking for more Affinity Publisher templates and InDesign flyer templates? Discover more flyer templates for tri-fold brochures, tear-off flyers and more over on Envato Elements.
Eager to develop your flyer design skills further? Don’t miss these Affinity Publisher and Affinity Photo flyer and print design tutorials:
Affinity Publisher templates can be a helpful addition to any print project, saving you both time and money. Let’s take a look at some awesome, Affinity…
In this tutorial, you’ll learn how to create a simple and stylish magazine spread using Affinity Publisher, the great-value and easy-to-use alternative to…
Adobe InDesign has long been the market leader in publishing software. But rival layout design programs are starting to make waves in the market, with…
Whether you are switching from Photoshop or this is your first editing software and you are new to learning photo effects, getting started in a program can…
In this Affinity Publisher tutorial, you’ll learn how to create a tear-off flyer template. This flyer is quick and easy to create, and you can easily adapt it with your own choice of images and fonts. You’ll learn how to create a cool flyer with tear-off tabs—a bonus free tear-off flyer template is also included.
This flyer template is for a US Letter-sized flyer with tear-off tabs, perfect for advertising business services or local events in your neighborhood. You’ll pick up tips on how to create a catchy flyer, using impactful colours, graphics, and photos to create a compelling tear-off flyer.
This tear-off flyer tutorial comes complete with a downloadable free tear-off flyer template for both Adobe InDesign and Affinity Publisher, allowing you to quickly create your own flyer with tear-off tabs.
Follow the steps below to get to grips with Affinity Publisher, pick up key print design skills, and learn how to make a good flyer from scratch.
What You’ll Learn in This Affinity Publisher Flyer Tutorial
How to make a blank tear-off flyer template and good flyer design, complete with stylish typography and colours.
How to create layers and colour swatches and then format text for your tear-off flyer in Affinity Publisher.
How to create a flyer template with tear-off tabs, set up to a standard US Letter format.
How to make a flyer template with an adaptable layout that can be customised with your own images and fonts.
Looking for more Affinity Publisher templates and blank tear-off flyer templates? Don’t miss the wide selection of flyer templates on Envato Elements.
What You’ll Need to Create Your Tear-Off Flyer Template
Let’s get started with how to make a tear-off flyer in Affinity Publisher. In this tutorial, we’ll be using Affinity Publisher to create our tear-off flyer template, and we’ll dip into Affinity Photo to edit the photo to place into the Affinity Publisher template. If you’re an InDesign user, you can download the InDesign flyer template.
As well as access to Publisher, you’ll also need to download the following fonts and images from Envato Elements to recreate the tear-off flyer design pictured here:
1. How to Set Up Your Blank Tear-Off Flyer Template in Affinity Publisher
Step 1
Open Publisher, and go to File > New.
Select Print from the options along the top of the window. Set the Page width to 11 in and Page height to 8.5 in. Deselect Facing Pages under the Pages section.
Step 2
From the Margins options, set a margin width of 0.5 in for all sides of the page except the Bottom, which you can set to 2.75 in. Add a Bleed width of 0.25 in.
Then click Create.
Step 3
Double-click on Page 1 in the Pages panel to go to the main page of your document.
Go to the Layers panel (View > Studio > Layers), click on the Add Layer button at the bottom-right of the panel, and rename Layer 1 as Background.
Click on the Add Layer button again. Name this second layer Text Behind. Repeat to create two more layers: Images and Text in Front.
Select all the layers except Background and lock them by clicking the padlock icon at top-right.
Step 4
Go to the Swatches panel (View > Studio > Swatches) and choose Add Global Colour from the drop-down menu at top-right.
Name the swatch Off-White and set the levels below to C=3 M=1 Y=4 K=0. Then click Add.
Repeat to create five more swatches:
Dark Yellow: C=4 M=44 Y=90 K=0
Medium Yellow: C=0 M=35 Y=81 K=0
Pale Yellow: C=0 M=28 Y=72 K=0
Purple: C=76 M=78 Y=0 K=0
Dark Purple: C=92 M=100 Y=7 K=2
2. How to Add Colour and Text to Your Tear-Off Flyer Template
Step 1
Working on the Background layer, select the Rectangle Tool (M) from the Tools panel and drag across the whole of the page, extending the edges up to the bleed.
From the Swatches panel, set the Fill Colour to Medium Yellow.
Step 2
Lock the Background layer and unlock the layer above, Text Behind.
Select the Frame Text Tool (T) and drag across the left side of the page to create a small text frame.
Type in the description text (e.g. „Ellie’s Friendly / Dog Walking / Service”), and from the Character and Paragraph panels (View > Studio > Character), set the Font to Lumber, All Caps, and Align Center.
Set the Font Colour to Off-White and Dark Purple.
You can add more text below the heading (such as „30% Off / Your First Walk / With the Code Below”), set in Lumber, All Caps, Align Center, and an Off-White Font Colour.
Step 3
Switch to the Pen Tool (P) and, holding Shift, click twice to create a straight vertical line below the bottom text frame.
From the Swatches panel, set the Stroke Colour to Off-White.
From the Stroke panel (View > Studio > Stroke), set the Width of the line to 2.5 pt. From the End drop-down menu, choose Simple to apply an arrowhead to the stroke.
To the right of the End arrow option, increase the percentage to 225% to enlarge the arrowhead.
Step 4
Open up the set of EPS animal icons in a vector program, such as Affinity Designer or Adobe Illustrator, and identify the paw icon. You can either use this as an outlined icon, or fill the paw with solid colour, as I’ve done here. In the vector program, Edit > Copy the paw icon.
Back in Publisher, and still working on the Text Behind layer, Edit > Paste the icon onto the page. Adjust the colour to Pale Yellow, and position it towards the top right of the layout.
Paste more paw icons, grouping them across the page to create a trail effect, setting the colour of some to Pale Yellow and others to Dark Yellow, to contrast against the background.
Step 5
Switch to the Pen Tool (P) and use this to draw a loose, wavy line across the top-left corner of the page. To create curves, hold the mouse down while you click. You can tidy up the curve afterwards by using the Node Tool (A) to select individual anchor points.
Make sure the line has no colour, from the Swatches panel.
Choose the Artistic Text Tool (T) from the Tools panel. Hover over the far left edge of the line and click to transform the line into a text path.
Type in introductory text (e.g. „did someone say…”). Highlight the text and set the Font to Southern, with an Off-White Font Colour.
Step 6
Select the Frame Text Tool (T) and create a larger text frame below the curved line, for a main title (e.g. „Walkies”). Rotate the frame slightly anti-clockwise.
Set the Font to Southern and the Font Colour to Dark Purple. You can make the text appear jauntier by highlighting individual letters and adjusting the Baseline value from the Positioning and Transform options in the Character panel.
For this design, I’ve also added a question mark in a separate text frame.
3. How to Remove the Background From a Photo in Affinity Photo
Step 1
Before we can use the photo we’ve chosen for our tear-off flyer design, we’ll need to remove the background.
Open the photo in Affinity Photo, before duplicating and switching off the visibility of the Background layer.
Go to Select > Select Sampled Colour, and click on the white background.
In the Select Sampled Colour window, adjust the Tolerance slider until all of the background colour is selected. Then click Apply.
Step 2
Delete the selection to remove the background, before saving the file as an afphoto file.
Step 3
Back in Affinity Publisher, use the Picture Frame Rectangle Tool (F) to create an image frame on the Images layer, towards the right side of the page, above the bottom margin.
File > Place, choosing the edited photo and opening it. Double-click inside the frame to select the image and scale it if needed.
4. How to Add a Tear-Off Section to Your Flyer Template
Step 1
Working on the Images layer, use the Rectangle Tool (M) to create a shape across the bottom margin area.
Set the Fill Colour to Dark Purple.
Step 2
Use guides pulled out from the left-hand ruler (View > Show Rulers) to divide the page into sections. You can divide the width of the page (8.5 in) into as many sections as you want—these will form the tear-off parts of your flyer.
Step 3
Use the Pen Tool (P) to create a vertical line over the first guide, setting the Stroke Colour to Medium Yellow.
From the Stroke panel, set the Style to Dash Line Style and the Width to 2.5 pt, and adjust the Dash options at the bottom of the panel to adjust the look of the dashed line.
Copy and Paste the line, moving each over a guide, to create a row of tear-off tabs.
Step 4
Use the Frame Text Tool (T) to create a text frame for the details on the tear-off tab, such as contact details.
Set the Font to Lumber, and vary the Font Colour between Off-White and Pale Yellow.
On the text frame, Right-Click > Transform > Rotate Left, and position the text frame centrally on the first tab.
Copy and Paste the text frame, positioning each pasted frame in its own tab.
5. How to Export Your Tear-Off Flyer for Print
Step 1
When you’ve finished working on your flyer, it’s time to export your artwork as a PDF, ready for sending to print.
Make sure to File > Save your work, before going to File > Export.
In the window that opens, choose PDF from the icon options at the top, and select PDF (press ready) from the Preset menu.
Make sure the Raster DPI is set to 300 and that the Include Bleed box is checked.
Then click Export.
Step 2
Name your file, select a folder to save it into, and then hit Save.
You can now send the exported PDF straight off to the printers!
Conclusion: Your Finished Tear-Off Flyer Template
Your tear-off flyer template with tear-off tabs is finished—great job!
In this tutorial, you’ve picked up a wide range of skills and techniques for how to make a good flyer and how to create a tear-off flyer in Affinity Publisher, from setting up a blank tear-off flyer template to creating colour swatches, placing images, and formatting typography to create a stylish and contemporary tear-off flyer design.
If you want to compare your tear-off flyer design with my own, make sure to download the completed Affinity Publisher template. The same tear-off flyer design is also available as an InDesign flyer template.
It’s quick and easy to customise your tear-off flyer design further by swapping in different colour swatches, fonts, and images, to create a completely unique tear-off flyer of your own.
Looking for more Affinity Publisher templates and InDesign flyer templates? Discover more flyer templates for tri-fold brochures, tear-off flyers and more over on Envato Elements.
Eager to develop your flyer design skills further? Don’t miss these Affinity Publisher and Affinity Photo flyer and print design tutorials:
Affinity Publisher templates can be a helpful addition to any print project, saving you both time and money. Let’s take a look at some awesome, Affinity…
In this tutorial, you’ll learn how to create a simple and stylish magazine spread using Affinity Publisher, the great-value and easy-to-use alternative to…
Adobe InDesign has long been the market leader in publishing software. But rival layout design programs are starting to make waves in the market, with…
Whether you are switching from Photoshop or this is your first editing software and you are new to learning photo effects, getting started in a program can…
Agregator najlepszych postów o designie, webdesignie, cssie i Internecie