Countless are the conflicts that are generated day by day in Bogotá, both business and personal and coexistence, the latter being the most common and where more reports are generated in which people do not find how to resolve differences without having to go to a legal instance, for this, the Bogotá Chamber of Commerce and its Arbitration and Conciliation Center launched services for the resolution of coexistence conflicts, such as debts, separations, pet related issues, noisy neighbors, delinquent tenants, among others.
THE IDEA: Achieving that such a complex and stiff topic was seen and communicated in a different, simple and understandable way, was a great challenge but at the same time a great achievement. Under the concept: „Unleashing the knot that united them was never so easy”, we developed a campaign with a message and a disruptive graphic identity in the category. From illustrations made by hand and in a single stroke, we show how easy a conflict can originate but at the same time how simple it would be to solve it thanks to the Arbitration and Conciliation Center. The result is a campaign as simple as blunt.
KFC South Africa wanted to launch their most significant innovation in more than 50 years on our country – a new Hot and Crispy flavour that was their first alternative to their world-famous Original Recipe Chicken. The reactions people have to hot food – perspiration, tugging at collars and flushed faces – can easily be misconstrued as signs of guilt. So we created Detective Duma, a private eye hell-bent on figuring out where the heat was coming from. The ad follows his search for the truth, wherever it may lead him.
Countless are the conflicts that are generated day by day in Bogotá, both business and personal and coexistence, the latter being the most common and where more reports are generated in which people do not find how to resolve differences without having to go to a legal instance, for this, the Bogotá Chamber of Commerce and its Arbitration and Conciliation Center launched services for the resolution of coexistence conflicts, such as debts, separations, pet related issues, noisy neighbors, delinquent tenants, among others.
THE IDEA: Achieving that such a complex and stiff topic was seen and communicated in a different, simple and understandable way, was a great challenge but at the same time a great achievement. Under the concept: „Unleashing the knot that united them was never so easy”, we developed a campaign with a message and a disruptive graphic identity in the category. From illustrations made by hand and in a single stroke, we show how easy a conflict can originate but at the same time how simple it would be to solve it thanks to the Arbitration and Conciliation Center. The result is a campaign as simple as blunt.
Campaign created by DMC Propaganda for divulgation of SANASA sponsorship of Campinas Symphony Orchestra Background In 1919, Campinas Municipal Symphony Orchestra was the first institution of the gender to arise in a Brazilian city outside the state capital. Ninety years later, the Symphony Orchestra goes on being sponsored by Sanasa – Water and Sanitation Supply Society. Reasoning Just like people who have thirst for water, the society also has thirst for entertainment , for fun. That was how the slogan Sanasa & OSMC has sprung up. For those who have thirst for culture.Visually, music instruments and orchestral elements – like a baton – are made up of nothing but water.
Campaign created by DMC Propaganda for divulgation of SANASA sponsorship of Campinas Symphony Orchestra Background In 1919, Campinas Municipal Symphony Orchestra was the first institution of the gender to arise in a Brazilian city outside the state capital. Ninety years later, the Symphony Orchestra goes on being sponsored by Sanasa – Water and Sanitation Supply Society. Reasoning Just like people who have thirst for water, the society also has thirst for entertainment , for fun. That was how the slogan Sanasa & OSMC has sprung up. For those who have thirst for culture.Visually, music instruments and orchestral elements – like a baton – are made up of nothing but water.
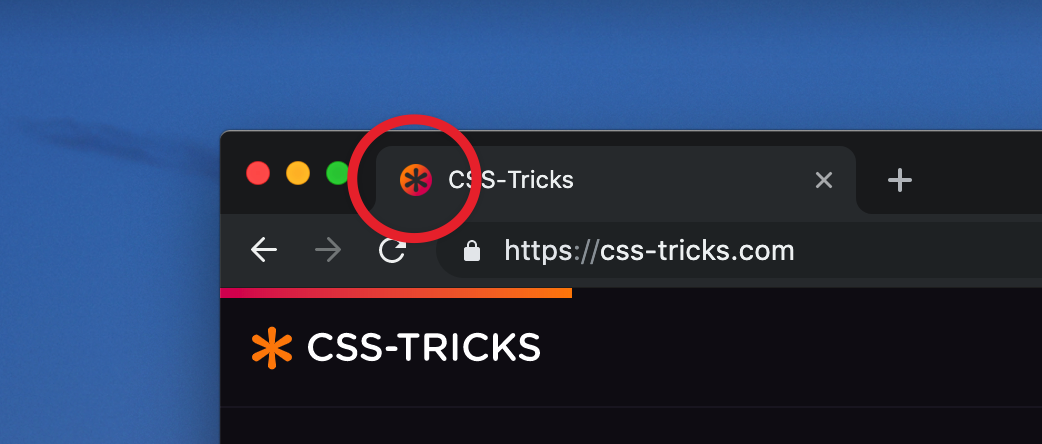
It’s the first thing your eyes look for when you’re switching tabs.
That’s one way of explaining what a favicon is. The tab area is a much more precious screen real-estate than what most assume. If done right, besides being a label with icon, it can be the perfect billboard to represent what’s in or what’s happening on a web page.
The CSS-Tricks Favicon
Favicons are actually at their most useful when you’re not active on a tab. Here’s an example:
Imagine you’re backing up photos from your recent summer vacation to a cloud service. While they are uploading, you’ve opened a new tab to gather details about the places you went on vacation to later annotate those photos. One thing led to the other, and now you’re watching Casey Neistat on the seventh tab. But you can’t continue your YouTube marathon without the anxious intervals of checking back on the cloud service page to see if the photos have been uploaded.
It’s this type of situation where we can get creative! What if we could dynamically change the pixels in that favicon and display the upload progress? That’s exactly what we’ll do in this article.
In supported browsers, we can display a loading/progress animation as a favicon with the help of JavaScript, HTML <canvas> and some centuries-old geometry.
Jumping straight in, we’ll start with the easiest part: adding the icon and canvas elements to the HTML.
In practical use, you would want to hide the <canvas> on the page, and one way of doing that is with the HTML hidden attribute.
<canvas hidden width=32 height=32></canvas>
I’m going to leave the <canvas> visible on the page for you to see both the favicon and canvas images animate together.
Both the favicon and the canvas are given a standard favicon size: 32 square pixels.
For demo purposes, in order to trigger the loading animation, I’m adding a button to the page which will start the animation when clicked. This also goes in the HTML:
<button>Load</button>
Now let’s set up the JavaScript. First, a check for canvas support:
onload = ()=> {
  canvas = document.querySelector('canvas'),
  context = canvas.getContext('2d');
  if (!!context) {
      /* if canvas is supported */
  }
};
Next, adding the button click event handler that will prompt the animation in the canvas.
button = document.querySelector('button');
button.addEventListener('click', function() {
    /* A variable to track the drawing intervals */
    n = 0,
    /* Interval speed for the animation */
    loadingInterval = setInterval(drawLoader, 60);
});
drawLoader will be the function doing the drawing at intervals of 60 milliseconds each, but before we code it, I want to define the style of the lines of the square to be drawn. Let’s do a gradient.
/* Style of the lines of the square that'll be drawn */
let gradient = context.createLinearGradient(0, 0, 32, 32);
gradient.addColorStop(0, '#c7f0fe');
gradient.addColorStop(1, '#56d3c9');
context.strokeStyle = gradient;
context.lineWidth = 8;
In drawLoader, we’ll draw the lines percent-wise: during the first 25 intervals, the top line will be incrementally drawn; in second quarter, the right line will be drawn; and so forth.
The animation effect is achieved by erasing the <canvas> in each interval before redrawing the line(s) from previous interval a little longer.
During each interval, once the drawing is done in the canvas, it’s quickly translated to a PNG image to be assigned as the favicon.
function drawLoader() {
  with(context) {
    clearRect(0, 0, 32, 32);
    beginPath();
    /* Up to 25% */
    if (n<=25){
      /*
        (0,0)-----(32,0)
      */
      // code to draw the top line, incrementally
    }
    /* Between 25 to 50 percent */
    else if(n>25 && n<=50){
      /*
        (0,0)-----(32,0)
                  |
                  |
                  (32,32)
      */
      // code to draw the top and right lines.
    }
    /* Between 50 to 75 percent */
    else if(n>50 && n<= 75){
      /*
        (0,0)-----(32,0)
                  |
                  |
        (0,32)----(32,32)
      */
      // code to draw the top, right and bottom lines.
    }
      /* Between 75 to 100 percent */
    else if(n>75 && n<=100){
      /*
        (0,0)-----(32,0)
            |      |
            |      |
        (0,32)----(32,32)
      */
      // code to draw all four lines of the square.
    }
    stroke();
  }
  // Convert the Canvas drawing to PNG and assign it to the favicon
  favicon.href = canvas.toDataURL('image/png');
  /* When finished drawing */
  if (n === 100) {
    clearInterval(loadingInterval);
    return;
  }
  // Increment the variable used to keep track of the drawing intervals
  n++;
}
Now to the math and the code for drawing the lines.
Here’s how we incrementally draw the top line at each interval during the first 25 intervals:
n = current interval,
x = x-coordinate of the line’s end point at a given interval.
(y-coordinate of the end point is 0 and start point of the line is 0,0)
At the completion of all 25 intervals, the value of x is 32 (the size of the favicon and canvas.)
So…
x/n = 32/25
x = (32/25) * n
The code to apply this math and draw the line is:
moveTo(0, 0); lineTo((32/25)*n, 0);
For the next 25 intervals (right line), we target the y coordinate similarly.
A lot of people out there tend to think that virtual reality is only for video games, films, and casino online America games. However, this is not true as recent developments show an increase in VR apps. In this article, we focus on a few of the best virtual reality apps for 2019.
Allumette This stop-motion VR film is truly breath-taking, telling the story of a young girl living in a cloud-borne village. In this app, you can decide to be the camera. That way, you get to explore the beautiful world, while ignoring the main storyline, if you wish. Allumette is not a game but rather a narrative. None of the characters in this narrative can speak well, although they can convey emotions and intent using noises.
This story has based a poem by Hans Christian Andersen and will transport you into a storybook world. The runtime’s actually quite long (20 minutes) as compared to other stories that last for less than 10 minutes. This app, which is between a video game and film narrative, will surely give you a divine experience.
Colosse This real-time visual reality story comes with top-notch sound design, as well as great animations. As you take a journey in this story, you get a natural pace as some audio and visual cues are the ones that will direct your gaze. Also, sitting objects will only be activated after you look at them. You also noticed that some of the events that happen will depend on the direction that you will be facing. Because of that, you’ll never get stuck looking for the next piece of the puzzle.
Google Earth VR We have always loved Google Earth and VR has made it super cool. You get to go around the world, enjoying the cool landscape. It’s also quite educational if you like geography. What we really love about Google Earth VR or online betting sites south africa is that you can quickly navigate the menu and visit some major landmarks such as the Golden Gate Bridge or the Sphinx.
If you have used Google Earth before, you probably already know what it’s about. The only huge difference now is that you can now zoom across fast distances within a matter of seconds and you also get to land on major structures all around the world.
A lot of people out there tend to think that virtual reality is only for video games, films, and casino online America games. However, this is not true as recent developments show an increase in VR apps. In this article, we focus on a few of the best virtual reality apps for 2019.
Allumette This stop-motion VR film is truly breath-taking, telling the story of a young girl living in a cloud-borne village. In this app, you can decide to be the camera. That way, you get to explore the beautiful world, while ignoring the main storyline, if you wish. Allumette is not a game but rather a narrative. None of the characters in this narrative can speak well, although they can convey emotions and intent using noises.
This story has based a poem by Hans Christian Andersen and will transport you into a storybook world. The runtime’s actually quite long (20 minutes) as compared to other stories that last for less than 10 minutes. This app, which is between a video game and film narrative, will surely give you a divine experience.
Colosse This real-time visual reality story comes with top-notch sound design, as well as great animations. As you take a journey in this story, you get a natural pace as some audio and visual cues are the ones that will direct your gaze. Also, sitting objects will only be activated after you look at them. You also noticed that some of the events that happen will depend on the direction that you will be facing. Because of that, you’ll never get stuck looking for the next piece of the puzzle.
Google Earth VR We have always loved Google Earth and VR has made it super cool. You get to go around the world, enjoying the cool landscape. It’s also quite educational if you like geography. What we really love about Google Earth VR or online betting sites south africa is that you can quickly navigate the menu and visit some major landmarks such as the Golden Gate Bridge or the Sphinx.
If you have used Google Earth before, you probably already know what it’s about. The only huge difference now is that you can now zoom across fast distances within a matter of seconds and you also get to land on major structures all around the world.
The React ecosystem offers us a lot of libraries that all are focused on the interaction of drag and drop. We have react-dnd, react-beautiful-dnd, react-drag-n-drop and many more, but some of them require quite a lot of work to build even a simple drag and drop demo, and some do not provide you with more complex functionality (e.g. multiple drag and drop instances), and if they do, it becomes very complex.
Let’s create a simple app and add drag-n-drop functionality to it. We’re going to use create-react-app to spin up a new React project:
npx create-react-app your-project-name
Now let’s change to the project directory and install react-sorting-hoc and array-move. The latter is needed to move items in an array to different positions.
cd your-project-name
yarn add react-sortable-hoc array-move
Adding styles, data and GIF component
For simplicity’s sake, we are going to write all styles in our App.css file. You can overwrite styles you have there with the following ones:
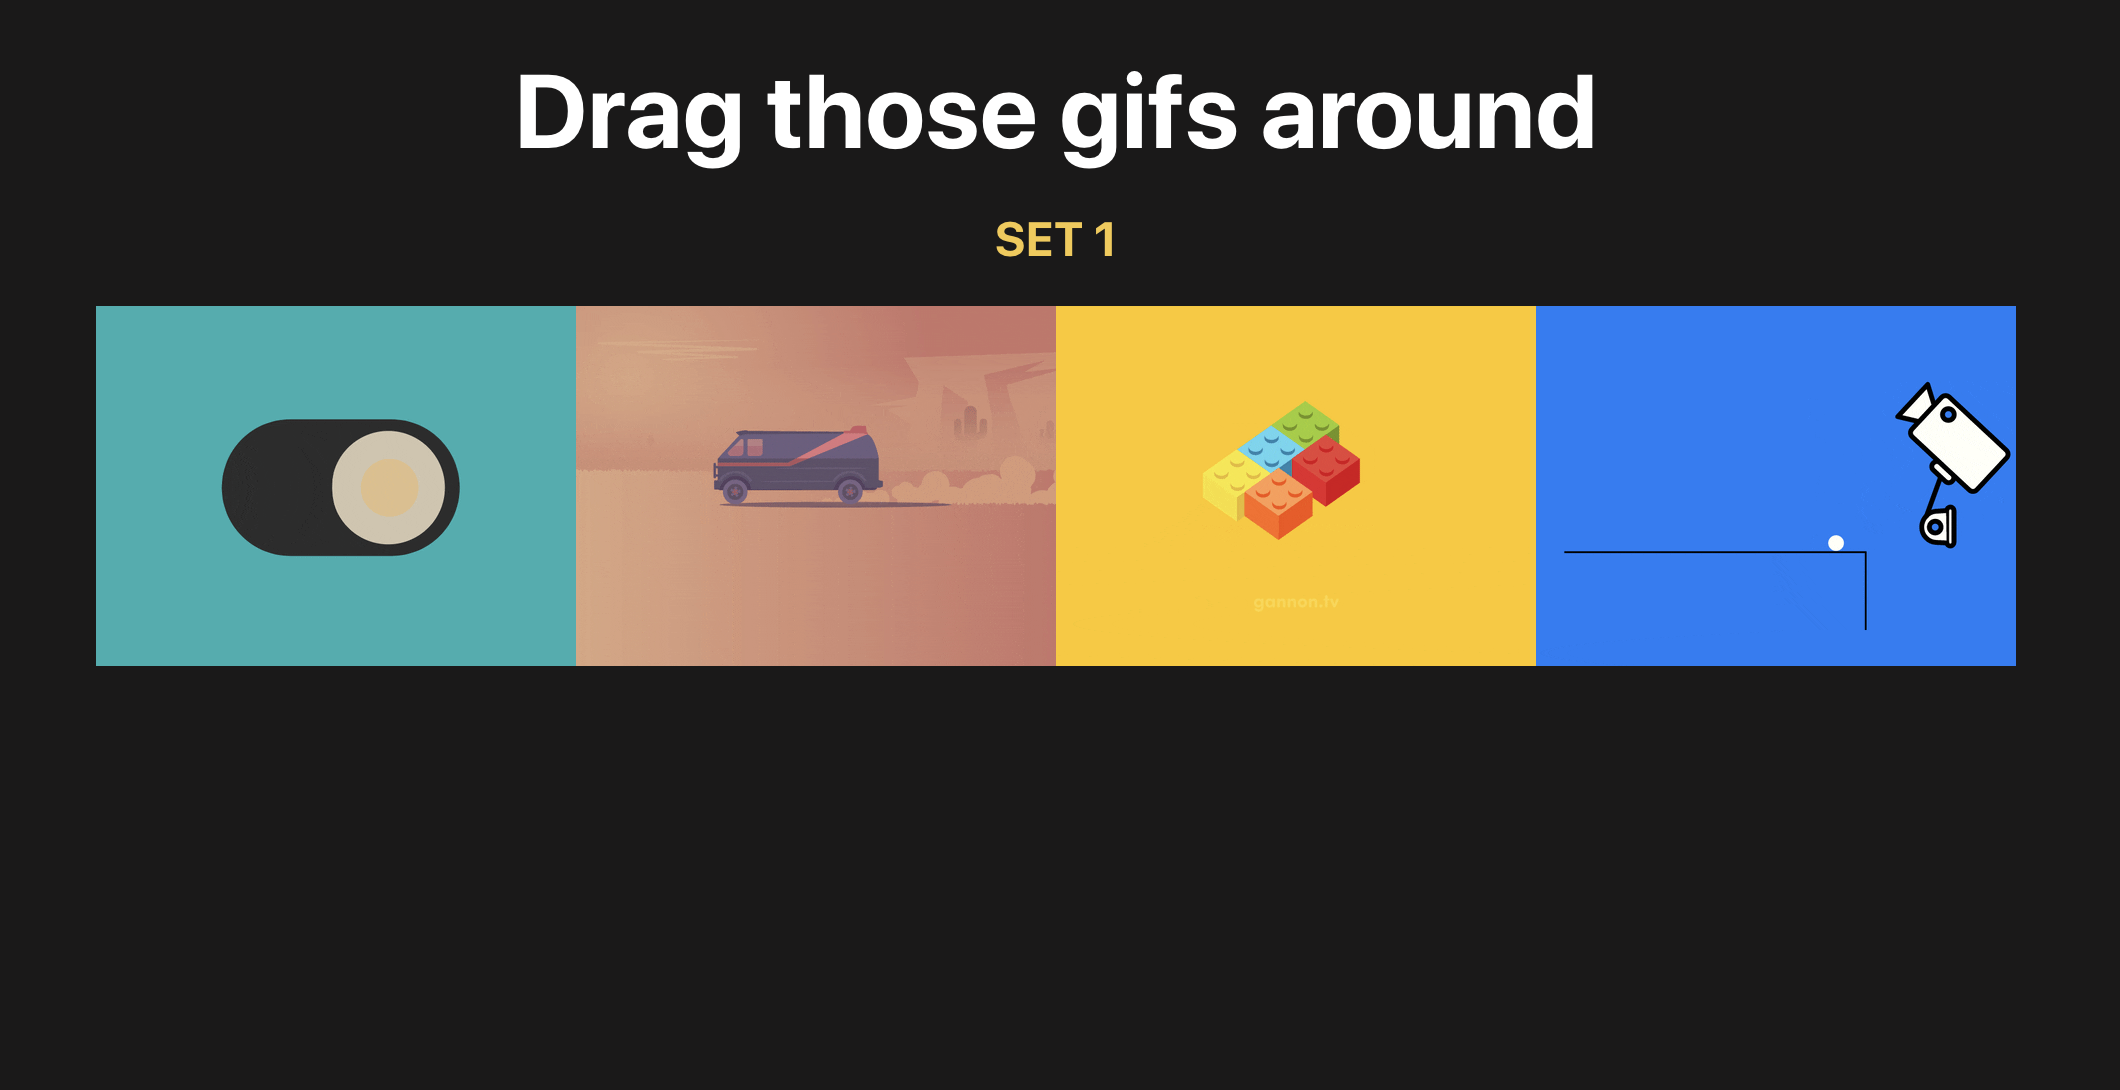
Go to http://localhost:3000/ to see what the app looks like now:
A screenshot of react-sortable-hoc-article-app
Onto the drag-n-drop stuff
Alright, it’s time make our GIFs draggable! And droppable.
To start, we need two HOCs from react-sortable-hoc, and the >arrayMove method from the array-move library to modify our new array after dragging happens. We want our GIFs to stay on their new positions, right? Well, that’s what this is going to allow us to do.
Let’s import them:
import { sortableContainer, sortableElement } from 'react-sortable-hoc';
import arrayMove from 'array-move';
As you might have guessed, those components will be wrappers which will expose functionality needed for us.
sortableContainer is a container for our sortable elements.
sortableElement is a container for each single element we are rendering.
We’ve just created a container for our children elements that would be passed inside our SortableGifsContainer and also created wrapper for a single Gif component.
If it’s a bit unclear to you, no worries — you will understand right after we implement it.
💡Note: You need to wrap your children in a div or any other valid HTML element.
It’s time to wrap our GIFs into the SortableGifsContainer and replace the Gif component with our newly created SortableGif:
<SortableGifsContainer axis="x" onSortEnd={onSortEnd}>
  {gifs.map((gif, i) =>
    <SortableGif
    // don't forget to pass index prop with item index
      index={i}
      key={gif}
      gif={gif}
    />
  )}
</SortableGifsContainer>
It’s important to note that you need to pass the index prop to your sortable element so the library can differentiate items. It’s similar to adding keys to the lists in React).
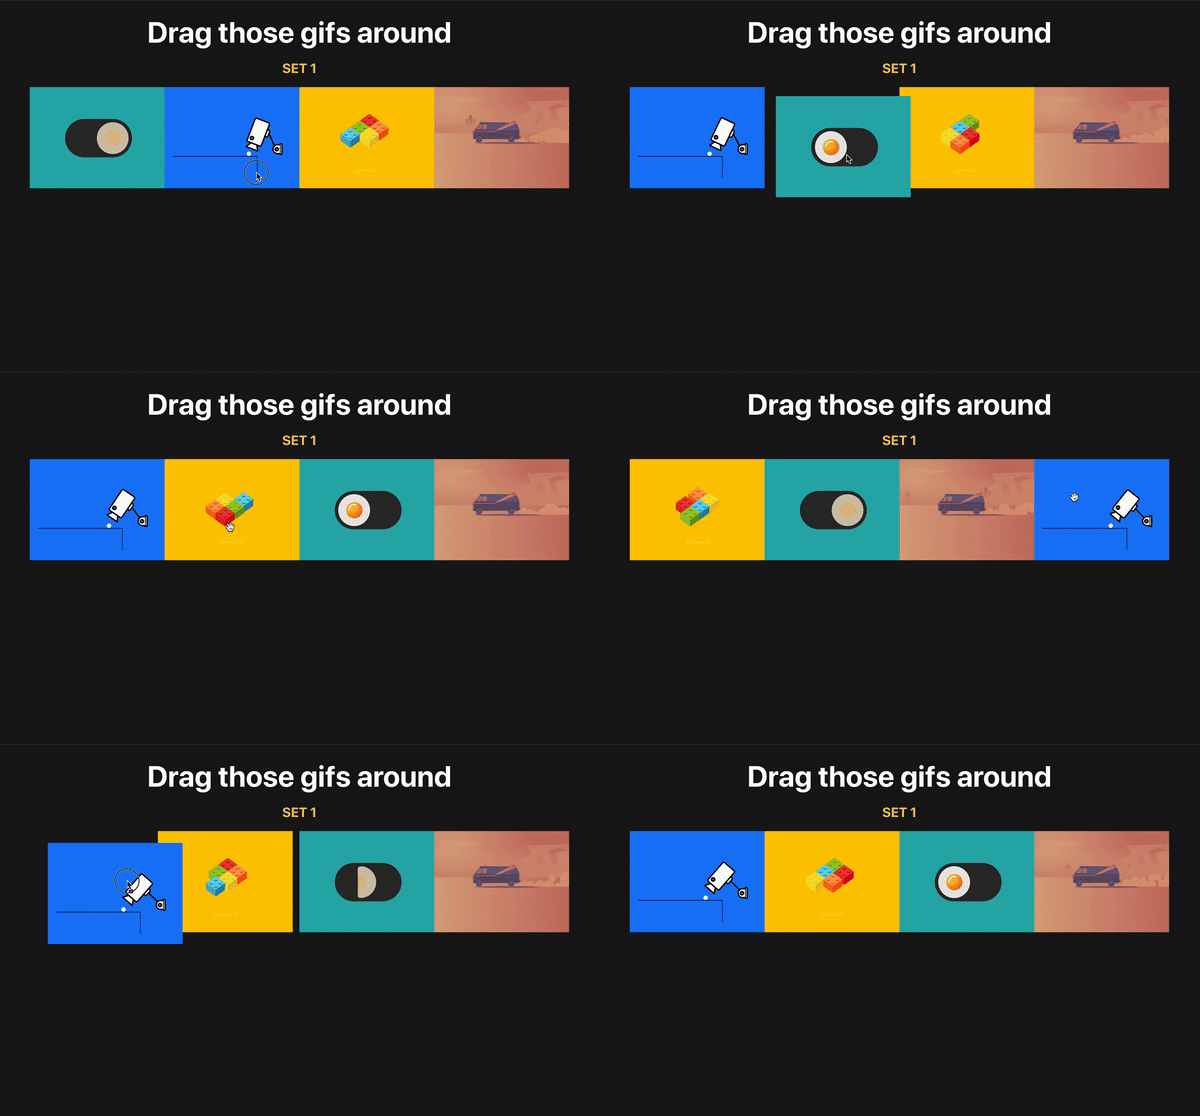
We add axis because our items are positioned horizontally and we want to drag them horizontally, while default is vertical dragging. In other words, we’re limiting dragging along the horizontal x-axis. As you can see we also add an onSortEnd function, which triggers every time we drag or sort our items around. There are, of course, a lot more events but you can find more info in the documentation which already does an excellent job of covering them.
Time to implement it! Add the following line above the return statement:
I want to explain one more thing: our function received an old and new index of the item which was dragged and, of course, each time after we move items around we modify our initial array with the help of arrayMove.
Tada! Now you know how to implement drag-n-drop in your project. Now go and do it! 🎉 🎉 🎉
What if we have multiple lists of items?
As you can see, the previous example was relatively simple. You basically wrap each of the items in a sortable HOC and wrap it around with sortableContainer and, bingo, you’ve got basic drag and drop.
But how will we do it with multiple lists? The good news is that react-sortable-hoc provides us with a collection prop so we can differentiate between lists.
If you want to see them before we move next, add the following lines after the SortableGifsContainer closing tag:
{newGifs.map(gif => <Gif key={gif} gif={gif} />)}
Alright, time to replace it with a draggable version.
Implementation is the same as in first example besides one thing — we have added a collection prop to our SortableGif. Of course, you can come up with any name for the collection, just remember, we’re gonna need it in for our onSortEnd function.
Next we need to add the collection prop to our first list. I’ve chosen the name GIFs for the first list of items, but it’s up to you!
Now we need to to change our onSortEnd function. Our function received old and new indexes, but we can also destructure a collection from it. Right, exactly the one we’ve added to our SortableGif.
So all we have to do now is write a JavaScript switch statement to check for the collection name and to modify the right array of GIFs on drag.
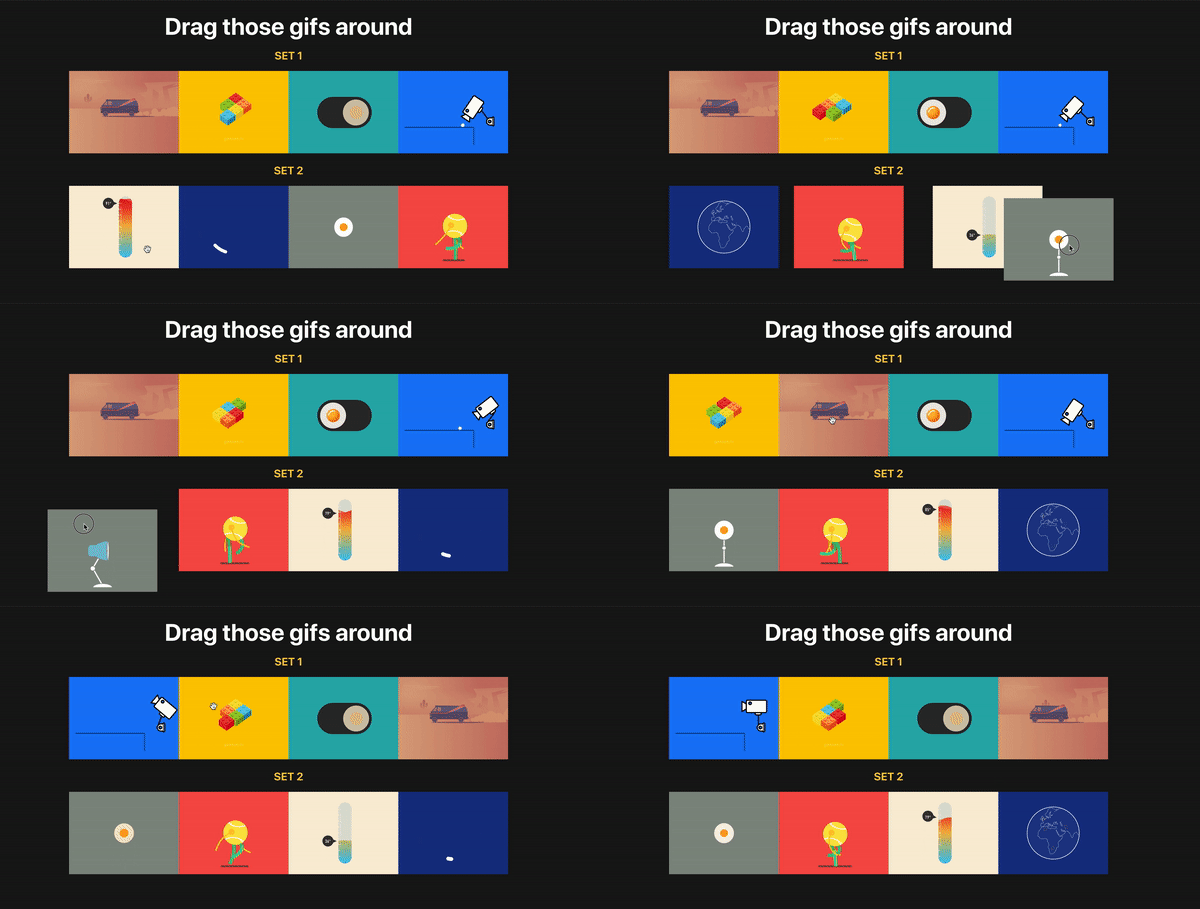
As you can see, we now have two separate lists of GIFs and we can drag and sort. Moreover, they are independent meaning items from different lists won’t be mixed up.
Exactly what we wanted to do! Now you know how to create and handle drag and drop with multiple lists of items. Congratulations 🎉
Hope you’ve enjoyed it as much as I did writing it! If you’d like to reference the complete code, it’s all up on GitHub here. If you have any questions, feel free to contact me via email.
The React ecosystem offers us a lot of libraries that all are focused on the interaction of drag and drop. We have react-dnd, react-beautiful-dnd, react-drag-n-drop and many more, but some of them require quite a lot of work to build even a simple drag and drop demo, and some do not provide you with more complex functionality (e.g. multiple drag and drop instances), and if they do, it becomes very complex.
Let’s create a simple app and add drag-n-drop functionality to it. We’re going to use create-react-app to spin up a new React project:
npx create-react-app your-project-name
Now let’s change to the project directory and install react-sorting-hoc and array-move. The latter is needed to move items in an array to different positions.
cd your-project-name
yarn add react-sortable-hoc array-move
Adding styles, data and GIF component
For simplicity’s sake, we are going to write all styles in our App.css file. You can overwrite styles you have there with the following ones:
Go to http://localhost:3000/ to see what the app looks like now:
A screenshot of react-sortable-hoc-article-app
Onto the drag-n-drop stuff
Alright, it’s time make our GIFs draggable! And droppable.
To start, we need two HOCs from react-sortable-hoc, and the >arrayMove method from the array-move library to modify our new array after dragging happens. We want our GIFs to stay on their new positions, right? Well, that’s what this is going to allow us to do.
Let’s import them:
import { sortableContainer, sortableElement } from 'react-sortable-hoc';
import arrayMove from 'array-move';
As you might have guessed, those components will be wrappers which will expose functionality needed for us.
sortableContainer is a container for our sortable elements.
sortableElement is a container for each single element we are rendering.
We’ve just created a container for our children elements that would be passed inside our SortableGifsContainer and also created wrapper for a single Gif component.
If it’s a bit unclear to you, no worries — you will understand right after we implement it.
💡Note: You need to wrap your children in a div or any other valid HTML element.
It’s time to wrap our GIFs into the SortableGifsContainer and replace the Gif component with our newly created SortableGif:
<SortableGifsContainer axis="x" onSortEnd={onSortEnd}>
  {gifs.map((gif, i) =>
    <SortableGif
    // don't forget to pass index prop with item index
      index={i}
      key={gif}
      gif={gif}
    />
  )}
</SortableGifsContainer>
It’s important to note that you need to pass the index prop to your sortable element so the library can differentiate items. It’s similar to adding keys to the lists in React).
We add axis because our items are positioned horizontally and we want to drag them horizontally, while default is vertical dragging. In other words, we’re limiting dragging along the horizontal x-axis. As you can see we also add an onSortEnd function, which triggers every time we drag or sort our items around. There are, of course, a lot more events but you can find more info in the documentation which already does an excellent job of covering them.
Time to implement it! Add the following line above the return statement:
I want to explain one more thing: our function received an old and new index of the item which was dragged and, of course, each time after we move items around we modify our initial array with the help of arrayMove.
Tada! Now you know how to implement drag-n-drop in your project. Now go and do it! 🎉 🎉 🎉
What if we have multiple lists of items?
As you can see, the previous example was relatively simple. You basically wrap each of the items in a sortable HOC and wrap it around with sortableContainer and, bingo, you’ve got basic drag and drop.
But how will we do it with multiple lists? The good news is that react-sortable-hoc provides us with a collection prop so we can differentiate between lists.
If you want to see them before we move next, add the following lines after the SortableGifsContainer closing tag:
{newGifs.map(gif => <Gif key={gif} gif={gif} />)}
Alright, time to replace it with a draggable version.
Implementation is the same as in first example besides one thing — we have added a collection prop to our SortableGif. Of course, you can come up with any name for the collection, just remember, we’re gonna need it in for our onSortEnd function.
Next we need to add the collection prop to our first list. I’ve chosen the name GIFs for the first list of items, but it’s up to you!
Now we need to to change our onSortEnd function. Our function received old and new indexes, but we can also destructure a collection from it. Right, exactly the one we’ve added to our SortableGif.
So all we have to do now is write a JavaScript switch statement to check for the collection name and to modify the right array of GIFs on drag.
As you can see, we now have two separate lists of GIFs and we can drag and sort. Moreover, they are independent meaning items from different lists won’t be mixed up.
Exactly what we wanted to do! Now you know how to create and handle drag and drop with multiple lists of items. Congratulations 🎉
Hope you’ve enjoyed it as much as I did writing it! If you’d like to reference the complete code, it’s all up on GitHub here. If you have any questions, feel free to contact me via email.