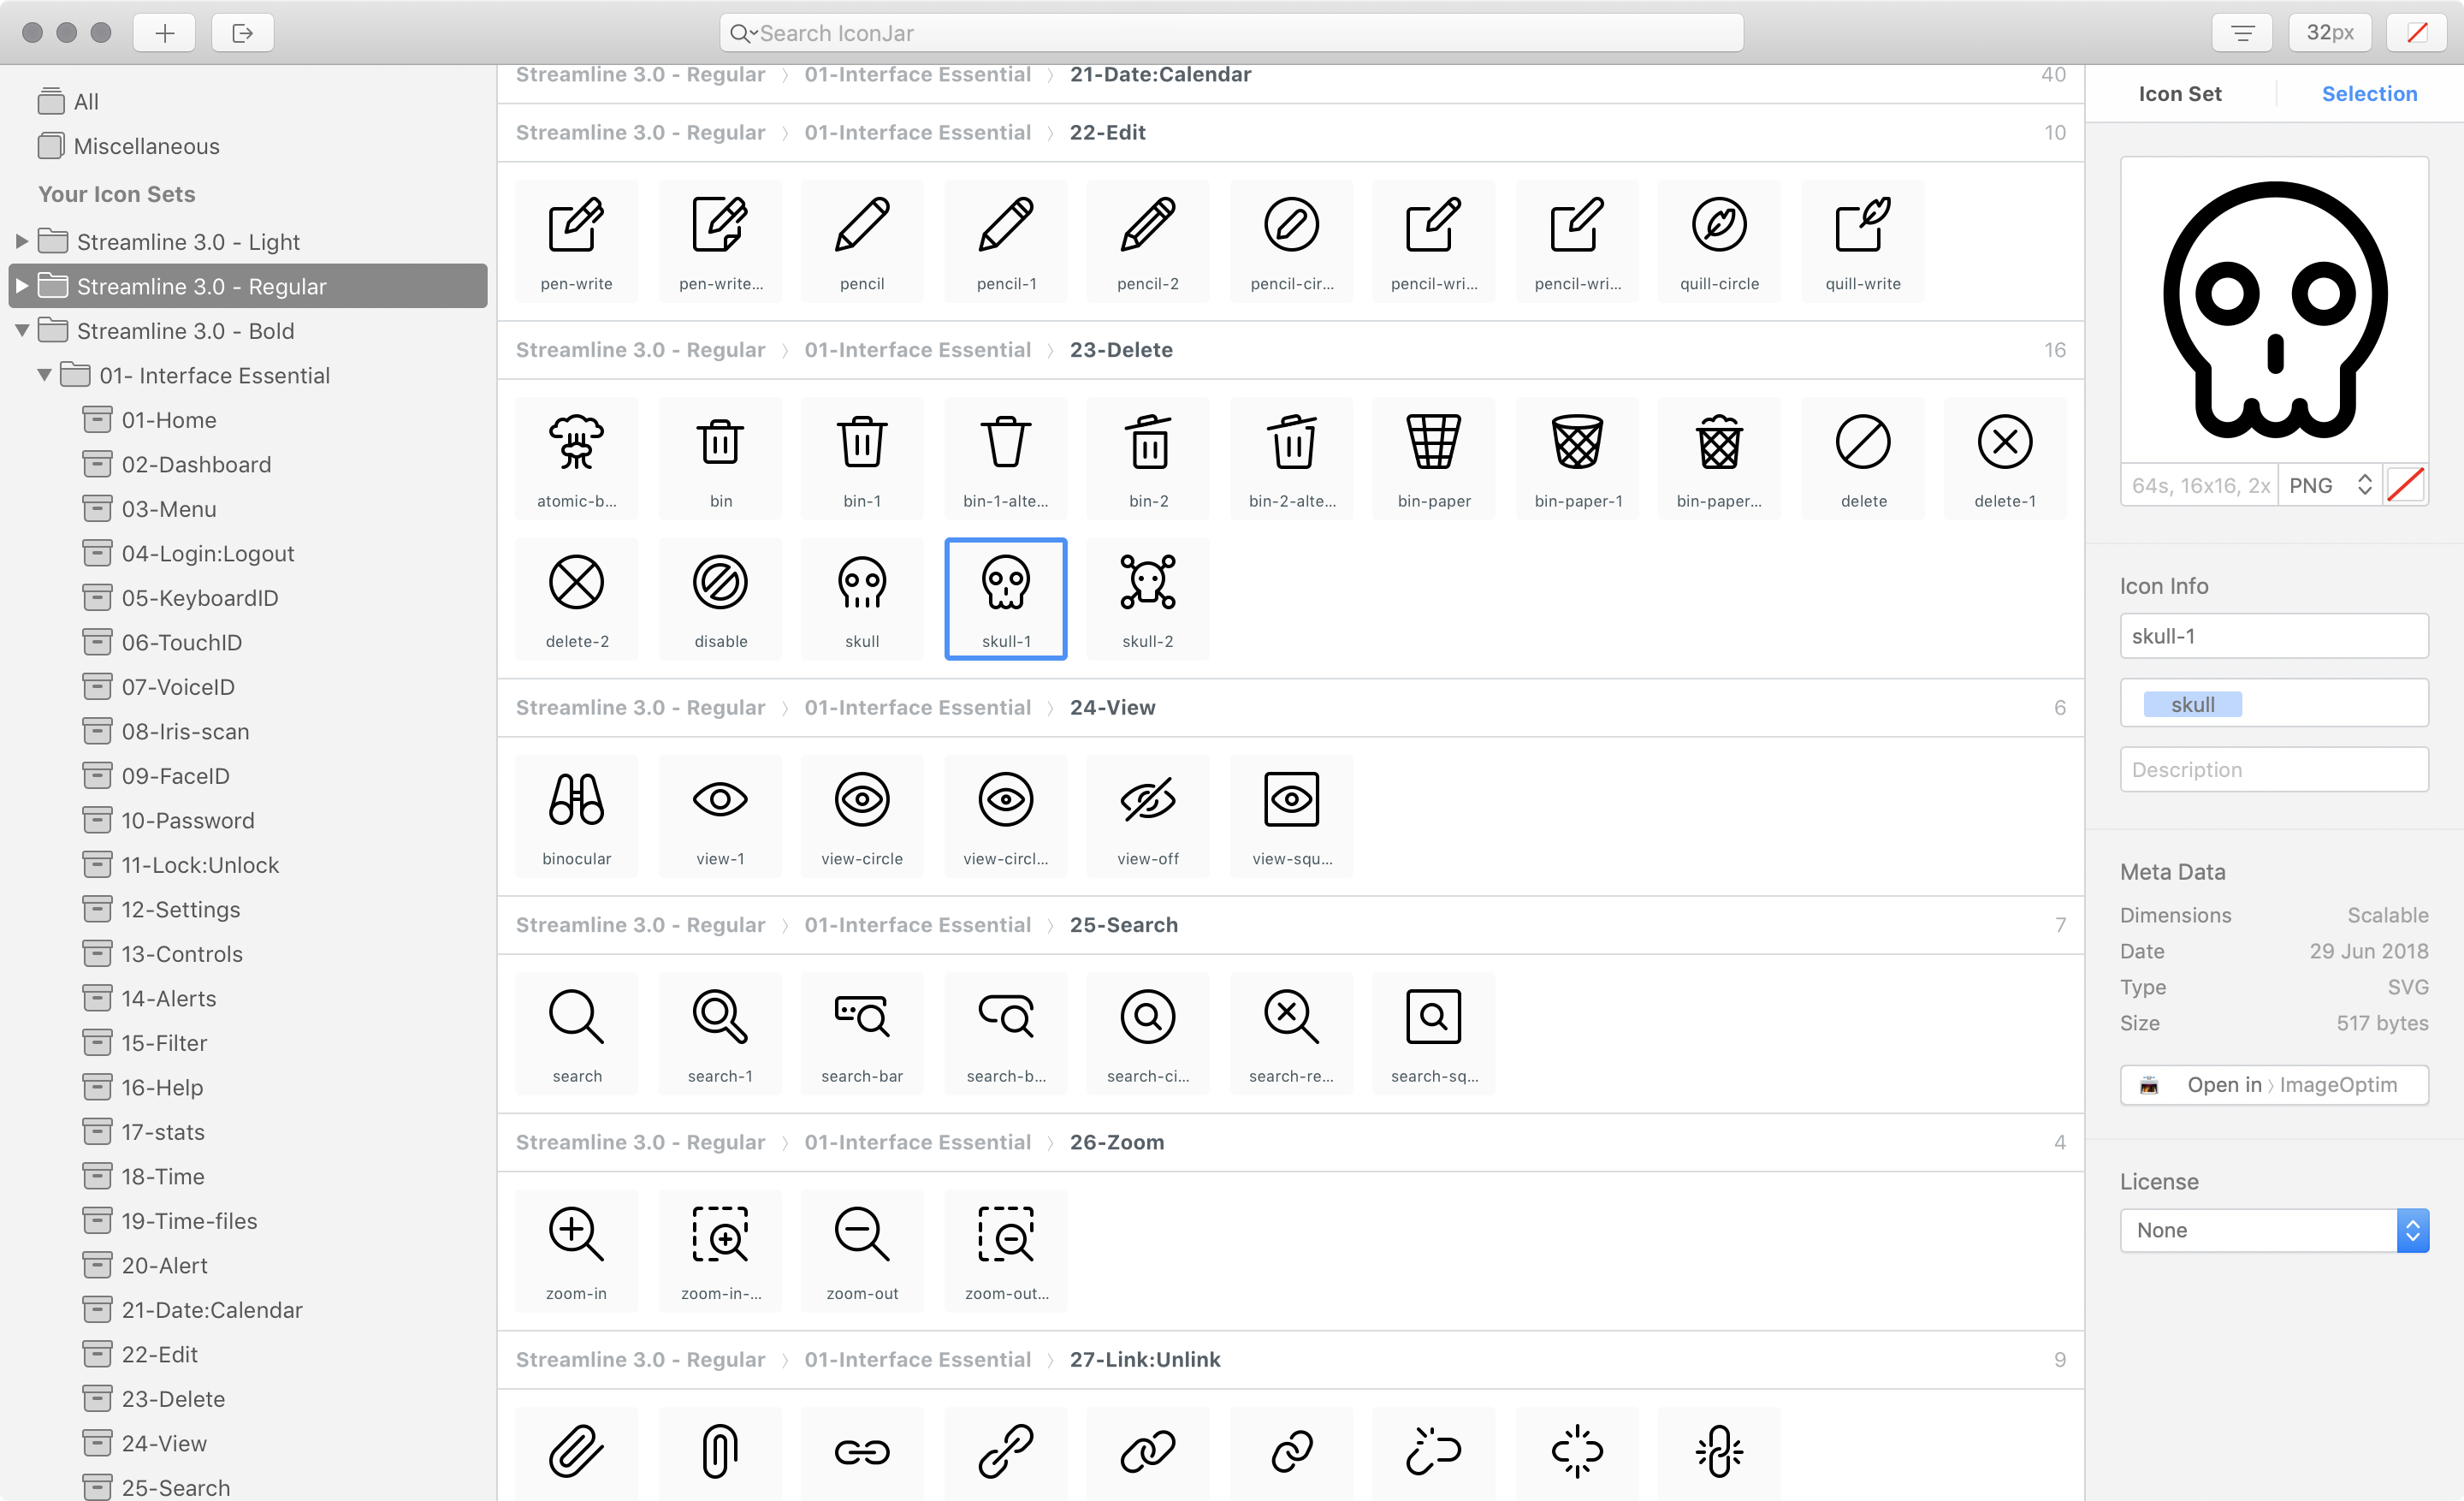
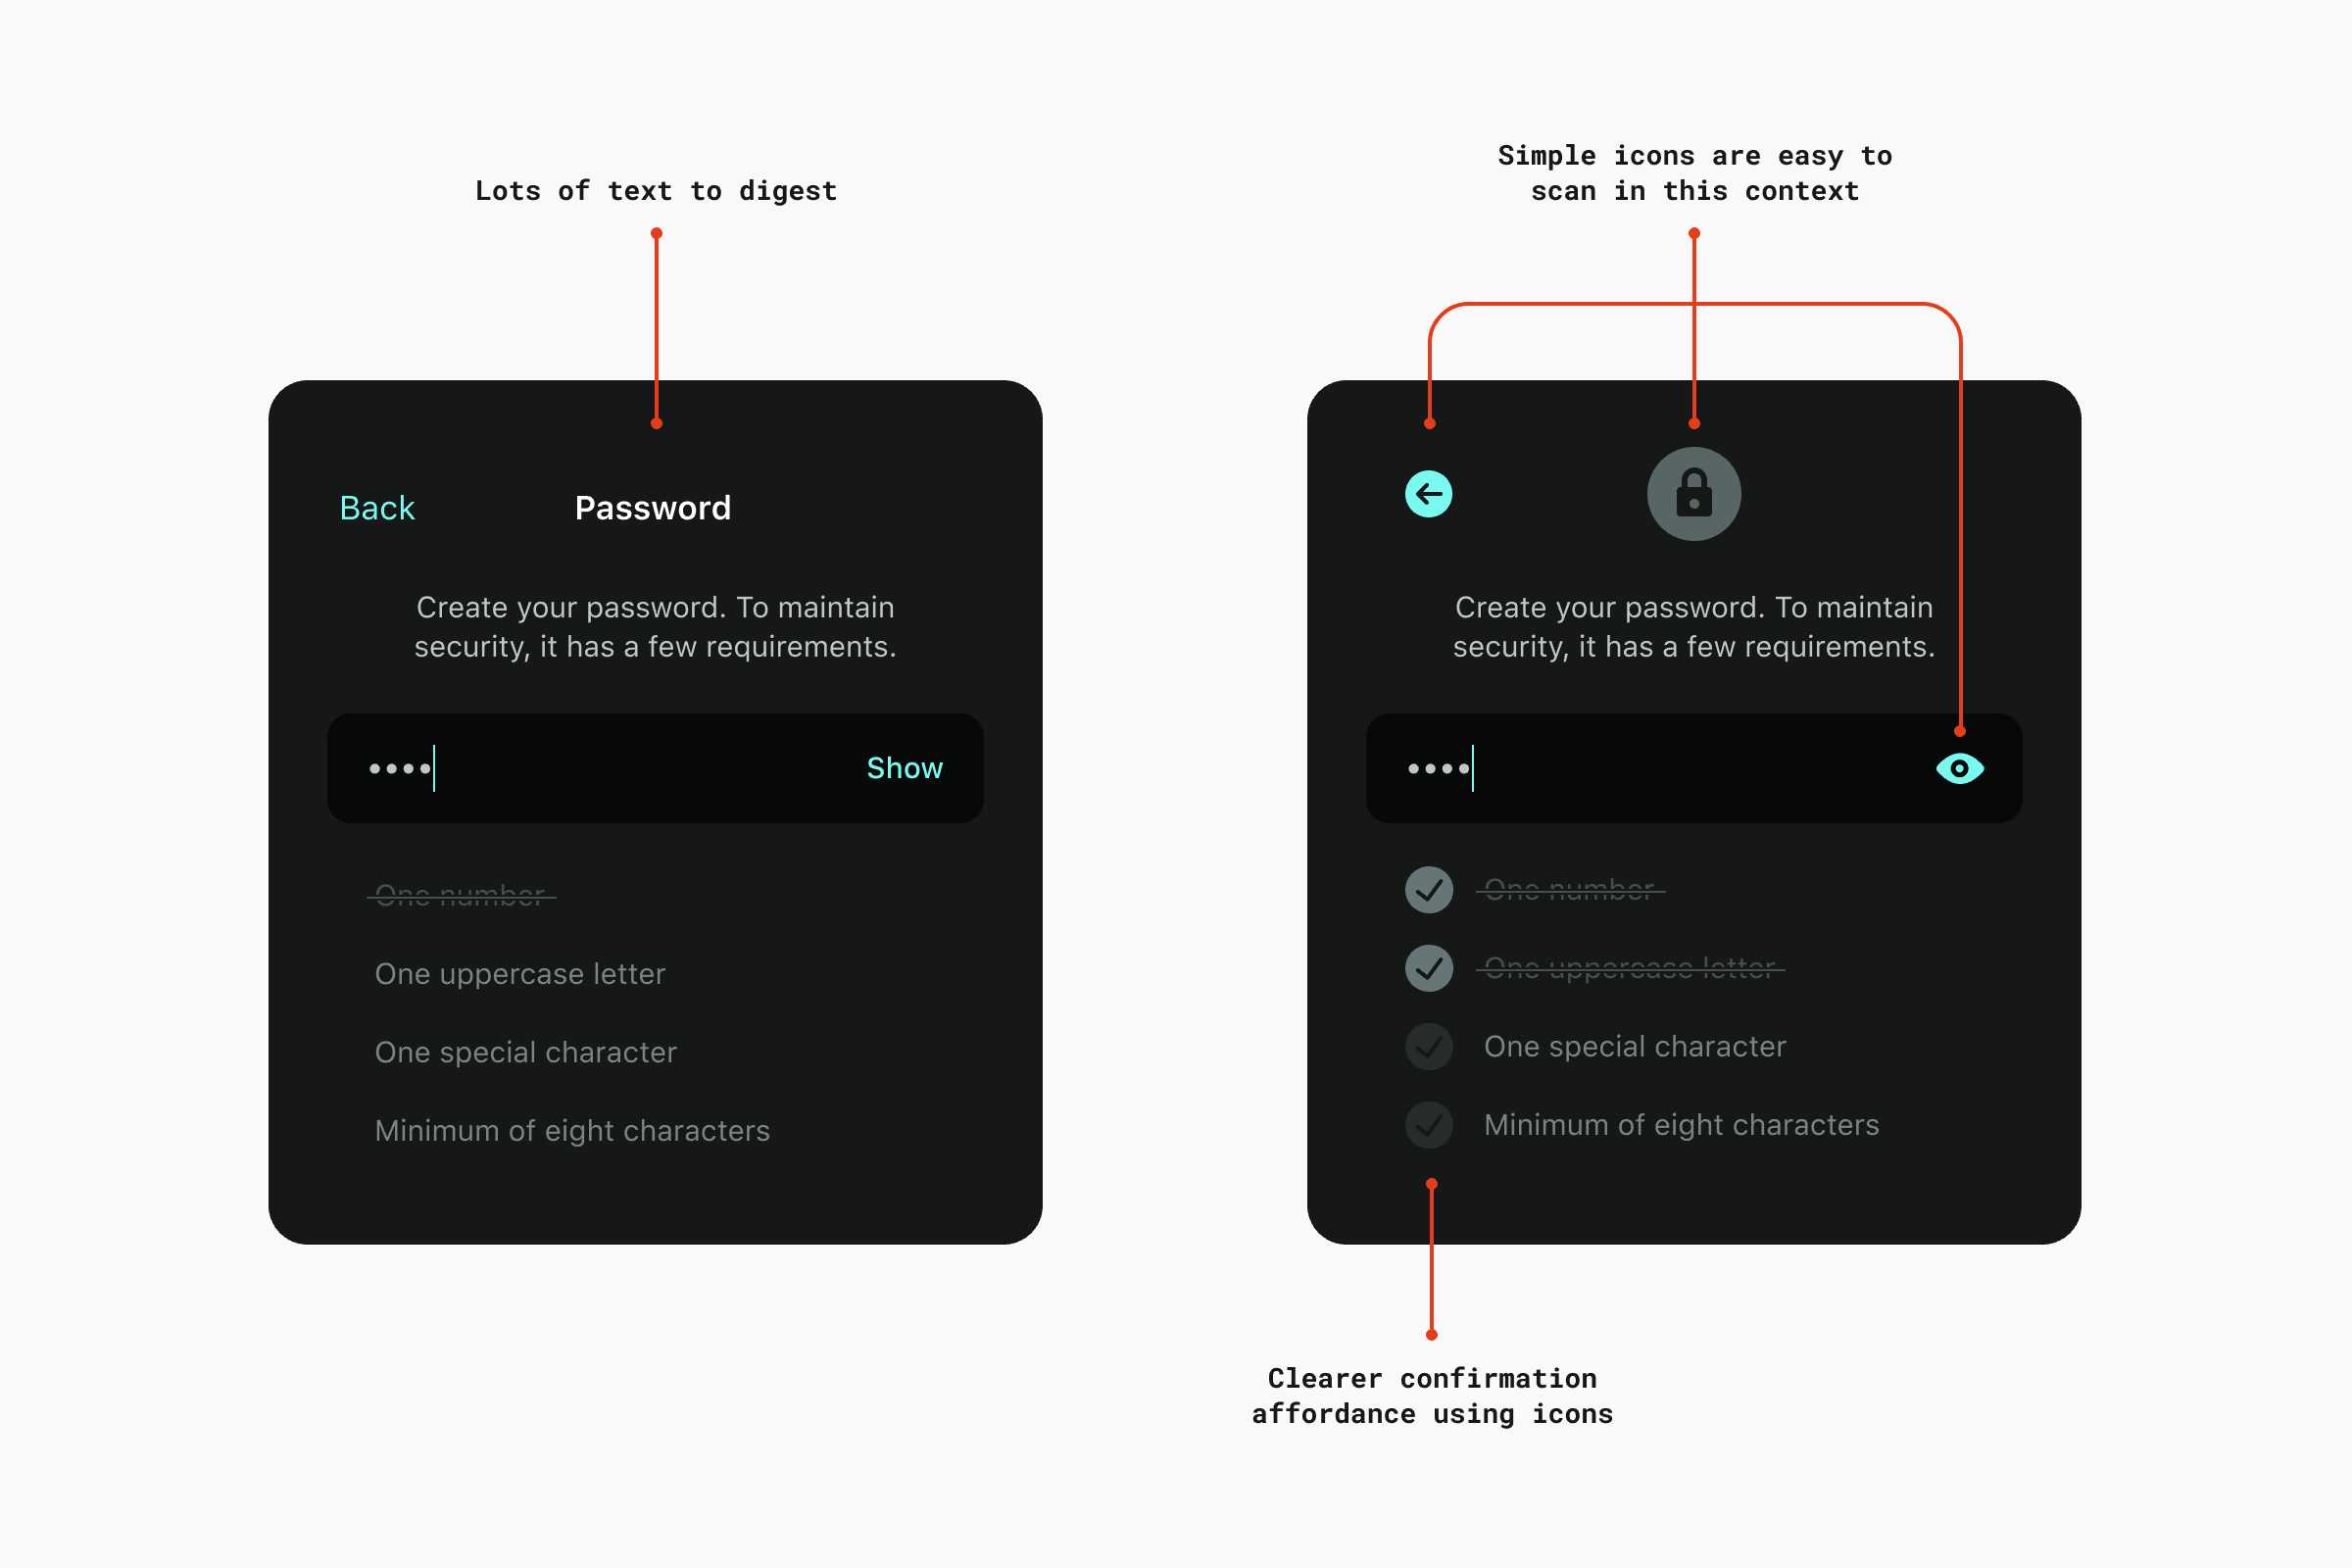
When you need to add icons to your interface, the whole process can really suck. “Should I use all these default bootstrap icons? Maybe I’ll just use the same Google Material icons for the hundredth time?”
Some important yet often overlooked things to consider when choosing an icon set includes, the size of the icons, style, consistency, and quantity. It’s frustrating to find icons that only cover half of the use cases you need.
We constantly felt this frustration too and decided to do something about it. This ultimately led to creating Streamline icon set.
Now in version 3.0, Streamline contains a whopping 30,000 icons in three distinct weights, similar to a font family. There are tons of options to pick the perfect icon for any interface you’re working with, whether it’s a big web application, documentation, or a marketing site.
„I own several icon sets but the one that I return to over and over is the copious Streamline pack, which almost always seems to have just the pictogram I need when I dig into its catalog.”
If you’re an IconJar user, you can also search for icons by name and drag and drop them into your project folder. We’re currently under development on this functionality for our web viewer too.
Every Streamline Icon pack comes with the following file types: .svg, .iconjar, .sketch, .fig, .ai, .pdf, .png, .xd.
So now matter how you like to work with icons, you have the file types you need.
„Streamline 3.0 is one of the most versatile and detailed icon packs I’ve ever used. The structure and hierarchy make it super easy to work with. This is an amazing product. Bravo, Vincent.”
—Stephanie Walter, UX & UI Designer
Optimized SVG
The SVG versions of Streamline is already dev-ready with proper viewbox tags in place and currentColor set as the color properties for all strokes and fills. You can pop in Streamline using your favorite SVG technique and start changing the color of the icons with CSS right out of the gate.
Every weight—light, regular, and bold—was designed with a very consistent style to give you tons of consistency within your interface.
Light
The classic Streamline style with bits of detail here and there. Designed with 1px stroke on a 24px grid. The Light icons are great for interfaces that need lots of fun personality. They also work well scaled up to 48px as small illustrations.
Regular
A new minimal and geometric style. Designed with a 1.5px stroke on a 24px grid. These are perfect to use on clean and modern web interfaces.
Bold
A new solid style akin to the latest iOS guidelines. Designed with fills and a 2px stroke on a 24px grid. The bold style gives a little more punch for an iOS style interface.
Put Streamline to work for you
There are two different package types available—Essential and Ultimate.
Essential contains 14 categories all related to interfaces and web design, whereas the Ultimate pack contains all 53 categories, including things like Pets, Weather, Finance, Outdoors, Transportation, and so much more.
I recently had an opportunity to work on a fantastic research and development project at Netguru. The goal of project (codename: „Wordguru”) was to create a card game that anyone can play with their friends. You can see the outcome here.
One element of the development process was to create an interactive card stack. The card stack had a set of requirements, including:
It should contain a few cards from the collection.
The first card should be interactive.
The user should be able to swipe the card in different directions that indicate an intent to accept, reject or skip the card.
This article will explain how to create that and make it interactive using Vue.js and interact.js. I created an example for you to refer to as we go through the process of creating a component that is in charge of displaying that card stack and a second component that is responsible for rendering a single card and managing user interactions in it.
Let’s start by creating a component that will show a card, but without any interactions just yet. We’ll call this file GameCard.vue and, in the component template, we’ll render a card wrapper and the keyword for a specific card. This is the file we’ll be working in throughout this post.
In the script section of the component, we receive the prop card that contains our card content as well as an isCurrent prop that gives the card a distinct look when needed.
Now that we have a single card, let’s create our card stack.
This component will receive an array of cards and render the GameCard for each card. It’s also going to mark the first card as the current card in the stack so a special styling is applied to it.
Here’s what we’re looking at so far, using the styles pulled from the demo:
At this point, our card looks complete, but isn’t very interactive. Let’s fix that in the next step!
Step 3: Add interactivity to GameCard component
All our interactivity logic will live in the GameCard component. Let’s start by allowing the user to drag the card. We will use interact.js to deal with dragging.
We’ll set the interactPosition initial values to 0 in the script section. These are the values that indicate a card’s order in the stack when it’s moved from its original position.
In the mounted lifecycle hook, we make use of the interact.js and its draggable method. That method allows us to fire a custom function each time the element is dragged (onmove). It also exposes an event object that carries information about how far the element is dragged from its original position. Each time user drags the card, we calculate a new position of the card and set it on the interactPosition property. That triggers our transformString computed property and sets new value of transform on our card.
We use the interact onend hook that allows us to listen when the user releases the mouse and finishes the drag. At this point, we will reset the position of our card and bring it back to its original position: { x: 0, y: 0 }.
We also need to make sure to remove the card element from the Interactable object before it gets destroyed. We do that in the beforeDestroy lifecycle hook by using interact(target).unset(). That removes all event listeners and makes interact.js completely forget about the target.
We need to add one thing in our template to make this work. As our transformString computed property returns a string, we need to apply it to the card component. We do that by binding to the :style attribute and then passing the string to the transform property.
With that done, we have created interaction with our card — we can drag it around!
You may have noticed that the behavior isn’t very natural, specifically when we drag the card and release it. The card immediately returns to its original position, but it would be more natural if the card would go back to initial position with animation to smooth the transition.
That’s where transition comes into play! But adding it to our card introduces another issue: there’s a lag in the card following as it follows the cursor because transition is applied to the element at all times. We only want it applied when the drag ends. We can do that by binding one more class (isAnimating) to the component.
We can add and remove the animation class by changing the isInteractAnimating property.
The animation effect should be applied initially and we do that by setting our property in data.
In the mounted hook where we initialize interact.js, we use one more interact hook (onstart) and change the value of isInteractAnimating to false so that the animation is disabled when the during the drag.
We’ll enable the animation again in the onend hook, and that will make our card animate smoothly to its original position when we release it from the drag.
We also need to update transformString computed property and add a guard to recalculate and return a string only when we are dragging the card.
Our card stack is ready for second set of interactions. We can drag the card around, but nothing is actually happening — the card is always coming back to its original place, but there is no way to get to the second card.
This will change when we add logic that allows the user to accept and rejecting cards.
Step 4: Detect when the card is accepted, rejected, or skipped
The card has three types of interactions:
Accept card (on swipe right)
Reject card (on swipe left)
Skip card (on swipe down)
We need to find a place where we can detect if the card was dragged from its initial position. We also want to be sure that this check will happen only when we finish dragging the card so the interactions do not conflict with the animation we just finished.
We used that place earlier smooth the transition during animation — it’s the onend hook provided by the interact.draggable method.
Let’s jump into the code.
First, we need to store our threshold values. Those values are the distances as the card is dragged from its original position and allows us to determine if the card should be accepted, rejected, or skipped. We use X axis for right (accept) and left (reject), then use the Y axis for downward movement (skip).
We also set coordinates where we want to place a card after it gets accepted, rejected or skipped (coordinates out of user’s sight).
Since those values will not change, we will keep them in the static property of our component, which can be accessed with this.$options.static.interactYThreshold.
We need to check if any of our thresholds were met in our onend hook and then fire the appropriate method that happened. If no threshold is met, then we reset the card to its initial position.
OK, now we need to create a playCard method that’s responsible for handling those interactive actions.
Step 5: Establish the logic to accept, reject, and skip cards
We will create a method that accepts a parameter telling us the user’s intended action. Depending on that parameter, we will set the final position of the current card and emit the accept, reject, or skip event. Let’s go step by step.
First, our playCard method will remove the card element from the Interactable object so that it stops tracking drag events. We do that by using interact(target).unset().
Secondly, we set the final position of the active card depending on the user’s intention. That new position allows us to animate the card and remove it from the user’s view.
Next, we emit an event up to the parent component so we can deal with our cards (e.g. change the current card, load more cards, shuffle the cards, etc.). We want to follow the DDAU principle that states a component should refrain from mutating data it doesn’t own. Since our cards are passed down to our component, it should emit an event up to the place from where those cards come.
Lastly, we hide the card that was just played and add a timeout that allow the card to animate out of view.
Next we created another component that renders the cards in a stack.
Thirdly, we implemented interact.js to allow interactive dragging.
Then we detected when the user wants takes an action with the current card.
Finally, we established the to handle those actions.
Phew, we covered a lot! Hopefully this gives you both a new trick in your toolbox as well as a hands-on use case for Vue. And, if you’ve ever had to build something similar, please share in the comments because it would be neat to compare notes.
In this tutorial, you will learn how to create an amazing watercolor photo effect in Adobe Photoshop. I will explain everything in so much detail that anyone can create it, even those who have just opened Photoshop for the first time.
The effect shown above is the one I will show you how to create in this tutorial. If you would like to create the even more advanced watercolor effects shown below, using just a single click and in only a few minutes, then check out my Aquarelle Photoshop Action.
What You’ll Need
To recreate the design above, you will need the following resources:
First, open the photo that you want to work with. To open your photo, go to File > Open, choose your photo, and click Open. Now, before we get started, just check a couple of things:
Your photo should be in RGB Color mode, 8 Bits/Channel. To check this, go to Image > Mode.
For best results, your photo size should be 2000–3000 px wide/high. To check this, go to Image > Image Size.
Your photo should be the Background layer. If it is not, go to Layer > New > Background from Layer.
Step 2
Now we need to expand the canvas on the left so we have more space around the subject on this side. Go to Image > Canvas Size and use the settings below:
Step 3
Choose the Rectangular Marquee Tool (M), and click and drag to make a selection of the empty white space we have just added. Then, go to Edit > Fill, and set Contents to Content-Aware, Blending to Normal, and Opacity to 100% as shown below. After that, press Control-D on your keyboard to deselect.
2. How to Create the Brushes
In
this section, we are going to create several watercolor brushes we’ll need.
You can check this tutorial to follow the process described and create your own brushes from scratch or using the attached textures, or you can download my TechnicalArt 2 Photoshop Action and get over 60 high-quality and resolution watercolor brushes. Here are the main brushes I’ll be using:
3. How to Create the Background
Step 1
In this section, we are going to create the background. Go to Layer > New Fill Layer > Solid Color to create a new solid color fill layer, name it Background color, and choose the color #cccccc.
Step 2
Go to File > Place Embedded, select thetexture from the second texture link, and click Place. Then, set the Width and Height of the texture to 83.03% as shown below, and name this layer Background_Texture.
Step 3
Now change the Blending Mode of this layer to Soft Light and set the Opacity to 52%.
Step 4
Go to Layer > New Adjustment Layer > Black & White to create a new black & white adjustment layer, and name it BT_Desaturate.
Step 5
Now press Control-Alt-G on your keyboard to create a clipping mask.
4. How to Create the Sketch
Step 1
In this section, we are going to create the sketch. Select the Background layer and press Control-J on your keyboard to duplicate it. Then, drag this layer to the top of the layers in the Layers panel.
Step 2
Now press Control-Shift-U on your keyboard to desaturate this layer. Then, go to Filter > Filter Gallery > Stylize > Glowing Edges and set the Edge Width to 1, Edge Brightness to 20, and Smoothness to 15.
Step 3
Press Control-I on your keyboard to invert this layer. Then, go to Filter > Sharpen > Unsharp Mask and set the Amount to 500%, Radius to 1 px, and Threshold to 0 levels.
Step 4
Now change the Blending Mode of this layer to Multiply and set the Opacity to 29%. Then, name this layer Sketch.
5. How to Create the Watercolor Painting
Step 1
In this section, we are going to create the watercolor painting. Go to Layer > New > Layer to create a new layer and name it Temp.
Step 2
Now set the foreground color to #000000, choose the Brush Tool (B), and pick some of the watercolor brushes you have created. Then, brush over and around the subject area where you want to create the watercolor painting.
Step 3
Control-click on this layer thumbnail to make a selection of this layer. Then, hide this layer, select the Background layer, and press Control-J on your keyboard to create a new layer using the selection. After that, drag this new layer just below the Temp layer in the Layers panel.
Step 4
Now change the Blending Mode of this layer to Multiply and set the Opacity to 80%. Then, name this layer Watercolor_Painting_1.
Step 5
Right-click on the Temp layer and choose Delete Layer.
Step 6
Now repeat this process using the different watercolor brushes to create more watercolor painting layers. Here is my result:
6. How to Create the Main Subject
Step 1
In this section, we are going to create the main subject. Select the Background layer and press Control-J on your keyboard to duplicate it. Then, drag this layer to the top of the layers in the Layers panel.
Step 2
Now go to Layer > Layer Mask > Hide All to add a layer mask that hides the whole layer.
Step 3
Set the foreground color to #ffffff, choose the Brush Tool (B), pick some of the watercolor brushes that you have created, and brush mostly over the subject area. Feel free to use different watercolor brushes.
Step 4
Now name this layer Main Subject.
7. How to Make the Final Adjustments
Step 1
In this section, we are going to make some final adjustments. Select the Subject Details layer, go to Layer > New Adjustment Layer > Curves to create a new curves adjustment layer, and name it Color Look.
Step 2
Now Double-click on this layer thumbnail and, in the Properties panel, enter the settings below:
Step 3
Press D on your keyboard to reset the swatches. Then, go to Layer > New Adjustment Layer > Gradient Map to create a new gradient map adjustment layer and name it Overall Contrast.
Step 4
Change the Blending Mode of this layer to Soft Light and set the Opacity to 25%.
Step 5
Go to Layer > New Adjustment Layer > Vibrance to create a new vibrance adjustment layer and name it Overall Vibrance/Saturation.
Step 6
Now Double-click on this layer thumbnail and, in the Properties panel, set the Vibrance to +47 and Saturation to +23.
Step 7
Go to Layer > New Adjustment Layer > Levels to create a new levels adjustment layer, and name it Overall Brightness.
Step 8
Now Double-click on this layer thumbnail and, in the Properties panel, enter the settings below:
Step 9
Press Control-Alt-Shift-E on your keyboard to make a screenshot, and then press Control-Shift-U to desaturate this layer. Then, go to Filter > Other > High Pass and set the Radius to 2 px.
Step 10
Now change the Blending Mode of this layer to Soft Light and name it Overall Sharpening.
8. How to Crop the Image
Now let’s crop the image to cut out the empty area of the design. Choose the Crop Tool (C) and transform the Crop Box as shown below:
You Made It!
Congratulations, you have succeeded! Here is our final result:
If you would like to create the even more advanced watercolor effects
shown below, using just a single click and in only a few minutes, then
check out my Aquarelle Photoshop Action.
Using
this action, you can transform your photos into professional aquarelle
artworks with no work at all! You just brush over your photo and play
the action. The action will do all the work for you in just a couple of
minutes, leaving you fully layered and customizable results.
The action is also made so that every time you run the action you will get a unique result,
even if you use the same brushed area. The action will always create
unique variations in the watercolor textures, so you can create an unlimited number of
results! The action also creates 50 preset color looks that you can choose from.
The action comes with a detailed video tutorial that demonstrates how to use the action and customize the results to get the most out of the effect.
In this tutorial, you will learn how to create an amazing pastel photo effect in Adobe Photoshop. Everything will be explained in so much detail that anyone…
In this tutorial, I’m going to teach you how to create a Photoshop sketch effect. You will learn how to turn your photos into amazing, advanced sketches. I…
In this tutorial you will learn how to create an amazing, scribble sketch effect in Adobe Photoshop. It’s an easy effect, suitable for Photoshop beginners.
In this tutorial, you will learn how to create an amazing watercolor photo effect in Adobe Photoshop. I will explain everything in so much detail that anyone can create it, even those who have just opened Photoshop for the first time.
The effect shown above is the one I will show you how to create in this tutorial. If you would like to create the even more advanced watercolor effects shown below, using just a single click and in only a few minutes, then check out my Aquarelle Photoshop Action.
What You’ll Need
To recreate the design above, you will need the following resources:
First, open the photo that you want to work with. To open your photo, go to File > Open, choose your photo, and click Open. Now, before we get started, just check a couple of things:
Your photo should be in RGB Color mode, 8 Bits/Channel. To check this, go to Image > Mode.
For best results, your photo size should be 2000–3000 px wide/high. To check this, go to Image > Image Size.
Your photo should be the Background layer. If it is not, go to Layer > New > Background from Layer.
Step 2
Now we need to expand the canvas on the left so we have more space around the subject on this side. Go to Image > Canvas Size and use the settings below:
Step 3
Choose the Rectangular Marquee Tool (M), and click and drag to make a selection of the empty white space we have just added. Then, go to Edit > Fill, and set Contents to Content-Aware, Blending to Normal, and Opacity to 100% as shown below. After that, press Control-D on your keyboard to deselect.
2. How to Create the Brushes
In
this section, we are going to create several watercolor brushes we’ll need.
You can check this tutorial to follow the process described and create your own brushes from scratch or using the attached textures, or you can download my TechnicalArt 2 Photoshop Action and get over 60 high-quality and resolution watercolor brushes. Here are the main brushes I’ll be using:
3. How to Create the Background
Step 1
In this section, we are going to create the background. Go to Layer > New Fill Layer > Solid Color to create a new solid color fill layer, name it Background color, and choose the color #cccccc.
Step 2
Go to File > Place Embedded, select thetexture from the second texture link, and click Place. Then, set the Width and Height of the texture to 83.03% as shown below, and name this layer Background_Texture.
Step 3
Now change the Blending Mode of this layer to Soft Light and set the Opacity to 52%.
Step 4
Go to Layer > New Adjustment Layer > Black & White to create a new black & white adjustment layer, and name it BT_Desaturate.
Step 5
Now press Control-Alt-G on your keyboard to create a clipping mask.
4. How to Create the Sketch
Step 1
In this section, we are going to create the sketch. Select the Background layer and press Control-J on your keyboard to duplicate it. Then, drag this layer to the top of the layers in the Layers panel.
Step 2
Now press Control-Shift-U on your keyboard to desaturate this layer. Then, go to Filter > Filter Gallery > Stylize > Glowing Edges and set the Edge Width to 1, Edge Brightness to 20, and Smoothness to 15.
Step 3
Press Control-I on your keyboard to invert this layer. Then, go to Filter > Sharpen > Unsharp Mask and set the Amount to 500%, Radius to 1 px, and Threshold to 0 levels.
Step 4
Now change the Blending Mode of this layer to Multiply and set the Opacity to 29%. Then, name this layer Sketch.
5. How to Create the Watercolor Painting
Step 1
In this section, we are going to create the watercolor painting. Go to Layer > New > Layer to create a new layer and name it Temp.
Step 2
Now set the foreground color to #000000, choose the Brush Tool (B), and pick some of the watercolor brushes you have created. Then, brush over and around the subject area where you want to create the watercolor painting.
Step 3
Control-click on this layer thumbnail to make a selection of this layer. Then, hide this layer, select the Background layer, and press Control-J on your keyboard to create a new layer using the selection. After that, drag this new layer just below the Temp layer in the Layers panel.
Step 4
Now change the Blending Mode of this layer to Multiply and set the Opacity to 80%. Then, name this layer Watercolor_Painting_1.
Step 5
Right-click on the Temp layer and choose Delete Layer.
Step 6
Now repeat this process using the different watercolor brushes to create more watercolor painting layers. Here is my result:
6. How to Create the Main Subject
Step 1
In this section, we are going to create the main subject. Select the Background layer and press Control-J on your keyboard to duplicate it. Then, drag this layer to the top of the layers in the Layers panel.
Step 2
Now go to Layer > Layer Mask > Hide All to add a layer mask that hides the whole layer.
Step 3
Set the foreground color to #ffffff, choose the Brush Tool (B), pick some of the watercolor brushes that you have created, and brush mostly over the subject area. Feel free to use different watercolor brushes.
Step 4
Now name this layer Main Subject.
7. How to Make the Final Adjustments
Step 1
In this section, we are going to make some final adjustments. Select the Subject Details layer, go to Layer > New Adjustment Layer > Curves to create a new curves adjustment layer, and name it Color Look.
Step 2
Now Double-click on this layer thumbnail and, in the Properties panel, enter the settings below:
Step 3
Press D on your keyboard to reset the swatches. Then, go to Layer > New Adjustment Layer > Gradient Map to create a new gradient map adjustment layer and name it Overall Contrast.
Step 4
Change the Blending Mode of this layer to Soft Light and set the Opacity to 25%.
Step 5
Go to Layer > New Adjustment Layer > Vibrance to create a new vibrance adjustment layer and name it Overall Vibrance/Saturation.
Step 6
Now Double-click on this layer thumbnail and, in the Properties panel, set the Vibrance to +47 and Saturation to +23.
Step 7
Go to Layer > New Adjustment Layer > Levels to create a new levels adjustment layer, and name it Overall Brightness.
Step 8
Now Double-click on this layer thumbnail and, in the Properties panel, enter the settings below:
Step 9
Press Control-Alt-Shift-E on your keyboard to make a screenshot, and then press Control-Shift-U to desaturate this layer. Then, go to Filter > Other > High Pass and set the Radius to 2 px.
Step 10
Now change the Blending Mode of this layer to Soft Light and name it Overall Sharpening.
8. How to Crop the Image
Now let’s crop the image to cut out the empty area of the design. Choose the Crop Tool (C) and transform the Crop Box as shown below:
You Made It!
Congratulations, you have succeeded! Here is our final result:
If you would like to create the even more advanced watercolor effects
shown below, using just a single click and in only a few minutes, then
check out my Aquarelle Photoshop Action.
Using
this action, you can transform your photos into professional aquarelle
artworks with no work at all! You just brush over your photo and play
the action. The action will do all the work for you in just a couple of
minutes, leaving you fully layered and customizable results.
The action is also made so that every time you run the action you will get a unique result,
even if you use the same brushed area. The action will always create
unique variations in the watercolor textures, so you can create an unlimited number of
results! The action also creates 50 preset color looks that you can choose from.
The action comes with a detailed video tutorial that demonstrates how to use the action and customize the results to get the most out of the effect.
In this tutorial, you will learn how to create an amazing pastel photo effect in Adobe Photoshop. Everything will be explained in so much detail that anyone…
In this tutorial, I’m going to teach you how to create a Photoshop sketch effect. You will learn how to turn your photos into amazing, advanced sketches. I…
In this tutorial you will learn how to create an amazing, scribble sketch effect in Adobe Photoshop. It’s an easy effect, suitable for Photoshop beginners.
In this tutorial, you will learn how to create an amazing watercolor photo effect in Adobe Photoshop. I will explain everything in so much detail that anyone can create it, even those who have just opened Photoshop for the first time.
The effect shown above is the one I will show you how to create in this tutorial. If you would like to create the even more advanced watercolor effects shown below, using just a single click and in only a few minutes, then check out my Aquarelle Photoshop Action.
What You’ll Need
To recreate the design above, you will need the following resources:
First, open the photo that you want to work with. To open your photo, go to File > Open, choose your photo, and click Open. Now, before we get started, just check a couple of things:
Your photo should be in RGB Color mode, 8 Bits/Channel. To check this, go to Image > Mode.
For best results, your photo size should be 2000–3000 px wide/high. To check this, go to Image > Image Size.
Your photo should be the Background layer. If it is not, go to Layer > New > Background from Layer.
Step 2
Now we need to expand the canvas on the left so we have more space around the subject on this side. Go to Image > Canvas Size and use the settings below:
Step 3
Choose the Rectangular Marquee Tool (M), and click and drag to make a selection of the empty white space we have just added. Then, go to Edit > Fill, and set Contents to Content-Aware, Blending to Normal, and Opacity to 100% as shown below. After that, press Control-D on your keyboard to deselect.
2. How to Create the Brushes
In
this section, we are going to create several watercolor brushes we’ll need.
You can check this tutorial to follow the process described and create your own brushes from scratch or using the attached textures, or you can download my TechnicalArt 2 Photoshop Action and get over 60 high-quality and resolution watercolor brushes. Here are the main brushes I’ll be using:
3. How to Create the Background
Step 1
In this section, we are going to create the background. Go to Layer > New Fill Layer > Solid Color to create a new solid color fill layer, name it Background color, and choose the color #cccccc.
Step 2
Go to File > Place Embedded, select thetexture from the second texture link, and click Place. Then, set the Width and Height of the texture to 83.03% as shown below, and name this layer Background_Texture.
Step 3
Now change the Blending Mode of this layer to Soft Light and set the Opacity to 52%.
Step 4
Go to Layer > New Adjustment Layer > Black & White to create a new black & white adjustment layer, and name it BT_Desaturate.
Step 5
Now press Control-Alt-G on your keyboard to create a clipping mask.
4. How to Create the Sketch
Step 1
In this section, we are going to create the sketch. Select the Background layer and press Control-J on your keyboard to duplicate it. Then, drag this layer to the top of the layers in the Layers panel.
Step 2
Now press Control-Shift-U on your keyboard to desaturate this layer. Then, go to Filter > Filter Gallery > Stylize > Glowing Edges and set the Edge Width to 1, Edge Brightness to 20, and Smoothness to 15.
Step 3
Press Control-I on your keyboard to invert this layer. Then, go to Filter > Sharpen > Unsharp Mask and set the Amount to 500%, Radius to 1 px, and Threshold to 0 levels.
Step 4
Now change the Blending Mode of this layer to Multiply and set the Opacity to 29%. Then, name this layer Sketch.
5. How to Create the Watercolor Painting
Step 1
In this section, we are going to create the watercolor painting. Go to Layer > New > Layer to create a new layer and name it Temp.
Step 2
Now set the foreground color to #000000, choose the Brush Tool (B), and pick some of the watercolor brushes you have created. Then, brush over and around the subject area where you want to create the watercolor painting.
Step 3
Control-click on this layer thumbnail to make a selection of this layer. Then, hide this layer, select the Background layer, and press Control-J on your keyboard to create a new layer using the selection. After that, drag this new layer just below the Temp layer in the Layers panel.
Step 4
Now change the Blending Mode of this layer to Multiply and set the Opacity to 80%. Then, name this layer Watercolor_Painting_1.
Step 5
Right-click on the Temp layer and choose Delete Layer.
Step 6
Now repeat this process using the different watercolor brushes to create more watercolor painting layers. Here is my result:
6. How to Create the Main Subject
Step 1
In this section, we are going to create the main subject. Select the Background layer and press Control-J on your keyboard to duplicate it. Then, drag this layer to the top of the layers in the Layers panel.
Step 2
Now go to Layer > Layer Mask > Hide All to add a layer mask that hides the whole layer.
Step 3
Set the foreground color to #ffffff, choose the Brush Tool (B), pick some of the watercolor brushes that you have created, and brush mostly over the subject area. Feel free to use different watercolor brushes.
Step 4
Now name this layer Main Subject.
7. How to Make the Final Adjustments
Step 1
In this section, we are going to make some final adjustments. Select the Subject Details layer, go to Layer > New Adjustment Layer > Curves to create a new curves adjustment layer, and name it Color Look.
Step 2
Now Double-click on this layer thumbnail and, in the Properties panel, enter the settings below:
Step 3
Press D on your keyboard to reset the swatches. Then, go to Layer > New Adjustment Layer > Gradient Map to create a new gradient map adjustment layer and name it Overall Contrast.
Step 4
Change the Blending Mode of this layer to Soft Light and set the Opacity to 25%.
Step 5
Go to Layer > New Adjustment Layer > Vibrance to create a new vibrance adjustment layer and name it Overall Vibrance/Saturation.
Step 6
Now Double-click on this layer thumbnail and, in the Properties panel, set the Vibrance to +47 and Saturation to +23.
Step 7
Go to Layer > New Adjustment Layer > Levels to create a new levels adjustment layer, and name it Overall Brightness.
Step 8
Now Double-click on this layer thumbnail and, in the Properties panel, enter the settings below:
Step 9
Press Control-Alt-Shift-E on your keyboard to make a screenshot, and then press Control-Shift-U to desaturate this layer. Then, go to Filter > Other > High Pass and set the Radius to 2 px.
Step 10
Now change the Blending Mode of this layer to Soft Light and name it Overall Sharpening.
8. How to Crop the Image
Now let’s crop the image to cut out the empty area of the design. Choose the Crop Tool (C) and transform the Crop Box as shown below:
You Made It!
Congratulations, you have succeeded! Here is our final result:
If you would like to create the even more advanced watercolor effects
shown below, using just a single click and in only a few minutes, then
check out my Aquarelle Photoshop Action.
Using
this action, you can transform your photos into professional aquarelle
artworks with no work at all! You just brush over your photo and play
the action. The action will do all the work for you in just a couple of
minutes, leaving you fully layered and customizable results.
The action is also made so that every time you run the action you will get a unique result,
even if you use the same brushed area. The action will always create
unique variations in the watercolor textures, so you can create an unlimited number of
results! The action also creates 50 preset color looks that you can choose from.
The action comes with a detailed video tutorial that demonstrates how to use the action and customize the results to get the most out of the effect.
In this tutorial, you will learn how to create an amazing pastel photo effect in Adobe Photoshop. Everything will be explained in so much detail that anyone…
In this tutorial, I’m going to teach you how to create a Photoshop sketch effect. You will learn how to turn your photos into amazing, advanced sketches. I…
In this tutorial you will learn how to create an amazing, scribble sketch effect in Adobe Photoshop. It’s an easy effect, suitable for Photoshop beginners.
In this tutorial, you will learn how to create an amazing watercolor photo effect in Adobe Photoshop. I will explain everything in so much detail that anyone can create it, even those who have just opened Photoshop for the first time.
The effect shown above is the one I will show you how to create in this tutorial. If you would like to create the even more advanced watercolor effects shown below, using just a single click and in only a few minutes, then check out my Aquarelle Photoshop Action.
What You’ll Need
To recreate the design above, you will need the following resources:
First, open the photo that you want to work with. To open your photo, go to File > Open, choose your photo, and click Open. Now, before we get started, just check a couple of things:
Your photo should be in RGB Color mode, 8 Bits/Channel. To check this, go to Image > Mode.
For best results, your photo size should be 2000–3000 px wide/high. To check this, go to Image > Image Size.
Your photo should be the Background layer. If it is not, go to Layer > New > Background from Layer.
Step 2
Now we need to expand the canvas on the left so we have more space around the subject on this side. Go to Image > Canvas Size and use the settings below:
Step 3
Choose the Rectangular Marquee Tool (M), and click and drag to make a selection of the empty white space we have just added. Then, go to Edit > Fill, and set Contents to Content-Aware, Blending to Normal, and Opacity to 100% as shown below. After that, press Control-D on your keyboard to deselect.
2. How to Create the Brushes
In
this section, we are going to create several watercolor brushes we’ll need.
You can check this tutorial to follow the process described and create your own brushes from scratch or using the attached textures, or you can download my TechnicalArt 2 Photoshop Action and get over 60 high-quality and resolution watercolor brushes. Here are the main brushes I’ll be using:
3. How to Create the Background
Step 1
In this section, we are going to create the background. Go to Layer > New Fill Layer > Solid Color to create a new solid color fill layer, name it Background color, and choose the color #cccccc.
Step 2
Go to File > Place Embedded, select thetexture from the second texture link, and click Place. Then, set the Width and Height of the texture to 83.03% as shown below, and name this layer Background_Texture.
Step 3
Now change the Blending Mode of this layer to Soft Light and set the Opacity to 52%.
Step 4
Go to Layer > New Adjustment Layer > Black & White to create a new black & white adjustment layer, and name it BT_Desaturate.
Step 5
Now press Control-Alt-G on your keyboard to create a clipping mask.
4. How to Create the Sketch
Step 1
In this section, we are going to create the sketch. Select the Background layer and press Control-J on your keyboard to duplicate it. Then, drag this layer to the top of the layers in the Layers panel.
Step 2
Now press Control-Shift-U on your keyboard to desaturate this layer. Then, go to Filter > Filter Gallery > Stylize > Glowing Edges and set the Edge Width to 1, Edge Brightness to 20, and Smoothness to 15.
Step 3
Press Control-I on your keyboard to invert this layer. Then, go to Filter > Sharpen > Unsharp Mask and set the Amount to 500%, Radius to 1 px, and Threshold to 0 levels.
Step 4
Now change the Blending Mode of this layer to Multiply and set the Opacity to 29%. Then, name this layer Sketch.
5. How to Create the Watercolor Painting
Step 1
In this section, we are going to create the watercolor painting. Go to Layer > New > Layer to create a new layer and name it Temp.
Step 2
Now set the foreground color to #000000, choose the Brush Tool (B), and pick some of the watercolor brushes you have created. Then, brush over and around the subject area where you want to create the watercolor painting.
Step 3
Control-click on this layer thumbnail to make a selection of this layer. Then, hide this layer, select the Background layer, and press Control-J on your keyboard to create a new layer using the selection. After that, drag this new layer just below the Temp layer in the Layers panel.
Step 4
Now change the Blending Mode of this layer to Multiply and set the Opacity to 80%. Then, name this layer Watercolor_Painting_1.
Step 5
Right-click on the Temp layer and choose Delete Layer.
Step 6
Now repeat this process using the different watercolor brushes to create more watercolor painting layers. Here is my result:
6. How to Create the Main Subject
Step 1
In this section, we are going to create the main subject. Select the Background layer and press Control-J on your keyboard to duplicate it. Then, drag this layer to the top of the layers in the Layers panel.
Step 2
Now go to Layer > Layer Mask > Hide All to add a layer mask that hides the whole layer.
Step 3
Set the foreground color to #ffffff, choose the Brush Tool (B), pick some of the watercolor brushes that you have created, and brush mostly over the subject area. Feel free to use different watercolor brushes.
Step 4
Now name this layer Main Subject.
7. How to Make the Final Adjustments
Step 1
In this section, we are going to make some final adjustments. Select the Subject Details layer, go to Layer > New Adjustment Layer > Curves to create a new curves adjustment layer, and name it Color Look.
Step 2
Now Double-click on this layer thumbnail and, in the Properties panel, enter the settings below:
Step 3
Press D on your keyboard to reset the swatches. Then, go to Layer > New Adjustment Layer > Gradient Map to create a new gradient map adjustment layer and name it Overall Contrast.
Step 4
Change the Blending Mode of this layer to Soft Light and set the Opacity to 25%.
Step 5
Go to Layer > New Adjustment Layer > Vibrance to create a new vibrance adjustment layer and name it Overall Vibrance/Saturation.
Step 6
Now Double-click on this layer thumbnail and, in the Properties panel, set the Vibrance to +47 and Saturation to +23.
Step 7
Go to Layer > New Adjustment Layer > Levels to create a new levels adjustment layer, and name it Overall Brightness.
Step 8
Now Double-click on this layer thumbnail and, in the Properties panel, enter the settings below:
Step 9
Press Control-Alt-Shift-E on your keyboard to make a screenshot, and then press Control-Shift-U to desaturate this layer. Then, go to Filter > Other > High Pass and set the Radius to 2 px.
Step 10
Now change the Blending Mode of this layer to Soft Light and name it Overall Sharpening.
8. How to Crop the Image
Now let’s crop the image to cut out the empty area of the design. Choose the Crop Tool (C) and transform the Crop Box as shown below:
You Made It!
Congratulations, you have succeeded! Here is our final result:
If you would like to create the even more advanced watercolor effects
shown below, using just a single click and in only a few minutes, then
check out my Aquarelle Photoshop Action.
Using
this action, you can transform your photos into professional aquarelle
artworks with no work at all! You just brush over your photo and play
the action. The action will do all the work for you in just a couple of
minutes, leaving you fully layered and customizable results.
The action is also made so that every time you run the action you will get a unique result,
even if you use the same brushed area. The action will always create
unique variations in the watercolor textures, so you can create an unlimited number of
results! The action also creates 50 preset color looks that you can choose from.
The action comes with a detailed video tutorial that demonstrates how to use the action and customize the results to get the most out of the effect.
In this tutorial, you will learn how to create an amazing pastel photo effect in Adobe Photoshop. Everything will be explained in so much detail that anyone…
In this tutorial, I’m going to teach you how to create a Photoshop sketch effect. You will learn how to turn your photos into amazing, advanced sketches. I…
In this tutorial you will learn how to create an amazing, scribble sketch effect in Adobe Photoshop. It’s an easy effect, suitable for Photoshop beginners.
In this tutorial, you will learn how to create an amazing watercolor photo effect in Adobe Photoshop. I will explain everything in so much detail that anyone can create it, even those who have just opened Photoshop for the first time.
The effect shown above is the one I will show you how to create in this tutorial. If you would like to create the even more advanced watercolor effects shown below, using just a single click and in only a few minutes, then check out my Aquarelle Photoshop Action.
What You’ll Need
To recreate the design above, you will need the following resources:
First, open the photo that you want to work with. To open your photo, go to File > Open, choose your photo, and click Open. Now, before we get started, just check a couple of things:
Your photo should be in RGB Color mode, 8 Bits/Channel. To check this, go to Image > Mode.
For best results, your photo size should be 2000–3000 px wide/high. To check this, go to Image > Image Size.
Your photo should be the Background layer. If it is not, go to Layer > New > Background from Layer.
Step 2
Now we need to expand the canvas on the left so we have more space around the subject on this side. Go to Image > Canvas Size and use the settings below:
Step 3
Choose the Rectangular Marquee Tool (M), and click and drag to make a selection of the empty white space we have just added. Then, go to Edit > Fill, and set Contents to Content-Aware, Blending to Normal, and Opacity to 100% as shown below. After that, press Control-D on your keyboard to deselect.
2. How to Create the Brushes
In
this section, we are going to create several watercolor brushes we’ll need.
You can check this tutorial to follow the process described and create your own brushes from scratch or using the attached textures, or you can download my TechnicalArt 2 Photoshop Action and get over 60 high-quality and resolution watercolor brushes. Here are the main brushes I’ll be using:
3. How to Create the Background
Step 1
In this section, we are going to create the background. Go to Layer > New Fill Layer > Solid Color to create a new solid color fill layer, name it Background color, and choose the color #cccccc.
Step 2
Go to File > Place Embedded, select thetexture from the second texture link, and click Place. Then, set the Width and Height of the texture to 83.03% as shown below, and name this layer Background_Texture.
Step 3
Now change the Blending Mode of this layer to Soft Light and set the Opacity to 52%.
Step 4
Go to Layer > New Adjustment Layer > Black & White to create a new black & white adjustment layer, and name it BT_Desaturate.
Step 5
Now press Control-Alt-G on your keyboard to create a clipping mask.
4. How to Create the Sketch
Step 1
In this section, we are going to create the sketch. Select the Background layer and press Control-J on your keyboard to duplicate it. Then, drag this layer to the top of the layers in the Layers panel.
Step 2
Now press Control-Shift-U on your keyboard to desaturate this layer. Then, go to Filter > Filter Gallery > Stylize > Glowing Edges and set the Edge Width to 1, Edge Brightness to 20, and Smoothness to 15.
Step 3
Press Control-I on your keyboard to invert this layer. Then, go to Filter > Sharpen > Unsharp Mask and set the Amount to 500%, Radius to 1 px, and Threshold to 0 levels.
Step 4
Now change the Blending Mode of this layer to Multiply and set the Opacity to 29%. Then, name this layer Sketch.
5. How to Create the Watercolor Painting
Step 1
In this section, we are going to create the watercolor painting. Go to Layer > New > Layer to create a new layer and name it Temp.
Step 2
Now set the foreground color to #000000, choose the Brush Tool (B), and pick some of the watercolor brushes you have created. Then, brush over and around the subject area where you want to create the watercolor painting.
Step 3
Control-click on this layer thumbnail to make a selection of this layer. Then, hide this layer, select the Background layer, and press Control-J on your keyboard to create a new layer using the selection. After that, drag this new layer just below the Temp layer in the Layers panel.
Step 4
Now change the Blending Mode of this layer to Multiply and set the Opacity to 80%. Then, name this layer Watercolor_Painting_1.
Step 5
Right-click on the Temp layer and choose Delete Layer.
Step 6
Now repeat this process using the different watercolor brushes to create more watercolor painting layers. Here is my result:
6. How to Create the Main Subject
Step 1
In this section, we are going to create the main subject. Select the Background layer and press Control-J on your keyboard to duplicate it. Then, drag this layer to the top of the layers in the Layers panel.
Step 2
Now go to Layer > Layer Mask > Hide All to add a layer mask that hides the whole layer.
Step 3
Set the foreground color to #ffffff, choose the Brush Tool (B), pick some of the watercolor brushes that you have created, and brush mostly over the subject area. Feel free to use different watercolor brushes.
Step 4
Now name this layer Main Subject.
7. How to Make the Final Adjustments
Step 1
In this section, we are going to make some final adjustments. Select the Subject Details layer, go to Layer > New Adjustment Layer > Curves to create a new curves adjustment layer, and name it Color Look.
Step 2
Now Double-click on this layer thumbnail and, in the Properties panel, enter the settings below:
Step 3
Press D on your keyboard to reset the swatches. Then, go to Layer > New Adjustment Layer > Gradient Map to create a new gradient map adjustment layer and name it Overall Contrast.
Step 4
Change the Blending Mode of this layer to Soft Light and set the Opacity to 25%.
Step 5
Go to Layer > New Adjustment Layer > Vibrance to create a new vibrance adjustment layer and name it Overall Vibrance/Saturation.
Step 6
Now Double-click on this layer thumbnail and, in the Properties panel, set the Vibrance to +47 and Saturation to +23.
Step 7
Go to Layer > New Adjustment Layer > Levels to create a new levels adjustment layer, and name it Overall Brightness.
Step 8
Now Double-click on this layer thumbnail and, in the Properties panel, enter the settings below:
Step 9
Press Control-Alt-Shift-E on your keyboard to make a screenshot, and then press Control-Shift-U to desaturate this layer. Then, go to Filter > Other > High Pass and set the Radius to 2 px.
Step 10
Now change the Blending Mode of this layer to Soft Light and name it Overall Sharpening.
8. How to Crop the Image
Now let’s crop the image to cut out the empty area of the design. Choose the Crop Tool (C) and transform the Crop Box as shown below:
You Made It!
Congratulations, you have succeeded! Here is our final result:
If you would like to create the even more advanced watercolor effects
shown below, using just a single click and in only a few minutes, then
check out my Aquarelle Photoshop Action.
Using
this action, you can transform your photos into professional aquarelle
artworks with no work at all! You just brush over your photo and play
the action. The action will do all the work for you in just a couple of
minutes, leaving you fully layered and customizable results.
The action is also made so that every time you run the action you will get a unique result,
even if you use the same brushed area. The action will always create
unique variations in the watercolor textures, so you can create an unlimited number of
results! The action also creates 50 preset color looks that you can choose from.
The action comes with a detailed video tutorial that demonstrates how to use the action and customize the results to get the most out of the effect.
In this tutorial, you will learn how to create an amazing pastel photo effect in Adobe Photoshop. Everything will be explained in so much detail that anyone…
In this tutorial, I’m going to teach you how to create a Photoshop sketch effect. You will learn how to turn your photos into amazing, advanced sketches. I…
In this tutorial you will learn how to create an amazing, scribble sketch effect in Adobe Photoshop. It’s an easy effect, suitable for Photoshop beginners.
In this tutorial, you will learn how to create an amazing watercolor photo effect in Adobe Photoshop. I will explain everything in so much detail that anyone can create it, even those who have just opened Photoshop for the first time.
The effect shown above is the one I will show you how to create in this tutorial. If you would like to create the even more advanced watercolor effects shown below, using just a single click and in only a few minutes, then check out my Aquarelle Photoshop Action.
What You’ll Need
To recreate the design above, you will need the following resources:
First, open the photo that you want to work with. To open your photo, go to File > Open, choose your photo, and click Open. Now, before we get started, just check a couple of things:
Your photo should be in RGB Color mode, 8 Bits/Channel. To check this, go to Image > Mode.
For best results, your photo size should be 2000–3000 px wide/high. To check this, go to Image > Image Size.
Your photo should be the Background layer. If it is not, go to Layer > New > Background from Layer.
Step 2
Now we need to expand the canvas on the left so we have more space around the subject on this side. Go to Image > Canvas Size and use the settings below:
Step 3
Choose the Rectangular Marquee Tool (M), and click and drag to make a selection of the empty white space we have just added. Then, go to Edit > Fill, and set Contents to Content-Aware, Blending to Normal, and Opacity to 100% as shown below. After that, press Control-D on your keyboard to deselect.
2. How to Create the Brushes
In
this section, we are going to create several watercolor brushes we’ll need.
You can check this tutorial to follow the process described and create your own brushes from scratch or using the attached textures, or you can download my TechnicalArt 2 Photoshop Action and get over 60 high-quality and resolution watercolor brushes. Here are the main brushes I’ll be using:
3. How to Create the Background
Step 1
In this section, we are going to create the background. Go to Layer > New Fill Layer > Solid Color to create a new solid color fill layer, name it Background color, and choose the color #cccccc.
Step 2
Go to File > Place Embedded, select thetexture from the second texture link, and click Place. Then, set the Width and Height of the texture to 83.03% as shown below, and name this layer Background_Texture.
Step 3
Now change the Blending Mode of this layer to Soft Light and set the Opacity to 52%.
Step 4
Go to Layer > New Adjustment Layer > Black & White to create a new black & white adjustment layer, and name it BT_Desaturate.
Step 5
Now press Control-Alt-G on your keyboard to create a clipping mask.
4. How to Create the Sketch
Step 1
In this section, we are going to create the sketch. Select the Background layer and press Control-J on your keyboard to duplicate it. Then, drag this layer to the top of the layers in the Layers panel.
Step 2
Now press Control-Shift-U on your keyboard to desaturate this layer. Then, go to Filter > Filter Gallery > Stylize > Glowing Edges and set the Edge Width to 1, Edge Brightness to 20, and Smoothness to 15.
Step 3
Press Control-I on your keyboard to invert this layer. Then, go to Filter > Sharpen > Unsharp Mask and set the Amount to 500%, Radius to 1 px, and Threshold to 0 levels.
Step 4
Now change the Blending Mode of this layer to Multiply and set the Opacity to 29%. Then, name this layer Sketch.
5. How to Create the Watercolor Painting
Step 1
In this section, we are going to create the watercolor painting. Go to Layer > New > Layer to create a new layer and name it Temp.
Step 2
Now set the foreground color to #000000, choose the Brush Tool (B), and pick some of the watercolor brushes you have created. Then, brush over and around the subject area where you want to create the watercolor painting.
Step 3
Control-click on this layer thumbnail to make a selection of this layer. Then, hide this layer, select the Background layer, and press Control-J on your keyboard to create a new layer using the selection. After that, drag this new layer just below the Temp layer in the Layers panel.
Step 4
Now change the Blending Mode of this layer to Multiply and set the Opacity to 80%. Then, name this layer Watercolor_Painting_1.
Step 5
Right-click on the Temp layer and choose Delete Layer.
Step 6
Now repeat this process using the different watercolor brushes to create more watercolor painting layers. Here is my result:
6. How to Create the Main Subject
Step 1
In this section, we are going to create the main subject. Select the Background layer and press Control-J on your keyboard to duplicate it. Then, drag this layer to the top of the layers in the Layers panel.
Step 2
Now go to Layer > Layer Mask > Hide All to add a layer mask that hides the whole layer.
Step 3
Set the foreground color to #ffffff, choose the Brush Tool (B), pick some of the watercolor brushes that you have created, and brush mostly over the subject area. Feel free to use different watercolor brushes.
Step 4
Now name this layer Main Subject.
7. How to Make the Final Adjustments
Step 1
In this section, we are going to make some final adjustments. Select the Subject Details layer, go to Layer > New Adjustment Layer > Curves to create a new curves adjustment layer, and name it Color Look.
Step 2
Now Double-click on this layer thumbnail and, in the Properties panel, enter the settings below:
Step 3
Press D on your keyboard to reset the swatches. Then, go to Layer > New Adjustment Layer > Gradient Map to create a new gradient map adjustment layer and name it Overall Contrast.
Step 4
Change the Blending Mode of this layer to Soft Light and set the Opacity to 25%.
Step 5
Go to Layer > New Adjustment Layer > Vibrance to create a new vibrance adjustment layer and name it Overall Vibrance/Saturation.
Step 6
Now Double-click on this layer thumbnail and, in the Properties panel, set the Vibrance to +47 and Saturation to +23.
Step 7
Go to Layer > New Adjustment Layer > Levels to create a new levels adjustment layer, and name it Overall Brightness.
Step 8
Now Double-click on this layer thumbnail and, in the Properties panel, enter the settings below:
Step 9
Press Control-Alt-Shift-E on your keyboard to make a screenshot, and then press Control-Shift-U to desaturate this layer. Then, go to Filter > Other > High Pass and set the Radius to 2 px.
Step 10
Now change the Blending Mode of this layer to Soft Light and name it Overall Sharpening.
8. How to Crop the Image
Now let’s crop the image to cut out the empty area of the design. Choose the Crop Tool (C) and transform the Crop Box as shown below:
You Made It!
Congratulations, you have succeeded! Here is our final result:
If you would like to create the even more advanced watercolor effects
shown below, using just a single click and in only a few minutes, then
check out my Aquarelle Photoshop Action.
Using
this action, you can transform your photos into professional aquarelle
artworks with no work at all! You just brush over your photo and play
the action. The action will do all the work for you in just a couple of
minutes, leaving you fully layered and customizable results.
The action is also made so that every time you run the action you will get a unique result,
even if you use the same brushed area. The action will always create
unique variations in the watercolor textures, so you can create an unlimited number of
results! The action also creates 50 preset color looks that you can choose from.
The action comes with a detailed video tutorial that demonstrates how to use the action and customize the results to get the most out of the effect.
In this tutorial, you will learn how to create an amazing pastel photo effect in Adobe Photoshop. Everything will be explained in so much detail that anyone…
In this tutorial, I’m going to teach you how to create a Photoshop sketch effect. You will learn how to turn your photos into amazing, advanced sketches. I…
In this tutorial you will learn how to create an amazing, scribble sketch effect in Adobe Photoshop. It’s an easy effect, suitable for Photoshop beginners.
In this tutorial, you will learn how to create an amazing watercolor photo effect in Adobe Photoshop. I will explain everything in so much detail that anyone can create it, even those who have just opened Photoshop for the first time.
The effect shown above is the one I will show you how to create in this tutorial. If you would like to create the even more advanced watercolor effects shown below, using just a single click and in only a few minutes, then check out my Aquarelle Photoshop Action.
What You’ll Need
To recreate the design above, you will need the following resources:
First, open the photo that you want to work with. To open your photo, go to File > Open, choose your photo, and click Open. Now, before we get started, just check a couple of things:
Your photo should be in RGB Color mode, 8 Bits/Channel. To check this, go to Image > Mode.
For best results, your photo size should be 2000–3000 px wide/high. To check this, go to Image > Image Size.
Your photo should be the Background layer. If it is not, go to Layer > New > Background from Layer.
Step 2
Now we need to expand the canvas on the left so we have more space around the subject on this side. Go to Image > Canvas Size and use the settings below:
Step 3
Choose the Rectangular Marquee Tool (M), and click and drag to make a selection of the empty white space we have just added. Then, go to Edit > Fill, and set Contents to Content-Aware, Blending to Normal, and Opacity to 100% as shown below. After that, press Control-D on your keyboard to deselect.
2. How to Create the Brushes
In
this section, we are going to create several watercolor brushes we’ll need.
You can check this tutorial to follow the process described and create your own brushes from scratch or using the attached textures, or you can download my TechnicalArt 2 Photoshop Action and get over 60 high-quality and resolution watercolor brushes. Here are the main brushes I’ll be using:
3. How to Create the Background
Step 1
In this section, we are going to create the background. Go to Layer > New Fill Layer > Solid Color to create a new solid color fill layer, name it Background color, and choose the color #cccccc.
Step 2
Go to File > Place Embedded, select thetexture from the second texture link, and click Place. Then, set the Width and Height of the texture to 83.03% as shown below, and name this layer Background_Texture.
Step 3
Now change the Blending Mode of this layer to Soft Light and set the Opacity to 52%.
Step 4
Go to Layer > New Adjustment Layer > Black & White to create a new black & white adjustment layer, and name it BT_Desaturate.
Step 5
Now press Control-Alt-G on your keyboard to create a clipping mask.
4. How to Create the Sketch
Step 1
In this section, we are going to create the sketch. Select the Background layer and press Control-J on your keyboard to duplicate it. Then, drag this layer to the top of the layers in the Layers panel.
Step 2
Now press Control-Shift-U on your keyboard to desaturate this layer. Then, go to Filter > Filter Gallery > Stylize > Glowing Edges and set the Edge Width to 1, Edge Brightness to 20, and Smoothness to 15.
Step 3
Press Control-I on your keyboard to invert this layer. Then, go to Filter > Sharpen > Unsharp Mask and set the Amount to 500%, Radius to 1 px, and Threshold to 0 levels.
Step 4
Now change the Blending Mode of this layer to Multiply and set the Opacity to 29%. Then, name this layer Sketch.
5. How to Create the Watercolor Painting
Step 1
In this section, we are going to create the watercolor painting. Go to Layer > New > Layer to create a new layer and name it Temp.
Step 2
Now set the foreground color to #000000, choose the Brush Tool (B), and pick some of the watercolor brushes you have created. Then, brush over and around the subject area where you want to create the watercolor painting.
Step 3
Control-click on this layer thumbnail to make a selection of this layer. Then, hide this layer, select the Background layer, and press Control-J on your keyboard to create a new layer using the selection. After that, drag this new layer just below the Temp layer in the Layers panel.
Step 4
Now change the Blending Mode of this layer to Multiply and set the Opacity to 80%. Then, name this layer Watercolor_Painting_1.
Step 5
Right-click on the Temp layer and choose Delete Layer.
Step 6
Now repeat this process using the different watercolor brushes to create more watercolor painting layers. Here is my result:
6. How to Create the Main Subject
Step 1
In this section, we are going to create the main subject. Select the Background layer and press Control-J on your keyboard to duplicate it. Then, drag this layer to the top of the layers in the Layers panel.
Step 2
Now go to Layer > Layer Mask > Hide All to add a layer mask that hides the whole layer.
Step 3
Set the foreground color to #ffffff, choose the Brush Tool (B), pick some of the watercolor brushes that you have created, and brush mostly over the subject area. Feel free to use different watercolor brushes.
Step 4
Now name this layer Main Subject.
7. How to Make the Final Adjustments
Step 1
In this section, we are going to make some final adjustments. Select the Subject Details layer, go to Layer > New Adjustment Layer > Curves to create a new curves adjustment layer, and name it Color Look.
Step 2
Now Double-click on this layer thumbnail and, in the Properties panel, enter the settings below:
Step 3
Press D on your keyboard to reset the swatches. Then, go to Layer > New Adjustment Layer > Gradient Map to create a new gradient map adjustment layer and name it Overall Contrast.
Step 4
Change the Blending Mode of this layer to Soft Light and set the Opacity to 25%.
Step 5
Go to Layer > New Adjustment Layer > Vibrance to create a new vibrance adjustment layer and name it Overall Vibrance/Saturation.
Step 6
Now Double-click on this layer thumbnail and, in the Properties panel, set the Vibrance to +47 and Saturation to +23.
Step 7
Go to Layer > New Adjustment Layer > Levels to create a new levels adjustment layer, and name it Overall Brightness.
Step 8
Now Double-click on this layer thumbnail and, in the Properties panel, enter the settings below:
Step 9
Press Control-Alt-Shift-E on your keyboard to make a screenshot, and then press Control-Shift-U to desaturate this layer. Then, go to Filter > Other > High Pass and set the Radius to 2 px.
Step 10
Now change the Blending Mode of this layer to Soft Light and name it Overall Sharpening.
8. How to Crop the Image
Now let’s crop the image to cut out the empty area of the design. Choose the Crop Tool (C) and transform the Crop Box as shown below:
You Made It!
Congratulations, you have succeeded! Here is our final result:
If you would like to create the even more advanced watercolor effects
shown below, using just a single click and in only a few minutes, then
check out my Aquarelle Photoshop Action.
Using
this action, you can transform your photos into professional aquarelle
artworks with no work at all! You just brush over your photo and play
the action. The action will do all the work for you in just a couple of
minutes, leaving you fully layered and customizable results.
The action is also made so that every time you run the action you will get a unique result,
even if you use the same brushed area. The action will always create
unique variations in the watercolor textures, so you can create an unlimited number of
results! The action also creates 50 preset color looks that you can choose from.
The action comes with a detailed video tutorial that demonstrates how to use the action and customize the results to get the most out of the effect.
In this tutorial, you will learn how to create an amazing pastel photo effect in Adobe Photoshop. Everything will be explained in so much detail that anyone…
In this tutorial, I’m going to teach you how to create a Photoshop sketch effect. You will learn how to turn your photos into amazing, advanced sketches. I…
In this tutorial you will learn how to create an amazing, scribble sketch effect in Adobe Photoshop. It’s an easy effect, suitable for Photoshop beginners.
There is good news on this front! The standards bodies that be have moved toward a standardizing methods to style scrollbars, starting with the gutter (or width) of them. The main property will be scrollbar-gutter and Geoff has written it up here. Hopefully Autoprefixer will help us as the spec is finalized and browsers start to implement it so we can start writing the standardized version and get any prefixed versions from that.