
Wszystkie wpisy, których autorem jest admin

Calaveras y Diablitos


Cozy tea


Kirovi Home


Rose Logo Design


Filipe Carvalho Updates
Post pobrano z: Filipe Carvalho Updates

Pilots In Training
Post pobrano z: Pilots In Training

How I learned to stop worrying and love the bomb
Post pobrano z: How I learned to stop worrying and love the bomb

In this Motionographer Guest Post by Joyce N. Ho, find out what it’s like to take on one of the biggest jobs in our industry, the Semi Permanent titles!
How to Draw a Flamingo
Post pobrano z: How to Draw a Flamingo

Flamingos are familiar even to those who have never seen one in real life. These large birds have long, stick-like legs with backward-bending knees and long, curvy necks.
Flamingos embody the saying „You are what you eat.” The pink and reddish colors of their feathers come from eating pigments found in algae and invertebrates. Zoo flamingos will turn white if their diet doesn’t contain shrimp or other food providing carotenoid pigments.
Let’s explore this bird and learn some interesting facts about it together! In this tutorial, we’ll draw a flamingo from scratch, using graphite pencils.
What You Will Need
You’ll need the following supplies to create this project:
- an HB graphite pencil
- a 3B graphite pencil
- an eraser
- drawing paper

How to Draw a Flamingo
Step 1
I outline a rough shape of the flamingo’s head, using the HB graphite pencil.

I add a shape of the bird’s beak; it is massive and slightly bent downwards.

Step 2
I add the long line of the neck—it has an “S” shape.
This position may vary, and sometimes the line of the neck becomes much straighter or, on the contrary, demonstrates even more curves.

Step 3
I draw a rough shape of the flamingo’s body; it is similar to a stylized drop that is lying on its side.

Step 4
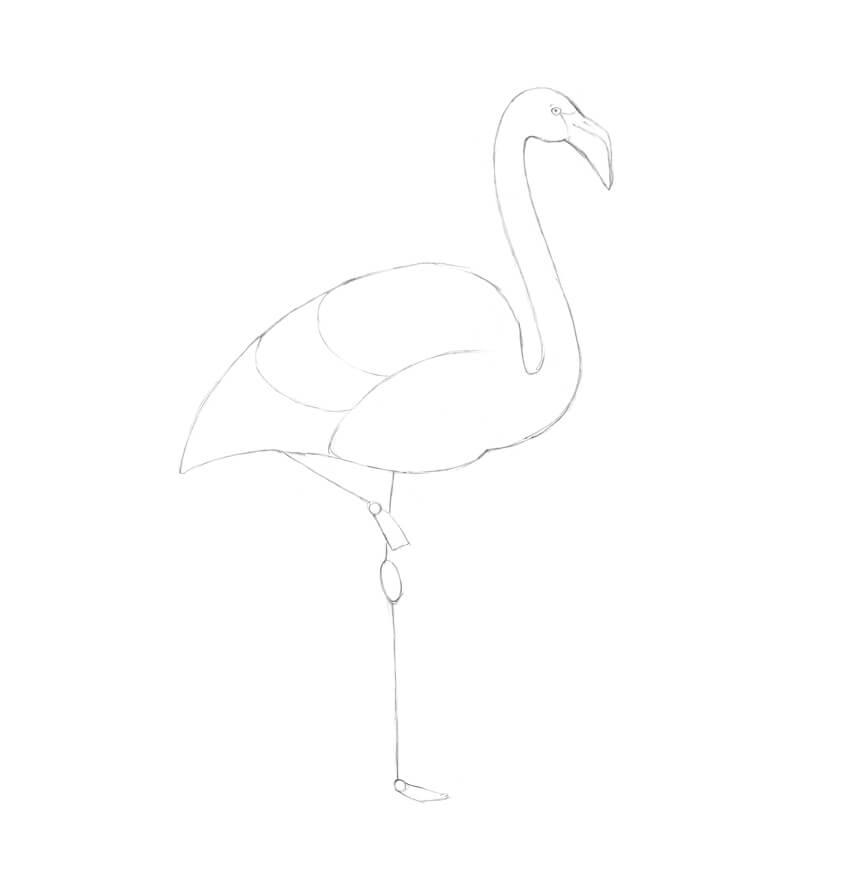
I add a framework of the first leg, marking the ankle with an oval. Let’s keep the outline as simple as possible for now.

I’m going to depict a common position in which the other leg is tucked beneath the bird’s body.
It’s difficult to say why flamingos tend to stand on one foot, but it’s supposed that keeping one of their feet out of the cold water helps birds to conserve body heat. However, this behavior also takes place in warm water and in birds that do not typically stand in water.
It also seems to be a comfortable resting position for flamingos; the one-legged pose can be held without any muscle activity.

Actually, the positions of the flamingo’s neck and legs can be quite versatile. Don’t feel limited to just one of them!

Step 5
It’s time to refine the head of the bird in our drawing. It is relatively small, compared to the massive black-tipped beak with a distinctive downward bent. The lower part of the beak is much larger and stronger than the upper one.
A flamingo’s beak has a filter-like structure to remove food from the water before the liquid is expelled.
You can find a stylized illustration of a flamingo’s head in the image below.
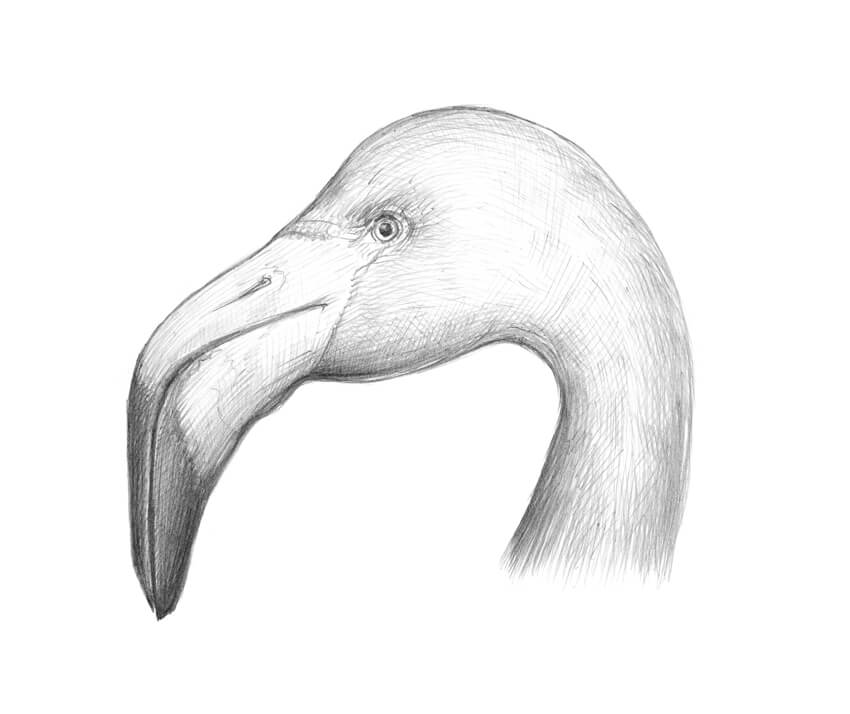
I add a small eye, and then refine the contours of the upper and lower bills.

Step 6
I outline the contours of the bird’s wing.

A flamingo has a massive covering of feathers; some of them, especially in the bottom part of the body, are longer, with clear-cut contours.
The feathers in the upper part of the body create a softer, smother impression—often, we can’t differentiate separate feathers there.
I divide the bird’s body into parts (or layers) to make the process of drawing the feathers easier.

Step 7
I draw the contours of the flamingo’s neck, joining the head and the body.
Step 8
I refine the leg, based on the framework.
The three main toes are webbed to help spread the bird’s weight as it stands on soft mud, and also to act as paddles when the flamingo swims.

I add the contours of the visible part of the tucked leg.

Step 9
I refine the outer contour of the wing, marking the feathers, and then create an illusion of soft feathers in the top part of the body. The direction of the pencil lines accentuates the contours of the flamingo’s body.
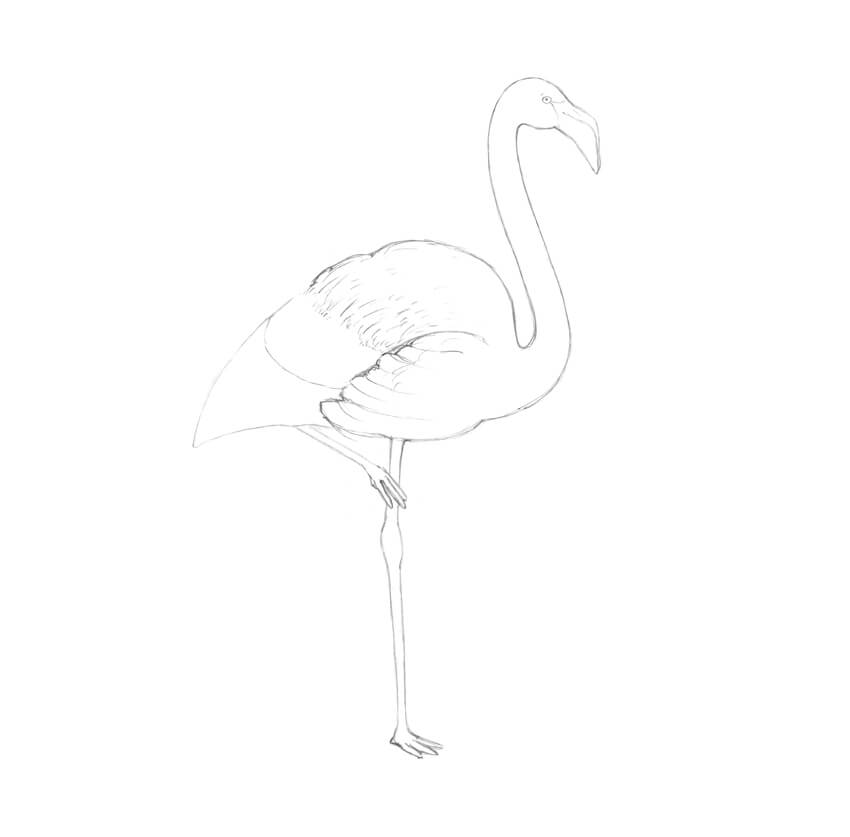
I add the longer feathers. They can be more fluffed up in slightly different directions or just come together at the tip of the tail.
I decided to make this flamingo more artistic and stylized, so I draw a decorative tail with attention to the long feathers.

Step 10
With the HB pencil, I apply some graphite hatching to give the drawing more volume.
I accent the bottom part of the bird’s body and the areas between the long feathers. There should be shadows on the bird’s neck and legs.
And, as a nice addition, a drop shadow makes the bird’s figure steadier.

Step 11
With the 3B pencil, I increase the contrast in my drawing. Flamingos have black flight feathers under their wings, so I create a hint at them.
I also darken the tip of the beak and the area around the eye to make the artwork more expressive. It’s a great trick to use a sharp tip of the eraser to add small highlights on the feathers and create a soft transition between the areas of shorter and longer feathers.
As a finishing touch, I add some graphite dots to the drop shadow under the flamingo to create an illusion of grainy sand texture.
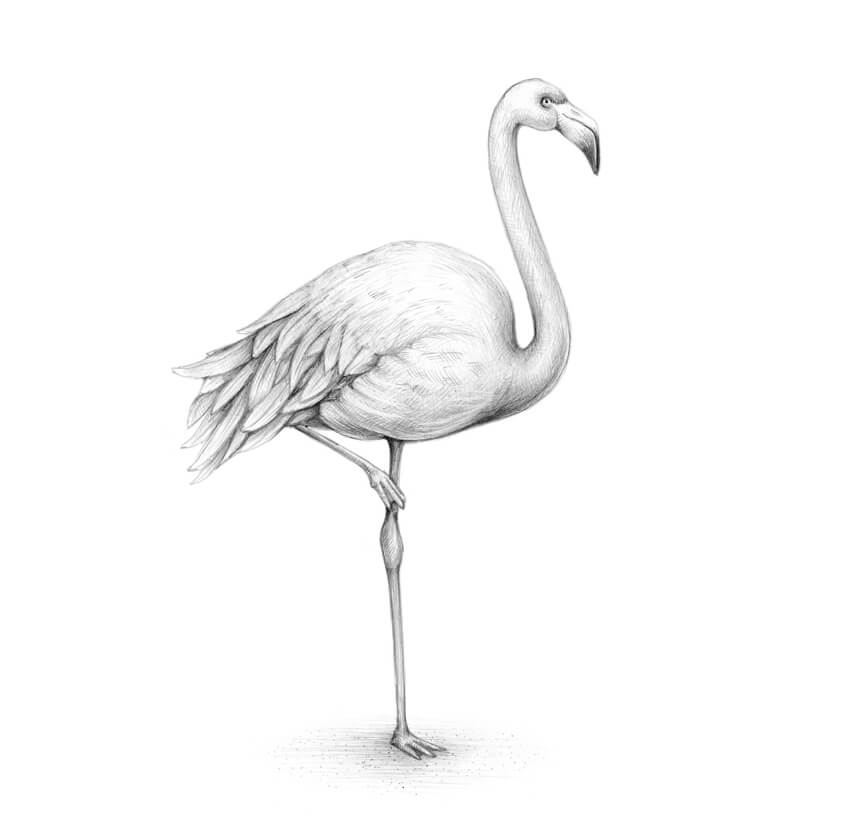
Your Drawing Is Complete
Congratulations—we’ve created a beautiful graphite pencil drawing! I hope you were inspired by the theme of this tutorial: wonderful flamingos.
Let your creative journey be fruitful and full of joy!

Join the Design & Illustration Instructor Team!
Post pobrano z: Join the Design & Illustration Instructor Team!
It’s that time of year again! We’re looking for some new designers to join our always developing team of awesome instructors.
What We’re Looking For
Envato Tuts+ has many areas of content, and while we love a variety of avenues, we’re specifically looking for instructors to create written content. The topics we’re specifically looking for are:
- Photo manipulation
- Product mockups
- Logo design
- Adobe Photoshop
- Procreate
- Affinity Photo
- Sketchbook
Vector Software Gurus:
- Affinity Designer
- Sketch
- Inkscape
Your area of expertise not listed? We never turn a good application down!
You must also be comfortable with the English language. We can proof your content, but we can’t rewrite everything for you.
We’re looking for content from quick tips to in-depth tutorials. Most of all, we want instructors who can explain themselves clearly and accurately and produce quality end results. Whether you’re an expert in Adobe Illustrator, Adobe InDesign, Inkscape, Adobe Photoshop, Sketch or any other design package, we want to hear from you!
We are passionate about diversity and inclusion, and this includes design and trends from all corners of the globe. If you want to contribute to our ever-expanding Global Influences content, please send us a pitch.
If you want to know more, please check out this insightful comment on our previous call for new instructors.
What Do You Get Out of It?
There are many benefits to becoming an Envato Tuts+ Instructor:
- Getting paid for a subject you’re passionate about is always rewarding. Depending on the content type and subject, you could be billing thousands per month! We pay $250 USD for a standard length tutorial (around 25-30 steps/images).
- We have in-depth guides to help you put together your posts, from formatting to tone to screenshot presentation. So if you’re new to tutorial writing, this is a great place to start!
- Get your name out into the community. This is especially good if you’re just starting your freelance career.
- If you create assets for Envato Market or Envato Elements, then use this opportunity to help promote your items!
Pitch a Tutorial!
While I can tell you which areas we’re specifically looking into, it all comes down to which areas are your strongest and what you feel most confident in teaching. If you are interested in becoming an Envato Tuts+ instructor, why don’t you pitch us an idea? We’re looking forward to hearing from you.
