Up and Running With Cinema 4D is a brand new course for artists and designers who are just getting started with 3D and are ready to learn the foundational skills that Cinema 4D provides. In this post, you’ll learn more about the course and watch some free preview videos to whet your appetite and pick up some useful Cinema 4D skills!
What You’ll Learn
In this course, you’ll learn how to create and manipulate basic shapes, use colour, work with lighting and rendering, and more. Jonathan Lam will walk you through the step-by-step process of how to use these skills to create a simple pair of headphones!
By the end of the course, you’ll have a better understanding of how these tools work together and how to come up with your own modelling solutions.
Here are some free lessons from this course, as a preview of what you can expect:
Introduction to Basic Shapes in Cinema 4D
In this video you’ll learn about different ways to create and manipulate basic shapes in Cinema 4D. This will act as the foundation of our modelling techniques.
Introduction to Deformers
In this video you’ll learn how to use the “deformers”, which will provide further options for manipulating shapes into what we want for modelling.
How to Edit Basic Shapes in Cinema 4D
In this video you will learn how to make basic shapes editable. You’ll learn the options that become available to you and discuss how this can affect your modelling. You will then use the half sphere object to create part of the headphones model.
Take the Course
You can take our new course straight away with a subscription to Envato Elements. For a single low monthly fee, you get access not only to this course, but also to our growing library of over 1,000 video courses and industry-leading eBooks on Envato Tuts+.
Plus you now get unlimited downloads from the huge Envato Elements library of 580,000+ creative assets. Create with unique fonts, photos, graphics and templates, and deliver better projects faster.
In this tutorial I’ll show you how to use Adobe Photoshop to create an abstract piece featuring a broken woman portrait.
First, we’ll build the base background using several landscape and abstract texture images. After that, we’ll retouch the model, add a mountain to the model’s head, and import the abstract texture and crack effect. Later, we’ll add rocks with lava effects and draw some lines. We’ll work with an abstract texture again, using the Dodge and Burn Tool and several adjustment layers to complete the final effect.
Tutorial Assets
The following assets were used during the production of this tutorial:
Create a new 3000 x 1790 px document with the given settings:
Step 2
Open the landscape 1 image. Drag this image into the white canvas using the Move Tool (V).
Click the
second icon at the bottom of the Layers panel to add a mask to this
layer. Select a soft round brush with black color (soft black brush) to
remove the hard edges and blend the landscape to make it fade out into
the white background.
Step 3
Go to Layer > New Adjustment Layer > Hue/Saturation and set it as Clipping Mask. Bring the Saturation value down to -100.
Step 4
Place the
landscape 2 image onto the existing canvas and add a mask to this layer.
Use a soft black brush to remove the bottom of this landscape and leave
the mountains visible softly and subtly in the middle of the canvas.
Step 5
Make a Hue/Saturation adjustment layer (set as Clipping Mask) to desaturate the landscape 2.
Step 6
Open the
abstract texture pack. Browse the folder of the colorful power backgrounds
and select the first group. Take the image you like and place it onto
the existing canvas.
Use a layer mask to erase most of this texture image, leaving some details visible subtly on top of both sides.
Step 7
Add a Gradient Map adjustment layer and pick the default colors (black and white) to desaturate the texture.
Step 8
Create a Curves adjustment layer and increase the lightness to make the effect more subtle.
Step 9
Open the
abstract texture pack again. Browse the grunge folder and select one
image from the fourth group to add to the main canvas. Use a layer mask
to erase the bottom and make the effect visible mostly on the upper section.
Step 10
Create a Hue/Saturation adjustment layer and reduce the Saturation value to the minimum.
Step 11
Use an Invert adjustment layer to make the effect more subtle.
2. How to Retouch the Model
Step 1
Open the model image. Cut out the model on the left and place her in the middle of the main canvas.
Step 2
Add a mask
to the model layer and select a brush from the watercolor brush set.
I’ve used the one numbered 2494 and pressed F5 to change the settings of
this brush.
Use this brush to trim the hair and some details on her shoulders.
Step 3
Make a Gradient Map adjustment layer with black and white to desaturate the model.
Step 4
Create a Curves adjustment layer to bring more light to the model, especially the
side of the model towards the background. Paint on the shadow and face
of the model so they won’t be affected or will be less affected by this adjustment
layer.
Step 5
Make a new layer and use a soft brush with Opacity and Flow about 50% to reduce the shadow on the model’s shoulder.
Step 6
Create a new layer, and use a soft brush with the color #808080 to decrease the light on the model’s lips and teeth.
Step 7
Add a new layer, change the mode to Overlay 100%, and fill with 50% gray.
Activate
the Dodge and Burn Tool (O) to refine the light and shadow on the model.
You can see how I did it with Normal mode and the result with Overlay
mode.
3. How to Add the Mountain
Step 1
Open the
mountain image. Select the big mountain on the right to add to the
model’s head. Use the Free Transform Tool (Control-T) with Warp mode
to distort the mountain to fit the size of the head.
Step 2
Add a mask to this layer and use a hard black brush to cut the contour of the mountain to fit the head completely.
Step 3
Create a Hue/Saturation adjustment layer to desaturate this mountain.
Step 4
Make a Curves adjustment layer to increase the contrast of the mountain.
Step 5
Use another Curves adjustment layer to brighten the mountain. On this layer mask,
use a soft black brush with a lowered opacity (about 20-50%) to reduce
the light to keep the mountain’s contrast but still show some texture.
4. How to Import the Abstract Textures
Step 1
Open the
abstract texture pack again. Browse the grunge folder and select one
from the fifth group to add to the lower part of the canvas. Use a layer mask
with a watercolor brush to remove the top and leave some jagged,
crumbly effects on the model’s body and both bottom corners of the canvas.
Lower the brush’s opacity if needed to get a better, more natural
effect.
Step 2
Create a Hue/Saturation adjustment layer to desaturate the effect.
Step 3
Make a Curves adjustment layer to strengthen the effect. On the layer mask,
use a watercolor brush to reduce the dark effect in the bottom right corner.
Step 4
Duplicate
this texture image and drag it above the top of the layers. Move it up
and use a layer mask with a watercolor brush to remove most of the
image, leaving some subtle abstract effects visible around the model’s head
and the bottom of the mountain to give it some details and texture.
Step 5
Add a Hue/Saturation adjustment layer to turn the color of the effect to black and white.
Step 6
Use a Curves adjustment layer to make the effect on the mountain more visible and on the background less visible.
5. How to Make the Crack Effect
Step 1
Move the crack image into the main document and change this layer mode to Multiply 100%.
Add a mask to this layer and use a watercolor brush to remove the areas outside the model.
Step 2
Use the
Lasso Tool (L) to select a part of the crack image and place it onto the
model’s face. Activate Control-T to make it much smaller, and then use a
layer mask to erase the parts outside the face.
Step 3
Select the
crack layers and hit Control-G to create a group for them. Change this
group’s mode to Multiply 100% and add a Curves adjustment layer within
this group. Decrease the lightness to increase the broken effect’s visibility.
On the layer mask, use a soft black brush to reduce the effect on the
areas which are too dark after this step.
Step 4
Use another Curves adjustment layer to brighten the effect, especially the contour
around the face and body. Paint on the shadow areas so they won’t be
affected by this adjustment layer.
6. How to Add the Rocks and Lava Effect
Step 1
Open the
rock images pack. Select the meteor_11 folder and take one rock from
this. Place it above the mountain’s area and use Control-T to rotate it
as shown below.
Use a layer mask to blend this rock with the existing surface.
Step 2
Add more lava effect to the head and model’s body using different rocks.
Step 3
For the lava effects on the model’s cheek and shoulder, use a Curves adjustment layer to brighten them as they’re too dark now.
Step 4
Add one
rock from the meteor_11 folder to our working document, and then go
to Filter > Liquify. Select the Twirl Clockwise Tool (C) to tweak the
rock so it looks different from the original form. Don’t overdo it as
it would look too strange and unnatural.
Use Control-T to scale it down and place it below the mountain area.
Step 5
Use the same method to tweak different rocks into different forms and add them around the ear area and above the forehead.
Use a layer
mask to blend the upper part of the rocks with the forehead and break their tops to get the form of a headpiece (the rocks above the forehead include two
rock parts; the smaller one is upper and the bigger is lower).
Step 6
Make a Curves adjustment layer to bring more light for the rocks on the
forehead. On their layer mask, paint on the shadow area so they won’t be
brightened by this adjustment layer.
Step 7
Use
the Liquify Tool to make some small twisted parts to decorate the eyes
and forehead. Use a Curves adjustment layer if you feel any
details are too dark or want to increase their visibility.
Step 8
Turn one
rock into a similar result below and place it onto one of the model’s
shoulders. Duplicate this layer and flip it horizontally and move it to the other shoulder.
Add another
rock to one of the shoulders to make the two sides appear different. On
each of these three layers, use a layer mask to blend them with the
shoulders.
Step 9
Create a
Curves adjustment layer for each of these indicated layers to match
their lightness with the background. Paint on the back side of the rocks
if you feel this part is too bright.
Step 10
Use the
same method to add more rocks on the background, and use Control-T with Warp mode to turn them into different sizes and forms. Place them
vertically on both sides of the model.
Step 11
Group all
the rock layers and use a Curves adjustment layer to brighten them a
bit. The selected areas show where to paint on the layer mask.
7. How to Draw the Lines
Step 1
Create a
new layer on top of the layer and activate the Line Tool (U). Draw five
lines with black color and 1 px stroke along the rocks on the background. Hold the Shift key to make them go straight.
Step 2
Use a layer mask to remove some line parts on the rocks.
8. How to Do the Final Adjustments
Step 1
Add the
texture used in section 4 to the top of the layers and use a layer mask
to erase most of this texture image, leaving the grunge effect covering
only the lower part of the model’s body, especially the rocks on the
shoulders, to make them integrated better with the background.
Step 2
Create a Hue/Saturation adjustment layer to desaturate the texture’s effect.
Step 3
Make a Curves adjustment layer to match the effect’s lightness with the rest of the body and background.
Step 4
I want to desaturate and reduce some lava details to make them appear
more subtle. Use the Lasso Tool to select one area on the neck (or any
areas you want) and go to Layer > New Adjustment Layer >
Hue/Saturation. Decrease the Reds and Yellows values.
On this layer mask, use a lowered soft black brush to recover some yellow details.
Step 5
Create a
new layer, change the mode to Overlay 100%, and fill with 50% gray. Use
the Burn Tool to paint more shadow below the strokes of the crack effect
on the model’s face to increase their visibility, and use the Dodge Tool
to brighten the model’s contour.
Step 6
Add a Curves adjustment layer to increase the whole canvas contrast. Paint on
the edges and the shadow areas of the model so they won’t be affected by
this adjustment layer.
Step 7
Make
another Curves adjustment layer to bring more light to the middle of the
canvas. The selected areas on the edges and shadows show where to paint on the layer mask.
Step 8
Use another Curves adjustment to darken the edges more, to give the whole scene a better contrast.
Congratulations, You’re Done!
I hope that you’ve enjoyed the tutorial and learned something new for
your own projects. Feel free to share your results or leave comments in
the box below. Enjoy Photoshopping!
As the digital world grows and evolves, many businesses are starting to work online. However, in order to appeal to new clients, businesses need a website. This website provides an interactive space between a business and its clients.
An excellent website designer is able to offer a business a custom-made website. This website will be both creative and adaptive to business needs.
What to consider when designing a website
When you begin designing a business website, take your audience into account. There are many different types of website templates available. However, each appeal to different members of an audience.
When designing a website, you might want to use an existing template which will suit a specific viewer.
Alternately, you might select a custom template. This choice largely depends on what you will be using a website for.
A good website should be able to adapt and adjust as the business expands. This will enable a business to grow with ease.
When creating a business website, it’s helpful to note that there are a lot of free resources which can be accessed.
These resources offer ready-made templates which can be adjusted to the needs of a site or its clients.
This enables you to save time and money on designing a site. Your site can also be up and running in a very short period of time.
Free website templates are also often very easy to manage, with drag and drop features which enable a site manager to change and adjust the content or images on a site with relative ease.
How to search for inspiration
When you’re working on a site, seek for inspiration everywhere you go. You could look at a collection of old art, view color combinations in nature or look at the dynamic movement of waves rolling off the sea.
Even the evolving colors of a city street might inspire you. Once you have the inspiration you need, begin by creating a mood board. This will assist you to bring your ideas together.
Learn about colors
Color sends out a message, creating atmosphere or mood. Some colors (those next to each other on the color wheel) are complementary and can be used to create attractive but subtle designs.
Others are contrasting (such as red and green or blue and orange). When placed together, these colors offset one another and bring a interest to a page.
Your local paint company should have a color wheel for you to explore. Interior and graphic designs both rely on color insights.
If it seems complicated, create a website with a dark background. There are lots of black textures online for you to use. And then, every color will be easily put into a contrasting scheme.
Learn about typography
When creating a website or blog, your knowledge of typography will enhance your viewing experience.
This is because, like color, typography sends out a clear message. Typography can be used to create a mood or tell a story about a site.
The layout of a webpage, the typeface was chosen, and the way this font is spaced will all make a difference to the legibility of a site.
Clean-lined, well-organized text will create a pleasant experience for the reader. This will encourage the reader to engage more deeply with a site.
Look at background images
Only a few years ago placing a great deal of imagery on a site meant that the site would take a long time to download.
Now, however, bandwidth is much faster and it is easier to add attractive background images to a site.
These images can reflect the goals of a company (for example blueprint drawings might represent an architectural firm).
Remember to keep your images responsive though. This means they will give the same impact when downloaded on a mobile device.
If you’re unfamiliar with the program, have a look for online tutorials. They’ll guide you on how to use the program in step by step fashion. Once you’ve mastered Photoshop, you’ll have far more to offer your clients.
Start drawing
Although websites use a variety of different codes to create the desired effect, begin by planning your website design on paper.
This will prevent any blocks between you and your ideas. Creative people often feel very comfortable planning on paper.
Search for internet inspiration
Once you’ve started planning your website, search the internet for a range of inspiring sites you can draw from.
Good quality web designs will offer you a multitude of different ideas to add to your site. It might also be helpful to explore ideas which don’t appeal to you.
This will show you what to avoid. You could even Google ‘worst sites’. Looking at badly designed sites might be educational for you.
Simplify your home page
When you are working with website design, your goal will be to keep your homepage simple and free of clutter.
When a viewer lands on your homepage, they’re looking for evidence that they’ve come to the right place. Brand identity needs to be clear and content minimal.
When your viewers land on your page, they will scan your page for information. The less they have to see and remember, the more likely they assess what they want from your site.
This means they will navigate more deeply into your site, or even respond to a call to action button.
If you do use content on your home page, break it up into small chunks. If you can, use an image or icon to portray a similar message. Your viewer can always search for any information they need later on.
Use hierarchy to direct your viewer
As a designer, it’s your goal to focus your viewer’s attention on important aspects of your site.
As a designer, you’ll be arranging the site and its context in a manner which is clear and easy to understand.
You’ll only have a short while to show your viewer what your site is about. If your information is clearly arranged, with headings and subheadings, your viewer will know what to expect.
You can also use contrast, color, size and spacing to show your viewer important information. Displaying your information in strips will make it easily comprehensible to viewers.
Keep your content easy to read
Legibility is always key when creating a website. No matter how attractive or profound the information you share might be, it won’t matter if viewers cannot read it. You want your viewer to be able to read and absorb your content easily.
Use contrast: if your information stands out against the background of your site, it will be easy to read. Think black letters on a white page or white lettering against a deep grey background.
This is much easier to read than the vague differences between green and turquoise, which make it hard for viewers to see.
Font size: when we read online, the screen is usually at least 24 inches from our faces. This makes small lettering very hard to read. Most online sites use a font size of at least 16pts. However, this may vary depending on the type of font used.
Use clean lined fonts: Clean-lined fonts are often referred to as ‘sans serifs’ and are often the most frequently used online font option.
Fonts with serifs are often used in books or offline publishing. Clean, easy looking text is best used for online site design.
Hand drawn text is very attractive and gives a unique feel to a website, but keep it limited to headings. It can be very difficult to read in large quantities.
Limit your fonts: When constructing your website, limit your fonts to two or three choices. This will help you to create an orderly site. Too many fonts can clutter up your site while a limited number will keep it harmonious.
Summary
As a website designer, you will never stop learning. Whether you focus on typography, digital skills or finding inspiration, there are always new steps to take.
As you grow and evolve as a designer, you will have more to offer your clients. Keep learning and you’ll watch your designs change as you do.
The reports say that the constructions of a 25MW largest solar PV project in Nepal has begun. The foundation stone was laid last week at Devighat in Nuwakot by Minister for Energy, Water Resources and Irrigation, Barsha Man Pun.
The government plans to finish the construction of the project in a year.
As stated by Pankaj Kumar, national capacity building expert, this is the first large-scale solar project in Nepal.
Install the font on your system and you are ready to get started!
1. How to Create a New Document and Set Rulers in Photoshop
Step 1
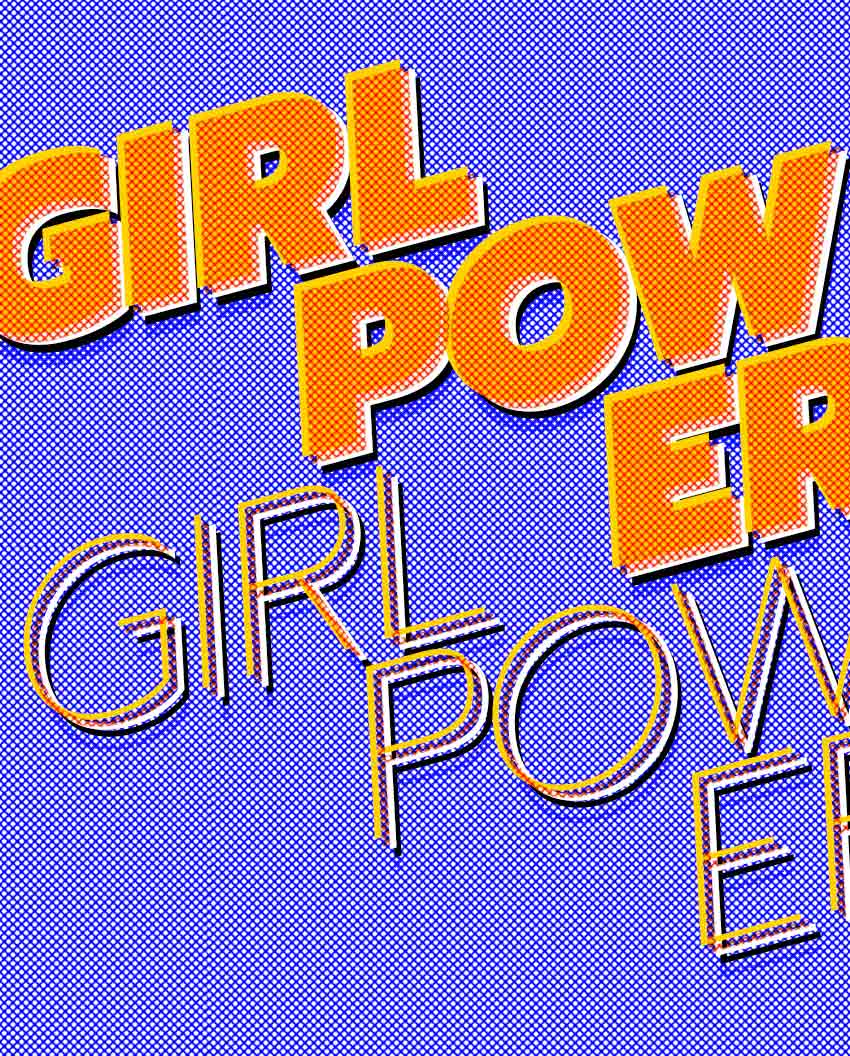
In Photoshop, go to File > New. Name the document Girl Power. Set the Width to 1275 px and Height to 1650 px. I will change the measurements of Width and Height to Inches. Set the Resolution to 72 Pixels/Inch. To start, we will set the Color Mode to Grayscale and change it later on. Click OK. Later on, we will need to change the mode to Duotone, and the only way to do this is by starting with a Grayscale mode file.
Step 2
Press Command-R to activate the rulers on the document. As I mentioned in the step above, I am using inches for this project. If you wish to change to other units, go to Photoshop > Preferences > Units & Rulers. A Preferences window will pop up,and you will be able to change to the desired system.
Step 3
Click on the Rulers and drag onto the page to create a guide. Hold Shift to drag to an even number. In this case, let’s create a 1 inch margin all around our document. Hide or display the guides by pressing Command-;.
2. How to Use the Color Halftone Filter
Step 1
In order to be able to create a screen or halftone effect, we need to start with a grayscale file and turn it into Monotone. A halftone effect only works on gradients if you are using CMYK or RGB. We are looking for an even pattern, and this can only be achieved by converting our file mode from Grayscale to Monotone. Head over to Image > Mode > Duotone.
Step 2
The Duotone Options window will pop up. Under Type, select Monotone. For Ink 1, click on the second square and use the color black or the code #000000. Click OK.
Step 3
Using the Paint Bucket Tool (G), color the page with the following color code: #a2a2a2.
Step 4
Head over to Filter > Pixelate > Color Halftone.
Step 5
The Color Halftone window will pop up. Use the settings from the image below and click OK.
Step 6
We want to create a denser look and have the dots be white. On the Layers panel, duplicate the Background layer by pressing Command-J. Let’s invert the pattern by pressing Command-I. The layer should change from left to right like the image below.
Step 7
In order to be able to work in color, we have to change the mode again to RGB. Go to Image > Mode > RGB Color.
Step 8
Create a new layer by pressing Shift-Command-N, and name it Blue background. Using the Paint Bucket Tool (G), select a blue foreground color (#0000ff), and paint over the new layer.
Step 9
To be able to see the halftone texture we created on Layer 1, we need to set the Blending Mode of the blue background layer to Screen on the Layers panel.
Step 10
We can alter the size of Layer 1to create a more prominent texture. I am resizing mine by pressing Command-T. Head over to the Options bar and check that the Maintain Aspect Ratio button is activated. Set the Width and Height to 130%.
3. How to Add and Adjust Text
Step 1
Set the foreground color to black on the Tools panel. Press T to activate the Type Tool and type Girl Power on three lines like the image below. We want to the text to cover the poster horizontally. I used separate layers for each word and activated right align text on the Options bar for the word Power. To edit the style, bring up the Character panel by going to Type > Panels > Character Panel. I am using the font Prompt Black Italic and set the Size to 360 pt. For the word Power, set the Leading to 280 pt.
Step 2
On the Layers panel, select both layers by pressing Shift and clicking on each layer. We want to add movement to the poster, so we will rotate these two text layers. Press Command-T to rotate and hold Shift for an even rotation to 15 degrees. Alternatively, you can head over to the Options bar and type -15.00 in the Rotate option. Hit Enter to set the text. Place the text just within the top margin.
On this specific poster, we want the type to bleed over to create a strong aesthetic, so we will leave the sides to bleed over.
Step 3
To add more texture to the text, we need to duplicate the two layers we created. Do this by selecting both layers on the Layers panel and pressing Command-J. Using the Move Tool (V), drag both of the new layers under the main text and move them to the right. To create contrast, let’s set the font style to Thin Italic on the Characters panel.
4. How to Add a Halftone Texture to the Text
Step 1
We want to add movement and a Lichtenstein effect to the poster. Let’s duplicate the text layers and set them in two other colors. First, we need to create folders containing all these layers to keep things organized. On the Layers panel, select the four text layers we created and drag them towards the folder at the bottom.
Step 2
Duplicate the folder to create three more folders by pressing Command-J on the folder. Name each folder with the following color names: black, white, yellow, red.
Step 3
Using the Characters panel, change the color of each folder’s text layer. Use plain black and white for the first two. For yellow, use the code #ffd200 and for red, the code #ff3d00. In order to see all the layers, we need to slightly move them around—there is no right or wrong for this part! I used the keyboard as it gives us more control compared to the mouse.
Step 4
The red text is taking over our poster, so I would like to add some texture and contrast to that text layer. Let’s duplicate (Command-J)Layer 1 with the halftone and drag it into the Red folder. Open the Red folder by clicking on the arrow. We will now be working within this folder.
Step 5
Select the four text layers, and Right Click > Rasterize Type. Keep the four layers selected and Right Click > Merge Layers.
Step 6
Remember we are still working on the Red folder. Press Command and click on the newly merged layer thumbnail. This will outline and select the objects in this layer, i.e. our text.
Step 7
Deactivate the visibility of the Power copy text layer and, while still selecting the objects, click on Layer 1 copy. Remember this is the halftone layer we duplicated. Press Shift-Command-I and use the Erase Tool (E) to brush over the poster. This will erase everything in the layer but the words we selected.
Step 8
We still want to maintain the red color to make our poster stand out. On the Layers panel, activate the visibility of the Power Copy text layer and set the Blending Mode to Screen. We want this layer to be transparent, so let’s merge the two layers left under the Red folder and set the Blending Mode to Multiply.
Step 9
If desired, on the Layers panel we can duplicate the black folder layer and set the blending mode to Color Burn and the Opacity to 55% to add more shadowing to the poster.
5. How to Save the Poster for Web
Head over to File > Save for Web (Shift-Option-Command-S). Set the quality to Maximum, or lower the quality if there are any size constraints. Under Image Size, set the width and height to the size you need. Click on Save…, add a name, and click on Save.
Great Job! You’ve Finished This Tutorial!
In this tutorial, we’ve created a poster using the famous Roy Lichtenstein style. Today we’ve learned how to:
Create a typography-based poster and add interesting touches by multiplying layers.
Roel Nieskens released a tool that lets you upload a font file and see what’s inside, from how many characters it contains to the number of languages it supports. Here’s what you see once you upload a font, in this case Covik Sans Mono Black:
Why is this data useful? Well, I used this tool just the other day when I found a font file in a random Dropbox folder. What OpenType features does this font have? Are there any extra glyphs besides the Roman alphabet inside? Wakamai Fondue answered those questions for me in a jiffy.
CSS is getting increasingly powerful, and with features like CSS grid and custom properties (also known as CSS variables), we’re seeing some really creative solutions emerging. Some of those solutions focus around not only making the web prettier, but making it more accessible, and making styling accessible experiences better. I’m definitely here for it!
A common UI pattern that we see on the web are dropdown menus. They’re used to display related information in pieces, without overwhelming the user with buttons, text, and options. Somewhere that we see these a lot is inside of headers or navigation areas on websites.
A Google search for „dropdown menu” yields many examples
Let’s see if we can make one of these menus with CSS alone. We’ll create a list of links within a nav component like so:
We now have our two-tiered navigation system. In order to have the content hidden and displayed when we want it to be visible, we’ll need to apply some CSS. All style properties have been removed from the following example for clarity on interaction:
li {
 display: block;
 transition-duration: 0.5s;
}

li:hover {
  cursor: pointer;
}

ul li ul {
  visibility: hidden;
  opacity: 0;
  position: absolute;
  transition: all 0.5s ease;
  margin-top: 1rem;
  left: 0;
  display: none;
}

ul li:hover > ul,
ul li ul:hover {
  visibility: visible;
  opacity: 1;
  display: block;
}

ul li ul li {
  clear: both;
  width: 100%;
}
Now, the submenu dropdown is hidden, but will be exposed and become visible when we hover over its correlating parent in the navigation bar. By styling ul li ul, we have access to that submenu, and by styling ul li ul li, we have access to the individual list items within it.
The Problem
This is starting to look like what we want, but we’re still far from finished at this point. Web accessibility is a core part of your product’s development, and right now would be the perfect opportunity to bring this up. Adding role="navigation" is a good start, but in order for a navigation bar to be accessible, one should be able to tab through it (and focus on the proper item in a sensible order), and also have a screen reader accurately read out loud what is being focused on.
You can hover over any of the list items and clearly see what is being hovered over, but this isn’t true for tab navigation. Go ahead and try to tab through the example above. You lose track of where the focus is visually As you tab to Two in the main menu, you’ll see a focus indicator ring, but when you tab to the next item (one of its submenu items), that focus disappears.
Now, it’s important to note that theoretically you are focused on this other item, and that a screen reader would be able to parse that, reading Sub-One, but keyboard users will not be able to see what’s going on and will lose track.
The reason this happens is because, while we’re styling the hover of the parent element, as soon as we transition focus from the parent to one of the list items within that parent, we lose that styling. This makes sense from a CSS standpoint, but it’s not what we want.
Luckily, there is a new CSS pseudo class that will give us exactly what we want in this case, and it’s called :focus-within.
The Solution: `:focus-within`
The :focus-within pseudo selector is a part of the CSS Selectors Level 4 Spec and tells the browser to apply a style to a parent when any of its children are in focus. So in our case, this means that we can tab to Sub-One and apply a :focus-within style along with the :hover style of the parent and see exactly where we are in the navigation dropdown. In our case it would be ul li:focus-within > ul:
ul li:hover > ul,
ul li:focus-within > ul,
ul li ul:hover {
  visibility: visible;
  opacity: 1;
  display: block;
}
Now, when we tab to the second item, our submenu pops up, and as we tab through the submenu, the visibility remains! Now, we can append our code to include :focus states alongside :hover to give keyboard users the same experience as our mouse users.
In most cases, such as on direct links, we usually can just write something like:
a:hover,
a:focus {
  ...
}
But in this case, since we’re applying hover styles based on the parent li, we can again utilize :focus-within to get the same look at feel when tabbing through. This is because we can’t actually focus on the li (unless we add a tabindex="0"). We’re actually focusing on the link (a) within it. :focus-within allows us to still apply styles to the parent li when focusing on the link (pretty darn cool!):
li:hover,
li:focus-within {
  ...
}
At this point, since we are applying a focus style, we can do something that’s typically not recommended (remove the styling of that blue outline focus ring). We can do this by:
li:focus-within a {
  outline: none;
}
The above code specifies that when we focus within list items via the link (a), do not apply an outline to the link item (a). It’s pretty safe to write it this way, because we’re exclusively styling the hover state, and with browsers that do not support :focus-within, the link will still get a focus ring. Now our menu looks like this:
Final menu using :focus-within, :hover states, and customizing the focus ring to disappear
If you’re familiar with accessibility, you may have heard of ARIA labels and states. You can use these to your advantage to also create these types of dropdowns with built-in accessibility at the same time! You can find an excellent example here by Heydon Pickering. When including ARIA markup, your code would look a little more like this:
You’re adding aria-haspopup="true" to the parent of the dropdown menu to indicate an alternative state, and including aria-label="submenu" on the actual dropdown menu itself (in this case our list with class="dropdown".
These properties themselves will give you the functionality you need to show the dropdown menu, but the downside is that they only work with JavaScript enabled.
Browser Support Caveat
Speaking of caveats, let’s talk about browser support. While :focus-within does have pretty good browser support, it’s important to note that Internet Explorer and Edge are not supported, so your users on those platforms will not be able to see the navigation.
This browser support data is from Caniuse, which has more detail. A number indicates that browser supports the feature at that version and up.
Desktop
Chrome
Opera
Firefox
IE
Edge
Safari
60
47
52
No
No
10.1
Mobile / Tablet
iOS Safari
Opera Mobile
Opera Mini
Android
Android Chrome
Android Firefox
10.3
No
No
No
64
57
The ultimate solution here would be to use both ARIA markup and CSS :focus-within to ensure a solid dropdown experience for your users.
If you want to be able to use this feature in the future, please upvote it on Edge User Voice! And upvote :focus-ring while you’re at it, so that we’ll be able to style that focus ring and create a beautiful interactive web experience for all 😀
More on `:focus-within` and A11Y
Scott O’Hara wrote about :focus-within, highlighting demos like highlighted <table> rows and dropdown menus