Archiwum kategorii: Design

The Best Fonts To Use For Typography Animation

Post pobrano z: The Best Fonts To Use For Typography Animation

Kinetic Typography. Sounds fancy, right? At its core, kinetic typography is just moving text. Think of your favorite movie intros or that super cool ad you can’t get out of your head. That’s typography animation at play. Why’s it so important, though? Well, it turns a boring static message into something alive, something that dances on the screen, and captures your attention.

The concept of moving text isn’t exactly brand-spanking-new. Remember those retro movie openings with moving titles? Those classics laid the foundation.

But then, the internet came around, and bam! Websites got a makeover, and suddenly we, web designers, started incorporating this magic called typography animation into the digital space. Websites went from static billboards to dynamic stages where text became the star performer.

There’s this unspoken thing about animated text: it’s seductive. No joke. It’s like watching a dance. Your eyes follow the rhythm, the moves, the pace. This isn’t just fancy footwork.

It tells a story, evokes emotion, and gets a message across in ways plain text can’t. Trust me, in the web design world, typography animation isn’t just a trend. It’s a powerhouse tool. When done right, it’s the difference between “meh” and “wow!”

Awesome fonts to use

Pangram

Oh man, this one? Absolute classic. Pangram has this quirky look, like it’s trying to show off each letter of the alphabet. Perfect if you’re aiming for a bit of fun, but still want to stay super elegant. A tightrope walk between fancy and funky.

RBNo2

Alright, so if you’re aiming for a modern vibe with a bit of edge, this one’s your go-to. It’s like that sleek car everyone’s eyeing – crisp, smooth, and drop-dead gorgeous.

Chunk Five

Heavy hitter alert! 🚨
Chunk Five is, well, chunky. It’s that bold statement piece you throw on and everyone’s like, “Whoa.” Great for headers when you wanna scream your message.

Abraham Lincoln

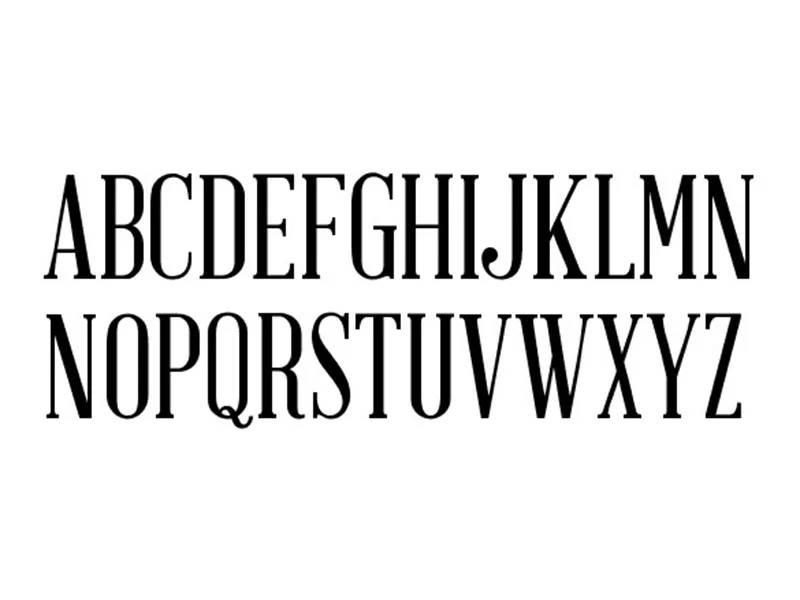
Feeling a bit historical? Abraham Lincoln is tall, slender, and has this vintage charm about it. Perfect if you’re going for a nostalgic look but still want to keep it fresh.

Couture

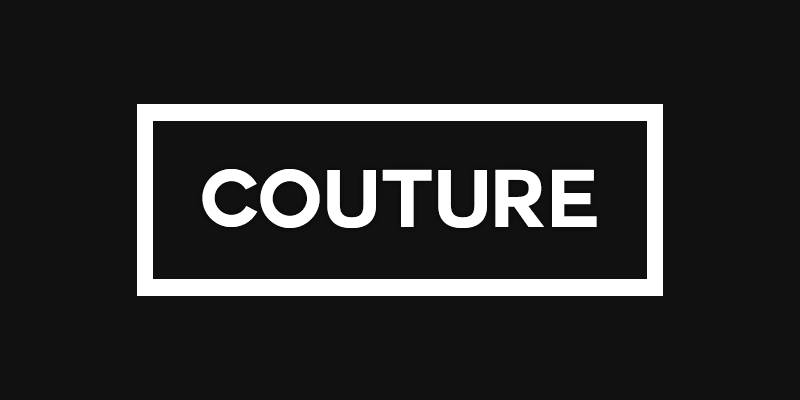
Now this, this is for when you wanna dress your text up. Couture is sharp, chic, and feels like it just walked off a high-end runway. Fashion-forward is its middle name.

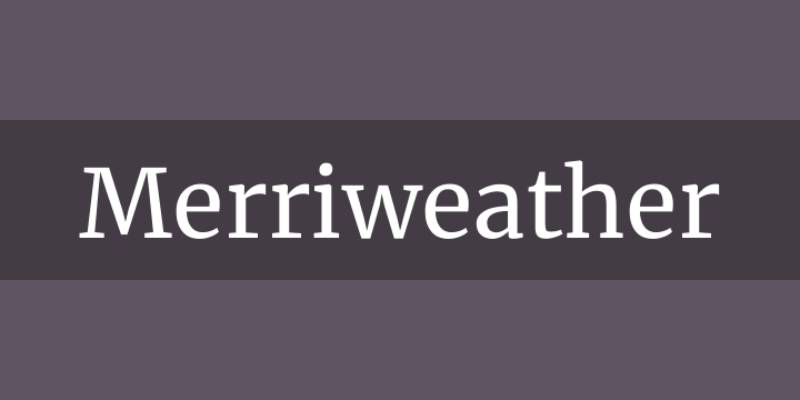
Merriweather

Ah, Merriweather. It’s like that comfy sweater you always reach for. Warm, welcoming, and a perfect fit for longer reads. It just feels… right.

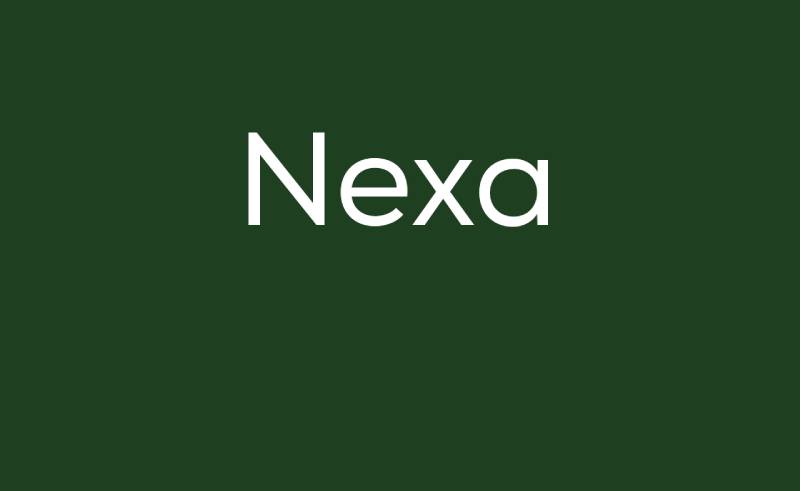
Nexa

Remember that friend who’s always super put together? Nexa’s kind of like that. Streamlined, versatile, and always on point.

Grand Hotel

Grand Hotel sweeps you off to a bygone era. It’s curly, it’s fancy, and boy, does it know how to make an entrance.

Geared

With an industrial touch, Geared is robust and ready to get down to business. But there’s also a hint of playfulness lurking in the background.

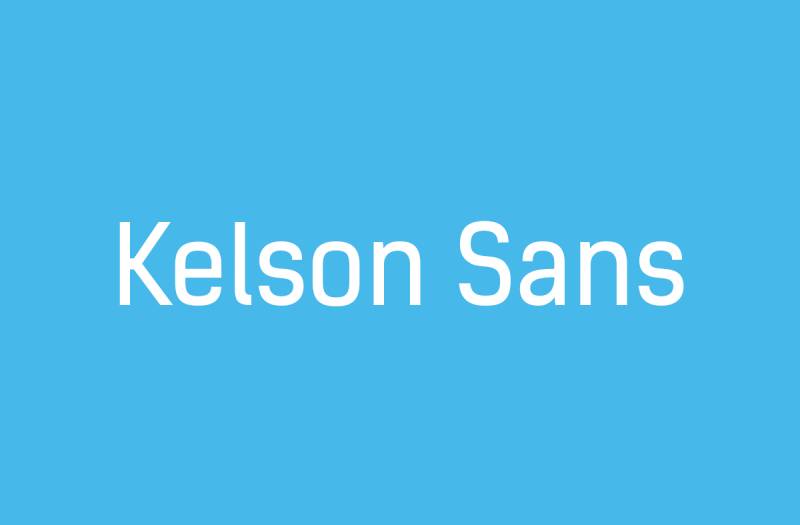
Kelson Sans

Super chill, yet undeniably professional. Kelson Sans is that dude who manages to look effortlessly cool in a plain white tee. Simple, but oh-so-effective.

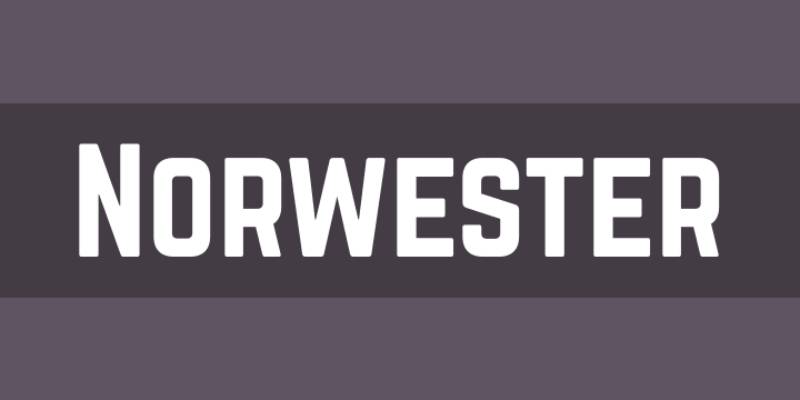
Norwester

Mountains? Check. Campfires? Check. Norwester brings in those outdoorsy vibes. It’s bold, yet rustic. Makes you wanna plan an adventure.

SciFly

Hello, future! SciFly feels like it’s from another galaxy. Sleek, smooth, and perfect for when you want to give your designs a futuristic twist.

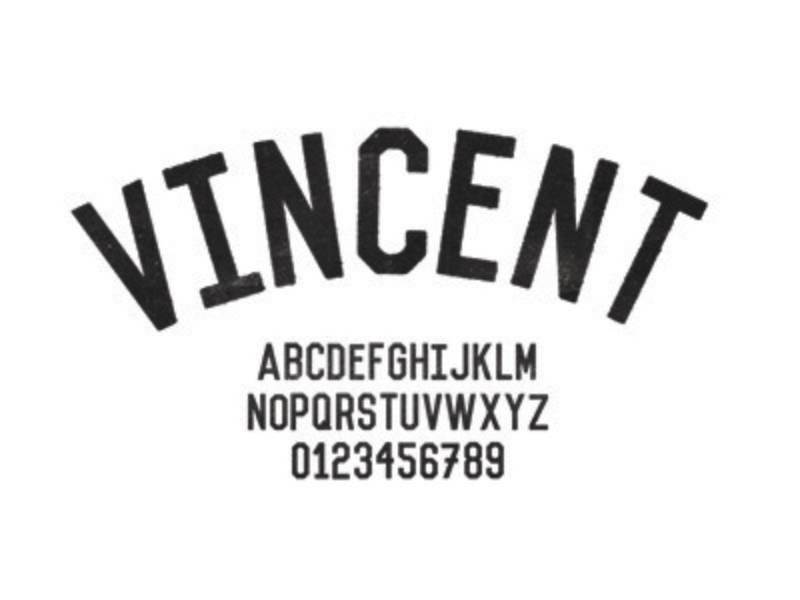
Vincent

Moody? Mysterious? Enter Vincent. This font plays in the shadows, but when it steps into the light? Showstopper.

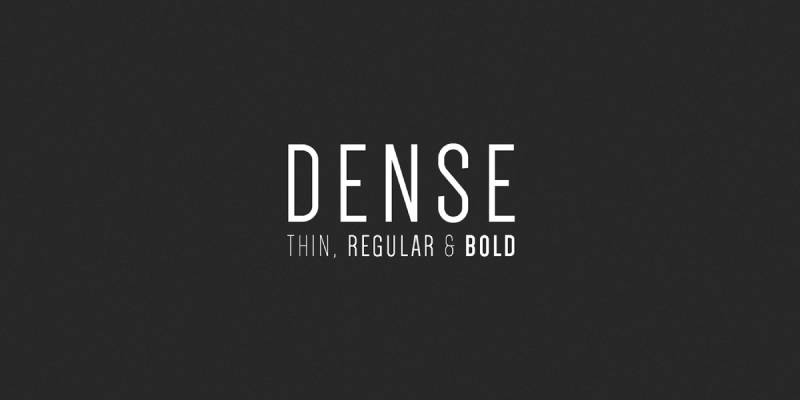
Dense

Compact and clean – that’s Dense for you. If you need to pack a punch in a small space, this font’s a no-brainer.

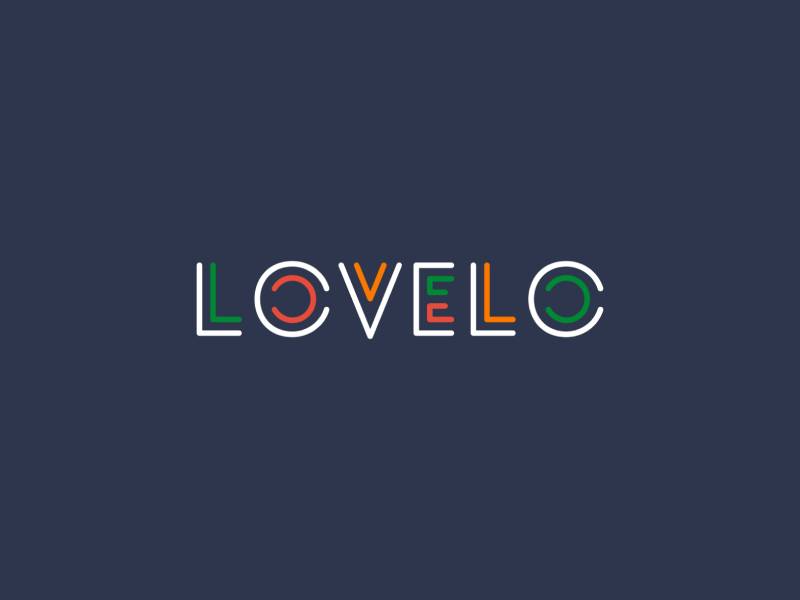
Lovelo

Circles, circles everywhere! Lovelo is bubbly and fun, kind of like that bubbly drink you can’t get enough of on a summer day.

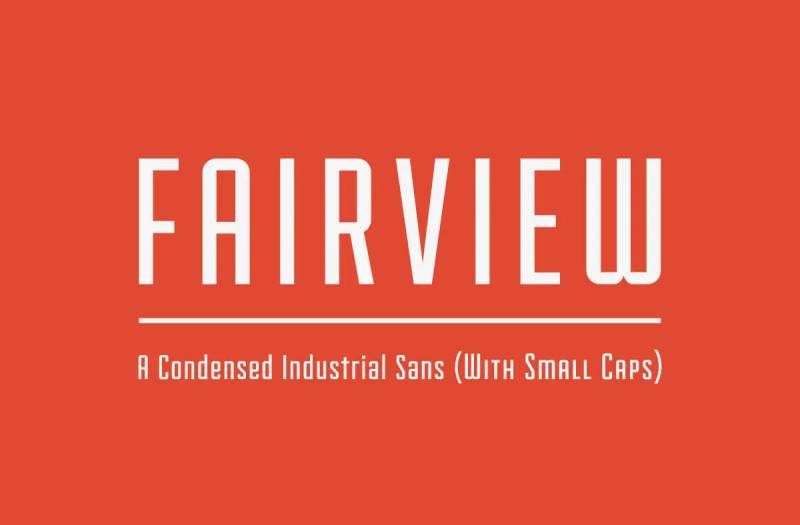
Fairview

Art Deco vibes, anyone? Fairview takes you back, but not too far back. It’s retro with a modern spin. Slick!

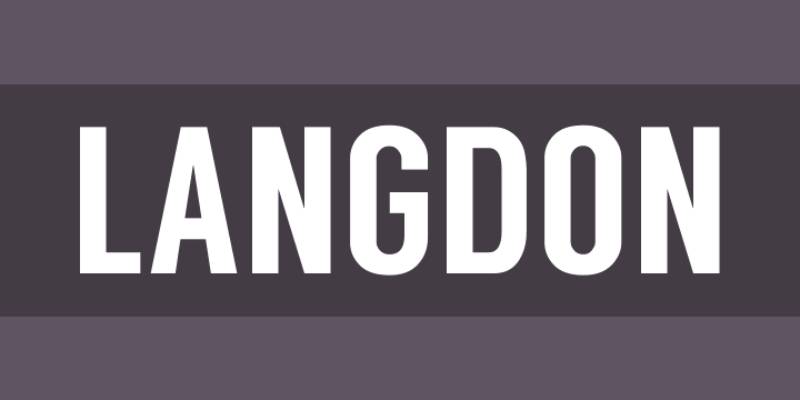
Langdon

Last, but by no means least, Langdon. Strong, sturdy, and stands tall. A bit of old-school flair without feeling outdated.

The Art and Science Behind Typography Animation

The Aesthetics of Moving Text

Let’s get a tad artsy here. Ever watch those animations and think, “Damn, that’s smooth!”? Well, that smoothness? That’s by design. Every bounce, twist, and turn in typography animation is crafted to be aesthetically pleasing. We pick fonts, colors, and motions that vibe with the overall feel. We’re not just moving text around. We’re choreographing a performance. It’s art, right there on your screen.

Psychological Impact on Viewers

Here’s the science bit: our brains? They love motion. And there’s a reason web designers like me are all over typography animation. When text moves, your brain’s like, “Ooh, shiny!”, and you’re instantly hooked. It’s not manipulation; it’s psychology. The dynamic dance of letters taps into our innate curiosity, making messages stickier and more memorable.

The Role of Typography in Branding and Marketing

Hold up, it’s not all art and games. There’s some real business logic here. Ever notice how some brands have that distinctive style with their moving text? Yup, typography animation isn’t just for show; it’s branding gold. When you see text glide in a certain way or morph into a brand symbol, it’s like a visual signature. Companies know this, and they harness it. They embed their identity into the way their text moves, turning mere words into branded experiences. And as for marketing? An animated message can be the difference between scrolling past and stopping to engage. It’s that potent.

Popular Techniques and Their Applications

Morphing: Creating Motion and Emphasis

Imagine a word, just chilling, then suddenly it stretches, bends, and turns into something entirely new. That’s morphing for you. It’s all about transition and transformation. It’s like your text is putting on a show, changing costumes, and taking on different roles. This technique in typography animation is a real game-changer. It keeps viewers on their toes, anticipating the next shift.

Flickering Text: The Art of Selective Animation

Now, here’s a trick I’ve used more times than I’d like to admit. You want to grab attention? Make your text flicker. But not too much—just a tad. Like a candle in the wind. It’s subtle but oh-so-effective. It’s that eye-catching glitch, the heartbeat of the message, emphasizing certain parts while making others play second fiddle.

Hypnotizing Text: Capturing Viewer Attention

Ever get lost staring at those hypnotic circles? Well, text can do that too. Through loops, spins, and other rhythmic motions, text becomes entrancing. This typography animation technique is less about relaying a message and more about making viewers lose themselves in the visual spectacle.

Moving Text: Directional Emphasis and Meaning

Text can walk, run, jump, or even slide. Upward movement? Optimism. Downward? Maybe a touch of sadness. Sideways? A shift or change. It’s storytelling, minus the storyteller.

Drawing Text: The Artistry of Lettering

Drawing text is all about the reveal. Imagine watching a painter sketching, and as the strokes connect, words form. This technique celebrates the beauty of each letter, each curve, each line. Typography animation becomes a canvas, and every letter is a masterpiece being born.

Geometric Constructions: Modern and Techy Vibes

Shapes and text. Who knew they’d be BFFs? From circles to squares to hexagons, geometric designs paired with text scream modern and cutting-edge. It’s like the future, but now. And trust me, the tech vibe it brings? Next level.

Fluid Geometry: Urban Dynamism in Typography

Now, imagine those geometric shapes but make them liquid. Sounds wild, right? Fluid geometry merges structure with flow, bringing dynamism and spontaneity to typography animation. It’s urban, it’s fresh, it’s unpredictably mesmerizing.

Texture Constructions: Layered Artistic Effects

You can literally feel this one. It’s text with depth, layers, and textures. Think of it like text with a fabric—maybe denim, silk, or even rough stone. It’s tactile, even if you can’t touch it. Such techniques add a touch of reality to the digital realm.

Complex Morphing: Storytelling Through Symbols

Words turning into symbols and vice versa. It’s storytelling on steroids. It bridges the gap between abstract and concrete, turning typography animation into a visual narrative that’s complex yet so darn intriguing.

Graphic Animations: Integrating Illustrations and Text

When words meet art, magic happens. Text melds into illustrations, and suddenly, they’re one. It’s not just about reading; it’s about experiencing a world where words are alive, taking forms we recognize and resonate with.

Dynamic Montage: Creating a Storyline with Text

You’ve got a bunch of text snippets, right? Now, imagine them coming together, creating a storyline—a montage, if you will. It’s like watching snippets of a movie, but it’s all text, building up to a climactic message.

Neon Flickering: The Nightlife Appeal

Bring the nightlife to text. Neon lights, buzzing, and flickering. It’s the city vibes, the allure of the late hours, all captured in typography animation.

Dash Typography: Elegance in Simplicity

Dashes, breaks, pauses. They’re so simple yet add elegance. It’s text, but make it fashion. Minimalistic, sophisticated, and oh-so-chic.

Creative Letters: Surprising and Engaging Viewers

Each letter, a unique design, a creative burst. Forget the norm; this is about breaking the mold, letter by letter. It’s unpredictable, it’s fresh, it keeps viewers guessing.

Illustrated Letters: Visual Storytelling

Why just read when you can see? Letters morphing into mini illustrations, adding a visual dimension to the narrative. Typography animation meets visual storytelling, and it’s a match made in design heaven.

Scrabble Effect: Dynamic Message Creation

Words, building up like a game of Scrabble. Each letter finding its place, coming together to form words, sentences, messages. It’s playful; it’s dynamic. It makes viewers lean in, wanting to see the final message take shape.

Morphing Geometric Shapes: Enhancing Narratives

Shapes telling stories, transforming and evolving. Circles morphing into squares, triangles blending into hexagons. It’s geometry but with a narrative twist, enhancing the core message.

Static and Animated Letter Combinations: Focused Messaging

Some letters move; some don’t. It’s like a dance where some dancers freeze while others whirl around them. It focuses attention, creating a contrast that highlights the core message.

Accelerated Typography: Quick Visual Stories

Fast-paced text, zooming in and out, racing against time. It’s about urgency, about capturing moments in split seconds. It’s a visual adrenaline rush.

Emotion-filled Animated Letters: Conveying Feelings

Letters that laugh, cry, shout, or whisper. Emotions captured in the way they move, the way they interact. Typography animation that touches the heart, making viewers feel the message.

DIY: Creating Your Own Kinetic Typography

Tools and Platforms: An Overview

So, before you start dancing with your words, you’re gonna need the right tunes. And by tunes, I mean tools.

  • Online Platforms: Sites like Canva or Biteable
  • Dedicated Software: Think of Adobe After Effects or Apple Motion. These bad boys give you more control. A bit of a learning curve, but totally worth it.
  • Mobile Apps: On the go? There’s an app for that. Legend and Quik can get your text grooving right from your phone.

The best part? There’s a ton of tutorials out there. Whether you’re a newbie or looking to level up, there’s always a YouTube tutorial or a forum waiting to be your fairy godmother.

Step-by-Step Guide to Creating Typography Animations

Alright, fam. Ready to get your hands dirty? Let’s break it down, step by step.

Choosing the Right Background

It’s all about setting the vibe. Think of it as picking the perfect wallpaper for your room. Whether it’s a static color, a gradient, or even a video clip—your background sets the tone. So, whether you’re going for moody blues or fiery reds, make sure it complements your text.

Adding and Styling Text

Next up, the star of the show: your text. Add it in. Choose that font that speaks to you. Maybe something bold? Or perhaps, something cursive and whimsical. Size it, position it, give it some space to breathe. 

Animating Text: From Basic to Advanced Techniques

Now, here’s where the magic happens. You ready?

  • Fade-ins and Fade-outs: Basic but effective. Like a ghostly appearance, it’s smooth and classy.
  • Swings and Bounces: Give it some energy! Perfect for something upbeat.
  • 3D Rotations: Add some depth, literally. It’s like your text is reaching out.

As you get comfortable, experiment with combinations. The sky’s the limit, really.

Previewing and Adjusting Animations

Once you’ve got the moves down, it’s rewind time. Play it back. Does it flow? Is it too fast? Too slow? Adjust the speed, tweak the movements, and make sure it’s just right. You know, like that perfect cup of coffee in the morning.

Exporting and Sharing Your Animated Typography

Done? Nah, we’re just getting started. Save it, export it. MP4, GIF, you name it. And then? Show it off. Social media, your website, maybe even on a big screen downtown. Let the world see your typography animation masterpiece.

FAQ about typography animation

What’s typography animation?

Oh, dude! It’s like when you see those moving, groovy texts in videos and websites. Typography animation is the art of bringing text to life, making it move, bounce, slide, or even morph. It’s like giving words their own dance moves. Super cool, right?

Does it work on all devices?

Oh, good question! Mostly, yes. But like all things web and tech, it’s best to test things out. Some older devices or browsers might struggle a bit, but most modern tech should handle it just fine. Still, always double-check, especially if it’s for a big project.

What’s trending in typography animation?

Oh man, it changes like the wind! But lately, I’ve been seeing a lot of fluid motions, morphing text, and 3D effects. Retro vibes, too. Think 80s neon and all. But you do you. Follow the trend, or set your own!

How do I make it accessible?

Props for thinking of that! Accessibility is key. Make sure to have a readable contrast, avoid super-fast flashes (can trigger seizures), and provide alternative content for those who can’t view animations. It’s about being inclusive, buddy.

Can it slow down my website?

Yeah, it can. Animated typography elements can be heavy, especially if not optimized. CSS only text animation should be light on the loading time. Keep an eye on file sizes and test your site’s speed. Nobody likes a snail-paced website, right?

Conclusion

Alright, let’s bring this beast home. We’ve dug deep into the world of kinetic typography and, honestly, it’s kind of wild how much there is to it. Words moving, dancing, and even telling stories.

I’ve been in the game for a while now, and things evolve faster than a meme on Twitter. But when it comes to typography animation, here’s what’s brewing:

  • Virtual Reality & Augmented Reality: Imagine it – you wear those fancy glasses and words fly around you, react to you, maybe even play hide and seek with you. Trippy, right? It’s coming.
  • Personalized Animations: Think of ads that are tailor-made for you, with typography animations that use your name and react based on your preferences. It’s like they know you. Well, they kinda do.
  • 3D is the New 2D: Flat is cool. But three-dimensional typography animations? They’re the next level. Expect more depth, shadows, and maybe even words you feel like you can touch.
  • Interactive Typography: Interactive websites are already here. But get ready for typography that responds to your mouse, voice, or even emotions. In my view, the websites that would work great with animated typography would be film maker websites. If you combine the website interactivity with a good video montage, the site will be a killer.
  • Sustainability & Typography: Sounds odd, right? But with digital art becoming more physical (like NFTs), expect some typography animations to have eco-friendliness baked in. Maybe a digital artwork that plants a tree?

 Typography animation isn’t just for websites or ads. Its magic is seeping into other domains too.

  • Education: Kids these days, right? Hand them a static book and they’re bored. But what about interactive typography animations that teach as they move? Schools are catching on.
  • Entertainment: Ever noticed those movie titles that kinda move? Or that music video with the crazy text effects? It’s more than a trend; it’s the norm now.
  • E-commerce: Online shopping is cool. But imagine reading a product description that’s not just static text but a typography animation that shows you, in real-time, what you’re about to buy. Hook, line, and sinker.
  • Public Spaces: Digital billboards, train stations, even the local coffee shop might have some typography animation going on. It grabs attention. It’s memorable. And it’s everywhere.

The post The Best Fonts To Use For Typography Animation appeared first on Designer Daily: graphic and web design blog.
Balancing Creativity And Client Expectations In Graphic Design

Post pobrano z: Balancing Creativity And Client Expectations In Graphic Design

Navigating the balance between boundless creativity and concrete client expectations is pivotal in graphic design. When crafting visually appealing pieces, you’re not merely focusing on aesthetics; you’re communicating a message, evoking emotions, and solving problems. 

This balancing act is like walking a tightrope, where tilting too far in one direction can compromise creative integrity, and leaning too much the other way might not meet client needs. The essence of successful graphic design lies in the harmonious blend of your vision as a designer and the client’s demands. In this dynamic field, keeping your explorations on track is crucial. 

Aligning creative ideas with client objectives leads to designs that captivate and achieve strategic goals. Let this article guide you into maintaining this equilibrium, ensuring your work aligns with your creativity and client goals. 

Finding The Right Graphic Designer 

Your search for the ideal graphic designer is akin to finding a creative counterpart—a partner who understands and elevates your vision. Start by meticulously examining portfolios, looking for a match in style and expertise with your project’s core. A standout portfolio shows versatility, a solid grasp of design principles, and storytelling prowess.  

Entering a partnership with a skilled designer such as Electric Graphic Design is built on clear communication and trust. Articulating your goals and expectations clearly while being open to creative suggestions cultivates an environment where ideas can thrive, leading to outcomes that exceed satisfaction. 

Feedback is integral to this partnership. Offering constructive critique with clarity and respect propels the project forward. Striking the right balance between directing the creative path and allowing the designer the freedom to innovate ensures the final product is a cohesive blend of client vision and designer ingenuity. 

Understanding Your Audience 

Before embarking on the design process, immerse yourself in your audience’s world. Who are they? What appeals to them? This insight directs every design decision, from selecting color palettes to choosing typography. Establishing a visual dialogue that connects with their desires and aspirations is key. 

Developing personas is an effective strategy here. These hypothetical profiles of your ideal audience members crystallize their demographics, motivations, and preferences, providing a targeted focus for your design efforts. 

This audience-first approach ensures that each design element serves a purpose, contributing to a unified message that captivates and engages. The goal extends beyond mere aesthetics; it infuses your designs with significance and relevance. 

Setting Clear Objectives 

Clarity of purpose is the cornerstone of impactful graphic design. Begin each project with a definitive understanding of your aims, be it increasing brand awareness, boosting user engagement, or driving sales. These objectives guide the design process and serve as markers of success. 

Crafting a creative brief is a critical step. This document details the project’s scope, target audience, intended message, and any specific requirements or constraints, serving as a guide to ensure alignment from the start. 

Consistent check-ins keep the project aligned, facilitating necessary adjustments. This ongoing process ensures that the final design meets and surpasses your objectives, yielding tangible results. 

Embracing Collaboration 

Graphic design thrives on collaboration, with ideas evolving through an exchange between you and your designer. Welcoming this interplay recognizes the unique perspective and wealth of experience your designer brings. Open communication is crucial for effective collaboration.  

Establishing consistent communication channels and feedback mechanisms ensures the project stays on course, promptly addressing any hurdles. Collaboration extends beyond the client-designer duo. Involving stakeholders, like marketing teams or end-users, in the feedback loop offers additional insights, enriching the final design with diverse viewpoints. 

Balancing Creativity With Functionality 

In graphic design, the intersection of beauty and functionality is crucial. Every creative decision, from layout to imagery, must fulfill a purpose, enhancing user experience and engagement. This balance requires a thorough understanding of design principles, such as hierarchy, contrast, and balance, and their impact on user perception and action.  

The aim is to create designs that are not only visually arresting but also intuitive and user-friendly. User testing provides invaluable feedback on a design’s effectiveness, enabling data-informed adjustments. This approach ensures the end product is both aesthetically pleasing and functionally sound. 

Leveraging Trends Wisely 

Trends in graphic design offer inspiration and relevance but should be approached with caution to avoid fleeting or derivative designs. The challenge lies in integrating trend elements in a way that supports your message without overwhelming it. Staying informed about trends while cultivating a discerning eye helps you assess their alignment with your brand identity and objectives.  

Consider how a trend might be adapted to create something distinctive and lasting. The ultimate goal is to craft enduring designs that appeal to audiences today and in the future, often involving blending trendy elements with timeless design principles for a balanced and impactful result. 

Prioritizing Feedback And Revisions 

Feedback propels the design process, offering a chance to refine and perfect the final product to align with your vision and objectives. Approach feedback sessions with an open mindset prepared to explore new ideas and solutions. 

Provide specific and constructive critiques, focusing on aligning design elements with the project’s goals. This clarity assists your designer in making precise adjustments. Revisions are integral to the creative journey, but setting clear boundaries helps maintain momentum and focus on the project. 

Ensuring Brand Consistency 

Your brand is your identity, and every design project should reinforce it. Maintaining consistency across all visual assets strengthens brand recognition and trust, offering a unified audience experience. 

This consistency goes beyond logos and color schemes; it extends to your designs’ tone, voice, and overall aesthetics. A brand style guide is invaluable, providing guidelines to ensure coherence across all brand touchpoints. 

Regular reviews of your visual assets can identify deviations from brand standards, allowing for timely corrections. This diligence ensures your brand remains robust and unified, regardless of project scale or scope. 

Conclusion 

Balancing creativity with client expectations in graphic design is an intricate interplay of art and strategy. It requires a deep understanding of your audience, clear communication of objectives, and a spirit of collaboration that values feedback and iteration.  

By selecting the right graphic design partner, setting definitive goals, and upholding brand consistency, you can create compelling visual narratives that resonate with your audience and fulfill your business aims. Embracing the dynamic between creativity and strategy ensures your designs not only captivate but also communicate effectively, making a lasting impression on viewers.

The post Balancing Creativity And Client Expectations In Graphic Design appeared first on Designer Daily: graphic and web design blog.

Edge Computing and Its Impact on Web Development

Post pobrano z: Edge Computing and Its Impact on Web Development

In recent years, the landscape of web development has undergone a significant transformation with the advent of edge computing. As the demand for faster and more efficient data processing continues to rise, edge computing has emerged as a groundbreaking technology that enhances the performance of web applications and reshapes the way developers approach the design and deployment of their projects. 

In this article, we will explore the concept of edge computing, delve into its key principles, and examine its profound impact on web development.

Understanding Edge Computing

Traditionally, web applications have relied on centralized cloud servers to process and store data. However, this model has limitations, especially regarding latency and bandwidth constraints. Edge computing addresses these challenges by bringing computation and data storage closer to the source of data generation, often called the “edge” of the network.

In essence, edge computing involves deploying computing resources, such as servers and storage, at or near the data source rather than relying solely on a centralized cloud infrastructure. This decentralized approach offers several advantages, including reduced latency, improved performance, and increased efficiency.

The key components of edge computing include:

  • Edge Devices: These are the devices that generate or consume data at the edge of the network. Examples include IoT (Internet of Things) devices, sensors, and mobile devices.
  • Edge Servers: These are the computing nodes located at the network’s edge, closer to the edge devices. They handle data processing and storage tasks locally.
  • Edge Data Centers: These are larger facilities that house multiple edge servers. They provide more significant computing power and storage capacity than individual edge servers.

The Impact of Edge Computing on Web Development

1. Reduced Latency and Improved Performance:

Edge computing in web development significantly reduces latency, addressing the delay between initiating actions and receiving responses. Unlike traditional cloud-based models where data travels to and from a centralized server, edge computing processes data closer to the user or device. This particularly benefits real-time applications such as online gaming, video streaming, and interactive web apps. 

Adding Figma to React integration in web development accelerates application responsiveness and enhances user experience. This seamless combination of the design tool, Figma, and React, streamlines development, promoting efficient collaboration and reducing latency for a more cohesive and performant web application. Ultimately, Figma to React empowers developers to bring visually engaging design ideas to life on the internet, creating user-friendly experiences.

2. Enhanced Security and Privacy:

Edge computing can contribute to improved security and privacy in web development. Developers can reduce the risk of data breaches during transit by processing sensitive data locally at the edge rather than transmitting it to a distant server. This is especially important for applications that handle personal or confidential information.

Additionally, edge computing allows for more granular control over data, as developers can implement security measures directly at the edge devices or servers. This decentralized approach mitigates the impact of a potential breach, as compromising one edge node does not expose the entire dataset.

3. Scalability and Resource Optimization:

Edge computing provides a more scalable architecture for web development. Instead of relying solely on a centralized server to handle all requests, developers can distribute the processing load across multiple edge servers or devices. This distributed approach enhances the scalability of web applications, allowing them to handle varying levels of demand efficiently.

Furthermore, edge computing enables resource optimization by offloading specific tasks to edge devices. For example, edge devices can perform preliminary data analysis and filtering in an IoT environment before sending relevant information to the cloud. This reduces the amount of data that needs to be processed centrally, leading to more efficient resource utilization.

4. Support for Edge-optimized Frameworks and Languages:

As edge computing gains prominence, web developers adapt their toolkits to exploit this paradigm shift. Edge-optimized frameworks and programming languages are emerging, allowing developers to build applications tailored to decentralized environments.

Frameworks like TensorFlow Lite for machine learning at the edge and edge.js for edge computing in JavaScript are becoming popular. These tools empower developers to create applications that harness the full potential of edge computing, leveraging the capabilities of edge devices and servers.

5. Edge-Friendly Content Delivery:

Edge computing has a profound impact on content delivery strategies. Content delivery networks (CDNs) have long been used to distribute content globally and reduce latency. With edge computing, CDNs can evolve to become more intelligent and capable of processing dynamic content at the edge.

Web developers can leverage edge locations to cache and serve content closer to end-users, ensuring faster load times for websites and applications. This enhances user experience and reduces the strain on central servers, leading to more efficient and cost-effective content delivery.

6. Challenges and Considerations:

While the benefits of edge computing for web development are clear, it’s important to acknowledge the challenges and considerations associated with this paradigm. Managing a distributed infrastructure, ensuring data consistency across edge nodes, and addressing security concerns in a decentralized environment are among the key challenges developers may face.

Additionally, developers must carefully assess whether their specific use case benefits from edge computing. Not all applications require low latency or real-time processing, and in some cases, the added complexity of managing edge infrastructure may outweigh the advantages.

Future Trends and Developments

As edge computing continues to shape the landscape of web development, several trends and developments are poised to influence the industry further:

1. 5G Integration:

The rollout of 5G networks is a catalyst for the widespread adoption of edge computing. The high bandwidth and low latency characteristics of 5G complement the goals of edge computing, providing an ideal infrastructure for deploying edge services. Web developers can anticipate creating applications that leverage the capabilities of 5G networks for even faster and more reliable data communication.

2. Edge AI and Machine Learning:

Combining edge computing and artificial intelligence (AI) is a potent force transforming web development. Edge devices with AI capabilities can process data locally, making real-time decisions without relying on centralized servers. This is particularly valuable for facial recognition, autonomous vehicles, and smart city solutions applications.

Web developers will increasingly incorporate edge AI and machine learning into their projects, enabling more intelligent and responsive applications. This trend aligns with the growing demand for personalized and context-aware user experiences.

3. Decentralized Web Architectures:

Edge computing contributes to the evolution of decentralized web architectures. Instead of relying on a single central server, web applications can be designed to operate in a peer-to-peer fashion, with each edge node contributing to the overall functionality. This decentralized approach enhances resilience and aligns with the principles of blockchain technology and decentralized finance (DeFi).

Web developers exploring decentralized architectures can leverage edge computing to create applications that are more resilient to failures, censorship-resistant, and inherently distributed.

4. Edge-Driven Analytics:

Edge computing facilitates real-time analytics at the source of data generation. This enables web developers to extract valuable insights without transferring massive datasets to central servers for analysis. Edge-driven analytics can be particularly beneficial when rapid decision-making based on local data is critical, such as in industrial IoT applications, healthcare, and smart infrastructure.

Developers will increasingly integrate analytics capabilities into edge nodes, creating web applications that leverage localized insights for improved decision support.

Conclusion

Edge computing has ushered in a new era for web development, offering unprecedented opportunities to enhance performance, security, and scalability. As developers embrace this paradigm shift, they are optimizing existing applications and paving the way for innovative solutions that leverage the full potential of edge computing.

Reduced latency, enhanced security, and the ability to create edge-optimized applications are just the beginning. As 5G networks become more prevalent and edge AI continues to evolve, web developers will play a crucial role in shaping the future of decentralized and intelligent web applications.

In conclusion, the impact of edge computing on web development is transformative, and its continued integration into the developer toolkit will shape the next generation of web applications, delivering a more responsive, efficient, and intelligent online experience. As the technology matures, developers and businesses alike should stay attuned to the evolving landscape of edge computing to harness its full potential and stay ahead in the ever-evolving digital realm.

The post Edge Computing and Its Impact on Web Development appeared first on Designer Daily: graphic and web design blog.

The Ultimate Guide: Where Creators Can Find Stock Video Footage to Download

Post pobrano z: The Ultimate Guide: Where Creators Can Find Stock Video Footage to Download

In the digital age, having access to diverse visual materials is critical for creators to generate engaging content. This is where the need for a stock video footage download comes into play. Not only does it save time and resources, but it also provides creators with a myriad of options to express their creativity. 

Understanding the Importance of Stock Video Footage for Creators

Stock video footage serves as an invaluable resource for creators of all kinds, be they filmmakers, digital marketers, or YouTubers. Offering an array of high-quality clips, stock footage can be the magic touch that transforms a project from ordinary to extraordinary. Utilizing these readily available clips, creators can inject added depth, context, and visual appeal into their works.

Stock footage can be leveraged in a wide array of content, from social media posts and online advertisements to websites and presentations. This not only saves creators the time and expense of producing new videos, but it also opens up a world of creative possibilities. Most stock video footage is royalty-free, giving creators the freedom to use the footage as they see fit without the worry of copyright violations. The power of stock footage lies in its versatility and accessibility, making it an essential tool in any creator’s arsenal.

Popular Platforms for Stock Video Footage Download

For creators seeking a vast array of stock video footage, several platforms stand out as top contenders:

**Artlist.io:** 

Artlist.io is a major platform for video creators, providing a vast collection of high-quality footage created by recognized industry artists. With a wide database of over 400K premium assets, Artlist differentiates out by offering unlimited downloads of royalty-free content, guaranteeing that creators have the right assets for any project.

**motionarray.com** 

Motion Array has established itself as a full-service marketplace with over 800,000 creative assets, including video templates, stock footage, pictures, music, and sound effects. To put it clearly, the purpose of employing Motion Array is to save time and money while creating content. If you study their website, which you should, you’ll quickly understand how Motion Array might benefit you. 

Each of these platforms offers something unique, and their extensive libraries cater to virtually any project or theme you might be working on. Your choice will depend on your specific requirements, budget, and personal preference.

Things to Keep in Mind While Choosing Stock Video Footage

When selecting stock video footage, several key factors require your consideration. It’s critical to ensure that the quality of the video is superior and compatible with your project’s aesthetic and narrative. Additionally, paying close attention to the license agreement is vital. Though many stock videos come royalty-free, some might necessitate credit acknowledgement or have specific limitations on how they can be used. Lastly, consider your budget. While numerous platforms provide complimentary downloads, others may require a payment per download or a subscription fee. Carefully weighing these elements will assist you in making an informed decision that best fits your creative needs and financial constraints.

How to Integrate Stock Video Footage into Your Projects

The process of embedding stock video footage into your projects is quite simple and straightforward. The first step involves downloading your chosen clip from your preferred stock footage platform. Next, open your video editing software and import the downloaded clip. Depending on your project’s needs, you can then begin to customize the clip. This might involve trimming it down to a suitable length, adjusting its orientation or speed, or adding effects and filters to better match your project’s aesthetic. It’s important to note that the goal is to use the stock video as a complementary tool to enhance the overall content. The stock footage should fit organically within your project, rather than become the focal point.

The Future of Stock Video Footage in Content Creation

In the dynamic landscape of digital content creation, the role of stock video footage is becoming increasingly significant. As creators continue to strive for visually captivating and consistent content, the reliance on these platforms is poised to grow. Besides providing quality and variety, these platforms are known for their time and resource-saving benefits. Looking ahead, stock video footage will not just be about traditional clips. We are on the cusp of witnessing exciting innovations in this realm. Emergent trends like 360-degree videos and Virtual Reality (VR) clips are starting to gain traction and are expected to redefine the boundaries of stock video usage. These advancements will add another dimension to content creation, providing creators with even more options to bring their ideas to life. Thus, the future of stock video footage promises to be an exciting one, full of possibilities and innovations that cater to the evolving needs of digital creators.

The post The Ultimate Guide: Where Creators Can Find Stock Video Footage to Download appeared first on Designer Daily: graphic and web design blog.

How To Decorate A Studio Apartment

Post pobrano z: How To Decorate A Studio Apartment

Decorating a studio apartment is an art – it’s about balancing functionality with personal style. In such a compact space, every inch counts, calling for clever design choices and innovative solutions. From cosy sleeping corners to streamlined kitchens, these small spaces hold immense potential for creativity and efficiency.

Mastering the art of studio living means turning constraints into opportunities, where limited square footage inspires rather than restricts, leading to a living space that’s as practical as it is personal.

Diving Up A Studio Apartment

Efficiently dividing a studio apartment starts with thorough planning. Measuring the space and creating a detailed floor plan is crucial; it’s the blueprint for transforming a single room into a multifunctional living area. Furniture plays an important role in this division. A strategically placed sofa, for instance, can effectively separate living and sleeping zones, creating an illusion of distinct rooms within a compact space. This approach not only maximises functionality but also maintains an open, airy feel, essential in studio living. By carefully planning and using furniture as dividers, you can achieve a harmonious balance between style and practicality in a studio apartment.

Organising The Rooms

Organising the rooms in a studio apartment calls for smart layout strategies to ensure each functional area is both practical and aesthetically pleasing.

Bedroom: In the sleeping area, the goal is to create a serene and restful environment. Opt for a bed with built-in storage or consider a loft bed to free up floor space. Use light, calming colours and minimalist interior design elements to keep the area open and tranquil.

Kitchen: For the kitchen, efficiency is key. Utilise vertical space with hanging racks for utensils and wall-mounted cabinets. Incorporate foldable or extendable counters to save space, ensuring every inch is optimally used.

Living Room: Designing a living room in your new home, especially within a studio, requires a blend of comfort and functionality. Choose a sofa that doubles as a room divider and select compact, multi-use furniture. Focus on a layout that invites relaxation while also allowing for entertainment and socialising within the limited space.

Selecting The Right Colour Palettes

Selecting the right colour palette is a pivotal aspect of decorating a studio apartment. The choice of colours sets the mood and influences the perception of space. Light, neutral shades like soft beiges, greys, and whites can make the area feel more open and airy, creating an illusion of more space. However, don’t shy away from incorporating a few bold accents to add character and depth. These can be introduced through accessories or a feature wall. The key is balance – maintaining a base of neutral tones while adding splashes of colour to bring warmth and personality to the apartment.

Store Things Out Of Sight

Storing things out of sight in a studio apartment, particularly in the dining area, is essential for maintaining a spacious and organised environment. It is important to limit clutter to reduce the risk of stress within the home. Opt for furniture with built-in storage, such as benches with hidden compartments or tables with drawers. These multifunctional pieces are perfect for tucking away dining essentials like napkins, cutlery, or placemats, keeping them accessible yet out of sight. Utilising such storable furniture not only declutters the space but also ensures that every item has its place, contributing to a neater and more efficient living area.

Properly Lighting The Space

Proper lighting in a studio apartment can transform the ambience and functionality of the space. Different areas require specific types of lighting. In living areas, soft, warm lights create a relaxing environment, while in workspaces like kitchens, brighter, focused lighting is essential for safety and functionality. Consider adding under-cabinet lights in the kitchen for task lighting and adjustable ceiling lights for a broader glow. Strategically placed lamps can also enhance the atmosphere and provide additional light where needed. The right lighting choices not only brighten the space but also help to define and separate different areas within the studio.

Elevating Your Space with Minimalist Accents

Accessorising in a studio apartment is a delicate balance between minimalism and personal expression. The key is to understand the fine line between decor and clutter. Choose accessories that are not only aesthetically pleasing but also functional, like decorative storage boxes or an elegant lamp that doubles as a statement piece. Opt for fewer, high-quality items rather than an abundance of smaller trinkets. This minimalist approach ensures your space feels personalised and stylish without being overwhelmed by unnecessary items. Every accessory should enhance the space’s overall feel, contributing to a cohesive and inviting studio apartment.

The post How To Decorate A Studio Apartment appeared first on Designer Daily: graphic and web design blog.

6 Tips for Selling Your Design Products

Post pobrano z: 6 Tips for Selling Your Design Products

You’ve been working tirelessly on creating your design products, and now you’re ready to share them with the world. But how do you ensure that your products don’t just sit on your digital shelf gathering virtual dust? Selling design products is not just about having a great product; it’s also about how you present it to potential buyers. In this article, we’ll provide six key tips to help you successfully sell your design products.

Tip 1: Understand Your Target Audience

The first crucial step in selling any product effectively is gaining a deep understanding of your target audience. Take the time to identify and define your ideal customers – explore their tastes, preferences, and needs. By comprehending your audience on a granular level, you can tailor your product offerings and marketing strategies to resonate with them on a profound level. For instance, if your target audience consists of young, tech-savvy individuals, incorporating modern and cutting-edge designs into your products can be a game-changer. This attention to detail will enable you to establish a strong connection with your customers and outshine the competition.

Tip 2: Create High-Quality Photos and Descriptions

When it comes to selling design products online, your photos and product descriptions play a crucial role as your virtual sales representatives. They not only need to accurately represent your product but also have the power to captivate potential buyers. To achieve this, it is important to ensure that your product photos are of the highest quality, providing clear visuals that showcase your product from various angles. This allows customers to have a comprehensive view of what they are purchasing.

In addition to visually appealing photos, your product descriptions should be detailed and informative. Take the time to highlight the unique features and benefits of your product, emphasizing what sets it apart from others in the market. By providing specific and compelling details, you can create a sense of desire and urgency in potential buyers, increasing the likelihood of conversion.

Remember, in the online marketplace, your photos and product descriptions are your first and sometimes only chance to make a lasting impression. Put in the effort to ensure they are engaging, persuasive, and accurately represent the value your product brings.

Tip 3: Choose the Right Platform

Choosing the right platform to sell your design products is essential for reaching and connecting with your target audience. There are several options available, such as online marketplaces or independent platforms. Take the time to research and evaluate which platform aligns best with your product offerings and business goals. Each platform has its own unique features, fees, and audience, so it’s crucial to choose wisely. For instance, if you need a print customizer, as professionals explain at Antigro Designer, you might opt for an independent platform that offers this feature rather than a marketplace. Or, if your target audience is mostly on social media, selling through a platform that integrates with various social channels could be the best option.

Tip 4: Price Your Products Correctly

Pricing can make or break your sales. It is a crucial factor that requires careful consideration. If you price your products too high, there is a risk of alienating potential buyers who may seek more affordable alternatives. On the other hand, pricing them too low may undermine your profitability. To strike the right balance, it is essential to conduct thorough research on your competitors’ pricing strategies, gain a comprehensive understanding of your costs, and carefully consider your target audience’s budgetary constraints. By taking these factors into account, you can set prices that are competitive, appealing, and aligned with your business goals.

Tip 5: Leverage Social Media

Social media is an exceptional platform for showcasing and promoting your design products. With platforms like Instagram and Pinterest, specifically tailored for visual products, you have the perfect opportunity to captivate your audience. Through creative posts, stunning visuals, and engaging content, you can create a buzz around your products, foster meaningful connections with your audience, and ultimately drive substantial traffic to your online store. The power of social media lies in its ability to amplify your brand’s reach and influence, enabling you to establish a strong online presence and connect with potential customers on a deeper level. So, leverage the immense potential of social media to take your design products to new heights and unlock a world of opportunities for your business.

Tip 6: Provide Excellent Customer Service

Providing great customer service can truly set you apart from your competitors. It’s not just about being responsive to customer inquiries, but also about going the extra mile to ensure their satisfaction. Handling complaints professionally and promptly addressing any issues that arise showcases your commitment to customer care. When you prioritize customer happiness, you foster long-lasting relationships that can lead to repeat business and valuable word-of-mouth recommendations. So remember, investing in exceptional customer service is an investment in the success and growth of your business.

Selling design products can be challenging, but with the right strategies, you can successfully market your products and attract the right customers. Remember, understanding your target audience, presenting your products effectively, pricing them right, optimizing for search engines, leveraging social media, and providing excellent customer service are key to your success. So, roll up your sleeves, implement these tips, and get ready to see your sales soar!

The post 6 Tips for Selling Your Design Products appeared first on Designer Daily: graphic and web design blog.

The Art of Office Desk Organization: Tips for a Clutter-Free Workspace

Post pobrano z: The Art of Office Desk Organization: Tips for a Clutter-Free Workspace

Maintaining an organized and clutter-free desk in the modern workplace isn’t just about aesthetics; it’s also essential for productivity and overall well-being. A messy workspace can lead to distractions, increased stress, and decreased efficiency. However, with the right strategies and mindset, you can master the art of office desk organization and create a workspace that promotes focus and creativity. In this article, we’ll explore some practical tips to help you achieve a clutter-free desk.

1. Declutter Regularly:

Before diving into the specifics of desk organization, it’s essential to declutter your workspace. Go through all the items on your desk and ask yourself if you use them daily or weekly. If not, consider whether you can store them elsewhere or if they are necessary. Be ruthless in your decluttering efforts; the less you have on your desk, the easier it is to keep it organized.

2. Invest in Desk Accessories:

When tidying your workspace, desk organizers, trays, and dividers are your best friends. Use them to separate pens, notepads, paperclips, and other small items. Consider getting a desktop file organizer to sort essential documents. Cable management solutions can also help keep charging cords and cables under control.

3. Prioritize with a To-Do List:

A to-do list is not only a valuable tool for task management but also for desk organization. Keep a notepad or digital task list on your desk to jot down priorities and deadlines. This prevents the clutter that can arise from having numerous sticky notes or loose papers scattered around.

4. Keep Only the Essentials on the Desk:

Your desk should primarily hold items you need for immediate work. This includes your computer or laptop, keyboard, mouse, phone, and desk lamp if necessary. Store additional office supplies, personal items, or decorative pieces in designated drawers or organizers.

5. Use Drawer Dividers:

Desk drawers can become a jumbled mess if not organized properly. Invest in drawer dividers or trays to separate items like pens, sticky notes, and paper. This not only makes it easier to find what you need but also prevents items from becoming a disorganized heap.

6. Designate a Mail and Paperwork Zone:

Create a designated area for incoming mail and paperwork. Use a letter tray or inbox to keep papers organized until you can address them. Regularly review this area to sort, file, or discard documents.

7. Implement a “One In, One Out” Rule:

To prevent future clutter, adopt the “one in, one out” rule. Whenever you bring a new item to your desk, commit to removing an old or unnecessary item. This simple practice can help maintain a clutter-free workspace over time.

8. Label Everything:

Labels are a powerful tool for organizations. Label drawers, containers, and shelves to ensure everything has a designated place. When items are clearly labeled, it’s easier to put them back where they belong.

9. Digital Decluttering:

Clutter isn’t limited to physical objects; digital clutter can be just as distracting. Organize your computer desktop by creating folders for different projects or file types. Delete unnecessary files, and regularly empty your email inbox to reduce digital clutter.

10. Regular Maintenance:

Maintaining an organized desk is an ongoing process. At the end of each day or week, take a few minutes to tidy up your workspace. Please return items to their designated spots, file documents, and remove trash or recycling. This habit will help you start each work session with a clean slate.

11. Eco-Conscious Clutter-Free: Greening Your Workspace

Don’t simply declutter, inexperienced your workspace! Swap disposables for reusables, embody digital files, and strength down unused electronics. Maximize herbal light and convey in a mini inexperienced associate. Choose sustainable fixtures and green brands. These small steps create a litter-loose and eco-conscious haven, boosting productivity and your carbon footprint!

12. Sprout Creativity: Plants Power Up Your Office

Beyond aesthetics, office flora are productivity powerhouses! Greenery reduces pressure, boosts awareness, and even will increase air great. So, rework your cubicles into mini jungles! Opt for low-preservation beauties like peace lilies or snake flowers. Place them close to home windows for natural mild, or spend money on develop lights. Host “Plant Parenthood” days to percentage guidelines and watch your workplace blossom. Let the green revolution begin – watch productivity jump and creativity sprout!

In Conclusion:

A clutter-free desk isn’t a one-time achievement but an ongoing practice that requires discipline and commitment. However, the benefits are well worth the effort. A well-organized workspace enhances productivity, reduces stress, and creates a more pleasant and efficient environment for work. By implementing these tips and prioritizing office furniture organization, you can enjoy the benefits of a clutter-free workspace and maximize your professional potential.

The post The Art of Office Desk Organization: Tips for a Clutter-Free Workspace appeared first on Designer Daily: graphic and web design blog.

The Absolute Guide to Staying Relevant and Boosting Visibility on Instagram

Post pobrano z: The Absolute Guide to Staying Relevant and Boosting Visibility on Instagram

In this era of digital connectivity, Instagram has emerged as a powerful platform for branding, networking, and gaining visibility. With over a billion monthly users, staying relevant and visible on Instagram can be a challenging endeavor. Yet, with strategic planning and a thorough understanding of the platform’s algorithm, it’s entirely achievable. This guide will walk you through the key strategies and tips to enhance your Instagram presence, increase engagement, and ensure your brand stays at the forefront of your audience’s minds.

Understanding Instagram’s Algorithm

Instagram’s algorithm is a machine-learning tool that adapts to your actions and preferences. It prioritizes posts based on several factors such as the frequency of interactions between you and the post’s creator, the timeliness of the post, and your general interest in the content category. To leverage the algorithm, engage actively with your followers by responding to comments, messaging, and sharing user-generated content. Regular interaction tells the algorithm that your followers value your content, keeping you visible in their feeds.

Crafting High-Quality, Engaging Content

Content is king on Instagram. High-quality photos and videos, coupled with compelling captions, can significantly increase engagement rates. Make your feed more visually appealing by using a consistent aesthetic for your posts to strengthen your brand identity. Remember, authenticity is key; audiences tend to engage more with brands that are genuine and relatable. Don’t hesitate to show behind-the-scenes clips or share your brand’s story. 

Boosting Your Follower Count

Increasing your follower count on Instagram requires a mix of strategic planning, consistency, and engagement. Get a following and likes from real IG users to boost your follower count and increase engagement. Start by identifying your target audience and creating content that resonates with their interests and needs. Use relevant, trending hashtags to increase the visibility of your posts. Participate in popular conversations related to your industry or niche. Additionally, collaborations with influencers or other brands can expose your profile to a broader audience, potentially boosting your follower count. Remember, gaining followers is not an overnight process; persistence and patience are key.

Strategically Using Hashtags and Geotags

In order to enhance your visibility on Instagram, it is crucial to strategically use hashtags and geotags. Hashtags play a significant role in categorizing your posts and making them discoverable to users who are interested in similar content. To maximize the reach of your posts, always include relevant hashtags and consider creating a unique hashtag for your brand to encourage user-generated content. On the other hand, geotags allow you to link your posts to a specific location, making them visible to users who are browsing posts from that particular place. This can be particularly beneficial if you are targeting a local audience or if the location is relevant to your content.

Implementing Instagram Stories and Reels

To further boost your visibility and engagement on Instagram, take advantage of the platform’s Stories and Reels features. Instagram Stories, with their 24-hour lifespan, are perfect for sharing time-sensitive content such as limited-time offers, behind-the-scenes peeks, or daily updates. Reels, on the other hand, provide an excellent opportunity to share short, entertaining videos that can capture the attention of your audience. Both features offer various interactive elements like polls, questions, and music overlays, which can significantly boost engagement rates. Additionally, Stories and Reels appear prominently at the top of users’ feeds, increasing the chances of your content being noticed by a wider audience.

Collaborating with Influencers and Industry Leaders

Influencer marketing has become a powerful tool for increasing brand exposure on Instagram. Collaborating with influencers or industry leaders who have a substantial follower base can help you reach a wider audience and establish credibility. Consider partnerships, guest takeovers, or shout-outs as part of your marketing strategies. When selecting influencers, it is crucial to choose those who align well with your brand values and aesthetics, ensuring an authentic collaboration that resonates with your target audience.

Scheduling Posts at Peak Times

Timing plays a crucial role in optimizing the visibility of your Instagram content. Posting when your followers are most active can significantly increase engagement and reach. Utilize Instagram insights to gain valuable information about your followers’ online activity, including peak interaction times. By scheduling your posts to align with these peak times, you can ensure that your content reaches a larger audience and maximizes its impact.

Utilizing Instagram Ads

Instagram’s advertising platform provides an effective method to boost your brand’s visibility and reach. With ads appearing in feeds and stories, you can extend your reach beyond your existing follower base. The ability to target ads based on demographics, interests, and behaviors allows you to reach the right people with your message. While utilizing Instagram ads may involve a monetary investment, the potential return in terms of increased visibility and engagement can be substantial, making it a worthwhile strategy to consider.

Interacting with Followers in the Comment Section

Fostering a sense of community is vital in keeping your brand relevant and successful on Instagram. Actively engaging with your audience in the comment section by responding to comments, addressing queries, and acknowledging feedback demonstrates that you value your followers and encourages stronger relationships. This interaction not only enhances visibility through the algorithm but also creates a positive impression of your brand. Remember, Instagram is a social platform, and promoting conversation and interaction can go a long way in boosting your brand’s success and fostering a loyal community of followers.

Staying relevant and boosting visibility on Instagram is a multifaceted process that requires strategic planning, consistent engagement, and compelling content. Understanding Instagram’s algorithm and utilizing its features, from hashtags and geotags to Stories and Reels, can significantly enhance your brand’s presence on the platform. Collaborations with influencers, scheduled posts, and targeted ads can further expand your reach. Above all, fostering a sense of community and maintaining active engagement with your followers is vital. Remember, Instagram is more than just a platform for sharing pictures; it’s a powerful tool for storytelling, interaction, and brand building. Navigate this digital landscape strategically, and your brand will thrive in the vibrant world of Instagram.

The post The Absolute Guide to Staying Relevant and Boosting Visibility on Instagram appeared first on Designer Daily: graphic and web design blog.
Top 7 Online Video Enhancer Review 2023 [updated]

Post pobrano z: Top 7 Online Video Enhancer Review 2023 [updated]

Are you looking for the perfect video quality enhancer? In a world where online video content has become an integral part of our daily lives, ensuring the highest quality for your videos is essential. Many users encounter frustrating issues such as blurry visuals, poor resolution, and inadequate lighting when creating or sharing video content.

The good news is that in 2023, there are a multitude of online video enhancer tools available to address these challenges and elevate your video quality.

In this comprehensive review, we will unveil the top 7 online video enhancers of 2023, offering you the confidence and guidance you need to enhance your videos and captivate your audience with stunning visuals.

So, let’s get started.

Why do we need a video enhancer?

In the world of online video content, ensuring exceptional quality is important. However, a myriad of issues can plague video quality, leaving content creators and viewers disappointed.

Common problems include pixelation, blurriness, low resolution, and improper lighting. These issues can detract from the viewer’s experience, diminish the impact of your content, and hinder effective communication.

A video enhancer serves as the solution to these problems, offering the means to sharpen, brighten, and enhance your videos, ultimately delivering a polished and professional final product that captivates and engages your audience.

Now, let’s discuss the top 7 online video enhancers you can consider using this year.

Top 7 Online Video Enhancers Review

Here is a brief review of 7 best online video enhancers:

1. HitPaw Online Video Enhancer

This is a free online tool that can enhance your videos in three simple steps: upload, choose the enhancement options, and download.

You can adjust the brightness, contrast, saturation, and sharpness of your videos, as well as upscale the resolution and remove noise.

The tool is easy to use and has a clear interface. However, it has a file size limit of 100 MB and does not support batch processing.

2. Clideo

This is another free online tool that can enhance your videos by changing the brightness, contrast, saturation, hue, and temperature. You can also crop, rotate, flip, and trim your videos, as well as add filters and audio.

The tool supports various formats and allows you to upload files from your device, Google Drive, Dropbox, or URL.

However, it also has a file size limit of 500 MB and adds a watermark to your videos unless you sign up for a premium plan.

3. Flixier

This is a powerful online video editor that can enhance your videos with advanced features such as color correction, stabilization, speed adjustment, transitions, animations, and more. You can also add text, stickers, shapes, and music to your videos, as well as use templates and stock media.

The tool is fast and easy to use and supports cloud storage and collaboration. However, it requires registration and has a monthly subscription fee of $10 for the basic plan.

4. Kapwing

This is a popular online video editor that can enhance your videos with basic features such as cropping, resizing, trimming, rotating, and filtering. You can also add text, subtitles, images, audio, and effects to your videos, as well as use templates and tools for memes, montages, slideshows, and more.

The tool is user-friendly and supports various formats and platforms. However, it also requires registration and has a monthly subscription fee of $20 for the pro plan.

5. Cutout.Pro

This is an online video enhancer that specializes in removing backgrounds from your videos. You can use the AI-powered tool to automatically or manually cut out the unwanted parts of your videos, as well as adjust the edges and feathering. You can also replace the background with an image or a video of your choice.

The tool is simple and fast to use. However, it has a limited number of free credits per day and has a monthly subscription fee of $9.99 for the premium plan.

6. Media.io

This is an online video converter that can also enhance your videos by changing the format, resolution, quality, aspect ratio, frame rate, and bitrate of your videos. You can also edit your videos by cropping, rotating, trimming, merging, splitting, and adding watermarks.

The tool supports various formats and allows you to upload files from your device or URL. However, it has a file size limit of 200 MB per file and does not offer any other enhancement features.

7. Veed.io

This is an online video editor that can enhance your videos with features such as filters, adjustments, effects, transitions, and more.

You can also add text, subtitles, stickers, drawings, and music to your videos, as well as use tools for screen recording, podcasting, and transcription. The tool is intuitive and creative and supports various formats and platforms.

However, it also requires registration and has a monthly subscription fee of $24 for the pro plan.

FAQ

Do video enhancers work?

Yes, video enhancers can effectively improve the quality of your videos. They offer various features to enhance aspects like brightness, contrast, saturation, sharpness, and resolution. The extent of improvement depends on the specific tool and its capabilities.

What is the best video enhancer?

While the “best” video enhancer can vary depending on your specific needs, HitPaw Online Photo Enhancer is a highly recommended option. It provides a user-friendly experience for enhancing videos and photos alike.

How can I improve video quality?

To improve video quality, you can use tools like HitPaw Online Video Enhancer and HitPaw Video Enhancer, which offer features such as adjusting brightness, contrast, saturation, sharpness, and resolution. Additionally, they can help reduce noise and enhance the overall quality of your videos.

Conclusion

So these are the 7 best online video enhancers available on the internet. All these tools are suitable for you to improve your overall video quality according to your needs and preferences. However, if you are looking for the best online video enhancer that can take your content game to the next level, we recommend HitPaw Online Video Enhancer.

It’s not just a video enhancer, but an overall video improvement tool that is user-friendly, free to use, and offers a variety of enhancement options.

The post Top 7 Online Video Enhancer Review 2023 [updated] appeared first on Designer Daily: graphic and web design blog.
The Best Photo Enhancer in 2024 and its 3 Alternatives

Post pobrano z: The Best Photo Enhancer in 2024 and its 3 Alternatives

Suppose you are looking for the best Photo Enhancer in 2024. In that case, you are in the right place because, in this guide, we will introduce you to the best background generator online in 2024 and also recommend its 3 alternatives that you can download. Well, many new users like you have been looking for the advanced AI Photo Enhancer so that they can easily enhance their Pictures with the help of AI Technology. These AI tools are easy to use and require no professional help. If you are here to do the same, then follow this guide till the end, and we assure you that after reading this guide properly, you will find the best tool.

What is a Photo Enhancer?

The technique of upscaling a low-quality image by using a program is known as AI enhancement. The program that performs this task is called Photo Enhancer. Those days are gone when photo enhancing was possible only with Photoshop. Technology has evolved, and now there are hundreds of Photo Enhancers free available online that allow users to enhance their Photo with the help of AI. These tools don’t require any photo editing skills and can solve your problem in an instant.

But why do we need an AI Photo quality Enhancer? With the help of an AI Photo Enhancer, users can easily upscale a low-quality image into a high-quality photo. These AI programs are trained to identify flaws and correct them automatically, so you will end up with a high-quality photo every time.

What’s more, if you are a busy professional who doesn’t have time for photo enhancement, then these tools are the perfect solution for you because these tools can edit your photo in less time.

The Best Photo Enhancer in 2024

The best photo enhancer available in 2024 is HitPaw Photo AI. This is an AI-powered photo enhancement tool that is available on multiple devices, such as Windows and Mac. It offers AI technology that will automatically analyze and then enhance the Photo seamlessly. The best part of this tool is that it offers an easy-to-use interface, making it best for beginners and non-tech users.

Furthermore, HitPaw Photo AI also includes amazing features, such as a text-to-image AI art generator. With this feature, users can create stunning artwork just from text. It also allows users to remove the unwanted background and then replace it with solid colors. This photo enhancer AI effortlessly removes the object from the Photo and then provides its users with the perfect result. If you want the best AI image enhancer, then we recommend you choose the HitPaw Photo AI because it helps you to upscale images and get higher resolution in no time.

Key Features

Here are the top features of HitPaw Photo AI.

  • Provides its users with an easy-to-use interface, making it the best option for beginners
  • Enhance low-quality images into high-quality images
  • Uses AI technology to perform many tasks
  • Remove the unwanted background and replace it
  • Allows users to remove certain objects from the image
  • Compatible with macOS and Windows
  • Offers a Text to Image generator to create stunning artwork

How to Enhance a Photo with HitPaw Photo AI?

Follow the below instructions if you want to enhance photo quality with HitPaw Photo AI.

  • First, go to the HitPaw official site and download the HitPaw Photo AI software on your PC. This program is available on Mac and Windows PCs. Now, launch the program and choose the Photo you want to enhance. Open it directly from the PC or use the drag-and-drop feature to import the image into the program. HitPaw supports JPEGS, PNGs and more.
  • Select the AI Model from the right panel. For general photos like Portraits and landscapes, select the General mode.
  • Click on the preview button available at the bottom and let Hitpaw perform its magic. This program will automatically analyze the image and enhance it accordingly, such as boosting brightness, upgrading the quality, and more, in no time.
  • Once the process is complete, you will notice that your image has improved dramatically. Click on the Export button to download or share it on social media.

3 Alternatives to HitPaw Photo AI

As we have mentioned before, there are hundreds of Photo Enhancer AI available online. Here are the top 3 alternatives to HitPaw Photo AI that will help you in upscaling your image.

1. AVCLabs Photo Enhancer

AVC Labs is a powerful image enhancement tool that is specially designed for professional Photographers and digital content creators. With its advanced AI technology, it offers amazing features such as image upscaling, noise reduction, background removal, and many more.

This photo enhancer provides you with the best tools that are necessary to enhance the image and bring out its full potential. The best part of this tool is its clean and intuitive interface, which is easy to navigate.

One of the key features of this program is its image-upscaling capability. On this tool, you will find different upscaling options, including a standard mode and an ultra-mode with face refinement options.

Key Features

  • This AI Upscaler turns low-resolution photos into ultra-high-quality image
  • Removes noise and grain from an image with a single click
  • Improve the natural color and contrast of your photos
  • Removes the background of the image instantly and makes it transparent
  • Easy-to-use interface
  • Face Refinement feature to enhance the facial features
  • Batch processing allows users to enhance multiple photos at once

2. HitPaw Online Photo Enhancer

HitPaw Online Photo Enhancer is a free AI Photo Enhancer that allows users to transform their pixelated and blurry images into high-quality images in no time. Further, this photo quality enhancer can also enlarge images up to 8X. Just upload the image, choose the format and size, and click on the Apply button to see the magic. In the end, download the high-quality enlarged image in popular formats such as JPEGS, PNG and more.

It’s a web-based online program, which means it’s available on any device that supports a web browser. The best part of this program is that it never collects any of the user’s data, and uploaded images will automatically be deleted after 48 hours, making it 100% safe to use. It provides a free model, but if you want better results, then we recommend you choose the advanced AI model.

Key Features

  • Enhance your Photo in 3 simple steps
  • Easy-to-use interface, making it a perfect choice for beginners
  • Ability to enlarge the image up to 8X without lowering the image quality
  • Provides a free model to enhance images for free
  • Affordable Pricing plans
  • Online web-based program, no downloading and registration required
  • Offers tools like AI Image Upscaler, Auto Enhancement, Lossless Image Enlarger and more

3. Image Upscaler

The last photo quality enhancer online free on our list is Image Upscaler. This is an AI-powered tool that will upscale and enhance your image in no time. It is integrated with the latest AI technology, which makes the enhancing process faster. You only need a few seconds to enhance your image via Image Upscaler. Further, it supports Batch processing, which means that you can enhance multiple images at the same time. What’s more, this Photo enhancer program is 100% safe to use, it doesn’t require any personal information, and all uploaded Photos will be cleared within 24 hours.

It also provides a powerful image editor that allows users to edit the Photo before or after photo enhancement. With this editor, users can easily crop images and add filters, annotations, stickers, and more. With this tool, users can also enlarge images and increase their resolution by 200% to 400% easily.

Key Features

  • Upscale and enhance images by using the latest AI technology
  • Supports Batch process, meaning you can easily enhance multiple images at once
  • Increase the image resolution up to 400%
  • Compatible with Android and iOS devices
  • User-Friendly Interface: no professional skill is required
  • Protect your Privacy, clear photos within 24 hours
  • 100% Free to use
  • Enlarge image up to 8X in high-quality

Conclusion

That’s it; in this guide, we have explored the best Photo enhancer in 2024 and its 3 alternatives. Professional photographers use photo enhancement tools to enhance low-quality images into high-quality photos. HitPaw Photo AI is the best photo enhancer in 2024. This tool has all the features that users want in a photo enhancement program. It uses AI technology to transform your low-quality image into a high-quality photo quickly.

Furthermore it provides an easy-to-use interface, meaning no professional skill is required to use this program. In the end, we have also mentioned the top 3 alternatives of HitPaw Photo AI that you can try in 2024.

The post The Best Photo Enhancer in 2024 and its 3 Alternatives appeared first on Designer Daily: graphic and web design blog.