Archiwum kategorii: Web Tools

How to Create a Timeline Infographic for Black History Month in Illustrator

Post pobrano z: How to Create a Timeline Infographic for Black History Month in Illustrator

Final product image
What You’ll Be Creating

In the following steps, you will learn how to create a timeline infographic for Black History Month in Adobe Illustrator. Black History Month is an annual observance in Canada, the United Kingdom, the Netherlands, and the United States. It began as a way of remembering important people and events in the history of the African diaspora. In this infographic, we will focus on the US Black History Month and the significant events that advanced civil rights. 

For starters, you will learn how to set up a simple grid and how to create the header of the infographic. Using several rectangles, the Appearance panel and some Transform effects, you will learn to create the main pieces of the infographic. Moving on, you will learn how to add some text and how to easily stylize it.

Finally, using basic vector shape building techniques and taking full advantage of the Snap to Grid feature, you will learn how to create a series of icons that will correspond with the events mentioned in your infographic.

For more inspiration on how to adjust or improve your final infographic, you can find plenty of resources at GraphicRiver.

What You Will Need

You will need the following resource in order to complete this project:

1. How to Create a New Document and Set Up a Grid

Hit Control-N to create a new document. Select Pixels from the Units drop-down menu, enter 850 in the width box and 2680 in the height box, and then click that More Settings button. Select RGB for the Color Mode, set the Raster Effects to Screen (72 ppi), and then click Create Document.

Enable the Grid (View > Show Grid) and the Snap to Grid (View > Snap to Grid). You will need a grid every 10 px, so simply go to Edit > Preferences > Guides & Grid, and enter 10 in the Gridline every box and 1 in the Subdivisions box. Try not to get discouraged by all that grid—it will make your work easier, and keep in mind that you can easily enable or disable it using the Control-„ keyboard shortcut.

You can learn more about Illustrator’s grid system in this short tutorial from Andrei Stefan: Understanding Adobe Illustrator’s Grid System.

You should also open the Info panel (Window > Info) for a live preview with the size and position of your shapes. Don’t forget to set the unit of measurement to pixels from Edit > Preferences > Units. All these options will significantly increase your work speed.

new document

2. How to Create the Header

Step 1

Pick the Rectangle Tool (M) and focus on your toolbar. Remove the color from the stroke and then select the fill and set its color to R=55 G=50 B=45. Move to your artboard and simply create an 850 x 180 px shape—the grid and the Snap to Grid should make it easier. Place this rectangle as shown below.

rectangle

Step 2

Pick the Type Tool (T) and open the Character panel (Window > Type > Character). Select the Odudo Mono font, set the style to Bold, and set the size to 50 px.

Move to the artboard and simply click on it. Type your text, place it as shown in the following image, and set the color to white (R=255 G=255 B=255).

type tool

Step 3

Make sure that your text stays selected and open the Appearance panel (Window > Appearance).

Add a new fill using the Add New Fill button and select it. Set the color to white and then add a second fill. Drag it below the white fill and select it. Set the color to R=240 G=175 B=50 and then go to Effect > Distort & Transform > Transform. Enter the attributes shown below and click OK.

add new fill

Step 4

Make sure that your text is still selected, and keep focusing on the Appearance panel.

Add a new fill and drag it below the existing ones. Select it, set the color to R=55 G=50 B=45, and then go to Effect > Distort & Transform > Transform. Enter the attributes shown below and click OK.

add new fill

Step 5

Pick the Type Tool (T), add a new piece of text, using the Stellar font. Change the style to Bold, and set the size to 15 px and the tracking to 100. For the text color, use R=240 G=175 B=50.

add new text

3. How to Create the Main Infographic Pieces

Step 1

Pick the Rectangle Tool (M) and create an 870 x 2510 px shape. Fill this new rectangle with R=240 G=175 B=50 and place it as shown in the following image.

yellow rectangle

Step 2

Pick the Rectangle Tool (M) and create a 200 x 80 px shape. Fill this new rectangle with white and place it as shown in the following image.

white rectangle

Step 3

Make sure that your white rectangle stays selected and focus on the Appearance panel. Add a second fill and select it.

Drag it below the white fill, set the color to R=160 G=40 B=35, lower its Opacity to 50%, and go to Effect > Distort & Transform > Transform. Enter the attributes shown below, click OK, and go to Effect > Blur > Gaussian Blur. Enter a 15 px Radius and click OK.

rectangle shadow

Step 4

Select your white rectangle and focus on the Appearance panel. Make sure that the entire path is selected (simply click the Path piece of text from the top of the panel) and go to Effect > Stylize > Rounded Corners. Enter a 10 px Radius and click OK.

rounded corners

Step 5

Pick the Rectangle Tool (M) and create a 320 x 80 px shape. Fill this new rectangle with R=245 G=200 B=110 and place it as shown below. Lower its Opacity to 50% and then go to Effect > Stylize > Rounded Corners. Enter a 10 px Radius and click OK.

rounded rectangle

Step 6

Pick the Rectangle Tool (M) and create an 80 px square. Fill this new rectangle with R=245 G=200 B=110 and place it as shown below. Lower its Opacity to 50% and then go to Effect > Stylize > Rounded Corners. Enter a 10 px Radius and click OK.

rounded square

Step 7

Pick the Pen Tool (P) or the Line Tool (\) and draw a 2280 px vertical line. Place it as shown below, add a 4 px stroke, and set its color to R=245 G=200 B=110.

vertical line

Step 8

Pick the Rounded Rectangle Tool and create a 20 x 20 px shape. Fill it with R=55 G=50 B=45 and place it as shown below. Make sure that this new shape stays selected, focus on the control panel, and enter 5 px in the Corners input field.

rounded square

Step 9

Make sure that your dark rounded rectangle stays selected, and focus on the Appearance panel. Add a 10 px stroke and set its color to R=240 G=175 B=50. Open the Stroke fly-out panel and simply check that Align Stroke to Outside button.

stroke

Step 10

Select the four rounded rectangles made so far and go to Effect > Distort & Transform > Transform. Drag the Move-Vertical slider to 190 px and enter 12 in the Copies input field, and then click OK.

transform effect

4. How to Add the Text Content

Step 1

For the following steps, you will need a grid every 1 px. Just go to Edit > Preferences > Guides & Grid and enter 1 in the Gridline every box.

Reselect that Odudo Mono Bold font and set the size to 40 px. Add all the years and set their color to R=55 G=50 B=45.

year text

Step 2

Select the Stellar font and set the size to 15 px. Add the main text information and set the color to R=55 G=50 B=45.

content text

Step 3

Go to Edit > Preferences > Guides & Grid and enter 10 in the Gridline every box.

Pick the Rectangle Tool (M) and create an 180 x 30 px shape. Fill this new rectangle with R=55 G=50 B=45 and place it as shown below.

Add a second fill for this shape and select it. Drag it below the existing fill, set the color to R=160 G=40 B=35, lower its Opacity to 50%, and then go to Effect > Distort & Transform > Transform. Enter the attributes shown below, click OK, and go to Effect > Blur > Gaussian Blur. Enter a 5 px Radius and click OK.

title rectangle

Step 4

Select the rectangle made in the previous step and focus on the Appearance panel. Make sure that the entire path is selected and go to Effect > Stylize > Rounded Corners. Enter a 5 px Radius and click OK. Go to Edit > Preferences > Guides & Grid and enter 1 in the Gridline every box.

Select the Stellar Bold font and set the size to 15 px. Add the title text for the first event in your infographic and set its color to R=249 G=247 B=234. Go to Edit > Preferences > Guides & Grid and enter 10 in the Gridline every box.

Duplicate (Control-C > Control-V) the rounded rectangle and the text added in this step. Move down to the next event in your infographic and align the copied objects with it. Change the text and adjust the length of the rounded rectangle to the text, as shown in the third image. Move the remaining events and add the titles shown in the final design.

title text

5. How to Create the Icons

Step 1

Go to Edit > Preferences > Guides & Grid and enter 1 in the Gridline every box.

Pick the Rounded Rectangle Tool, create a 60 x 20 px shape, and enter 2 px in the Corners input field. Fill this new shape with R=55 G=50 B=45 and then duplicate it (Control-C > Control-V). Place the copy as shown below.

rounded rectangles

Step 2

Pick the Pen Tool (P) or the Line Tool (\) and draw a 60 px horizontal path. Place it as shown below, add a 4 px stroke, and set its color to R=55 G=50 B=45.

horizontal path

Step 3

Select the Stellar Bold font and set the size to 14 px. Add the FREE and SLAVES pieces of text, set their color to R=249 G=247 B=234, and place them as shown below.

Once you’re done, select all the shapes that make up this icon and place them as shown in the second image.

free slaves

Step 4

Pick the Rectangle Tool (M), create an 81 x 4 px shape and fill it with R=55 G=50 B=45. Focus on the left side of this rectangle and pick the Direct Selection Tool (A). Select the top anchor point and drag it 8 px to the right.

thin rectangle

Step 5

Focus on the right side of the shape made in the previous step. Pick the Rectangle Tool (M) and create a 16 x 10 px shape. Add a 4 px stroke for this rectangle, set its color to R=55 G=50 B=45 and check the Align Stroke to Inside button from the Stroke fly-out panel.

Focus on the top side of this rectangle and switch to the Direct Selection Tool (A). Select both anchor points and enter 6 px in the Corners input field. Make sure that your shape is still selected and go to Object > Path > Outline Stroke.

live corners

Step 6

Pick the Rectangle Tool (M) and create a 4 x 8 px shape. Fill this new rectangle with R=55 G=50 B=45 and place it as shown in the first image.

Switch to the Direct Selection Tool (A), select the bottom-right anchor point, and drag it 4 px up, as shown in the second image.

direct selection tool

Step 7

Select all the shapes that make up your stylized sword, open the Pathfinder panel (Window > Pathfinder), and click the Unite button. Select the resulting shape and rotate it 45 degrees as shown in the third image.

pathfinder unite

Step 8

Select your stylized sword and go to Object > Transform > Reflect. Check the Vertical box and then click that Copy button.

reflect

Step 9

Select your left sword and go to Object > Path > Offset Path. Enter a 4 px Offset and click OK. Select the resulting shape along with the right sword and click the Minus Front button from the Pathfinder panel.

Select the three shapes that make up this new icon and place them as shown in the third image.

offset path

Step 10

Pick the Rectangle Tool (M) and create a 40 x 56 px shape. Add a 4 px stroke for this rectangle, set its color to R=55 G=50 B=45, and don’t forget to check the Round Join button from the Stroke fly-out panel.

rectangle tool

Step 11

Pick the Rounded Rectangle Tool, create a 30 x 4 px shape, and enter 2 px in the Corners input field. Fill this new shape with R=55 G=50 B=45 and then create three copies (Control-C > Control-V). Place all these rounded rectangles as shown below.

rounded rectangles

Step 12

Duplicate that FREE pieces of text from your first icon, change its color to R=55 G=50 B=45, and place it as shown below.

text FREE

Step 13

Pick the Ellipse Tool (L), create a 10 x 42 px shape, and place it as shown in the first image. Fill this squeezed circle with R=242 G=188 B=80 and then add a 4 px stroke and set its color to R=55 G=50 B=45.

Keep focusing on this shape, switch to the Anchor Point Tool (Shift-C), and simply click the top and bottom anchor points. In the end, things should look like in the second image.

anchor point tool

Step 14

Pick the Pen Tool (P) or the Line Tool (\), draw a 9 px vertical path, and place it as shown below. Add a 4 px stroke, set its color to R=55 G=50 B=45, and don’t forget to check that Round Cap button from the Stroke fly-out panel.

round cap

Step 15

Select the two shapes that make up your stylized feather and go to Object > Transform > Rotate. Set the Angle to -25 degrees and click OK. Once it’s rotated, place your feather about as shown in the second image.

rotate

Step 16

Pick the Rectangle Tool (M) and create an 11 x 6 px shape. Add a 4 px stroke for this rectangle, set its color to R=55 G=50 B=45, and don’t forget to check the Round Join button from the Stroke fly-out panel.

rectangle

Step 17

Focus on the rectangle added in the previous step and select it. Pick the Add Anchor Point Tool (+) and add two new anchor points as shown in the first image.

Switch to the Direct Selection Tool (A), select the newly added anchor points, and simply drag them 3 px up. Pick the Rectangle Tool (M), create a 5 px square, and apply the same 4 px stroke used for the previous shape.

add anchor points

Step 18

Select all the shapes that make up your new icon and place them as shown in the following image.

place icon

Step 19

Create three copies of the Emancipation Proclamation icon. Place the copies as shown in the following image and replace the FREE piece of text with 13TH, 14TH, and 15TH.

multiply icon

Step 20

Duplicate your first icon. Focus on the text and replace FREE with COLORED and SLAVES with WHITE. Once you’re done, place the icon as shown in the second image.

colored white

Step 21

Pick the Rounded Rectangle Tool, create a 60 x 56 px shape and enter 5 px in the Corners input field. Add a 4 px stroke for this new shape, set its color to R=55 G=50 B=45, and check the Align Stroke to Inside button from the Stroke fly-out panel.

rounded rectangle

Step 22

Pick the R=55 G=50 B=45 and create an R=55 G=50 B=45 shape. Fill this new rectangle with R=55 G=50 B=45 and place it as shown in the first image.

Pick the Rounded Rectangle Tool, create a 4 x 10 px shape, and enter 1 px in the Corners input field. Make sure that it’s filled with R=55 G=50 B=45 and then create two copies. Place these three rounded rectangles as shown in the second image.

rectangle

Step 23

Select the Stellar Bold font and set the size to 30 px. Add the „7” text, set its color to R=55 G=50 B=45, and place it as shown below.

Once you’re done, select all the shapes that make up this icon and place them as shown in the second image.

calendar text

Step 24

Pick the Rectangle Tool (M) and create a 56 x 17 px shape. Fill this new rectangle with R=55 G=50 B=45 and then add a 4 px stroke, set its color to R=55 G=50 B=45, and don’t forget to check the Round Join button from the Stroke fly-out panel.

Focus on the top side of this new shape and pick the Direct Selection Tool (A). Select both anchor points and go to Object > Path > Average. Check the Both box and click OK. This should turn your rectangle into a triangle, as shown in the second image.

path average both

Step 25

Pick the Rounded Rectangle Tool, create a 6 x 25 px shape, and enter 2 px in the Corners input field. Fill this new shape with R=55 G=50 B=45 and then create three copies (Control-C > Control-V). Place all these rounded rectangles as shown below.

rounded rectangle

Step 26

Pick the Rounded Rectangle Tool and create a 52 x 4 px shape and a 60 x 4 px shape. Fill both shapes with R=55 G=50 B=45 and place them as shown in the first image.

Once you’re done, select all the shapes that make up this new icon, and place them as shown in the second image.

rounded rectangle

Step 27

Pick the Rectangle Tool (M), create a 44 x 52 px shape, and fill it with R=55 G=50 B=45.

Keep focusing on this new rectangle and switch to the Direct Selection Tool (A). Select the top anchor points and enter 10 px in the Corners input field, and then select the bottom anchor points and enter 4 px in the Corners input field.

live corners

Step 28

Pick the Rounded Rectangle Tool, create a 16 x 4 px shape, and enter 1 px in the Corners input field. Fill this new shape with white and place it as shown below.

rounded rectangle

Step 29

Pick the Rounded Rectangle Tool, create a 36 x 24 px shape and enter 2 px in the Corners input field. Fill this new shape with white and place it as shown below.

Switch to the Ellipse Tool (L) and create two 7 px circles. Fill both shapes with white and place them as shown in the second image.

rounded rectangle

Step 30

Select the five shapes highlighted in the following image and click the Minus Front button from the Pathfinder panel.

minus front

Step 31

Pick the Rectangle Tool (M) and create two 10 px squares. Fill both shapes with R=55 G=50 B=45 and place them as shown below.

Switch to the Direct Selection Tool (A), select the anchor points highlighted in the first image, and enter 4 px in the Corners input field.

live corners

Step 32

Pick the Rectangle Tool (M) and create two 4 x 12 px shapes. Fill both rectangles with R=55 G=50 B=45 and place them as shown below.

Switch to the Direct Selection Tool (A), select the anchor points highlighted in the first image, and enter 2 px in the Corners input field.

Once you’re done, select all the shapes that make up this new icon and place them as shown in the second image.

live corners

Step 33

Select the Stellar Bold font and set the size to 40 px. Add the „MLK” text, set its color to R=55 G=50 B=45, and then go to Type > Create Outlines.

Ungroup the resulting group of shapes (Shift-Control-G) and then turn them into a simple compound path (Object > Compound Path > Make or Control-8).

Martin Luther King

Step 34

Make sure that your compound path stays selected and open the Transform panel (Window > Transform). Set the Width to 60 px and the Height to 30 px, and then place your compound path as shown in the second image.

scale compound path

Step 35

Pick the Rectangle Tool (M) and create a 50 x 28 px shape. Add a 4 px stroke for this rectangle, set its color to R=55 G=50 B=45, and don’t forget to check the Round Join button from the Stroke fly-out panel.

rectangle

Step 36

Select the Stellar Bold font and set the size to 20 px. Add the „VOTE” text, set its color to R=55 G=50 B=45, and place it as shown below.

text VOTE

Step 37

Select the rectangle and the „VOTE” piece of text, rotate them 45 degrees, and then place them as shown in the second image.

rotate icon

Step 38

Duplicate your calendar icon (Control-C > Control-V). Replace that „7″ with „FEB” and then place your new icon as shown in the second image.

second calendar icon

Congratulations! You’re Done!

Here is how your timeline infographic for Black History Month should look. I hope you’ve enjoyed this tutorial and can apply these techniques in your future projects. Don’t hesitate to share your final result in the comments section.

Feel free to adjust the final design and make it your own. You can find some great sources of inspiration at GraphicRiver, with interesting solutions to improve your design.

Final Black History Month infographic

Learn more about creating infographics with these tutorials:

How to Make a Twitch Banner Design Using a Banner Maker

Post pobrano z: How to Make a Twitch Banner Design Using a Banner Maker

Final product image
What You’ll Be Creating

Creating a Twitch banner design can sometimes prove to be a tedious and difficult task, especially if you’ve never really dabbled with graphic design tools before. But what if I told you that there’s an easy solution that can help you create a beautiful digital banner in a manner of seconds using Placeit’s online banner maker? Well, if that sounds interesting then follow me in this quick tutorial as I will walk you through the entire process.

1. What Is Placeit?

Before we begin, I
want to take a couple of moments and quickly talk about what Placeit is and how
it can help you.

If you aren’t a
designer yourself, most of the time that means that you won’t have access to
the tools that designers usually use, such as Adobe Illustrator, Adobe Photoshop,
Sketch, etc.

But what if
sometimes you actually need to create something yourself, but don’t feel like
spending a lot of money on a graphics suite that you probably won’t use all
that often?

Well, when that
happens, Placeit can be a better fit, since it comes with a set of online tools
that help you create digital banners, mockups, logos, etc. using just a couple of
clicks.

That being said, we’re going to see how easy it is to create your very
own Twitch banner using Placeit’s online banner generator.

placeit website preview

2. How to Access the
Twitch Banner Maker

Before we can start
working on the actual banner design, we first need to navigate to the correct section
of the website that houses the Twitch Banner Maker.

Step 1

If you take a quick look at the horizontal navigation menu found next to
the logo, you’ll notice that you have a category called Designs.

how to find the banner category

Step 2

As soon as you hover or click on the link, it will bring up a horizontal
submenu, to the right of which you’ll find a tool called Twitch Banner Maker. If your browser’s window isn’t fully occupying the width of your screen, you can either scroll through the menu using the little right-facing arrow or
you can find the link within the page’s left-sided Design Templates menu. Of
course, you can always use the search function, which should bring up all the
available banner templates.

locating the twitch banner maker

Step 3

Here, you have a library of 85 different available Twitch banner templates (at the
moment of this tutorial), from which you can choose the design that fits your needs.

choosing a banner template

3. How to Make a Banner Using the
Twitch Banner Maker

At this point, let’s
say that we’ve found a banner template that we really like and we want to gradually
customize it in order to make it our own.

For example, I’ve
decided to go with this gaming one, which gives you the option of adding your
social links as well as adjusting the look and position of its elements using
interactive editing.

No matter what template you end up using, the editing layout will always
be the same. On the left side you’ll have all your text-related controls, while
on the right side you’ll find all your background and shape-related ones. All
the changes that you make will immediately be previewed within the banner template preview, which is front and center, allowing you to adjust it as you please.

template preview

Step 1

Let’s start by adjusting some of the text found within the banner. For
example, I want to change the channel’s name from Zion-Sports to Nitro Gaming.
To do this, I’ll simply select the text found within the top-left input box,
and then overwrite it with my own.

As you can see, the tool lets me know the amount of characters that I’m currently using out of the total allowed.

example of changing the name of the channel

Step 2

I can easily change the font by clicking on the dropdown box found
underneath and choosing a new one from the available list.

example of changing the font

Step 3

You can also change the color of your text by clicking on the little
dropdown box found next to the font, which will allow you to use one of the predefined
values or a new one of your own if you click on the More button.

changing the color of the text

Step 4

You can also completely remove the current text field (or any other one), by unchecking its
little checkbox, which will hide both it and its underlying decorative shape.

example of removing a text field

Step 5

Next, I’m going to customize the larger catchphrase, by going through
the same settings presented for the channel’s name.

example of adjusting the catch phrase

Step 6

Lastly, we have the social media handles, which I can individually rename
and then customize to my own desire. Since at this point I’m pretty much done
working on my text-based elements, I can now move on to customizing my banner’s
different composing elements.

example of adjusting the social media handles

Step 7

If we move on to the right side of the browser’s window, we’ll see that we
have a couple more options, which allow us to control the look and feel of our
non-text-based elements.

The first is one is called Accent Color, and it enables
us to change the color of our little avatar.

example of adjusting the accent color

Step 8 

Next, we have Icon Color, which as the name
implies allows you to change the color of the little social icons.

adjusting the color of the social media icons

Step 9

I then have the option of changing the colors
for the two banner shapes (Banner 1 & Banner 2), but I’m going to leave
them white for this current example.

example of changing the color of the smaller banners

Step 10

The next option is called Main Color and
controls the fill shape of the avatar illustration. As with the banners, I’m
going to leave this set to default (white) in order to maintain the color
scheme that I’m trying to build.

example of changing the color of the avatar

Step 11

Moving on down, we have the ability of changing
the avatar itself using one of the pre-created designs, or uploading a custom one
of our own. Personally, I ended up using one of the provided ones, which due to
its high quality proved to be a perfect fit.

example of changing the avatar

Step 12

Finally, we have another option called
Background, which as the name implies allows us to change the color of our
background.

example of changing the color of the background

Step 13

If I feel that some elements could use a
little adjusting, I can easily click on them, which will bring up a bounding box
that I can then use in order to resize or reposition that specific element. If for
some reason I’m not happy with the changes, I can easily undo them using the Reset Layout button.

example of adjusting the position and shape of a composing element

Step 14

As soon as I’m happy with how my banner design ended up looking, I can
easily download it by clicking the Download
button, which will charge me a small fee each time I use the banner template generator.

example of downloading the final result

4. How to Upload Your
Banner to Twitch

So you’ve finished
creating your awesome banner using Placeit’s online banner generator, but how do you go about using it on
Twitch?

Well, first you need to make sure you have an account and are already logged in to it. Once you’re within your account, simply go to Settings
> Profile Banner
and then click on the Update button in order to upload your digital banner.

uploading the banner within twitch

Once you’ve uploaded your design, you can go to your channel, and you should be able to see your new Twitch banner in all its glory.

example of banner used within twitch

Great Work!

As always, I hope you’ve found this tutorial useful, and if you have any
questions, feel free to post them within the comments section and I’ll get back
to you as soon as I can!

finished project preview

Expand Your Designer Skills!

Just finished going through this quick tutorial, and feel like learning more of what it takes to become a visual tinkerer? Well, if that’s the case then you’re in luck since I’ve put together this little list which should get you up and ready in no time!

How to Make a Twitch Banner Design Using a Banner Maker

Post pobrano z: How to Make a Twitch Banner Design Using a Banner Maker

Final product image
What You’ll Be Creating

Creating a Twitch banner design can sometimes prove to be a tedious and difficult task, especially if you’ve never really dabbled with graphic design tools before. But what if I told you that there’s an easy solution that can help you create a beautiful digital banner in a manner of seconds using Placeit’s online banner maker? Well, if that sounds interesting then follow me in this quick tutorial as I will walk you through the entire process.

1. What Is Placeit?

Before we begin, I
want to take a couple of moments and quickly talk about what Placeit is and how
it can help you.

If you aren’t a
designer yourself, most of the time that means that you won’t have access to
the tools that designers usually use, such as Adobe Illustrator, Adobe Photoshop,
Sketch, etc.

But what if
sometimes you actually need to create something yourself, but don’t feel like
spending a lot of money on a graphics suite that you probably won’t use all
that often?

Well, when that
happens, Placeit can be a better fit, since it comes with a set of online tools
that help you create digital banners, mockups, logos, etc. using just a couple of
clicks.

That being said, we’re going to see how easy it is to create your very
own Twitch banner using Placeit’s online banner generator.

placeit website preview

2. How to Access the
Twitch Banner Maker

Before we can start
working on the actual banner design, we first need to navigate to the correct section
of the website that houses the Twitch Banner Maker.

Step 1

If you take a quick look at the horizontal navigation menu found next to
the logo, you’ll notice that you have a category called Designs.

how to find the banner category

Step 2

As soon as you hover or click on the link, it will bring up a horizontal
submenu, to the right of which you’ll find a tool called Twitch Banner Maker. If your browser’s window isn’t fully occupying the width of your screen, you can either scroll through the menu using the little right-facing arrow or
you can find the link within the page’s left-sided Design Templates menu. Of
course, you can always use the search function, which should bring up all the
available banner templates.

locating the twitch banner maker

Step 3

Here, you have a library of 85 different available Twitch banner templates (at the
moment of this tutorial), from which you can choose the design that fits your needs.

choosing a banner template

3. How to Make a Banner Using the
Twitch Banner Maker

At this point, let’s
say that we’ve found a banner template that we really like and we want to gradually
customize it in order to make it our own.

For example, I’ve
decided to go with this gaming one, which gives you the option of adding your
social links as well as adjusting the look and position of its elements using
interactive editing.

No matter what template you end up using, the editing layout will always
be the same. On the left side you’ll have all your text-related controls, while
on the right side you’ll find all your background and shape-related ones. All
the changes that you make will immediately be previewed within the banner template preview, which is front and center, allowing you to adjust it as you please.

template preview

Step 1

Let’s start by adjusting some of the text found within the banner. For
example, I want to change the channel’s name from Zion-Sports to Nitro Gaming.
To do this, I’ll simply select the text found within the top-left input box,
and then overwrite it with my own.

As you can see, the tool lets me know the amount of characters that I’m currently using out of the total allowed.

example of changing the name of the channel

Step 2

I can easily change the font by clicking on the dropdown box found
underneath and choosing a new one from the available list.

example of changing the font

Step 3

You can also change the color of your text by clicking on the little
dropdown box found next to the font, which will allow you to use one of the predefined
values or a new one of your own if you click on the More button.

changing the color of the text

Step 4

You can also completely remove the current text field (or any other one), by unchecking its
little checkbox, which will hide both it and its underlying decorative shape.

example of removing a text field

Step 5

Next, I’m going to customize the larger catchphrase, by going through
the same settings presented for the channel’s name.

example of adjusting the catch phrase

Step 6

Lastly, we have the social media handles, which I can individually rename
and then customize to my own desire. Since at this point I’m pretty much done
working on my text-based elements, I can now move on to customizing my banner’s
different composing elements.

example of adjusting the social media handles

Step 7

If we move on to the right side of the browser’s window, we’ll see that we
have a couple more options, which allow us to control the look and feel of our
non-text-based elements.

The first is one is called Accent Color, and it enables
us to change the color of our little avatar.

example of adjusting the accent color

Step 8 

Next, we have Icon Color, which as the name
implies allows you to change the color of the little social icons.

adjusting the color of the social media icons

Step 9

I then have the option of changing the colors
for the two banner shapes (Banner 1 & Banner 2), but I’m going to leave
them white for this current example.

example of changing the color of the smaller banners

Step 10

The next option is called Main Color and
controls the fill shape of the avatar illustration. As with the banners, I’m
going to leave this set to default (white) in order to maintain the color
scheme that I’m trying to build.

example of changing the color of the avatar

Step 11

Moving on down, we have the ability of changing
the avatar itself using one of the pre-created designs, or uploading a custom one
of our own. Personally, I ended up using one of the provided ones, which due to
its high quality proved to be a perfect fit.

example of changing the avatar

Step 12

Finally, we have another option called
Background, which as the name implies allows us to change the color of our
background.

example of changing the color of the background

Step 13

If I feel that some elements could use a
little adjusting, I can easily click on them, which will bring up a bounding box
that I can then use in order to resize or reposition that specific element. If for
some reason I’m not happy with the changes, I can easily undo them using the Reset Layout button.

example of adjusting the position and shape of a composing element

Step 14

As soon as I’m happy with how my banner design ended up looking, I can
easily download it by clicking the Download
button, which will charge me a small fee each time I use the banner template generator.

example of downloading the final result

4. How to Upload Your
Banner to Twitch

So you’ve finished
creating your awesome banner using Placeit’s online banner generator, but how do you go about using it on
Twitch?

Well, first you need to make sure you have an account and are already logged in to it. Once you’re within your account, simply go to Settings
> Profile Banner
and then click on the Update button in order to upload your digital banner.

uploading the banner within twitch

Once you’ve uploaded your design, you can go to your channel, and you should be able to see your new Twitch banner in all its glory.

example of banner used within twitch

Great Work!

As always, I hope you’ve found this tutorial useful, and if you have any
questions, feel free to post them within the comments section and I’ll get back
to you as soon as I can!

finished project preview

Expand Your Designer Skills!

Just finished going through this quick tutorial, and feel like learning more of what it takes to become a visual tinkerer? Well, if that’s the case then you’re in luck since I’ve put together this little list which should get you up and ready in no time!

How to Make a Twitch Banner Design Using a Banner Maker

Post pobrano z: How to Make a Twitch Banner Design Using a Banner Maker

Final product image
What You’ll Be Creating

Creating a Twitch banner design can sometimes prove to be a tedious and difficult task, especially if you’ve never really dabbled with graphic design tools before. But what if I told you that there’s an easy solution that can help you create a beautiful digital banner in a manner of seconds using Placeit’s online banner maker? Well, if that sounds interesting then follow me in this quick tutorial as I will walk you through the entire process.

1. What Is Placeit?

Before we begin, I
want to take a couple of moments and quickly talk about what Placeit is and how
it can help you.

If you aren’t a
designer yourself, most of the time that means that you won’t have access to
the tools that designers usually use, such as Adobe Illustrator, Adobe Photoshop,
Sketch, etc.

But what if
sometimes you actually need to create something yourself, but don’t feel like
spending a lot of money on a graphics suite that you probably won’t use all
that often?

Well, when that
happens, Placeit can be a better fit, since it comes with a set of online tools
that help you create digital banners, mockups, logos, etc. using just a couple of
clicks.

That being said, we’re going to see how easy it is to create your very
own Twitch banner using Placeit’s online banner generator.

placeit website preview

2. How to Access the
Twitch Banner Maker

Before we can start
working on the actual banner design, we first need to navigate to the correct section
of the website that houses the Twitch Banner Maker.

Step 1

If you take a quick look at the horizontal navigation menu found next to
the logo, you’ll notice that you have a category called Designs.

how to find the banner category

Step 2

As soon as you hover or click on the link, it will bring up a horizontal
submenu, to the right of which you’ll find a tool called Twitch Banner Maker. If your browser’s window isn’t fully occupying the width of your screen, you can either scroll through the menu using the little right-facing arrow or
you can find the link within the page’s left-sided Design Templates menu. Of
course, you can always use the search function, which should bring up all the
available banner templates.

locating the twitch banner maker

Step 3

Here, you have a library of 85 different available Twitch banner templates (at the
moment of this tutorial), from which you can choose the design that fits your needs.

choosing a banner template

3. How to Make a Banner Using the
Twitch Banner Maker

At this point, let’s
say that we’ve found a banner template that we really like and we want to gradually
customize it in order to make it our own.

For example, I’ve
decided to go with this gaming one, which gives you the option of adding your
social links as well as adjusting the look and position of its elements using
interactive editing.

No matter what template you end up using, the editing layout will always
be the same. On the left side you’ll have all your text-related controls, while
on the right side you’ll find all your background and shape-related ones. All
the changes that you make will immediately be previewed within the banner template preview, which is front and center, allowing you to adjust it as you please.

template preview

Step 1

Let’s start by adjusting some of the text found within the banner. For
example, I want to change the channel’s name from Zion-Sports to Nitro Gaming.
To do this, I’ll simply select the text found within the top-left input box,
and then overwrite it with my own.

As you can see, the tool lets me know the amount of characters that I’m currently using out of the total allowed.

example of changing the name of the channel

Step 2

I can easily change the font by clicking on the dropdown box found
underneath and choosing a new one from the available list.

example of changing the font

Step 3

You can also change the color of your text by clicking on the little
dropdown box found next to the font, which will allow you to use one of the predefined
values or a new one of your own if you click on the More button.

changing the color of the text

Step 4

You can also completely remove the current text field (or any other one), by unchecking its
little checkbox, which will hide both it and its underlying decorative shape.

example of removing a text field

Step 5

Next, I’m going to customize the larger catchphrase, by going through
the same settings presented for the channel’s name.

example of adjusting the catch phrase

Step 6

Lastly, we have the social media handles, which I can individually rename
and then customize to my own desire. Since at this point I’m pretty much done
working on my text-based elements, I can now move on to customizing my banner’s
different composing elements.

example of adjusting the social media handles

Step 7

If we move on to the right side of the browser’s window, we’ll see that we
have a couple more options, which allow us to control the look and feel of our
non-text-based elements.

The first is one is called Accent Color, and it enables
us to change the color of our little avatar.

example of adjusting the accent color

Step 8 

Next, we have Icon Color, which as the name
implies allows you to change the color of the little social icons.

adjusting the color of the social media icons

Step 9

I then have the option of changing the colors
for the two banner shapes (Banner 1 & Banner 2), but I’m going to leave
them white for this current example.

example of changing the color of the smaller banners

Step 10

The next option is called Main Color and
controls the fill shape of the avatar illustration. As with the banners, I’m
going to leave this set to default (white) in order to maintain the color
scheme that I’m trying to build.

example of changing the color of the avatar

Step 11

Moving on down, we have the ability of changing
the avatar itself using one of the pre-created designs, or uploading a custom one
of our own. Personally, I ended up using one of the provided ones, which due to
its high quality proved to be a perfect fit.

example of changing the avatar

Step 12

Finally, we have another option called
Background, which as the name implies allows us to change the color of our
background.

example of changing the color of the background

Step 13

If I feel that some elements could use a
little adjusting, I can easily click on them, which will bring up a bounding box
that I can then use in order to resize or reposition that specific element. If for
some reason I’m not happy with the changes, I can easily undo them using the Reset Layout button.

example of adjusting the position and shape of a composing element

Step 14

As soon as I’m happy with how my banner design ended up looking, I can
easily download it by clicking the Download
button, which will charge me a small fee each time I use the banner template generator.

example of downloading the final result

4. How to Upload Your
Banner to Twitch

So you’ve finished
creating your awesome banner using Placeit’s online banner generator, but how do you go about using it on
Twitch?

Well, first you need to make sure you have an account and are already logged in to it. Once you’re within your account, simply go to Settings
> Profile Banner
and then click on the Update button in order to upload your digital banner.

uploading the banner within twitch

Once you’ve uploaded your design, you can go to your channel, and you should be able to see your new Twitch banner in all its glory.

example of banner used within twitch

Great Work!

As always, I hope you’ve found this tutorial useful, and if you have any
questions, feel free to post them within the comments section and I’ll get back
to you as soon as I can!

finished project preview

Expand Your Designer Skills!

Just finished going through this quick tutorial, and feel like learning more of what it takes to become a visual tinkerer? Well, if that’s the case then you’re in luck since I’ve put together this little list which should get you up and ready in no time!

How to Make a Twitch Banner Design Using a Banner Maker

Post pobrano z: How to Make a Twitch Banner Design Using a Banner Maker

Final product image
What You’ll Be Creating

Creating a Twitch banner design can sometimes prove to be a tedious and difficult task, especially if you’ve never really dabbled with graphic design tools before. But what if I told you that there’s an easy solution that can help you create a beautiful digital banner in a manner of seconds using Placeit’s online banner maker? Well, if that sounds interesting then follow me in this quick tutorial as I will walk you through the entire process.

1. What Is Placeit?

Before we begin, I
want to take a couple of moments and quickly talk about what Placeit is and how
it can help you.

If you aren’t a
designer yourself, most of the time that means that you won’t have access to
the tools that designers usually use, such as Adobe Illustrator, Adobe Photoshop,
Sketch, etc.

But what if
sometimes you actually need to create something yourself, but don’t feel like
spending a lot of money on a graphics suite that you probably won’t use all
that often?

Well, when that
happens, Placeit can be a better fit, since it comes with a set of online tools
that help you create digital banners, mockups, logos, etc. using just a couple of
clicks.

That being said, we’re going to see how easy it is to create your very
own Twitch banner using Placeit’s online banner generator.

placeit website preview

2. How to Access the
Twitch Banner Maker

Before we can start
working on the actual banner design, we first need to navigate to the correct section
of the website that houses the Twitch Banner Maker.

Step 1

If you take a quick look at the horizontal navigation menu found next to
the logo, you’ll notice that you have a category called Designs.

how to find the banner category

Step 2

As soon as you hover or click on the link, it will bring up a horizontal
submenu, to the right of which you’ll find a tool called Twitch Banner Maker. If your browser’s window isn’t fully occupying the width of your screen, you can either scroll through the menu using the little right-facing arrow or
you can find the link within the page’s left-sided Design Templates menu. Of
course, you can always use the search function, which should bring up all the
available banner templates.

locating the twitch banner maker

Step 3

Here, you have a library of 85 different available Twitch banner templates (at the
moment of this tutorial), from which you can choose the design that fits your needs.

choosing a banner template

3. How to Make a Banner Using the
Twitch Banner Maker

At this point, let’s
say that we’ve found a banner template that we really like and we want to gradually
customize it in order to make it our own.

For example, I’ve
decided to go with this gaming one, which gives you the option of adding your
social links as well as adjusting the look and position of its elements using
interactive editing.

No matter what template you end up using, the editing layout will always
be the same. On the left side you’ll have all your text-related controls, while
on the right side you’ll find all your background and shape-related ones. All
the changes that you make will immediately be previewed within the banner template preview, which is front and center, allowing you to adjust it as you please.

template preview

Step 1

Let’s start by adjusting some of the text found within the banner. For
example, I want to change the channel’s name from Zion-Sports to Nitro Gaming.
To do this, I’ll simply select the text found within the top-left input box,
and then overwrite it with my own.

As you can see, the tool lets me know the amount of characters that I’m currently using out of the total allowed.

example of changing the name of the channel

Step 2

I can easily change the font by clicking on the dropdown box found
underneath and choosing a new one from the available list.

example of changing the font

Step 3

You can also change the color of your text by clicking on the little
dropdown box found next to the font, which will allow you to use one of the predefined
values or a new one of your own if you click on the More button.

changing the color of the text

Step 4

You can also completely remove the current text field (or any other one), by unchecking its
little checkbox, which will hide both it and its underlying decorative shape.

example of removing a text field

Step 5

Next, I’m going to customize the larger catchphrase, by going through
the same settings presented for the channel’s name.

example of adjusting the catch phrase

Step 6

Lastly, we have the social media handles, which I can individually rename
and then customize to my own desire. Since at this point I’m pretty much done
working on my text-based elements, I can now move on to customizing my banner’s
different composing elements.

example of adjusting the social media handles

Step 7

If we move on to the right side of the browser’s window, we’ll see that we
have a couple more options, which allow us to control the look and feel of our
non-text-based elements.

The first is one is called Accent Color, and it enables
us to change the color of our little avatar.

example of adjusting the accent color

Step 8 

Next, we have Icon Color, which as the name
implies allows you to change the color of the little social icons.

adjusting the color of the social media icons

Step 9

I then have the option of changing the colors
for the two banner shapes (Banner 1 & Banner 2), but I’m going to leave
them white for this current example.

example of changing the color of the smaller banners

Step 10

The next option is called Main Color and
controls the fill shape of the avatar illustration. As with the banners, I’m
going to leave this set to default (white) in order to maintain the color
scheme that I’m trying to build.

example of changing the color of the avatar

Step 11

Moving on down, we have the ability of changing
the avatar itself using one of the pre-created designs, or uploading a custom one
of our own. Personally, I ended up using one of the provided ones, which due to
its high quality proved to be a perfect fit.

example of changing the avatar

Step 12

Finally, we have another option called
Background, which as the name implies allows us to change the color of our
background.

example of changing the color of the background

Step 13

If I feel that some elements could use a
little adjusting, I can easily click on them, which will bring up a bounding box
that I can then use in order to resize or reposition that specific element. If for
some reason I’m not happy with the changes, I can easily undo them using the Reset Layout button.

example of adjusting the position and shape of a composing element

Step 14

As soon as I’m happy with how my banner design ended up looking, I can
easily download it by clicking the Download
button, which will charge me a small fee each time I use the banner template generator.

example of downloading the final result

4. How to Upload Your
Banner to Twitch

So you’ve finished
creating your awesome banner using Placeit’s online banner generator, but how do you go about using it on
Twitch?

Well, first you need to make sure you have an account and are already logged in to it. Once you’re within your account, simply go to Settings
> Profile Banner
and then click on the Update button in order to upload your digital banner.

uploading the banner within twitch

Once you’ve uploaded your design, you can go to your channel, and you should be able to see your new Twitch banner in all its glory.

example of banner used within twitch

Great Work!

As always, I hope you’ve found this tutorial useful, and if you have any
questions, feel free to post them within the comments section and I’ll get back
to you as soon as I can!

finished project preview

Expand Your Designer Skills!

Just finished going through this quick tutorial, and feel like learning more of what it takes to become a visual tinkerer? Well, if that’s the case then you’re in luck since I’ve put together this little list which should get you up and ready in no time!

25 Creative Photo Collage Templates for Adobe Photoshop

Post pobrano z: 25 Creative Photo Collage Templates for Adobe Photoshop

Place all your favorite memories into a photo collage for a fun project or gift! Check out this incredible list below for premium Photoshop resources.

25 Creative Photo Collage Templates

A photo collage is a collection of images made by you. These compositions can be arranged into simple configurations or more complex arrangements for more creativity.

Today we’ve gathered 25 creative photo collage templates all created with Adobe Photoshop. Easily update these files using the editable placeholders perfect for any experience level.

Featuring abstract geometric templates and modern designs, these templates will help you add unique decor to your home or social media profiles. Enjoy this amazing selection exclusively picked from Envato Market and Envato Elements.

Need more help? Let our designers guide you! Get reliable feedback and design from the talented folks at Envato Studio.

4 Abstract Geometric Photo Templates

Blow your followers away with stunning geometric visuals inspired by the latest trends in design. This awesome photo collage pack includes four abstract designs with exciting layouts. Check out the examples to see how it works and download this suite for amazing, high-quality design.

4 Abstract Geometric Photo Templates

20 Gravity Photo Frame Mockups

Celebrate your photos like the work of art that they are with this amazing selection of photo frame mockups. A fully customizable Photoshop file that is simple to use, this package features 20 total layouts in realistic environments. Enjoy the cool anti-gravity effect with this stylish collection!

20 Gravity Photo Frame Mockups

Facebook Cover Photography Collage

Your social media should shine just as much as your photography. Create a beautiful collage using the inspiring template below. This Facebook cover is great for both personal and business profiles. So highlight your best work with this fresh and modern setup.

Facebook Cover Photography Collage

Dark Photo Collage Template

With a sleek and stylish design, you’ll definitely want to this dark photo collage template. Easily update the original background color using Adobe Photoshop for unlimited color options. Included in this download are two high-resolution files ready for your photos.

Dark Photo Collage Template

Abstract Photo Collage Pro v.3

Enjoy divine compositions for show-stopping appeal. This photo collage package features two Photoshop files with dazzling layouts. Simply replace the stock images with your own to try out this template right away! A super easy help guide is also included!

Abstract Photo Collage Pro v3

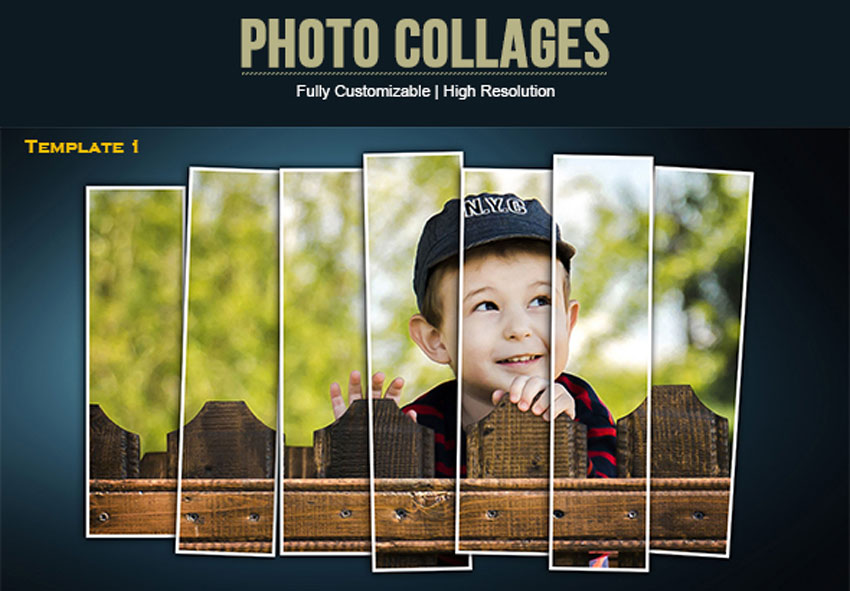
Photo Collage Template

Transform your photography with inspiring collages using this Photoshop template. Featuring four total files smartly organized and grouped, this template lets you turn layers on and off to reveal new looks. Experiment with new designs for an exciting, fresh look!

Photo Collage Template

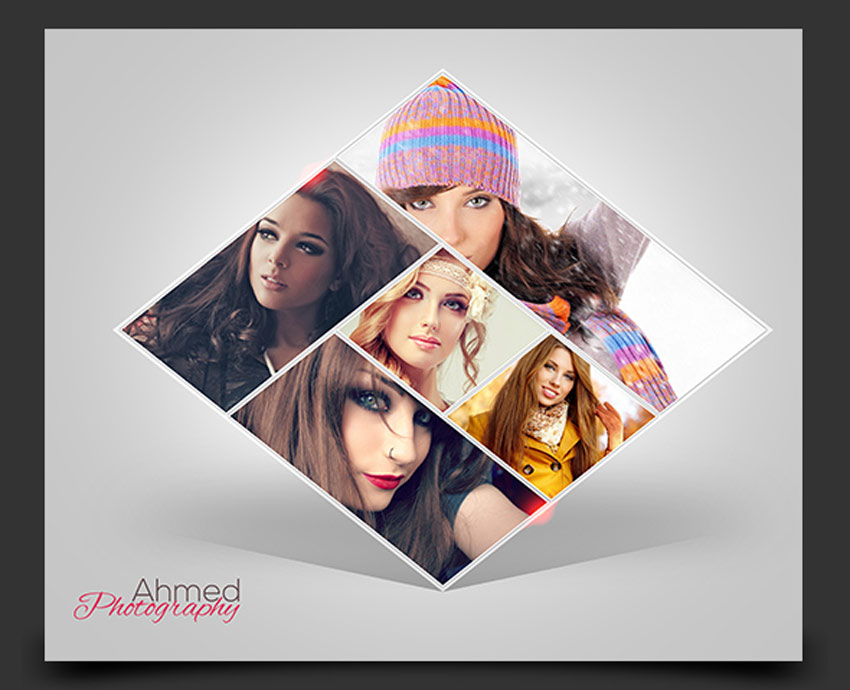
Diamond Photo Collage V.01

Diamonds are forever. And this gorgeous template features five awesome layouts for amazing photo collages. Update the fully editable smart objects with landscape photography or your favorite portraits. Well organized and grouped, this template is super easy to use!

Diamond Photo Collage V01

Photo Collage Flyer Template

Need a swanky photo collage for your next event? Then give this stylish design a try! Featuring fully organized layers you can update in seconds, this flyer just needs your favorite photos to get started. Finish with your event details and print it out today!

Photo Collage Flyer Template

Wedding Photo Album Facebook Cover

Celebrate your special day with an awesome Facebook cover. This unique template helps creative couples share their love with the world! Enjoy two elegant cover designs to show off your engagement or special wedding moments. You’ll love this template!

Wedding Photo Album Facebook Cover

The Office Photo Collage Mockup

Photo mockups are always a great alternative for polished collages. This mockup template features a chic office environment with several amazing setups. Enjoy a cool, modern look complete with eight easily adjustable images. Download this set today!

The Office Photo Collage Mockup

Glossy Long Shadow Photo Collage

For a unique twist on your collage, add a trendy long shadow effect with this premium photo template. Featuring beautiful lens flare highlights against a sleek dark design, this template is smartly organized and ready to use. Try it out today for a stunning glossy effect!

Glossy Long Shadow Photo Collage

Photography Collage Trifold Brochure

Improve your photography business with a beautiful photo collage brochure. This awesome suite includes a stunning trifold design that is hard to ignore! It includes a print-ready design with fully accessible elements and free fonts for more savings!

Photography Collage Trifold Brochure

Abstract Photo Collage Pro v.5

Abstract collages are the perfect way to shake things up! So craft an extraordinary look with this set of abstract arrangements. It features 10 layer compositions and 21 layouts, so you’ll have plenty of variations to choose from for a special result. Enjoy fun bonus extras like added lens flares and even color effects!

Abstract Photo Collage Pro v5

Fashion Sale Photo Collage Flyer

Kick off your next sale with a photo collage of your best-selling items! This flyer template includes adjustable elements as well as convenient free fonts. Perfect for any fashion event or ad, this template will help you achieve amazing results for your business!

Fashion Sale Photo Collage Flyer

Abstract Photo Collage Pro V.2

Are your photos looking a little blah? Freshen up your work with a modern photo collage. This sleek template features two extraordinary layouts with bonus color effects for more customization. Simply add your favorite photos to enjoy this template fast!

Abstract Photo Collage Pro v2

Photo Collage Business Card

Use this popular photo collage technique for business cards too! Fit for any photographer or creative professional, this business card is print ready with a double-sided design. Change it easily using Adobe Photoshop and switch out the photos with your best selection!

Photo Collage Business Card

Creative Collage Photoshop Templates

Collage templates won’t get any easier than this! Featuring 15 total templates in a convenient square format, these collages are perfect for Instagram and more. A helpful instructional guide is also included to walk you through the process step by step.

Creative Collage Photoshop Templates

Picture Art Mockup

Display your photos in an elegant art scene with these mockup templates. Presented with a clean 3D display, this download includes several inspiring scenes with realistic lighting and shadows. Also included is an easy-to-follow instructional guide.

Picture Art Mockup

Picture Art Collage Template

Sell your extraordinary expertise with a professional collage of your best work. This incredible resource features a collage-based art mockup that is very easy to customize. Try it out for any project or industry and enjoy the sleek result!

Picture Art Collage Template

Twitter Photo Collage Header

Your Twitter header says a lot about you. So make the right impression by sharing your favorite photos. Great for professional photographers and creatives, this template has four different layouts with three color effects included.

Twitter Photo Collage Header

Travel Songs Flyer Collage

A photo collage is fantastic way to excite any music event goer! So entice them with this flyer, featuring a selection of impressive visuals to go with your event details. Already included is the awesome railroad background, so just update it fast with your most valued music-inspired photos.

Travel Songs Flyer Collage

Valentine Photo Collage

Love is in the air. And what better way to show how much you love your honey or loved one than this crafty collage? Packed with two easy-to-use Photoshop files, this template lets you add your photo to the heart-shaped smart objects for easy updates. Try it out!

 Valentine Photo Collage

Photo Collage Christmas Photo Card

Send grandma a beautiful Christmas card featuring a photo collage of the kids! This lovely template includes A5-sized Christmas cards with two color variations available. Choose from festive red and orange designs already set up with bleed lines and more.

Photo Collage Christmas Photo Card

Black White Photo Collage

Visualize your photos against a modern interior layout with this brilliant pack of photo mockups. Test your design using several high-quality environments with realistic home and business compositions. Enjoy the black and white color scheme for a trendy, modern appeal!

Black White Photo Collage

Photo Collages Template

Your kids and family will look cute as can be in this photo collage template! A fully customizable template, this download comes with two ready-to-use Photoshop files. Enjoy the high-resolution result and choice of four background colors.

Photo Collages

Show Us Your Photo Collages!

Post a result and share with us your favorite photo collages!

For more amazing photo collage templates, check out hundreds of incredible designs to add to your
collection. If you need a more hands-on approach, however,
consider enlisting the help of a design professional from Envato Studio.

This list is jam-packed with
amazing resources for the avid designer familiar with
Adobe Photoshop. Be sure to browse Envato Market and Envato Elements for more resources and let us know your favorites in the comments!

25 Creative Photo Collage Templates for Adobe Photoshop

Post pobrano z: 25 Creative Photo Collage Templates for Adobe Photoshop

Place all your favorite memories into a photo collage for a fun project or gift! Check out this incredible list below for premium Photoshop resources.

25 Creative Photo Collage Templates

A photo collage is a collection of images made by you. These compositions can be arranged into simple configurations or more complex arrangements for more creativity.

Today we’ve gathered 25 creative photo collage templates all created with Adobe Photoshop. Easily update these files using the editable placeholders perfect for any experience level.

Featuring abstract geometric templates and modern designs, these templates will help you add unique decor to your home or social media profiles. Enjoy this amazing selection exclusively picked from Envato Market and Envato Elements.

Need more help? Let our designers guide you! Get reliable feedback and design from the talented folks at Envato Studio.

4 Abstract Geometric Photo Templates

Blow your followers away with stunning geometric visuals inspired by the latest trends in design. This awesome photo collage pack includes four abstract designs with exciting layouts. Check out the examples to see how it works and download this suite for amazing, high-quality design.

4 Abstract Geometric Photo Templates

20 Gravity Photo Frame Mockups

Celebrate your photos like the work of art that they are with this amazing selection of photo frame mockups. A fully customizable Photoshop file that is simple to use, this package features 20 total layouts in realistic environments. Enjoy the cool anti-gravity effect with this stylish collection!

20 Gravity Photo Frame Mockups

Facebook Cover Photography Collage

Your social media should shine just as much as your photography. Create a beautiful collage using the inspiring template below. This Facebook cover is great for both personal and business profiles. So highlight your best work with this fresh and modern setup.

Facebook Cover Photography Collage

Dark Photo Collage Template

With a sleek and stylish design, you’ll definitely want to this dark photo collage template. Easily update the original background color using Adobe Photoshop for unlimited color options. Included in this download are two high-resolution files ready for your photos.

Dark Photo Collage Template

Abstract Photo Collage Pro v.3

Enjoy divine compositions for show-stopping appeal. This photo collage package features two Photoshop files with dazzling layouts. Simply replace the stock images with your own to try out this template right away! A super easy help guide is also included!

Abstract Photo Collage Pro v3

Photo Collage Template

Transform your photography with inspiring collages using this Photoshop template. Featuring four total files smartly organized and grouped, this template lets you turn layers on and off to reveal new looks. Experiment with new designs for an exciting, fresh look!

Photo Collage Template

Diamond Photo Collage V.01

Diamonds are forever. And this gorgeous template features five awesome layouts for amazing photo collages. Update the fully editable smart objects with landscape photography or your favorite portraits. Well organized and grouped, this template is super easy to use!

Diamond Photo Collage V01

Photo Collage Flyer Template

Need a swanky photo collage for your next event? Then give this stylish design a try! Featuring fully organized layers you can update in seconds, this flyer just needs your favorite photos to get started. Finish with your event details and print it out today!

Photo Collage Flyer Template

Wedding Photo Album Facebook Cover

Celebrate your special day with an awesome Facebook cover. This unique template helps creative couples share their love with the world! Enjoy two elegant cover designs to show off your engagement or special wedding moments. You’ll love this template!

Wedding Photo Album Facebook Cover

The Office Photo Collage Mockup

Photo mockups are always a great alternative for polished collages. This mockup template features a chic office environment with several amazing setups. Enjoy a cool, modern look complete with eight easily adjustable images. Download this set today!

The Office Photo Collage Mockup

Glossy Long Shadow Photo Collage

For a unique twist on your collage, add a trendy long shadow effect with this premium photo template. Featuring beautiful lens flare highlights against a sleek dark design, this template is smartly organized and ready to use. Try it out today for a stunning glossy effect!

Glossy Long Shadow Photo Collage

Photography Collage Trifold Brochure

Improve your photography business with a beautiful photo collage brochure. This awesome suite includes a stunning trifold design that is hard to ignore! It includes a print-ready design with fully accessible elements and free fonts for more savings!

Photography Collage Trifold Brochure

Abstract Photo Collage Pro v.5

Abstract collages are the perfect way to shake things up! So craft an extraordinary look with this set of abstract arrangements. It features 10 layer compositions and 21 layouts, so you’ll have plenty of variations to choose from for a special result. Enjoy fun bonus extras like added lens flares and even color effects!

Abstract Photo Collage Pro v5

Fashion Sale Photo Collage Flyer

Kick off your next sale with a photo collage of your best-selling items! This flyer template includes adjustable elements as well as convenient free fonts. Perfect for any fashion event or ad, this template will help you achieve amazing results for your business!

Fashion Sale Photo Collage Flyer

Abstract Photo Collage Pro V.2

Are your photos looking a little blah? Freshen up your work with a modern photo collage. This sleek template features two extraordinary layouts with bonus color effects for more customization. Simply add your favorite photos to enjoy this template fast!

Abstract Photo Collage Pro v2

Photo Collage Business Card

Use this popular photo collage technique for business cards too! Fit for any photographer or creative professional, this business card is print ready with a double-sided design. Change it easily using Adobe Photoshop and switch out the photos with your best selection!

Photo Collage Business Card

Creative Collage Photoshop Templates

Collage templates won’t get any easier than this! Featuring 15 total templates in a convenient square format, these collages are perfect for Instagram and more. A helpful instructional guide is also included to walk you through the process step by step.

Creative Collage Photoshop Templates

Picture Art Mockup

Display your photos in an elegant art scene with these mockup templates. Presented with a clean 3D display, this download includes several inspiring scenes with realistic lighting and shadows. Also included is an easy-to-follow instructional guide.

Picture Art Mockup

Picture Art Collage Template

Sell your extraordinary expertise with a professional collage of your best work. This incredible resource features a collage-based art mockup that is very easy to customize. Try it out for any project or industry and enjoy the sleek result!

Picture Art Collage Template

Twitter Photo Collage Header

Your Twitter header says a lot about you. So make the right impression by sharing your favorite photos. Great for professional photographers and creatives, this template has four different layouts with three color effects included.

Twitter Photo Collage Header

Travel Songs Flyer Collage

A photo collage is fantastic way to excite any music event goer! So entice them with this flyer, featuring a selection of impressive visuals to go with your event details. Already included is the awesome railroad background, so just update it fast with your most valued music-inspired photos.

Travel Songs Flyer Collage

Valentine Photo Collage

Love is in the air. And what better way to show how much you love your honey or loved one than this crafty collage? Packed with two easy-to-use Photoshop files, this template lets you add your photo to the heart-shaped smart objects for easy updates. Try it out!

 Valentine Photo Collage

Photo Collage Christmas Photo Card

Send grandma a beautiful Christmas card featuring a photo collage of the kids! This lovely template includes A5-sized Christmas cards with two color variations available. Choose from festive red and orange designs already set up with bleed lines and more.

Photo Collage Christmas Photo Card

Black White Photo Collage

Visualize your photos against a modern interior layout with this brilliant pack of photo mockups. Test your design using several high-quality environments with realistic home and business compositions. Enjoy the black and white color scheme for a trendy, modern appeal!

Black White Photo Collage

Photo Collages Template

Your kids and family will look cute as can be in this photo collage template! A fully customizable template, this download comes with two ready-to-use Photoshop files. Enjoy the high-resolution result and choice of four background colors.

Photo Collages

Show Us Your Photo Collages!

Post a result and share with us your favorite photo collages!

For more amazing photo collage templates, check out hundreds of incredible designs to add to your
collection. If you need a more hands-on approach, however,
consider enlisting the help of a design professional from Envato Studio.

This list is jam-packed with
amazing resources for the avid designer familiar with
Adobe Photoshop. Be sure to browse Envato Market and Envato Elements for more resources and let us know your favorites in the comments!

25 Creative Photo Collage Templates for Adobe Photoshop

Post pobrano z: 25 Creative Photo Collage Templates for Adobe Photoshop

Place all your favorite memories into a photo collage for a fun project or gift! Check out this incredible list below for premium Photoshop resources.

25 Creative Photo Collage Templates

A photo collage is a collection of images made by you. These compositions can be arranged into simple configurations or more complex arrangements for more creativity.

Today we’ve gathered 25 creative photo collage templates all created with Adobe Photoshop. Easily update these files using the editable placeholders perfect for any experience level.

Featuring abstract geometric templates and modern designs, these templates will help you add unique decor to your home or social media profiles. Enjoy this amazing selection exclusively picked from Envato Market and Envato Elements.

Need more help? Let our designers guide you! Get reliable feedback and design from the talented folks at Envato Studio.

4 Abstract Geometric Photo Templates

Blow your followers away with stunning geometric visuals inspired by the latest trends in design. This awesome photo collage pack includes four abstract designs with exciting layouts. Check out the examples to see how it works and download this suite for amazing, high-quality design.

4 Abstract Geometric Photo Templates

20 Gravity Photo Frame Mockups

Celebrate your photos like the work of art that they are with this amazing selection of photo frame mockups. A fully customizable Photoshop file that is simple to use, this package features 20 total layouts in realistic environments. Enjoy the cool anti-gravity effect with this stylish collection!

20 Gravity Photo Frame Mockups

Facebook Cover Photography Collage

Your social media should shine just as much as your photography. Create a beautiful collage using the inspiring template below. This Facebook cover is great for both personal and business profiles. So highlight your best work with this fresh and modern setup.

Facebook Cover Photography Collage

Dark Photo Collage Template

With a sleek and stylish design, you’ll definitely want to this dark photo collage template. Easily update the original background color using Adobe Photoshop for unlimited color options. Included in this download are two high-resolution files ready for your photos.

Dark Photo Collage Template

Abstract Photo Collage Pro v.3

Enjoy divine compositions for show-stopping appeal. This photo collage package features two Photoshop files with dazzling layouts. Simply replace the stock images with your own to try out this template right away! A super easy help guide is also included!

Abstract Photo Collage Pro v3

Photo Collage Template

Transform your photography with inspiring collages using this Photoshop template. Featuring four total files smartly organized and grouped, this template lets you turn layers on and off to reveal new looks. Experiment with new designs for an exciting, fresh look!

Photo Collage Template

Diamond Photo Collage V.01

Diamonds are forever. And this gorgeous template features five awesome layouts for amazing photo collages. Update the fully editable smart objects with landscape photography or your favorite portraits. Well organized and grouped, this template is super easy to use!

Diamond Photo Collage V01

Photo Collage Flyer Template

Need a swanky photo collage for your next event? Then give this stylish design a try! Featuring fully organized layers you can update in seconds, this flyer just needs your favorite photos to get started. Finish with your event details and print it out today!

Photo Collage Flyer Template

Wedding Photo Album Facebook Cover

Celebrate your special day with an awesome Facebook cover. This unique template helps creative couples share their love with the world! Enjoy two elegant cover designs to show off your engagement or special wedding moments. You’ll love this template!

Wedding Photo Album Facebook Cover

The Office Photo Collage Mockup

Photo mockups are always a great alternative for polished collages. This mockup template features a chic office environment with several amazing setups. Enjoy a cool, modern look complete with eight easily adjustable images. Download this set today!

The Office Photo Collage Mockup

Glossy Long Shadow Photo Collage

For a unique twist on your collage, add a trendy long shadow effect with this premium photo template. Featuring beautiful lens flare highlights against a sleek dark design, this template is smartly organized and ready to use. Try it out today for a stunning glossy effect!

Glossy Long Shadow Photo Collage

Photography Collage Trifold Brochure

Improve your photography business with a beautiful photo collage brochure. This awesome suite includes a stunning trifold design that is hard to ignore! It includes a print-ready design with fully accessible elements and free fonts for more savings!

Photography Collage Trifold Brochure

Abstract Photo Collage Pro v.5

Abstract collages are the perfect way to shake things up! So craft an extraordinary look with this set of abstract arrangements. It features 10 layer compositions and 21 layouts, so you’ll have plenty of variations to choose from for a special result. Enjoy fun bonus extras like added lens flares and even color effects!

Abstract Photo Collage Pro v5

Fashion Sale Photo Collage Flyer

Kick off your next sale with a photo collage of your best-selling items! This flyer template includes adjustable elements as well as convenient free fonts. Perfect for any fashion event or ad, this template will help you achieve amazing results for your business!

Fashion Sale Photo Collage Flyer

Abstract Photo Collage Pro V.2

Are your photos looking a little blah? Freshen up your work with a modern photo collage. This sleek template features two extraordinary layouts with bonus color effects for more customization. Simply add your favorite photos to enjoy this template fast!

Abstract Photo Collage Pro v2

Photo Collage Business Card

Use this popular photo collage technique for business cards too! Fit for any photographer or creative professional, this business card is print ready with a double-sided design. Change it easily using Adobe Photoshop and switch out the photos with your best selection!

Photo Collage Business Card

Creative Collage Photoshop Templates

Collage templates won’t get any easier than this! Featuring 15 total templates in a convenient square format, these collages are perfect for Instagram and more. A helpful instructional guide is also included to walk you through the process step by step.

Creative Collage Photoshop Templates

Picture Art Mockup

Display your photos in an elegant art scene with these mockup templates. Presented with a clean 3D display, this download includes several inspiring scenes with realistic lighting and shadows. Also included is an easy-to-follow instructional guide.

Picture Art Mockup

Picture Art Collage Template

Sell your extraordinary expertise with a professional collage of your best work. This incredible resource features a collage-based art mockup that is very easy to customize. Try it out for any project or industry and enjoy the sleek result!

Picture Art Collage Template

Twitter Photo Collage Header

Your Twitter header says a lot about you. So make the right impression by sharing your favorite photos. Great for professional photographers and creatives, this template has four different layouts with three color effects included.

Twitter Photo Collage Header

Travel Songs Flyer Collage

A photo collage is fantastic way to excite any music event goer! So entice them with this flyer, featuring a selection of impressive visuals to go with your event details. Already included is the awesome railroad background, so just update it fast with your most valued music-inspired photos.

Travel Songs Flyer Collage

Valentine Photo Collage

Love is in the air. And what better way to show how much you love your honey or loved one than this crafty collage? Packed with two easy-to-use Photoshop files, this template lets you add your photo to the heart-shaped smart objects for easy updates. Try it out!

 Valentine Photo Collage

Photo Collage Christmas Photo Card

Send grandma a beautiful Christmas card featuring a photo collage of the kids! This lovely template includes A5-sized Christmas cards with two color variations available. Choose from festive red and orange designs already set up with bleed lines and more.

Photo Collage Christmas Photo Card

Black White Photo Collage

Visualize your photos against a modern interior layout with this brilliant pack of photo mockups. Test your design using several high-quality environments with realistic home and business compositions. Enjoy the black and white color scheme for a trendy, modern appeal!

Black White Photo Collage

Photo Collages Template

Your kids and family will look cute as can be in this photo collage template! A fully customizable template, this download comes with two ready-to-use Photoshop files. Enjoy the high-resolution result and choice of four background colors.

Photo Collages

Show Us Your Photo Collages!

Post a result and share with us your favorite photo collages!

For more amazing photo collage templates, check out hundreds of incredible designs to add to your
collection. If you need a more hands-on approach, however,
consider enlisting the help of a design professional from Envato Studio.

This list is jam-packed with
amazing resources for the avid designer familiar with
Adobe Photoshop. Be sure to browse Envato Market and Envato Elements for more resources and let us know your favorites in the comments!

How to Make a 3D Text Effect in Photoshop

Post pobrano z: How to Make a 3D Text Effect in Photoshop

Final product image
What You’ll Be Creating

If you’re interested in Photoshop text effects, in this tutorial I’ll show you how to create a 3D text in Photoshop in just a few steps. We’re going to adjust its shape, set the light sources, create a material, and then render it all. Just keep in mind you need Photoshop CC or CS6 Extended for this.

Follow along with us over on our Envato Tuts+ YouTube Channel:

How to Make a 3D Text Effect in Photoshop

Step 1

Create a New File. Type some text in a big, bold font. If you like, you can download the one I used, Streetwear.

type text in photoshop

Step 2

With the text layer selected, go to 3D > New 3D Extrusion From Selected Layer.

turn text into 3d in photoshop

Step 3

Your text will be turned into a 3D object with some default settings. Before we start changing them, let’s set the scene first. Click the 3D text and go to the Coordinates tab in the Properties panel. Change the X angle to 90 degrees.

rotate 3d text down

Step 4

Select the first tool in the upper bar, and click somewhere outside of the object to move the camera. Drag it until you see a red-blue cross.

rotate 3d camera in photoshop

Step 5

Go to the Coordinates tab and adjust the second column to only include a 90-degree rotation on the X axis.

change camera coordinates

Step 6

If needed, drag the cross more to the center and place the 3D text in the center, too.

center 3d camera

Step 7

Let’s add a background that our object will be interacting with. Go back to the layers and draw a rectangular shape.

add 3d background

Step 8

Go to 3D > New Mesh from Layer > Depth Map to > Plane.

turn rectangle into 3d in photoshop

Step 9

Select both layers and go to 3D > Merge 3D Layers.

merge 3d layers

Step 10

Select the last tool in the upper bar and resize the rectangular shape to fill the whole scene. You can adjust the thickness of the letters by dragging the shape up by its Z axis (the blue arrow)

move in z axis

Step 11

Let’s adjust the setting of the 3D text now. Go to the first tab in the Properties panel and click Shape Presets. Select one from the list, keeping in mind that they can all still be adjusted.

change shape preset

Step 12

To adjust the shape, go to the Cap tab. Here you have access to many settings to achieve the result you need. I decided to use a simple contour with a very thin bevel and a slight indentation.

adjust shape preset options

Step 13

Time to set the lights! Scroll down the list to find Infinite Light. Drag it to cast a nice shadow under the letters.

adjust infinite light

Step 14

You can change the Softness of the shadow and the Intensity of the light in the Properties panel.

change sfotness of shadow

Step 15

Let’s add one more light. Click the white card on the bottom of the 3D panel and select New Infinite Light.

add new light

Step 16

Turn off the first light for a moment and drag the new light so as to illuminate mostly the contours of the letters. Keep the shadow
soft, too.

adjust new light

Step 17

Go to the Materials tab now. Select all the materials of the text and add some colors to them. Diffuse is the main color of the object. Specular is the color of the highlights and shine. Ambient is the color of the shadow. Keep these colors in the same hue range for a natural effect.

add diffuse color
add specular color
add ambient color

Step 18

Once you’ve set all the colors, create a New Material.

create new material

Step 19

Click the Rectangle on the list and add the material to it.

add material to object

Step 20

If you want to make the shadows brighter, you can also add some ambient light to the scene. Find Environment on the 3D list and change Global Ambient to a bright color. You can increase the intensity of the ambient light, too.

change global light

Step 21

When you’re done, click Render to see how your scene really looks. It can take a while to finish rendering, but even a few passes can show you what to expect.

render 3d in photoshop

Step 22

If you noticed something you want to fix, just hit Escape to stop rendering and adjust the settings that you want to change, like the intensity of light, the direction of the light sources, or the properties of the material. Feel free to repeat this until you’re completely happy with the end result.

3d text effect photoshop

3D Text Effects

Cinematic 3D Text Effects

So now you know how to create a basic 3D text effect, but it still takes a lot of effort to create something more complex. If you want to save time, there are plenty of ready-made 3D text effects available on Envato Elements. 

For example, this pack contains eight text effects based on popular movie titles. Just pick the one that you want to edit, type your own text, and see the magic happen.

Cinematic 3D Text Effects
3d metal text effect

Real 3D Text Mockups

If you want something more original, this set contains six simple but very effective text effects. You can easily add realistic materials to your letters, and the background will complement the text nicely. You can create text for a flyer or a poster this way—just add your text, change the font, and enjoy the end result.

Real 3D Text Mockups
wooden text effect

3D Gold Text Effects

Was that too simple? Maybe you want something more ornate? This set offers eight text effects that will turn your letters into gold. The texture, the shine, and the details of the shape will all be adjusted to create a realistic effect of golden metal. Just think how much time it would take to create such an effect on your own!

3D Gold Text Effects
golden text effect

Rubber 3D Text Effects

You can also create a unique double-3D text with this set. It offers three variations of the same effect: nice, softly shaded letters that bring rubber to mind. You can change the text, font, and even color in this effect.

Rubber 3D Text Effects
rubber logo text effect

Good Job!

Now you know how to create 3D text in Photoshop. If you want to learn more about creating 3D text effects in many styles, try these tutorials:

How to Make a 3D Text Effect in Photoshop

Post pobrano z: How to Make a 3D Text Effect in Photoshop

Final product image
What You’ll Be Creating

If you’re interested in Photoshop text effects, in this tutorial I’ll show you how to create a 3D text in Photoshop in just a few steps. We’re going to adjust its shape, set the light sources, create a material, and then render it all. Just keep in mind you need Photoshop CC or CS6 Extended for this.

Follow along with us over on our Envato Tuts+ YouTube Channel:

How to Make a 3D Text Effect in Photoshop

Step 1

Create a New File. Type some text in a big, bold font. If you like, you can download the one I used, Streetwear.

type text in photoshop

Step 2

With the text layer selected, go to 3D > New 3D Extrusion From Selected Layer.

turn text into 3d in photoshop

Step 3

Your text will be turned into a 3D object with some default settings. Before we start changing them, let’s set the scene first. Click the 3D text and go to the Coordinates tab in the Properties panel. Change the X angle to 90 degrees.

rotate 3d text down

Step 4

Select the first tool in the upper bar, and click somewhere outside of the object to move the camera. Drag it until you see a red-blue cross.

rotate 3d camera in photoshop

Step 5

Go to the Coordinates tab and adjust the second column to only include a 90-degree rotation on the X axis.

change camera coordinates

Step 6

If needed, drag the cross more to the center and place the 3D text in the center, too.

center 3d camera

Step 7

Let’s add a background that our object will be interacting with. Go back to the layers and draw a rectangular shape.

add 3d background

Step 8

Go to 3D > New Mesh from Layer > Depth Map to > Plane.

turn rectangle into 3d in photoshop

Step 9

Select both layers and go to 3D > Merge 3D Layers.

merge 3d layers

Step 10

Select the last tool in the upper bar and resize the rectangular shape to fill the whole scene. You can adjust the thickness of the letters by dragging the shape up by its Z axis (the blue arrow)

move in z axis

Step 11

Let’s adjust the setting of the 3D text now. Go to the first tab in the Properties panel and click Shape Presets. Select one from the list, keeping in mind that they can all still be adjusted.

change shape preset

Step 12

To adjust the shape, go to the Cap tab. Here you have access to many settings to achieve the result you need. I decided to use a simple contour with a very thin bevel and a slight indentation.

adjust shape preset options

Step 13

Time to set the lights! Scroll down the list to find Infinite Light. Drag it to cast a nice shadow under the letters.

adjust infinite light

Step 14

You can change the Softness of the shadow and the Intensity of the light in the Properties panel.

change sfotness of shadow

Step 15

Let’s add one more light. Click the white card on the bottom of the 3D panel and select New Infinite Light.

add new light

Step 16

Turn off the first light for a moment and drag the new light so as to illuminate mostly the contours of the letters. Keep the shadow
soft, too.

adjust new light

Step 17

Go to the Materials tab now. Select all the materials of the text and add some colors to them. Diffuse is the main color of the object. Specular is the color of the highlights and shine. Ambient is the color of the shadow. Keep these colors in the same hue range for a natural effect.

add diffuse color
add specular color
add ambient color

Step 18

Once you’ve set all the colors, create a New Material.

create new material

Step 19

Click the Rectangle on the list and add the material to it.

add material to object

Step 20

If you want to make the shadows brighter, you can also add some ambient light to the scene. Find Environment on the 3D list and change Global Ambient to a bright color. You can increase the intensity of the ambient light, too.

change global light

Step 21

When you’re done, click Render to see how your scene really looks. It can take a while to finish rendering, but even a few passes can show you what to expect.

render 3d in photoshop

Step 22

If you noticed something you want to fix, just hit Escape to stop rendering and adjust the settings that you want to change, like the intensity of light, the direction of the light sources, or the properties of the material. Feel free to repeat this until you’re completely happy with the end result.

3d text effect photoshop

3D Text Effects

Cinematic 3D Text Effects

So now you know how to create a basic 3D text effect, but it still takes a lot of effort to create something more complex. If you want to save time, there are plenty of ready-made 3D text effects available on Envato Elements. 

For example, this pack contains eight text effects based on popular movie titles. Just pick the one that you want to edit, type your own text, and see the magic happen.

Cinematic 3D Text Effects
3d metal text effect

Real 3D Text Mockups

If you want something more original, this set contains six simple but very effective text effects. You can easily add realistic materials to your letters, and the background will complement the text nicely. You can create text for a flyer or a poster this way—just add your text, change the font, and enjoy the end result.

Real 3D Text Mockups
wooden text effect

3D Gold Text Effects

Was that too simple? Maybe you want something more ornate? This set offers eight text effects that will turn your letters into gold. The texture, the shine, and the details of the shape will all be adjusted to create a realistic effect of golden metal. Just think how much time it would take to create such an effect on your own!

3D Gold Text Effects
golden text effect

Rubber 3D Text Effects

You can also create a unique double-3D text with this set. It offers three variations of the same effect: nice, softly shaded letters that bring rubber to mind. You can change the text, font, and even color in this effect.

Rubber 3D Text Effects
rubber logo text effect

Good Job!

Now you know how to create 3D text in Photoshop. If you want to learn more about creating 3D text effects in many styles, try these tutorials: