If you want to learn how to reset preferences in Photoshop, in this tutorial I’ll show you three methods for this: one for how to reset Photoshop preferences alone, one for how to reset Photoshop tools, and one for how to reset Photoshop to the default settings completely.
What You’ll Learn in This Tutorial
How to reset Photoshop preferences
How to reset Photoshop settings
How to make Photoshop reset to the default completely
How to reset Photoshop tools (separately and all at once)
How to reset Photoshop to the default settings without reinstalling it
This method should be used to reset the workspace—the placement and look of all the panels—as well as the keyboard shortcuts. It doesn’t affect the tool presets, brushes, or actions.
The easiest way to reset Photoshop preferences is to go to Edit > Preferences > General (Control-K). Click Reset Preferences on Quit.
Step 2
Confirm your choice, then restart Photoshop. Once it reopens, you’ll see the workspace back in its default state!
Step 3
If you’re wondering how to reset Photoshop preferences without opening it first, you can also use a quicker method. Attempt to open Photoshop the normal way, but then click and hold Control-Shift-Alt before the loading window even appears. Then you just need to click Yes to reset the Photoshop preferences right away.
2. How to Reset Tools in Photoshop
Step 1
What if you only want to reset the tools, not everything else? Let’s say you just want to get the default values in the tools back after you experimented with them a bit too much, for example. What can you do in such a case?
Select any tool. Click its icon in the upper bar, right next to the house icon.
Step 2
Click the gear icon.
Step 3
Now, if you only want to select this one tool, select Reset Tool. If you want to reset all of them, select Reset All Tools.
Step 4
Confirm your choice. Keep in mind that this action will not affect the rest of the workspace—just the tool settings.
3. How to Reset Photoshop to the Default Settings
OK, but what if you want to reset Photoshop completely? Put it back to the same state it would be in right after installation, but without wasting time reinstalling the whole thing? There’s a manual method for that!
You need to locate the folder containing all the Photoshop settings:
On Windows: C:\Users\<username>\AppData\Roaming\Adobe\Adobe Photoshop 2023
On Mac: Users/<username>/Library/Preferences/Adobe Photoshop 2023 Settings
ClosePhotoshop and delete everything in this folder. Once you reopen Photoshop, it will have that brand-new look again, with all the settings, tool presets, actions, brushes, and swatches back to the defaults. The only thing that you may need to remove manually later are the custom plugins, if you’ve installed any.
Good Job!
Now you know how to reset Photoshop preferences and how to reset Photoshop tools!
Explore More Photoshop Resources and Tutorials
If you found this tutorial on how to reset Photoshop settings useful, you may also be interested in other tutorials on our site:
What is a typeface in graphic design? Is a typeface the same as a font? What is the difference between font and typeface? If you’re curious about the definition of a typeface or about fonts vs. typefaces, read on!
What Is a Typeface in Graphic Design?
Let’s start with the basics: the definition of a typeface.
„Typeface” is a term that gained currency in the early days of printing to describe text characters, numbers, punctuation, and symbols that share common design features.
For example, Georgia is a typeface with characters that share common design characteristics. Likewise, Calibri is a different typeface with characters that share common design characteristics.
Fonts vs. Typefaces: What Is the Difference Between Font and Typeface?
Now, let’s move on to the eternal struggle: fonts vs. typefaces. If you’re unaware of the difference between font and typeface, worry not.
For starters, most typefaces contain a number of fonts (though there are a growing number of contemporary typefaces that offer just one font), each of which has its own specific style, weight, size, and effect.
So, for example, the Georgia typeface contains four fonts: Georgia Regular, Georgia Bold, Georgia Italic, and Georgia Bold Italic.
You could think of typefaces as a family unit made up of fonts—in fact, in web development, the term typeface has been replaced by the class name: font-family. Each font in the family unit is related to the other but has its own unique characteristics which differentiate it from the others.
The term „font” began to replace „typeface” with the advent of desktop publishing, with operating systems and various applications using the term „font” in their menus instead of „typeface”.
For example, you upload fonts to the Mac library, not typefaces, and both Adobe and Google offer font libraries, not typeface libraries.
All these factors serve to blur the line in the difference between font and typeface, so that in common usage, the terms are often used interchangeably. In the battle of fonts vs. typefaces, there’s basically a tie.
Cool Premium Typeface Examples
So far, we’ve answered some of the most pressing typeface-related questions, like „what is a typeface” and „what are fonts vs. typefaces.” Now, we’ll get to see the definition of a typeface in action! Here are some cool options of premium typeface examples from Envato Elements.
Check out Evirma, an awesome futuristic typeface that offers upper and lowercase characters, numbers, and symbols that’ll bring your posters, title covers, and signage to life. An asset like this one defines typefaces and makes them easier to understand!
This is another option to understand what typeface means. Bonwick Typeface is a sans serif that offers eight different font styles. Use them to create stunning logos, headlines, signage, and more.
In this case, typeface means quirkiness. When you’re looking for a typeface with a large personality, choose Maglony Typeface. Maglony is a serif typeface with beautiful curves that make it unique and irresistible. The typeface contains nine fonts, so you have plenty of styles to experiment with.
How about Bonoligt, a wonderful script that offers both upper and lowercase characters, numbers, and punctuation with beautiful alternates and ligatures that’ll help you create your own one-of-a-kind text.
Nillota Typeface is an elegant and dynamic serif with a beautifully flowing style. The typeface contains 618 glyphs with tons of interesting alternatives, so it’s a great font to experiment with to get unique results.
Breymont is a minimalist but elegant option. It’s an all-caps typeface that’s versatile. You can use it to draw attention to your logo, magazine, webpage, or other graphic design products. It comes with numerals, punctuation, and multilingual characters.
Looking for a clean and modern font for your next project? How about Lumber Typeface? This example is the definition of typefaces that are versatile. It includes upper and lowercase letters, numbers, and over 40 glyphs.
When you want text that has a handcrafted feel, choose Elosiam Script Typeface. This elegant script could be a great choice for signatures, stationery, quotations, branding, and more.
Brighton Smith Typeface also offers a handcrafted feel but in a different way than Elosiam above. Brighton Smith offers two fonts in different weights so that you can mix and match to your heart’s content. There is also an ornament pack included that you can use to enhance your text and design.
How awesome is this typeface? With its unexpected curves, text created with Bellyman is bound to stand out from the rest. The typeface contains over 600 glyphs, including a unique swash alternative and a large selection of ligatures.
Choose Your Favourite Typeface
Now you know all about what a typeface is, as well as the difference between fonts and typefaces. You’ve also seen a great selection when you need them. So head on over to Envato Elements and select your favourites today.
If you want more information on fonts, check out these really helpful articles from Envato Tuts+:
Want to add a new font to Adobe Photoshop? Using Adobe Fonts is an easy way to do so via Adobe’s Creative Cloud. We can use this tool to add new fonts to Photoshop, as well as other Creative Cloud apps, quickly and easily!
In this article, we’ll learn how to use Adobe Fonts to easily add fonts to Photoshop, as well as some other ways to install fonts for both Windows and Mac.
Please note that we’ll be using Adobe Creative Cloud in this tutorial; Adobe Fonts are included with your Creative Cloud subscription.
Watch How to Add Fonts to Photoshop (Mac and Windows)
If you prefer to learn about adding fonts to Photoshop via video, you can follow along with us over on our Envato Tuts+ YouTube channel:
What You’ll Learn in This Tutorial on Adding Fonts to Photoshop
How to use Adobe Fonts to add fonts to Photoshop
How to install new fonts on Windows 10
How to add fonts on Mac
1. How to Use Adobe Fonts
Step 1
Learning how to add fonts to Photoshop with Adobe Fonts is easy. Begin by opening up Adobe Creative Cloud. Make sure that you’ve updated and you’re running the latest version.
Not sure where to find it?
On Windows, you can find the Creative Cloud application by searching for it in the taskbar.
On Mac, you can find the Creative Cloud application by searching for it on your launchpad (or you could ask Siri!).
Step 2
Next, click on the font icon at the top right of the window, and select Manage Fonts. This will open Adobe Fonts in your default browser.
Note: You can also find a link to Adobe Fonts in the resource link.
Step 3
Note, you may need to log in to your Adobe account, if you aren’t already logged in. Remember to log in with the same account associated with your Creative Cloud subscription.
From here, within our browser, we can search for fonts, based on any criteria we like! Type in a search term or use the filters to find fonts suitable for your project.
Step 4
For example, let’s check out some of the Classifications—like Sans Serif. This might be a great fit for body copy. Looking for something with a bit more variety? Try out Hand or Decorative.
Step 5
If you’re looking for a very particular kind of style, you can also use the Properties search options. Looking for bold fonts, for example? Try the thicker weight.
Adjust these settings until you find what’s right for you.
Browse through the fonts to pick out one that appeals to you and select the View Family button.
Step 6
We also have several options for previewing fonts. We can, for example, change the sample text to get a better feel for how the type looks before we install it. This can be helpful if you’re looking for a font for a specific word or phrase.
You can also adjust the text size in this preview. For example, we could make it quite small to test out readability and legibility at smaller sizes—or to take it for a test run for something like body copy.
Step 7
Once you’ve found a font that you’d like to use, we can select View Family to get a more detailed look at it.
Select a font, and then click on View Family to proceed.
Step 8
In this example, I’ve chosen to take a closer look at the Macho font.
If you’ve decided you’d like to use a font, click on Activate Font, as highlighted below. It’s that easy! Adobe Creative Cloud will then activate that font and make it available for you.
Step 9
Now, I can return to Photoshop and search for my newly activated font. With the Text Tool selected, I typed the name of my font into the Options Bar.
Check it out! There’s Macho—my newly activated font. And that’s that—piece of cake. You just learned to add a font to Photoshop.
2. How to Install New Fonts in Windows 10
Adobe Fonts is handy, but it’s not the only way to learn how to import fonts to Photoshop. We can also do so outside of Creative Cloud.
Not sure how? Check out this step-by-step tutorial. It has both a text walk-through and a video to help you out, specifically for Windows 10:
Or here’s a quick guide to learn how to import fonts to Photoshop on Windows 10:
Download your font from a source on the Internet.
Many times, font files will come in a compressed zip file. Extract the font files to your Desktop (or another place on your computer).
Then, locate your Windows folder, where your operating system has been installed.
Inside the Windows folder, open up the Fonts folder.
Drag your extracted font files to the Fonts folder.
Then, you should see visual confirmation that Windows is installing your font. Voila!
3. How to Add Fonts on Mac
On a Mac instead? Like Windows, you also have the option to install fonts in other ways—particularly using Font Book. Here’s how to install fonts in Photoshop on Mac:
Download your font from a source on the Internet. Again, many times, font files will come in a compressed zip file.
Extract these files by double-clicking on the zip file. Your Mac should automatically create a folder with the contents inside.
Click on the font file and a preview will open up in Font Book for you.
Then, click Install Font to install your font.
This will take you to your fonts within Font Book, where you can preview your newly installed font.
Simple, right? You can also arrange, enable, disable, and uninstall fonts from Font Book!
Want to know more or need a little extra help? Check out this step-by-step tutorial, with both a text and video guide for how to install fonts in Photoshop on a Mac:
And There You Have It!
We have plenty of options when it comes to adding fonts to Photoshop on our computers. Now you know many ways to add a font to Photoshop. Whether you choose the convenience of installation via Adobe Fonts and Creative Cloud or you prefer another method, it’s a great idea to know more than one way to do these things. Why? Sometimes, one way might prove to be a little more convenient than another!
Love typography? Want more font-related tips and tricks? Check out these articles:
Norse fonts possess a mythical quality that can really transform a design project. If you are in the market for a Nordic writing font, then you’ll love this collection of 23 best Viking fonts from Envato Elements we’re featuring today.
Envato Elements is a terrific resource for a wide variety of fonts and other thousands of premium digital assets like graphic templates, mockups, add-ons, photos, and much more. Moreover, for one low monthly fee, you can download as many of these digital assets as you like, as often as you like.
Let’s take a look at some of the wonderful Viking rune fonts and other Nordic fonts available from Envato Elements.
The beautiful Nordica Viking Font helps you bring the soul of the north into your design work. Great for posters, apparel design, branding, greeting cards, and invitations, Nordica comes with upper-case only characters, numerals, and basic punctuation.
Lexaviers Nordic Font is an excellent font for giving your text that strong Nordic touch. Use it for titles, labels, T-shirts, product packaging, invitations, advertising, and more.
This wonderfully whimsical font is a perfect display font for posters, titles, headlines, and the like. The Nordic font includes uppercase and lowercase characters, special glyphs, and multilingual support.
Scourge Nordic Font Style is a textured runic typeface that includes uppercase multilingual letters, numbers, and punctuation. Add this interesting font to your special projects to give them an air of the mysterious.
In the festive spirit? Try Christmas Nordic Font, a hand-drawn display font that will charm everyone who sees it. The font is offered in regular and bold styles and includes uppercase and lowercase characters
Jotunheim Norse Rune Font is inspired by ancient runes. The Nordic font features three different versions. The first is the most simple and legible style, the second is a bit more complex with some reduced legibility, and the third is the most intricate of the three styles. Mix the three versions to achieve unique results.
Legendary Norse Runes Font is a fantasy font inspired by Nordic mythology. The font includes upper and lowercase characters, symbols, punctuation, and loads of ligatures and alternates to help you create your own unique look.
Paraoh Sacred Norse Font is a stylish handwritten Norse script font that you can use when you need a unique display font for that special project. You can use it for signage, titles, logos, and more.
Mjölnir Old Norse Style Font is a tribal font inspired by Nordic runes and the Viking era. This tribal font is meant to be used for headlines, titles, logos, posters, etc. The font offers uppercase and lowercase characters, special glyphs, and multilingual support.
Forestarms Norse Letters Font is a mystical sans serif font designed with thin, tall, straight letters with sharp corners. The Nordic font offers uppercase and lowercase characters and numbers.
Noatun Viking Letters Font is a gorgeous and enigmatic font. It comes in two different versions and features a unique geometric style. It’s perfect for titles, logos, posters, and other projects where a display font is needed.
Garked is a beautiful display font that features runic elements of the Viking Age and contemporary font elements. All the letters have a decorative and geometric appearance that will elevate your design projects.
Use this Viking font style when you need a less stylized Nordic display font. This light font is great for large-scale projects with a minimalist aesthetic.
The Gareon font has a unique and modern geometric style. It’s great for creating logos, film titles, music posters, and other projects that need a strong and unique Nordic font.
Requiem Viking font offers uniquely styled letters that retain a high degree of legibility. The Nordic font is offered in two styles and includes uppercase characters, multilingual letters, numbers, and punctuation.
Loura is a modern runic font with a fancy touch. If you’re looking for a more stylish, toned-down rune font, try this one. This norse font has uppercase letters, numbers, punctuation marks, and alternates.
There’s a strong influence of neo-gothic, rustic, and Scandinavian fonts in the Haext Font. Create beautiful designs by pairing this Nordic font with black and white or color.
Relic Island is a beautiful, bold typeface with a unique twist. It has a thick shape and some rune-inspired designs, as well as many letter combinations. Get inspired by adventure and nostalgia!
Choose Your Favorite Modern Runic Fonts
Now you know just where to find the best Nordic fonts when you need them. Head on over to Envato Elements and download your favorite font today.
And if you’re interested in learning more about a wide variety of fonts, check out these super helpful articles below:
Have you ever what wondered what kind of planning goes into making commercials, short films, or animations? Well, for starters, the backbone of any of these projects is a storyboard or a storyboard artist.
Storyboard artists are individuals who take a script/concept and turn it into a visual story.
If you want to become a storyboard artist on any type of production set, whether it’s a freelance job, personal project, TV show, commercial, or music video, there are some guidelines you need to follow in order to get the storyboards created.
Contrary to what many might think, you don’t need to be a great artist to illustrate a storyboard, although of course it’s a bonus. Generally, all that is really required is an understanding of the basic techniques and principles of storyboard art. Your role is to be able to communicate the vision and concept as accurately as possible.
If you want to learn how to be a storyboard artist, this is the tutorial for you. Along the way, you will learn what essential skills you need to get you motivated and started in the creative field and art of storyboarding.
Let’s get you started!!
1. Introduction to Storyboarding
1.1 What Is a Storyboard?
Storyboarding is the practice of producing storyboard sketches for a script/concept. It is an essential part of the preproduction process of any animation.
It’s a sequence of hand-drawn sketches or visual images that are supported by script notes or dialogue and placed in a sequence, for the viewer to visualise an animation before production.
Each shot in a storyboard represents a type of camera shot, angle, action, or special effect, to effectively tell a story.
1.2 What Is a Storyboard Used For?
Storyboarding helps the production team envision and develop an idea, visualise and test out concepts, and highlight any potential obstacles with the structure or layout of a story before it heads into production.
What is a storyboard and why do you need one?
It is a step-by-step guide to the production process, so it helps manage timing in production, and it saves money.
Builds a connection with the viewer and between the production teams on a project, so all can communicate from one source of reference.
Helps communicate a vision and understanding of the story.
Helps in production direction.
Most importantly, it’s used to sell/pitch the idea to clients to get funding in!
1.3 Who Directs & Lays Out the Storyboard?
Depending on the type of shoot or budget, the director might sit down with the storyboard artist to present their vision and place their input in the storyboard process. However, in most cases the budget isn’t available, and you will need to break down the scenes and rely on your own experience to direct the shots as you see fit.
The key to storyboarding is to practice, by understanding how moving productions work.
Watch plenty of movies, TV series or commercials, and try to study by sketching out the scenes as you watch.
Look for camera angles and how a story is cut up and told visually.
Keep in mind that storyboards are not a frame-by-frame breakdown, but more a scene-by-scene development, and each scene must serve a purpose in the storytelling.
Check out this drawing storyboard example with scene-by-scene development.
2. Storyboard Lingo & Techniques
Now, let’s learn some essential lingo to get you started on the right foot and familiarise you with the terms used in the industry. The following list will give you some up-front information.
2.1 What Are Film Aspect Ratios?
As you know, storyboards showcase a series of images, of what the audience will see on screen. These are shown in formats called a Storyboard Panel or Storyboard Frame, which is basically a rectangular box presented digitally or on paper.
The size and shape of the panels are different, depending on what is called the Aspect Ratio (the relationship between the width & height of your video). The most common aspect ratios are 4:3 and 16:9.
TV aspect ratio is known as 4:3.
HDTV is 16:9.
Standard Widescreen is 1.85:1.
Anamorphic is 2.39:1, also known today as „two-four-o”.
Note that the dimensions of your panels should be the same as the aspect ratio the animation will be at the end.
Storyboard panel sizes.
2.2 What Are Different Types of Camera Shots?
There are some different types of camera shots that you should know before starting. We will go over just the basic shots. Note that most shots are named in connection with the subject framed in the panel.
Establishing Shot (ES) is usually shown at the beginning of a scene to present where the action is taking place—for example, an island, a school, a basement, etc.
Close Up (CU) shots, are obviously close-range views. They’re often used in emotional scenes to show reactions or create intimacy. They can also increase tension, allow close views of characters or products, or accentuate an action.
Extreme Close Up (ECU or XCU) shots are sparingly used, usually when you need to add drama or focus to an event or scene, or represent some aggression or discomfort.
Mid Shot (MS) or Medium Shot is a frame from the character’s waist and up. Typically used to show emotions and reactions, or during dialogue sequences.
Medium Close Up (MCU) is what is sometimes called a Head & Shoulders. It’s basically a head shot from shoulder up, used to focus on a character’s expressions or during dialogue scenes between two or three people.
Long Shot (LS), also known as Full Shot, is a shot taken from a distance. It’s typically used to show the entire character or subject, and when you want to point something out between the subject and its surroundings or release tension in a scene. It’s like giving breathing space to an event/action.
Medium Long Shot (MLS) frames the subject from the knees and up. It’s a mix between a long shot and a medium shot and is usually used when there are a group of people in a frame or you wish to show the subject’s hands and expressions.
Extreme Long Shot (ELS or XLS) is more long range and is used to establish the surrounding setting.
A Camera Angle refers to where the camera is shooting from. When storyboarding, always imagine yourself holding the camera, and ask yourself what’s the best way to portray the action or subject in a scene. Do that by establishing the most effective way to place the camera angle:
Point of View (POV) camera angles are used when you want the viewer to understand what the character is seeing. The view can be close, mid, or long.
Over the Shoulder Shot (OSS or OTS or also known as ‘Third-Person) is a view from behind an individual and towards a subject. It’s typically used between people in conversation, and the frame has one person/thing on the side of the frame.
Two-Shot is an angle where two subjects are both in a single frame together, and usually speaking. When drawing dialogue frames, alternate between two-shots and OTS shots.
Up Shot / Worm’s Eye View are angles that look up at a subject/object.
Down Shots / Bird’s Eye View are angles that look down at a subject/object.
2.4 What Are the Standard Camera Movements?
Next, let’s familiarise ourselves with the following list of camera motions:
Pan/Tilt. Pan is short for Panorama Shot. The camera is on a tripod, and moves right or left. A Tilt is when you move up or down.
Zoom In or Out is when you adjust the lens to view in or out, and is used to increase the significance of something. Draw arrows from the edge of the panel inwards/outwards.
Dolly is similar to a Zoom, but the entire camera moves towards a subject or away from it. Use thick arrows to show this motion.
Truck In & Truck Out is similar to dolly, but the whole camera moves left to right or vice versa.
Pan or Panning are when the camera rotates sideways in one direction, often used in dialogue scenes or when following a subject or revealing something near. When storyboarding, draw an arrow in the camera’s direction.
Track or Tracking is another way of following subjects. It’s when the camera moves and follows the subject/action without cutting. It’s typically used in walk cycles and is symbolised by using an arrow in the motion of direction. It can also be Hand-held or on a Dolly.
Hand-held is carrying a camera by hand, to give a more natural documentary feel to a scene, typically used in police or war scenes.
Rack Focus is when the camera focuses on a subject in the foreground and the background is blurry, and then it reverses so that the focus shifts to a clear background and blurred foreground. In a storyboard, just draw where the focus starts and an arrow and rectangle where it moves to.
3. The Art of Storyboarding
3.1 Before Starting to Storyboard
Next, let’s take a glimpse at the art of storyboard making.
Before you get started, gather your notes, read over your script, and research whatever source materials you need. Clients might give you some reference material, but in most cases you need to gather your own.
Consider asking the client a few questions before storyboarding:
Do you have a script or breakdown of the script?
Who is the storyboard for?
Color or black and white?
Budget?
Format to be used?
Reference material?
Delivery date?
3.2 What Are Thumbnail Storyboards?
Before you start illustrating the storyboard, you need to break down the script, in order to examine the scenes and translate them into individual storyboard panels.
The easiest way is to add Thumbnails to your storyboard scenes.
Thumbnail storyboards are sketches, mainly quick illustrations of stick figure forms, notes, and laid-out sequences of events on a page. This is done to quickly determine how each shot/camera angle/movement will be used. It also helps to evaluate which images need to be storyboarded and which not. With thumbnails, you can swiftly step back and analyze your entire animation in individual panels, before even starting with the actual storyboard work.
Here is an example:
3.3 How to Break Down the Script
Once you have thumbnailed your script and gathered all your material, it’s time to start drawing out your frames.
Figure out what aspect ratio will be used, lay out what each panel needs to show, and then transform those ideas into a series of storyboard panels.
Decide what elements are in each frame of the storyboard (characters, objects, background), and the best shot type to communicate the event.
Here you can see a storyboard with characters and other visual elements.
3.4 Lay Out, Structure & The Best Storyboard Software
Every artist has a preferred method of drawing and structuring their panels. You can work with a number of templates available online (one example is the „6panel” single-page template below) or create your own. There is no right way of drafting a storyboard. You can use the good old-fashioned pen/pencil and paper, Adobe Photoshop, or any sketch app and storyboard software available today!
Here is a short list of the best storyboard software and apps you can lean on:
Learn to label your shots correctly, so that they are in order and you and the team can stay organised.
There’s more than one way to effectively number storyboards.
In short, the process is like having an ID for each panel. If you’re using storyboard software, it will automatically assign panel numbers. However, if you’re not on any software, and a client/director wants to move, add, or delete a panel, you can’t name a panel, for example, Panel_6_New_New_New. You will end up needing to find old/new files, and it becomes a messy, time-consuming burden.
The proper way would be to follow this order: Project Name_Script#_Scene_Frame_01.jpg
3.6 Numbering Presentation vs. Production Boards
It’s important to know which style of boards your client wants: Presentation or Production boards.
Presentation boards are typically short and are presented internally or used in pitches. They represent only the key shots needed, and not every shot of the director’s vision. Only the key elements are illustrated in individual frames.
So, in numbering presentations, it’s easy to add a letter, number, or decimal at the end of each panel number.
For example, if you want to add a shot between 23 and 24, then you would call it 23-1. If you want to convey a single shot, in several panels, it could be 23i, 23ii, 23iii, etc.
If you make an alteration to your panel then the correction will be labelled 23-a. That way they’re clearly connected, but still have their own unique ID numbers.
Production boards are numbered the same, but the difference is that they are a breakdown of every scene’s „action”, so each action is broken into camera angles. This means that whenever the camera cuts, you must change the scene number to represent a new shot. So, for example:
Scene# 2: Shot 1A
Scene# 2: Shot 1B
Scene# 2: Shot 2
Scene# 2: Shot 3
Scene# 3: Shot 1…
Once you have submitted the board, your job is done. The client might transform it into an animatic.
3.7 What’s an Animatic?
An Animatic is simply an animated storyboard!
Once you submit your storyboard, the production team might take the illustrated panels, import them into an editing program, and add a Voice Over (VO), audio, sound effects and/or demo music, to prepare the timing and pace of the production for presentation purposes.
4. Storyboard Artist Job, Tips & Hints
4.1 How to Storyboard Effectively
The whole concept of storyboarding is to represent the concept, as closely as possible to what the animation will look like in the end. So your audience should be able to follow and understand the story through the sequence of frames you illustrate. Your job is to make the script come to life.
Elements that might help communicate a story more accurately include:
Use of storyboard Arrows or Symbols to show camera movements. Storyboard Arrows help show movement, direction, and transitions.
Color an object/subject to differentiate it from the surroundings.
Add Captions under or in the images
Here’s an example of how storyboard arrows can help show camera movements.
4.2 How to Enhance the Look & Feel of the Storyboard Frames
Creating a comprehensive storyboard that looks and feels professional is not just an art but a skill.
If the audience doesn’t understand a part of the storyboard then usually it will need to be enhanced or altered. They should be able to understand the visuals without the dialog. Your best „test” audience would be your parents, siblings, or cat/dog. Try it out.
There are different approaches to illustrating a storyboard. Some artists like to use splashes of ink and color, others draw rough doodles and scribbles, some may only draw outlines, or in greyscale, or you may be the type that adds lots of details.
There are no rules to storyboarding, but there are some guidelines and tips to enhance your images and help stretch out your skills:
Add details to a scene or character—this helps the viewer’s imagination. For example, add utensils in a kitchen scene, or a zebra crossing on a street scene. The more you communicate through a board, the more accurate the production will be.
Experiment with different camera angles, especially within dramatic scenes. Try over the shoulder shots, worm’s eye views, or extreme close-ups.
Avoid positioning the subject in the center of a panel, and make use of most of your negative space.
Avoid tilted frames, complicated angles, or splitting screens in half with horizontal lines.
When drawing people or a setting, where a crowd is needed, add a number of people, instead of just two people in the background.
Be sure your subject/character is facing the correct camera direction.
Ask yourself what type of camera shot/angle you will use. Do you need a close-up? Will the camera move?
Make every frame count.
It pays to practice! Practice at home while watching your favourite movies.
4.3 Understanding the Job
Now that you have equipped yourself with some visual references and storyboard terminology, here are a few things to remember.
Be professional and punctual, and add your personal touchto the work.
Being able to draw is one thing, but you need to grasp the technique of good visual storytelling.
Understanding how to frame shots will help the production team to save time and costs.
You should be able to take the client’s script, notes, and references and turn them into a readable visual. If you can analyse how a scene can be transformed into a great visual, that’s a bonus.
You also need to draw fast!! Like really fast. Delivery on time is essential. Be punctual!
Clients tend to need storyboards delivered the next day, or within two days, or you might get emergency work to be done the same night. They might even request additional frames after delivery, and you will need to deliver them by the hour. So, unfortunately, there is not the luxury of time.
Storyboarding is paid by frame, so the longer you take, the less you make.
If you also have a specific artistic style/touch that clients like/want, you will make good money and be on your way to becoming a good storyboard artist!
4.4 How to Land the Job?
The best way? Well, you can start by working for free or a small fee.
Seek internships.
Apply to entry-level storyboard artist positions.
Apply to little production studios first, to test out your skills.
Build a portfolio that will show off your abilities.
Draw, draw, draw.
Be ready to take criticism. Constructive feedback will help you develop.
That’s It!
I hope you found our post on how to be a storyboard artist was useful. Now you have your basics ready, so it’s time to get started.
Chances are if you continually get called on for work, then either your price rates are cheap or your delivery is fast or your style is just right!
On the other hand, if you feel you are not cut out for the task and wish to hire a storyboard artist then feel free to email me, anytime.
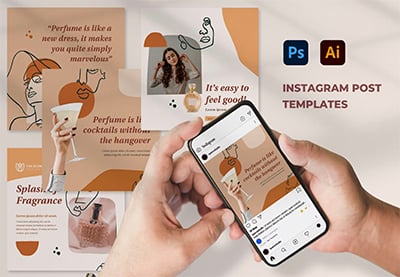
Brands are competing for popularity by jumping on the Instagram bandwagon in record numbers. It can be a challenge to create new and eye-catching posts daily. This is where templates for Instagram posts from Envato Elements can save you hours of time!
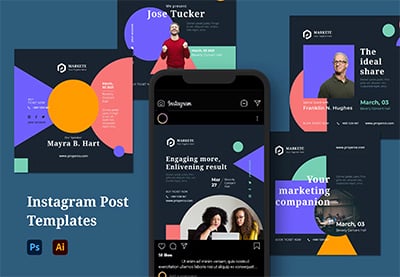
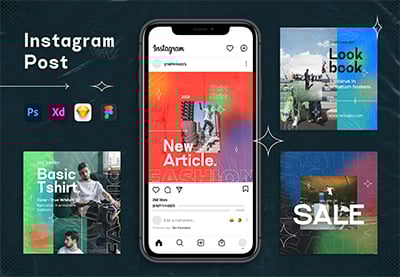
This is a great Instagram text template for startups and small businesses. Edit this template in Photoshop, Figma, Adobe XD, or Sketch. All files come with organized layers, and the post size is 1080×1080 px.
Work with trendy post templates for your next campaign. This blank Instagram post template pack comes with 20+ stylish designs. The files are 1080×1080 px Instagram post size. It uses free Google Fonts, and all the images, text, and colours are fully editable.
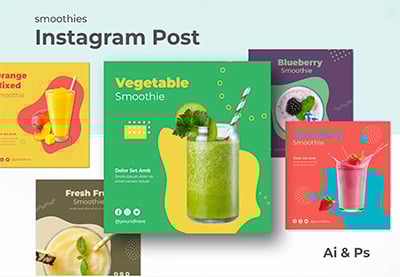
Looking for an Instagram writing template for sale posts? This template for IG posts offers a clean and bold design. Change the photos, text, and colours to make this your own. Both AI and PSD files come fully layered and well organized.
Check out this animated and creative Instagram post design. You’ll get 22 Photoshop templates for IG posts. Work with smart objects to change the images and use shape layers to change the colours. Export as video, and you’re all set to start posting!
Work with a versatile Instagram introduction post template. This download contains nine fully editable and customizable templates for Instagram posts. Edit them in Sketch, Photoshop, or Illustrator. Easily place your images with smart objects and add your brand’s text and colours.
Looking for a beautiful Instagram post layout template? This download contains four templates for IG posts. Customize them in Photoshop or Illustrator. Work with a creative Instagram post design for your next campaign.
This Instagram post outline is perfect for lovers of minimalism. You’ll get six unique IG post template designs to choose from. Add your own text and images in Sketch, Figma, or Adobe XD. Work with a blank Instagram post template to bring your ideas to life!
Check out this Instagram post layout template. It uses a fun yet simple design. This download comes with five templates for Instagram posts. All of them are great if you’re looking for an Instagram writing template. Just add your content, change the colours, and you’re all set.
Oakheart is a simple and eye-catching template for IG posts. Work with a set of nine templates for Instagram posts where you can add your images and content. These IG post templates come in 2000 x 2000px format and use free fonts.
Create an eye-catching and creative Instagram post design. This blank Instagram post template is the perfect place to start. Add your own images, select your colours, and adjust the copy. All the files are fully layered and well organized.
How to Use an Editable Instagram Post Template
Wondering how a tool like the Instagram Post Creator can be a lifesaver? Follow these steps to help you create your own striking Instagram ad template. Alternatively, you can follow along over on our Envato Tuts+ YouTube channel:
2. Review the Instagram post templates on offer and select the one you like the most.
3. Customise your blank Instagram post template as much or as little as you like.
Starting with the controls on the left, you can add your own text and change the font style and colour to match your brand.
Moving to the controls on the right, you can change the graphics used in the design and their colour.
Using the settings on the bottom right, you can also change your background image by using any of the ones provided or uploading your own.
You can resize any of your text and graphics and move them around to find the layout that’s right for you. If you’re not happy with the changes you’ve made, you can hit the Reset Layout button to return the design to its original layout.
4. Once you’re satisfied with your Instagram template, hit the download button at the top of the screen.
Download your Instagram template for a small fee, or if you regularly need blank Instagram post templates and other resources like flyers, posters, social media banners, etc., then the monthly plan may be the best deal for you.
And that’s how you use an Instagram post template to make your own unique Instagram post in four simple steps.
10 Best Instagram Post Creator Templates
Check out these Instagram post designs made using the Instagram ad template creator. You can use these as a starting point to create your own Instagram post.
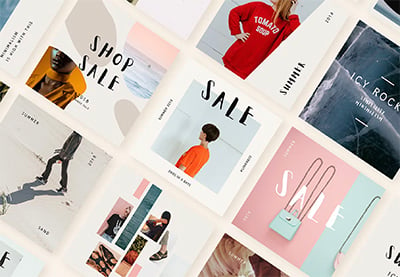
A terrific template for fashion brands that want a professional template for use in Instagram posts, this IG post template offers a gorgeous selection of fonts, loads of cool images, and stylish graphics.
For those times when you want to celebrate LGBTQI people, there is this wonderful editable Instagram Post Template. It’s a creative Instagram post design that inspires equality and love.
This blank Instagram post template will help your post stand out in a busy Instagram timeline. Just upload a photo of your product, change the text, and your template is ready for use.
The best thing about customizing an Instagram post outline is that you can easily make it your own. Here’s an IG post template with a cool photo, banner, and frame colours. You can just edit and add different text and colours for your audience.
Who doesn’t love a great quote? Use this great template for an Instagram post as your go-to signature style for quotes, and update the background and colours to make it uniquely yours.
Lovers of quirky illustration will adore this template theme, which features a wonderful selection of endearing illustrations to which you can add your favourite quotes.
Celebrate your follower count landmark with this awesome editable Instagram post template. Choose your background, add your text, download your template, and upload it to your Instagram account.
A template dedicated to beauty bloggers and others working in the beauty industry, this editable Instagram post template uses fun illustrations and striking text to hold your viewers’ attention.
Here’s an awesome Instagram template for travel businesses. Start your customisation by adding your text, and then select an image or upload your own images, customise the colours, and experiment with the hundreds of great graphics available.
The great thing about templates is that you can access stylish designs with no effort whatsoever. This template is no exception. It would take you much longer to create your own Instagram post template PSD file in Photoshop than the two minutes this awesome template takes to customise.
Create Your Own Unique Instagram Posts
Instagram post templates are a terrific tool for helping you make an Instagram post quickly and easily. Use your favourite template to make your own Instagram post and share it with us on Twitter. We’d love to see what you come up with.


 How to Outline Something in Photoshop
 Marko Kožokar23 Dec 2022
 How to Remove a Color in Photoshop
 Daisy Ein11 Jan 2023
 How to Change the Color of Clothing in Photoshop
 Monika Zagrobelna03 Dec 2022
 How to Erase in a Straight Line in Photoshop
 MissChatz21 Jan 2023
 How to Deselect in Photoshop
 How to Fade an Image in Photoshop
 How to Dehaze a Photo in Photoshop
 Adobe Photoshop for Beginners
 Daniel Walter Scott13 Apr 2023