How to Improve User Experience Design: Tips to Increase Conversion Rates

Post pobrano z: How to Improve User Experience Design: Tips to Increase Conversion Rates

Image by David Schwarzenberg from Pixabay

No one can deny that UX (user experience) is the foundation of any website. This is the main reason why many website owners always look for ways to improve it. Some even spend a lot of money on design because of it.

So, what is UX design exactly? And what is the difference between user interface vs user experience?

UX design is the process of improving user satisfaction through various aspects of a website. These enhancements usually deal with usability, efficiency, and accessibility of a website.

On the other hand, the user interface consists of the elements that a user interacts with when using a digital website or service. Of course, the user interface is a part of the user experience.

Conversion rates are directly proportional to the UX design of a website. After all, according to the latest sales stats, as much as 83% of customers would give a recommendation after a positive experience with a brand.

In other words, a good UX design means much more than an intuitive user flow and stunning layout. 

However, what’s even more important is that a great UX will instantly boost the experience visitors are having while on your website. And that can significantly help with conversions in your sales funnel.

If you are interested in learning how to improve user experience with some great design tips, keep reading.

Create a straightforward call-to-action button

Call-to-action (CTA) buttons are used to attract users towards conversion on a website.

The way people implement these buttons can vary. However, some of the most common ones include:

  • Starting a trial.
  • Signing up for updates.
  • Downloading the app.
  • Booking a consultation.

The CTA on your website needs to be placed on every page of the website. It has been recorded that websites that have a clear CTA have higher conversion rates.

Furthermore, if your website is designed in folds, it is essential to keep your CTA above the fold so that it is easy for users to see.

Bear in mind the following:

  • Be careful when picking the color for your CTA. Use colors that make the CTA stand out and make them big enough to be easily spotted.
  • When writing your CTA text, make sure that it is action-oriented. Do not use passive verbs in the text. The text needs to be subtle but still active enough to prompt the user to take action.
  • Be careful not to include more than five words when writing your CTA.

All in all, a clear and visible CTA is important if you want to improve UX.

All your website pages have to be consistent

When it comes to user experience, consistency means making everything on your website match. 

This includes:

  1. Heading sizes
  2. Font choices
  3. Coloring
  4. Button styles
  5. Spacing
  6. Design elements
  7. Illustration styles
  8. Photo choices

All of the elements need to be themed to make the overall design coherent between pages and on the same page.

For users to have a nice experience as they navigate your website, it is important that they are aware of the fact that they are still on your website. Hence, drastic design changes from one page to the other can make visitors feel lost and confused.

If you need to rearrange elements or add new ones to your website, consider utilizing the power of the drag and drop WordPress page builders.

WordPress is the most widely used website-building platform and the drag and drop feature makes it really easy for non-experts to make design changes.

Fix all 404s
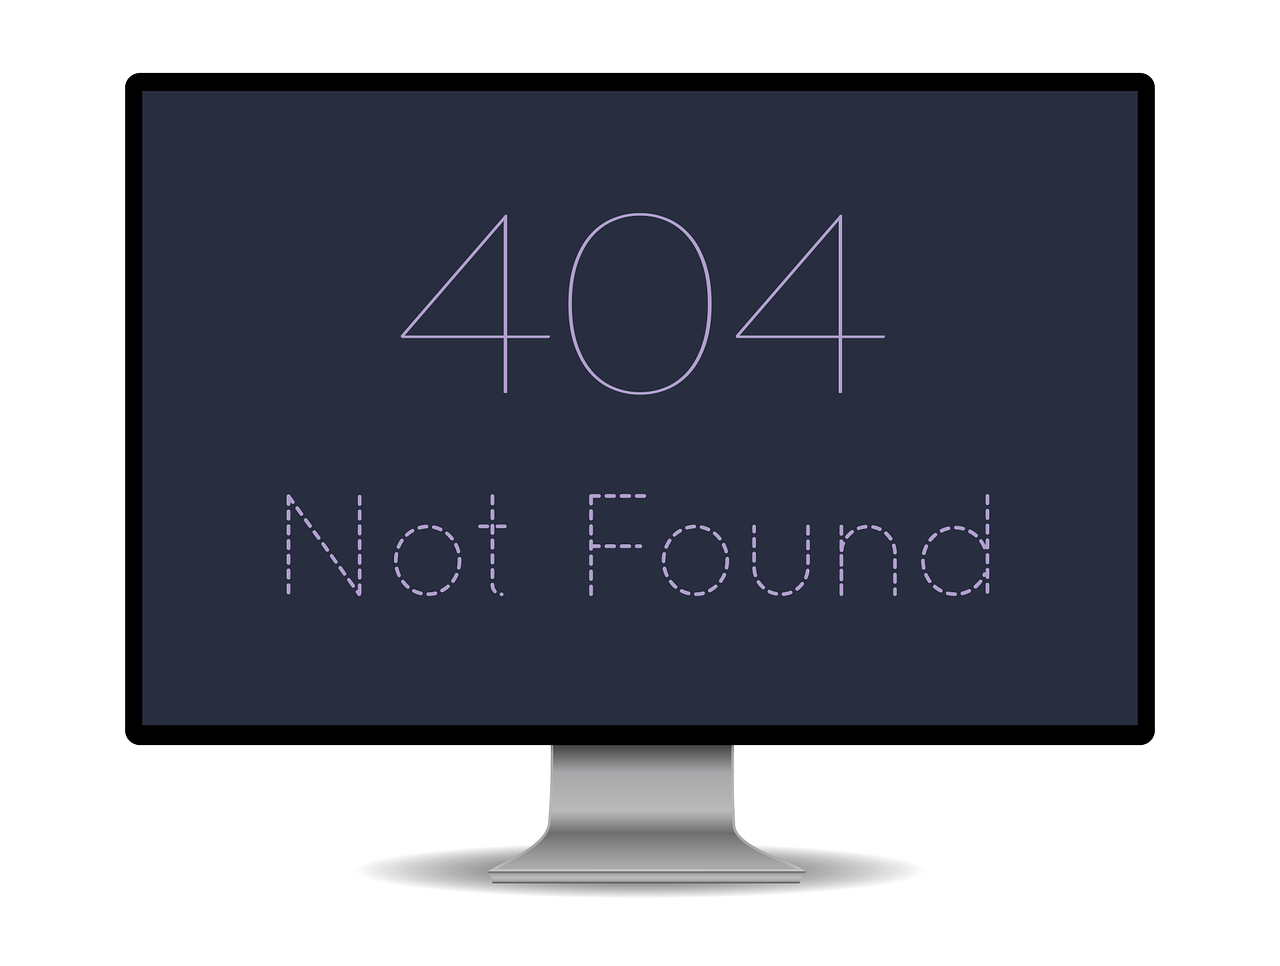
Image by Mocho from Pixabay

Although search engines don’t punish you harshly for soft 404 errors (page not found), a user will.

When a website visitor clicks on an image or link, they expect it to take them to the next place they want to go. It will annoy them if they find a 404 error page. 

Also, it will definitely make them think about whether spending time on your website was a good decision. After all, they can always go to another website for a faster solution. 

Error pages are very frustrating and they completely disrupt the user’s journey throughout your website. Next to slow page load time, they are at the top of the list of unwanted aspects of a website.

If you want to check for 404s, you can set up Google Webmaster tools on your website and check crawl errors. 

Additionally, you can also ensure that when a visitor lands on a 404, the page provides them with the option to get back on track.

Speed up page loading time

It is easy to get frustrated when a web page is loading slowly. This can lead to visitors abandoning your website and moving on to another website where they can enjoy faster loading times.

In general, if a page takes more than 2 seconds to load, the users are most likely to leave the website. Depending on the loading time of your website, users decide if they would like to further visit your website or move to another site.

Remember, improving the website load speed for desktop is not enough. You need to optimize for mobile users too. Since the mobile-first approach is promoted by Google, it is crucial to optimize and design your webpage for mobile users and show you care about them.

Thanks to Google and its tool called PageSpeed Insights, if you enter the URL of the site you want to check, Google will highlight the areas where your page speed is weak.

On top of that, the tool provides suggestions on how you can improve the loading time.

Authentic images are better than stock photos

Images play a significant role in making a website look more professional and pleasing. However, you need to pay attention here too since your photos have to fit the overall design of your pages.

Avoid stock photos for a couple of very simple reasons. Yes, they are cheap (and often free), they are easy to use, but they may do more harm than good.

Stock images look professional. However, your website visitors will figure out these are stock images and thus lose interest before too long. Also, stock images are overused and don’t appeal to the users.

On the other hand, original photos draw more website visitors. The reason for this is that they have a personal approach and the user can easily connect. 

Another thing to bear in mind is that using stock photos shows that you have not invested too much effort in designing the website. Therefore, it won’t look unique, as the visitors might have already seen it on another website.

Therefore, try to use authentic images, no matter how basic and simple they might look.

Be consistent even with your outreach efforts

Image by Andrian Valeanu from Pixabay

Finally, just because outreach campaigns aren’t necessarily something directly related to the website design, it doesn’t mean that the messages you send out should look different and feel different from the content of your website.

In other words, after you learn how to create a newsletter, you should think about conversions and efficient converting email design.

Therefore, you also need to follow some email design practices that can help with UX.

White space

In order for your email design to be appealing, you need an adequate amount of white space around your CTA button.

This use of white space is meant to signal the importance of a given CTA button. Not only will your email look nice this way, but it will also guide a reader’s eyes towards the button.

Directional cues

If you want an effective and simple way to guide your readers to the crucial part of your email, you need to use directional cues. 

These cues will help a person to move in the direction of your CTA, which is, generally speaking, the whole point of the email. Consequently, this enables the user to easily follow the action process, which results in a higher click-through rate for your business.

Therefore, it shouldn’t be emphasized how important it is to use the directional cues in your emails and thus integrate them into your larger campaign and journey for the user.

How to Create a 3D Anaglyph Effect in Photoshop

Post pobrano z: How to Create a 3D Anaglyph Effect in Photoshop

Final product image
What You’ll Be Creating

You can create an easy 3D anaglyph effect in this Photoshop tutorial showing you how to make anaglyph pictures. We will show you how to create this 3D photo effect in less than 60 seconds with this anaglyph tutorial.

A 3D Anaglyph image is one that contains two different
colored images, one for each eye, using filters of typically red and
cyan, although some people may describe it as a red-blue 3D image.

To experience that pop-out stereoscopic photo effect, make sure to use
3D red-cyan glasses to see this cool trick in action. Though it’s known
to be used for photography and film, you can incorporate this look into
your designs and illustrations for an interesting twist.

Let’s take a look at how to create this simple effect in this quick 60-second video below. And check out our selection of 3D Effect Photoshop Actions on Envato Market.

Photoshop in 60 Seconds: 3D Anaglyph Effect

1. How to Create a 3D Anaglyph Photo Effect in Photoshop

Step 1

Double-click the background layer and Name the new layer „Left”. Then hold Control-J to create a Duplicate of this layer, renaming the new copy „Right”.

Setting Up Your Art for a 3D Effect

Step 2

Select the right layer and Right-click to go to Blending Options. Under Blending Options, Advanced Blending, uncheck the Red option for the RGB channels and hit OK.

Uncheck the Red Option in Blending Options

Step 3

Repeat this process with the left layer, Right-click and go to Blending Options, but this time uncheck the Green option for the RGB channels and hit OK.

Uncheck the Green Option for Blending Options

Step 4

With the left layer still selected, grab the Move Tool (V) and press the Left Arrow key between five to ten times to shift the layer to the left. Now select the right layer and press the Right Arrow key several times to shift the layer to the right.

Shift the Layers Right and Left to Create a 3D Effect

Step 5

Then use the Crop Tool (C) to crop away the edges.

Crop the Edges with the Crop Tool

How to Make Anaglyph Pictures—With Photoshop Actions!

Continue working with 3D effects with these great resources! Find more incredible design assets on Envato Market and Envato Elements. Create quick red-blue stereoscopic images with these amazing 3D anaglyph Photoshop action resources which you can download now!

3D Effects Photoshop Action

Master the 3D look with just a few clicks. This first Photoshop action features eight different color options with separate distortion settings. Adjust the effect even more with 17 filters that will make your images pop. Check it out!

3D Effects Photoshop Action

3D Effect Photoshop Action

Need a quick and easy red-blue 3D filter effect? Check out this awesome Photoshop action from Feelfreestudio. Designed for Photoshop versions CS3 and above, this action makes an intense 3D anaglyph you can customize with new colors. 

3D Effect Photoshop Action

Interactive 3D Stereoscopic Effect

Make a special interactive version for your 3D effect. This exclusive Photoshop action comes from mrcharlesbrown. Grab it to enjoy a perfected anaglyph effect that works with Type A and B 3D glasses. Add it to your design arsenal!

Interactive 3D Stereoscopic Effect

Anaglyph 3D Photoshop Action

Stereoscopic 3D effects work brilliantly for movie posters, websites, and videos. Create content you love with this great action that includes a total of eight actions. Easy to use, this non-destructive action will produce professional results without damaging your photos.

Anaglyph 3D Photoshop Action

3D Effect Photoshop Actions

Or check out this simple 3D effect action for a trippy effect. Made by designer ClauGabriel, this action includes well-organized layers that can be customized to your preferences. Style any portrait, object, or landscape photo with a cool red-blue 3D filter effect!

3D Effect Photoshop Actions

More Photo Effect Inspiration

This is part of a series of quick video tutorials on
Envato Tuts+ in which we introduce a range of subjects, all in 60
seconds—just enough to whet your appetite. Let us know in the comments
what you thought of this video and what else you’d like to see explained
in 60 seconds!

Enjoyed this anaglyph tutorial? Want to learn more about Adobe Photoshop and how to create awesome photo effects? Check out the following tutorials below:

Or if you prefer to use Illustrator, try this course on creating 3D text in Adobe Illustrator.

How to Create a 3D Anaglyph Effect in Photoshop

Post pobrano z: How to Create a 3D Anaglyph Effect in Photoshop

Final product image
What You’ll Be Creating

You can create an easy 3D anaglyph effect in this Photoshop tutorial showing you how to make anaglyph pictures. We will show you how to create this 3D photo effect in less than 60 seconds with this anaglyph tutorial.

A 3D Anaglyph image is one that contains two different
colored images, one for each eye, using filters of typically red and
cyan, although some people may describe it as a red-blue 3D image.

To experience that pop-out stereoscopic photo effect, make sure to use
3D red-cyan glasses to see this cool trick in action. Though it’s known
to be used for photography and film, you can incorporate this look into
your designs and illustrations for an interesting twist.

Let’s take a look at how to create this simple effect in this quick 60-second video below. And check out our selection of 3D Effect Photoshop Actions on Envato Market.

Photoshop in 60 Seconds: 3D Anaglyph Effect

1. How to Create a 3D Anaglyph Photo Effect in Photoshop

Step 1

Double-click the background layer and Name the new layer „Left”. Then hold Control-J to create a Duplicate of this layer, renaming the new copy „Right”.

Setting Up Your Art for a 3D Effect

Step 2

Select the right layer and Right-click to go to Blending Options. Under Blending Options, Advanced Blending, uncheck the Red option for the RGB channels and hit OK.

Uncheck the Red Option in Blending Options

Step 3

Repeat this process with the left layer, Right-click and go to Blending Options, but this time uncheck the Green option for the RGB channels and hit OK.

Uncheck the Green Option for Blending Options

Step 4

With the left layer still selected, grab the Move Tool (V) and press the Left Arrow key between five to ten times to shift the layer to the left. Now select the right layer and press the Right Arrow key several times to shift the layer to the right.

Shift the Layers Right and Left to Create a 3D Effect

Step 5

Then use the Crop Tool (C) to crop away the edges.

Crop the Edges with the Crop Tool

How to Make Anaglyph Pictures—With Photoshop Actions!

Continue working with 3D effects with these great resources! Find more incredible design assets on Envato Market and Envato Elements. Create quick red-blue stereoscopic images with these amazing 3D anaglyph Photoshop action resources which you can download now!

3D Effects Photoshop Action

Master the 3D look with just a few clicks. This first Photoshop action features eight different color options with separate distortion settings. Adjust the effect even more with 17 filters that will make your images pop. Check it out!

3D Effects Photoshop Action

3D Effect Photoshop Action

Need a quick and easy red-blue 3D filter effect? Check out this awesome Photoshop action from Feelfreestudio. Designed for Photoshop versions CS3 and above, this action makes an intense 3D anaglyph you can customize with new colors. 

3D Effect Photoshop Action

Interactive 3D Stereoscopic Effect

Make a special interactive version for your 3D effect. This exclusive Photoshop action comes from mrcharlesbrown. Grab it to enjoy a perfected anaglyph effect that works with Type A and B 3D glasses. Add it to your design arsenal!

Interactive 3D Stereoscopic Effect

Anaglyph 3D Photoshop Action

Stereoscopic 3D effects work brilliantly for movie posters, websites, and videos. Create content you love with this great action that includes a total of eight actions. Easy to use, this non-destructive action will produce professional results without damaging your photos.

Anaglyph 3D Photoshop Action

3D Effect Photoshop Actions

Or check out this simple 3D effect action for a trippy effect. Made by designer ClauGabriel, this action includes well-organized layers that can be customized to your preferences. Style any portrait, object, or landscape photo with a cool red-blue 3D filter effect!

3D Effect Photoshop Actions

More Photo Effect Inspiration

This is part of a series of quick video tutorials on
Envato Tuts+ in which we introduce a range of subjects, all in 60
seconds—just enough to whet your appetite. Let us know in the comments
what you thought of this video and what else you’d like to see explained
in 60 seconds!

Enjoyed this anaglyph tutorial? Want to learn more about Adobe Photoshop and how to create awesome photo effects? Check out the following tutorials below:

Or if you prefer to use Illustrator, try this course on creating 3D text in Adobe Illustrator.

How to Create a 3D Anaglyph Effect in Photoshop

Post pobrano z: How to Create a 3D Anaglyph Effect in Photoshop

Final product image
What You’ll Be Creating

You can create an easy 3D anaglyph effect in this Photoshop tutorial showing you how to make anaglyph pictures. We will show you how to create this 3D photo effect in less than 60 seconds with this anaglyph tutorial.

A 3D Anaglyph image is one that contains two different
colored images, one for each eye, using filters of typically red and
cyan, although some people may describe it as a red-blue 3D image.

To experience that pop-out stereoscopic photo effect, make sure to use
3D red-cyan glasses to see this cool trick in action. Though it’s known
to be used for photography and film, you can incorporate this look into
your designs and illustrations for an interesting twist.

Let’s take a look at how to create this simple effect in this quick 60-second video below. And check out our selection of 3D Effect Photoshop Actions on Envato Market.

Photoshop in 60 Seconds: 3D Anaglyph Effect

1. How to Create a 3D Anaglyph Photo Effect in Photoshop

Step 1

Double-click the background layer and Name the new layer „Left”. Then hold Control-J to create a Duplicate of this layer, renaming the new copy „Right”.

Setting Up Your Art for a 3D Effect

Step 2

Select the right layer and Right-click to go to Blending Options. Under Blending Options, Advanced Blending, uncheck the Red option for the RGB channels and hit OK.

Uncheck the Red Option in Blending Options

Step 3

Repeat this process with the left layer, Right-click and go to Blending Options, but this time uncheck the Green option for the RGB channels and hit OK.

Uncheck the Green Option for Blending Options

Step 4

With the left layer still selected, grab the Move Tool (V) and press the Left Arrow key between five to ten times to shift the layer to the left. Now select the right layer and press the Right Arrow key several times to shift the layer to the right.

Shift the Layers Right and Left to Create a 3D Effect

Step 5

Then use the Crop Tool (C) to crop away the edges.

Crop the Edges with the Crop Tool

How to Make Anaglyph Pictures—With Photoshop Actions!

Continue working with 3D effects with these great resources! Find more incredible design assets on Envato Market and Envato Elements. Create quick red-blue stereoscopic images with these amazing 3D anaglyph Photoshop action resources which you can download now!

3D Effects Photoshop Action

Master the 3D look with just a few clicks. This first Photoshop action features eight different color options with separate distortion settings. Adjust the effect even more with 17 filters that will make your images pop. Check it out!

3D Effects Photoshop Action

3D Effect Photoshop Action

Need a quick and easy red-blue 3D filter effect? Check out this awesome Photoshop action from Feelfreestudio. Designed for Photoshop versions CS3 and above, this action makes an intense 3D anaglyph you can customize with new colors. 

3D Effect Photoshop Action

Interactive 3D Stereoscopic Effect

Make a special interactive version for your 3D effect. This exclusive Photoshop action comes from mrcharlesbrown. Grab it to enjoy a perfected anaglyph effect that works with Type A and B 3D glasses. Add it to your design arsenal!

Interactive 3D Stereoscopic Effect

Anaglyph 3D Photoshop Action

Stereoscopic 3D effects work brilliantly for movie posters, websites, and videos. Create content you love with this great action that includes a total of eight actions. Easy to use, this non-destructive action will produce professional results without damaging your photos.

Anaglyph 3D Photoshop Action

3D Effect Photoshop Actions

Or check out this simple 3D effect action for a trippy effect. Made by designer ClauGabriel, this action includes well-organized layers that can be customized to your preferences. Style any portrait, object, or landscape photo with a cool red-blue 3D filter effect!

3D Effect Photoshop Actions

More Photo Effect Inspiration

This is part of a series of quick video tutorials on
Envato Tuts+ in which we introduce a range of subjects, all in 60
seconds—just enough to whet your appetite. Let us know in the comments
what you thought of this video and what else you’d like to see explained
in 60 seconds!

Enjoyed this anaglyph tutorial? Want to learn more about Adobe Photoshop and how to create awesome photo effects? Check out the following tutorials below:

Or if you prefer to use Illustrator, try this course on creating 3D text in Adobe Illustrator.

How to Create a 3D Anaglyph Effect in Photoshop

Post pobrano z: How to Create a 3D Anaglyph Effect in Photoshop

Final product image
What You’ll Be Creating

You can create an easy 3D anaglyph effect in this Photoshop tutorial showing you how to make anaglyph pictures. We will show you how to create this 3D photo effect in less than 60 seconds with this anaglyph tutorial.

A 3D Anaglyph image is one that contains two different
colored images, one for each eye, using filters of typically red and
cyan, although some people may describe it as a red-blue 3D image.

To experience that pop-out stereoscopic photo effect, make sure to use
3D red-cyan glasses to see this cool trick in action. Though it’s known
to be used for photography and film, you can incorporate this look into
your designs and illustrations for an interesting twist.

Let’s take a look at how to create this simple effect in this quick 60-second video below. And check out our selection of 3D Effect Photoshop Actions on Envato Market.

Photoshop in 60 Seconds: 3D Anaglyph Effect

1. How to Create a 3D Anaglyph Photo Effect in Photoshop

Step 1

Double-click the background layer and Name the new layer „Left”. Then hold Control-J to create a Duplicate of this layer, renaming the new copy „Right”.

Setting Up Your Art for a 3D Effect

Step 2

Select the right layer and Right-click to go to Blending Options. Under Blending Options, Advanced Blending, uncheck the Red option for the RGB channels and hit OK.

Uncheck the Red Option in Blending Options

Step 3

Repeat this process with the left layer, Right-click and go to Blending Options, but this time uncheck the Green option for the RGB channels and hit OK.

Uncheck the Green Option for Blending Options

Step 4

With the left layer still selected, grab the Move Tool (V) and press the Left Arrow key between five to ten times to shift the layer to the left. Now select the right layer and press the Right Arrow key several times to shift the layer to the right.

Shift the Layers Right and Left to Create a 3D Effect

Step 5

Then use the Crop Tool (C) to crop away the edges.

Crop the Edges with the Crop Tool

How to Make Anaglyph Pictures—With Photoshop Actions!

Continue working with 3D effects with these great resources! Find more incredible design assets on Envato Market and Envato Elements. Create quick red-blue stereoscopic images with these amazing 3D anaglyph Photoshop action resources which you can download now!

3D Effects Photoshop Action

Master the 3D look with just a few clicks. This first Photoshop action features eight different color options with separate distortion settings. Adjust the effect even more with 17 filters that will make your images pop. Check it out!

3D Effects Photoshop Action

3D Effect Photoshop Action

Need a quick and easy red-blue 3D filter effect? Check out this awesome Photoshop action from Feelfreestudio. Designed for Photoshop versions CS3 and above, this action makes an intense 3D anaglyph you can customize with new colors. 

3D Effect Photoshop Action

Interactive 3D Stereoscopic Effect

Make a special interactive version for your 3D effect. This exclusive Photoshop action comes from mrcharlesbrown. Grab it to enjoy a perfected anaglyph effect that works with Type A and B 3D glasses. Add it to your design arsenal!

Interactive 3D Stereoscopic Effect

Anaglyph 3D Photoshop Action

Stereoscopic 3D effects work brilliantly for movie posters, websites, and videos. Create content you love with this great action that includes a total of eight actions. Easy to use, this non-destructive action will produce professional results without damaging your photos.

Anaglyph 3D Photoshop Action

3D Effect Photoshop Actions

Or check out this simple 3D effect action for a trippy effect. Made by designer ClauGabriel, this action includes well-organized layers that can be customized to your preferences. Style any portrait, object, or landscape photo with a cool red-blue 3D filter effect!

3D Effect Photoshop Actions

More Photo Effect Inspiration

This is part of a series of quick video tutorials on
Envato Tuts+ in which we introduce a range of subjects, all in 60
seconds—just enough to whet your appetite. Let us know in the comments
what you thought of this video and what else you’d like to see explained
in 60 seconds!

Enjoyed this anaglyph tutorial? Want to learn more about Adobe Photoshop and how to create awesome photo effects? Check out the following tutorials below:

Or if you prefer to use Illustrator, try this course on creating 3D text in Adobe Illustrator.

How to Create a 3D Anaglyph Effect in Photoshop

Post pobrano z: How to Create a 3D Anaglyph Effect in Photoshop

Final product image
What You’ll Be Creating

You can create an easy 3D anaglyph effect in this Photoshop tutorial showing you how to make anaglyph pictures. We will show you how to create this 3D photo effect in less than 60 seconds with this anaglyph tutorial.

A 3D Anaglyph image is one that contains two different
colored images, one for each eye, using filters of typically red and
cyan, although some people may describe it as a red-blue 3D image.

To experience that pop-out stereoscopic photo effect, make sure to use
3D red-cyan glasses to see this cool trick in action. Though it’s known
to be used for photography and film, you can incorporate this look into
your designs and illustrations for an interesting twist.

Let’s take a look at how to create this simple effect in this quick 60-second video below. And check out our selection of 3D Effect Photoshop Actions on Envato Market.

Photoshop in 60 Seconds: 3D Anaglyph Effect

1. How to Create a 3D Anaglyph Photo Effect in Photoshop

Step 1

Double-click the background layer and Name the new layer „Left”. Then hold Control-J to create a Duplicate of this layer, renaming the new copy „Right”.

Setting Up Your Art for a 3D Effect

Step 2

Select the right layer and Right-click to go to Blending Options. Under Blending Options, Advanced Blending, uncheck the Red option for the RGB channels and hit OK.

Uncheck the Red Option in Blending Options

Step 3

Repeat this process with the left layer, Right-click and go to Blending Options, but this time uncheck the Green option for the RGB channels and hit OK.

Uncheck the Green Option for Blending Options

Step 4

With the left layer still selected, grab the Move Tool (V) and press the Left Arrow key between five to ten times to shift the layer to the left. Now select the right layer and press the Right Arrow key several times to shift the layer to the right.

Shift the Layers Right and Left to Create a 3D Effect

Step 5

Then use the Crop Tool (C) to crop away the edges.

Crop the Edges with the Crop Tool

How to Make Anaglyph Pictures—With Photoshop Actions!

Continue working with 3D effects with these great resources! Find more incredible design assets on Envato Market and Envato Elements. Create quick red-blue stereoscopic images with these amazing 3D anaglyph Photoshop action resources which you can download now!

3D Effects Photoshop Action

Master the 3D look with just a few clicks. This first Photoshop action features eight different color options with separate distortion settings. Adjust the effect even more with 17 filters that will make your images pop. Check it out!

3D Effects Photoshop Action

3D Effect Photoshop Action

Need a quick and easy red-blue 3D filter effect? Check out this awesome Photoshop action from Feelfreestudio. Designed for Photoshop versions CS3 and above, this action makes an intense 3D anaglyph you can customize with new colors. 

3D Effect Photoshop Action

Interactive 3D Stereoscopic Effect

Make a special interactive version for your 3D effect. This exclusive Photoshop action comes from mrcharlesbrown. Grab it to enjoy a perfected anaglyph effect that works with Type A and B 3D glasses. Add it to your design arsenal!

Interactive 3D Stereoscopic Effect

Anaglyph 3D Photoshop Action

Stereoscopic 3D effects work brilliantly for movie posters, websites, and videos. Create content you love with this great action that includes a total of eight actions. Easy to use, this non-destructive action will produce professional results without damaging your photos.

Anaglyph 3D Photoshop Action

3D Effect Photoshop Actions

Or check out this simple 3D effect action for a trippy effect. Made by designer ClauGabriel, this action includes well-organized layers that can be customized to your preferences. Style any portrait, object, or landscape photo with a cool red-blue 3D filter effect!

3D Effect Photoshop Actions

More Photo Effect Inspiration

This is part of a series of quick video tutorials on
Envato Tuts+ in which we introduce a range of subjects, all in 60
seconds—just enough to whet your appetite. Let us know in the comments
what you thought of this video and what else you’d like to see explained
in 60 seconds!

Enjoyed this anaglyph tutorial? Want to learn more about Adobe Photoshop and how to create awesome photo effects? Check out the following tutorials below:

Or if you prefer to use Illustrator, try this course on creating 3D text in Adobe Illustrator.

How to Create a 3D Anaglyph Effect in Photoshop

Post pobrano z: How to Create a 3D Anaglyph Effect in Photoshop

Final product image
What You’ll Be Creating

You can create an easy 3D anaglyph effect in this Photoshop tutorial showing you how to make anaglyph pictures. We will show you how to create this 3D photo effect in less than 60 seconds with this anaglyph tutorial.

A 3D Anaglyph image is one that contains two different
colored images, one for each eye, using filters of typically red and
cyan, although some people may describe it as a red-blue 3D image.

To experience that pop-out stereoscopic photo effect, make sure to use
3D red-cyan glasses to see this cool trick in action. Though it’s known
to be used for photography and film, you can incorporate this look into
your designs and illustrations for an interesting twist.

Let’s take a look at how to create this simple effect in this quick 60-second video below. And check out our selection of 3D Effect Photoshop Actions on Envato Market.

Photoshop in 60 Seconds: 3D Anaglyph Effect

1. How to Create a 3D Anaglyph Photo Effect in Photoshop

Step 1

Double-click the background layer and Name the new layer „Left”. Then hold Control-J to create a Duplicate of this layer, renaming the new copy „Right”.

Setting Up Your Art for a 3D Effect

Step 2

Select the right layer and Right-click to go to Blending Options. Under Blending Options, Advanced Blending, uncheck the Red option for the RGB channels and hit OK.

Uncheck the Red Option in Blending Options

Step 3

Repeat this process with the left layer, Right-click and go to Blending Options, but this time uncheck the Green option for the RGB channels and hit OK.

Uncheck the Green Option for Blending Options

Step 4

With the left layer still selected, grab the Move Tool (V) and press the Left Arrow key between five to ten times to shift the layer to the left. Now select the right layer and press the Right Arrow key several times to shift the layer to the right.

Shift the Layers Right and Left to Create a 3D Effect

Step 5

Then use the Crop Tool (C) to crop away the edges.

Crop the Edges with the Crop Tool

How to Make Anaglyph Pictures—With Photoshop Actions!

Continue working with 3D effects with these great resources! Find more incredible design assets on Envato Market and Envato Elements. Create quick red-blue stereoscopic images with these amazing 3D anaglyph Photoshop action resources which you can download now!

3D Effects Photoshop Action

Master the 3D look with just a few clicks. This first Photoshop action features eight different color options with separate distortion settings. Adjust the effect even more with 17 filters that will make your images pop. Check it out!

3D Effects Photoshop Action

3D Effect Photoshop Action

Need a quick and easy red-blue 3D filter effect? Check out this awesome Photoshop action from Feelfreestudio. Designed for Photoshop versions CS3 and above, this action makes an intense 3D anaglyph you can customize with new colors. 

3D Effect Photoshop Action

Interactive 3D Stereoscopic Effect

Make a special interactive version for your 3D effect. This exclusive Photoshop action comes from mrcharlesbrown. Grab it to enjoy a perfected anaglyph effect that works with Type A and B 3D glasses. Add it to your design arsenal!

Interactive 3D Stereoscopic Effect

Anaglyph 3D Photoshop Action

Stereoscopic 3D effects work brilliantly for movie posters, websites, and videos. Create content you love with this great action that includes a total of eight actions. Easy to use, this non-destructive action will produce professional results without damaging your photos.

Anaglyph 3D Photoshop Action

3D Effect Photoshop Actions

Or check out this simple 3D effect action for a trippy effect. Made by designer ClauGabriel, this action includes well-organized layers that can be customized to your preferences. Style any portrait, object, or landscape photo with a cool red-blue 3D filter effect!

3D Effect Photoshop Actions

More Photo Effect Inspiration

This is part of a series of quick video tutorials on
Envato Tuts+ in which we introduce a range of subjects, all in 60
seconds—just enough to whet your appetite. Let us know in the comments
what you thought of this video and what else you’d like to see explained
in 60 seconds!

Enjoyed this anaglyph tutorial? Want to learn more about Adobe Photoshop and how to create awesome photo effects? Check out the following tutorials below:

Or if you prefer to use Illustrator, try this course on creating 3D text in Adobe Illustrator.

Agregator najlepszych postów o designie, webdesignie, cssie i Internecie