
Cartoon Astronaut Logo


Cartoon Astronaut Logo
Besouro

Wools of Nations

How to Make a Twitch Banner Design Using a Banner Maker
Post pobrano z: How to Make a Twitch Banner Design Using a Banner Maker

Creating a Twitch banner design can sometimes prove to be a tedious and difficult task, especially if you’ve never really dabbled with graphic design tools before. But what if I told you that there’s an easy solution that can help you create a beautiful digital banner in a manner of seconds using Placeit’s online banner maker? Well, if that sounds interesting then follow me in this quick tutorial as I will walk you through the entire process.
1. What Is Placeit?
Before we begin, I
want to take a couple of moments and quickly talk about what Placeit is and how
it can help you.
If you aren’t a
designer yourself, most of the time that means that you won’t have access to
the tools that designers usually use, such as Adobe Illustrator, Adobe Photoshop,
Sketch, etc.
But what if
sometimes you actually need to create something yourself, but don’t feel like
spending a lot of money on a graphics suite that you probably won’t use all
that often?
Well, when that
happens, Placeit can be a better fit, since it comes with a set of online tools
that help you create digital banners, mockups, logos, etc. using just a couple of
clicks.
That being said, we’re going to see how easy it is to create your very
own Twitch banner using Placeit’s online banner generator.

2. How to Access the
Twitch Banner Maker
Before we can start
working on the actual banner design, we first need to navigate to the correct section
of the website that houses the Twitch Banner Maker.
Step 1
If you take a quick look at the horizontal navigation menu found next to
the logo, you’ll notice that you have a category called Designs.

Step 2
As soon as you hover or click on the link, it will bring up a horizontal
submenu, to the right of which you’ll find a tool called Twitch Banner Maker. If your browser’s window isn’t fully occupying the width of your screen, you can either scroll through the menu using the little right-facing arrow or
you can find the link within the page’s left-sided Design Templates menu. Of
course, you can always use the search function, which should bring up all the
available banner templates.

Step 3
Here, you have a library of 85 different available Twitch banner templates (at the
moment of this tutorial), from which you can choose the design that fits your needs.

3. How to Make a Banner Using the
Twitch Banner Maker
At this point, let’s
say that we’ve found a banner template that we really like and we want to gradually
customize it in order to make it our own.
For example, I’ve
decided to go with this gaming one, which gives you the option of adding your
social links as well as adjusting the look and position of its elements using
interactive editing.
No matter what template you end up using, the editing layout will always
be the same. On the left side you’ll have all your text-related controls, while
on the right side you’ll find all your background and shape-related ones. All
the changes that you make will immediately be previewed within the banner template preview, which is front and center, allowing you to adjust it as you please.

Step 1
Let’s start by adjusting some of the text found within the banner. For
example, I want to change the channel’s name from Zion-Sports to Nitro Gaming.
To do this, I’ll simply select the text found within the top-left input box,
and then overwrite it with my own.
As you can see, the tool lets me know the amount of characters that I’m currently using out of the total allowed.

Step 2
I can easily change the font by clicking on the dropdown box found
underneath and choosing a new one from the available list.

Step 3
You can also change the color of your text by clicking on the little
dropdown box found next to the font, which will allow you to use one of the predefined
values or a new one of your own if you click on the More button.

Step 4
You can also completely remove the current text field (or any other one), by unchecking its
little checkbox, which will hide both it and its underlying decorative shape.

Step 5
Next, I’m going to customize the larger catchphrase, by going through
the same settings presented for the channel’s name.

Step 6
Lastly, we have the social media handles, which I can individually rename
and then customize to my own desire. Since at this point I’m pretty much done
working on my text-based elements, I can now move on to customizing my banner’s
different composing elements.

Step 7
If we move on to the right side of the browser’s window, we’ll see that we
have a couple more options, which allow us to control the look and feel of our
non-text-based elements.
The first is one is called Accent Color, and it enables
us to change the color of our little avatar.

Step 8
Next, we have Icon Color, which as the name
implies allows you to change the color of the little social icons.

Step 9
I then have the option of changing the colors
for the two banner shapes (Banner 1 & Banner 2), but I’m going to leave
them white for this current example.

Step 10
The next option is called Main Color and
controls the fill shape of the avatar illustration. As with the banners, I’m
going to leave this set to default (white) in order to maintain the color
scheme that I’m trying to build.

Step 11
Moving on down, we have the ability of changing
the avatar itself using one of the pre-created designs, or uploading a custom one
of our own. Personally, I ended up using one of the provided ones, which due to
its high quality proved to be a perfect fit.

Step 12
Finally, we have another option called
Background, which as the name implies allows us to change the color of our
background.

Step 13
If I feel that some elements could use a
little adjusting, I can easily click on them, which will bring up a bounding box
that I can then use in order to resize or reposition that specific element. If for
some reason I’m not happy with the changes, I can easily undo them using the Reset Layout button.

Step 14
As soon as I’m happy with how my banner design ended up looking, I can
easily download it by clicking the Download
button, which will charge me a small fee each time I use the banner template generator.

4. How to Upload Your
Banner to Twitch
So you’ve finished
creating your awesome banner using Placeit’s online banner generator, but how do you go about using it on
Twitch?
Well, first you need to make sure you have an account and are already logged in to it. Once you’re within your account, simply go to Settings
> Profile Banner and then click on the Update button in order to upload your digital banner.

Once you’ve uploaded your design, you can go to your channel, and you should be able to see your new Twitch banner in all its glory.

Great Work!
As always, I hope you’ve found this tutorial useful, and if you have any
questions, feel free to post them within the comments section and I’ll get back
to you as soon as I can!

Expand Your Designer Skills!
Just finished going through this quick tutorial, and feel like learning more of what it takes to become a visual tinkerer? Well, if that’s the case then you’re in luck since I’ve put together this little list which should get you up and ready in no time!
-

What Is a Mockup?
Always wondered what a „mockup” is but never managed to fully figure it out? Well, in today’s video, we’re going to break it down and see how easy it is to… -

Different Image File Types and Formats
From file type to file format, we’re going to explore the meaning of these notions and learn what are the most common images that are used right now. -

New Course: Adobe Illustrator for Beginners
If you’ve never opened Illustrator before, our new course is for you! Adobe Illustrator for Beginners will show you the easy way to make beautiful artwork in… -

The A to Z of Affinity Designer
Affinity Designer is a powerful program that allows you to create and combine both raster and vector graphics. This A to Z list breaks down all the tools and… -

Transitioning From Adobe Illustrator to Affinity Designer
Learn all about the experience of switching from Adobe Illustrator to Affinity Designer, and the key obstacles to overcome.

How to Make a Twitch Banner Design Using a Banner Maker
Post pobrano z: How to Make a Twitch Banner Design Using a Banner Maker
Creating a Twitch banner design can sometimes prove to be a tedious and difficult task, especially if you’ve never really dabbled with graphic design tools before. But what if I told you that there’s an easy solution that can help you create a beautiful digital banner in a manner of seconds using Placeit’s online banner maker? Well, if that sounds interesting then follow me in this quick tutorial as I will walk you through the entire process.
1. What Is Placeit?
Before we begin, I
want to take a couple of moments and quickly talk about what Placeit is and how
it can help you.
If you aren’t a
designer yourself, most of the time that means that you won’t have access to
the tools that designers usually use, such as Adobe Illustrator, Adobe Photoshop,
Sketch, etc.
But what if
sometimes you actually need to create something yourself, but don’t feel like
spending a lot of money on a graphics suite that you probably won’t use all
that often?
Well, when that
happens, Placeit can be a better fit, since it comes with a set of online tools
that help you create digital banners, mockups, logos, etc. using just a couple of
clicks.
That being said, we’re going to see how easy it is to create your very
own Twitch banner using Placeit’s online banner generator.
2. How to Access the
Twitch Banner Maker
Before we can start
working on the actual banner design, we first need to navigate to the correct section
of the website that houses the Twitch Banner Maker.
Step 1
If you take a quick look at the horizontal navigation menu found next to
the logo, you’ll notice that you have a category called Designs.
Step 2
As soon as you hover or click on the link, it will bring up a horizontal
submenu, to the right of which you’ll find a tool called Twitch Banner Maker. If your browser’s window isn’t fully occupying the width of your screen, you can either scroll through the menu using the little right-facing arrow or
you can find the link within the page’s left-sided Design Templates menu. Of
course, you can always use the search function, which should bring up all the
available banner templates.
Step 3
Here, you have a library of 85 different available Twitch banner templates (at the
moment of this tutorial), from which you can choose the design that fits your needs.
3. How to Make a Banner Using the
Twitch Banner Maker
At this point, let’s
say that we’ve found a banner template that we really like and we want to gradually
customize it in order to make it our own.
For example, I’ve
decided to go with this gaming one, which gives you the option of adding your
social links as well as adjusting the look and position of its elements using
interactive editing.
No matter what template you end up using, the editing layout will always
be the same. On the left side you’ll have all your text-related controls, while
on the right side you’ll find all your background and shape-related ones. All
the changes that you make will immediately be previewed within the banner template preview, which is front and center, allowing you to adjust it as you please.
Step 1
Let’s start by adjusting some of the text found within the banner. For
example, I want to change the channel’s name from Zion-Sports to Nitro Gaming.
To do this, I’ll simply select the text found within the top-left input box,
and then overwrite it with my own.
As you can see, the tool lets me know the amount of characters that I’m currently using out of the total allowed.
Step 2
I can easily change the font by clicking on the dropdown box found
underneath and choosing a new one from the available list.
Step 3
You can also change the color of your text by clicking on the little
dropdown box found next to the font, which will allow you to use one of the predefined
values or a new one of your own if you click on the More button.
Step 4
You can also completely remove the current text field (or any other one), by unchecking its
little checkbox, which will hide both it and its underlying decorative shape.
Step 5
Next, I’m going to customize the larger catchphrase, by going through
the same settings presented for the channel’s name.
Step 6
Lastly, we have the social media handles, which I can individually rename
and then customize to my own desire. Since at this point I’m pretty much done
working on my text-based elements, I can now move on to customizing my banner’s
different composing elements.
Step 7
If we move on to the right side of the browser’s window, we’ll see that we
have a couple more options, which allow us to control the look and feel of our
non-text-based elements.
The first is one is called Accent Color, and it enables
us to change the color of our little avatar.
Step 8
Next, we have Icon Color, which as the name
implies allows you to change the color of the little social icons.
Step 9
I then have the option of changing the colors
for the two banner shapes (Banner 1 & Banner 2), but I’m going to leave
them white for this current example.
Step 10
The next option is called Main Color and
controls the fill shape of the avatar illustration. As with the banners, I’m
going to leave this set to default (white) in order to maintain the color
scheme that I’m trying to build.
Step 11
Moving on down, we have the ability of changing
the avatar itself using one of the pre-created designs, or uploading a custom one
of our own. Personally, I ended up using one of the provided ones, which due to
its high quality proved to be a perfect fit.
Step 12
Finally, we have another option called
Background, which as the name implies allows us to change the color of our
background.
Step 13
If I feel that some elements could use a
little adjusting, I can easily click on them, which will bring up a bounding box
that I can then use in order to resize or reposition that specific element. If for
some reason I’m not happy with the changes, I can easily undo them using the Reset Layout button.
Step 14
As soon as I’m happy with how my banner design ended up looking, I can
easily download it by clicking the Download
button, which will charge me a small fee each time I use the banner template generator.
4. How to Upload Your
Banner to Twitch
So you’ve finished
creating your awesome banner using Placeit’s online banner generator, but how do you go about using it on
Twitch?
Well, first you need to make sure you have an account and are already logged in to it. Once you’re within your account, simply go to Settings
> Profile Banner and then click on the Update button in order to upload your digital banner.
Once you’ve uploaded your design, you can go to your channel, and you should be able to see your new Twitch banner in all its glory.
Great Work!
As always, I hope you’ve found this tutorial useful, and if you have any
questions, feel free to post them within the comments section and I’ll get back
to you as soon as I can!
Expand Your Designer Skills!
Just finished going through this quick tutorial, and feel like learning more of what it takes to become a visual tinkerer? Well, if that’s the case then you’re in luck since I’ve put together this little list which should get you up and ready in no time!
-
What Is a Mockup?
Always wondered what a „mockup” is but never managed to fully figure it out? Well, in today’s video, we’re going to break it down and see how easy it is to… -
Different Image File Types and Formats
From file type to file format, we’re going to explore the meaning of these notions and learn what are the most common images that are used right now. -
New Course: Adobe Illustrator for Beginners
If you’ve never opened Illustrator before, our new course is for you! Adobe Illustrator for Beginners will show you the easy way to make beautiful artwork in… -
The A to Z of Affinity Designer
Affinity Designer is a powerful program that allows you to create and combine both raster and vector graphics. This A to Z list breaks down all the tools and… -
Transitioning From Adobe Illustrator to Affinity Designer
Learn all about the experience of switching from Adobe Illustrator to Affinity Designer, and the key obstacles to overcome.
How to Make a Twitch Banner Design Using a Banner Maker
Post pobrano z: How to Make a Twitch Banner Design Using a Banner Maker
Creating a Twitch banner design can sometimes prove to be a tedious and difficult task, especially if you’ve never really dabbled with graphic design tools before. But what if I told you that there’s an easy solution that can help you create a beautiful digital banner in a manner of seconds using Placeit’s online banner maker? Well, if that sounds interesting then follow me in this quick tutorial as I will walk you through the entire process.
1. What Is Placeit?
Before we begin, I
want to take a couple of moments and quickly talk about what Placeit is and how
it can help you.
If you aren’t a
designer yourself, most of the time that means that you won’t have access to
the tools that designers usually use, such as Adobe Illustrator, Adobe Photoshop,
Sketch, etc.
But what if
sometimes you actually need to create something yourself, but don’t feel like
spending a lot of money on a graphics suite that you probably won’t use all
that often?
Well, when that
happens, Placeit can be a better fit, since it comes with a set of online tools
that help you create digital banners, mockups, logos, etc. using just a couple of
clicks.
That being said, we’re going to see how easy it is to create your very
own Twitch banner using Placeit’s online banner generator.
2. How to Access the
Twitch Banner Maker
Before we can start
working on the actual banner design, we first need to navigate to the correct section
of the website that houses the Twitch Banner Maker.
Step 1
If you take a quick look at the horizontal navigation menu found next to
the logo, you’ll notice that you have a category called Designs.
Step 2
As soon as you hover or click on the link, it will bring up a horizontal
submenu, to the right of which you’ll find a tool called Twitch Banner Maker. If your browser’s window isn’t fully occupying the width of your screen, you can either scroll through the menu using the little right-facing arrow or
you can find the link within the page’s left-sided Design Templates menu. Of
course, you can always use the search function, which should bring up all the
available banner templates.
Step 3
Here, you have a library of 85 different available Twitch banner templates (at the
moment of this tutorial), from which you can choose the design that fits your needs.
3. How to Make a Banner Using the
Twitch Banner Maker
At this point, let’s
say that we’ve found a banner template that we really like and we want to gradually
customize it in order to make it our own.
For example, I’ve
decided to go with this gaming one, which gives you the option of adding your
social links as well as adjusting the look and position of its elements using
interactive editing.
No matter what template you end up using, the editing layout will always
be the same. On the left side you’ll have all your text-related controls, while
on the right side you’ll find all your background and shape-related ones. All
the changes that you make will immediately be previewed within the banner template preview, which is front and center, allowing you to adjust it as you please.
Step 1
Let’s start by adjusting some of the text found within the banner. For
example, I want to change the channel’s name from Zion-Sports to Nitro Gaming.
To do this, I’ll simply select the text found within the top-left input box,
and then overwrite it with my own.
As you can see, the tool lets me know the amount of characters that I’m currently using out of the total allowed.
Step 2
I can easily change the font by clicking on the dropdown box found
underneath and choosing a new one from the available list.
Step 3
You can also change the color of your text by clicking on the little
dropdown box found next to the font, which will allow you to use one of the predefined
values or a new one of your own if you click on the More button.
Step 4
You can also completely remove the current text field (or any other one), by unchecking its
little checkbox, which will hide both it and its underlying decorative shape.
Step 5
Next, I’m going to customize the larger catchphrase, by going through
the same settings presented for the channel’s name.
Step 6
Lastly, we have the social media handles, which I can individually rename
and then customize to my own desire. Since at this point I’m pretty much done
working on my text-based elements, I can now move on to customizing my banner’s
different composing elements.
Step 7
If we move on to the right side of the browser’s window, we’ll see that we
have a couple more options, which allow us to control the look and feel of our
non-text-based elements.
The first is one is called Accent Color, and it enables
us to change the color of our little avatar.
Step 8
Next, we have Icon Color, which as the name
implies allows you to change the color of the little social icons.
Step 9
I then have the option of changing the colors
for the two banner shapes (Banner 1 & Banner 2), but I’m going to leave
them white for this current example.
Step 10
The next option is called Main Color and
controls the fill shape of the avatar illustration. As with the banners, I’m
going to leave this set to default (white) in order to maintain the color
scheme that I’m trying to build.
Step 11
Moving on down, we have the ability of changing
the avatar itself using one of the pre-created designs, or uploading a custom one
of our own. Personally, I ended up using one of the provided ones, which due to
its high quality proved to be a perfect fit.
Step 12
Finally, we have another option called
Background, which as the name implies allows us to change the color of our
background.
Step 13
If I feel that some elements could use a
little adjusting, I can easily click on them, which will bring up a bounding box
that I can then use in order to resize or reposition that specific element. If for
some reason I’m not happy with the changes, I can easily undo them using the Reset Layout button.
Step 14
As soon as I’m happy with how my banner design ended up looking, I can
easily download it by clicking the Download
button, which will charge me a small fee each time I use the banner template generator.
4. How to Upload Your
Banner to Twitch
So you’ve finished
creating your awesome banner using Placeit’s online banner generator, but how do you go about using it on
Twitch?
Well, first you need to make sure you have an account and are already logged in to it. Once you’re within your account, simply go to Settings
> Profile Banner and then click on the Update button in order to upload your digital banner.
Once you’ve uploaded your design, you can go to your channel, and you should be able to see your new Twitch banner in all its glory.
Great Work!
As always, I hope you’ve found this tutorial useful, and if you have any
questions, feel free to post them within the comments section and I’ll get back
to you as soon as I can!
Expand Your Designer Skills!
Just finished going through this quick tutorial, and feel like learning more of what it takes to become a visual tinkerer? Well, if that’s the case then you’re in luck since I’ve put together this little list which should get you up and ready in no time!
-
What Is a Mockup?
Always wondered what a „mockup” is but never managed to fully figure it out? Well, in today’s video, we’re going to break it down and see how easy it is to… -
Different Image File Types and Formats
From file type to file format, we’re going to explore the meaning of these notions and learn what are the most common images that are used right now. -
New Course: Adobe Illustrator for Beginners
If you’ve never opened Illustrator before, our new course is for you! Adobe Illustrator for Beginners will show you the easy way to make beautiful artwork in… -
The A to Z of Affinity Designer
Affinity Designer is a powerful program that allows you to create and combine both raster and vector graphics. This A to Z list breaks down all the tools and… -
Transitioning From Adobe Illustrator to Affinity Designer
Learn all about the experience of switching from Adobe Illustrator to Affinity Designer, and the key obstacles to overcome.
How to Make a Twitch Banner Design Using a Banner Maker
Post pobrano z: How to Make a Twitch Banner Design Using a Banner Maker
Creating a Twitch banner design can sometimes prove to be a tedious and difficult task, especially if you’ve never really dabbled with graphic design tools before. But what if I told you that there’s an easy solution that can help you create a beautiful digital banner in a manner of seconds using Placeit’s online banner maker? Well, if that sounds interesting then follow me in this quick tutorial as I will walk you through the entire process.
1. What Is Placeit?
Before we begin, I
want to take a couple of moments and quickly talk about what Placeit is and how
it can help you.
If you aren’t a
designer yourself, most of the time that means that you won’t have access to
the tools that designers usually use, such as Adobe Illustrator, Adobe Photoshop,
Sketch, etc.
But what if
sometimes you actually need to create something yourself, but don’t feel like
spending a lot of money on a graphics suite that you probably won’t use all
that often?
Well, when that
happens, Placeit can be a better fit, since it comes with a set of online tools
that help you create digital banners, mockups, logos, etc. using just a couple of
clicks.
That being said, we’re going to see how easy it is to create your very
own Twitch banner using Placeit’s online banner generator.
2. How to Access the
Twitch Banner Maker
Before we can start
working on the actual banner design, we first need to navigate to the correct section
of the website that houses the Twitch Banner Maker.
Step 1
If you take a quick look at the horizontal navigation menu found next to
the logo, you’ll notice that you have a category called Designs.
Step 2
As soon as you hover or click on the link, it will bring up a horizontal
submenu, to the right of which you’ll find a tool called Twitch Banner Maker. If your browser’s window isn’t fully occupying the width of your screen, you can either scroll through the menu using the little right-facing arrow or
you can find the link within the page’s left-sided Design Templates menu. Of
course, you can always use the search function, which should bring up all the
available banner templates.
Step 3
Here, you have a library of 85 different available Twitch banner templates (at the
moment of this tutorial), from which you can choose the design that fits your needs.
3. How to Make a Banner Using the
Twitch Banner Maker
At this point, let’s
say that we’ve found a banner template that we really like and we want to gradually
customize it in order to make it our own.
For example, I’ve
decided to go with this gaming one, which gives you the option of adding your
social links as well as adjusting the look and position of its elements using
interactive editing.
No matter what template you end up using, the editing layout will always
be the same. On the left side you’ll have all your text-related controls, while
on the right side you’ll find all your background and shape-related ones. All
the changes that you make will immediately be previewed within the banner template preview, which is front and center, allowing you to adjust it as you please.
Step 1
Let’s start by adjusting some of the text found within the banner. For
example, I want to change the channel’s name from Zion-Sports to Nitro Gaming.
To do this, I’ll simply select the text found within the top-left input box,
and then overwrite it with my own.
As you can see, the tool lets me know the amount of characters that I’m currently using out of the total allowed.
Step 2
I can easily change the font by clicking on the dropdown box found
underneath and choosing a new one from the available list.
Step 3
You can also change the color of your text by clicking on the little
dropdown box found next to the font, which will allow you to use one of the predefined
values or a new one of your own if you click on the More button.
Step 4
You can also completely remove the current text field (or any other one), by unchecking its
little checkbox, which will hide both it and its underlying decorative shape.
Step 5
Next, I’m going to customize the larger catchphrase, by going through
the same settings presented for the channel’s name.
Step 6
Lastly, we have the social media handles, which I can individually rename
and then customize to my own desire. Since at this point I’m pretty much done
working on my text-based elements, I can now move on to customizing my banner’s
different composing elements.
Step 7
If we move on to the right side of the browser’s window, we’ll see that we
have a couple more options, which allow us to control the look and feel of our
non-text-based elements.
The first is one is called Accent Color, and it enables
us to change the color of our little avatar.
Step 8
Next, we have Icon Color, which as the name
implies allows you to change the color of the little social icons.
Step 9
I then have the option of changing the colors
for the two banner shapes (Banner 1 & Banner 2), but I’m going to leave
them white for this current example.
Step 10
The next option is called Main Color and
controls the fill shape of the avatar illustration. As with the banners, I’m
going to leave this set to default (white) in order to maintain the color
scheme that I’m trying to build.
Step 11
Moving on down, we have the ability of changing
the avatar itself using one of the pre-created designs, or uploading a custom one
of our own. Personally, I ended up using one of the provided ones, which due to
its high quality proved to be a perfect fit.
Step 12
Finally, we have another option called
Background, which as the name implies allows us to change the color of our
background.
Step 13
If I feel that some elements could use a
little adjusting, I can easily click on them, which will bring up a bounding box
that I can then use in order to resize or reposition that specific element. If for
some reason I’m not happy with the changes, I can easily undo them using the Reset Layout button.
Step 14
As soon as I’m happy with how my banner design ended up looking, I can
easily download it by clicking the Download
button, which will charge me a small fee each time I use the banner template generator.
4. How to Upload Your
Banner to Twitch
So you’ve finished
creating your awesome banner using Placeit’s online banner generator, but how do you go about using it on
Twitch?
Well, first you need to make sure you have an account and are already logged in to it. Once you’re within your account, simply go to Settings
> Profile Banner and then click on the Update button in order to upload your digital banner.
Once you’ve uploaded your design, you can go to your channel, and you should be able to see your new Twitch banner in all its glory.
Great Work!
As always, I hope you’ve found this tutorial useful, and if you have any
questions, feel free to post them within the comments section and I’ll get back
to you as soon as I can!
Expand Your Designer Skills!
Just finished going through this quick tutorial, and feel like learning more of what it takes to become a visual tinkerer? Well, if that’s the case then you’re in luck since I’ve put together this little list which should get you up and ready in no time!
-
What Is a Mockup?
Always wondered what a „mockup” is but never managed to fully figure it out? Well, in today’s video, we’re going to break it down and see how easy it is to… -
Different Image File Types and Formats
From file type to file format, we’re going to explore the meaning of these notions and learn what are the most common images that are used right now. -
New Course: Adobe Illustrator for Beginners
If you’ve never opened Illustrator before, our new course is for you! Adobe Illustrator for Beginners will show you the easy way to make beautiful artwork in… -
The A to Z of Affinity Designer
Affinity Designer is a powerful program that allows you to create and combine both raster and vector graphics. This A to Z list breaks down all the tools and… -
Transitioning From Adobe Illustrator to Affinity Designer
Learn all about the experience of switching from Adobe Illustrator to Affinity Designer, and the key obstacles to overcome.
25 Creative Photo Collage Templates for Adobe Photoshop
Post pobrano z: 25 Creative Photo Collage Templates for Adobe Photoshop
Place all your favorite memories into a photo collage for a fun project or gift! Check out this incredible list below for premium Photoshop resources.
25 Creative Photo Collage Templates
A photo collage is a collection of images made by you. These compositions can be arranged into simple configurations or more complex arrangements for more creativity.
Today we’ve gathered 25 creative photo collage templates all created with Adobe Photoshop. Easily update these files using the editable placeholders perfect for any experience level.
Featuring abstract geometric templates and modern designs, these templates will help you add unique decor to your home or social media profiles. Enjoy this amazing selection exclusively picked from Envato Market and Envato Elements.
Need more help? Let our designers guide you! Get reliable feedback and design from the talented folks at Envato Studio.
4 Abstract Geometric Photo Templates
Blow your followers away with stunning geometric visuals inspired by the latest trends in design. This awesome photo collage pack includes four abstract designs with exciting layouts. Check out the examples to see how it works and download this suite for amazing, high-quality design.

20 Gravity Photo Frame Mockups
Celebrate your photos like the work of art that they are with this amazing selection of photo frame mockups. A fully customizable Photoshop file that is simple to use, this package features 20 total layouts in realistic environments. Enjoy the cool anti-gravity effect with this stylish collection!

Facebook Cover Photography Collage
Your social media should shine just as much as your photography. Create a beautiful collage using the inspiring template below. This Facebook cover is great for both personal and business profiles. So highlight your best work with this fresh and modern setup.

Dark Photo Collage Template
With a sleek and stylish design, you’ll definitely want to this dark photo collage template. Easily update the original background color using Adobe Photoshop for unlimited color options. Included in this download are two high-resolution files ready for your photos.

Abstract Photo Collage Pro v.3
Enjoy divine compositions for show-stopping appeal. This photo collage package features two Photoshop files with dazzling layouts. Simply replace the stock images with your own to try out this template right away! A super easy help guide is also included!

Photo Collage Template
Transform your photography with inspiring collages using this Photoshop template. Featuring four total files smartly organized and grouped, this template lets you turn layers on and off to reveal new looks. Experiment with new designs for an exciting, fresh look!

Diamond Photo Collage V.01
Diamonds are forever. And this gorgeous template features five awesome layouts for amazing photo collages. Update the fully editable smart objects with landscape photography or your favorite portraits. Well organized and grouped, this template is super easy to use!
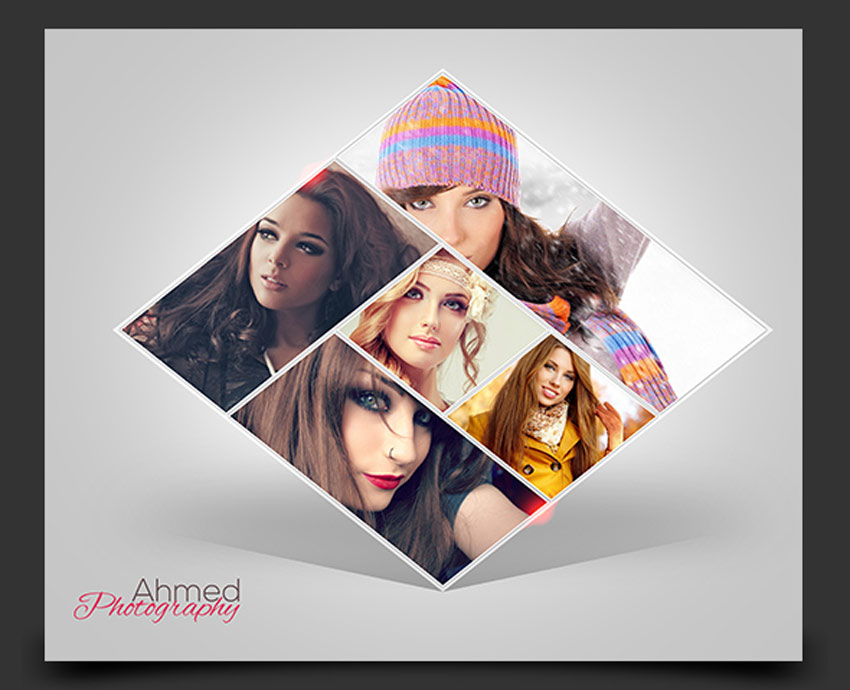
Photo Collage Flyer Template
Need a swanky photo collage for your next event? Then give this stylish design a try! Featuring fully organized layers you can update in seconds, this flyer just needs your favorite photos to get started. Finish with your event details and print it out today!

Wedding Photo Album Facebook Cover
Celebrate your special day with an awesome Facebook cover. This unique template helps creative couples share their love with the world! Enjoy two elegant cover designs to show off your engagement or special wedding moments. You’ll love this template!

The Office Photo Collage Mockup
Photo mockups are always a great alternative for polished collages. This mockup template features a chic office environment with several amazing setups. Enjoy a cool, modern look complete with eight easily adjustable images. Download this set today!

Glossy Long Shadow Photo Collage
For a unique twist on your collage, add a trendy long shadow effect with this premium photo template. Featuring beautiful lens flare highlights against a sleek dark design, this template is smartly organized and ready to use. Try it out today for a stunning glossy effect!

Photography Collage Trifold Brochure
Improve your photography business with a beautiful photo collage brochure. This awesome suite includes a stunning trifold design that is hard to ignore! It includes a print-ready design with fully accessible elements and free fonts for more savings!

Abstract Photo Collage Pro v.5
Abstract collages are the perfect way to shake things up! So craft an extraordinary look with this set of abstract arrangements. It features 10 layer compositions and 21 layouts, so you’ll have plenty of variations to choose from for a special result. Enjoy fun bonus extras like added lens flares and even color effects!

Fashion Sale Photo Collage Flyer
Kick off your next sale with a photo collage of your best-selling items! This flyer template includes adjustable elements as well as convenient free fonts. Perfect for any fashion event or ad, this template will help you achieve amazing results for your business!

Abstract Photo Collage Pro V.2
Are your photos looking a little blah? Freshen up your work with a modern photo collage. This sleek template features two extraordinary layouts with bonus color effects for more customization. Simply add your favorite photos to enjoy this template fast!

Photo Collage Business Card
Use this popular photo collage technique for business cards too! Fit for any photographer or creative professional, this business card is print ready with a double-sided design. Change it easily using Adobe Photoshop and switch out the photos with your best selection!

Creative Collage Photoshop Templates
Collage templates won’t get any easier than this! Featuring 15 total templates in a convenient square format, these collages are perfect for Instagram and more. A helpful instructional guide is also included to walk you through the process step by step.

Picture Art Mockup
Display your photos in an elegant art scene with these mockup templates. Presented with a clean 3D display, this download includes several inspiring scenes with realistic lighting and shadows. Also included is an easy-to-follow instructional guide.

Picture Art Collage Template
Sell your extraordinary expertise with a professional collage of your best work. This incredible resource features a collage-based art mockup that is very easy to customize. Try it out for any project or industry and enjoy the sleek result!

Twitter Photo Collage Header
Your Twitter header says a lot about you. So make the right impression by sharing your favorite photos. Great for professional photographers and creatives, this template has four different layouts with three color effects included.

Travel Songs Flyer Collage
A photo collage is fantastic way to excite any music event goer! So entice them with this flyer, featuring a selection of impressive visuals to go with your event details. Already included is the awesome railroad background, so just update it fast with your most valued music-inspired photos.

Valentine Photo Collage
Love is in the air. And what better way to show how much you love your honey or loved one than this crafty collage? Packed with two easy-to-use Photoshop files, this template lets you add your photo to the heart-shaped smart objects for easy updates. Try it out!

Photo Collage Christmas Photo Card
Send grandma a beautiful Christmas card featuring a photo collage of the kids! This lovely template includes A5-sized Christmas cards with two color variations available. Choose from festive red and orange designs already set up with bleed lines and more.

Black White Photo Collage
Visualize your photos against a modern interior layout with this brilliant pack of photo mockups. Test your design using several high-quality environments with realistic home and business compositions. Enjoy the black and white color scheme for a trendy, modern appeal!

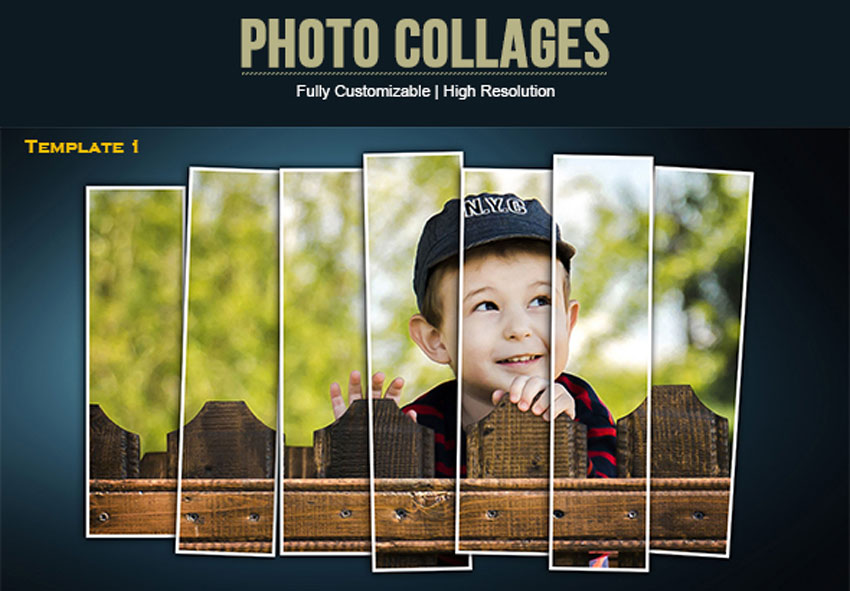
Photo Collages Template
Your kids and family will look cute as can be in this photo collage template! A fully customizable template, this download comes with two ready-to-use Photoshop files. Enjoy the high-resolution result and choice of four background colors.
Show Us Your Photo Collages!
Post a result and share with us your favorite photo collages!
For more amazing photo collage templates, check out hundreds of incredible designs to add to your
collection. If you need a more hands-on approach, however,
consider enlisting the help of a design professional from Envato Studio.
This list is jam-packed with
amazing resources for the avid designer familiar with
Adobe Photoshop. Be sure to browse Envato Market and Envato Elements for more resources and let us know your favorites in the comments!
