Post pobrano z: Gifs collection #2

Post pobrano z: Gifs collection #2
Post pobrano z: Upside down logotype / Essayent-ils de nous la faire à l’envers?
 |
 |
| THE ORIGINAL? Mc Donald’s “Welcome King Willem” – 2016 Source : Coloribus, Cannes Lions BRONZE Watch the Case Study film Agency : TBWA\Neboko (Netherlands) |
LESS ORIGINAL Mc Donald’s “Women’s Day” – 2018 Source : Coloribus Watch the Case Study film Agency : We Are Unlimited (USA) |
Post pobrano z: Same idea… round 2 / Milka – Orangina : Même combat?
 |
 |
| THE ORIGINAL? Milka Chocolate – 2015 “Catch me tender” Watch the video Agency : We Are Social Paris (France) |
LESS ORIGINAL Orangina Orange Soft Drink – 2018 “Super Lucha” Watch the video Agency : BETC Paris (France) |
Post pobrano z: 5 Tips to Branding Your Business
In any business, branding is important as it makes one’s company edgy and competitive in the markets. A brand says so much about the business, like what are the products or services being offered and what should the customers expect from them. A brand is what differentiates an individual from their competitors. One requires defining their brand and this requires a branding strategy. This article by Packwire explains what one should consider when branding their business:
It is very important to ensure that you have your own identity that is discrete and makes you stand out from your competitors. Avoid mimicking the look of big brands. Try and come up with your own brand that is unique. Many consumers are attracted to independent establishments as they are looking for something authentic or original.
One should come up with a voice for the business that reflects on the brand. This voice should be able to speak to the customer and the consumer is very aware of what to expect from the service or product. For any written communication, this voice should be applied. Also in the visual imagery whether online or off, the voice should be incorporated.
Packaging serves the sole purpose of attracting the consumer attention. This is very key as it can determine whether a consumer buys the product or not. The product should be packed in such a way that it compels the consumer to pick up the product and have a look at it. When coming up with branding packaging, one should stand out, be simple, trigger emotional engagement and create iconic assets. There are various tools used in packaging designs and they include logos, colors, fonts, and description. Therefore an individual should know the relevant tools to use.
It is very crucial to know your target market as this will help you know the right way to reach them. How you convey your service or product is determined by the potential customers. Knowing your personas will help you know the kind of media that they relate to and you can use it to reach out to them.
With the advancement in technology, most people spend their time online on social media platforms such as Facebook, Pinterest, Instagram, Twitter and LinkedIn. You can sell your brand easily on these platforms. Once the social media presence has been established, you should maintain it by being consistent in posting about your brand from time to time. Blogging is also an important aspect when it comes to marketing and one can reach out to as many consumers as possible.
With these few steps, one can build their brand easily. It involves creativity and being innovative. For already established business, they can rebrand themselves in order to keep up with the competing markets. For those interested in rebranding, they can read an article by Packwire on rebranding.
Featured image by Brad Neathery
Post pobrano z: Bathroom tiles repurposed in a creative way

Innovation and creativity come straight out of our brains, not from huge budgets or financial conditions. Actually, a constraint can even force designers and other creatives to innovate in order to produce good work.
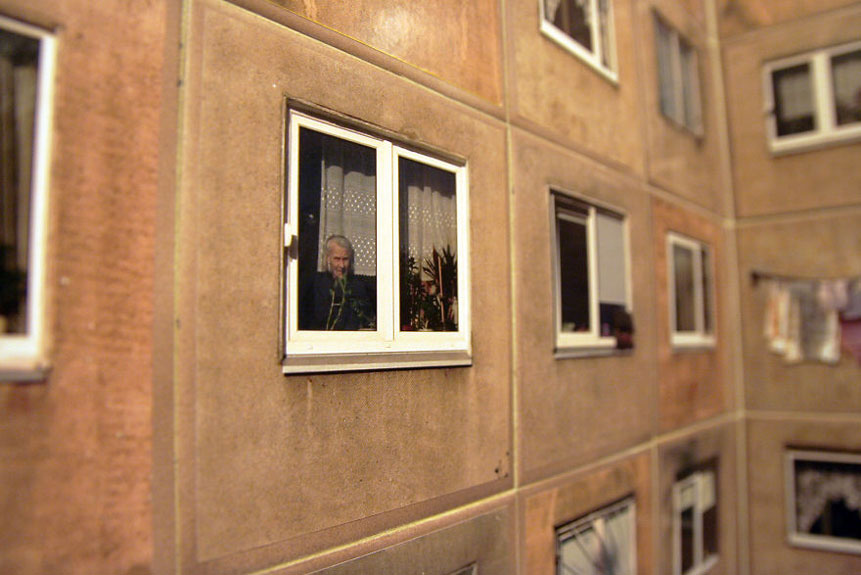
This bathroom redesign for a restaurant in Lithuania is a perfect example of this. The designers had to redecorate the place, but they couldn’t change the ugly tiles on the wall. Talk about a challenge!
Instead of giving up, design studio Gyva Grafika decided to turn the tiles into a big building by adding tiny windows. The result is great and makes the place look much more lively with a tiny investment.

An example of a window on a tile, these have become so popular that the design studio started to sell it. To buy some, contact them on their website or through their Facebook page.




Post pobrano z: Design deals for the week
Every week, we’ll give you an overview of the best deals for designers, make sure you don’t miss any by subscribing to our deals feed. You can also follow the recently launched website Type Deals if you are looking for free fonts or font deals.
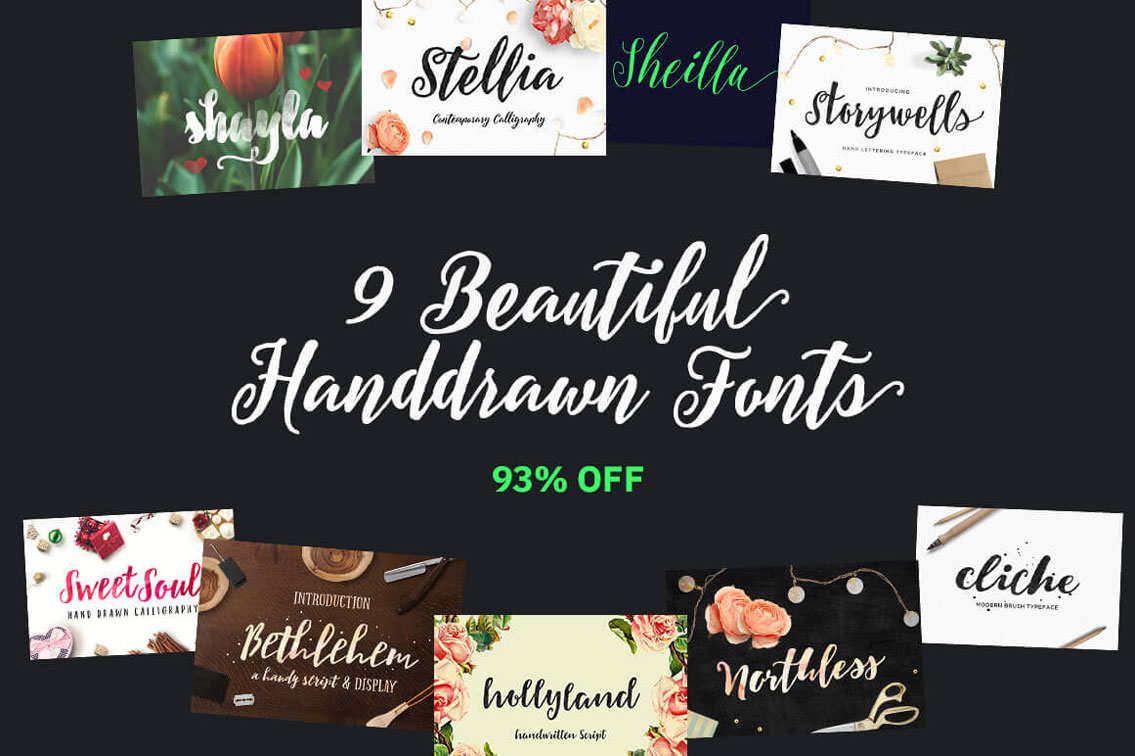
Whether you’re looking to add to your existing collection of script fonts or just getting started, this Mighty Deal from Typezilla was made for you! You’ll snag 9 beautiful hand-drawn typefaces with a wide range of styles from elegant calligraphy to a more personal natural feeling. Mix it up with a variety of OpenType Features.
$9 instead of $125 – Get it now!
This crafter friendly Bundle includes 50 of the best-selling craft products from our marketplace and bundles.
$19 instead of $185 – Get it now!

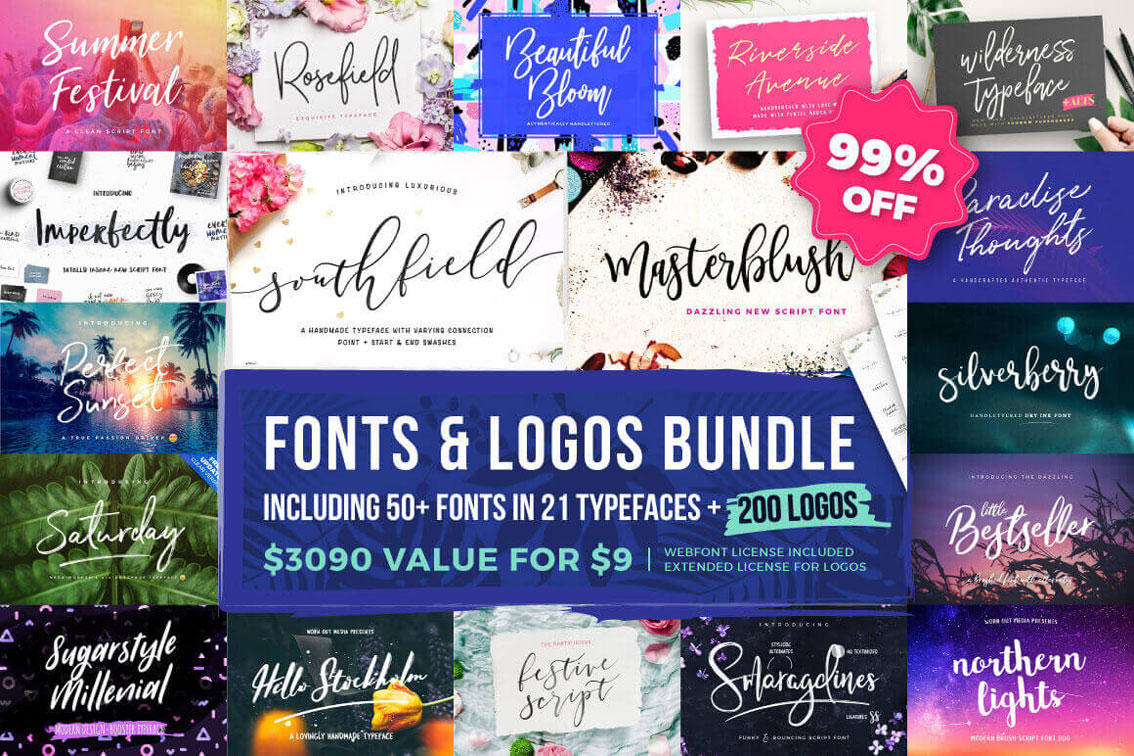
You can stop pinching yourself now. It’s only a dream in name. This Typographer’s Dream Box is 100% real and packed with more than 50 fonts and 200+ logo templates! Use this collection of typefaces and logos to create the perfect branding for yourself or your clients as you whip up some truly impressive masterpieces.
$9 instead of $3090 – Get it now!
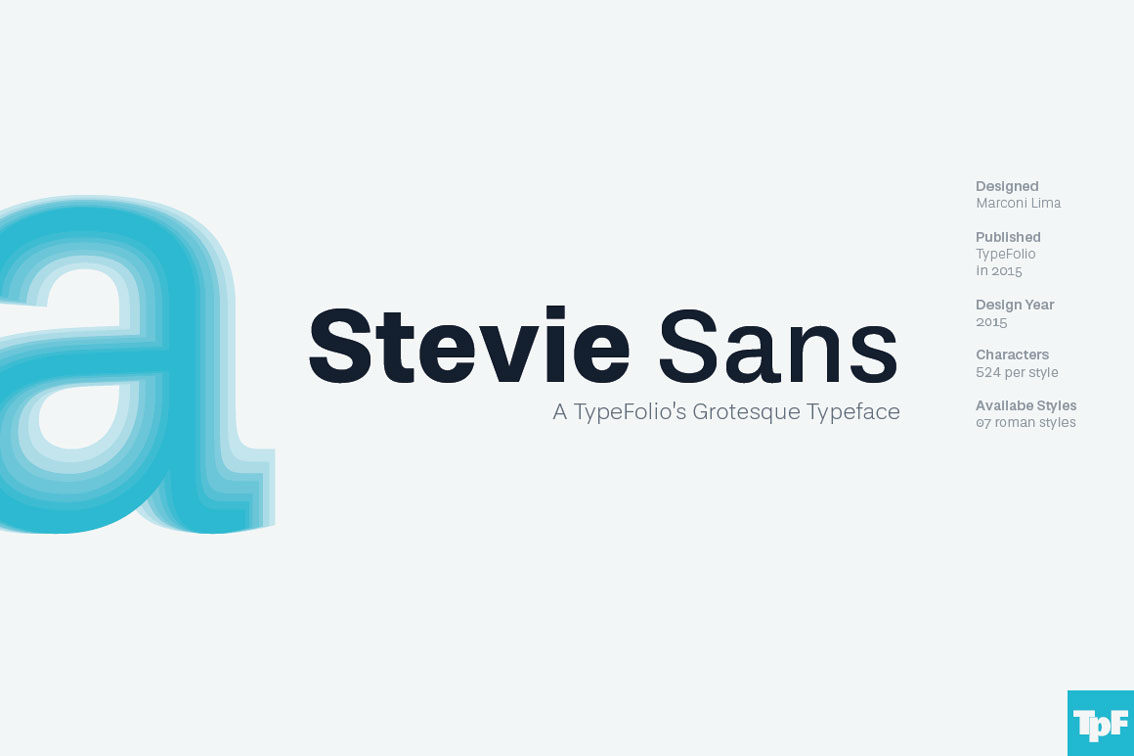
Meet Stevie Sans, a modern take on the grotesque typeface. With weights ranging from Thin to Medium to Black, it’s like getting 7 professional fonts in 1. A brilliant choice for headlines and small text, this bad boy is perfect for loads of printed projects ranging from T-shirts to prints. Toss in a gaggle of OpenType Features and support for more than 70 languages, and there’s no excuse not to add Stevie Sans to your typeface toolbox today!
$9 instead of $100 – Get it now!
If you could craft pure elegance by hand, you’d end up with the Elegans font. This breathtaking hand-crafted typeface just exudes elegance with its fluid, connected script design. Work with more than 575 unique letters, all of which have been created to flow right into the next letter.
$7 instead of $22 – Get it now!

Post pobrano z: A heater that mines cryptocurrencies while keeping you warm

Cryptocurrencies have been a very hot topic since 2017, it’s been in the news daily and keeps on staying at the center of attention. Apart from the volatility of the Bitcoin, one big concern for all the specialists has been the sustainability of the blockchain as a technology, can it really scale and become a mainstream technology?
The example that first comes to mind when talking about this is the insane amount electricity needed to mine a Bitcoin now that it’s expensive. Can you even believe there is a Bitcoin Energy Consumption Index?
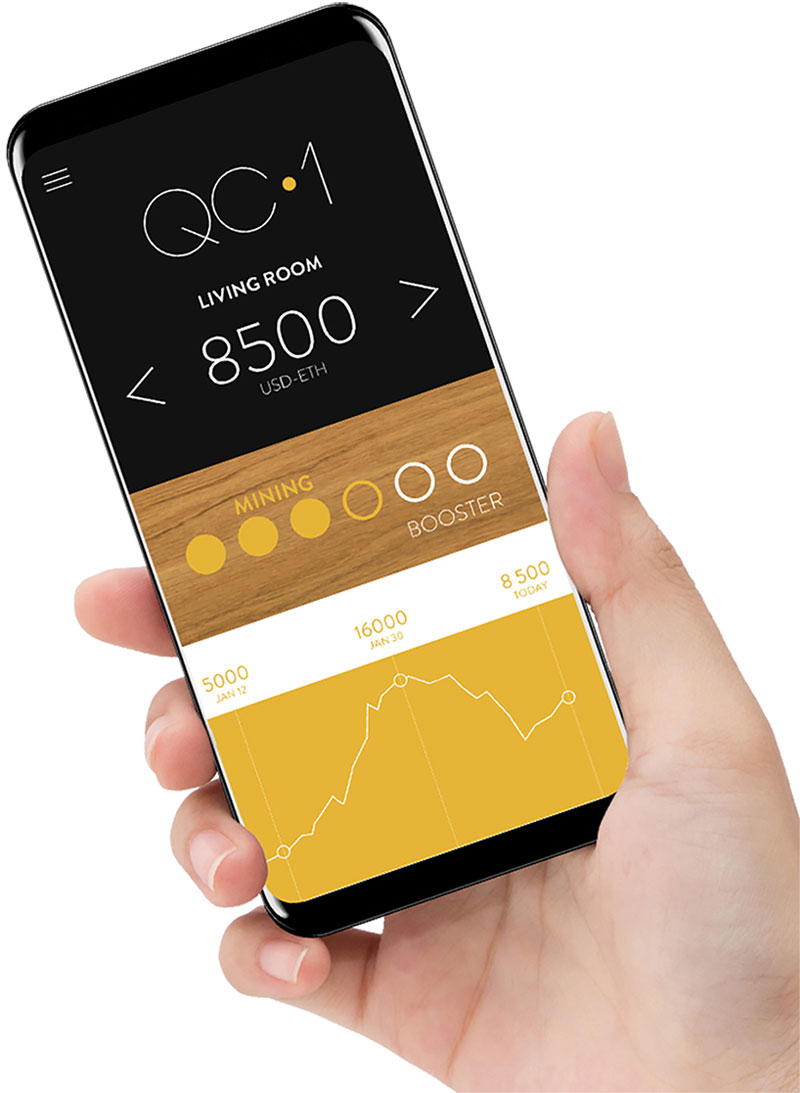
French company Qarnot found its own clever solution to this issue, they have released a heater that passively mines cryptocurrencies (Ether by default, but you can change) while warming up the room. They even claim that the cryptocurrencies mined this way will pay for your electrical bill.

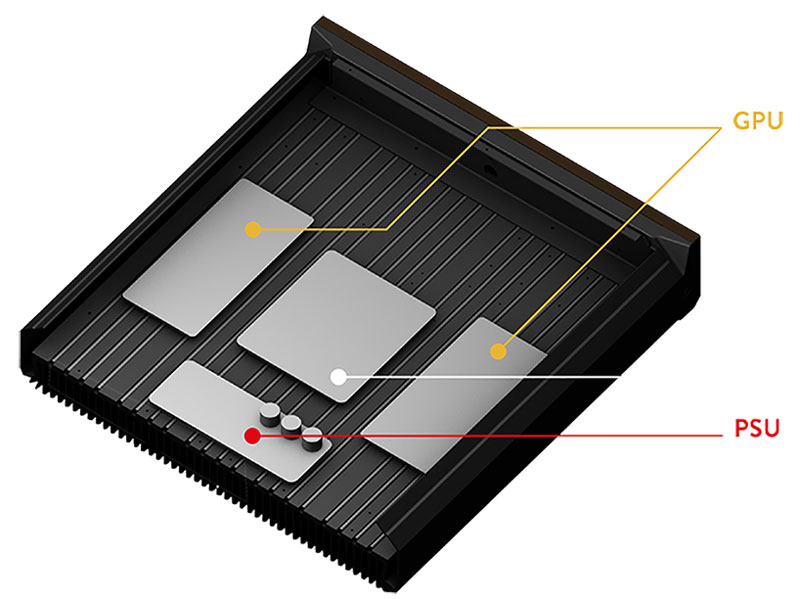
The elegantly designed heating device comes at the price of $3,500 and can very easily be set up to start mining as soon as you use it. Normally, the energy used for mining cryptocurrencies will generate some heat that will be cooled down using fans. This makes is use even more electricity. The QC1 by Qarnot turns this heat into a passive feature, which is really clever if it works as well as they claim.

Post pobrano z: The Vue Cookbook
I’m extremely excited to announce that the Vue Cookbook is officially in beta! For the past few months, the Vue team has been writing, and editing and accepting PRs from the community to build a new section of our docs called the Cookbook. Each recipe stands on its own, meaning that recipes can focus on one specific aspect of Vue or something that integrates with Vue, and do a small deep dive into that subject. We can then include more complex examples, combining features in interesting ways.
One of my favorite parts of the cookbook is the Alternative Patterns section of each recipe. Usually when people write blog posts or document something, they’re also selling you on the concept that they’re explaining. In the cookbook, we strive to consider that we’re all building different kinds of applications and websites, and thus a variety of choices will be valid, given divergent scenarios. The cookbook spends a little time in each recipe weighing the tradeoffs, and considering when one might need another path.
For advanced features, we assume some ecosystem knowledge. For example, if you want to use single-file components in Webpack, we don’t explain how to configure the non-Vue parts of the Webpack config. In the cookbook, we have the space to explore these ecosystem libraries in more depth—at least to the extent that is universally useful for Vue developers.
This section will continue to be in development! We have more recipes that we’re writing, we’re still accepting PRs, and the more community involvement, the richer a resource it becomes! I hope you enjoy it and find it useful.
Direct Link to Article — Permalink
The post The Vue Cookbook appeared first on CSS-Tricks.
Post pobrano z: React State From the Ground Up
As you begin to learn React, you will be faced with understanding what state is. State is hugely important in React, and perhaps a big reason you’ve looked into using React in the first place. Let’s take a stab at understanding what state is and how it works.
State, in React, is a plain JavaScript object that allows you keep track of a component’s data. The state of a component can change. A change to the state of a component depends on the functionality of the application. Changes can be based on user response, new messages from server-side, network response, or anything.
Component state is expected to be private to the component and controlled by the same component. To make changes to a component’s state, you have to make them inside the component — the initialization and updating of the component’s state.
States is only available to components that are called class components. The main reason why you will want to use class components over their counterpart, functional components, is that class components can have state. Let’s see the difference. Functional components are JavaScript functions, like this:
const App = (props) => {
  return (
    <div>
      { this.props }
    </div>
  )
}
If the functionality you need from your component is as simple as the one above, then a functional component is the perfect fit. A class component will look a lot more complex than that.
class App extends React.Component {
  constructor(props) {
    super(props)
    this.state = { username: 'johndoe' }
  }
  render() {
    const { username } = this.state
    return(
      <div>
        { username }
      </div>
    )
  }
}
Above, I am setting the state of the component’s username to a string.
According to the official documentation, the constructor is the right place to initialize state. Initializing state is done by setting this.state to an object, like you can see above. Remember: state is a plain JavaScript object. The initial state of the App component has been set to a state object which contains the key username, and its value johndoe using this.state = { username: 'johndoe' }.
Initializing a component state can get as complex as what you can see here:
constructor(props) {
  super(props)
  this.state = {
    currentTime: 0,
    status: false,
    btnOne: false,
    todoList: [],
    name: 'John Doe'
  }
}An initialized state can be accessed in the render() method, as I did above.
render() {
  const { username } = this.state
  return(
    <div>
      { username }
    </div>
  )
}
An alternative to the above snippet is:
render() {
  return(
    <div>
      { this.state.username }
    </div>
  )
}
The difference is that I extracted the username from state in the first example, but it can also be written as const status = this.state.username. Thanks to ES6 destructuring, I do not have to go that route. Do not get confused when you see things like this. It is important to know that I am not reassigning state when I did that. The initial setup of state was done in the constructor, and should not be done again – never update your component state directly.
A state can be accessed using this.state.property-name. Do not forget that aside from the point where you initialized your state, the next time you are to make use of this.state is when you want to access the state.
The only permissible way to update a component’s state is by using setState(). Let’s see how this works practically.
First, I will start with creating the method that gets called to update the component’s username. This method should receive an argument, and it is expected to use that argument to update the state.
handleInputChange(username) {
  this.setState({username})
}
Once again, you can see that I am passing in an object to setState(). With that done, I will need to pass this function to the event handler that gets called when the value of an input box is changed. The event handler will give the context of the event that was triggered which makes it possible to obtain the value entered in the input box using event.target.value. This is the argument passed to handleInputChange() method. So, the render method should look like this.
render() {
  const { username } = this.state
  return (
    <div>
      <div>
        <input
          type="text"
          value={this.state.username}
          onChange={event => this.handleInputChange(event.target.value)}
        />
      </div>
      <p>Your username is, {username}</p>
    </div>
  )
}
Each time setState() is called, a request is sent to React to update the DOM using the newly updated state. Having this mindset makes you understand that state update can be delayed.
Your component should look like this;
class App extends React.Component {
  constructor(props) {
    super(props)
    this.state = { username: 'johndoe' }
  }
  handleInputChange(username) {
    this.setState({username})
  }
  render() {
    const { username } = this.state
    return (
      <div>
        <div>
          <input
            type="text"
            value={this.state.username}
            onChange={event => this.handleInputChange(event.target.value)}
          />
        </div>
        <p>Your username is, {username}</p>
      </div>
    )
  }
}A state can be passed as props from a parent to the child component. To see this in action, let’s create a new component for creating a To Do List. This component will have an input field to enter daily tasks and the tasks will be passed as props to the child component.
Try to create the parent component on your own, using the lessons you have learned thus far.
Let’s start with creating the initial state of the component.
class App extends React.Component {
  constructor(props) {
    super(props)
    this.state = { todoList: [] }
  }
  render() {
    return()
  }
}
The component’s state has its todoList set to an empty array. In the render() method, I want to return a form for submitting tasks.
render() {
  const { todoList } = this.state
  return (
    <div>
      <h2>Enter your to-do</h2>
      <form onSubmit={this.handleSubmit}>
        <label>Todo Item</label>
        <input
          type="text"
          name="todoitem"
        />
        <button type="submit">Submit</button>
      </form>
    </div >
  )
}
Each time a new item is entered and the submit button is clicked, the method handleSubmit gets called. This method will be used to update the state of the component. The way I want to update it is by using concat to add the new value in the todoList array. Doing so will set the value for todoList inside the setState() method. Here’s how that should look:
handleSubmit = (event) => {
  event.preventDefault()
  const value = (event.target.elements.todoitem.value)
  this.setState(({todoList}) => ({
    todoList: todoList.concat(value)
  }))
}
The event context is obtained each time the submit button is clicked. We use event.preventDefault() to stop the default action of submission which would reload the page. The value entered in the input field is assigned a variable called value, which is then passed an argument when todoList.concat() is called. React updates the state of todoList by adding the new value to the initial empty array. This new array becomes the current state of todoList. When another item is added, the cycle repeats.

The goal here is to pass the individual item to a child component as props. For this tutorial, we’ll call it the TodoItem component. Add the code snippet below inside the parent div which you have in render() method.
<div>
  <h2>Your todo lists include:</h2>
  { todoList.map(i => <TodoItem item={i} /> )}
</div>
You’re using map to loop through the todoList array, which means the individual item is then passed to the TodoItem component as props. To make use of this, you need to have a TodoItem component that receives props and renders it on the DOM. I will show you how to do this using functional and class components.
Written as a functional component:
const TodoItem = (props) => {
  return (
    <div>
      {props.item}
    </div>
  )
}
For the class component, it would be:
class TodoItem extends React.Component {
  constructor(props) {
    super(props)
  }
  render() {
    const {item} = this.props
    return (
      <div>
        {item}
      </div>
    )
  }
}
If there is no need to manage state in this component, you are better off using functional component.
You will be handling state very often while developing React application. With all the areas covered above, you should have the confidence of being able to dive into the advanced part of state management in React. To dig deeper, I recommend React’s official documentation on State and Lifecycle as well as Uber’s React Guide on Props vs State.
The post React State From the Ground Up appeared first on CSS-Tricks.
Post pobrano z: Microsoft Edge Variable Fonts Demo
The Edge team put together a thorough demo of variable fonts, showcasing them in all of their shape-shifting and adaptive glory. Equally interesting as the demo itself is a history of web typography and where variable fonts fit in the grand scheme of things.
This demo pairs well with v-fonts.com, which is an interactive collection of variable fonts that allows you to play around with the variable features each font provides.
Direct Link to Article — Permalink
The post Microsoft Edge Variable Fonts Demo appeared first on CSS-Tricks.