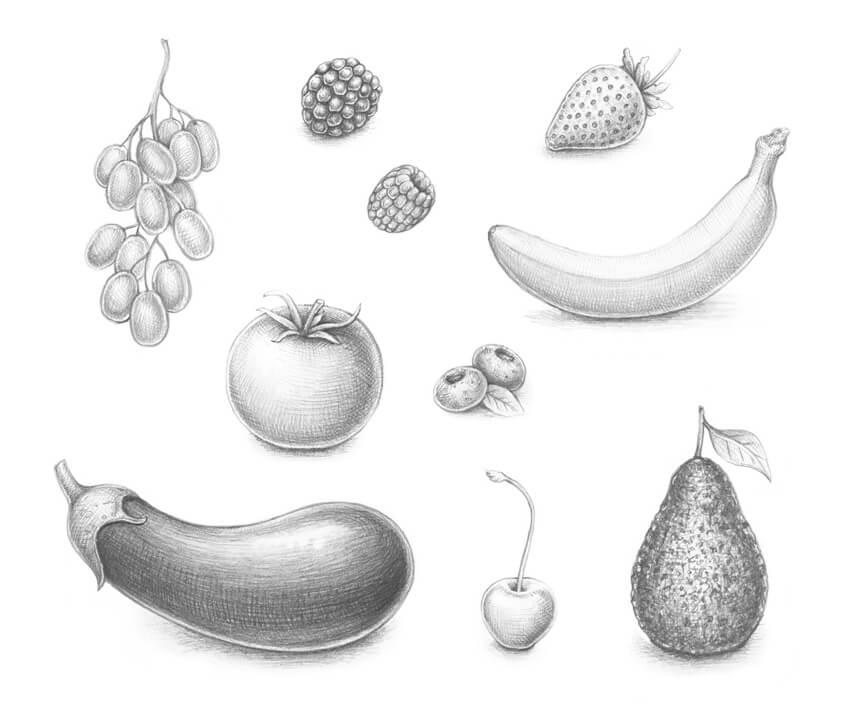
Post pobrano z: How to Draw 10 Different Varieties of Berry

In this tutorial, I’ll show you an easy and quick way to sketch with graphite pencils. We’ll also learn to apply different types of hatching to achieve impressive results.
You don’t need anything fancy to complete this tutorial; just two pencils, an eraser, several sheets of drawing paper, and, of course, a desire for experimenting with your art supplies and creativity!
A background in drawing is desirable but not obligatory. To understand and repeat the steps, you just need to become familiar with the hatching techniques and observe my illustrations closely.
Nothing benefits an artist more than thoughtful observation and daily practice!

What You Will Need
In order to complete this tutorial, you’ll need the following equipment:
- an HB graphite pencil
- a 3B graphite pencil
- an eraser
- drawing paper

1. How to Draw With a Graphite Pencil
Step 1
This part of the tutorial is devoted to the tips and tricks of using graphite pencils. We’ll observe different ways of applying strokes and provide a starting point for developing your skill set.
The first type of hatching is a group of straight lines that have the same direction and approximately equal length.

Step 2
Another important technique for creating an illusion of three-dimensionality is contour hatching.
As you can see in the image below, the lines are slightly bent, as if they are repeating the contours of an object.

Step 3
Let’s compare the possibilities of our pencils. We have two types: an HB and a 3B.
Create two samples of simple parallel hatching, just to observe how they look next to each other. In my image, the HB sample is on the left, and the 3B is on the right.
The HB pencil leaves lighter marks on the paper, and we’ll use it mostly for creating the initial contours and designing the drawing.
The lines made with the 3B pencil are darker and more intense, so this tool is the optimal choice for shading.

Step 4
Let’s create a beautiful, velvety-looking texture. I’m making lines with soft rubbing strokes, holding my 3B pencil at an angle.
Try to vary the pressure and layer the graphite strokes; you can get a dark surface which will seem almost black.

Step 5
Sometimes it’s great to smooth over the look of the graphite strokes, making them blurry. To do that, I use my finger, gently rubbing the end of the hatching sample.
Please be sure that your hands are clean and dry before you make anything like this. Human skin has natural oils, so your drawing may get dirty.
If you don’t like using your own hand, you can get a blending stump or an ordinary cotton bud.

2. How to Draw a Strawberry
Step 1
Technically, a strawberry is not a berry—it’s an aggregate fruit. However, for the sake of this tutorial, let’s close our eyes to this fact.
With an HB pencil, I draw the rough shape of the strawberry. Then I add the shapes of the leaves and the stem.

Step 2
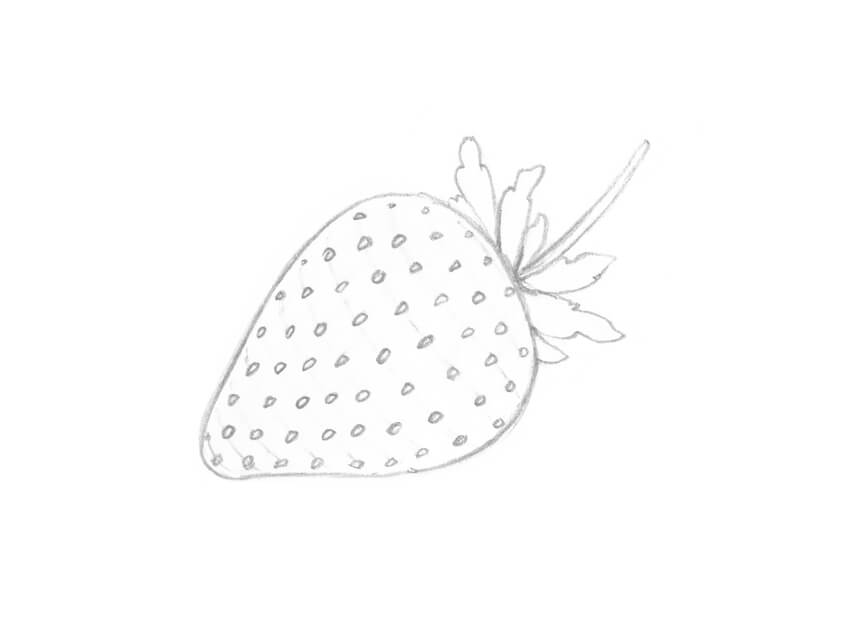
I refine the shape of the strawberry and the contours of the leaves.
I also add the subsidiary lines; they will help us to allocate small seeds on the fruit’s body. Our goal is to make an illusion of volume, so the lines should be slightly bent.

Step 3
I soften the subsidiary lines with an eraser, so that they are barely visible, and draw the seeds. They arrange themselves in a staggered order.
Step 4
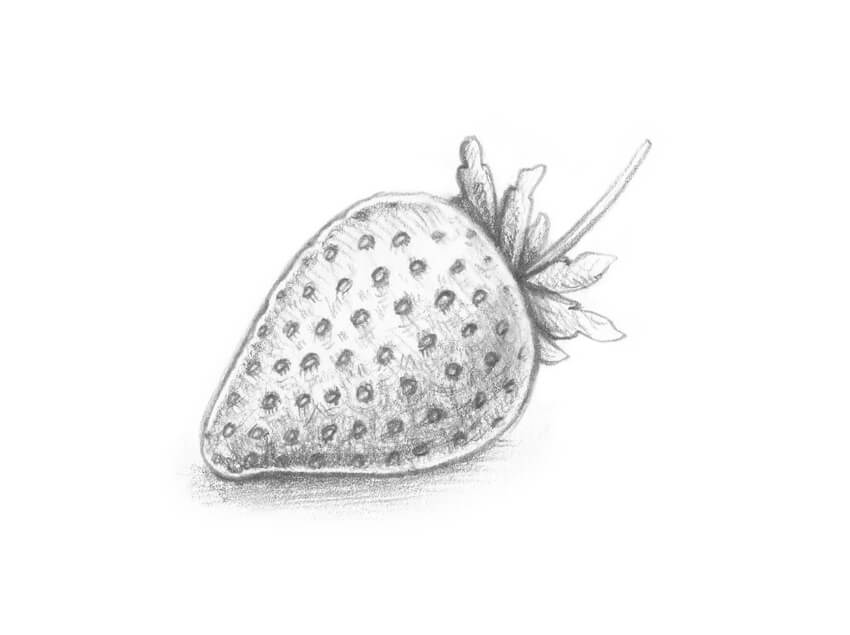
It’s time to apply the hatching, using a 3B pencil. I accentuate the sides of the strawberry, leaving the thin lines of the reflected light, and darken the leaves.
I also emphasize the small hollows (where the seeds are located) and then add the drop shadow. Please be sure to leave a highlight on the upper part of the strawberry.
This drawing already looks as if we’ve worked on it for a long time!
3. How to Draw a Cherry
Step 1
I draw the shape of the cherry, using the HB pencil. This shape resembles a circle with a narrowed bottom part.
Then I add a curved line for the stem.

Step 2
I add a small hollow to the upper part of the cherry and refine the stem.

Step 3
With the 3B pencil, I add the shadows.
I accentuate the hollow and the sides of the cherry with the contour hatching. Then I add some graphite strokes to the stem and mark the drop shadow.
It’s important to leave the highlights because a cherry is a smooth, glossy object.

4. How to Draw a Blackberry
Step 1
With an HB pencil, I draw a rough shape of the blackberry; then I add the parallel, slightly curved subsidiary lines.
Berries like blackberries are composed of a cluster of small drupes around a central stem. The reference lines are helpful for adding the rows of the drupes.

Step 2
Just imagine that the center of each drupe is sitting on the line you drew in the previous step. The rows are fitting closely to each other.
I noticed that it’s much easier to fill the shape of the blackberry with the small elements, starting with the bottom row.

Step 3
With the 3B pencil, I darken the borders between the drupes. I also add a shadow to each small element, leaving a highlight and a thin stripe of the reflexed light.
I’ve drawn a separate drupe just for your reference—you can see it in the image below.
As a finishing touch, I add a drop shadow.

5. How to Draw a Raspberry
Step 1
With the HB pencil, I draw the shape of the raspberry and then add the opening of the berry.
I sketch the subsidiary lines, just as we did with the blackberry drawing.

Step 2
I draw the rows of drupes, starting with the upper one. The principles of perspective are important here; the side drupes are less visible to the viewer.

Step 3
I add the shadows, making a soft texture with the 3B pencil. A raspberry doesn’t look glossy, so we don’t have to create deep shadows and contrasting highlights.
I’ve also added a sample of an individual drupe, just for your reference.

6. How to Draw a Blueberry
Step 1
With the HB pencil, I draw two oval shapes of the berries and add the small openings. To make this composition more interesting, I place a small leaf between the berries.

Step 2
I refine the upper part of each blueberry, adding a flared crown with the uneven edges.
I also add a drop shadow, using the 3B pencil.

Step 3
With the 3B pencil, I add smooth graphite strokes to the sides of the berries. It’s important to accentuate the borders between the objects and darken the openings.
If you wish to make your drawing more credible, you can add the groups of short hatches to create a beautiful spotty texture.

7. How to Draw Grapes
Now we are getting to some things you may not think of as berries. But grapes, tomatoes, and even bananas are berries according to the scientific definition. So let’s keep going!
Step 1
Drawing grapes can seem intimidating—there are so many elements to keep in mind! But don’t worry, we’ll find an easy way to design a small bunch of grapes.
I start with a framework, drawing a vertical core line and adding the shorter divergent lines. The grapes can grow singly or in a small group.

Step 2
I add some thickness to the stem and draw the elongated shapes of the grapes.
To make this process easier, let’s draw the elements that are closer to the viewer first. Some grapes overlap the vertical twig and other grapes.

Step 3
I add the remaining grapes. The initial sketch is complete!

Step 4
With the 3B pencil, I apply the shading. Basically, it’s just a layer of the contour hatching at the sides of each grape. Please be sure to leave the small highlights!

8. How to Draw a Tomato
Step 1
I draw a round shape of the tomato, using the HB pencil. I also mark the hollow in the upper part of the shape.

Step 2
I draw the stem and long shapes resembling leaves.

Step 3
I add the contour hatching, using the HB pencil. It’s important to accentuate the area of the hollow and the sides of the tomato.

Step 4
I darken the shape even more, using the 3B pencil. The strokes should be smooth and soft; you can shade them with your finger or a blending stump.
As usual, I check that the highlight and reflexes are in place, and add a drop shadow.

9. How to Draw a Banana
Step 1
I sketch a rough shape of the banana, using the HB pencil. This form consists of two elements: a long, wide shape for the banana’s body, and a thinner, shorter one for its upper part.

Step 2
I refine the contours of the banana, making this drawing more realistic.
A banana’s body has several sides (and we see two of them), so don’t forget to mark the border between these sides.

Step 3
I apply the contour hatching, using the 3B pencil. It’s important to darken the underside of the banana and accentuate the border between its sides.
I leave a strip of reflected light at the bottom side of the banana and create a drop shadow.

10. How to Draw an Eggplant (Aubergine)
Step 1
With the HB pencil, I draw the shape of the eggplant. It is an oval, with a prominent curve. I add the rough shape of the stem.

Step 2
I refine the upper part of the eggplant, adding the leaf-like elements.

Step 3
With the 3B pencil, I start shading the drawing; contour hatching is the best choice to give this sketch more volume.
The body of an eggplant is dark and glossy, so I apply a thick layer of the graphite strokes to its bottom part.

Step 4
I add more hatching to the sides of the eggplant, making it dark and contrasting.
I leave a bright highlight on the object’s body and add a drop shadow. With an eraser, I make the line of the reflected light at the bottom part of the eggplant.

11. How to Draw an Avocado
Step 1
With the HB pencil, I outline the shape of the avocado. It resembles a pear: a thinner upper part proceeds smoothly to a wider circular base.
I also add a stem and a leaf; these elements will help us to balance the composition.

Step 2
I add a pattern of the small semicircles and wavy lines to create the beautiful texture of the avocado.

Step 3
I add the contour hatching to the sketch, using the HB graphite pencil. I accentuate the sides of the avocado with an additional layer of strokes.
I also add a drop shadow, using the 3B pencil.

Step 4
With the 3B pencil, I work on the texture of the avocado and make my drawing more three-dimensional.
I apply the soft graphite strokes to emphasize the small surface imperfections, accentuating the dents and bumps. I also darken the sides of the avocado and blend the strokes with my finger.

Your Drawings Are Complete
Congratulations—we’ve created ten beautiful graphite pencil sketches! I hope you were inspired by the berries and enjoyed the process of drawing.
For practice, I recommend that you try getting some real berries (or other objects) and making your own sketches. It will help you to develop your observation skills and understand the principles of shading with graphite pencils much better.
Let your creative journey be successful and full of joy!
And if you are interested in other simple, step-by-step drawing tutorials, please check out these: