Tales of a Non-Unicorn: A Story About the Roller Coaster of Job Searching

Post pobrano z: Tales of a Non-Unicorn: A Story About the Roller Coaster of Job Searching

Hey there! It’s Lara, author of the infamous„Tales of a Non-Unicorn: A Story About the Trouble with Job Titles and Descriptions” from a couple years back. If you haven’t read that original article, I recommend skimming it to give you some context for this one, but I think you’ll still find value here even if you don’t.

A lot has happened since I wrote that article in 2015, and this follow-up has been in the works for a good six months. I ended up, not with a solution for the job titles conundrum or a manifesto about the importance of HTML and CSS, rather a simple, honest story about my roller coaster ride.

Okay, enough dilly-dally. Let’s go!

<story>

In the aftermath of the FizzBuzz drama in 2015, I doubled down on my freelance business and did really well. I got a great contract gig with startup in New York refactoring a Haml/Bootstrap situation that paid the bills and then some. I hired an assistant and started the Tackle Box, an online school sort-of-thing where I taught web development and WordPress. I made a little money off that one, too. I spoke at a handful of conferences and meetups, taught a bunch of classes, and generally had the pedal to the metal.

Then I got really, really tired.

I was sick of writing emails, sick of sending invoices, and sick of being on the computer all the damn time. I wanted to go to work and then leave work at work; something that is very hard to do in our industry, and extra difficult when you are your own boss. I enjoyed coding sometimes, but it was all about the billable hour. Why should I write code or be on the computer at all if I’m not being paid for it? This was burnout, that thing that’s become a weird, convoluted rite of passage in our industry.

I wanted to shut down Lara Schenck, LLC and be a ski bum. And you know what? I did. It was time for a break, and I took one for about six months.

Ski Bum Sabbatical

I left New York City in August of 2016 and moved back to my family’s farm near Pittsburgh. I got a job cleaning horse stalls for $7/hr at the stable where I used to ride when I was a kid. My plan was to gradually ramp down business while I lived rent-free and prepared myself for the simple life. That December, I would be starting work as a bartender at Goldminer’s Daughter Lodge in Alta, Utah, a tiny ski town outside of Salt Lake City. Room and board were included in the job; I’d make enough pocket money for booze, and my life would consist of skiing, sleeping, and socializing. No emails.

Image of a sign for the Town of Alta, population 370, elevation 8,460
Just down the winding road from Alta Ski Area.

The simple life was okay for a little bit, but bartending at a 3:2 beer bar and skiing every day wasn’t as fulfilling as I’d hoped. I cut the season short and moved to Los Angeles in March with my partner at the time. We had a mutual friend with an open room in Hollywood, and I was starved for city-living. (I have since learned that LA is not the city-living I expected, at all, but that’s another conversation.)

Time to Get a Job (for real this time)

I formally announced I was back on the scene, reached out to old clients and people from my New York network, and was even on a podcast out of the gate. None of that translated into much paying work. Luckily, I had a cushion of savings to float me for a few months (Freelancing Rule #1: You must have savings), but my heart just wasn’t in the freelance hustle this time. The prospect of negotiating contracts and engaging new leads was nauseating rather than exciting, and the small business website work I did was no longer the challenging and invigorating experience it had been before.

I decided to get a full-time job, for real this time. Once again, I wanted to work on a team and on bigger projects. I was tired of doing everything myself, and I wanted to learn from and share my experience with others. And, you know, a regular paycheck.

I set to work applying for jobs, putting long hours into carefully crafted cover letters. I had several promising interviews, got my hopes way up a couple of times, and received zero job offers. For one particular role, I’d gotten as far as discussing salary requirements and start dates, and was expecting an offer letter within the week. Then, the next week they were all of a sudden no longer hiring. I didn’t run into any FizzBuzz, for better or for worse.

I started to question why my designer/developer skillset appeared to hold so little value now when I’d felt so in demand just a year ago. I stubbornly refused to learn React just so I could have it on my resume—I’m great at other important things, why can’t people see that?! I wondered whether the five years of self-employment was a hindrance, or was there something fundamentally wrong with how I interviewed? Did I shoot myself in the foot with this whole „non-unicorn” thing in the first place?

These months were a major ego-check. It turns out, full-time jobs aren’t something you can just „get.” It’s just not that easy, for me at least.

The Value of HTML and CSS

Responding to job posts with those carefully crafted cover letters had a very low return on investment so I decided to change my approach. Instead of putting my time into writing said cover letters, I would focus on writing about real things and becoming a better developer, and the jobs would come to me. I launched a well-thought-out redesign of my website, published a Reverse Job Post, and buckled down on my JavaScript studies.

This was right around the time Mandy Michael wrote „Is there any value in people who cannot write JavaScript?” which hit the nail on the head. I wrote a question into ShopTalk show about this phenomenon and mentioned to Chris that I’d love to come on the show and talk about it if they’d like. The next day, Chris invited both Mandy and me to come on the show and hash it out:

HTML and CSS are valuable, but intimate knowledge of them has become more of a specialist role. Perhaps, one can position their skills as HTML, CSS, plus something else (e.g. UI design or WordPress). The nature of products and rapid feature releases deem quality HTML and CSS an afterthought at many companies so at the moment, maybe the demand just isn’t there. Perhaps the rise in accessibility awareness, design systems, and time lost debugging bad CSS will change the tide?

The episode was well received; I was obviously not the only one struggling with this issue. I made a Github repository called Front-end Discourse with the intention of gathering and synthesizing opinions and coming up with a plan of action on the job titles front. Chris even wrote about the job titles conundrum here on CSS-Tricks. The momentum was there; this could be my thing!

But then…I let it die.

An Unexpected Twist

A few days after the ShopTalk episode came out, I received this tweet:

Image of tweet asking Lara if she is still looking for a job, with a link to job post at careers.google.com/jobs

Umm…that’s a link to a Google job post.

I thought it was a joke at first, but nope, the tweet author sent me an email later that day, and it was the real deal! They’d been referred to me by a benevolent figure in the web industry whom I’d never met. I had a call with them and another member of their team, and it was magical. They told me all about a new team starting within Developer Relations at Google that would be working to improve the „Web Content Ecosystem.” Web Content Ecosystem? That’s WordPress! And they were recruiting me! Holy sh#t, this actually happens!

This was my dream job, not a front-end designer/developer role. I didn’t even know this was a job! I had already been doing this work on my own time for several years: teaching and speaking about WordPress, writing informational blog posts, recording videos, and helping people use WordPress more responsibly. And they would move me to San Francisco! I was not a huge fan of Los Angeles.

Unfortunately, Google doesn’t just „give” people jobs…you have to interview.

Computer Science Bootcamp

Now we have me, the designer who applied for a JS job and failed FizzBuzz, preparing for the Google interview otherwise known as the grandparent of all technical white-boarding interviews. It was time to swallow any feelings I had toward this interviewing style and get to work.

I had three weeks until a „coaching call” that would unofficially determine whether or not I could skip the technical phone screening and jump straight to the day of on-site interviews because, duh, this was meant to be. Luckily, this coincided with a lull in freelance work, which had also been picking up, so for about a week and a half, I put myself through a self-directed computer science bootcamp. On the way, I wrote a bunch of blog posts about what I learned.

Oh, how I longed to write that Tales of a Non-Unicorn: I GOT A JOB AT GOOGLE, F@#KERS!!! follow-up for all those Reddit haters after it was said and done!

The day of the coaching call arrived, and it was fantastic! I was a little slow on the coding question, but it wasn’t as hard as I’d thought, I aced the role-related questions, and the interviewer was excellent. I heard back from the recruiter who was coordinating with me, and he said I could go straight to the on-site interviews.

In the meantime, I went to WordCamp US in Nashville where this particular team at Google was a sponsor. I got to meet a few of the folks I’d be working with, and it seemed like such a great fit. This Google interest and being at WordCamp made me question why, at the beginning of my job search, I had seen my knowledge of WordPress as such a secondary skillset. WordPress is everywhere! And its awesome! I mean, sure, it’s not that „cool” yet, but mark my words, it will be in the „cool” ranks soon enough.

The Non-Unicorn Interviews at Google

In the week leading up to the interview, I focused on researching the role and beefing up my passion for improving WordPress and helping those who work with it. This was not a software engineering role, after all; in Developer Relations, passion for and knowledge of your subject is more important than knowing binary tree traversal, right?

Google flew me to San Francisco and put me up in a nice hotel. I had a full day of four interviews—usually, it’s five, one was canceled—and a long, enjoyable lunch with the folks I’d been in touch with from the get-go. I didn’t feel great about my performance in the technical parts of the interviews, but I did my best and my strategy was to come off as a great coworker who knows when to ask for help. When in doubt, I remembered the strong correlation between „hard interview” and „received offer” on Google’s Glassdoor profile.

Back in LA, freelance work kept me busy while I waited for a verdict, which wasn’t long. I felt relatively zen about the whole thing. Yes, I had my hopes up, but if it didn’t work out, I at least had work to pay the bills, and it wasn’t going half-bad. I’d been contracting with an agency and learning a lot; it wasn’t the small business WordPress sites I’d been building all by myself previously.

The Thursday after my Monday interview, I got a call from my recruiter contact. They were not going to proceed with the approval process at this time. He said I showed some very promising „Google-y” qualities, but my performance in the coding portion of the interviews wasn’t strong enough. He said he had it in his calendar to reconnect with me in six months, and that he would keep an eye out for less technical roles that might be a better fit.

…oof.

Incredibly, I was able to fend off the majority of the anger and the „I’m a failure and I suck at everything” thoughts that go hand-in-hand with rejection, maybe in part because I received such a nice email from one of the people I’d been in touch with throughout the process. He had applied three times before he got a job there—which apparently is not uncommon—and this simply meant I’d be taking a slightly different path. They were all bummed I didn’t make it.

This brings us back to the present. I don’t feel sour about algorithms or white-boarding interviews…I have another one to get ready for in six months! Unless, of course, another really awesome opportunity comes my way in the meantime. Who knows.

This whole job search has been such a ridiculous roller coaster of hopes slowly going up then crashing down. If there’s one thing I’ve learned, it’s that I still don’t know where I’ll end up, but I’m doing my best and I’ll keep doing it until the right thing comes along.

Silhouette of a car on a roller coaster about to go down a large hill

</story>

Whew, that was a lot! Thanks for making it this far. A+ for you, reader!

Post-Mortem

Before I wrap this thing up, I want to make a few observations about this whole job searching process that I hope can help others on their roller coaster ride.

  1. Algorithms and white-boarding interviews aren’t necessarily bad. I think they can be implemented badly. The Big Tech Companies are fully aware that they miss out on great candidates because of algorithm questions, but this interviewing strategy is so good at filtering out bad candidates that they keep it around. It sucks for us, but I don’t see that changing anytime soon. Plus, I learned a hell of a lot of stuff preparing for it, and it’s made me a better developer and better human being.
  2. Write a „Reverse Job Post.” I don’t recall where I learned about it, but here’s mine for reference. Even if no one reads it, it’s a great way to figure out what type of job and company you are looking for, and you could totally paste a link to it in the cover letter field for an application and call it a day.
  3. Learn computer science fundamentals. I know we are already inundated with things to learn, so it’s hard to preach this, but having context for what the tools we use actually are has helped me a lot. For example, two months ago I would have had a hard time wrapping my mind around GraphQL, but in my interview preparation I learned about graphs and tree data structures, so I was able to understand the concept relatively easily. Cracking the Coding Interview is not a good place to start, BaseCS and the Impostor’s Handbook are. Also, stay tuned for some relevant articles here on CSS-Tricks, from yours truly!
  4. Don’t spend all of your time on job boards. It’s a crapshoot. I think there are great job boards, but in general, no matter how quality the listing, whether or not the position is actually available or accurately represented in the post is a toss-up.
  5. Be vocal. I doubt any of this Google stuff would have happened if I hadn’t written into ShopTalk show and asked Chris to have me on the episode. If you have an impulse to write something or have a question or feel the urge to tweet at someone you don’t know, do it (but be a good person about it, obviously). The more web people that know you exist, the more likely it is that something will come your way.

Those are some things that helped me, but I still don’t have a job, so maybe don’t listen to what I say. I don’t know. It’s an incredibly difficult and demeaning process, and there’s no secret sauce that works for everyone. Our industry is a young one, and as far as I’m aware, there is no such thing as a surefire career path in web development.

I hope I don’t write another „Tales of a Non-Unicorn” installment. The whole idea of a „unicorn” is bogus, anyway. We are all just people, with different levels of knowledge in different areas, and if you can honestly say you’re doing your best then I think that’s all you can do.

What I will be writing, however, are some „Computer Science Study Guides” for the self-taught developer, here on CSS-Tricks, and maybe some stuff about how cool WordPress is nowadays. At the very least, „Intro To Algorithms” will be coming at you, soon!

How about you, reader?

Have you been on this roller coaster ride, too? Where did you end up? What advice can you offer to those of us who are still in the midst of our journey?


Tales of a Non-Unicorn: A Story About the Roller Coaster of Job Searching is a post from CSS-Tricks

10 Top Tips for Designing Music Festival Posters

Post pobrano z: 10 Top Tips for Designing Music Festival Posters

With more music events launching each year, the festival market is booming… and fiercely competitive. Thoughtfully designed posters and flyers will make a huge difference to ticket sales, and will help set the mood for the event.

So whether you’re planning to host your own festival event or looking for inspiration to help with a design project, these top design tips will help you create posters that are memorable and beautiful. 

If time is of the essence, you can always adapt an existing poster template to create a unique design. On GraphicRiver and Envato Elements, you’ll find plenty of festival templates to get you started.

Read on to get inspired and start creating something special…

indie flyer
Music flyer template by enamdua.

1. Consider Prioritising Typography on Your Poster Layout

It can be difficult to know where to get started with creating a poster design. For festivals, it’s likely that the publicity would be displayed in places where people are quickly viewing them as they pass by, such as metro stations, at bus stops, or on street walls. 

For this reason, it’s best to prioritise one main element on the layout. Whether that’s an image (see Tip 2, below) or text really depends on the type of festival being advertised and which design approach you’d like to take. 

If your festival has an established history, it may be best to make typography the key focus of your design. Blow up the name of the festival to large scale, and choose a typeface to really make the type stand out. Look for display fonts or slab serifs (you can find a wide range of display fonts here), and set the type in uppercase letters and a contrasting font color. 

indie flyer
This indie flyer template could be easily adapted to any style of festival, and would make the most of a well-known festival name.

If your festival is lucky enough to have bagged a few well-known artists, make the most of it. Set the names of the best-known bands towards the top of the design, creating a hierarchy that catches the attention of existing fans. 

2. Illustration or Photo?

Festival posters tend to fall into three main camps of design—with a typographic (see above), illustrative, or photographic focus. 

Certain music genres and styles of event tend to suit either an illustrated or photographic approach. While photos work best for pop or rock events, illustrations and abstract designs make a perfect match for jazz festivals, food festivals, or alternative music events. 

jazz dance
Illustrator Indrė Vaiciukaitė references 1920s illustration styles in this poster for international jazz dance and music festival „HARLEM”, based in Lithuania. Image via Behance.

If your festival falls into the more alternative side of the festival spectrum, an illustrated approach, like in these designs for the Jazz in June music festival by Brock Wynn, will inject a dose of creativity and uniqueness into your poster. 

jazz in june
jazz in june
Poster designs for the Jazz in June music festival by Brock Wynn. Image via Behance.

If you’re short on time, look out for vector elements you can adapt for your poster design, like these jazz-themed logo illustrations

jazz illustrations
Music festival logo vectors by danjazzia.

3. Use Color to Create Ambience and Mood

Although most designers begin conceptualising their poster designs in terms of typography or graphics, color is actually the single most transformative element you can apply to your layout. 

More so than perhaps any other poster subject, a festival poster has to entice potential attendees by communicating a vivid sense of atmosphere. Festival-goers attend these events to share a particular vibe and experience an ambience which is unique to that festival. It’s your job as the poster designer to convey what it would feel like to attend the event as evocatively as possible. 

Switching up your color palette is the quickest way to evoke a sense of time and place. Using a sunset-inspired palette of oranges and yellows would make a great fit for summertime, hot-weather events. 

These neon illustrations, when placed against a dark background, evoke a sense of night-time glamor.

neon
Music festival illustrations by danjazzia.

4. Create an Immersive Experience With 3D Layering

As well as using color, you can increase the immersive potential of your poster design by playing with layering, creating a 3D effect that helps the viewer to become completely absorbed in the design. 

As well as building a flat, grid-based hierarchy on your layout, think about which elements will sit in the background and foreground of your design. 

This flyer design is an example of how simple layering can create an absorbing design that helps you to feel you are actually at the event. 

Placing the singer in the background of the image, and allowing the atmospheric smoke to mingle with the headline in the foreground, creates a sense of depth and makes the image feel as if it expands beyond the edges of the page. 

flyer design
Music flyer template by enamdua.

5. Don’t Neglect Texture and Light

Graphics, type, and color might be the building blocks of your poster design, but it’s the extra details that will really make it look incredible. 

Texture overlays are a quick and easy way of adding grungy, vintage-inspired textures to your designs. They have the ability to de-formalise any layout, which makes them perfect for rock or indie festivals. You can track down some grunge overlay textures here

indie rock fest
Indie Rock Fest flyer template by Shelby67.

Adding light effects to your artwork also adds an extra dimension to the poster and fits beautifully with festival-themed designs. Try creating a lit-up effect for typography (look at how to add glow effects or screen filters in your design software), or frame a design with a border of flashbulbs to create a starry, stage-like effect. 

classic
Classic Fever flyer template by isoarts.

6. Look to the Past for Authentic Inspiration

Everybody seems to have a relative who attended the very first Glastonbury festival, and yep, they all say how festivals now just aren’t the same. 

You can channel the authentic, carefree vibes of the original music festivals in your own designs by looking to vintage styles for inspiration. 

Choose retro-style typefaces and muted color palettes, and build papery textures into the background of your design. Look to retro styling ideas, like the exaggerated drop-shadow used in this flyer template, to make a stylish nod to the past.

indie flyer
Retro-inspired flyer template by BlueMonkeyLab

Vintage-inspired festival posters will always look cool, and they suit indie, rock, and folk events particularly well. 

vintage flyer
Vintage flyer template by BlueMonkeyLab.

7. Go Minimal for Electronica and Dance

If you’re designing a poster for an electronic music event or a dance festival, digital-inspired designs always look slick and ultra-contemporary. 

These designs blend club-night style with pared-back layouts, creating designs which are really atmospheric.

Try using Photoshop to create abstract effects in neon shades, like in this flyer template. Set your designs against a dark background for a night-time effect. 

minimal template
Minimal poster template by BlueMonkeyLab.

Even the most minimal of designs can create a strong sense of atmosphere. This ultra-simple design by Luca Izzo contrasts a deep black circle with a clean, white background, creating an intriguing, abstract design.

minimal poster
Sottotempo poster design by Luca Izzo. Image via Behance.

8. Create a Series of Poster Designs

Once you’ve designed your poster, it might be tempting to sit back and relax. But take a tip from some of the most successful festivals, and expand your design into a series. 

Why make the effort? A series of related designs transforms a single poster into an advertising campaign, allowing you to place different designs in different locations, making them more memorable and intriguing for passing viewers. 

Try keeping some of the core elements of your design consistent across the posters, to build a brand look for your series. This music flyer template keeps all elements except color consistent across the series. 

music flyer
Music flyer template by BlueMonkeyLab.

9. Develop a Brand for Your Posters

Beyond creating a series of related posters, you can take a leaf out of the book of established festivals and work on creating a complete brand identity for your festival posters. This will really impress clients who are looking for something special, and is really fun to do. 

For the Helsinki-based Spotlight Festival, design agency Manitou developed a versatile logo design, which could be used across their posters. The logo and colors can be split and used in different ways, creating a complete brand look for the event using just a few simple design elements. 

spotlight
spotlight
spotlight
Logo and poster designs for Spotlight Festival by Manitou. Images via Behance.

When some festivals become established, they often come back to a particular brand look for their posters each year, to help reinforce the event as a brand and attract previous attendees. 

These poster designs for Printemps de Pérouges (« Spring of Pérouges »), a music festival in France, come back to the same formula year after year, as it works so well for the event. The consistent typography, punchy colors, and 3D-style graphics make the designs instantly recognisable. 

spring festival
Spring Festival poster series by Graphéine. Image via grapheine.com.

10. Go a Step Further and Create a Complete Brand Identity for the Festival

Festivals are no longer the casual affairs they were in eras past. Now, festival organisers can reach huge audiences over social media and TV, and the financial potential of these events has skyrocketed. 

As a result, many festivals are looking to go a step further with their branding, and are looking to develop complete brand identities which go beyond the posters. 

Once you’ve created core elements for your posters, such as a logo-like headline, graphics, and a color palette, you can lift some of these and adapt them to use across other festival media, like merchandise, social media images and animations, tickets, signage, and stationery. 

This complete brand identity for Move Phnom Penh, a music festival in Cambodia, by Sonich Touch, shows how you can adapt simple design elements for a wide range of media. 

move festival
Move Phnom Penh festival brand identity by Sonich Touch. Image via Behance. Check out more of Sonich Touch’s work on Instagram here.

Conclusion

Music festivals are really fun events to design posters for. Most festival organisers will be looking for something exceptionally creative and unique, so dive in and start creating something fantastic!

If you’re short on time, it can be easier and quicker to adapt an existing poster or flyer template, tweaking fonts and colors to create a unique design. You can find a huge range of easy-to-edit templates over on GraphicRiver and Envato Elements. 

indie flyer
Indie flyer template by enamdua on GraphicRiver.

Design Deals for the Week

Post pobrano z: Design Deals for the Week

Every week, we’ll give you an overview of the best deals for designers, make sure you don’t miss any by subscribing to our deals feed. You can also follow the recently launched website Type Deals if you are looking for free fonts or font deals.

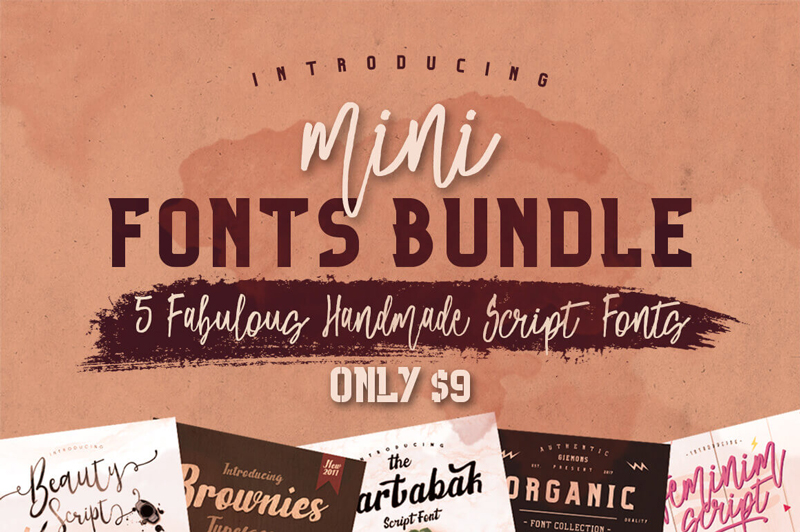
5 Fabulous Handmade Script Fonts

Fonts make all the difference in your designs. Sure, what you say is important, but how you say it is just as powerful! Be sure to hurry and grab this Mini-Font collection sporting 5 fantastic handmade script fonts! Whether you’re working on invitations or mugs, these professional typefaces can be molded to suit your style thanks to the many OpenType Features they include.

$9 instead of $75 – Get it now!

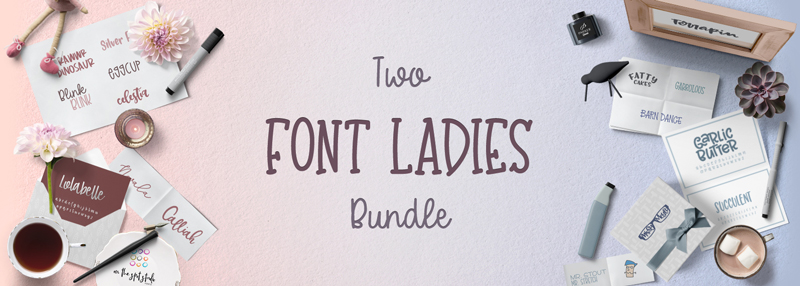
The Two Font Ladies Bundle

Missy Meyer and On The Spot Studio have teamed up for a brand new font bundle with 93% off!

$15 instead of $203 – Get it now!

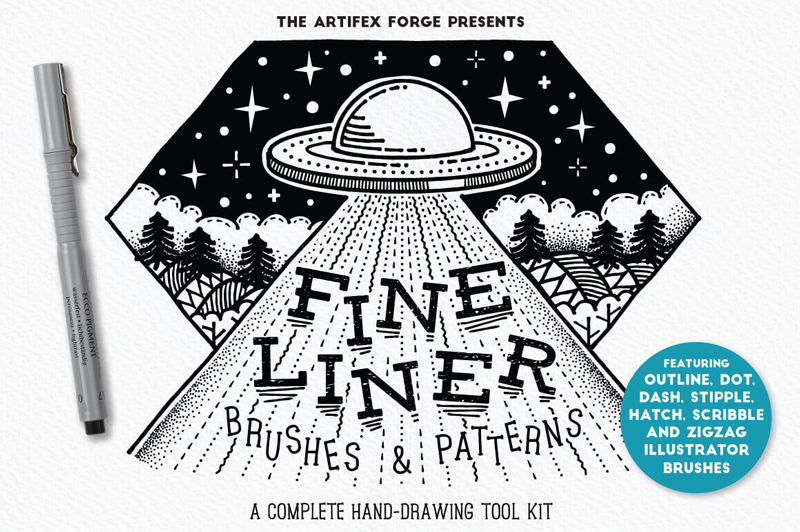
20+ Fineliner Brushes & Patterns

Looking for a quick and easy way to draw up some basic doodles on your computer? Then this Mighty Deal from The Artifex Forge shapes up perfectly for you. You’ll get a real authentic hand-drawn feel on your projects with this collection of Fineliner Brushes and Patterns. You’ll get 17 anti-stretch brushes in a variety of styles from dots to hatches to dashes, as well as a set of patterns to fill up large areas in one fell swoop.

$8 instead of $16 – Get it now!

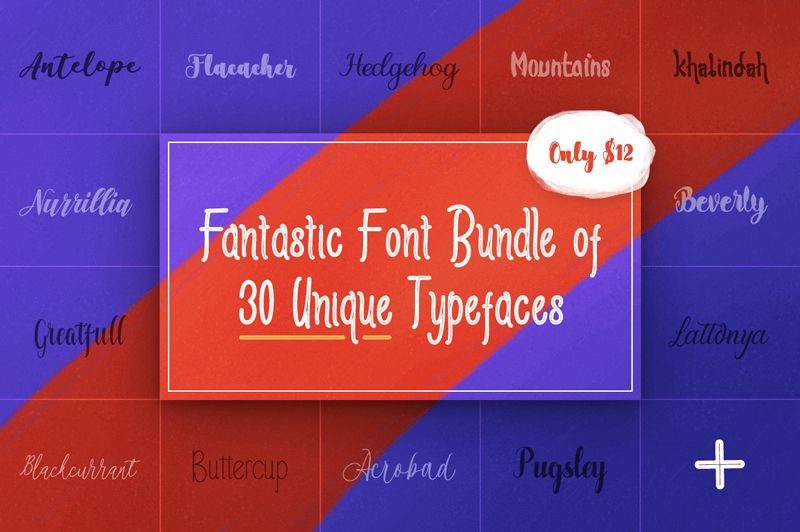
Fantastic Font Bundle of 30 Unique Typefaces

It’s time for another font-astic deal! This one from the mighty Polem, you’ll get yourself a collection of 30 unique hand-drawn, script and serif fonts. Gorgeous, elegant and flowing, these fonts are packed with oodles of OpenType features, and are just the thing you’re looking for in terms of your next project whether it’s greeting cards, invitations or even T-shirts.

$12 instead of $312 – Get it now!

How fitness wear designs are incorporating style and functionality

Post pobrano z: How fitness wear designs are incorporating style and functionality

Many folks who tell you they want to get fit also say they don’t like going to the gym. Often you’ll hear the opinion that it’s because they can’t stand to be around all those Lycra-clad people who appear to be in fabulous shape and have no need to work out at all.

Well, times have moved on and designs for fitness wear nowadays go well beyond the basic elastane fabric, also known as Lycra or Spandex, which originated in the 1950s. Fashion designers have taken fitness wear to their hearts, while manufacturers have worked hard to develop new synthetic products; so much so that the range and variety of clothing and shoes as well as support garments is more extensive and more stylish than ever before. Here are a few of the ideas that are trending among the connoisseurs of fitness fashion.

Style or functionality?

You will already know that architects often debate whether, when designing a building, form follows function or the other way round. So it is that designers have just the same argument about the importance of style versus functionality. In truth, it has to be said that the best garment designs are those that combine both, and as a result create clothing that performs well for the people, including athletes, who wear it for utility as well as looking great in the process.

The rise of athleisure

The designs that are gaining most attention and applause have been categorized as ‘athleisure’ – a hybrid style deriving from business casual clothing and sportswear. Deirdre Clemente, professor of history at the University of Nevada in Las Vegas, believes this new form of styling is attractive to consumers because business casual clothing is very versatile, and sportswear is very durable.

She has examined trends in fashion over more than a century and feels the introduction of synthetic fibers to sportswear has resulted in these comfortable clothes edging towards the mainstream of the casual clothing market. An increased interest in health and fitness has helped swing opinion on the acceptability of sportswear-led designs in business and casual settings, all of which adds up to increased sales in the athleisure sector.

More than a trend?

Athleisure may be a fashion buzzword, however, designers and retailers currently are obsessed with clothes that fit this broad category of being appropriate for leisure pursuits, sports activities or both.

Think designer leggings, yoga pants, cashmere sweats and layers of various pricey and fancy gym clothes. Underneath the hype, however, there are some seriously good products emerging from the top designers. The interesting thing is that just as many of these quality items are hidden beneath outer clothes as are showing off their designer labels.

Functionality that’s stylish

If you like support garments to wear next to your skin, you really need these to perform for you, particularly if you’re recovering from injury or aiming to prevent pain, for example, from repetitive strain injury (RSI).

An advanced fabric using copper technology is used in the manufacture of copper socks, which provide additional support and relief to your legs and feet. This innovative material allows your skin to stay cool and dry while eliminating odors, and is just as comfortable in an overheated office building as it is on the sports field.

Other attractive options include lightweight undershirts and boxer briefs, both ideal for a long-haul business flight as well as a hockey game or a session at the gym. Women’s wear includes elegant compression tops with great wicking qualities and stylish designs. These can be worn under other clothing or alone.

Ethical footwear

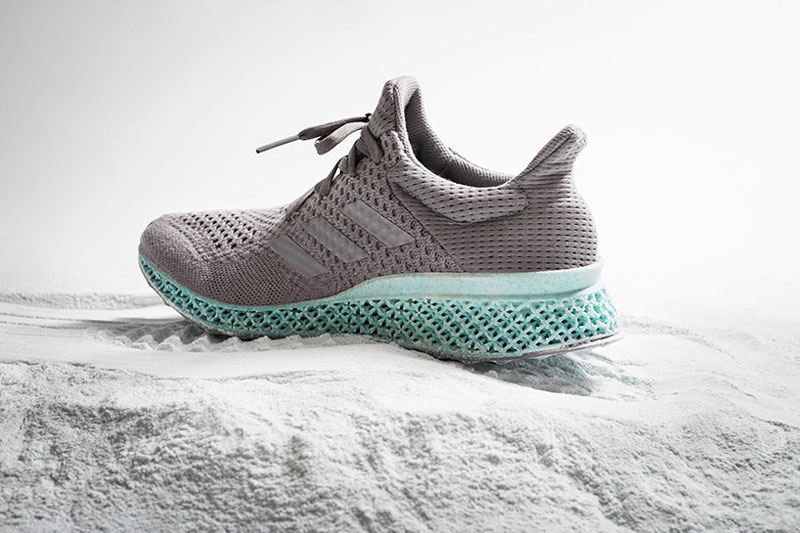
Besides clothing, sports and casual footwear is undergoing something of a revolution. We are hearing more and more about plastic waste choking the oceans of the world, and scientists have been actively seeking solutions for decades. It’s only a couple of years since manufacturers adidas announced a partnership with Parley to create trainers printed in 3D from waste plastic. Parley for the Oceans is continuing its innovative work and the shoes are now a powerful symbol of the exciting collaborative relationship between the eminent sports shoe manufacturer and the environmentalists working to rebalance the eco-system.

The first product collaboration with adidas Originals introduced the EQT Support ADV sneaker, made using materials created from upcycled plastic waste, and more have followed. The shoes are available in at least two color ways and are becoming increasingly popular, especially with young people, among worldwide concerns about the damage being caused by climate change.

Making CSS Animations Feel More Natural

Post pobrano z: Making CSS Animations Feel More Natural

It used to be that designers designed and coders coded. There was no crossover, and that’s the way it was. But with the advent of CSS transitions and animations, those lines are blurring a bit. It’s no longer as simple as the designer dictating the design and the coder transcribing—designers must now know something about code, and coders must know something about design in order to effectively collaborate.

As an example, let’s say a designer asks a developer to make a box bounce. That’s it—no additional instruction. Without some cross-knowledge and a common vocabulary, both sides are a little lost in this communication: the developer doesn’t have enough information to fully realize the designer’s vision, but the designer doesn’t really know what the options are and how to communicate them. With a very basic interpretation, you might end up with something that looks like this:

See the Pen Bouncing Box 1 by Brandon Gregory (@pulpexploder) on CodePen.

Not very exciting. Although, to be fair, this does meet all of the criteria given. We can definitely do better than this, though.

The first thing to look at is the timing function. In the above example, we’re using a linear timing function, which means that the box is constantly moving at the same speed. In some cases, this is desirable; however, in the real world, motion usually doesn’t work like that.

An easy fix is to simply change the timing function to ease. This makes the beginning and ending of each animation a little slower than the middle part, which adds a more natural look to some animations. Here’s the box with the easing function turned on:

See the Pen Bouncing Box 2 by Brandon Gregory (@pulpexploder) on CodePen.

This is a slight improvement, but there’s still a lot of work to be done. The box still looks mechanical and stiff, with the same animation occurring in the same timeframe over and over. Adding a slight delay between bounces adds some visual contrast that seems a little more natural:

See the Pen Bouncing Box 3 by Brandon Gregory (@pulpexploder) on CodePen.

The box now looks like it’s jumping rather than simply moving up and down. There’s a little wind-up and cool-down between jumps that mimics what a live creature might do if given the same instruction. Even though we have no reference for what a jumping box would look like, we all have a pretty good idea of what a jumping creature would look like. Because we know what would happen in nature, by mimicking that, the animation feels more natural. But we can do more to make that wind-up feel a little more weighty.

If you watch cartoons, you’ll notice that natural movements are often exaggerated, creating a caricature of real life. When done well, this can feel just as natural as something in the real world, with the added bonus of infusing a little charm and character into the animation.

At this stage, collaboration between the designer and developer is crucial — but many designers may not even be aware that these options exist. It may be up to the developer to pitch this possibility to the designer.

By adding some subtle distortion to the scale of the box, we can add a lot to the animation:

See the Pen Bouncing Box 4 by Brandon Gregory (@pulpexploder) on CodePen.

Now, the box has character. It feels alive. There are many things to tweak, but this is already moving much farther than the original instruction — in a very good way!

We’re going to go a step further and add a little rebound at the end of the jump:

See the Pen Bouncing Box 5 by Brandon Gregory (@pulpexploder) on CodePen.

The second bounce is making this feel more alive, but something still seems off. The bounce looks stiff compared to the rest of the animation. We need to add another bit of distortion like we did for the wind-up:

See the Pen Bouncing Box 6 by Brandon Gregory (@pulpexploder) on CodePen.

That subtle distortion at the end makes the rebound seem much more natural. Overall, a huge improvement from our basic linear bounce in the first example.

That right there may be exactly what we’re looking for, but further tweaks to the rate of movement can be made with a custom cubic Bézier curve:

See the Pen Bouncing Box 7 by Brandon Gregory (@pulpexploder) on CodePen.

Without both the designer and the developer aware of basic animation principles and controls, this level of customization is impossible. Really, this article just scratches the surface of both fields. If you’re a web designer or a web developer who works with designers, I’d strongly urge you to read up on both.

For animation principles, The Illusion of Life: Disney Animation by Ollie Johnston and Frank Thomas is a great primer on how to make that caricature of real life seem alive and real. With that common language in place, communication and collaboration between designers and developers becomes much easier.

For the technical controls and variations of CSS animation, the possibilities are nearly endless. Delay and timing are simple to adjust. As mentioned, if you don’t like the out-of-the-box ease timing function, it’s very possible to create your own using a cubic-bezier(). You can also adjust the level of distortion you want to bring the animation closer to or further from reality. The important thing is that both the designer and developer are thinking about these variations rather than blindly taking everything without customization. Shared knowledge and collaboration can make even simple animations into great ones.

More Resources


Making CSS Animations Feel More Natural is a post from CSS-Tricks

How to Create a Magical Chest Photo Manipulation With Adobe Photoshop

Post pobrano z: How to Create a Magical Chest Photo Manipulation With Adobe Photoshop

Final product image
What You’ll Be Creating

In this tutorial I’ll show you how to create a dark and magical scene using a range of photo manipulation techniques in Adobe Photoshop. 

First, we’ll build the base scene using three stock images. After that, we’ll import the chest and blend it with the existing ground. Later, we’ll use several adjustment layers to change the light and color of the whole scene. We’ll add the crow, paint the light, and create light rays and magical dots to complete the final result.

If you’re looking for resources, including stock images, textures, and 3D models for your manipulation projects, you can find them all over on Envato Elements or GraphicRiver.

Tutorial Assets

The following assets were used during the production of this tutorial:

1. How to Build the Base Landscape

Step 1

Create a new 2200 x 1500 px document in Photoshop with the given settings:

new file

Step 2

Open the landscape image. Drag this image into the white canvas using
the Move Tool (V). Use the Free Transform Tool (Control-T) to rotate it a
bit.

add landscape

Step 3

We need to reduce the light on the background and particles in the sky.
To do it, go to Layer > New Fill Layer > Solid Color and pick a
similar color to the sky. Remember to set this layer under the landscape
image. I’ve turned off the landscape image to show the result.

color fill

Step 4

Turn on the landscape image and click the second icon at the bottom of
the Layers panel to add a mask to this layer. Activate the Brush Tool
(B)
and choose a soft round one with black color (soft black brush) with
a lowered opacity (about 70-80%) to paint over the sky and the top of the sun.

landscape masking

Step 5

Create a new layer and
select the Clone Tool (S). Use this tool to remove the sign and line on the right edge.

landscape cloning

Step 6

Open the mountain 1 image and place it over the canvas and rotate it to
fit the existing background angle. After that, add a mask to this layer
and use a soft black brush to erase its ground and the right mountain, make
the left one fade into the existing sky.

add mountain 1
mountain1 masking

Step 7

Use the same method to make the right misty mountain with the mountain 2
image. Flip it horizontally (Edit > Transform > Flip Horizontal)
before applying the mask.

add mountain 2
mountain 2 masking

2. How to Import the Chest

Step 1

Open the chest image. As it has a transparent background, you just
need to use the Move Tool to drag it into our working document. Place it
near the foreground and use Control-T to transform it a bit as shown
below:

add chest

Add a mask to this layer and use a medium-soft black brush to paint over
its bottom so that this part looks as if it’s buried in the ground.

chest masking

Step 2

We’re aiming to add a light coming directly from inside the chest, so
it will create a shadow dispersed around the chest’s bottom. Make a new
layer below the chest one and use the Polygonal Lasso Tool (L) to make
a slanted rectangle on the ground and fill it with the color #010101.

chest shadow 1 fill

Lower the opacity of this layer to 30% and go to Filter > Blur > Gaussian Blur and set the Radius to 10 px.

chest shadow 1 gaussian blur

The shadow needs to be a bit softer, so use a layer mask to reduce the opacity around its edges.

chest shadow 1 masking

Step 3

To create a shadow for the top of the chest, create a new layer and use
the Polygonal Lasso Tool to select it and fill it with the color
#010101
.

chest shadow 2 fill

Lower the opacity of this shadow layer to 30% and use Control-T to transform the shadow, making it narrower and thinner to fit the perspective of the ground.

chest shadow 2 transform

Step 4

Apply a Gaussian Blur of 10 px to this shadow layer and reduce the top’s visibility using a layer mask.

chest shadow 2 masking

Step 5

Create a Hue/Saturation adjustment layer above the chest one and set it as Clipping Mask. Reduce the Saturation value to -72:

chest hue saturation

Step 6

Add a Curves adjustment layer and decrease the lightness. On the layer
mask, use a layer mask to remove the dark effect on the sides of the
chest as well as the curvy details inside the top.

chest curves 1
chest curves 1 masking

Step 7

Continue darkening the chest using another Curves adjustment layer. The selected areas show where to paint on the layer mask.

chest curves 2
chest curves 2 masking

Step 8

Make a new layer, change the mode to Overlay 100%, and fill with 50% gray.

DBnew layer

Activate the Dodge and Burn Tool (O) with Midtones Range, Exposure about
15-40% to refine the light and shadow of the chest. You can see how I
did it with Normal mode and the result with Overlay mode.

DB result

3. How to Do the Basic Adjustments

Step 1

Create a Gradient Map adjustment layer on top of the layers and pick the colors #0d0501 and #0a437b.

whole scene gradient map 1

Step 2

Make a Curves adjustment layer and increase the lightness. On this layer
mask, use a soft black brush to erase around the edges and sides of the
scene and make the light visible subtly in the middle.

whole scene curves 1
whole scene curves 1 masking

Step 3

Create another Gradient Map adjustment layer and pick the colors #750909
and #00601b. Lower the opacity of this layer to 20% and paint around
the chest’s area so it won’t be affected by this adjustment layer.

whole scene curves 2

Step 4

Add a Color Lookup adjustment layer and choose Bleach Bypass.look. Lower the opacity of this layer to 70%.

whole scene color lookup

4. How to Add the Crow

Step 1

Cut out the crow and add him to the higher position of the right side of
the chest. Place this layer below
the basic adjustment layers.

add crow

Step 2

Make a Curves adjustment layer to brighten the crow. On the layer mask,
paint on the shadow areas so they won’t be affected by this adjustment
layer.

crow curves 1
crow curves 1 masking

Step 3

Create a new layer and use a small medium-soft brush with the color
#1a1a19
to remove the unwanted bright details on the crow’s wings.

crow bright details remove

Step 4

Make a new layer, change the mode to Overlay 100%, and fill with 50%
gray. Use the Dodge Tool to paint highlights on the crow’s wings and the
Burn Tool to strengthen the shadow’s details.

crow DB

5. How to Paint the Light

Step 1

In this step, we’ll add light to the chest. Create a new layer and use a
soft brush with the color #152c3c to paint inside the chest. Change
this layer mode to Linear Dodge 100%.

light 1

Step 2

On a new layer, change the brush’s color to #85aacb to paint inside the chest and alter the layer’s mode to Overlay 100%.

light 2

Step 3

Make a new layer with Overlay mode and continue painting inside this box using a lighter color (#b4d4f1).

light 3

Step 4

Use another color (#c6d7e6) to paint inside the box again, but alter its mode to Soft Light 100%.

light 4

Step 5

Add a new layer and paint more highlight for the contour of the crow and his eye. Change this layer mode to Overlay 100%.

crow light

6. How to Make the Light Rays and Magical Dots

Step 1

Open the smoke image and add it to our main canvas. Change this layer mode to Linear Dodge 100%.

add smoke

Go to Filter > Blur > Motion Blur and fill in the following settings:

smoke motion blur

Step 2

Use Control-T to change the light’s perspective, making it look as if it’s coming from inside the chest:

turn smoke to light

Step 3

Duplicate this layer several times and move them to the middle and the other side of the box. Use a layer mask if needed to remove any
unwanted light details outside the box.

duplicate to add more light

Step 4

Select all the light ray layers and group them into a new folder using
Control-G. Alter this group’s mode to Linear Dodge 100% and create a
Hue/Saturation adjustment layer to desaturate the blue light a bit.

light hue saturation

Step 5

Use a Levels adjustment layer to increase the highlight of the effect.

light levels

Step 6

Make a new layer and change the foreground to #b6d4df. Press F5 to change the settings of this brush:

dot brush settings 1
dot brush settings 2
dot brush settings 3

Use this brush to paint tiny dots flying from inside the chest, following the direction of the light rays.

dots paint

Step 7

Hit Control-G to make a group of this layer and change the group’s mode to Color Dodge 100%. Now the effect looks a lot better!

dots color dodge mode

Congratulations, You’re Done!

I hope that you’ve enjoyed the tutorial and learned something new for
your own projects. Feel free to share your results or leave comments in
the box below. Enjoy Photoshopping!

final result