A CSS Approach to Trap Focus Inside of an Element

Post pobrano z: A CSS Approach to Trap Focus Inside of an Element

I recently read this article by Keith Grant which introduced the newly arrived <dialog>. Excited by this new UI element, I immediately sat down to experiment with it to see how it can be used effectively as a modal — the most common use of it. While experimenting, I discovered a neat CSS trick on how to trap focus within the <dialog> element, a common accessibility requirement for modals, and a notoriously difficult one.

Disclaimer: The <dialog> demos in this article are tested on Chrome and Firefox browsers only. Safari has some weird issue where not all elements are focused while doing a normal keyboard navigation with Tab key!

What is focus trapping?

First, a quote from the W3C documentation regarding what should happen following a key press inside a dialog:

Tab:

  • Moves focus to the next tab-able element inside the dialog.
  • If focus is on the last tab-able element inside the dialog, moves focus to the first tab-able element inside the dialog.

Shift + Tab

  • Moves focus to the previous tab-able element inside the dialog.
  • If focus is on the first tab-able element inside the dialog, moves focus to the last tab-able element inside the dialog.

To summarize, when inside a dialog, pressing Tab or Shift+Tab should cycle the focus within the dialog only—amongst the focusable elements inside the dialog.

This makes sense because when a dialog is open, a user is interacting only inside it and allowing the focus to escape outside the dialog would essentially be mixing contexts and possibly create a state where the user doesn’t know which element is in focus.

So, going back to the idea of a modal, our expectation would be that tabbing inside of the modal would only focus on elements inside of the modal. Anything outside of the context of the modal would be out of scope because the tab is only concerned with what is inside of it. This is what we mean by focus trapping.

An implementation with JavaScript

If we were to implement focus trapping inside a <dialog>, the most common approach would be to do the following when the dialog opens:

1. Grab all the focusable/tappable elements inside the dialog.
2. Listen for Tab and Shift+Tab keypresses and manually focus the next or previous element, respectively.
3. If the keypress happens on the first focusable element, then focus the last focusable element in the chain and vice versa.

This way, we create a loop on focus as the user presses Tab or Shift+Tab. See this W3C code snippet as an an example of how this might be approached with JavaScript. You’ll see it’s quite a bit of JavaScript.

Enter :focus-within

Back to my experiment with the new <dialog> element. When thinking about focus trapping, a CSS pseudo class (also very recent in browsers) immediately came to my mind : :focus-within.

If you have not heard about that before, it represents an element that has received focus or contains an element that has received focus. So, for example, you have a <div> and inside of it is an input element. If you want to style that <div> when the contained input has focus, you can do it like so:

div:focus-within {
 border: 2px solid red;
}

See the Pen :focus-within by Geoff Graham (@geoffgraham) on CodePen.

The CSS trick to focus trapping

Let’s exploit :focus-within and CSS transitions to implement a basic focus trap inside of a <dialog> element.

To summarise, here is how the trick works. When the focus is not within the dialog (and the dialog is open), we:

  1. trigger a CSS transition
  2. detect that transition completion in JavaScript
  3. focus the first element in the dialog

But, first let’s get set up. Here’s the basic dialog and opening functionality:

<button id="button">Open dialog</button>
<dialog id="modal">
  <form action="">
    <label>
      <input type="text" /> Username
    </label>
    <label>
      <input type="password" /> Password
    </label>
    <input type="submit" value="Submit" />
  </form>
</dialog>
button.onclick = () => {
  modal.showModal();
}

There we go. Clicking on the button should open our dialog. Just this much code required to make a basic working modal using the new <dialog> element!

See the Pen Dialog without focus trap by Kushagra Gour (@chinchang) on CodePen.

Note: As in the above example demo of dialog, you’ll notice some extra polyfill code to make <dialog> work in browsers where it isn’t supported.

If you opened the dialog in the example above and started tabbing several times, you may have already noticed the problem: the focus starts with elements in the dialog, but then leaves once the last element in the dialog has been passed.

This is the core of our trick. We somehow need to send the lost focus detected with :focus-within over to JavaScript so that we can send the focus back to the dialog. This is where CSS transitions come into play. A CSS transition is something that happens through CSS, but emits events in JavaScript too. In our case, we can trigger a transition on any property with a negligible (because it doesn’t matter in our case) visual difference and listen for the transition completion in JavaScript.

Note that we need to trigger this transition when the dialog is open but doesn’t have focus inside it.

dialog {
  background-color: rgb(255, 255, 255);
}
dialog[open]:not(:focus-within) {
  background-color: rgb(255, 255, 254);
  transition: background-color 0.01s;
}

Let’s see what that CSS is doing.

  1. We put a background-color of our choice on the dialog. This isn’t necessary, but ensures we have the same background color across browsers.
  2. The dialog[open]:not(:focus-within) selector applies when the dialog is open but doesn’t have focus on or inside it. This works because native <dialog> element puts an open attribute when it’s open.
  3. Inside this rule, we change the background-color by a minimum amount. This is the least change required to trigger a CSS animation and at the same time not causing any visual difference for the user (remember this is a dummy transition). Also, we set the transition property with a very small duration because we want it to finish as soon as possible and get detected in JavaScript.

A touch of JavaScript

Now, all we need to do is detect the end of our triggered CSS transition and focus back the first element inside the modal, like so:

modal.addEventListener('transitionend', (e) => {
  modal.querySelector('input').focus();
});

We attach a transitionend listener on the modal and inside the callback, we focus the first input inside the modal. Done!

See the Pen Dialog focus trapping with CSS by Kushagra Gour (@chinchang) on CodePen.

Limitations

This is a quick experiment I did to create a working proof-of-concept of focus trapping with the :focus-within pseudo class. It has several limitations compared to dedicated JavaScript solutions to achieve this. Nevertheless, something is better than nothing!

Here are a couple of things this implementation lacks:

  1. According to W3C guidelines, the focus should cycle on the focusable element. But we are always focusing on the first input element. This is because without writing more JavaScript, we cannot know whether the focus was lost from the first or last element.
  2. We are always focusing back to the first input element. But there are many more focusable HTML elements that might be present before input or maybe there is not input element at all inside the modal. Again, full-fledged JavaScript solutions detect and maintain a list of all focusable elements and focus the right one.

Better (JavaScript) implementations of focus trapping

  1. As mentioned earlier, one working example is available inside the W3C documentation itself.
  2. Here is another implementation by Rodney Rehm that also listens for tab.
  3. Greg Kraus has a library that achieves this. His implementation maintains a list of selectors for all valid focusable elements.
  4. One more lightweight library to create accessible modals.

That is all for this experiment. If you liked this trick, you can follow me on Twitter where I share more articles and side projects of mine.

The post A CSS Approach to Trap Focus Inside of an Element appeared first on CSS-Tricks.

How to Create an Architecture Sketch Effect in Adobe Photoshop

Post pobrano z: How to Create an Architecture Sketch Effect in Adobe Photoshop

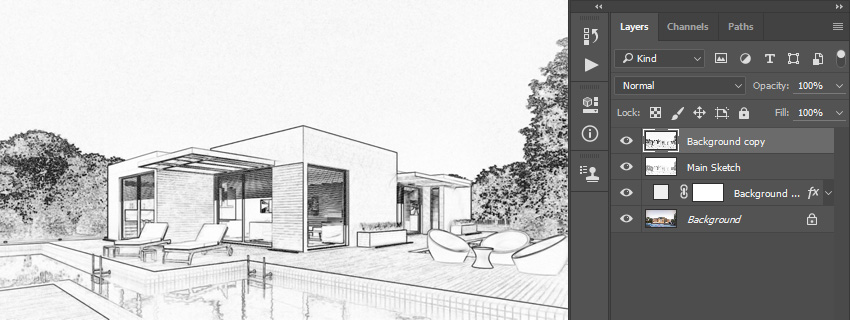
Final product image
What You’ll Be Creating

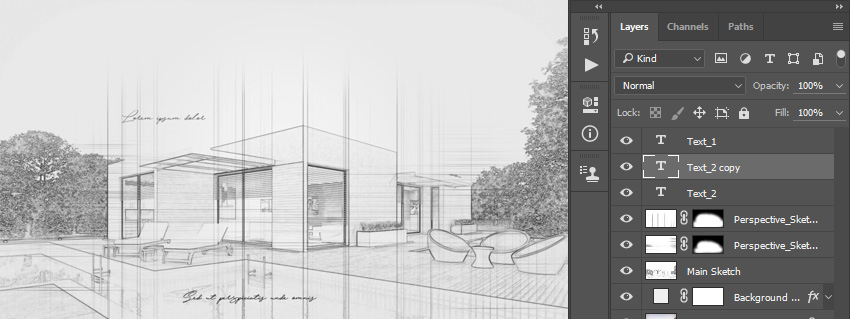
In this tutorial you will learn how to create an amazing architecture sketch effect. I will explain everything in so much detail that everyone can create it, even those who have just opened Photoshop for the first time. 

The effect shown above is the one I will show you how to create in this tutorial. If you would like to create the even more advanced sketch with watercolor effects shown below, using just a single click and in only a few minutes, then check out my TechnicalArt 2 Photoshop Action.

Action final results

What You’ll Need

To recreate the design above, you will need the following resources:

1. Let’s Get Started

First, open the photo that you want to work with. To open your photo, go to File > Open, choose your photo, and click Open. Now, before we get started, just check a couple of things:

  1. Your photo should be in RGB Color mode, 8 Bits/Channel. To check this, go to Image > Mode.
  2. For best results, your photo size should be 2000–4000 px wide/high. To check this, go to Image > Image Size.
  3. Your photo should be the Background layer. If it is not, go to Layer > New > Background from Layer.
Checking image size and mode

2. How to Create the Background

Step 1

In this section, we are going to create the background. Go to Layer > New Fill Layer > Solid Color to create a new solid color fill layer, name it Background color, and choose the color #f0f0f0 as shown below:

Creating new solid color fill layer

Step 2

Now Right-click on this layer, choose Blending Options, check Gradient Overlay, and use the settings below:

Adding layer style

3. How to Create the Main Sketch

Step 1

In this section we are going to create the main sketch. Select the Background layer and press Control-J on your keyboard to duplicate this layer. Then, drag this layer to the top of the Layers panel.

Duplicating layer

Step 2

Now press Control-Shift-U on your keyboard to desaturate this layer. Then, go to Image > Adjustments > Levels and enter the settings below:

Adjusting levels

Step 3

Name this layer Temp and press Control-J on your keyboard to duplicate this layer.

Duplicating layer

Step 4

Now press Control-I on your keyboard to invert this layer and change the Blending Mode of this layer to Color Dodge. Then, go to Filter > Other > Minimum, and set the Radius to 2 px and Preserve to Squareness as shown below:

Adding minimum filter

Step 5

Control-click on the Temp layer to get both layers selected at the same time. Then, press Control-E on your keyboard to merge these two layers into one layer.

Merging layers

Step 6

Change the Blending Mode of this layer to Multiply and name it Main Sketch.

Changing blending mode

4. How to Create the Perspective Sketch

Step 1

In this section, we are going to create the perspective sketch. Select the Background layer and press Control-J on your keyboard to duplicate it. Then, drag this layer to the top of the Layers panel.

Duplicating layer

Step 2

Now go to Filter > Stylize > Find Edges and then press Control-Shift-U on your keyboard to desaturate this layer.

Adding stylize filter

Step 3

Go to Filter > Blur > Motion Blur, and set the Angle to 90° and Distance to 1200 px as shown below:

Adding motion blur filter

Step 4

Now go to Filter > Sharpen > Smart Sharpen and enter the settings below:

Adding smart sharpen filter

Step 5

Go to Filter > Filter Gallery > Sketch > Photocopy, and set the Detail to 2 and Darkness to 5.

Adding photocopy filter

Step 6

Change the Blending Mode of this layer to Multiply and change the Opacity to 40%. Then, name this layer Perspective_Sketch_1.

Changing blending mode and opacity

Step 7

Now go to Layer > Layer Mask > Hide All to add a layer mask that hides the whole layer.

Adding layer mask

Step 8

Set the foreground color to #ffffff, choose the Brush Tool (B), pick a soft brush, and brush where you want to reveal the vertical perspective lines.

Brushing into layer mask

Step 9

Now select the Background layer and press Control-J on your keyboard to duplicate this layer. Then, drag this layer just below the Perspective_Sketch_1 layer in the Layers panel.

Duplicating layer

Step 10

Go to Filter > Stylize > Find Edges and then press Control-Shift-U on your keyboard to desaturate this layer.

Adding stylize filter

Step 11

Go to Filter > Blur > Motion Blur, and set the Angle to 0° and Distance to 1200 px as shown below:

Adding motion blur filter

Step 12

Now go to Filter > Sharpen > Smart Sharpen and enter the settings below:

Adding smart sharpen filter

Step 13

Go to Filter > Filter Gallery > Sketch > Photocopy, and set the Detail to 2 and Darkness to 5.

Adding photocopy filter

Step 14

Change the Blending Mode of this layer to Multiply and change the Opacity to 55%. Then, name this layer Perspective_Sketch_2.

Changing blending mode and opacity

Step 15

Now go to Layer > Layer Mask > Hide All to add a layer mask that hides the whole layer.

Adding layer mask

Step 16

Set the foreground color to #ffffff, choose the Brush Tool (B), pick a soft brush, and brush where you want to reveal the vertical perspective lines.

Brushing into layer mask

5. How to Create the Text

Step 1

In this section, we are going to create the text. Choose the Horizontal Type Tool (T) and set the font to Hijrnotes, font size to 80 px, alignment to Left, and color to #000000. Then, click anywhere inside the canvas and go to Type > Paste Lorem Ipsum to paste some random text. Feel free to use your own text and font settings.

Creating text

Step 2

Double-click on this layer thumbnail to make the text editable and delete some of the text. Then, choose the Move Tool (V) and click and drag anywhere inside the canvas to position the text as shown below:

Editing text

Step 3

Now name this layer Text_1. Then, press Control-J on your keyboard to duplicate this layer.

Duplicating layer

Step 4

Double-click on this layer thumbnail to make the text editable, press Control-A to select all text, and go to Type > Paste Lorem Ipsum to paste random text. Then, delete some of the text, choose the Move Tool (V), and click and drag anywhere inside the canvas to position the text as shown below:

Editing text

Step 5

Name this layer Text_2 and drag it just below the Text_1 layer in the Layers panel. Then, press Control-J on your keyboard to duplicate this layer.

Duplicating layer

Step 6

Now Double-click on this layer thumbnail to make the text editable, press Control-A to select all text, and go to Type > Paste Lorem Ipsum to paste random text. Then, delete some of the text, choose the Move Tool (V), and click and drag anywhere inside the canvas to position the text as shown below:

Editing text

Step 7

Press Control-T on your keyboard to transform this layer and set the Rotate to 15°.

Transforming layer

Step 8

Now name this layer Text_3 and drag it just below the Text_2 layer in the Layers panel.

Arranging layers

6. How to Make the Final Adjustments

Step 1

In this section, we are going to make final adjustments to the design. Press D on your keyboard to reset the swatches and select the Text_1 layer. Then, go to Layer > New Adjustment Layer > Gradient Map to create a new gradient map adjustment layer and name it Overall Contrast.

Creating new gradient map adjustment layer

Step 2

Now change the Blending Mode of this layer to Soft Light and set the Opacity to 35%.

Changing blending mode and opacity

Step 3

Go to Layer > New Adjustment Layer > Levels to create a new levels adjustment layer and name it Overall Brightness.

Creating new levels adjustment layer

Step 4

Now Double-click on this layer thumbnail and, in the Properties panel, use the settings below:

Adjusting levels

Step 5

Press Control-Alt-Shift-E on your keyboard to make a screenshot. Then, go to Filter > Other > High Pass and set the Radius to 2 px as shown below:

Adding high pass filter

Step 6

Change the Blending Mode of this layer to Hard Light and name it Overall Sharpening.

Changing blending mode

You Made It!

Congratulations, you have succeeded! Here is our final result:

Final result

If you would like to create the even more advanced sketch with watercolor effects shown below, using just a single click and in
only a few minutes, then check out my TechnicalArt 2 Photoshop Action.

The
action works so you simply brush over your photo with a color and just
play the action. The action will do everything for you,
giving you fully
layered and customizable results. There are also over 60 high-quality watercolor brushes included with the
action that you can use to build the designs even further. The action
will also create four textures (watercolor, canvas, paper, and halftone)
and 25 preset color looks that you can choose from.

The action comes with a detailed video tutorial that demonstrates how to use the action and customize the results to get the most out of the effect.

Action final results

You can also get this item in a bundle and save 50%—check out my Artistic 4in1 Photoshop Actions Bundle.

New Course: 5 Ways to Brand Your Small Business With Envato Elements

Post pobrano z: New Course: 5 Ways to Brand Your Small Business With Envato Elements

Our new Coffee Break Course is ideal for the small business owner who is looking for a convenient and quick way to establish or revamp their professional presence through effective branding. 

Try 5 Ways to Brand Your Small Business With Envato Elements to get a jump start on creating a cohesive brand identity for your business.

Stationery available on Envato Elements

In this quick, ten-minute course, Chamira Young will show you how to strategically select a logo, a font, a stationery set, a website template, and a presentation template. The goal is to represent your business as professionally as possible without spending a ton of time doing it, and to use assets that work well together.

Watch the introduction below to find out more.


You can take our new Coffee Break Course straight away with a subscription to Envato Elements. For a single low monthly fee, you get access not only to this course, but also to our growing library of over 1,000 video courses and industry-leading eBooks on Envato Tuts+. 

Plus you now get unlimited downloads from the huge Envato Elements library of 460,000+ creative assets. Create with unique fonts, photos, graphics and templates, and deliver better projects faster.

5 Tips to Branding Your Business

Post pobrano z: 5 Tips to Branding Your Business

In any business, branding is important as it makes one’s company edgy and competitive in the markets. A brand says so much about the business, like what are the products or services being offered and what should the customers expect from them. A brand is what differentiates an individual from their competitors. One requires defining their brand and this requires a branding strategy. This article by Packwire explains what one should consider when branding their business:

1. Be unique

It is very important to ensure that you have your own identity that is discrete and makes you stand out from your competitors. Avoid mimicking the look of big brands. Try and come up with your own brand that is unique. Many consumers are attracted to independent establishments as they are looking for something authentic or original.

2. Have a “voice” to reflect on the brand

One should come up with a voice for the business that reflects on the brand. This voice should be able to speak to the customer and the consumer is very aware of what to expect from the service or product. For any written communication, this voice should be applied. Also in the visual imagery whether online or off, the voice should be incorporated.

3. Branding packaging

Packaging serves the sole purpose of attracting the consumer attention. This is very key as it can determine whether a consumer buys the product or not. The product should be packed in such a way that it compels the consumer to pick up the product and have a look at it. When coming up with branding packaging, one should stand out, be simple, trigger emotional engagement and create iconic assets. There are various tools used in packaging designs and they include logos, colors, fonts, and description. Therefore an individual should know the relevant tools to use.

4. Know your consumers

It is very crucial to know your target market as this will help you know the right way to reach them. How you convey your service or product is determined by the potential customers. Knowing your personas will help you know the kind of media that they relate to and you can use it to reach out to them.

5. Consistent social media presence

With the advancement in technology, most people spend their time online on social media platforms such as Facebook, Pinterest, Instagram, Twitter and LinkedIn. You can sell your brand easily on these platforms. Once the social media presence has been established, you should maintain it by being consistent in posting about your brand from time to time. Blogging is also an important aspect when it comes to marketing and one can reach out to as many consumers as possible.

With these few steps, one can build their brand easily. It involves creativity and being innovative. For already established business, they can rebrand themselves in order to keep up with the competing markets. For those interested in rebranding, they can read an article by Packwire on rebranding.

Featured image by Brad Neathery

Bathroom tiles repurposed in a creative way

Post pobrano z: Bathroom tiles repurposed in a creative way

Innovation and creativity come straight out of our brains, not from huge budgets or financial conditions. Actually, a constraint can even force designers and other creatives to innovate in order to produce good work.

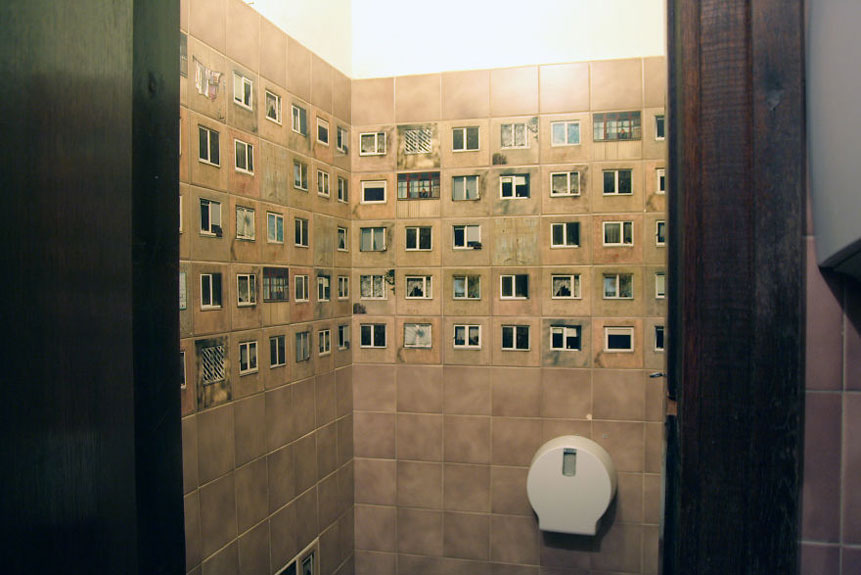
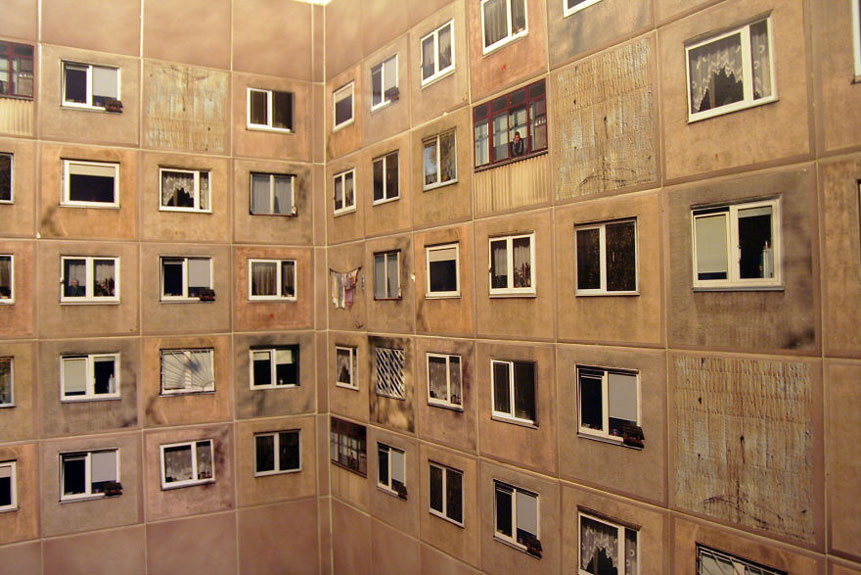
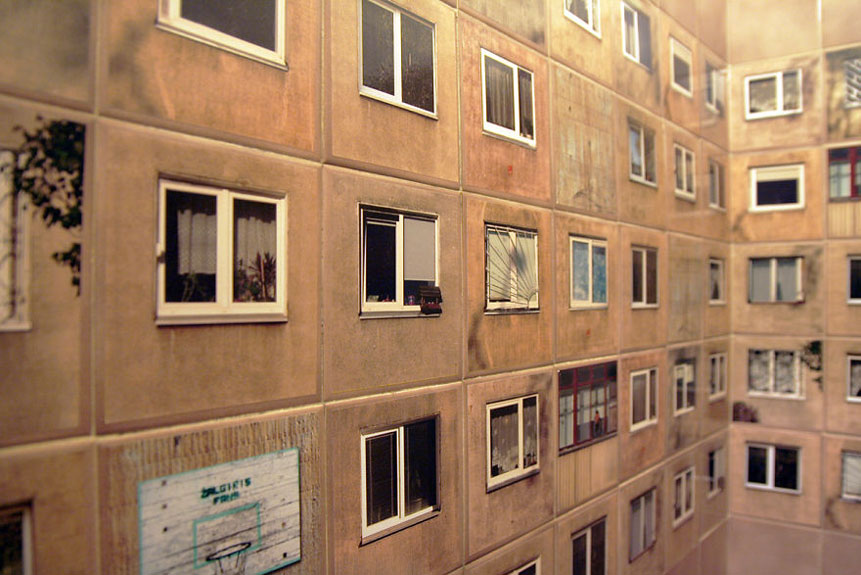
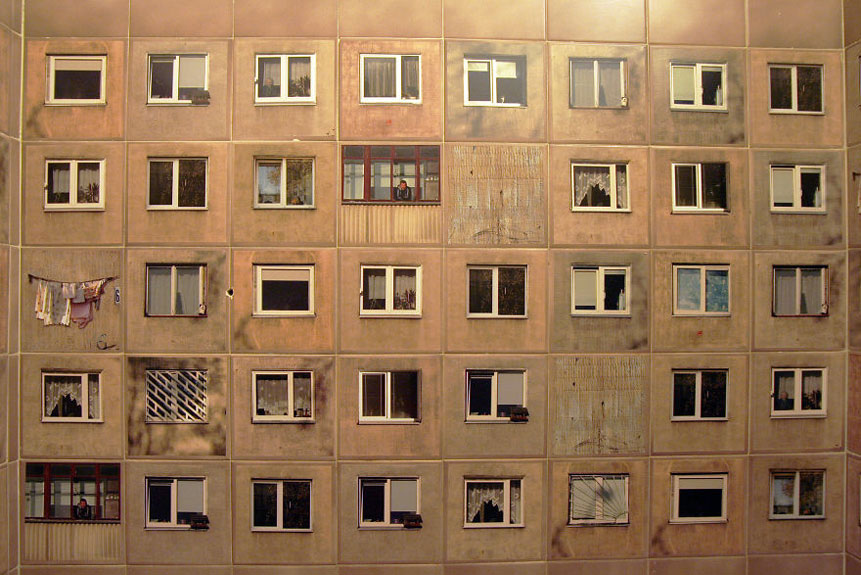
This bathroom redesign for a restaurant in Lithuania is a perfect example of this. The designers had to redecorate the place, but they couldn’t change the ugly tiles on the wall. Talk about a challenge!

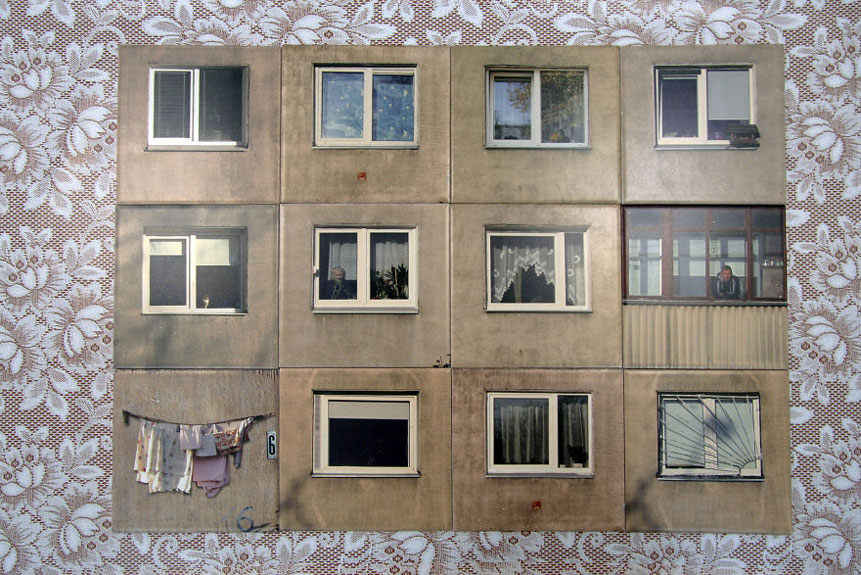
Instead of giving up, design studio Gyva Grafika decided to turn the tiles into a big building by adding tiny windows. The result is great and makes the place look much more lively with a tiny investment.

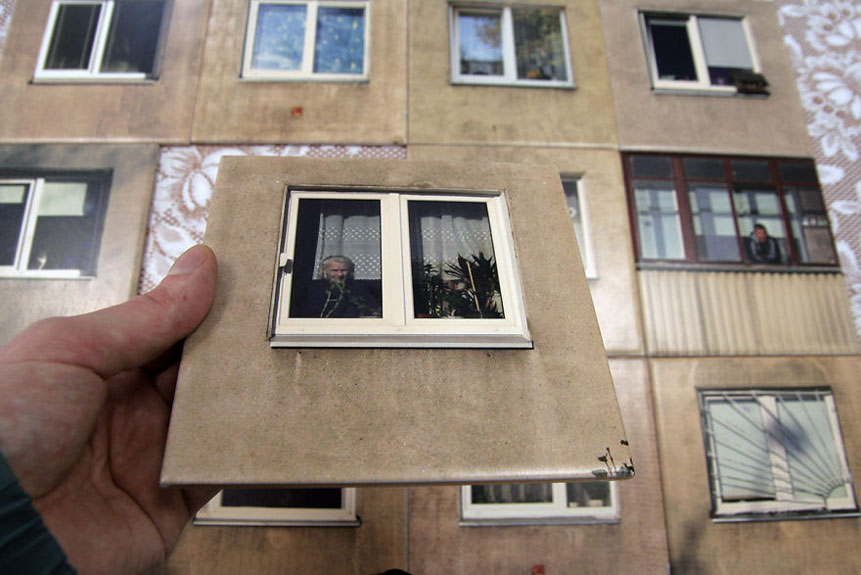
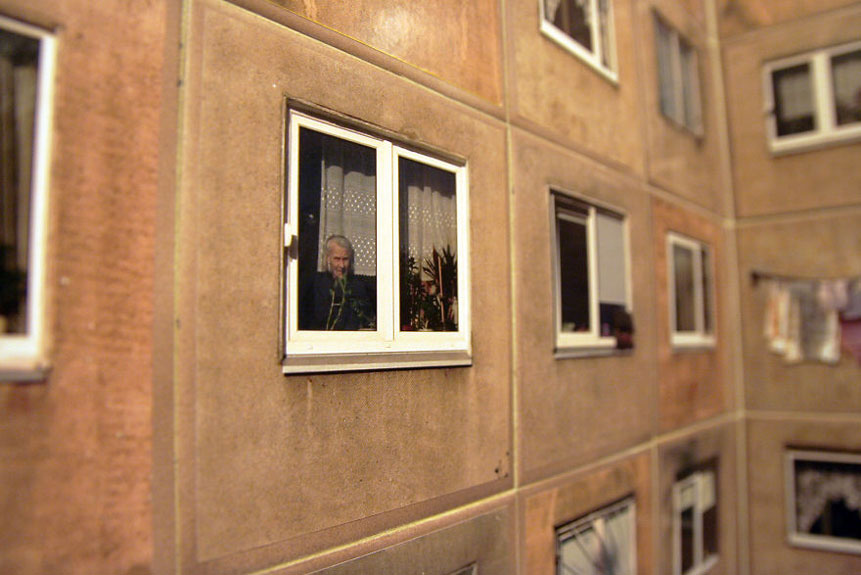
An example of a window on a tile, these have become so popular that the design studio started to sell it. To buy some, contact them on their website or through their Facebook page.