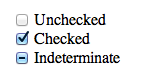
There is a such thing as an indeterminate checkbox value. It’s a checkbox (<input type="checkbox">) that isn’t checked. Nor is it not checked. It’s indeterminate.
We can even select a checkbox in that state and style it with CSS!
Some curious points though:
It’s only possible to set via JavaScript. There is no HTML attribute or value for it.
It doesn’t POST (or GET or whatever else) or have a value. It’s like being unchecked.
And, for whatever reason, you make that checkbox indeterminate:
let veg = document.querySelector(".veg");
veg.indeterminate = true;
If you serialize that form and take a look at what will POST, you’ll get "name=Chris". No value for the checkbox. Conversely, had you checked the checkbox in the HTML and didn’t touch it in JavaScript, you’d get "name=Chris&vegetarian=on".
Apparently, this is by design. Checkboxes are meant to be boolean, and the indeterminate value is just an aesthetic thing meant to indicate that visual „child” checkboxes are in a mixed state (some checked, some not). That’s fine. Can’t change it now without serious breakage of websites.
But say you really need to know on the server if a checkbox is in that indeterminate state. The only way I can think of is to have a buddy hidden input that you keep in sync.
let veg = document.querySelector(".veg");
let veg_value = document.querySelector(".veg-value");
veg.indeterminate = true;
veg_value.value = "indeterminate";
I’ve set the indeterminate value of one input and I’ve set another hidden input value to "indeterminate", which I can POST. Serialized means it looks like "name=Chris&vegetarian-value=indeterminate". Good enough.
There is a such thing as an indeterminate checkbox value. It’s a checkbox (<input type="checkbox">) that isn’t checked. Nor is it not checked. It’s indeterminate.
We can even select a checkbox in that state and style it with CSS!
Some curious points though:
It’s only possible to set via JavaScript. There is no HTML attribute or value for it.
It doesn’t POST (or GET or whatever else) or have a value. It’s like being unchecked.
And, for whatever reason, you make that checkbox indeterminate:
let veg = document.querySelector(".veg");
veg.indeterminate = true;
If you serialize that form and take a look at what will POST, you’ll get "name=Chris". No value for the checkbox. Conversely, had you checked the checkbox in the HTML and didn’t touch it in JavaScript, you’d get "name=Chris&vegetarian=on".
Apparently, this is by design. Checkboxes are meant to be boolean, and the indeterminate value is just an aesthetic thing meant to indicate that visual „child” checkboxes are in a mixed state (some checked, some not). That’s fine. Can’t change it now without serious breakage of websites.
But say you really need to know on the server if a checkbox is in that indeterminate state. The only way I can think of is to have a buddy hidden input that you keep in sync.
let veg = document.querySelector(".veg");
let veg_value = document.querySelector(".veg-value");
veg.indeterminate = true;
veg_value.value = "indeterminate";
I’ve set the indeterminate value of one input and I’ve set another hidden input value to "indeterminate", which I can POST. Serialized means it looks like "name=Chris&vegetarian-value=indeterminate". Good enough.
There’s a ton of very quotable stuff from Rachel Andrew’s latest post all about CSS and how we talk about it in the community:
CSS has been seen as this fragile language that we stumble around, trying things out and seeing what works. In particular for layout, rather than using the system as specified, we have so often exploited things about the language in order to achieve far more complex layouts than it was ever designed for. We had to, or resign ourselves to very simple looking web pages.
Rachel goes on to argue that we probably shouldn’t disparage CSS for being so weird when there are very good reasons for why and how it works — not to mention that it’s getting exponentially more predictable and powerful as time goes by:
There is frequently talk about how developers whose main area of expertise is CSS feel that their skills are underrated. I do not think we help our cause by talking about CSS as this whacky, quirky language. CSS is unlike anything else, because it exists to serve an environment that is unlike anything else. However we can start to understand it as a designed language, with much consistency. It has codified rules and we can develop ways to explain and teach it, just as we can teach our teams to use Bootstrap, or the latest JavaScript framework.
I tend to feel the same way and I’ve been spending a lot of time thinking about how best to reply to folks that argue that “CSS is dumb and weird.” It can sometimes be a demoralizing challenge, attempting to explain why your career and area of expertise is a useful one.
I guess the best way to start doing that is to stand up and say, “No, CSS is not dumb and weird. CSS is awesome!”
WordPress 5.0 is quickly approaching, and the new Gutenberg editor is coming with it. There’s been a lot of discussion in the WordPress community over what exactly that means for users, designers, and developers. And while Gutenberg is sure to improve the writing experience, it can cause a bit of a headache for developers who now need to ensure their plugins and themes are updated and compatible.
One of the clearest ways you can make sure your theme is compatible with WordPress 5.0 and Gutenberg is to add some basic styles for the new blocks Gutenberg introduces. Aside from the basic HTML blocks (like paragraphs, headings, lists, and images) that likely already have styles, you’ll now have some complex blocks that you probably haven’t accounted for, like pull quotes, cover images, buttons, and columns. In this article, we’re going to take a look at some styling conventions for Gutenberg blocks, and then add our own styles for Gutenberg’s Columns block.
Block naming conventions
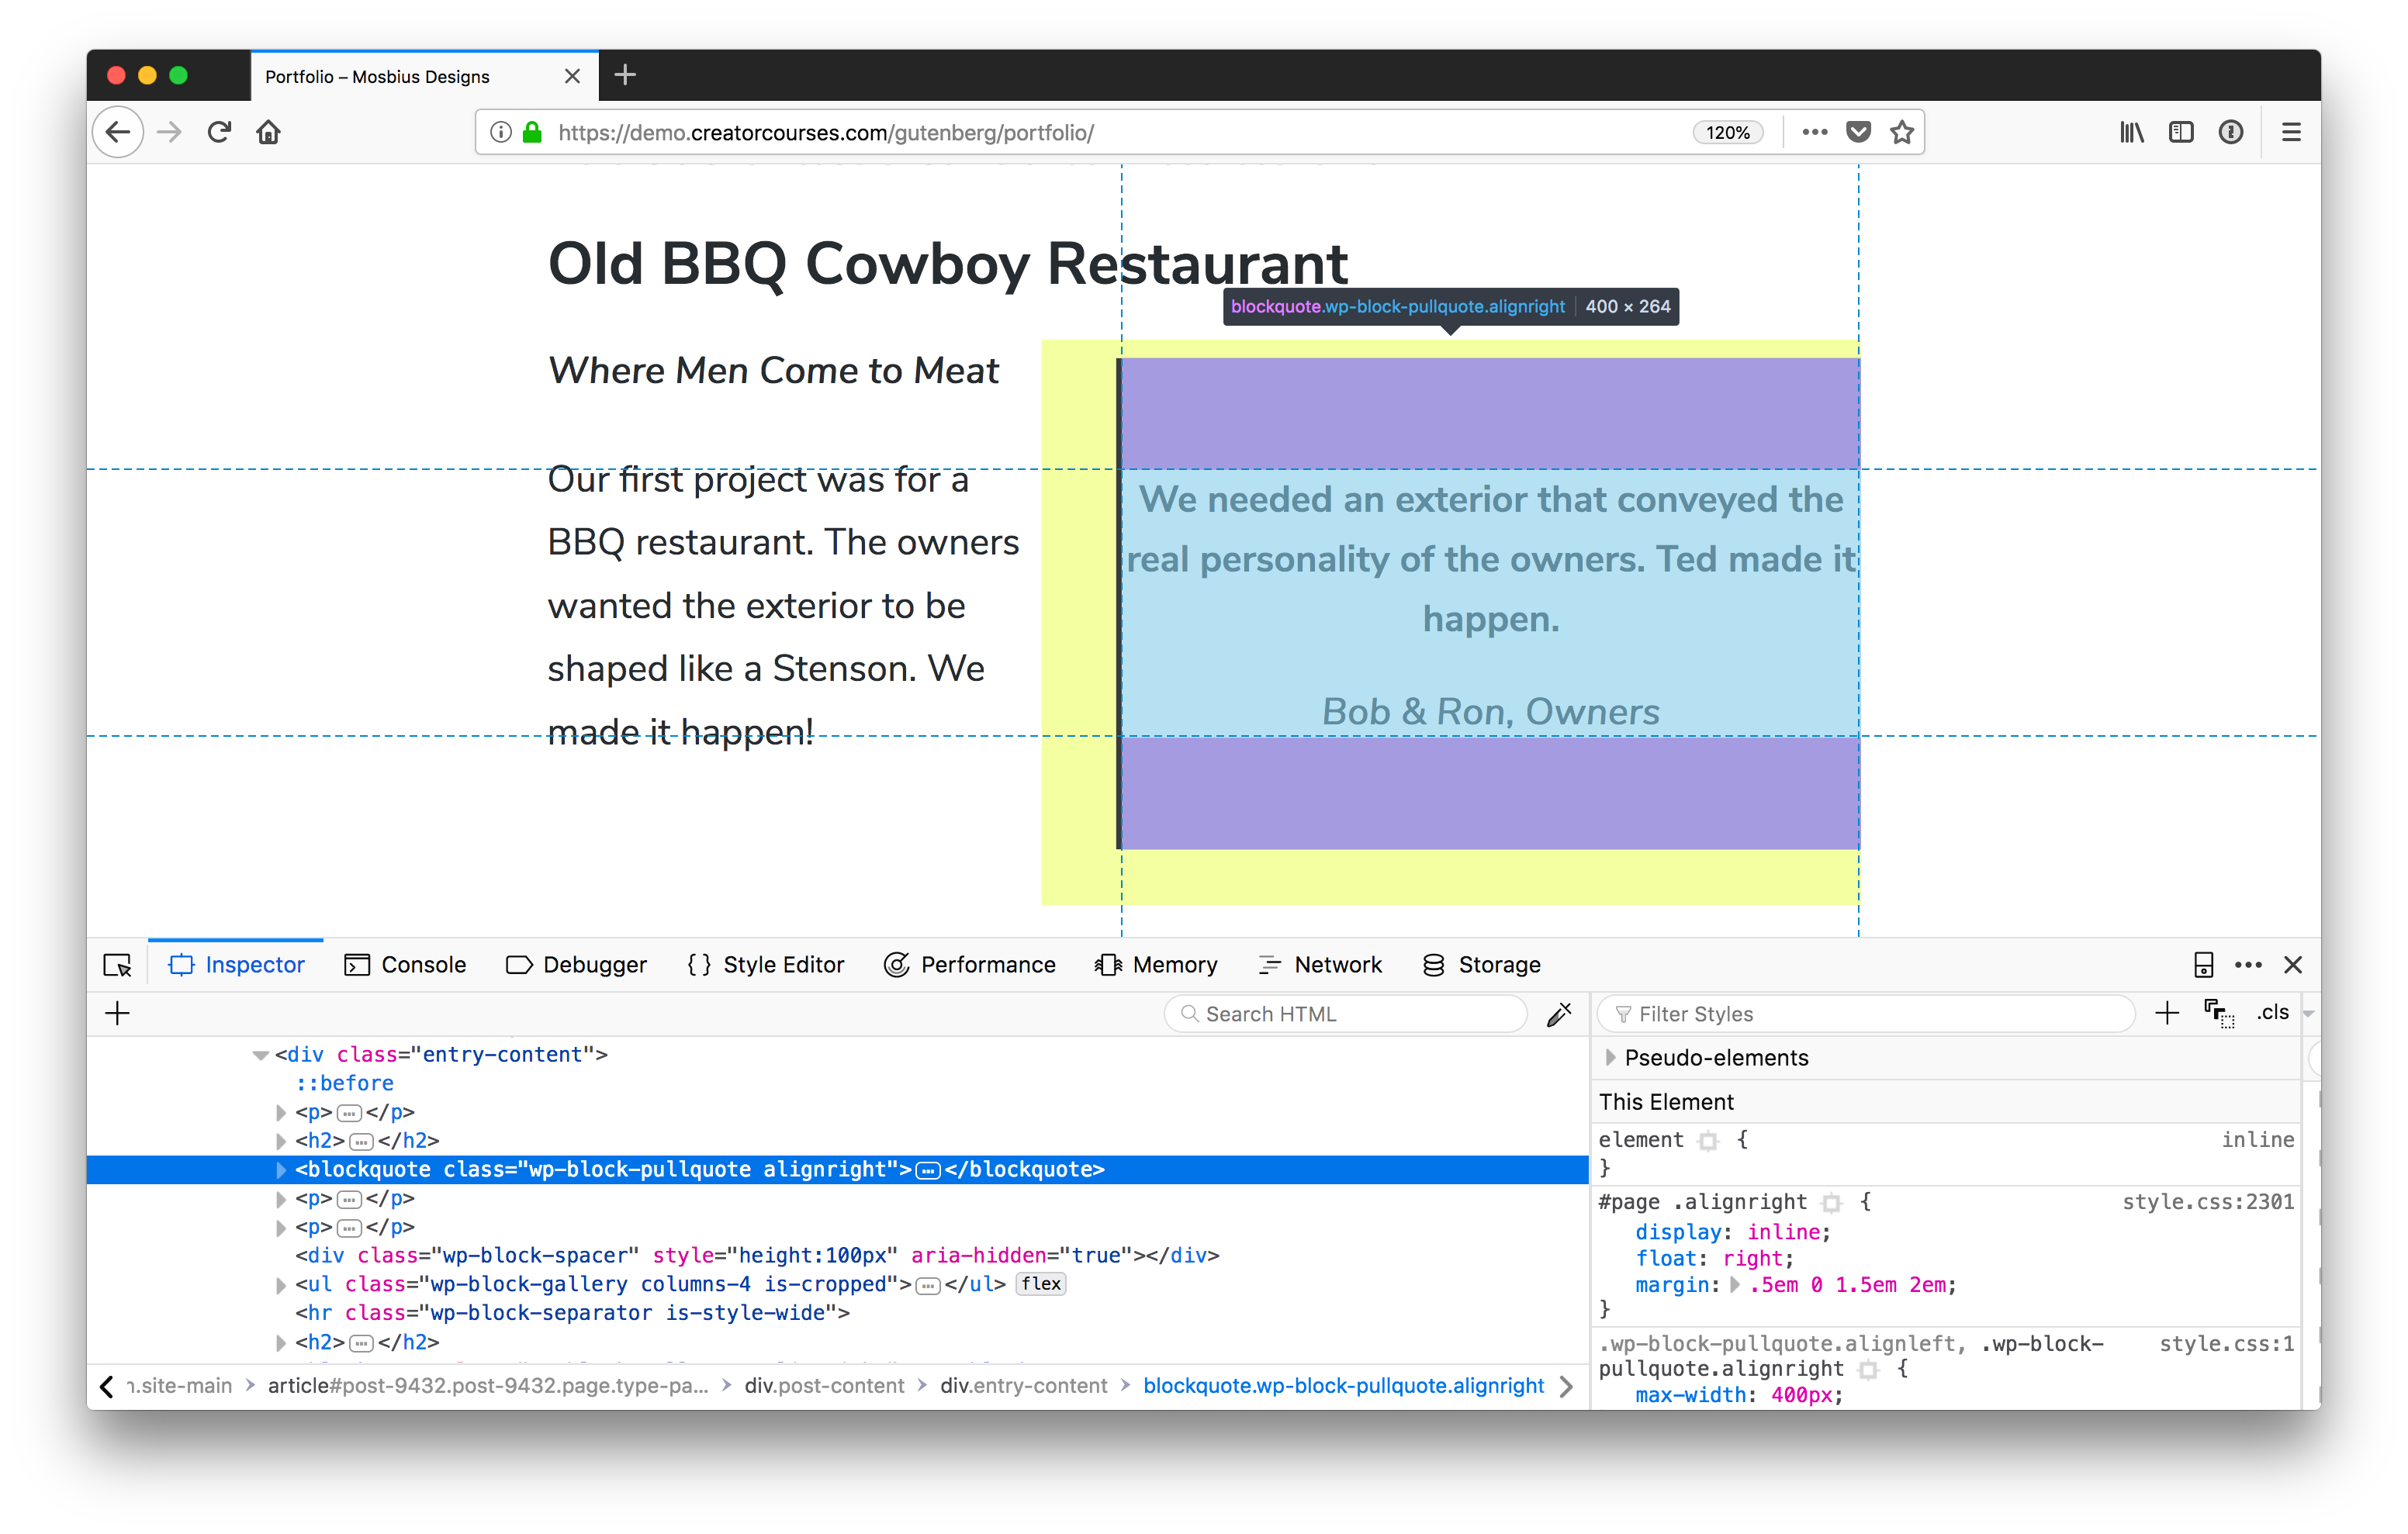
First things first: how are Gutenberg blocks named? If you’re familiar with the code inspector, you can open that up on a page using the block you want to style, and check it for yourself:
The Gutenberg Pull Quote block has a class of wp-block-pullquote.
Now, it could get cumbersome to do that for each and every block you want to style, and luckily, there is a method to the madness. Gutenberg blocks use a form of the Block, Element, Modifier (BEM) naming convention. The main difference is that the top level for each of the blocks is wp . So, for our pull quote, the name is wp-block-pullquote. Columns would be wp-block-columns, and so on. You can read more about it in the WordPress Development Handbook.
Class name caveat
There is a small caveat here in that the block name may not be the only class name you’re dealing with. In the example above, we see that the class alignright is also applied. And Gutenberg comes with two new classes: alignfull and alignwide. You’ll see in our columns that there’s also a class to tell us how many there are. But we’ll get to that soon.
Applying your own class names
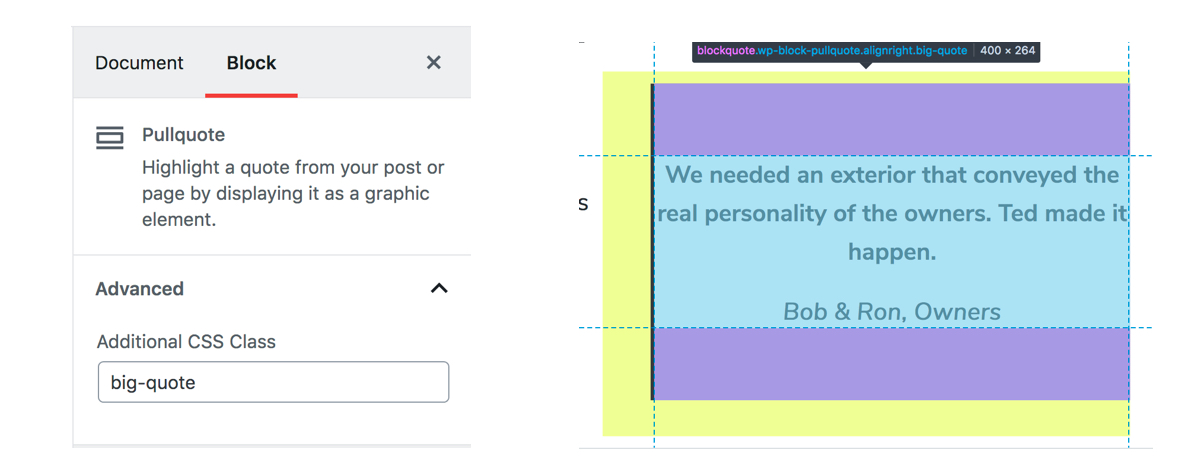
Gutenberg blocks also give us a way to apply our own classes:
The class added to the options panel in the Gutenberg editor (left). It gets applied to the element, as seen in DevTools (right).
This is great if you want to have a common set of classes for blocks across different themes, want to apply previously existing classes to blocks where it makes sense, or want to have variations on blocks.
Much like the current (or “Classic”) WordPress post editor, Gutenberg makes as few choices as possible for the front end, leaving most of the heavy lifting to us. This includes the columns, which basically only include enough styles to make them form columns. So we need to add the padding, margins, and responsive styles.
Styling columns
Time to get to the crux of the matter: let’s style some columns! The first thing we’ll need to do is find a theme that we can use. There aren’t too many that have extensive Gutenberg support yet, but that’s actually good in our case. Instead, we’re going to use a theme that’s flexible enough to give us a good starting point: Astra.
Astra is available for free in the WordPress Theme Directory. (Source)
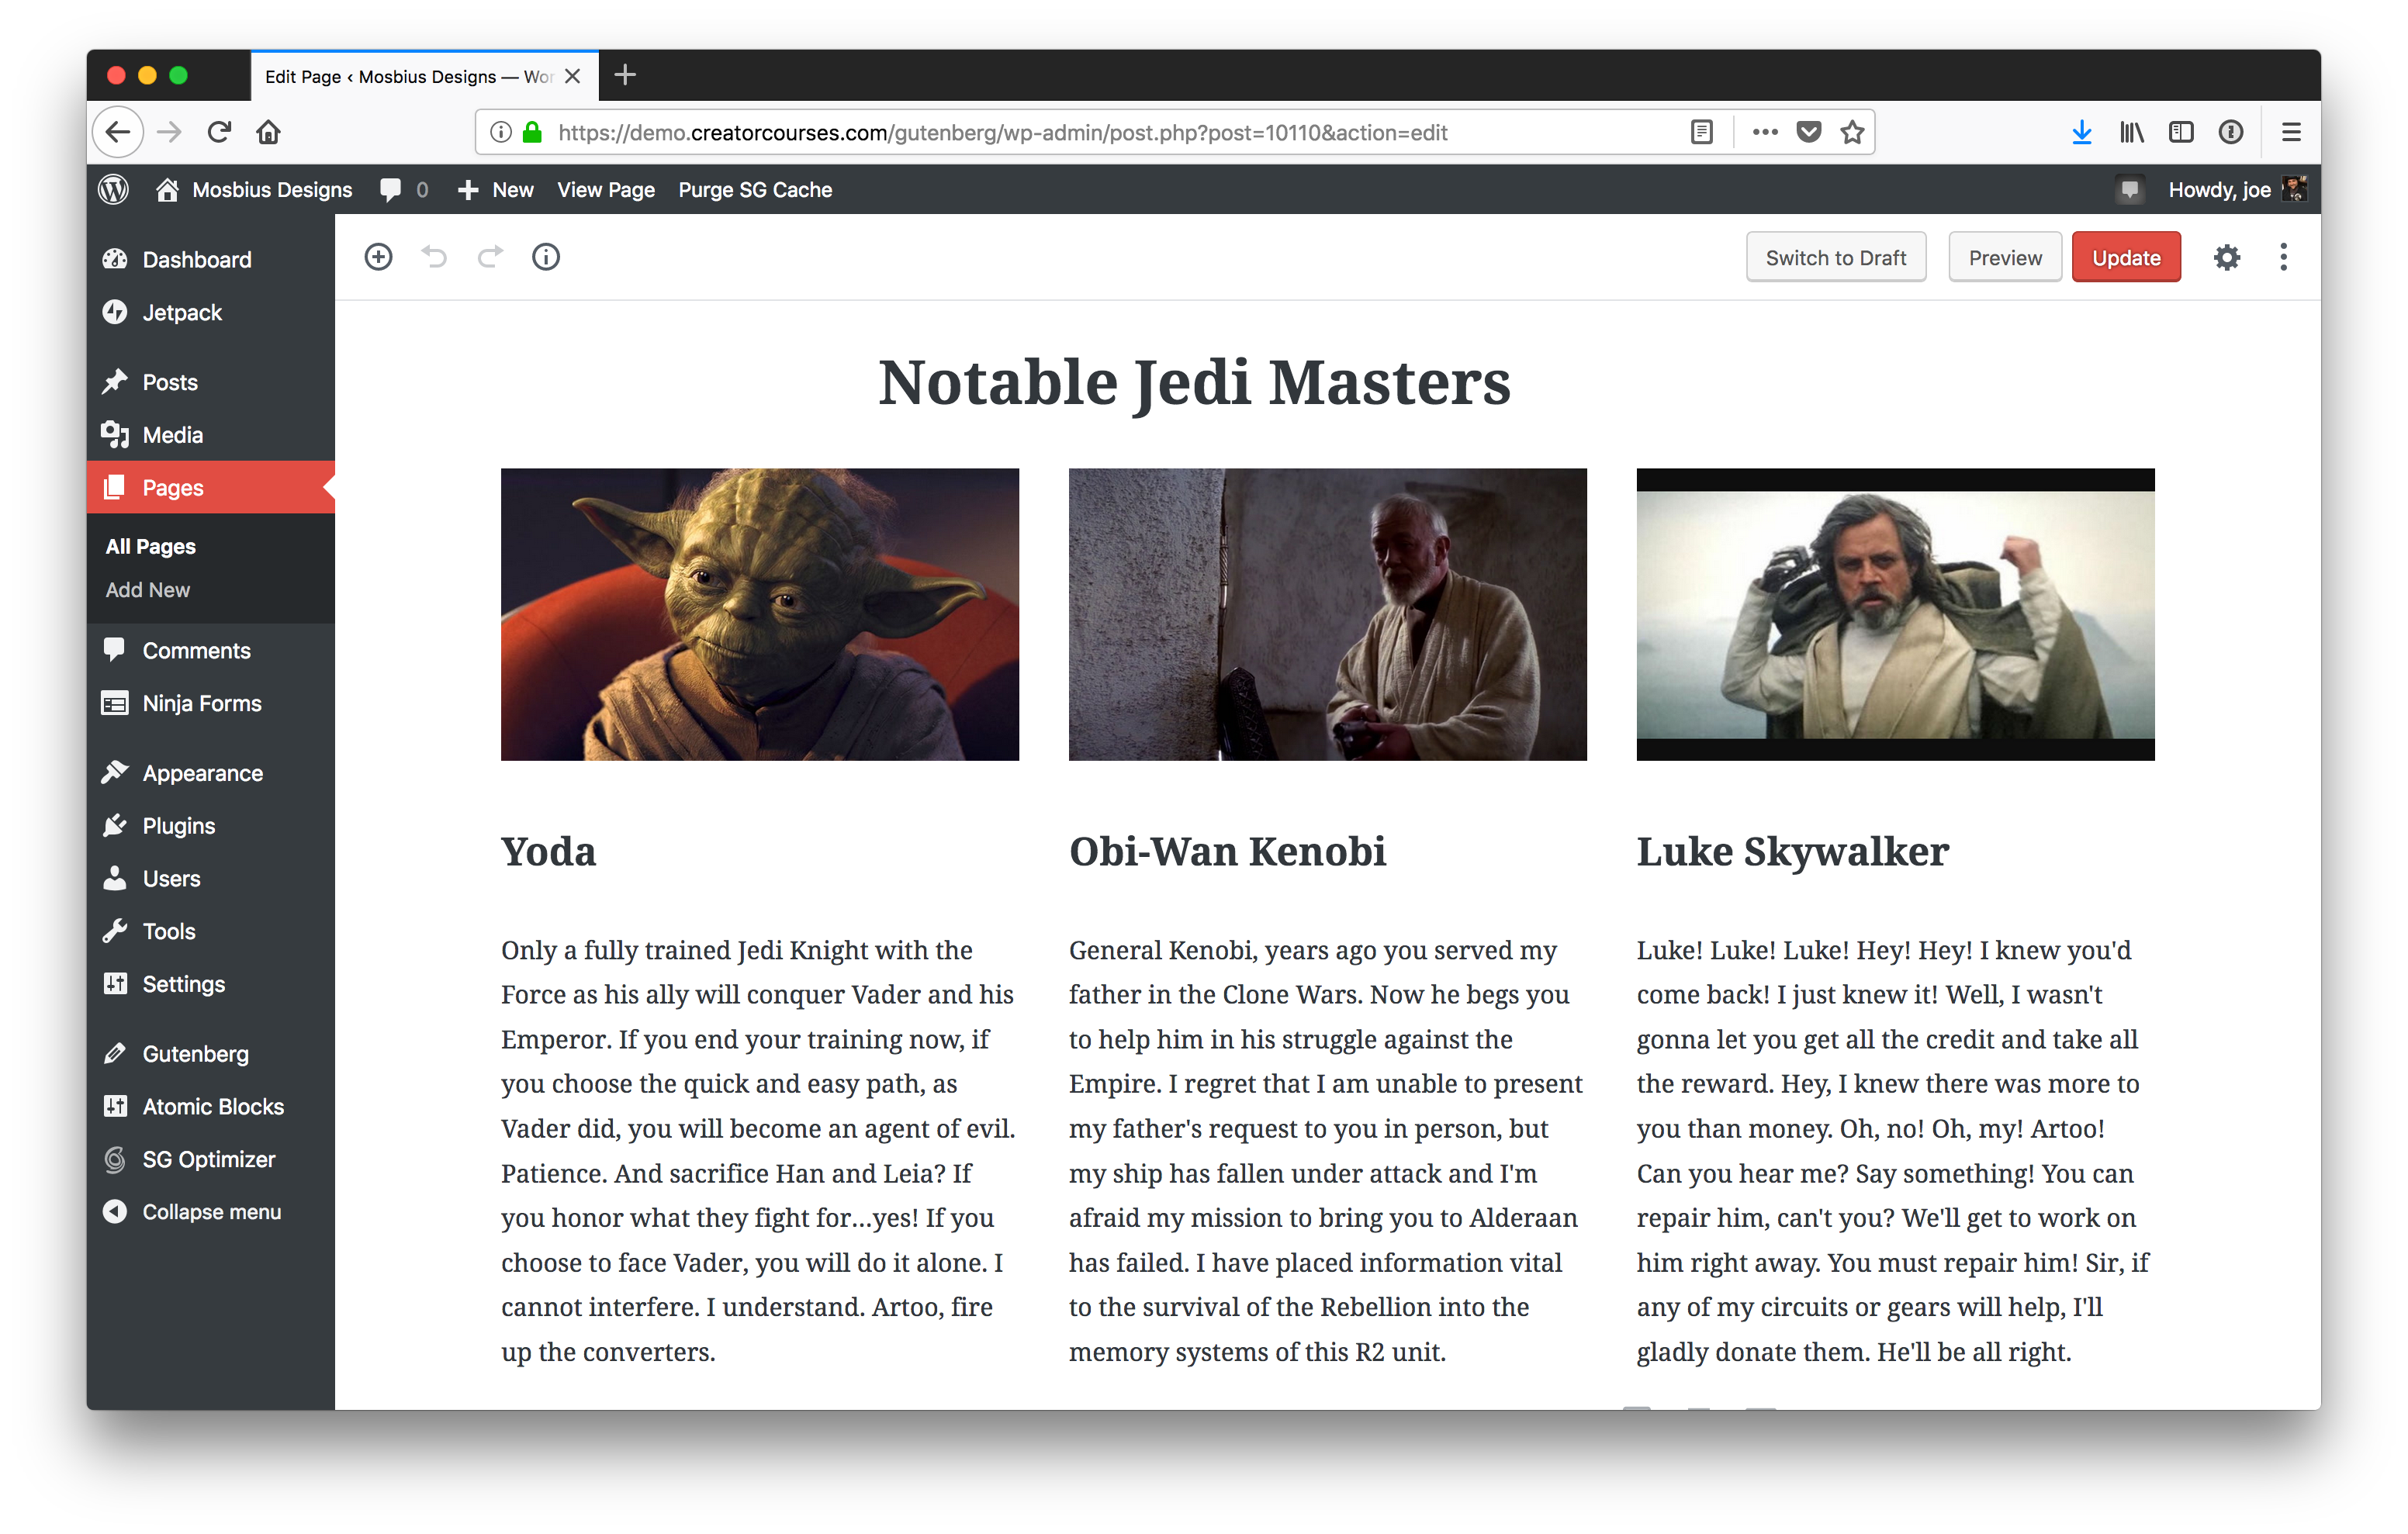
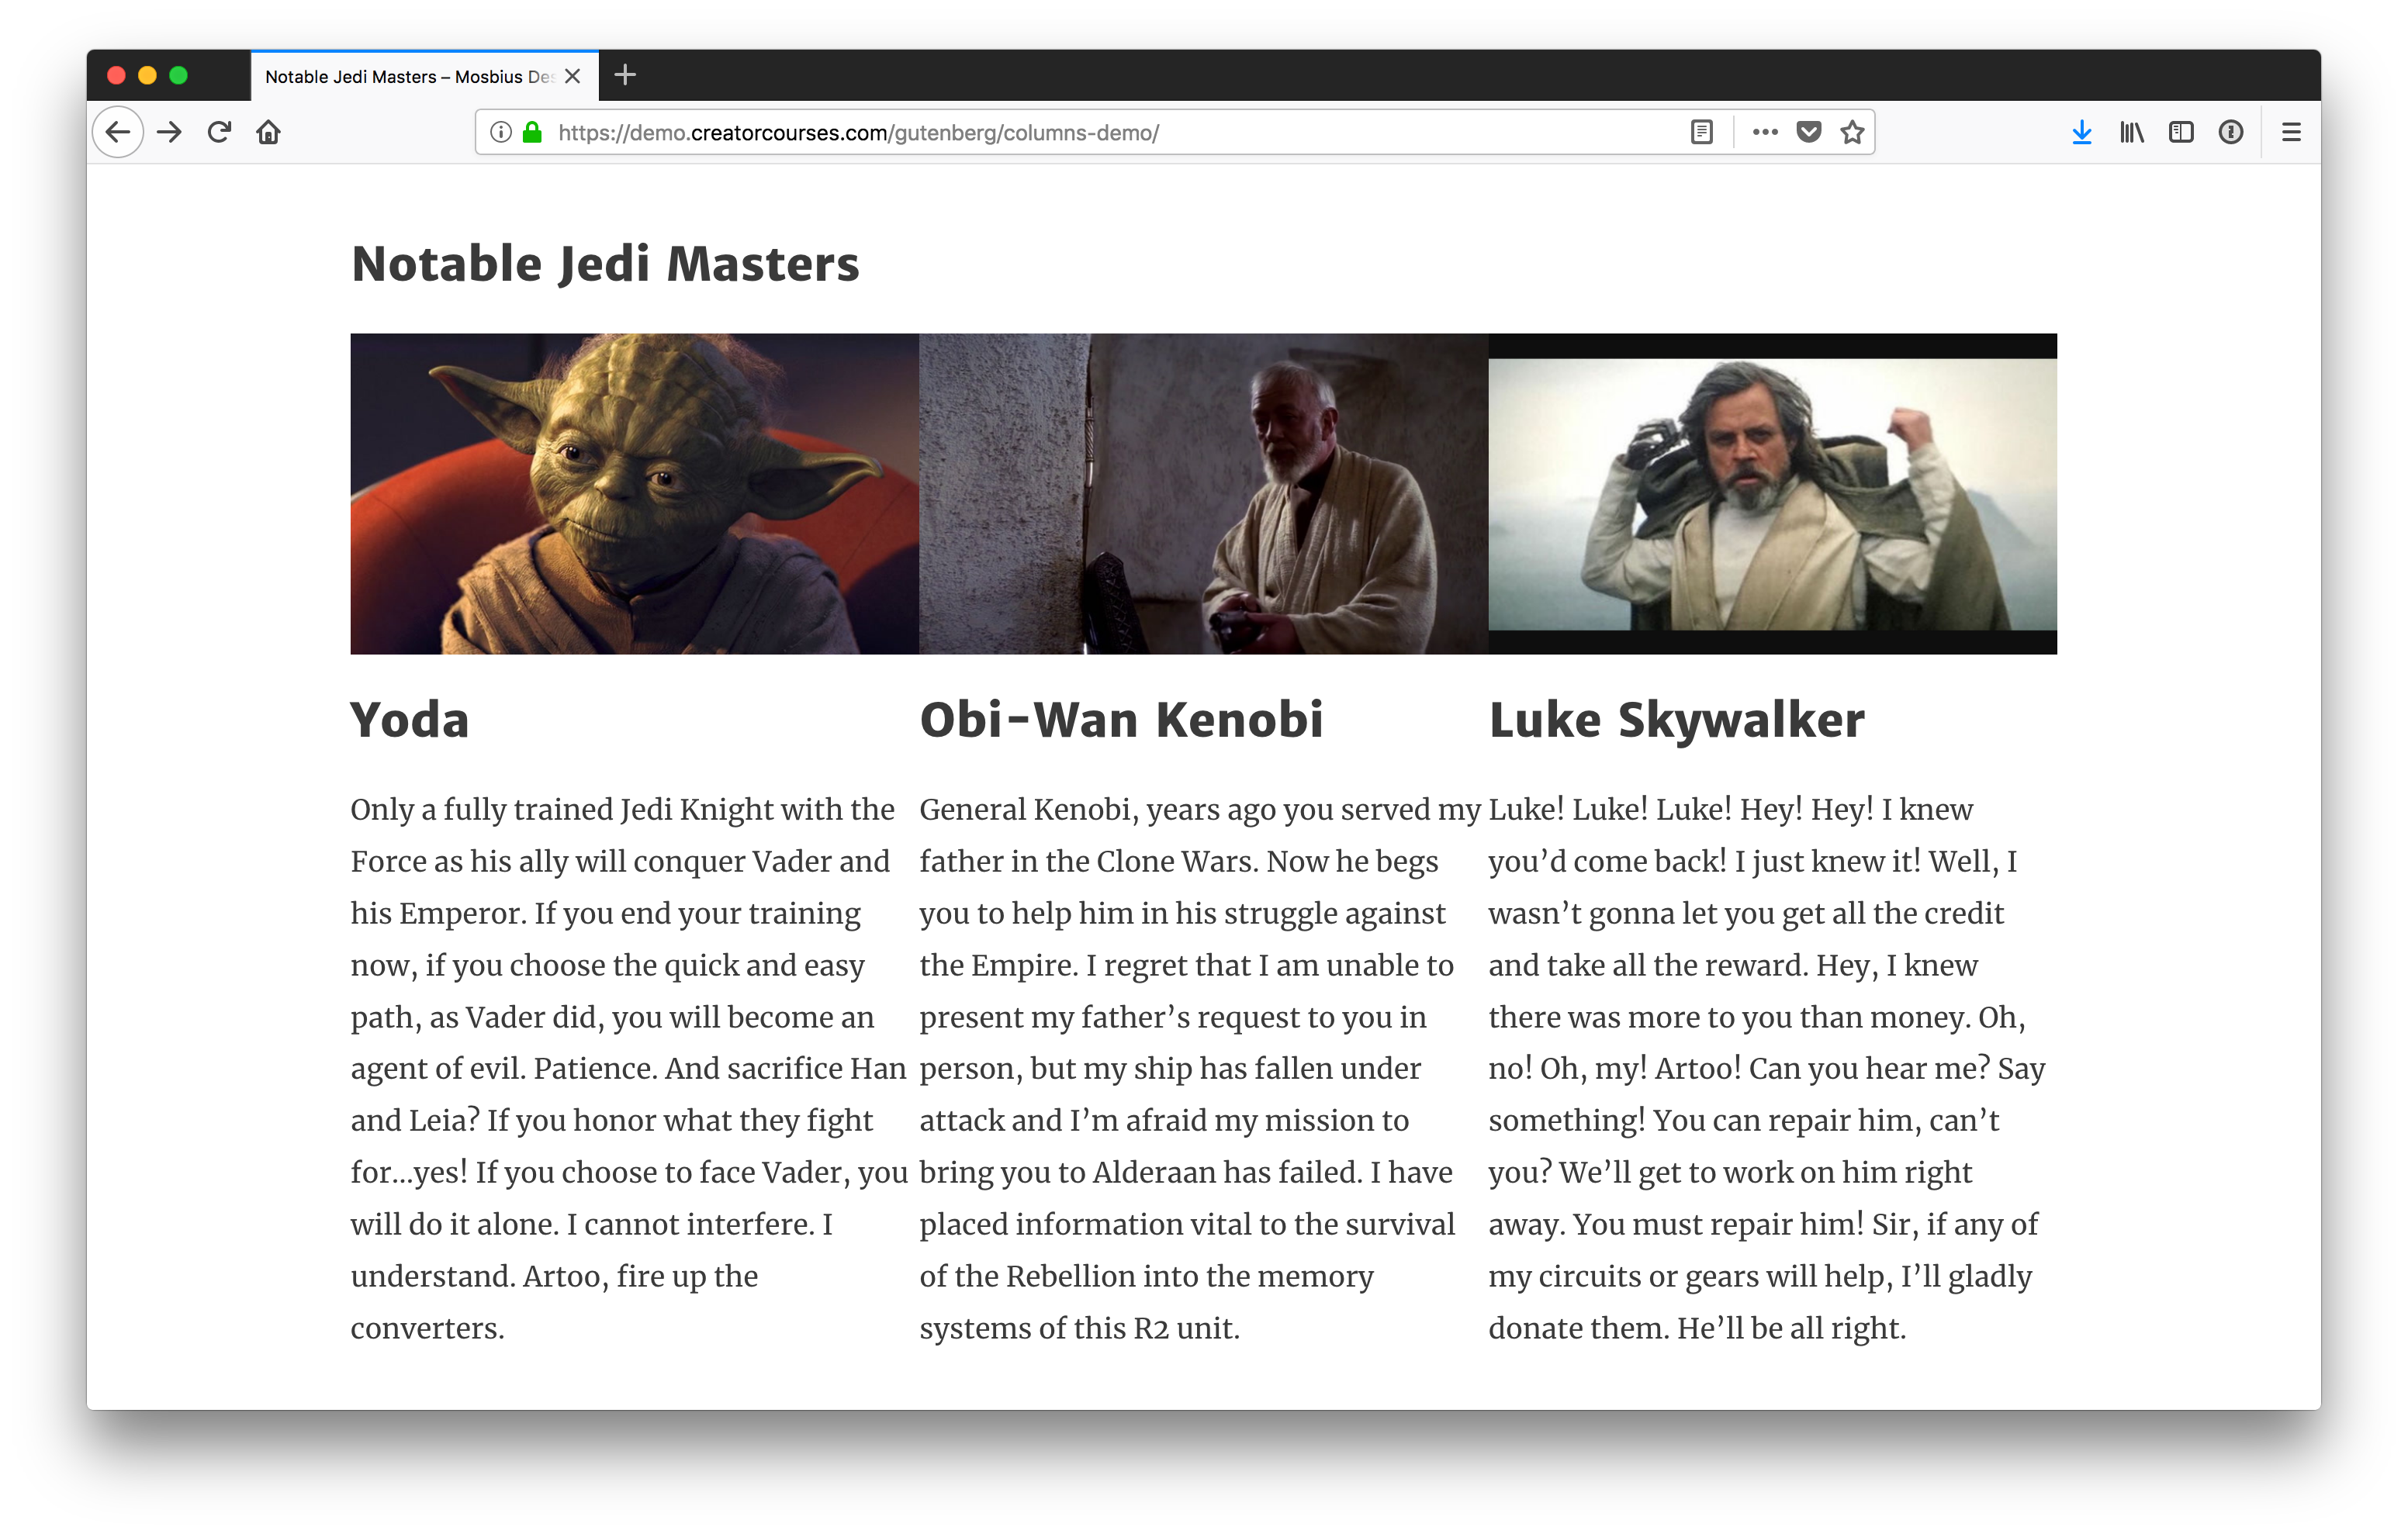
Astra is a free, fast, and flexible theme that has been designed to work with page builders. That means that it can give us a really good starting template for our columns. Speaking of which, we need some content. Here’s what we’ll be working with:
Our columns inside the Gutenberg editor.
We have a three-column layout with images, headings, and text. The image above is what the columns look like inside the Gutenberg editor. Here’s what they look like on the front end:
Our columns on the front end.
You can see there are a few differences between what we see in the editor and what we see on the front end. Most notably, there is no spacing in between the columns on the front end. The left end of the heading on the front end is also lined up with the left edge of the first column. In the editor, it is not because we’re using the alignfull class.
Note: For the sake of this tutorial, we’re going to treat .alignfull, .alignwide, and no alignment the same, since the Astra theme does not support the new classes yet.
How Gutenberg columns work
Now that we have a theme, we to answer the question: “how do columns in Gutenberg work?”
Until recently, they were actually using CSS grid, but then switched to flexbox. (The reasoning was that flexbox offers wider browser support.) That said, the styles are super light:
We’ve got a pen with the final styles if you want to see the result we are aiming for. You can see in it that Gutenberg is only defining the flexbox and then stating each column should be the same length. But you’ll also notice a couple of other things:
The parent container is wp-block-columns.
There’s also the class has-3-columns, noting the number of columns for us. Gutenberg supports anywhere from two to six columns.
The individual columns have the class wp-block-column.
This information is enough for us to get started.
Styling the parents
Since we have flexbox applied by default, the best action to take is to make sure these columns look good on the front end in a larger screen context like we saw earlier.
First and foremost, let’s add some margins to these so they aren’t running into each other, or other elements:
/* Add vertical breathing room to the full row of columns. */
.wp-block-columns {
  margin: 20px 0;
}

/* Add horiztonal breathing room between individual columns. */
.wp-block-column {
  margin: 0 20px;
}
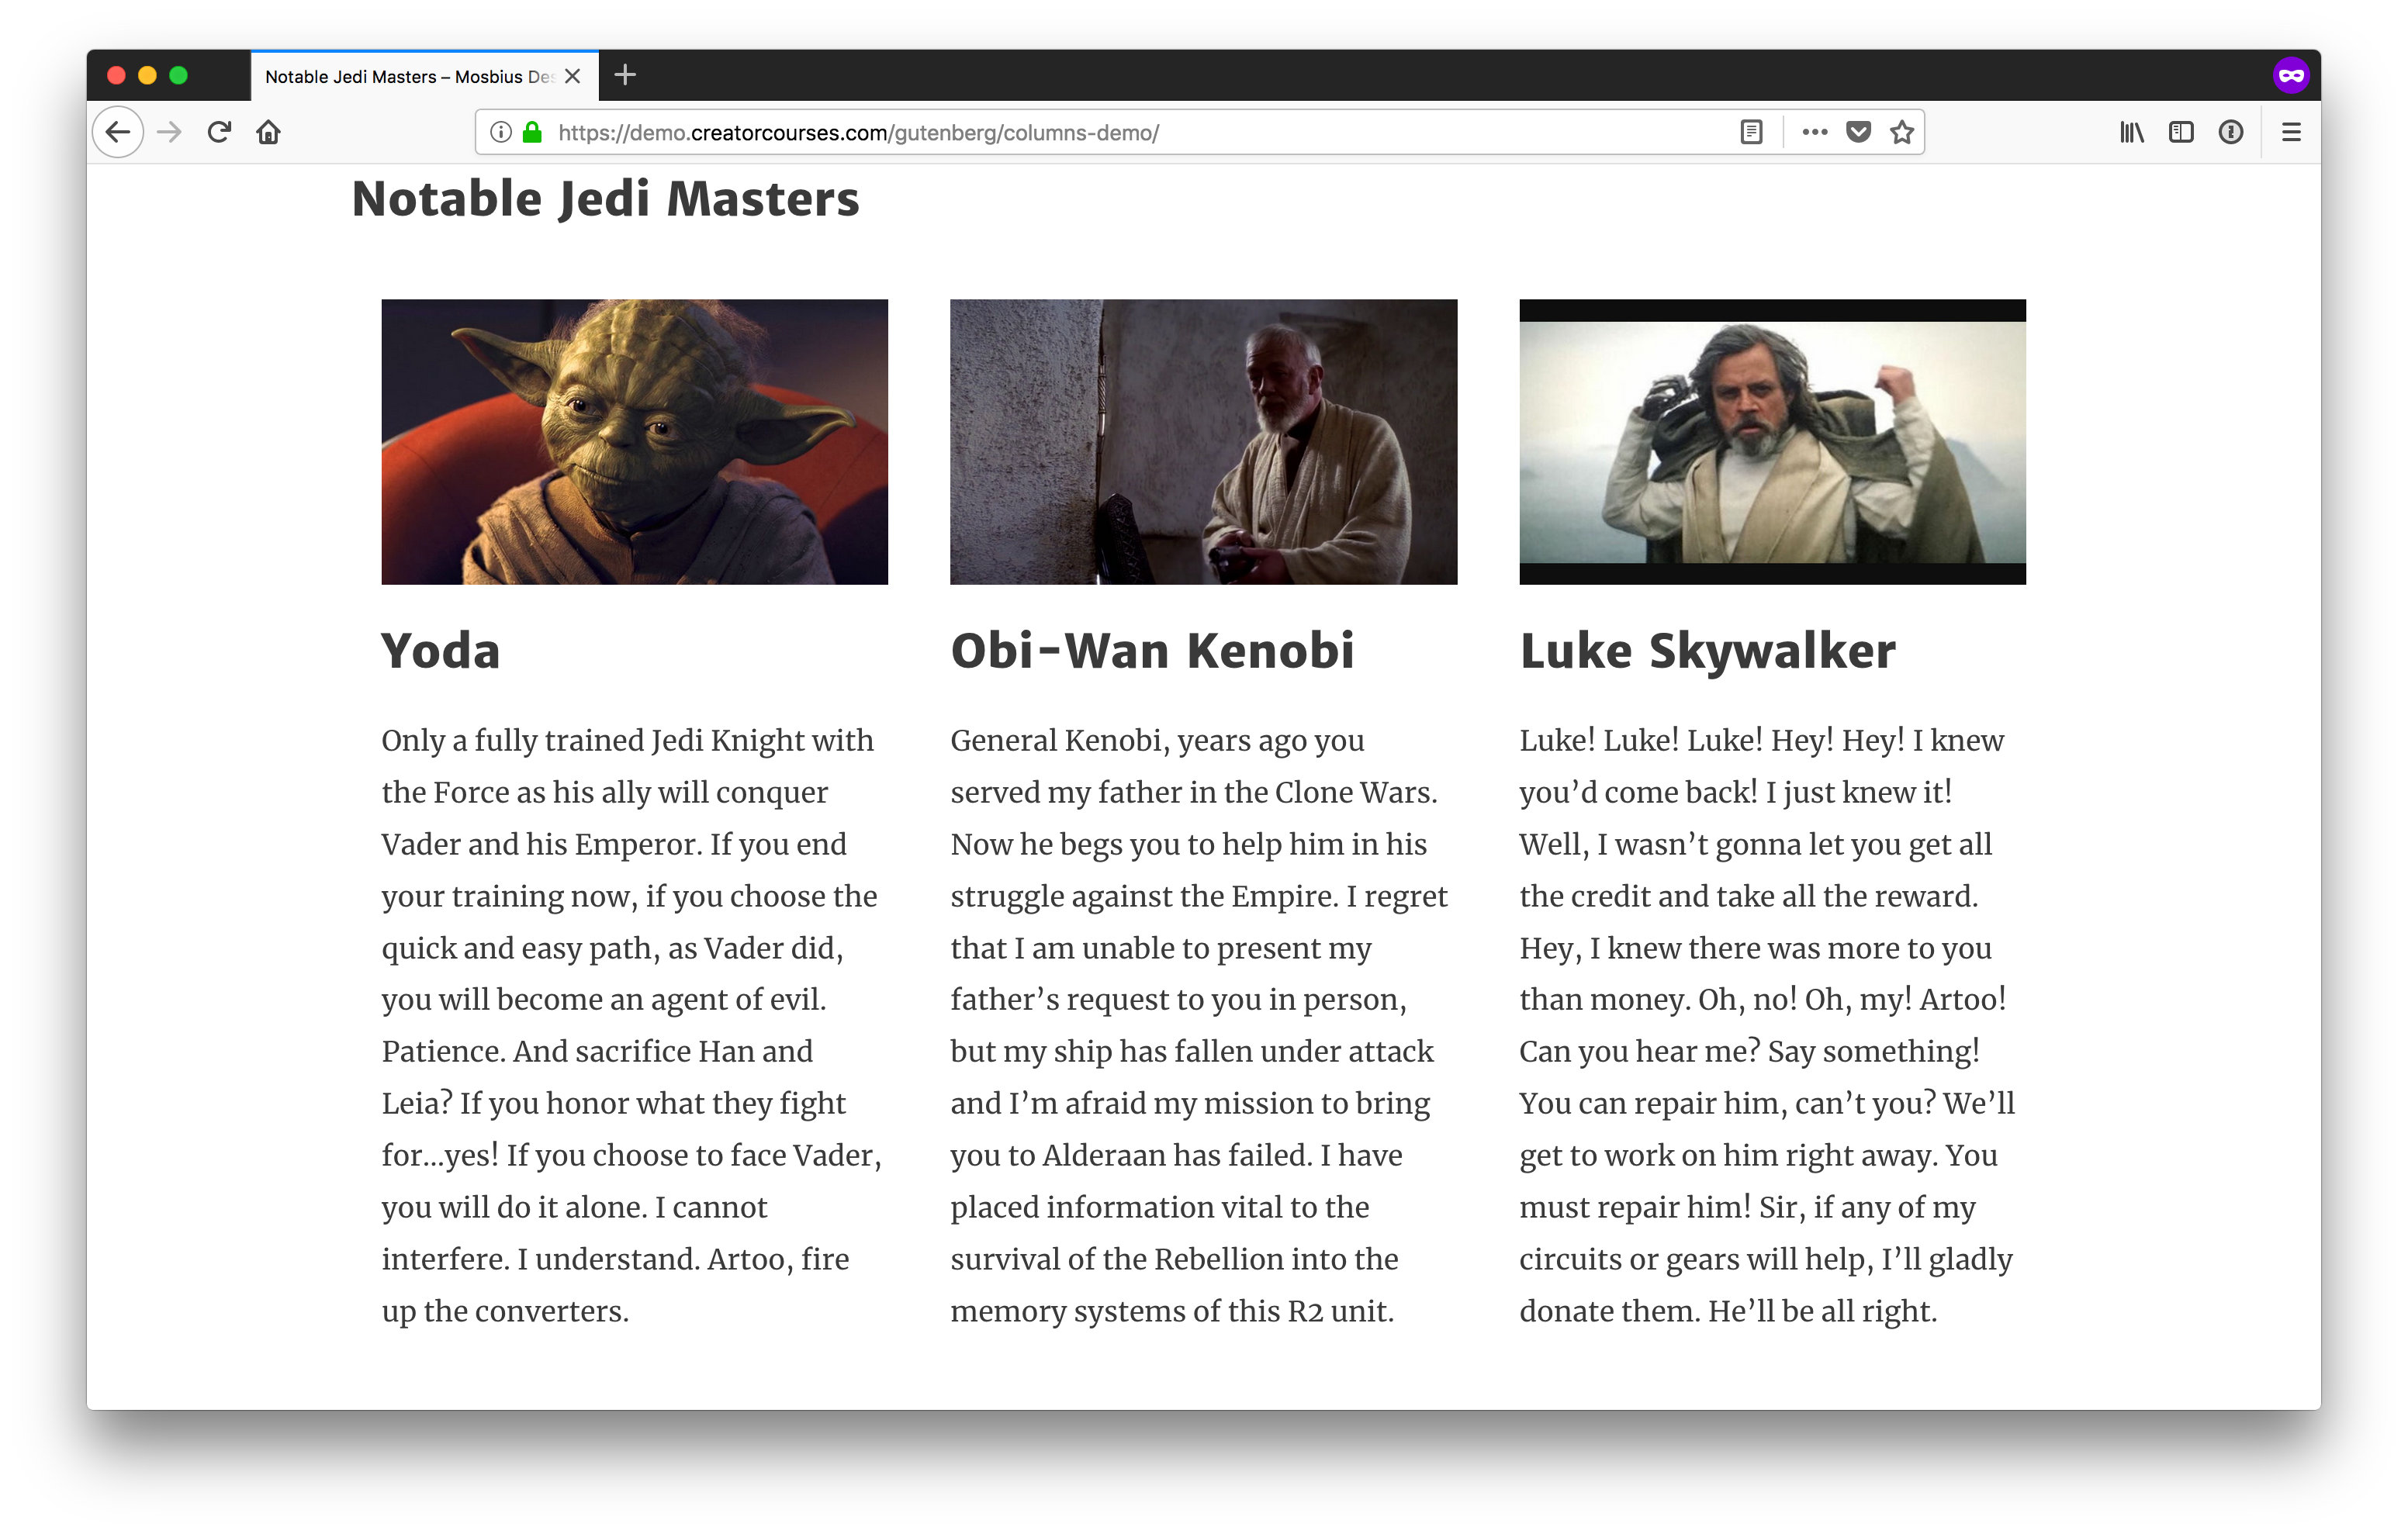
Since it’s reasonable to assume the columns won’t be the only blocks on the page, we added top and bottom margins to the whole parent container so there’s some separation between the columns and other blocks on the page. Then, so the columns don’t run up against each other, we apply left and right margins to each individual column.
Columns with some margins added.
These are starting to look better already! If you want them to look more uniform, you can always throw text-align: justify; on the columns, too.
Making the columns responsive
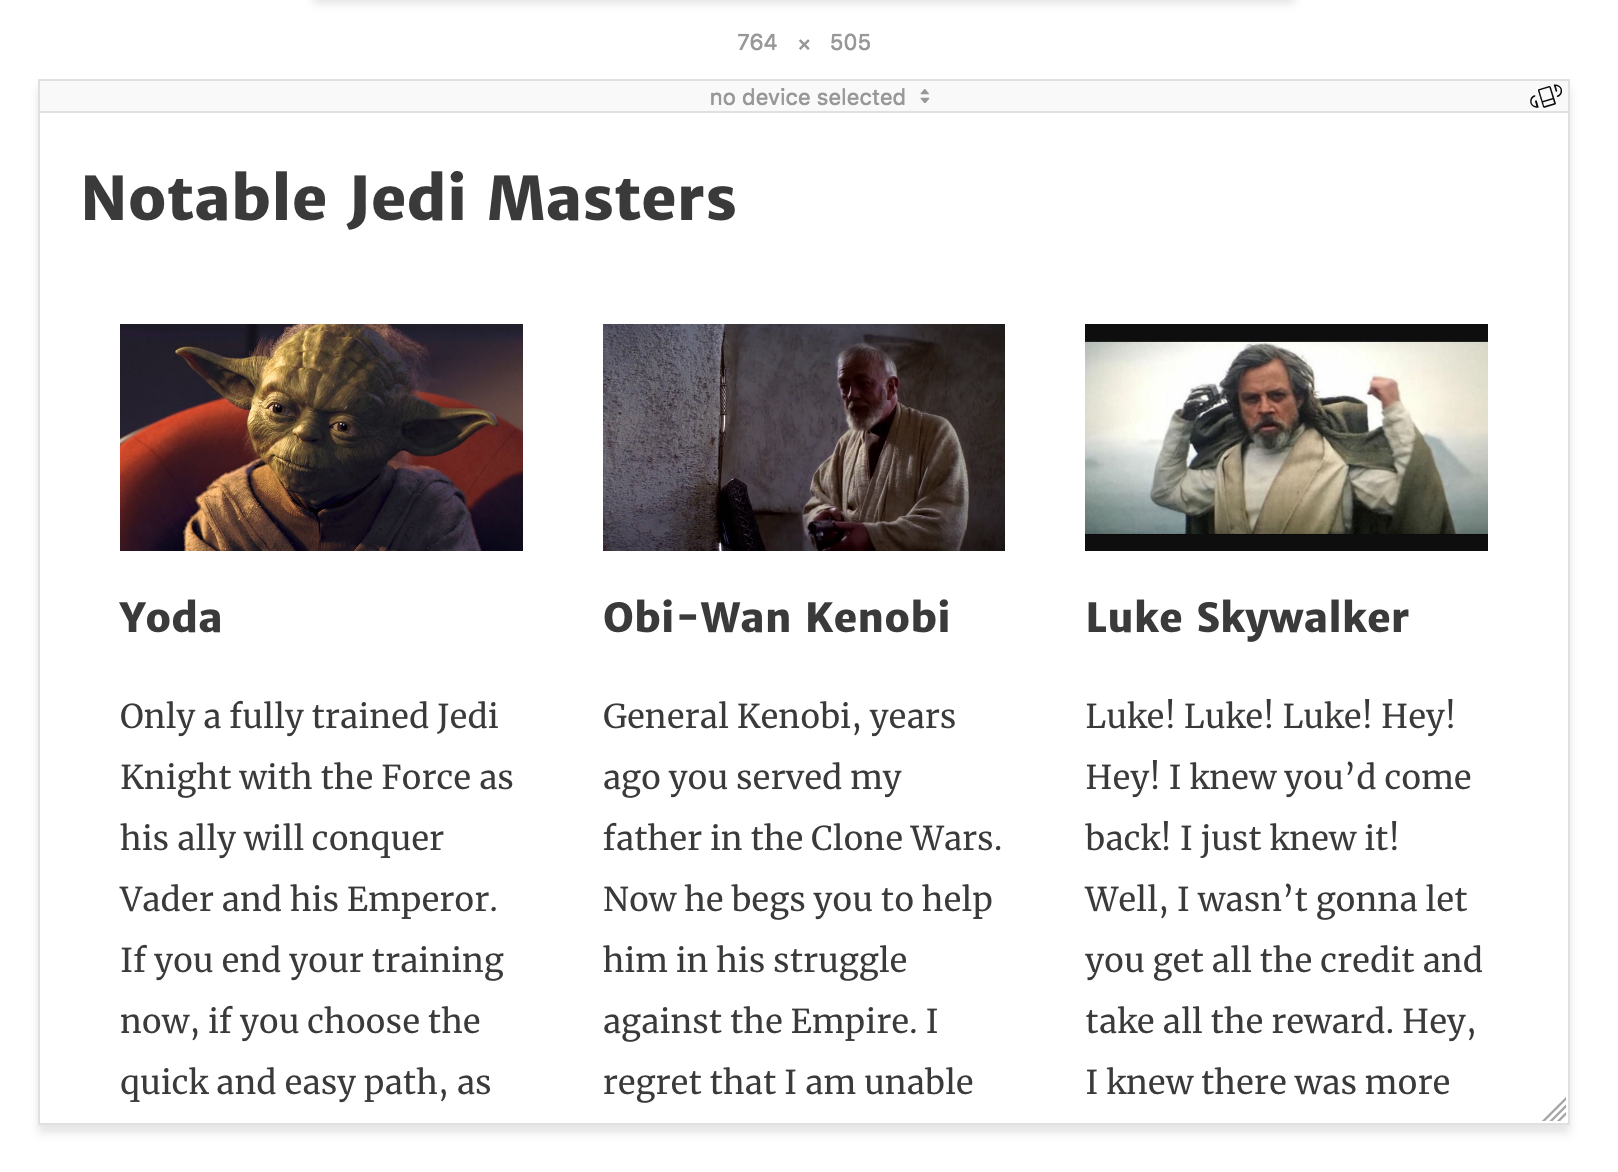
The layout starts to fall apart when we move to smaller screen widths. Astra does a nice job with reducing font sizes as we shrink down, but when we start to get around 764px, things start to get a little cramped:
Our columns at 764px wide.
At this point, since we have three columns, we can explicitly style the columns using the .has-3-columns class. The simplest solution would be to remove flexbox altogether:
This would automatically convert our columns into blocks. All we’d need to do now is adjust the padding and we’re good to go — it’s not the prettiest solution, but it’s readable. I’d like to get a little more creative, though. Instead, we’ll make the first column the widest, and then the other two will remain columns under the first one.
This will only work depending on the content. I think here it’s forgivable to give Yoda priority as the most notable Jedi Master.
In the first few lines after the media query, we’re targeting .has-3-columns to change the flex-flow to row wrap. This will tell the browser to allow the columns to fill the container but wrap when needed.
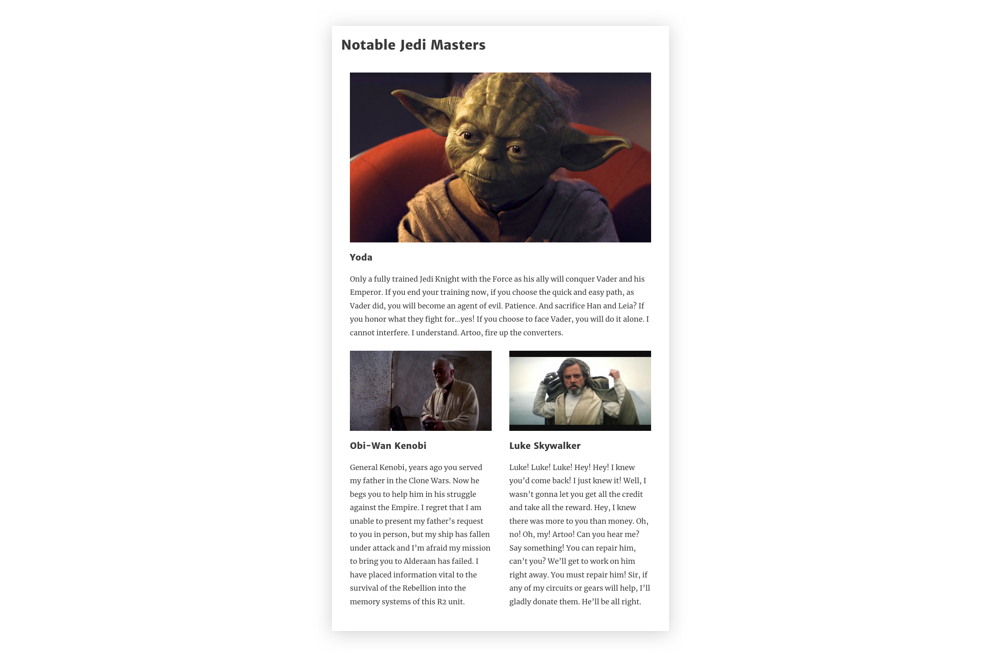
Then, we target the first column with .wp-block-column:first-child and we tell the browser to make the flex-basis 100%. This says, “make the first column fill all available space.” And since we’re wrapping columns, the other two will automatically move to the next line. Our result is this:
Our newly responsive columns.
The nice part about this layout is that with row wrap, the columns all become full-width on the smallest screens. Still, as they start to get hard to read before that, we should find a good breakpoint and set the styles ourselves. Around 478px should do nicely:
This removes the flex layout, and reverses the margins on the individual columns, maintaining the spacing between them as they move to a stacked layout.
Our small screen layout.
Again, you can see all these concepts come together in the following demo:
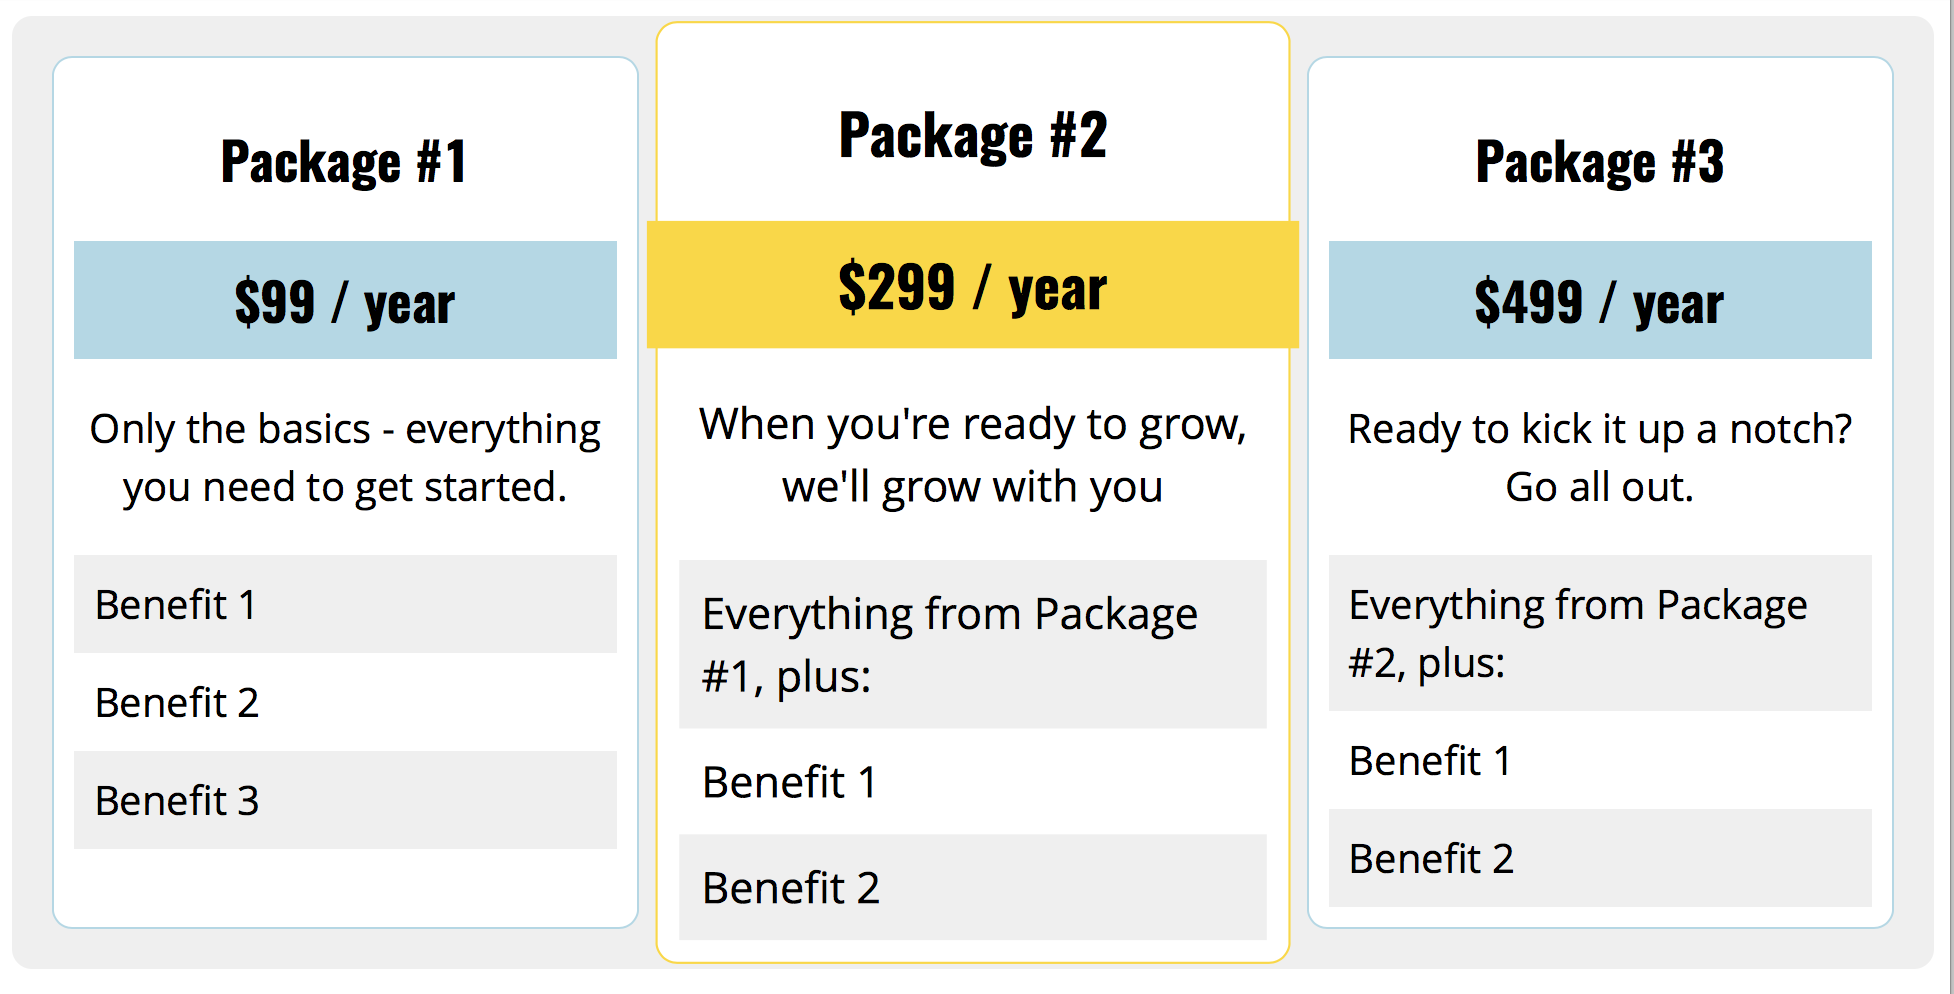
So, there you have it! In this tutorial, we examined how Gutenberg’s Columns block works, it’s class naming conventions, and then applied basic styles to make the columns look good at every screen size on the front end. From here, you can take this code and run with it — we’ve barely scratched the surface and you can do tons more with the CSS alone. For example, I recently made this pricing table using only Gutenberg Columns:
And, of course, there are the other blocks. Gutenberg puts a lot of power into the hands of content editors, but even more into the hands of theme developers. We no longer need to build the infrastructure for doing more complex layouts in the WordPress editor, and we no longer need to instruct users to insert shortcodes or HTML to get what need on a page. We can add a little CSS to our themes and let content creators do the rest.
If you want to get more in-depth into preparing your theme for Gutenberg, you can check out my course, Theming with Gutenberg. We go over how to style lots of different blocks, set custom color palettes, block templates, and more.
Learn helpful Photoshop tips in less than five minutes! Check out this quick video below!
Is there a certain detail ruining your perfect shot? Some photos are easy to recreate, while others need additional editing. So in this short video, I’ll show you how to remove an object, specifically a whole person, from a nature landscape photo in Adobe Photoshop.
Watch the steps unfold and get all the written details you need in the process below. Check out more amazing photos and resources on Envato Elements.
Tutorial Assets
The following assets were used in the production of this tutorial.
1. How to Remove an Object or Person in Adobe Photoshop
Step 1
For this particular photo, I’ll be focusing this tip around the Stamp Tool (S) so that I have more control over the result. But feel free to use your own discretion when removing objects by taking advantage of similar tools like the Content Aware Fill and Patch Tool options.
Select the Background Layer and drag it over the Paper Icon to create a Copy on a New Layer. Then create a new Group and place the copy inside.
Rename the group „After” and the original picture „Before„so we can easily flip back and forth to check our progress later.
Step 3
Next, add a New Layer.
Zoom(Z) in on your photo to assess the landscape. Look for nearby areas that will help cover up the object or person with more nature.
In this case, these large bits of snow will help me remove the torso, while the top and lower rock forms are needed for his head and feet.
Step 4
Select the Polygonal Lasso Tool (L) and make a selection around the middle area. Then select the Background Copy Layer.
Now that this area is isolated, we can use the Stamp Tool (S) with a Hard Round Brush (B) (100% Hardness, 100% Opacity) to paint over the torso and legs with snow.
First, hold the Alt key to source the area you need, and then slowly paint over the person with snow or rocks until he disappears.
Step 5
Continue this process for the legs, head, and shoulders. Adjust the Brush Size, Brush Hardness, and Brush Opacity if necessary, and create a seamless look by looking at the original landscape for cues on its natural layout.
Toggle the Visibility of the group to see the before and after. Then hold Control-J to create a duplicate of the Background Copy Layer. If there are any harsh edges left, continue to use the Stamp Tool (S) to paint over those areas and blend the dirt and rocks together.
You may also need to lower the Brush Hardness/Opacity to help you create a soft, natural result.
Step 6
Finish this edit with the Brush Tool (B). Select Layer 1 and use a Hard Round Brush(B) (100% Hardness, 100% Opacity) to carve out the snowy landscape with white. If you’re not using this particular photo, this tool can still help you clean up any stubborn areas in your work.
Here’s the final photo. Try this tip with your images, and share your results!
Learn More With Our Tutorials!
This helpful tip is the starting point for many fun photo projects and more. So transform your photography with quick, useful edits!
Learn how to create awesome photo effects and amazing manipulations with one of our Photoshop
tutorials!
Get Amazing Design Resources
Want to create videos like this? Download the resources used in this video:
Learn helpful Photoshop tips in less than five minutes! Check out this quick video below!
Is there a certain detail ruining your perfect shot? Some photos are easy to recreate, while others need additional editing. So in this short video, I’ll show you how to remove an object, specifically a whole person, from a nature landscape photo in Adobe Photoshop.
Watch the steps unfold and get all the written details you need in the process below. Check out more amazing photos and resources on Envato Elements.
Tutorial Assets
The following assets were used in the production of this tutorial.
1. How to Remove an Object or Person in Adobe Photoshop
Step 1
For this particular photo, I’ll be focusing this tip around the Stamp Tool (S) so that I have more control over the result. But feel free to use your own discretion when removing objects by taking advantage of similar tools like the Content Aware Fill and Patch Tool options.
Select the Background Layer and drag it over the Paper Icon to create a Copy on a New Layer. Then create a new Group and place the copy inside.
Rename the group „After” and the original picture „Before„so we can easily flip back and forth to check our progress later.
Step 3
Next, add a New Layer.
Zoom(Z) in on your photo to assess the landscape. Look for nearby areas that will help cover up the object or person with more nature.
In this case, these large bits of snow will help me remove the torso, while the top and lower rock forms are needed for his head and feet.
Step 4
Select the Polygonal Lasso Tool (L) and make a selection around the middle area. Then select the Background Copy Layer.
Now that this area is isolated, we can use the Stamp Tool (S) with a Hard Round Brush (B) (100% Hardness, 100% Opacity) to paint over the torso and legs with snow.
First, hold the Alt key to source the area you need, and then slowly paint over the person with snow or rocks until he disappears.
Step 5
Continue this process for the legs, head, and shoulders. Adjust the Brush Size, Brush Hardness, and Brush Opacity if necessary, and create a seamless look by looking at the original landscape for cues on its natural layout.
Toggle the Visibility of the group to see the before and after. Then hold Control-J to create a duplicate of the Background Copy Layer. If there are any harsh edges left, continue to use the Stamp Tool (S) to paint over those areas and blend the dirt and rocks together.
You may also need to lower the Brush Hardness/Opacity to help you create a soft, natural result.
Step 6
Finish this edit with the Brush Tool (B). Select Layer 1 and use a Hard Round Brush(B) (100% Hardness, 100% Opacity) to carve out the snowy landscape with white. If you’re not using this particular photo, this tool can still help you clean up any stubborn areas in your work.
Here’s the final photo. Try this tip with your images, and share your results!
Learn More With Our Tutorials!
This helpful tip is the starting point for many fun photo projects and more. So transform your photography with quick, useful edits!
Learn how to create awesome photo effects and amazing manipulations with one of our Photoshop
tutorials!
Get Amazing Design Resources
Want to create videos like this? Download the resources used in this video:
Learn helpful Photoshop tips in less than five minutes! Check out this quick video below!
Is there a certain detail ruining your perfect shot? Some photos are easy to recreate, while others need additional editing. So in this short video, I’ll show you how to remove an object, specifically a whole person, from a nature landscape photo in Adobe Photoshop.
Watch the steps unfold and get all the written details you need in the process below. Check out more amazing photos and resources on Envato Elements.
Tutorial Assets
The following assets were used in the production of this tutorial.
1. How to Remove an Object or Person in Adobe Photoshop
Step 1
For this particular photo, I’ll be focusing this tip around the Stamp Tool (S) so that I have more control over the result. But feel free to use your own discretion when removing objects by taking advantage of similar tools like the Content Aware Fill and Patch Tool options.
Select the Background Layer and drag it over the Paper Icon to create a Copy on a New Layer. Then create a new Group and place the copy inside.
Rename the group „After” and the original picture „Before„so we can easily flip back and forth to check our progress later.
Step 3
Next, add a New Layer.
Zoom(Z) in on your photo to assess the landscape. Look for nearby areas that will help cover up the object or person with more nature.
In this case, these large bits of snow will help me remove the torso, while the top and lower rock forms are needed for his head and feet.
Step 4
Select the Polygonal Lasso Tool (L) and make a selection around the middle area. Then select the Background Copy Layer.
Now that this area is isolated, we can use the Stamp Tool (S) with a Hard Round Brush (B) (100% Hardness, 100% Opacity) to paint over the torso and legs with snow.
First, hold the Alt key to source the area you need, and then slowly paint over the person with snow or rocks until he disappears.
Step 5
Continue this process for the legs, head, and shoulders. Adjust the Brush Size, Brush Hardness, and Brush Opacity if necessary, and create a seamless look by looking at the original landscape for cues on its natural layout.
Toggle the Visibility of the group to see the before and after. Then hold Control-J to create a duplicate of the Background Copy Layer. If there are any harsh edges left, continue to use the Stamp Tool (S) to paint over those areas and blend the dirt and rocks together.
You may also need to lower the Brush Hardness/Opacity to help you create a soft, natural result.
Step 6
Finish this edit with the Brush Tool (B). Select Layer 1 and use a Hard Round Brush(B) (100% Hardness, 100% Opacity) to carve out the snowy landscape with white. If you’re not using this particular photo, this tool can still help you clean up any stubborn areas in your work.
Here’s the final photo. Try this tip with your images, and share your results!
Learn More With Our Tutorials!
This helpful tip is the starting point for many fun photo projects and more. So transform your photography with quick, useful edits!
Learn how to create awesome photo effects and amazing manipulations with one of our Photoshop
tutorials!
Get Amazing Design Resources
Want to create videos like this? Download the resources used in this video:
Learn helpful Photoshop tips in less than five minutes! Check out this quick video below!
Is there a certain detail ruining your perfect shot? Some photos are easy to recreate, while others need additional editing. So in this short video, I’ll show you how to remove an object, specifically a whole person, from a nature landscape photo in Adobe Photoshop.
Watch the steps unfold and get all the written details you need in the process below. Check out more amazing photos and resources on Envato Elements.
Tutorial Assets
The following assets were used in the production of this tutorial.
1. How to Remove an Object or Person in Adobe Photoshop
Step 1
For this particular photo, I’ll be focusing this tip around the Stamp Tool (S) so that I have more control over the result. But feel free to use your own discretion when removing objects by taking advantage of similar tools like the Content Aware Fill and Patch Tool options.
Select the Background Layer and drag it over the Paper Icon to create a Copy on a New Layer. Then create a new Group and place the copy inside.
Rename the group „After” and the original picture „Before„so we can easily flip back and forth to check our progress later.
Step 3
Next, add a New Layer.
Zoom(Z) in on your photo to assess the landscape. Look for nearby areas that will help cover up the object or person with more nature.
In this case, these large bits of snow will help me remove the torso, while the top and lower rock forms are needed for his head and feet.
Step 4
Select the Polygonal Lasso Tool (L) and make a selection around the middle area. Then select the Background Copy Layer.
Now that this area is isolated, we can use the Stamp Tool (S) with a Hard Round Brush (B) (100% Hardness, 100% Opacity) to paint over the torso and legs with snow.
First, hold the Alt key to source the area you need, and then slowly paint over the person with snow or rocks until he disappears.
Step 5
Continue this process for the legs, head, and shoulders. Adjust the Brush Size, Brush Hardness, and Brush Opacity if necessary, and create a seamless look by looking at the original landscape for cues on its natural layout.
Toggle the Visibility of the group to see the before and after. Then hold Control-J to create a duplicate of the Background Copy Layer. If there are any harsh edges left, continue to use the Stamp Tool (S) to paint over those areas and blend the dirt and rocks together.
You may also need to lower the Brush Hardness/Opacity to help you create a soft, natural result.
Step 6
Finish this edit with the Brush Tool (B). Select Layer 1 and use a Hard Round Brush(B) (100% Hardness, 100% Opacity) to carve out the snowy landscape with white. If you’re not using this particular photo, this tool can still help you clean up any stubborn areas in your work.
Here’s the final photo. Try this tip with your images, and share your results!
Learn More With Our Tutorials!
This helpful tip is the starting point for many fun photo projects and more. So transform your photography with quick, useful edits!
Learn how to create awesome photo effects and amazing manipulations with one of our Photoshop
tutorials!
Get Amazing Design Resources
Want to create videos like this? Download the resources used in this video:
Learn helpful Photoshop tips in less than five minutes! Check out this quick video below!
Is there a certain detail ruining your perfect shot? Some photos are easy to recreate, while others need additional editing. So in this short video, I’ll show you how to remove an object, specifically a whole person, from a nature landscape photo in Adobe Photoshop.
Watch the steps unfold and get all the written details you need in the process below. Check out more amazing photos and resources on Envato Elements.
Tutorial Assets
The following assets were used in the production of this tutorial.
1. How to Remove an Object or Person in Adobe Photoshop
Step 1
For this particular photo, I’ll be focusing this tip around the Stamp Tool (S) so that I have more control over the result. But feel free to use your own discretion when removing objects by taking advantage of similar tools like the Content Aware Fill and Patch Tool options.
Select the Background Layer and drag it over the Paper Icon to create a Copy on a New Layer. Then create a new Group and place the copy inside.
Rename the group „After” and the original picture „Before„so we can easily flip back and forth to check our progress later.
Step 3
Next, add a New Layer.
Zoom(Z) in on your photo to assess the landscape. Look for nearby areas that will help cover up the object or person with more nature.
In this case, these large bits of snow will help me remove the torso, while the top and lower rock forms are needed for his head and feet.
Step 4
Select the Polygonal Lasso Tool (L) and make a selection around the middle area. Then select the Background Copy Layer.
Now that this area is isolated, we can use the Stamp Tool (S) with a Hard Round Brush (B) (100% Hardness, 100% Opacity) to paint over the torso and legs with snow.
First, hold the Alt key to source the area you need, and then slowly paint over the person with snow or rocks until he disappears.
Step 5
Continue this process for the legs, head, and shoulders. Adjust the Brush Size, Brush Hardness, and Brush Opacity if necessary, and create a seamless look by looking at the original landscape for cues on its natural layout.
Toggle the Visibility of the group to see the before and after. Then hold Control-J to create a duplicate of the Background Copy Layer. If there are any harsh edges left, continue to use the Stamp Tool (S) to paint over those areas and blend the dirt and rocks together.
You may also need to lower the Brush Hardness/Opacity to help you create a soft, natural result.
Step 6
Finish this edit with the Brush Tool (B). Select Layer 1 and use a Hard Round Brush(B) (100% Hardness, 100% Opacity) to carve out the snowy landscape with white. If you’re not using this particular photo, this tool can still help you clean up any stubborn areas in your work.
Here’s the final photo. Try this tip with your images, and share your results!
Learn More With Our Tutorials!
This helpful tip is the starting point for many fun photo projects and more. So transform your photography with quick, useful edits!
Learn how to create awesome photo effects and amazing manipulations with one of our Photoshop
tutorials!
Get Amazing Design Resources
Want to create videos like this? Download the resources used in this video:
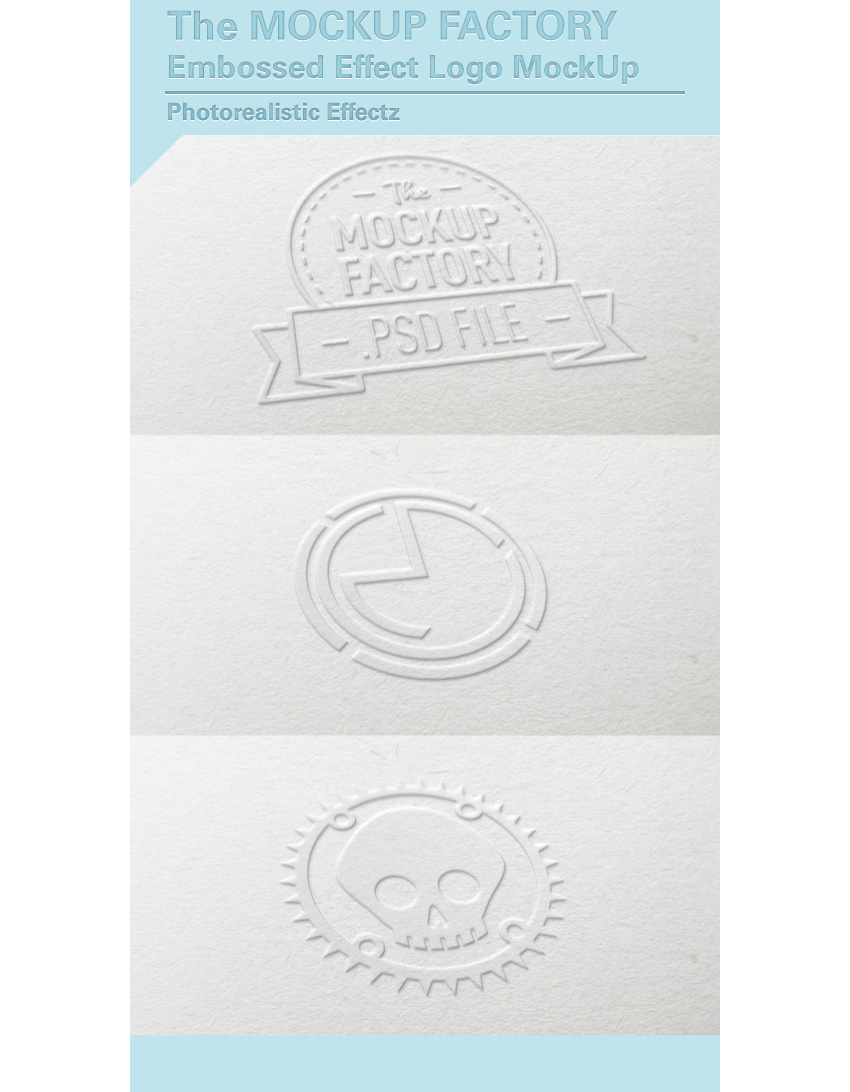
Building your own high-quality mockup is not as hard as it seems. In fact, it’s something anyone with a digital camera and some basic Photoshop knowledge can master. In this tutorial, I’ll show you how to create a realistic paper embossed logo mockup with Adobe Photoshop, and I’ll provide you all the resources that you need to get this done quickly!
But first, do you need to design a logo? Check out this simple, easy to use online logo maker. Over 745 SMART logo templates to design your custom logo all in one place, Placeit.
In the top menu, choose Select > All, and then choose Edit > Copy to copy the selection to the clipboard.
Go back to the background document and choose, in the top menu, Edit > Paste to paste the perspective image over the background.
Rename the layer by double-clicking directly on the layer’s name in the Layers panel and changing it to „Perspective„.
2. How to Create the Smart Object
Step 1
Set the foreground color to red (any color different from black is good).
Then choose the Rectangle Tool, move the cursor over the canvas, and click. You’ll open a small dialog box that allows you to enter precise dimensions for your new shape. Type 1353 x 1015 px and click the OK button.
Rename the layer by double-clicking directly on the layer’s name in the Layers panel and changing it to „Smart Object„.
With the „Smart Object” layer selected, choose, in the top menu, Layer > Smart Object > Convert to Smart Object.
Step 2
What we’re going to do now is distort the red rectangle to fit the shape of the black perspective rectangle.
Choose Edit > Transform > Distort.
Click on the top right corner of the red rectangle and drag the corner until it touches the top right corner of the black rectangle.
In this step, it’s extremely important that we transform the red rectangle using only the handles at the corners of the bounding box.
Step 3
Keep dragging the corners to fit the red rectangle into the black one:
Step 4
Select the „Perspective” layer in the Layers panel and remove it by choosing Layer > Delete > Layer.
Now we’re ready to replace the red rectangle inside the smart object with a badge or logo to customize our project. Let’s go!
3. How to Get the Badge Ready With Illustrator
Now, for the purpose of this tutorial, we’re going to use a badge from a set available on Envato Elements. The site offers a wide range of high-quality badges and vector elements ready for use. Subscribe to unlock unlimited, high-quality badges, templates, photos and more for one monthly fee!
Open the vector .ai file with Adobe Illustrator. While you open the file, a window may pop up alerting you that the document uses fonts that are currently not available on your computer. Download the required fonts for the badge that we’re going to use.
For the purpose of this tutorial, I replaced the commercial fonts used in this badge with two free fonts:
Once you’re done with fonts, choose the Selection Tool (V).
Now select the „Skateboards” badge (or whatever badge you like). Copy the badge by going to Edit > Copy or pressing Command-C.
Create a new 350 x 350 px document in Adobe Illustrator. Now paste the badge you just copied by choosing Edit > Paste or pressing Command-V.
Step 3
With the Selection Tool (V), move the badge over the grey area, out of the white canvas.
Select the badge by clicking on it using the Selection Tool (V).
In the top menu, choose Object > Expand Appearance. Again, choose Object > Expand. A dialog window will appear; select Object and Fill and press OK:
Step 4
Locate the Pathfinder panel. If you can’t see the panel, open it by choosing Window > Pathfinder.
Choose the Trim button, from the Pathfinder panel, to remove the overlapping elements of the badge.
Step 5
Choose the Magic Wand Tool:
Move the cursor over a white area and click to select all the white areas of the badge:
Remove the selected white areas by choosing, in the top menu, Edit > Cut. Keep removing all the white areas within the badge:
Remove them by choosing, in the top menu, Edit > Cut.
Now the badge is ready to be imported into the Photoshop scene!
4. How to Include the Badge in the Scene
Step 1
Select and copy the badge by going to Edit > Copy or pressing Command-C.
Step 2
Go back to Photoshop, select the Smart Objectfrom the Layers panel, and double-click on the Smart Objects thumbnail.
In the Layers panel, deactivate the visibility for the red rectangle layer, and paste the badge just copied by choosing Edit > Paste or pressing Command-V.
From the dialog box, choose Smart Object and press OK.
Locate the top options bar and set the badge’s position to 676 x 507 px and its dimension to 440% for both the Width and Height fields. When you’re done, press Enter on your keyboard.
Step 3
Save the document by choosing File > Save or using the keyboard shortcut Command-S. The smart object is now updated with the last changes.
5. How to Add the Embossed Effect
Step 1
Set the Fill for the „Smart Object” layer to 0%:
Duplicate the „Smart Object” layer three times by going to Layer > New > Layer Via Copy. Now rename the layers as shown in the image below:
From now on, when you need to replace the badge in your smart object, you can use the „Smart Object” layer, by clicking on it and editing the content.
Step 2
Let’s start adding some layer styles to the „Effect 3” layer. Open the Layers Style panel and add a new Bevel & Embossed effect. Set it as shown in the image below:
The color is White #ffffff for the Highlight Mode and Black #000000 for the Shadow Mode.
Step 3
Add a new Inner Shadow effect and set it as shown in the image below:
The color for the Blend Mode is White #ffffff.
Step 4
Add a new Drop Shadow effect and set it as shown in the image below:
The color for the Blend Mode is Black #000000.
Step 5
Let’s add some smart filters by choosing Filter > Distort > Ripple. Set the filter amount to -50%.
Choose Filter > Blur > Gaussian Blur and set the radius to 1.0 pixels.
Step 6
Now let’s add some layer styles to the „Effect 2” layer. Open the Layers Style panel and add a new Bevel & Embossed effect, and set it as shown in the image below:
The color is White #ffffff for the Highlight Mode and Black #000000 for the Shadow Mode.
Step 7
Add a new Inner Shadow effect and set it as shown in the image below:
The color for the Blend Mode is White #ffffff.
Step 8
Let’s add some smart filters by choosing Filter > Distort > Ripple. Set the filter amount to -50%.
Choose Filter > Blur > Gaussian Blur and set the radius to 1.0 pixels.
Step 9
Select the „Effect 2” layer and right-click on it. Choose Group from Layers, type the name „Group 1„, and press OK.
Now choose Layer > Layer Mask > Reveal All to add a mask to the group.
Choose Layer > New Fill Layer > Gradient and press OK to confirm.
In the Gradient Fill dialog, set the effect as follows:
Then click on the small gradient window to edit the gradient. Set the first color stop to Location 0% with Color#444444 and the second color stop to Location 100% and Color#ffffff.
Press OK twice to confirm the effect.
Select the gradient layer just created (its name should be „Gradient Fill 1″), right-click on it, and choose Convert to Smart Object. Right-click again and choose Rasterize Layer.
In the top menu, choose Select > All, choose Edit > Copy, and then choose Select > Deselect.
Press the Option/Alt key on your keyboard and click on the mask thumbnail for the „Group 1” folder to edit the mask.
Paste the gradient inside the mask by choosing Edit > Paste, and then choose Select > Deselect.
Remove the gradient by selecting the „Gradient Fill 1” layer, right-click on it, and choose Delete > Layer.
Step 10
Now let’s add some layer styles to the „Effect 1” layer. Open the Layers Style panel and add a new Bevel & Embossed effect, and set it as shown in the image below:
The color is White #ffffff for the Highlight Mode and Black #000000 for the Shadow Mode.
Step 11
Add a new Inner Shadow effect and set it as shown in the image below:
The color for the Blend Mode is White #ffffff.
Step 12
Add a new Drop Shadow effect and set it as shown in the image below:
The color for the Blend Mode is Black #000000.
Step 13
Let’s add some smart filters by choosing Filter > Distort > Ripple. Set the filter amount to -50%.
Choose Filter > Blur > Gaussian Blur and set the radius to 1.0 pixels.
Step 14
Select the „Effect 1” layer and then right-click on it, choose Group from Layers, type the name „Group 2„, and press OK.
Now choose Layer > Layer Mask > Reveal All to add a mask to the group.
Choose Layer > New Fill Layer > Gradient and press OK to confirm.
In the Gradient Fill dialog, set the effect as follows:
Then click on the small gradient window to edit the gradient. Set the first color stop to Location 0% with Color#000000 and the second color stop to Location 100% and Color#ffffff.
Press OK twice to confirm the effect.
Select the gradient layer just created (its name should be „Gradient Fill 1″), right-click on it, and choose Convert to Smart Object. Right-click again and choose Rasterize Layer.
In the top menu, choose Select > All, choose Edit > Copy, and then choose Select > Deselect.
Press the Option/Alt key on your keyboard and click on the mask thumbnail for the „Group 2” folder to edit the mask.
Paste the gradient inside the mask by choosing Edit > Paste, andthen choose Select > Deselect.
Remove the gradient by selecting the „Gradient Fill 1” layer, right-click on it, and choose Delete > Layer.
Congratulations, You’re Done!
In this tutorial, you learned how to create an embossed paper logo mockup with Adobe Photoshop!
I hope that you’ve enjoyed my tutorial and learned something new. Please feel free to leave your comments, suggestions, and outcomes below.
Enjoy Photoshopping!
Agregator najlepszych postów o designie, webdesignie, cssie i Internecie