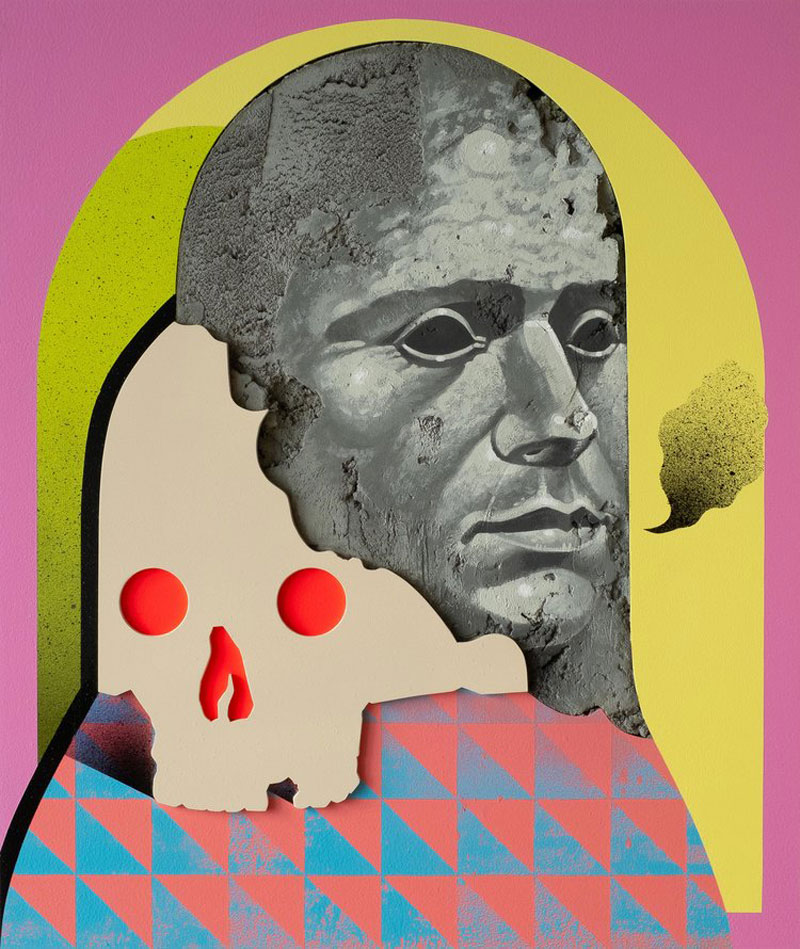
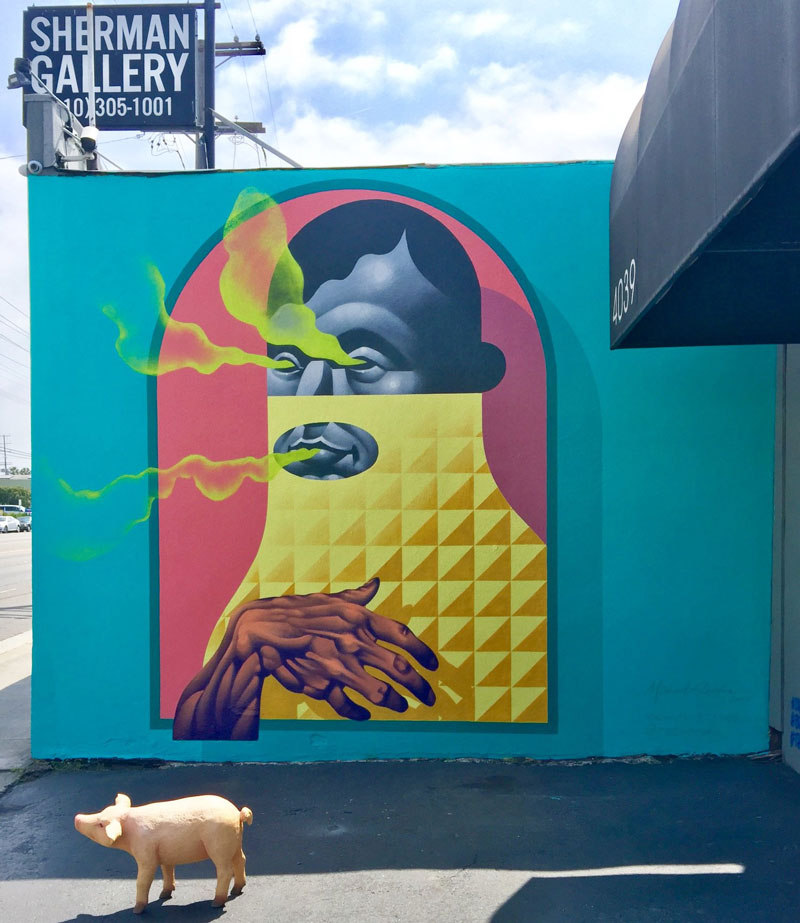
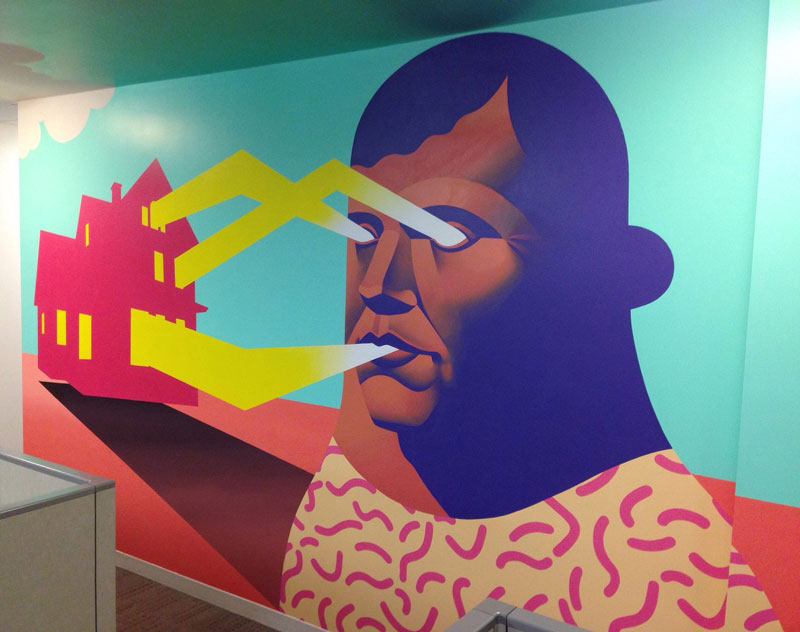
There is something Klimt-esque about Reeder’s art. The mix of realistic faces and skulls in black and white with bold colors, patterns, and geometric shapes, gives life to a type of street art nouveau.
Based in Dallas, Texas, Michael Reeder was influenced from early on by street art. Although he still creates murals, his work has evolved into something different that you can discover on this post or on his website.
There is something Klimt-esque about Reeder’s art. The mix of realistic faces and skulls in black and white with bold colors, patterns, and geometric shapes, gives life to a type of street art nouveau.
Based in Dallas, Texas, Michael Reeder was influenced from early on by street art. Although he still creates murals, his work has evolved into something different that you can discover on this post or on his website.
This is the second post in a two-part series about creating a Gulp workflow for WordPress theme development. Part one focused on the initial installation, setup, and organization of Gulp in a WordPress theme project. This post goes deep into the tasks Gulp will run by breaking down what each task does and how to tailor them to streamline theme development.
Now that we spent the first part of this series setting up a WordPress theme project with Grunt installed in it, it’s time to dive into the tasks we want it to do for us as we develop the theme. We’re going to get our hands extremely dirty in this post, get ready to write some code!
Let’s start by compiling src/bundle.scss from Sass to CSS, then minifying the CSS output for production mode and putting the completed bundle.css file into the dist directory.
We’re going to use a couple of Gulp plugins to do the heavy lifting. We’ll use gulp-sass to compile things and gulp-clean-css to minify. Then, gulp-if will allow us to conditionally run functions which, In our case, will check if we are in production or development modes before those tasks run and then execute accordingly.
We can install all three plugins in one fell swoop:
Let’s make sure we have something in our bundle.scss file so we can test the tasks:
$colour: #f03;

body {
  background-color: $colour;
}
Alright, back to the Gulpfile to import the plugins and define the task that runs them:
import { src, dest } from 'gulp';
import yargs from 'yargs';
import sass from 'gulp-sass';
import cleanCss from 'gulp-clean-css';
import gulpif from 'gulp-if';
const PRODUCTION = yargs.argv.prod;

export const styles = () => {
  return src('src/scss/bundle.scss')
    .pipe(sass().on('error', sass.logError))
    .pipe(gulpif(PRODUCTION, cleanCss({compatibility:'ie8'})))
    .pipe(dest('dist/css'));
}
Let’s walk through this code to explain what’s happening.
The src and dest functions are imported from Gulp. src will read the file that you pass as an argument and return a node stream.
We pull in yargs to create our flag that separates tasks between the development and production modes.
The three plugins are called into action.
The PRODUCTION flag is defined and held in the prod command.
We define styles as the task name we will use to run these tasks in the command line.
We tell the task what file we want processed (bundle.scss) and where it lives (src/scss/bundle.scss).
We create „pipes” that serve as the plungs that run when the styles command is executed. Those pipes run in the order they are written: convert Sass to CSS, minify the CSS (if we’re in production), and place the resulting CSS file into the dist/css directory.
Go ahead. Run gulp styles in the command line and see that a new CSS file has been added to your CSS directory dist/css.
Now do gulp styles --prod. The same thing happens, but now that CSS file has been minified for production use.
Now, assuming you have a functioning WordPress theme with header.php and footer.php, the CSS file (as well as JavaScript files when we get to those tasks) can be safely enqueued, likely in your functions.php file:
That’s all good, but we can make our style command even better.
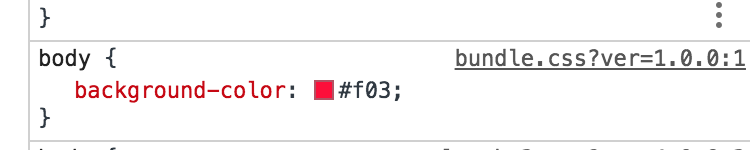
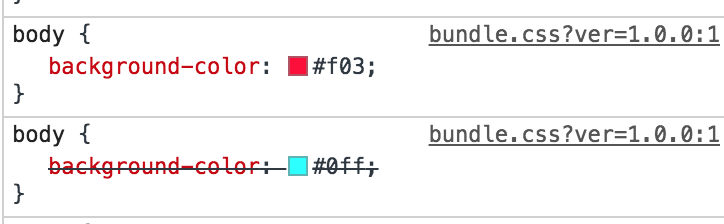
For example, try inspecting the body on the homepage with the WordPress theme active. The styles that we added should be there:
As you can see, it says that our style is coming from bundle.css, which is true. However, it would be much better if the name of the original SCSS file is displayed here instead for our development purposes — it makes it so much easier to locate code, particularly when we’re working with a ton of partials. This is where source maps come into play. That will detail the location of our styles in DevTools. To further illustrate this issue, let’s also add some SCSS inside src/scss/components/slider.scss and then import this file in bundle.scss.
//src/scss/components/slider.scss
body {
  background-color: aqua;
}
//src/scss/bundle.scss
@import './components/slider.scss';
$colour: #f03;
body {
  background-color: $colour;
}
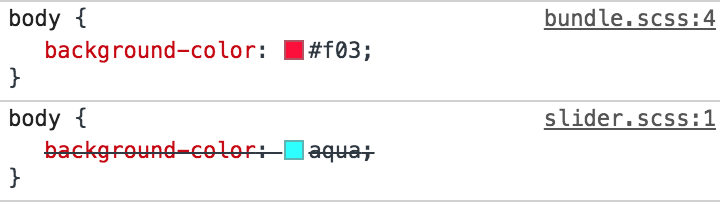
Run gulp styles again to recompile your files. Your inspector should then look like this:
The DevTools inspector will show that both styles are coming from bundle.css. But we would like it to show the original file instead (i.e bundle.scss and slider.scss). So let’s add that to our wish list of improvements before we get to the code.
The other thing we’ll want is vendor prefixing to be handled for us. There’s nothing worse than having to write and manage all of those on our own, and Autoprefixer is the tool that can do it for us.
And, in order for Autoprefixer to work its magic, we’ll need the PostCSS plugin.
OK, that adds up to three more plugins and tasks we need to run. Let’s install all three:
So gulp-sourcemaps will obviously be used for sourcemaps. gulp-postcss and autoprefixer will be used to add autoprefixing to our CSS. postcss is a famous plugin for transforming CSS files and autoprefixer is just a plugin for postcss. You can read more about the other things that you can do with postcss here.
Now at the very top let’s import our plugins into the Gulpfile:
import postcss from 'gulp-postcss';
import sourcemaps from 'gulp-sourcemaps';
import autoprefixer from 'autoprefixer';
And then let’s update the task to use these plugins:
To use the the sourcemaps plugin we have to follow some steps:
First, we initialize the plugin using sourcemaps.init().
Next, pipe all the plugins that you would like to map.
Finally, Create the source map file by calling sourcemaps.write() just before writing the bundle to the destination.
Note that all the plugins piped between sourcemaps.init() and sourcemaps.write() should be compatible with gulp-sourcemaps. In our case, we are using sass(), postcss() and cleanCss() and all of them are compatible with sourcemaps.
Notice that we only run the Autoprefixer begind the production flag since there’s really no need for all those vendor prefixes during development.
Let’s run gulp styles now, without the production flag. Here’s the output in bundle.css:
body {
  background-color: aqua; }
body {
  background-color: #f03; }
/*#sourceMappingURL=data:application/json;charset=utf8;base64,eyJ2ZXJzaW9uIjozLCJmaWxlIjoiYnVuZGxlLmNzcyIsInNvdXJjZXMiOlsiYnVuZGxlLnNjc3MiLCJjb21wb25lbnRzL3NsaWRlci5zY3NzIl0sInNvdXJjZXNDb250ZW50IjpbIkBpbXBvcnQgJy4vY29tcG9uZW50cy9zbGlkZXIuc2Nzcyc7XG5cbiRjb2xvdXI6ICNmMDM7XG5ib2R5IHtcbiAgICBiYWNrZ3JvdW5kLWNvbG9yOiAkY29sb3VyO1xufVxuOjpwbGFjZWhvbGRlciB7XG4gICAgY29sb3I6IGdyYXk7XG59IiwiYm9keSB7XG4gICAgYmFja2dyb3VuZC1jb2xvcjogYXF1YTtcbn0iXSwibmFtZXMiOltdLCJtYXBwaW5ncyI6IkFDQUEsQUFBQSxJQUFJLENBQUM7RUFDRCxnQkFBZ0IsRUFBRSxJQUFJLEdBQ3pCOztBRENELEFBQUEsSUFBSSxDQUFDO0VBQ0QsZ0JBQWdCLEVBRlgsSUFBSSxHQUdaOztBQUNELEFBQUEsYUFBYSxDQUFDO0VBQ1YsS0FBSyxFQUFFLElBQUksR0FDZCJ9 */#
The extra text below is source maps. Now, when we inspect the site in DevTools, we see:
Nice! Now onto production mode:
gulp styles --prod
Check DevTools against style rules that require prefixing (e.g. display: grid;) and confirm those are all there. And make sure that your file is minified as well.
One final notice for this task. Let’s assume we want multiple CSS bundles: one for front-end styles and one for WordPress admin styles. We can create add a new admin.scss file in the src/scss directory and pass an array of paths in the Gulpfile:
Now we have bundle.css and admin.css in the dist/css directory. Just make sure to properly enqueue any new bundles that are separated out like this.
Creating the watch task
Alright, next up is the watch task, which makes our life so much easier by looking for files with saved changes, then executing tasks on our behalf without have to call them ourselves in the command line. How great is that?
Note that watch is unavailable as a name since we already have a variable using it.
Now let’s run gulp watchForChanges the command line will be on a constant, ongoing watch for changes in any .scss files inside the src/scss directory. And, when those changes happen, the styles task will run right away with no further action on our part.
Note that src/scss/**/*.scss is a glob pattern. That basically means that this string will match any .scss file inside the src/scss directory or any sub-folder in it. Right now, we are only watching for .scss files and running the styles task. Later, we’ll expand its scope to watch for other files as well.
Creating the images task
As we covered earlier, the images task will compress images in src/images and then move them to dist/images. Let’s install a gulp plugin that will be responsible for compressing images:
npm install --save-dev gulp-imagemin
Now, import this plugin at the top of the Gulpfile:
We give the src() function a glob that matches all .jpg, .jpeg, .png, .svg and .gif images in the src/images directory. Then, we run the imagemin plugin, but only for production. Compressing images can take some time and isn’t necessary during development, so we can leave it out of the development flow. Finally, we put the compressed versions of images in dist/images.
Now any images that we drop into src/images will be copied when we run gulp images. However, running gulp images --prod, will both compress and copy the image over.
Last thing we need to do is modify our watchForChanges task to include images in its watch:
Now, assuming the watchForChanges task is running, the images task will be run automatically whenever we add an image to the src/images folder. It does all the lifting for us!
Important: If the watchForChanges task is running and when the Gulpfile is modified, it will need to be stopped and restarted in order for the changes to take effect.
Creating the copy task
You probably have been in situations where you’ve created files, processed them, then needed to manually grab the production files and put them where they need to be. Well, as we saw in the images task, we can use the copy feature to do this for us and help prevent moving wrong files.
Try to read the array of paths supplied to src() carefully. We are telling Gulp to match all files and folders inside src (src/**/*), except the images, js and scss folders (!src/{images,js,scss}) and any of the files or sub-folders inside them (!src/{images,js,scss}/**/*).
We want our watch task to look for these changes as well, so we’ll add it to the mix:
Try adding any file or folder to the src directory and it should be copied over to the the /dist directory. If, however, we were to add a file or folder inside of /images, /js or /scss, it would be ignored since we already handle these folders in separate tasks.
We still have a problem here though. Try to delete the added file and it won’t happen. Our task only handles copying. This problem could also happen for our /images, /js and /scss, folders. If we have old images or JavaScript and CSS bundles that were removed from the src folder, then they won’t get removed from the dist folder. Therefore, it’s a good idea to completely clean the dist folder every time to start developing or building a theme. And that’s what we are going to do in the next task.
Composing tasks for developing and building
Let’s now install a package that will be responsible for deleting the dist folder. This package is called del:
Notice that del returns a promise. Thus, we don’t have to call the cb() function. Using the new JavaScript features allows us to refactor this to:
export const clean = () => del(['dist']);
The folder should be deleted now when running gulp clean. What we need to do next is delete the dist folder, run the images, copy and styles tasks, and finally watch for changes every time we start developing. This can be done by running gulp clean, gulp images, gulp styles, gulp copy and then gulp watch. But, of course, we will not do that manually. Gulp has a couple of functions that will help us compose tasks. So, let’s import these functions from Gulp:
import { src, dest, watch, series, parallel } from 'gulp';
series() will take some tasks as arguments and run them in series (one after another). And parallel() will take tasks as arguments and run them all at once. Let’s create two new tasks by composing the tasks that we already created:
Both tasks will do the exact same thing: clean the dist folder, then styles, images and copy will run in parallel one the cleaning is complete. We will start watching for changes as well for the dev (short for develop) task, after these parallel tasks. Additionally, we are also exporting dev as the default task.
Notice that when we run the build task, we want our files to be minified, images to be compressed, and so on. So, when we run this command, we will have to add the --prod flag. Since this can easily be forgotten when running the build task, we can use npm scripts to create aliases for the dev and build commands. Let’s go to package.json, and in the scripts field, we will probably find something like this:
"scripts": {
  "test": "echo "Error: no test specified" && exit 1"
}
This will allow us to run npm run start in the command line, which will go to the scripts field and find what command corresponds to start. In our case, start will run gulp and gulp will run the default gulp task, which is dev. Similarly, npm run build will run gulp build --prod. This way, we can completely forget about the --prod flag and also forget about running the Gulp tasks using the gulp command. Of course, our dev and build commands will do more than that later on, but for now, we have the foundation that we will work with throughout the rest of the tasks.
Creating the scripts task
As mentioned, in order to bundle our JavaScript files, we are going to need a module bundler. webpack is the most famous option out there, however it is not a Gulp plugin. Rather, it’s a plugin on its own that has a completely separate setup and configuration file. Luckily, there is a package called webpack-stream that helps us use webpack within a Gulp task. So, let’s install this package:
npm install --save-dev webpack-stream
webpack works with something called loaders. Loaders are responsible for transforming files in webpack. And to transform new Javascript versions into ES5, we will need a loader called babel-loader. We will also need @babel/preset-env but we already installed this earlier:
npm install --save-dev babel-loader
Let’s import webpack-stream at the top of the Gulpfile:
import webpack from 'webpack-stream';
Also, to test our task, lets add these lines in src/js/bundle.js and src/js/components/slider.js:
First, we specify bundle.js as our entry point in the src() function.
Then, we pipe the webpack plugin and specify some options for it.
The rules field in the module option lets webpack know what loaders to use in order to transform our files. In our case we need to transform JavaScript files using the babel-loader.
The mode option is either production or development. For development, webpack will not minify the output JavaScript bundle, but it will for production. Therefore, we don’t need a separate Gulp plugin to minify JavaScript because webpack can do that depending on our PRODUCTION constant.
The devtool option will add source maps, but not in production. In development, however, we will use inline-source-maps. This kind of source maps is the most accurate though it can be a bit slow to create. If you find it too slow, check the other options here. They won’t be as accurate as inline-source-maps but they can be pretty fast.
Finally, the output option can specify some information about the output file. In our case, we only need to change the filename. If we don’t specify the filename, webpack will generate a bundle with a hash as the filename. Read more about these options here.
Now we should be able to run gulp scripts and gulp scripts --prod and see a bundle.js file created in dist/js. Make sure that minification and source maps are working properly. Let’s now enqueue our JavaScript file in WordPress, which can be in the theme’s functions.php file, or wherever you write your functions.
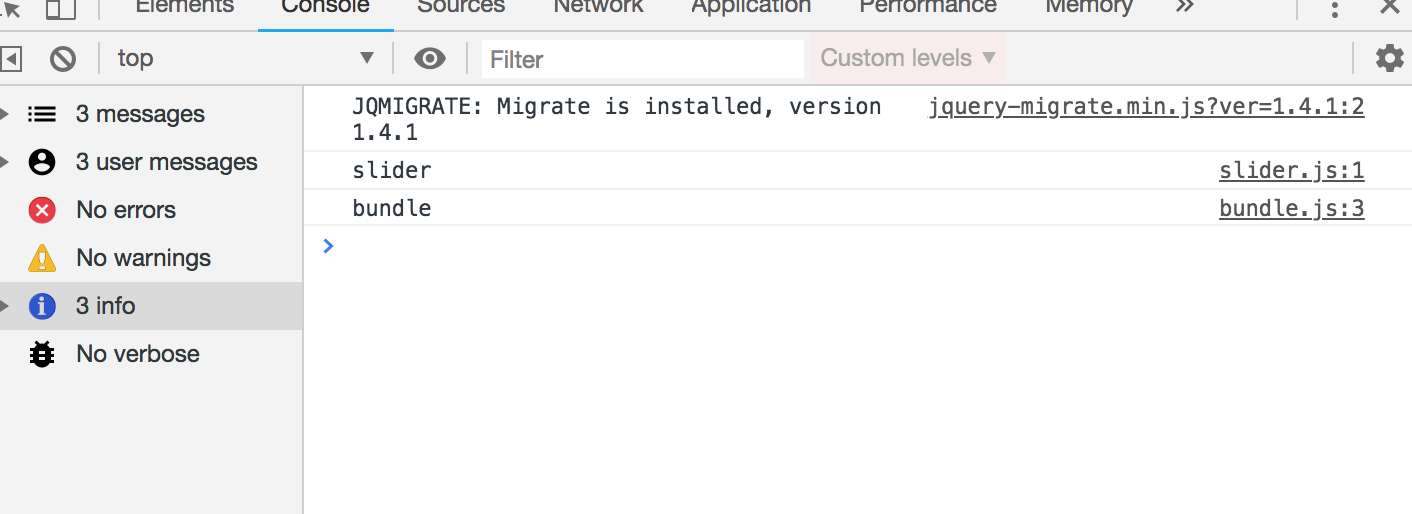
Now, looking at the console, let’s confirm that source maps are working correctly by checking the file that the console logs come from:
Without the source maps, both logs will appear coming from bundle.js.
What if we would like to create multiple JavaScript bundles the same way we do for the styles? Let’s create a file called admin.js in src/js. You might think that we can simply change the entry point in the src() to an array like so:
However, this will not work. webpack works a bit differently that normal Gulp plugins. What we did above will still create one file called bundle.js in the dist folder. webpack-stream provides a couple of solutions for creating multiple entry points. I chose to use the second solution since it will allow us to create multiple bundles by passing an array to the src() the same way we did for the styles. This will require us to install vinyl-named:
The only difference is that we now have an array in the src(). We then pipe the named plugin before webpack, which allows us to use a [name] placeholder in the output field’s filename instead of hardcoding the file name directly. After running the task, we get two bundles in dist/js.
Another feature that webpack provides is using libraries from external sources rather than bundling them into the final bundle. For example, let’s say your bundle needs to use jQuery. You can run npm install jquery --save and then import it to your bundle import $ from 'jquery'. However, this will increase the bundle size and, in some cases, you may already have jQuery loaded via a CDN or — in case of WordPress — it can exist as a dependency like so:
So, now WordPress will enqueue jQuery using a normal script tag. How can we then use it inside our bundle using import $ from'jquery'? The answer is by using webpack’s externals option. Let’s modify our scripts task to add it in:
In the externals option, jquery is the key that identifies the name of the library we want to import. In our case, it will be import $ from'jquery'. And the value jQuery is the name of a global variable where that the library lives. Now try to import $ from ‘jquery’ in the bundle and use jQuery using the $ — it should work perfectly.
Let’s watch for changes for JavaScript files as well:
Let’s now improve our watch task by installing Browsersync, a plugin that refreshes the browser each time tasks finish running.
npm install browser-sync gulp --save-dev
As usual, let’s import it:
import browserSync from "browser-sync";
Next, we will initialize a Browsersync server and write two new tasks:
const server = browserSync.create();
export const serve = done => {
  server.init({
    proxy: "http://localhost/yourFolderName" // put your local website link here
  });
  done();
};
export const reload = done => {
  server.reload();
  done();
};
In order to control the browser using Browsersync, we have to initialize a Browsersync server. This is different from a local server where WordPresss would typically live. the first task is serve, which starts the Browsersync server, and is pointed to our local WordPress server using the proxy option. The second task will simply reload the browser.
Now we need to run this server when we are developing our theme. We can add the serve task to the dev series tasks:
Now run npm start and the browser should open up a new URL that’s different than the original one. This URL is the one that Browsersync will refresh. Now let’s use the reload task to reload the browser once tasks are done:
As you can see, we added a new line to run the reload task every time a PHP file changes. We are also using series() to wait for our styles, images, scripts and copy tasks to finish before reloading the browser. Now, run npm start and change something in a Sass file. The browser should reload automatically and changes should be reflected after refresh once the tasks have finished running.
Don’t see CSS or JavaScript changes after refresh? Make sure caching is disabled in your browser’s inspector.
We can make even one more improvement to the styles tasks. Browsersync allows us to inject CSS directly to the page without even having to reload the browser. And this can be done by adding server.stream() at the very end of the styles task:
Make sure to stop watchForChanges if it’s already running and then run it again. Try to modify any file in the scss folder and the changes should appear immediately in the browser without even reloading.
Packaging the theme in a ZIP file
WordPress themes are generally packaged up as a ZIP file that can be installed directly in the WordPress admin. We can create a task that will take the required theme files and ZIP them up for us. To do that we need to install another Gulp plugin: gulp-zip.
npm install --save-dev gulp-zip
And, as always, import it at the top:
import zip from "gulp-zip";
Let’s also import the JSON object in the package.json file. We need that in order to grab the name of the package which is also the name of our theme:
We are passing the src() the files and folders that we need to compress, which is basically all files and folders (**/), except a few specific types of files, which are preceded by !. Next, we are piping the gulp-zip plugin and calling the file the name of the theme from the package.json file (info.name). The result is a fresh ZIP file an a new folder called bundled.
Try running gulp compress and make sure it all works. Open up the generated ZIP file and make sure that it only contains the files and folders needed to run the theme.
Normally, though, we only need to ZIP things up *after* the theme files have been built. So let’s add the compress task to the build task so it only runs when we need it:
Running npm run build should now run all of our tasks in production mode.
Replacing the placeholder prefix in the ZIP file
One step we need to do before zipping our files is to scan them and replace the themename placeholder with the theme name we plan to use. As you may have guessed, there is indeed a Gulp plugin that does that for us, called gulp-replace.
npm install --save-dev gulp-replace
Then import it:
import replace from "gulp-replace";
We want this task to run immediately before our files are zipped, so let’s modify the compress task by slotting it in the right place:
Try to building the theme now with npm run build and then unzip the file inside the bundled folder. Open any PHP file where the _themename placeholder may have been used and make sure it’s replaced with the actual theme name.
There is a gotcha to watch for that I noticed in the replace plugin as I was working with it. If there are ZIP files inside the theme (e.g. you are bundling WordPress plugins inside your theme), then they will get corrupted when they pass through the replace plugin. That can be resolved by ignoring ZIP files using a gulp-if statement:
Translation is a big thing in the WordPress community, so for our final task, we let’s scan through all of our PHP files and generate a POT file that gets used for translation. Luckily, we also have a gulp plugin for that:
Phew, that’s everything! I hope you learned something from this series and that it helps streamline your WordPress development flow. Let me know if you have any questions in the comments. If you are interested in a complete WordPress theme development course, make sure to check out my course on Udemy with a special discount for you. 😀
This is the second post in a two-part series about creating a Gulp workflow for WordPress theme development. Part one focused on the initial installation, setup, and organization of Gulp in a WordPress theme project. This post goes deep into the tasks Gulp will run by breaking down what each task does and how to tailor them to streamline theme development.
Now that we spent the first part of this series setting up a WordPress theme project with Grunt installed in it, it’s time to dive into the tasks we want it to do for us as we develop the theme. We’re going to get our hands extremely dirty in this post, get ready to write some code!
Let’s start by compiling src/bundle.scss from Sass to CSS, then minifying the CSS output for production mode and putting the completed bundle.css file into the dist directory.
We’re going to use a couple of Gulp plugins to do the heavy lifting. We’ll use gulp-sass to compile things and gulp-clean-css to minify. Then, gulp-if will allow us to conditionally run functions which, In our case, will check if we are in production or development modes before those tasks run and then execute accordingly.
We can install all three plugins in one fell swoop:
Let’s make sure we have something in our bundle.scss file so we can test the tasks:
$colour: #f03;

body {
  background-color: $colour;
}
Alright, back to the Gulpfile to import the plugins and define the task that runs them:
import { src, dest } from 'gulp';
import yargs from 'yargs';
import sass from 'gulp-sass';
import cleanCss from 'gulp-clean-css';
import gulpif from 'gulp-if';
const PRODUCTION = yargs.argv.prod;

export const styles = () => {
  return src('src/scss/bundle.scss')
    .pipe(sass().on('error', sass.logError))
    .pipe(gulpif(PRODUCTION, cleanCss({compatibility:'ie8'})))
    .pipe(dest('dist/css'));
}
Let’s walk through this code to explain what’s happening.
The src and dest functions are imported from Gulp. src will read the file that you pass as an argument and return a node stream.
We pull in yargs to create our flag that separates tasks between the development and production modes.
The three plugins are called into action.
The PRODUCTION flag is defined and held in the prod command.
We define styles as the task name we will use to run these tasks in the command line.
We tell the task what file we want processed (bundle.scss) and where it lives (src/scss/bundle.scss).
We create „pipes” that serve as the plungs that run when the styles command is executed. Those pipes run in the order they are written: convert Sass to CSS, minify the CSS (if we’re in production), and place the resulting CSS file into the dist/css directory.
Go ahead. Run gulp styles in the command line and see that a new CSS file has been added to your CSS directory dist/css.
Now do gulp styles --prod. The same thing happens, but now that CSS file has been minified for production use.
Now, assuming you have a functioning WordPress theme with header.php and footer.php, the CSS file (as well as JavaScript files when we get to those tasks) can be safely enqueued, likely in your functions.php file:
That’s all good, but we can make our style command even better.
For example, try inspecting the body on the homepage with the WordPress theme active. The styles that we added should be there:
As you can see, it says that our style is coming from bundle.css, which is true. However, it would be much better if the name of the original SCSS file is displayed here instead for our development purposes — it makes it so much easier to locate code, particularly when we’re working with a ton of partials. This is where source maps come into play. That will detail the location of our styles in DevTools. To further illustrate this issue, let’s also add some SCSS inside src/scss/components/slider.scss and then import this file in bundle.scss.
//src/scss/components/slider.scss
body {
  background-color: aqua;
}
//src/scss/bundle.scss
@import './components/slider.scss';
$colour: #f03;
body {
  background-color: $colour;
}
Run gulp styles again to recompile your files. Your inspector should then look like this:
The DevTools inspector will show that both styles are coming from bundle.css. But we would like it to show the original file instead (i.e bundle.scss and slider.scss). So let’s add that to our wish list of improvements before we get to the code.
The other thing we’ll want is vendor prefixing to be handled for us. There’s nothing worse than having to write and manage all of those on our own, and Autoprefixer is the tool that can do it for us.
And, in order for Autoprefixer to work its magic, we’ll need the PostCSS plugin.
OK, that adds up to three more plugins and tasks we need to run. Let’s install all three:
So gulp-sourcemaps will obviously be used for sourcemaps. gulp-postcss and autoprefixer will be used to add autoprefixing to our CSS. postcss is a famous plugin for transforming CSS files and autoprefixer is just a plugin for postcss. You can read more about the other things that you can do with postcss here.
Now at the very top let’s import our plugins into the Gulpfile:
import postcss from 'gulp-postcss';
import sourcemaps from 'gulp-sourcemaps';
import autoprefixer from 'autoprefixer';
And then let’s update the task to use these plugins:
To use the the sourcemaps plugin we have to follow some steps:
First, we initialize the plugin using sourcemaps.init().
Next, pipe all the plugins that you would like to map.
Finally, Create the source map file by calling sourcemaps.write() just before writing the bundle to the destination.
Note that all the plugins piped between sourcemaps.init() and sourcemaps.write() should be compatible with gulp-sourcemaps. In our case, we are using sass(), postcss() and cleanCss() and all of them are compatible with sourcemaps.
Notice that we only run the Autoprefixer begind the production flag since there’s really no need for all those vendor prefixes during development.
Let’s run gulp styles now, without the production flag. Here’s the output in bundle.css:
body {
  background-color: aqua; }
body {
  background-color: #f03; }
/*#sourceMappingURL=data:application/json;charset=utf8;base64,eyJ2ZXJzaW9uIjozLCJmaWxlIjoiYnVuZGxlLmNzcyIsInNvdXJjZXMiOlsiYnVuZGxlLnNjc3MiLCJjb21wb25lbnRzL3NsaWRlci5zY3NzIl0sInNvdXJjZXNDb250ZW50IjpbIkBpbXBvcnQgJy4vY29tcG9uZW50cy9zbGlkZXIuc2Nzcyc7XG5cbiRjb2xvdXI6ICNmMDM7XG5ib2R5IHtcbiAgICBiYWNrZ3JvdW5kLWNvbG9yOiAkY29sb3VyO1xufVxuOjpwbGFjZWhvbGRlciB7XG4gICAgY29sb3I6IGdyYXk7XG59IiwiYm9keSB7XG4gICAgYmFja2dyb3VuZC1jb2xvcjogYXF1YTtcbn0iXSwibmFtZXMiOltdLCJtYXBwaW5ncyI6IkFDQUEsQUFBQSxJQUFJLENBQUM7RUFDRCxnQkFBZ0IsRUFBRSxJQUFJLEdBQ3pCOztBRENELEFBQUEsSUFBSSxDQUFDO0VBQ0QsZ0JBQWdCLEVBRlgsSUFBSSxHQUdaOztBQUNELEFBQUEsYUFBYSxDQUFDO0VBQ1YsS0FBSyxFQUFFLElBQUksR0FDZCJ9 */#
The extra text below is source maps. Now, when we inspect the site in DevTools, we see:
Nice! Now onto production mode:
gulp styles --prod
Check DevTools against style rules that require prefixing (e.g. display: grid;) and confirm those are all there. And make sure that your file is minified as well.
One final notice for this task. Let’s assume we want multiple CSS bundles: one for front-end styles and one for WordPress admin styles. We can create add a new admin.scss file in the src/scss directory and pass an array of paths in the Gulpfile:
Now we have bundle.css and admin.css in the dist/css directory. Just make sure to properly enqueue any new bundles that are separated out like this.
Creating the watch task
Alright, next up is the watch task, which makes our life so much easier by looking for files with saved changes, then executing tasks on our behalf without have to call them ourselves in the command line. How great is that?
Note that watch is unavailable as a name since we already have a variable using it.
Now let’s run gulp watchForChanges the command line will be on a constant, ongoing watch for changes in any .scss files inside the src/scss directory. And, when those changes happen, the styles task will run right away with no further action on our part.
Note that src/scss/**/*.scss is a glob pattern. That basically means that this string will match any .scss file inside the src/scss directory or any sub-folder in it. Right now, we are only watching for .scss files and running the styles task. Later, we’ll expand its scope to watch for other files as well.
Creating the images task
As we covered earlier, the images task will compress images in src/images and then move them to dist/images. Let’s install a gulp plugin that will be responsible for compressing images:
npm install --save-dev gulp-imagemin
Now, import this plugin at the top of the Gulpfile:
We give the src() function a glob that matches all .jpg, .jpeg, .png, .svg and .gif images in the src/images directory. Then, we run the imagemin plugin, but only for production. Compressing images can take some time and isn’t necessary during development, so we can leave it out of the development flow. Finally, we put the compressed versions of images in dist/images.
Now any images that we drop into src/images will be copied when we run gulp images. However, running gulp images --prod, will both compress and copy the image over.
Last thing we need to do is modify our watchForChanges task to include images in its watch:
Now, assuming the watchForChanges task is running, the images task will be run automatically whenever we add an image to the src/images folder. It does all the lifting for us!
Important: If the watchForChanges task is running and when the Gulpfile is modified, it will need to be stopped and restarted in order for the changes to take effect.
Creating the copy task
You probably have been in situations where you’ve created files, processed them, then needed to manually grab the production files and put them where they need to be. Well, as we saw in the images task, we can use the copy feature to do this for us and help prevent moving wrong files.
Try to read the array of paths supplied to src() carefully. We are telling Gulp to match all files and folders inside src (src/**/*), except the images, js and scss folders (!src/{images,js,scss}) and any of the files or sub-folders inside them (!src/{images,js,scss}/**/*).
We want our watch task to look for these changes as well, so we’ll add it to the mix:
Try adding any file or folder to the src directory and it should be copied over to the the /dist directory. If, however, we were to add a file or folder inside of /images, /js or /scss, it would be ignored since we already handle these folders in separate tasks.
We still have a problem here though. Try to delete the added file and it won’t happen. Our task only handles copying. This problem could also happen for our /images, /js and /scss, folders. If we have old images or JavaScript and CSS bundles that were removed from the src folder, then they won’t get removed from the dist folder. Therefore, it’s a good idea to completely clean the dist folder every time to start developing or building a theme. And that’s what we are going to do in the next task.
Composing tasks for developing and building
Let’s now install a package that will be responsible for deleting the dist folder. This package is called del:
Notice that del returns a promise. Thus, we don’t have to call the cb() function. Using the new JavaScript features allows us to refactor this to:
export const clean = () => del(['dist']);
The folder should be deleted now when running gulp clean. What we need to do next is delete the dist folder, run the images, copy and styles tasks, and finally watch for changes every time we start developing. This can be done by running gulp clean, gulp images, gulp styles, gulp copy and then gulp watch. But, of course, we will not do that manually. Gulp has a couple of functions that will help us compose tasks. So, let’s import these functions from Gulp:
import { src, dest, watch, series, parallel } from 'gulp';
series() will take some tasks as arguments and run them in series (one after another). And parallel() will take tasks as arguments and run them all at once. Let’s create two new tasks by composing the tasks that we already created:
Both tasks will do the exact same thing: clean the dist folder, then styles, images and copy will run in parallel one the cleaning is complete. We will start watching for changes as well for the dev (short for develop) task, after these parallel tasks. Additionally, we are also exporting dev as the default task.
Notice that when we run the build task, we want our files to be minified, images to be compressed, and so on. So, when we run this command, we will have to add the --prod flag. Since this can easily be forgotten when running the build task, we can use npm scripts to create aliases for the dev and build commands. Let’s go to package.json, and in the scripts field, we will probably find something like this:
"scripts": {
  "test": "echo "Error: no test specified" && exit 1"
}
This will allow us to run npm run start in the command line, which will go to the scripts field and find what command corresponds to start. In our case, start will run gulp and gulp will run the default gulp task, which is dev. Similarly, npm run build will run gulp build --prod. This way, we can completely forget about the --prod flag and also forget about running the Gulp tasks using the gulp command. Of course, our dev and build commands will do more than that later on, but for now, we have the foundation that we will work with throughout the rest of the tasks.
Creating the scripts task
As mentioned, in order to bundle our JavaScript files, we are going to need a module bundler. webpack is the most famous option out there, however it is not a Gulp plugin. Rather, it’s a plugin on its own that has a completely separate setup and configuration file. Luckily, there is a package called webpack-stream that helps us use webpack within a Gulp task. So, let’s install this package:
npm install --save-dev webpack-stream
webpack works with something called loaders. Loaders are responsible for transforming files in webpack. And to transform new Javascript versions into ES5, we will need a loader called babel-loader. We will also need @babel/preset-env but we already installed this earlier:
npm install --save-dev babel-loader
Let’s import webpack-stream at the top of the Gulpfile:
import webpack from 'webpack-stream';
Also, to test our task, lets add these lines in src/js/bundle.js and src/js/components/slider.js:
First, we specify bundle.js as our entry point in the src() function.
Then, we pipe the webpack plugin and specify some options for it.
The rules field in the module option lets webpack know what loaders to use in order to transform our files. In our case we need to transform JavaScript files using the babel-loader.
The mode option is either production or development. For development, webpack will not minify the output JavaScript bundle, but it will for production. Therefore, we don’t need a separate Gulp plugin to minify JavaScript because webpack can do that depending on our PRODUCTION constant.
The devtool option will add source maps, but not in production. In development, however, we will use inline-source-maps. This kind of source maps is the most accurate though it can be a bit slow to create. If you find it too slow, check the other options here. They won’t be as accurate as inline-source-maps but they can be pretty fast.
Finally, the output option can specify some information about the output file. In our case, we only need to change the filename. If we don’t specify the filename, webpack will generate a bundle with a hash as the filename. Read more about these options here.
Now we should be able to run gulp scripts and gulp scripts --prod and see a bundle.js file created in dist/js. Make sure that minification and source maps are working properly. Let’s now enqueue our JavaScript file in WordPress, which can be in the theme’s functions.php file, or wherever you write your functions.
Now, looking at the console, let’s confirm that source maps are working correctly by checking the file that the console logs come from:
Without the source maps, both logs will appear coming from bundle.js.
What if we would like to create multiple JavaScript bundles the same way we do for the styles? Let’s create a file called admin.js in src/js. You might think that we can simply change the entry point in the src() to an array like so:
However, this will not work. webpack works a bit differently that normal Gulp plugins. What we did above will still create one file called bundle.js in the dist folder. webpack-stream provides a couple of solutions for creating multiple entry points. I chose to use the second solution since it will allow us to create multiple bundles by passing an array to the src() the same way we did for the styles. This will require us to install vinyl-named:
The only difference is that we now have an array in the src(). We then pipe the named plugin before webpack, which allows us to use a [name] placeholder in the output field’s filename instead of hardcoding the file name directly. After running the task, we get two bundles in dist/js.
Another feature that webpack provides is using libraries from external sources rather than bundling them into the final bundle. For example, let’s say your bundle needs to use jQuery. You can run npm install jquery --save and then import it to your bundle import $ from 'jquery'. However, this will increase the bundle size and, in some cases, you may already have jQuery loaded via a CDN or — in case of WordPress — it can exist as a dependency like so:
So, now WordPress will enqueue jQuery using a normal script tag. How can we then use it inside our bundle using import $ from'jquery'? The answer is by using webpack’s externals option. Let’s modify our scripts task to add it in:
In the externals option, jquery is the key that identifies the name of the library we want to import. In our case, it will be import $ from'jquery'. And the value jQuery is the name of a global variable where that the library lives. Now try to import $ from ‘jquery’ in the bundle and use jQuery using the $ — it should work perfectly.
Let’s watch for changes for JavaScript files as well:
Let’s now improve our watch task by installing Browsersync, a plugin that refreshes the browser each time tasks finish running.
npm install browser-sync gulp --save-dev
As usual, let’s import it:
import browserSync from "browser-sync";
Next, we will initialize a Browsersync server and write two new tasks:
const server = browserSync.create();
export const serve = done => {
  server.init({
    proxy: "http://localhost/yourFolderName" // put your local website link here
  });
  done();
};
export const reload = done => {
  server.reload();
  done();
};
In order to control the browser using Browsersync, we have to initialize a Browsersync server. This is different from a local server where WordPresss would typically live. the first task is serve, which starts the Browsersync server, and is pointed to our local WordPress server using the proxy option. The second task will simply reload the browser.
Now we need to run this server when we are developing our theme. We can add the serve task to the dev series tasks:
Now run npm start and the browser should open up a new URL that’s different than the original one. This URL is the one that Browsersync will refresh. Now let’s use the reload task to reload the browser once tasks are done:
As you can see, we added a new line to run the reload task every time a PHP file changes. We are also using series() to wait for our styles, images, scripts and copy tasks to finish before reloading the browser. Now, run npm start and change something in a Sass file. The browser should reload automatically and changes should be reflected after refresh once the tasks have finished running.
Don’t see CSS or JavaScript changes after refresh? Make sure caching is disabled in your browser’s inspector.
We can make even one more improvement to the styles tasks. Browsersync allows us to inject CSS directly to the page without even having to reload the browser. And this can be done by adding server.stream() at the very end of the styles task:
Make sure to stop watchForChanges if it’s already running and then run it again. Try to modify any file in the scss folder and the changes should appear immediately in the browser without even reloading.
Packaging the theme in a ZIP file
WordPress themes are generally packaged up as a ZIP file that can be installed directly in the WordPress admin. We can create a task that will take the required theme files and ZIP them up for us. To do that we need to install another Gulp plugin: gulp-zip.
npm install --save-dev gulp-zip
And, as always, import it at the top:
import zip from "gulp-zip";
Let’s also import the JSON object in the package.json file. We need that in order to grab the name of the package which is also the name of our theme:
We are passing the src() the files and folders that we need to compress, which is basically all files and folders (**/), except a few specific types of files, which are preceded by !. Next, we are piping the gulp-zip plugin and calling the file the name of the theme from the package.json file (info.name). The result is a fresh ZIP file an a new folder called bundled.
Try running gulp compress and make sure it all works. Open up the generated ZIP file and make sure that it only contains the files and folders needed to run the theme.
Normally, though, we only need to ZIP things up *after* the theme files have been built. So let’s add the compress task to the build task so it only runs when we need it:
Running npm run build should now run all of our tasks in production mode.
Replacing the placeholder prefix in the ZIP file
One step we need to do before zipping our files is to scan them and replace the themename placeholder with the theme name we plan to use. As you may have guessed, there is indeed a Gulp plugin that does that for us, called gulp-replace.
npm install --save-dev gulp-replace
Then import it:
import replace from "gulp-replace";
We want this task to run immediately before our files are zipped, so let’s modify the compress task by slotting it in the right place:
Try to building the theme now with npm run build and then unzip the file inside the bundled folder. Open any PHP file where the _themename placeholder may have been used and make sure it’s replaced with the actual theme name.
There is a gotcha to watch for that I noticed in the replace plugin as I was working with it. If there are ZIP files inside the theme (e.g. you are bundling WordPress plugins inside your theme), then they will get corrupted when they pass through the replace plugin. That can be resolved by ignoring ZIP files using a gulp-if statement:
Translation is a big thing in the WordPress community, so for our final task, we let’s scan through all of our PHP files and generate a POT file that gets used for translation. Luckily, we also have a gulp plugin for that:
Phew, that’s everything! I hope you learned something from this series and that it helps streamline your WordPress development flow. Let me know if you have any questions in the comments. If you are interested in a complete WordPress theme development course, make sure to check out my course on Udemy with a special discount for you. 😀
This is the first part of a two-part series on creating a Gulp workflow for WordPress theme development. This first part covers a lot of ground for the initial setup, including Gulp installation and an outline of the tasks we want it to run. If you’re interested in how the tasks are created, then stay tuned for part two.
Earlier this year, I created a course for building premium WordPress themes. During the process, I wanted to use a task runner to concatenate and minify JavaScript and CSS files. I ended up using that task runner to automate a lot of other tasks that made the theme much more efficient and scalable.
The two most popular task runners powered by Node are Gulp and Grunt. I went with Gulp after a good amount of research, it appeared to have an intuitive way to write tasks. It uses Node streams to manipulate files and JavaScript functions to write the tasks, whereas Grunt uses a configuration object to define tasks — which might be fine for some, but is something that made me a little uncomfortable. Also, Gulp is a bit faster that Grunt because of those Node streams and faster is always a good thing to me!
So, we’re going to set Gulp up to do a lot of the heavy lifting for WordPress theme development. We’ll cover the initial setup for now, but then go super in-depth on the tasks themselves in another post.
So, how can we use Gulp to power the tasks for a WordPress theme? First off, let’s assume our theme only contains the two files that WordPress requires for any theme: index.php and styles.css. Sure, most themes are likely to include many more files that this, but that’s not important right now.
Secondly, let’s assume that our primary goal is to create tasks that help manage our assets, like minify our CSS and JavaScript files, compile Sass to CSS, and transpile modern JavaScript syntax (e.g. ES6, ES7, etc..) into ES5 in order to support older browsers.
The only thing we’ve added on top of the two required files is a src directory where our original un-compiled assets will live.
Inside of that src directory, we have an images subdirectory as well as others for our JavaScript and Sass files. And from, there, the JavaScript and Sass subdirectories are organized into components that will be called from their respective bundle file. So, for example, bundle.js will import and include slider.js when our JavaScript tasks run so all our code is concatenated into a single file.
Identifying Gulp tasks
OK, next we want Gulp tasks to a create a new dist directory where all of our compiled, minified and concatenated versions of our assets will be distributed after the tasks have completed. Even though we’re calling this directory dist in this post because it is short for „distribution,” it could really be called anything, as long as Gulp knows what it is called. Regardless, these are the assets that will be distributed to end users. The src folder will only contain the files that we edit directly during development.
Identifying which Gulp tasks are the best fit for a project will depend on the project’s specific needs. Some tasks will be super helpful on some projects but completely irrelevant on others. I’ve identified the following for us to cover in this post. You’ll see that one or two are more useful in a WordPress context (e.g. the POT task) than others. Yet, most of these are broad enough that you’re likely to see them in many projects that use Gulp to process Sass, JavaScript and image assets.
Styles Task: This task is responsible for compiling the bundle.scss file in the scss subdirectory to bundle.css in a css directory located in the dist directory. This task will also minify the generated CSS file so that its is it’s smallest possible size when used in production.
We will talk about production vs. development modes during the article. Note that we will not create a task to concatenate CSS files. The bundle.scss file will act as an entry point for all . <code>scss files that we want to include. In other words; any Sass or CSS files you want to include in your project, just import them in the bundle.scss file using @import statements. For instance, in our example folder, we can use @import ./components/slider'; to import the slider.scss file. This way in our task we will have to compile and minify only one file (bundle.css).
Scripts Task: Similar to the Styles task, this task will transpile bundle.js from ES6 syntax to ES5, then minify the file for production.
We will only compile bundle.js. Any other JavaScript files we want to include will be done using ES6 import statements. But in order for those import statements to work on all browsers, we will need to use a module bundler. We’re going to use webpack as our bundler. If this is your first time working with it, this primer is a good place to get an overview of what it is and does.
Images Task: This task will simply copy images from src/images and send them to dist/images after the files have been compressed to their smallest size.
Copy Task: This task will be responsible for copying any other files or folders that are not in /src/images, /src/js or /src/scss and post them to the dist directory.
Remember. the src folder will contain the files that are only used during development and that will not be included in the final theme package. Thus, any assets other than our images, JavaScript and Sass files need to be copied posted to the dist folder. For instance, if we have a /src/fonts folder, we would want to copy the files in there into the dist directory so they get included in the final deliverable.
POT Task: As the name suggests, this task will scan all your theme’s PHP files and generate a .pot (i.e. translation) file from gettext calls in the files. This is the most WordPress-centric of all the tasks we’re covering here.
Watch Task: This task will literally watch for changes in your files. When a change is made, certain tasks will be triggered and executed, depending on the type of file that changed.
For instance, if we change a JavaScript file, then the Scripts task should do its magic and then it would be ideal if the browser refreshed for us automatically so we can see those changes. Further, If we change a PHP file, then let’s simply refresh the browser since PHP files don’t rely on any other tasks in our project. We’ll be using a Gulp plugin called Browsersync to handle browser refreshes, but we’ll get to that and other plugins a little later.
Compress Task: As you might expect, all the plugins that we use to write our tasks will be managed using npm. So, our theme folder will contain another folder, like node_modules, that in turn, contains files like package.json and other configuration files that define our project’s dependencies — and these files and folders are only needed during development. During production, we can take out the necessary files for our theme and leave the unneeded development files behind. That’s what this task will do; it will create a ZIP file that only contains the necessary files to run our theme.
As a bonus step for the compress task, if you are creating a theme that you intend to publish on WordPress.org or maybe on a website like ThemeForest, then you probably already know that all functions in your theme must be prefixed with a unique prefix:
function mythemename_enqueue_assets() {
  // function body
}
So, if you are creating a lot of themes. you’ll need to easily reuse functions in different themes but change the prefix to the name of the theme, to prevent conflicts. We can prefix our functions with a placeholder prefix and then replace all instances of that placeholder in the compress task. For instance, we can choose the string _themename as a place holder, and when we compress our theme we will replace all ‘_themename’ strings to the actual theme name:
function _themename_enqueue_assets() {
  // function body
}
This can also apply to anywhere we use the theme name for example in the text domain:
<?php _e('some string', '_themename'); ?>
Develop Task: This task does nothing new. It runs when as we develop our theme. It cleans the dist folder, runs the Styles, Scripts, Images and Copy tasks in development mode (i.e. without minifying any of the assets), then watches for file changes to refresh the browser for us.
Build Task: This task is intended to build our files for production. It will do all the same cleaning and tasks as the Develop task, but in production mode (i.e. minify the assets in the process) and generate a new POT file for translation updates. After it runs, our dist folder should contain the the files that are ready for distribution.
Bundle Task: This task will simply run the build task, will making sure that all the files in the dist folder are minified and ready for distribution. Then, it will run the Compress task, which bundles all of the production-ready files and folders into a ZIP file. We want a ZIP file because that is the format WordPress recognizes to extract and install a theme.
Here’s how our file structure looks after our tasks complete:
themefolder/
├── index.php
├── style.css
├── src/
└── dist/
    ├── images/
    │   └── cat.jpg // after compression
    ├── js/
    │   └── bundle.js // bundled with all imported files (minified in prodcution)
    └── scss/
        └── bundle.scss // bundled with all imported files (minified in production)
Now that we know what tasks we’re going to use on our project and that they do, let’s get into the process for installing Gulp into the project.
Installing Gulp
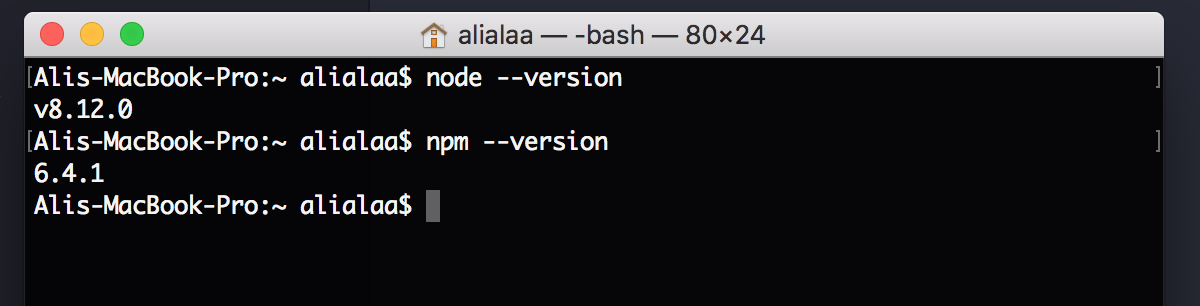
Before we install Gulp, we should make sure that we have Node and npm installed on our machines. We can do that by running these commands in the command line:
node --version
npm --version
…and, we should get some version number as seen here:
Now, let’s point the command line to the theme folder:
cd path/to/your/theme/folder
…and then run this command to initialize a new npm project:
npm init
This will prompt us with some options. The only important option in our case is the package name option. This is where the name of the theme can be provided — everything else can stay at their default setting. When choosing the theme name, make sure to only use lowercase characters and underscores while avoiding dashes and special characters since this theme name will be used to replace the functions placeholder that we mentioned earlier.
On to installing Gulp! First, we’ve got to install Gulp’s command line interface (gulp-cli) globally so we can use Gulp in the command line.
npm install --global gulp-cli
After that, we run this command in order to install Gulp itself in the theme directory:
npm install –save-dev gulp
The current stable release of Gulp is 3.9.1 at the time of this writing, but version 4.0 is already available in the project repository. The command above uses the @next which installs version 4.0. Removing that will install 3.9.1 (or whatever the current version is) instead.
To make sure everything is installed correctly, we’ll run this command:
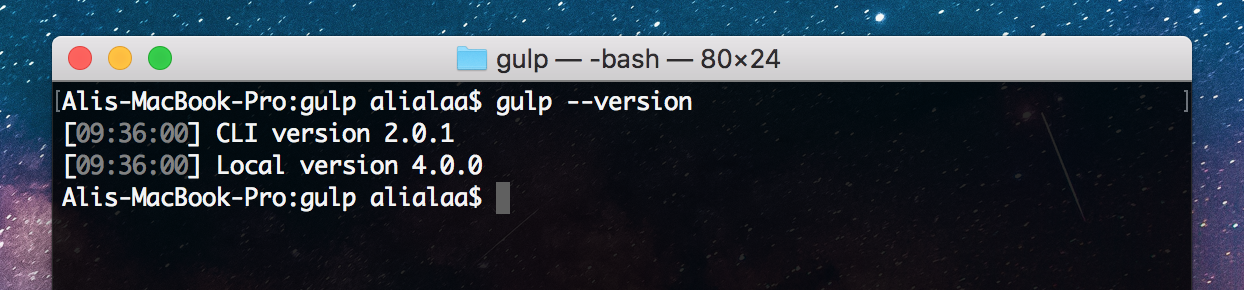
gulp --version
Nice! Looks like we’re running version 4.0, which is the latest version at the time of this writing.
Writing Gulp tasks
Gulp tasks are defined in a a file in called gulpfile.js that we’ll need to create and place into the root of our theme.
Gulp is JavaScript at its core, so we can define a quick example task that logs something to the console.
var gulp = require('gulp');
gulp.task('hello', function() {
  console.log('First Task');
})
In this example, we’ve defined a new task by calling gulp.task. The first argument for this function is the task’s name (hello) and the second argument is the function we want to run when that name is entered into the command line which, in this case, should print „First Task” into the console.
Let’s do that now.
gulp hello
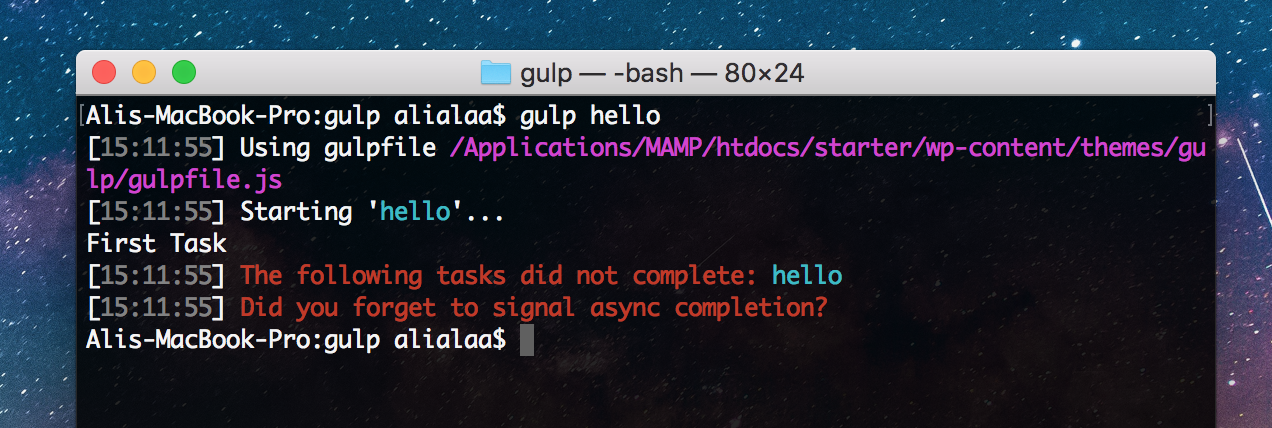
Here’s what we get:
As you can see, we do indeed get the console.log('First Task') output we want. However, we also get an error saying that our task did not complete. All Gulp tasks require telling Gulp where to end the task, and we do that by calling a function that is passed as the first argument in our task function like so:
Let’s try running gulp hello again and we should get the same output, but without the error this time.
There are some cases where we won’t have to call the cb() function, such as when a task returns a promise or a node stream. A node stream is what we will use in the tasks in this post, which means we will see it a lot throughout our article.
Here’s an example of a task that returns a promise. In this task, we won’t have to call the cb() function because gulp already knows that the task will end when the promise resolves or returns an error:
Now try and run ‘gulp promise’ and the task will complete without returning any errors.
Finally, it’s worth mentioning that Gulp accepts a default task that runs by typing gulp alone in the command line. All it takes is using „default” as the task name argument.
Now, typing gulp by itself in the command line will run the task.
Whew! Now we know the basics of writing Gulp tasks.
There is one more thing we can do to improve things and that’s enabling ES6 syntax in the Gulpfile. This will allow us to use features like destructuring, import statements, and arrow functions, among others.
Using ES6 in the Gulpfile
The first step to use ES6 syntax in the Gulpfile is to rename it from gulpfile.js to gulpfile.babel.js. As you may already know, Babel is the compiler that compiles ES6 to ES5.
So, let’s install Babel and some of its required packages by running:
After that, we have to create a file called .babelrc inside of our theme folder. This file will tell Babel which preset to use to compile our JavaScript. The contents of the .babelrc file will look like this:
{
  "presets": ["@babel/preset-env"]
}
Now we can use ES6 in our Gulpfile! Here’s how that would look if we were to re-write it:
As you can see, we are importing Gulp using import and not require. In fact, there’s no longer any need to import Gulp at all! I included the import statement anyway to show it can be used instead of require. We’re allowed to skip importing Gulp because we don’t have to call gulp.task — instead, we only need to export a function, and the name of this function will be the name of the task. Further, all that’s needed to define a default function is use export default. And notice those arrow functions, too! Everything is so much more concise.
Let’s move on and start coding the actual tasks.
Development vs. Production
As we covered earlier, we need to create two modes: development and production. The reason we need to delineate between the two is that some details in our tasks will be time and memory-consuming, which only make sense in a production environment. For instance, the styles task needs to minify the CSS. However, the minification can take both time and memory — and if that process runs every single time something changes during development, that is not only unnecessary, but is very inefficient. It’s ideal for tasks to be as fast as possible during development.
We need to set a flag that specifies whether a task should run in one mode or the other. We can use a package called yargs that allows us to define these types of arguments while running a command. So, let’s install it and put it to use:
npm install --save-dev yargs
Now, we can add arguments to our command like so:
gulp hello --prod=true
…and then retrieve these argument in the Gulpfile:
import yargs from 'yargs';
const PRODUCTION = yargs.argv.prod;

export const hello = (cb) => {
  console.log(PRODUCTION);
  cb();
}
Notice that the values we define in the command are available inside the yargs.argv object in the Gulpfile and in console.log(PRODUCTION). In our case this will output true, so PRODUCTION will be our flag that decides whether or not a function runs inside the tasks.
We’re all set up!
We covered a lot of ground here, but we now have everything we need to start writing tasks for our WordPress theme development. That just so happens to be the sole focus of the next part of this series, so stay tuned for tomorrow.
One thing that has long surprised (and saddened) me is that the clip-path property, as awesome as it is, only takes a few values. The circle() and ellipse() functions are nice, but hiding overflows and rounding with border-radius generally helps there already. Perhaps the most useful value is polygon() because it allows us to draw a shape out of straight lines at arbitrary points.
The sad part comes in when you find out that clip-path doesn’t accept path(). C’mon it’s got path in the name! The path syntax, which comes from SVG, is the ultimate syntax. It allows us to draw literally any shape.
More confusingly, there already is a path() function, which is what properties like offset-path take.
The talk goes into the shape-outside property and how it can’t use path(). It also goes into the fact that we can change the d property of a literal <path>.
I don’t really blame anyone, though. This is weird stuff and it’s being implemented by different teams, which inevitably results in different outcomes. Even the fact that SVG uses unit-less values in the <path> syntax is a little weird and an anomaly in CSS-land. How that behaves, how values with units behave, what comma-syntax is allowed and disallowed, and what the DOM returns when asked is plenty to make your head spin.
Anyway! Along comes Firefox with an implementation!
Does anyone know if clip-path: path() is behind a flag in chrome or something. Can't seem to find it, but they do support offset-path: path(), so figured they would support both.
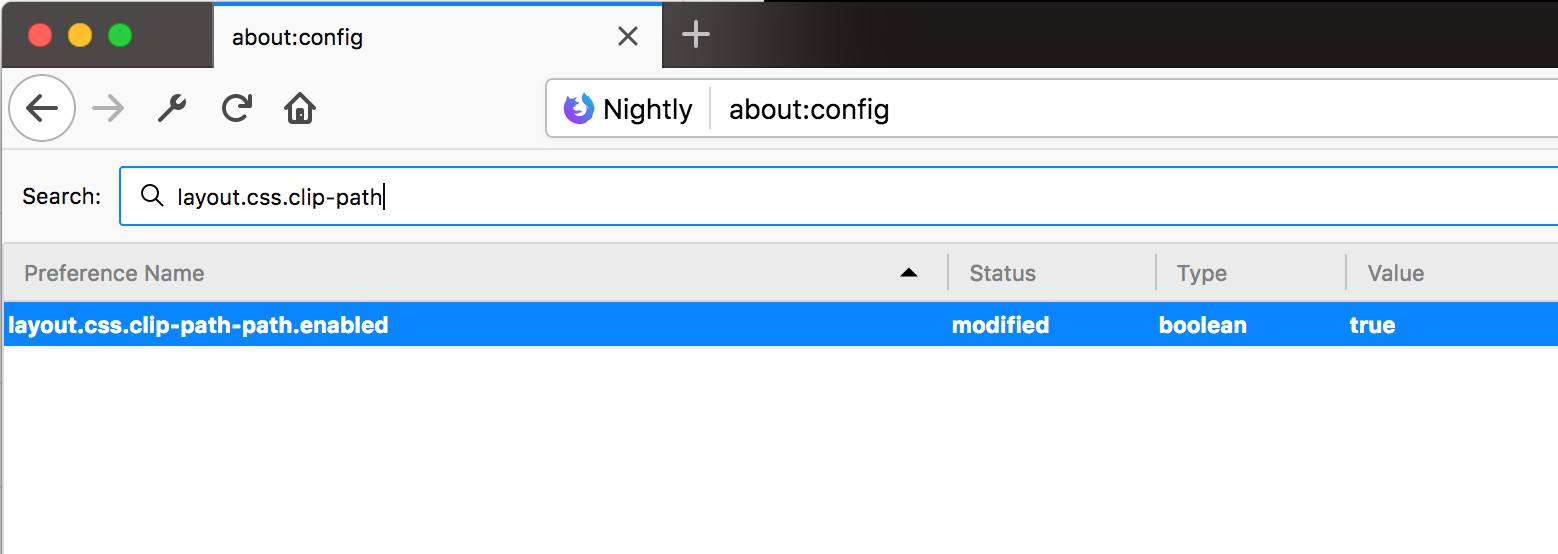
Here’s that flag in Firefox (layout.css.clip-path-path.enabled):
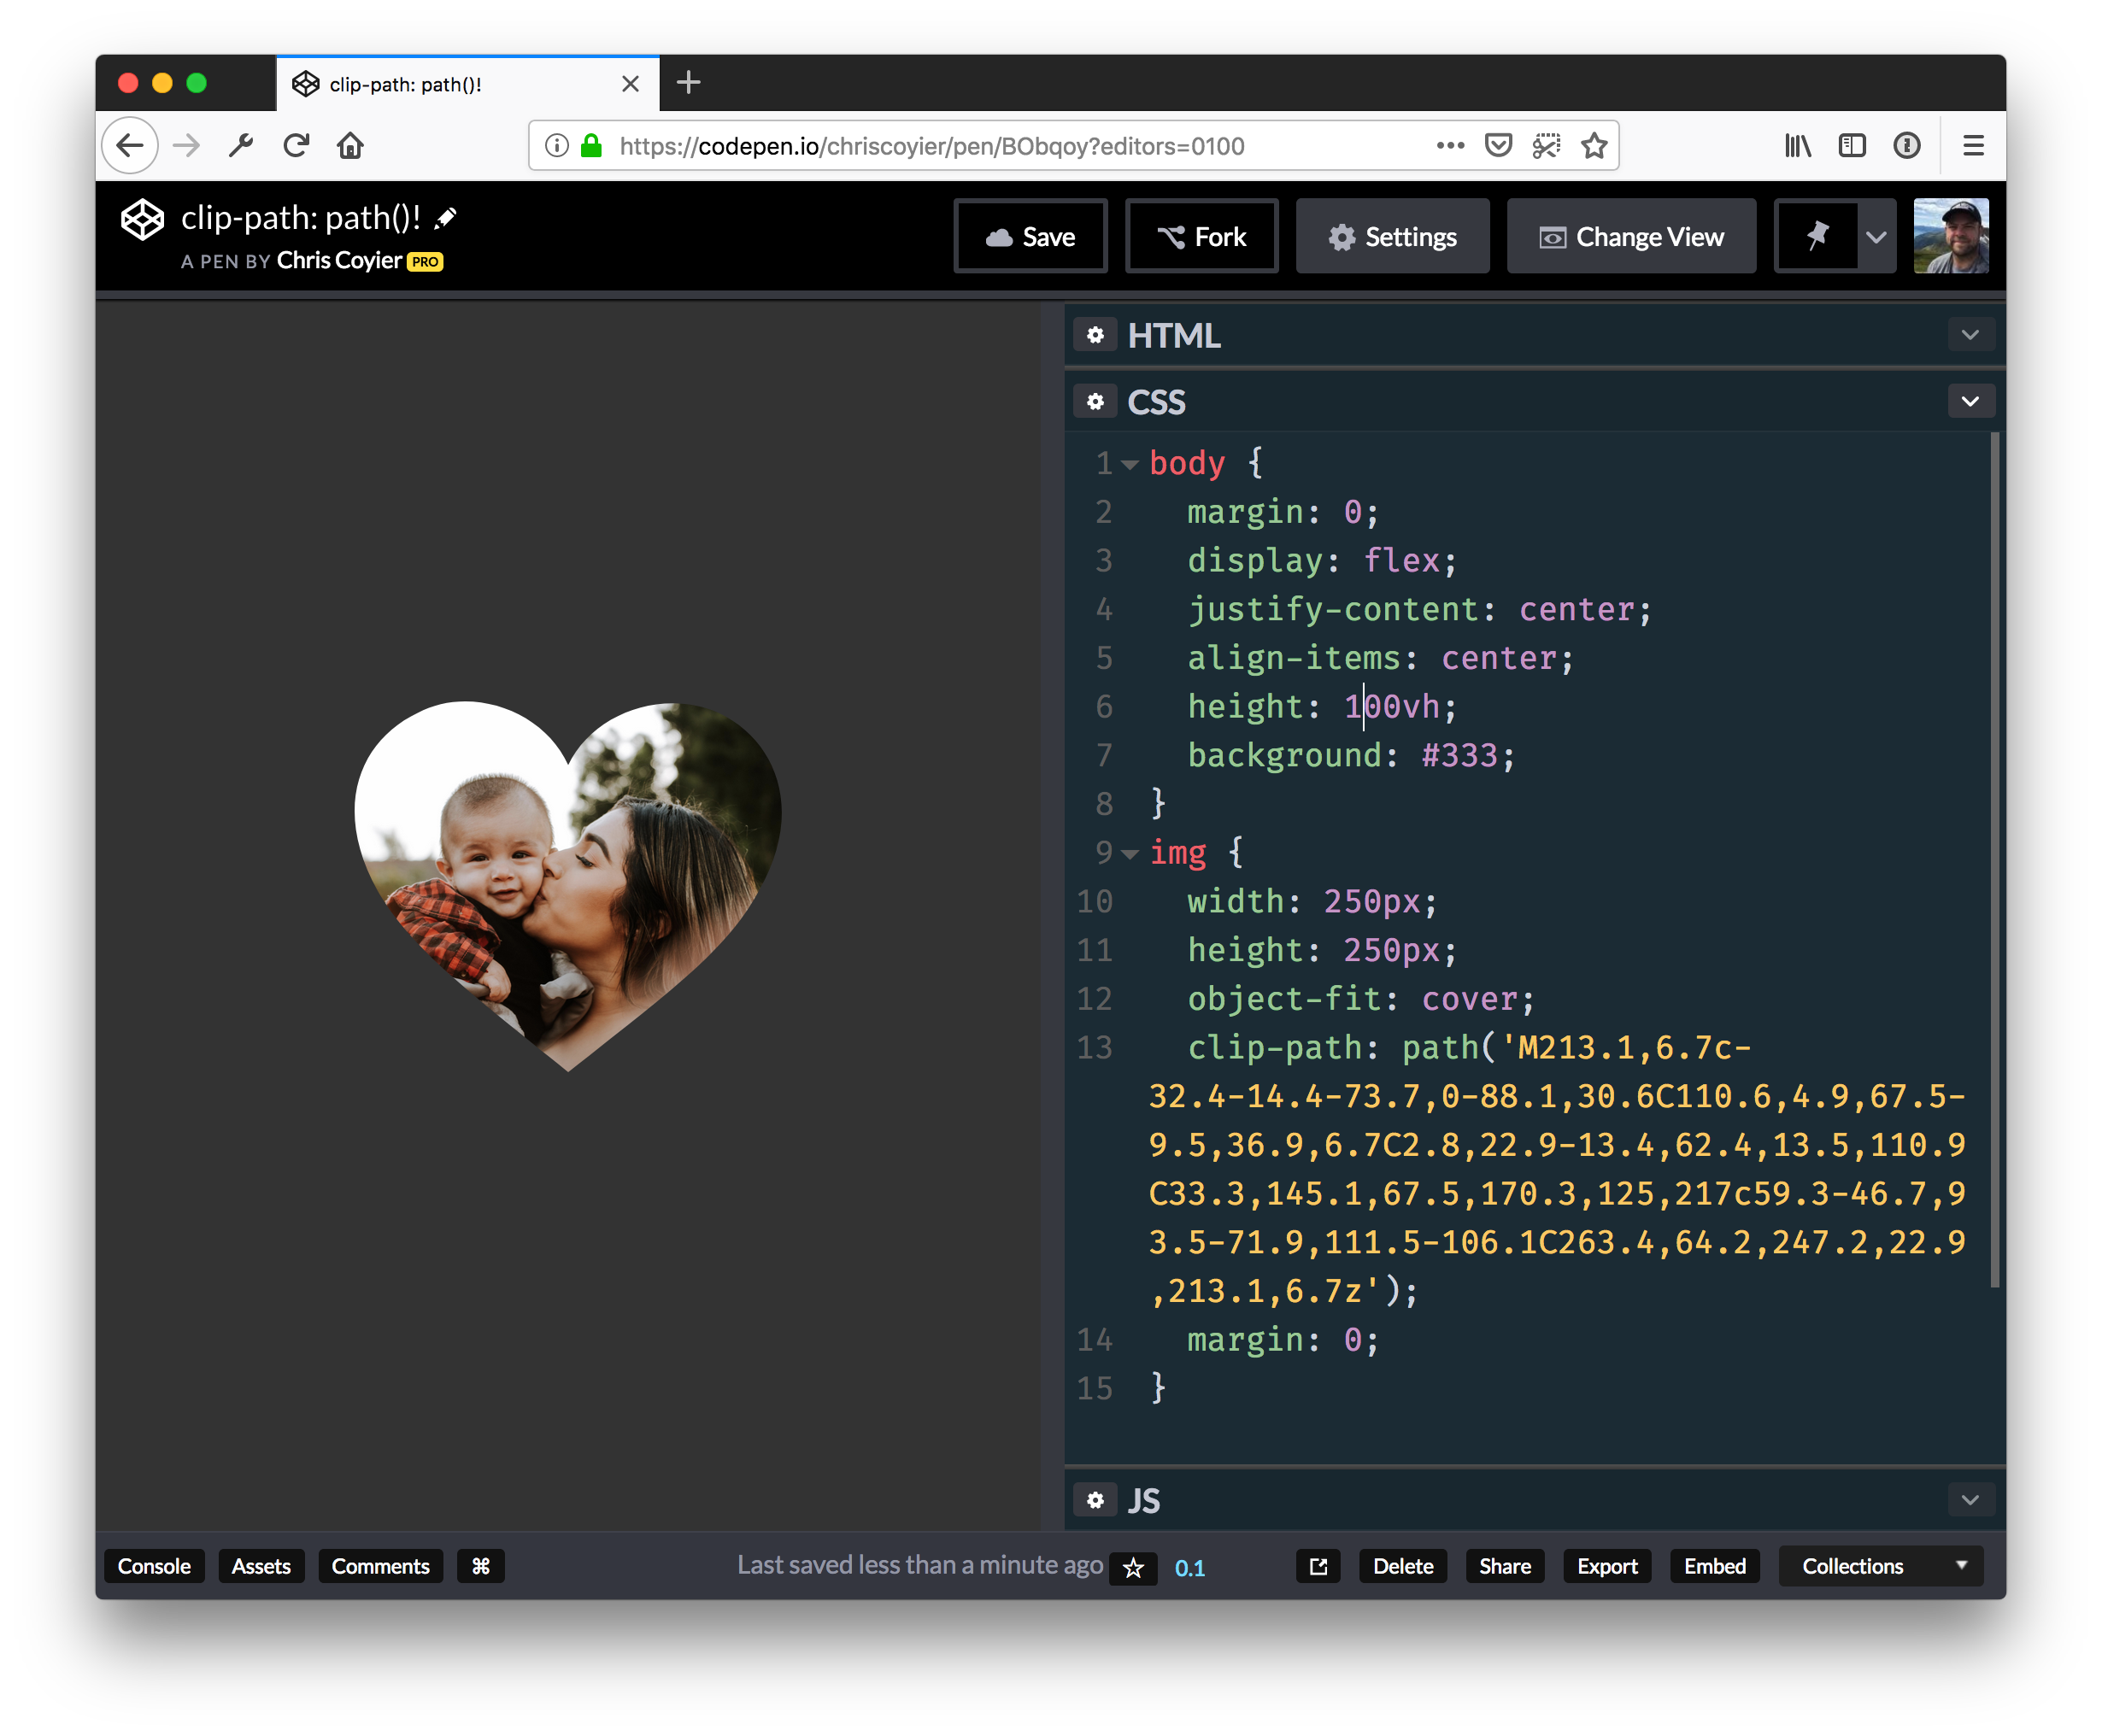
And here’s a demo… you’ll see a square in unsupported browsers and a heart in the ones that support clip-path: path(); — which is only Firefox Nightly with the flag turned on at the time of this writing.
Portraying everyday life at its best has always been the desire of writers and painters, and although the literature is a passive and serene art, painting, on the other hand, has the power to attract people’s attention. A painting artwork projects a fragment of life that interacts with the human mind, filling it up with images and memories as vivid as life itself. Oil painting is the process of painting with pigments that are bound with a medium of drying oil. Traditional oil painting techniques often begin with the artists sketching the subject onto the canvas with charcoal or thinned paint. The details express feelings, and that is why many great painters mostly used this medium to present their artworks.
So I gathered 25 paintings that I personally think are beautiful and hope you enjoy looking at it aswell, also don’t forget to click the images to support the artists.
Let’s say you need a gradient border around an element. My mind goes like this:
There is no simple obvious CSS API for this.
I’ll just make a wrapper element with a linear-gradient background, then an inner element will block out most of that background, except a thin line of padding around it.
If you hate the idea of a wrapping element, you could use a pseudo-element, as long as a negative z-index value is OK (it wouldn’t be if there was much nesting going on with parent elements with their own backgrounds).
Here’s a Stephen Shaw example of that, tackling border-radius in the process:
You could even place individual sides as skinny pseudo-element rectangles if you didn’t need all four sides.
But don’t totally forget about border-image, perhaps the most obtuse CSS property of all time. You can use it to get gradient borders even on individual sides:
Using both border-image and border-image-slice is probably the easiest possible syntax for a gradient border, it’s just incompatible with border-radius, unfortunately.
Let’s say you need a gradient border around an element. My mind goes like this:
There is no simple obvious CSS API for this.
I’ll just make a wrapper element with a linear-gradient background, then an inner element will block out most of that background, except a thin line of padding around it.
If you hate the idea of a wrapping element, you could use a pseudo-element, as long as a negative z-index value is OK (it wouldn’t be if there was much nesting going on with parent elements with their own backgrounds).
Here’s a Stephen Shaw example of that, tackling border-radius in the process:
You could even place individual sides as skinny pseudo-element rectangles if you didn’t need all four sides.
But don’t totally forget about border-image, perhaps the most obtuse CSS property of all time. You can use it to get gradient borders even on individual sides:
Using both border-image and border-image-slice is probably the easiest possible syntax for a gradient border, it’s just incompatible with border-radius, unfortunately.
Brochures may be one of the oldest marketing tools, but they’re a tried and tested technique used by all sorts of businesses to reach potential customers.
A poorly designed brochure might be tossed in the trash, but a creative and beautiful one will be kept and pored over and can directly lead to sales for the business.
In this article, you’ll learn how to create a brochure that’s guaranteed to grab and hold someone’s attention. Read on to get to know your bifolds, trifolds and everything in-between.
Before you start designing, hit pause and think about the kind of brochure that will suit your brief best. Some questions to consider:
What industry is the company operating in?
Are there particular types of marketing campaign that work best in this industry, such as door-to-door sales, attending conventions, or showroom presentations?
The format of your brochure should suit the marketing campaign perfectly. So, for example, a small, compact brochure design might work best for posting through front doors, but a more impressive booklet with a presentation folder might be more appropriate for conventions or showrooms.
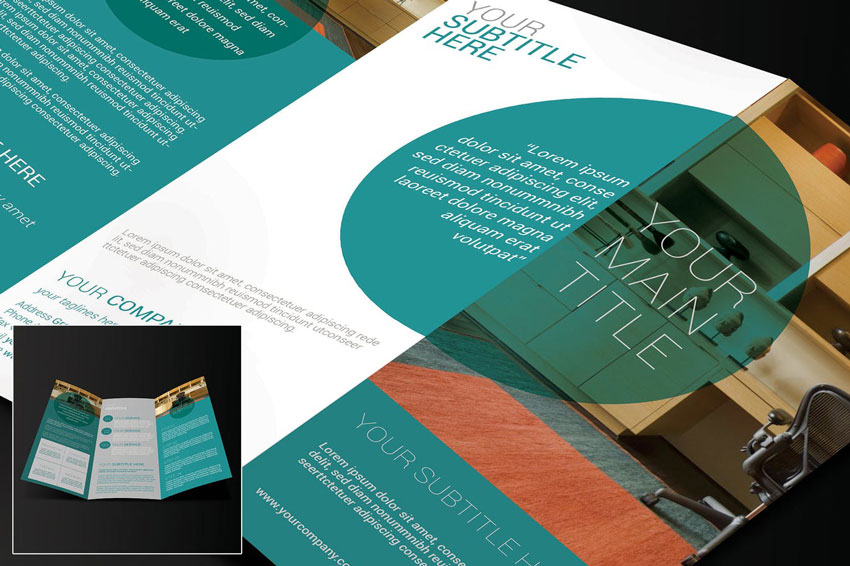
Make yourself familiar with the huge range of brochure formats that you could choose from (yep, there are a lot!). These are just a few of the more common formats:
Bifold
A bifold brochure is folded just once, down the spine. They are easy to make, and have a formal feel to them as they mimic the design of books or booklets.
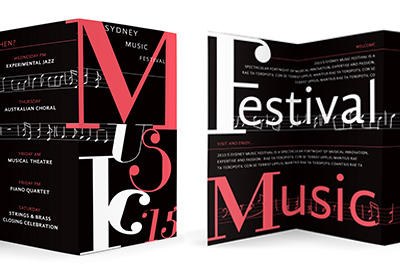
A trifold brochure has two parallel folds, splitting the brochure into three sections. Even when printed on low-weight paper, trifolds can stand up easily, which makes them a great choice for displaying at conventions. You can fold both folds inwards so that the left and right sections of the brochure sit on top of one another, or you can have one fold inwards and the other outwards, to create an accordion effect, which looks very attractive.
Great for: Companies on small budgets who want a brochure that still looks great on display.
The big daddy of the brochure world, a booklet is really a group of multiple bifold brochures bound together into a larger book-like format. Booklets are more expensive to print, but they can make a big impression. You will need to choose how to bind your booklet from a range of options, such as saddle stitching, perfect binding and spiral binding. Spiral binding is usually cheaper, but perfect binding or saddle stitching can make your booklet look much more polished and professional.
Great for: Big corporations who want a formal brochure design.
If you’re looking for something more formal without the bulk of a big booklet, consider creating a custom folder and an insert brochure, which is specifically designed to fit inside. This is a great choice for more corporate marketing events, and you can pop a business card inside too.
Great for: Educational organisations, like universities and schools, real estate firms, and companies attending conventions and industry events.
Flyers are the simplest form of brochure, and the cheapest to produce. Flyers are usually simple, one-sheet promotions printed on low-weight paper. They are ideally suited for reaching the maximum number of potential customers, but they are also the most likely type of brochure to be thrown away.
Great for: Events, like music gigs, club nights, festivals and community meet-ups
Above all, you need to remember that brochures are a marketing tool, so even if you’ve just been tasked with the design of the brochure, you need to have some idea of how the brochure is going to be used. Brush up on your marketing design skills with Nicki Hart’s course on Print Marketing Design.
Unless you’re designing a one-page flyer, your brochure will have to be folded in some way, whether that’s as a bifold, trifold or something more complex. Folds can be tricky to accommodate, but they can also enhance your design if you set them up in the correct way.
Because you’ll be initially designing your brochure as a 2D, flat layout, you need to make sure that the final brochure is going to look just as good when it’s printed and folded.
Before you start designing on the computer, it’s a great idea to put together a rough mock-up that you can scribble on and fold. This doesn’t necessarily need to be true to size—a smaller-scale version will still give you a good idea of where content should be placed.
If you’re going to be printing on a medium- or heavy-weight paper, like a thick paper or card, you also need to consider that a fold can make the margins around it appear narrower, even if by just a millimeter or so. Experiment with folding different weights of paper to get a good idea of how the fold will behave—it may be a good idea to increase the margins around folds by an extra millimeter or two.
Tip: If you’re creating a trifold brochure (which has two folds on a page, effectively ‘splitting’ the brochure into three parts), make sure you double the margin space across a fold. If you include the same margin as you do around the edge of the page, the fold will slice the margin width in half, giving the layout a cramped, uneven appearance once folded.
Folds have the ability to conceal and reveal selectively. This means you can design a brochure that has multiple different ‘looks’, depending on how the brochure is folded, and whether it is open or closed.
Take a look at the layout for this folded tourism brochure:
This brochure was created in CorelDRAW as a 2D layout. You can see how when the brochure is closed, the outside sections are drawn together, and the typography and triangular shapes have been designed to match each other.
When the brochure is opened up, the outside sections are drawn apart, revealing a different design. The triangular shapes still work together seamlessly whether the brochure is opened or closed.
Creating a rough mock-up will help you to visualise how these different fold combinations will affect the look of your brochure. Take my word for it, it’s well worth doing this before you begin designing on the computer!
Whether you’re using Adobe InDesign, Photoshop or CorelDRAW, pull out guidelines from the workspace’s rulers to define the fold lines without the need to print them.
A printer might find it helpful if you also leave short lines on the bleed (if you’re supplying a print-ready PDF) or pasteboard (if you’re sending them the original artwork) to indicate where the brochure should be folded.
Unlike other printed items like books, magazines and posters, brochures are often seen as being instantly disposable by the reader. Because they are cheaply produced, brochures are rarely seen as something to be treasured, and more often than not end up in the trash soon after delivery to market.
How can you make sure that your flyer doesn’t instantly end up in landfill? Well, you need to think outside of the box and make your design really creative and eye-catching.
One way of doing this is to make your brochure into an unusual format or shape that people will want to keep. This folded city guide is a great example of how to condense a lot of information into a format that tightly folds up and can easily be slotted into someone’s back pocket.
It’s cute, practical and non-obtrusive—great qualities to aim for in your own brochure designs.
Why not try adapting the layout of this city map to your own brochure content? Giving your brochure an additional use, such as featuring a map or a calendar, is going to ensure that your brochure hangs around for longer in someone’s possession too.
A simple fold technique to try that looks really effective is a French fold:
This results in a compact brochure that actually has a very simple one-sheet layout at its core. It’s the perfect way to get lots of information onto your brochure while keeping the design pocket-friendly.
You can also look into unusual print finishes to give your brochure an edge—metallic foiling or laser cutting might be more pricey, but they can be worth investing in to make sure your brochure translates into sales or attendees.
4. Be Bold!
A brochure is no place to be shy—to grab someone’s attention quickly, you need to create a bold, in-your-face design. Brochures may be smaller than posters, but headings and images should be blown up much larger than you would normally think.
Focus on making the cover of your brochure (the side that is visible when the brochure is closed) as bold as possible, and focus on formatting the graphics and typography for maximum impact.
Take inspiration from this typographic brochure design—the event details inside the brochure may be at normal reading size, but the title of the event has been blown up to fill the whole cover.
Bright, bold color is also a great way to attract attention.
Rainbow-inspired colors, like the ones used on this BBQ flyer, are instantly optimistic, sunny and cheerful, making the reader feel positive about the brochure.
A lit-up effect, made by contrasting pale or neon colors against a darker background, instantly draws the eye and has a glamorous, exciting look which is perfect for advertising after-dark events.
Think big and bold with your brochure designs. It might be useful to print out a draft of your brochure and place it 5 meters or so away from you—does it still stand out to the eye, or could you make some elements look even more striking? A successful brochure is one that will be spotted from afar, hold a reader’s attention and be picked up, so maximizing the size and impact of your typography, colors and graphics will help your brochure to really stand out. Go big or go home!
5. Meet Your New Best Friend…
Everybody has their own preference for the software they like to use for designing brochures, whether that’s Adobe Photoshop, Quark or CorelDRAW. But if you really want to create an ultra-professional brochure layout, you need to make very good friends with Adobe InDesign.
As the resident InDesign writer here at Envato Tuts+, I am admittedly biased. But InDesign really does allow you to create any sort of brochure, and produce it to a very high standard. Here are just a few reasons why you should set up your brochure layout in InDesign:
It’s optimised for print design—setting the Intent of your document to Print will allow you to design in CMYK color, and you can also use the Preflight function to identify low-resolution images or stray RGB swatches.
You can do the fiddly stuff with ease—creating multi-page layouts, applying die lines and instructing them to Overprint, rotating pages… it’s all possible with InDesign.
Printing mock-ups of your brochures is a breeze with the Print Booklet feature in InDesign. Discover how to use the function with this tutorial:
This isn’t to say that you can’t use other programs to set up your brochure layouts, but just to point out that InDesign is ideally suited to the task, and can make the whole job a lot easier and smoother.
If you want to get started with learning the basics of Adobe InDesign, check out our selection of 30 quick and simple tutorials:
When you set up your brochure in InDesign, you need to think carefully about the practical elements of the design.
We’ve already touched on the need to accommodate folds, but you also need to think about the rotation of content—will some sections of the brochure need to be rotated a different way to work in the right way once folded? If the brochure is two-sided, you also need to make sure that the sides will match up in the right way once the brochure’s been printed. As I’ve already stressed, a rough mock-up is the best way to iron out these problems and get your head around the final 3D format of the brochure.
If you’re designing a lengthier brochure, like a booklet, you also need to consider how your page count will work out. Booklets should be made up of groups of four pages, so your final page count should be divisible by four.
To avoid being left with extra blank pages at the end of your booklet, you need to remember that each sheet of paper will be folded in half, creating four actual pages—two on the reverse side and two on the front.
Adobe InDesign makes this easier for you as you can set up a Facing Pages layout, creating a sequence of reader’s spreads (these are how the reader will actually see the booklet once it’s printed and bound). The number of pages is easy to track using the Pages panel (Window > Pages).
You can also view how the Imposition process (whereby the printer rearranges your pages to make the printing and binding process easier) would play out by using the Print Booklet function (File > Print Booklet > Preview).
Still feeling confused about the practicalities of designing booklets? Take ten minutes to check out this helpful tutorial on page counts:
Once you have your brochure artwork set up and refined, you’re ready to export it for printing.
You can provide your brochure artwork to a professional printer as either a print-ready PDF (make sure all Bleeds and necessary Printer’s Marks are included on a Press-Quality PDF) or as a ‘native’ file (this is the artwork in its original format, such as a packaged InDesign INDD file). Your printer may prefer one or the other, so make sure to ask them in advance.
It’s a good idea to have a basic understanding of the print process, and the various finishes and techniques that can affect the final look of your brochure. Some important things to consider are:
The Paper Weight—Brochures can be printed on a range of paper weights. Lower weights are cheaper, and they can look and feel lower quality as a result. For more formal brochures and booklets, heavier weights will look better, but they will also cost more. You can ask your printer for paper samples before you make a decision.
The Paper Finish—Paper finishes fall into two main categories: Coated and Uncoated. Uncoated paper feels a bit smoother and stronger than standard copy paper. Coated paper falls into two sub-groups: Matte-coated and Gloss-coated. Matte-coated gives a smooth, non-glossy finish and can give your print documents a modern, pared-back look. Gloss-coated paper is smooth, with a slightly reflective finish, giving your documents a glossy, high-end look. Because the ink sits on the surface of the coating, rather than being absorbed into the paper, colors appear more vibrant and rich. You should choose the paper finish that’s going to be the most suitable for your brochure—keep in mind that even though gloss finishes can be pricey, they don’t always look as modern as matte finishes.
Post-Print Techniques—If you’ve designed a brochure with many folds, multiple pages that need to be bound, or intricate die lines, you should expect the post-print process to be longer and costlier. Make sure you get a quote from your printer for both the print and post-print jobs before you hand over your artwork to avoid nasty shocks (or days of folding brochures by hand!).
If you have a basic understanding of the print process, you’ll feel much more confident that your final brochure will look as good in hard copy as it does on your screen. Read up on all the essentials of preparing your artwork for print with this useful beginner’s guide:
Let’s recap this checklist, and keep it to hand for future brochure design projects.
Decide on the kind of brochure you need—brochures are designed to be used as part of a marketing campaign and the brochure format needs to be perfectly adapted to the sort of campaign. Would a flyer work better for door-to-door? Would a trifold look great on display? Would a booklet be more appropriate for a convention or conference?
Allow for folds in your artwork—all brochures, except flyers, will need to be folded in some way. Because you’ll be designing your artwork in a 2D format, make use of mock-ups to test out how folds will affect your design.
Think outside the box—Unusual folds or multi-purpose designs can make your brochure look unique and special, which will encourage readers to keep hold of it.
Be bold—strong, large-scale typography and bright, eye-catching color and graphics will make your brochure more visible from afar and help it to stand out from the crowd.
Adobe InDesign is your new best friend—for designing print-friendly multi-page layouts like booklets, you can’t go wrong with using InDesign.
Think about the practicalities—take the time to adjust the page count of your booklet, or to switch the orientation of content on a brochure that’s going to be folded. Again, using a printed mock-up can be really helpful to get your head around the tricky technicalities.
Understand your printing choices—paper weights and finishes, and post-print techniques, such as binding and folding, will affect the final look of your brochure and will have a significant impact on the cost of producing it too, so make sure you have an awareness of what you can expect before you approach a professional printer.
Looking for a bright and colorful brochure template design? This modern and funky style could be adapted for photographers, illustrators or interior designers.
This landscape brochure template has a simple, punchy style with a single color accent. Perfect for showcasing portfolio work or photos to their best potential.
Looking for a fresh, colorful design for your brochure? This square brochure template has an app-inspired design which gives the pages an optimistic, youthful look.