Eight Shopify Apps to Boost Your Ecommerce Store in 2019

Post pobrano z: Eight Shopify Apps to Boost Your Ecommerce Store in 2019

Image credit: Rawpixel

The popularity of online businesses is steadily rising to
the point that even Google is facing stiff competition from the rise of
ecommerce. One reason that we attribute to the growth of online businesses is
due to the less cost that it entails in comparison with physical stores.

By investing in online stores, business owners reap higher
dividend while saving costs and bypassing the hurdles of establishing a
physical store. Then again, maximizing profits that accrue from your online
store takes some level of investment in the right tools, and we bring to you 8
Shopify apps that you can use to boost your store in 2019.

SkuHarmony
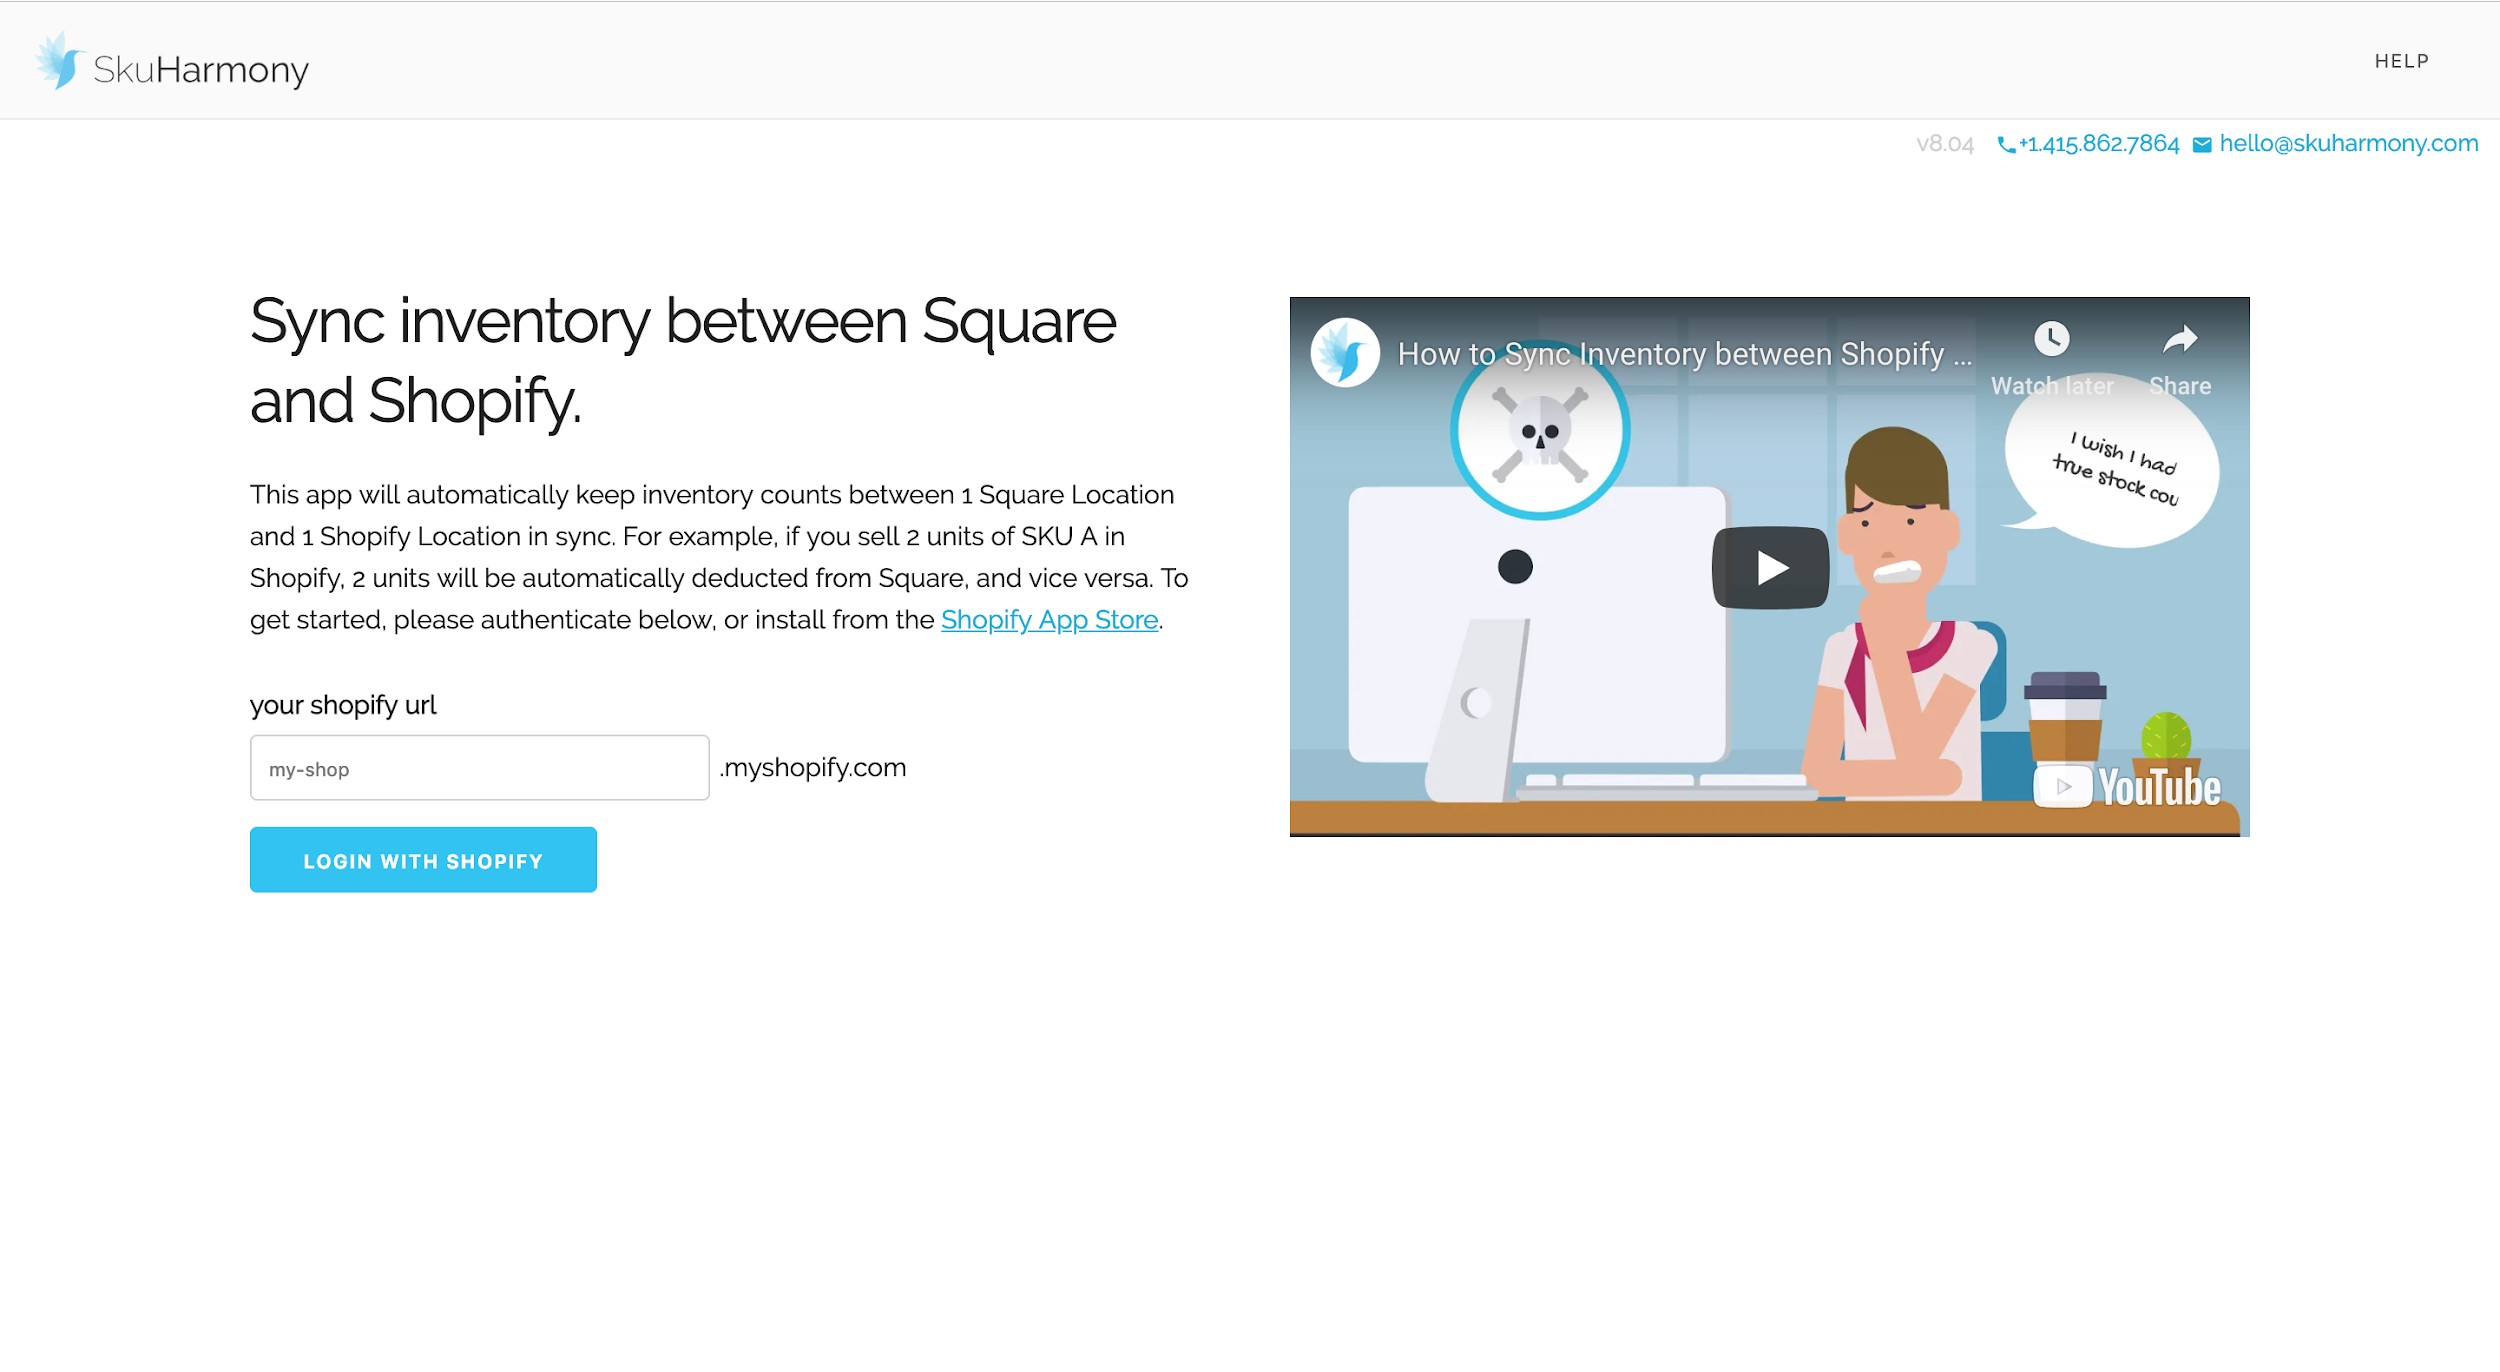
Image credit: SkuHarmony

With SkuHarmony, sync Shopify with
Square
in a very hassle-free way. The Shopify app is very
effective by helping you to automatically keep inventory counts synchronized
between two locations which are Square and Shopify. If we are to illustrate, if
you sell 1 SKU unit of a product in Shopify, it will automatically get the
deducted from Square. This process applies both ways. SkuHarmony has
revolutionized the way in which shop owners keep their inventory counts in
sync. All that time when you had to battle with the inconsistencies that arise
from managing both platforms is eliminated as this app comes with a top-notch
interface such that all events that occur on a particular platform will reflect
in the other platform within seconds.

Weglot
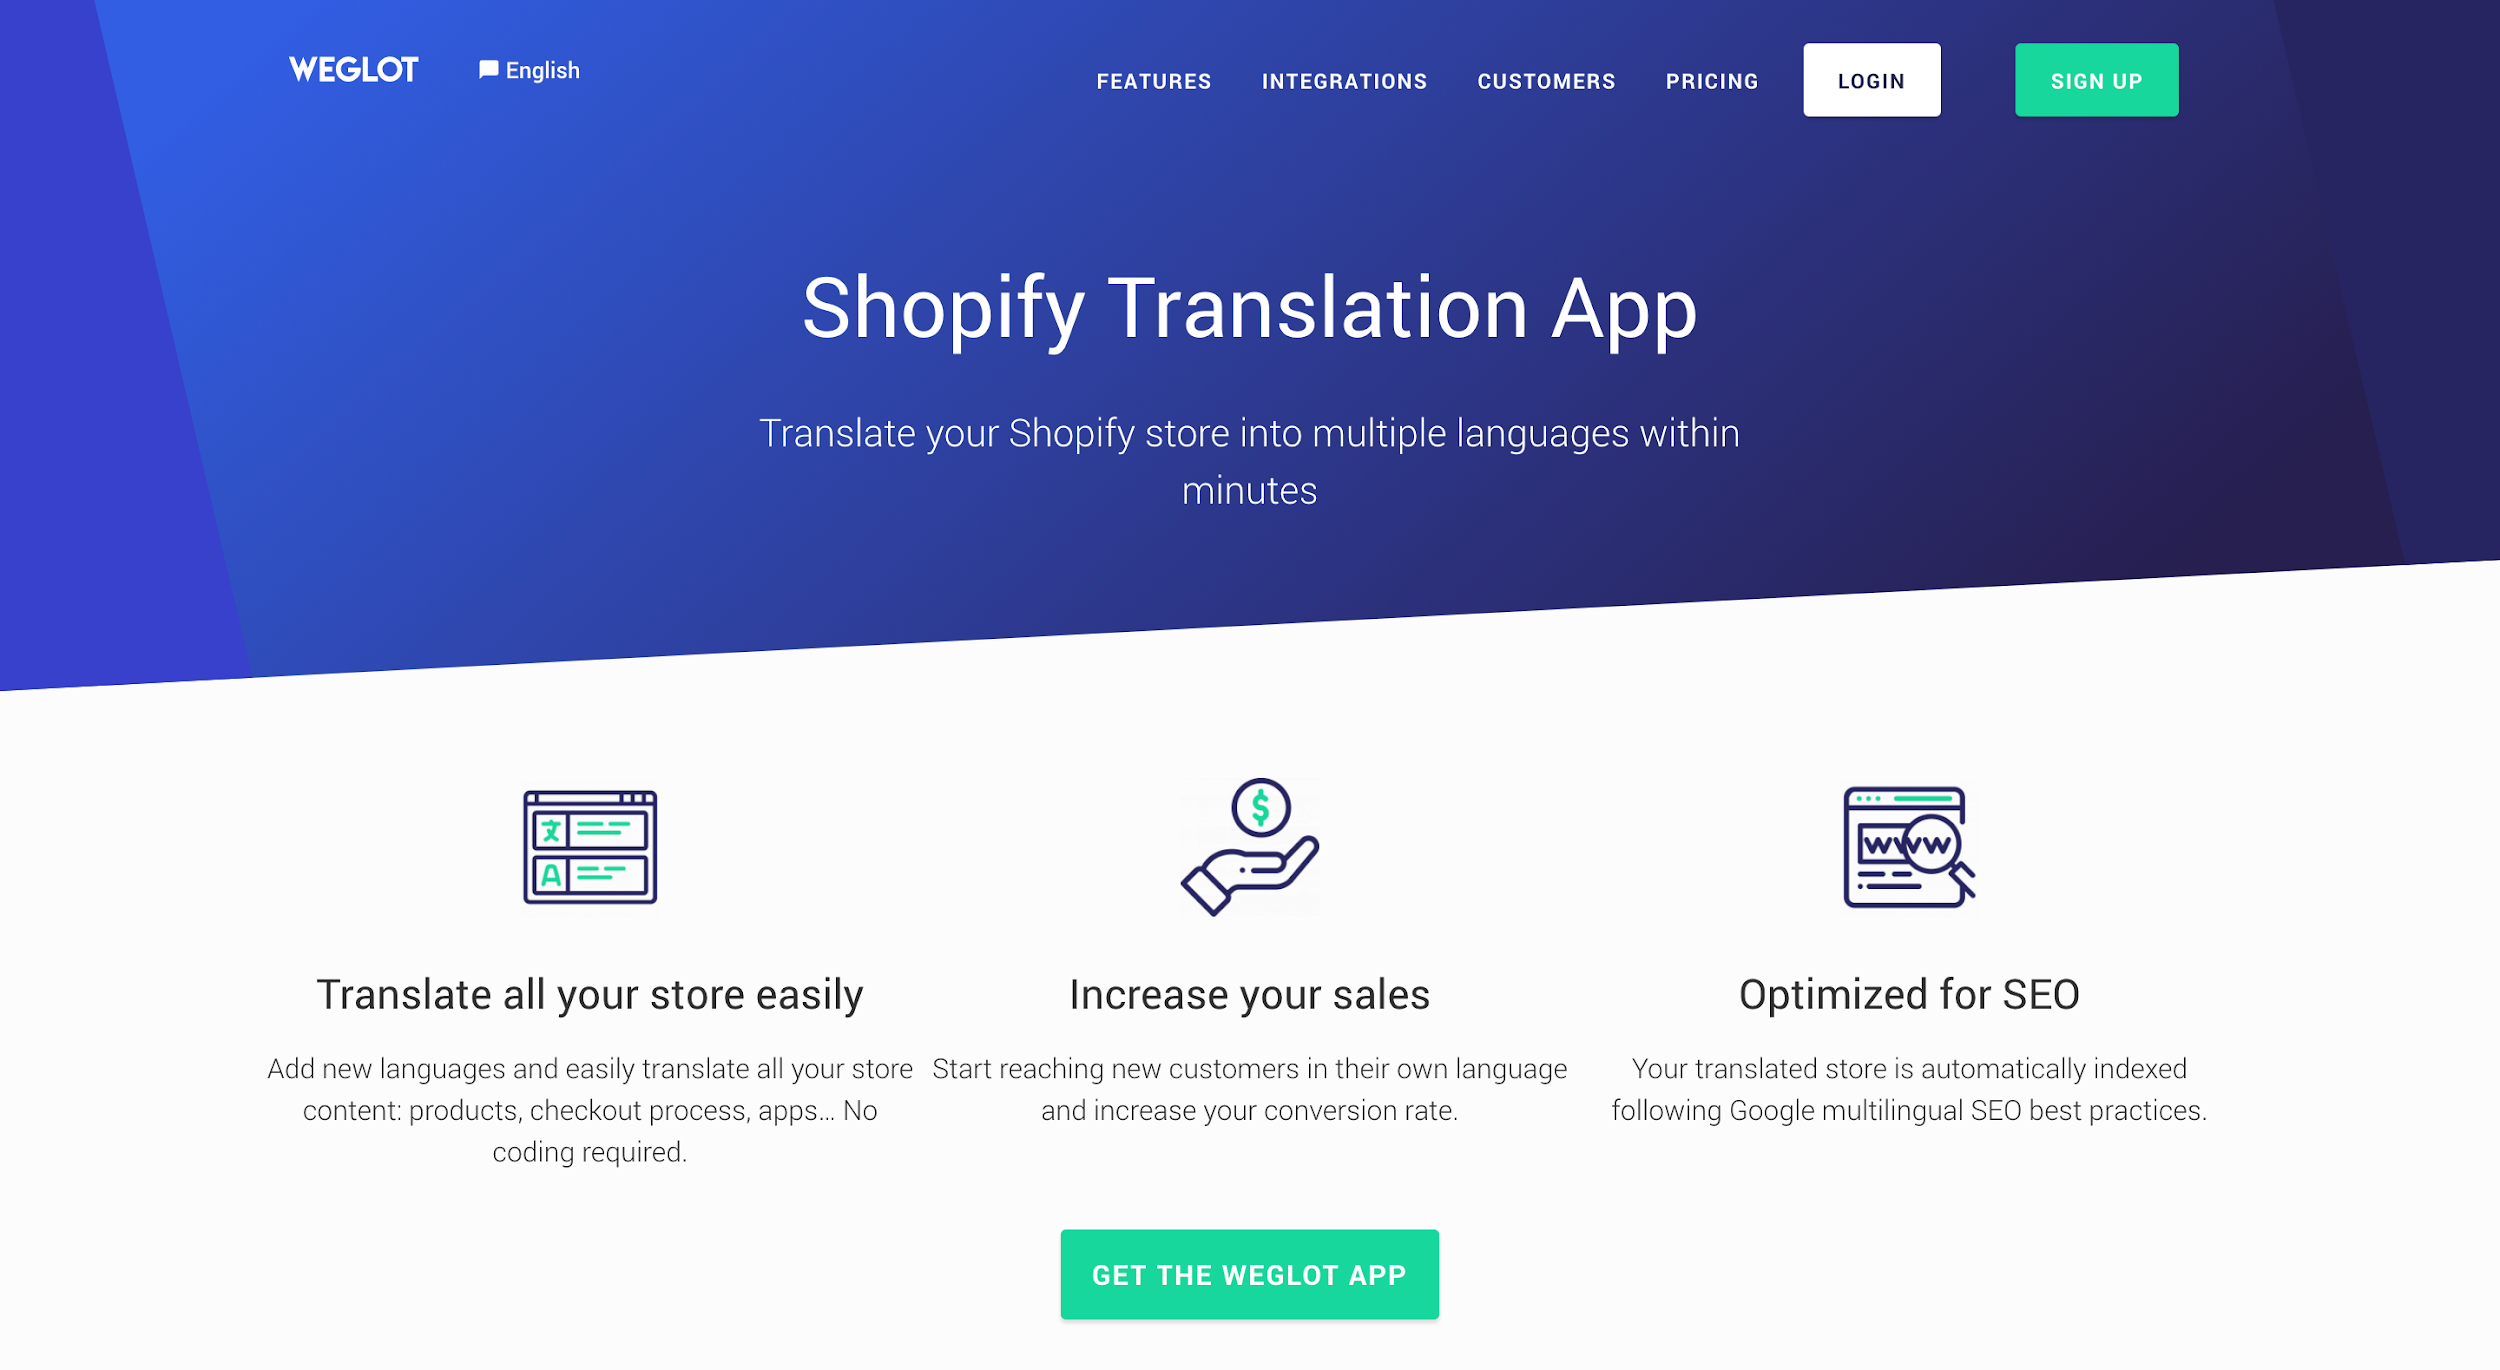
Image credit: Weglot

With the release of Weglot, getting a multilingual
Shopify store has never been easier. This app is designed to ensure that you
get a multilingual website with an interface that is very easy to use and
simplified to help you manage translations seamlessly. With the use of the
Shopify translation app, shop owners now have what it takes to get their
Shopify store translated in a wide range of languages in record time. New
languages can be added and content from your store can be translated without
you having any prior knowledge of coding whatsoever. Weglot can easily
integrate with all apps and themes on Shopify and you can interact with your
customers in languages which they find more convenient. All of this helps to
engineer better leads and increase conversions. The best part is that this
Shopify app has been optimized for SEO.

Opinew
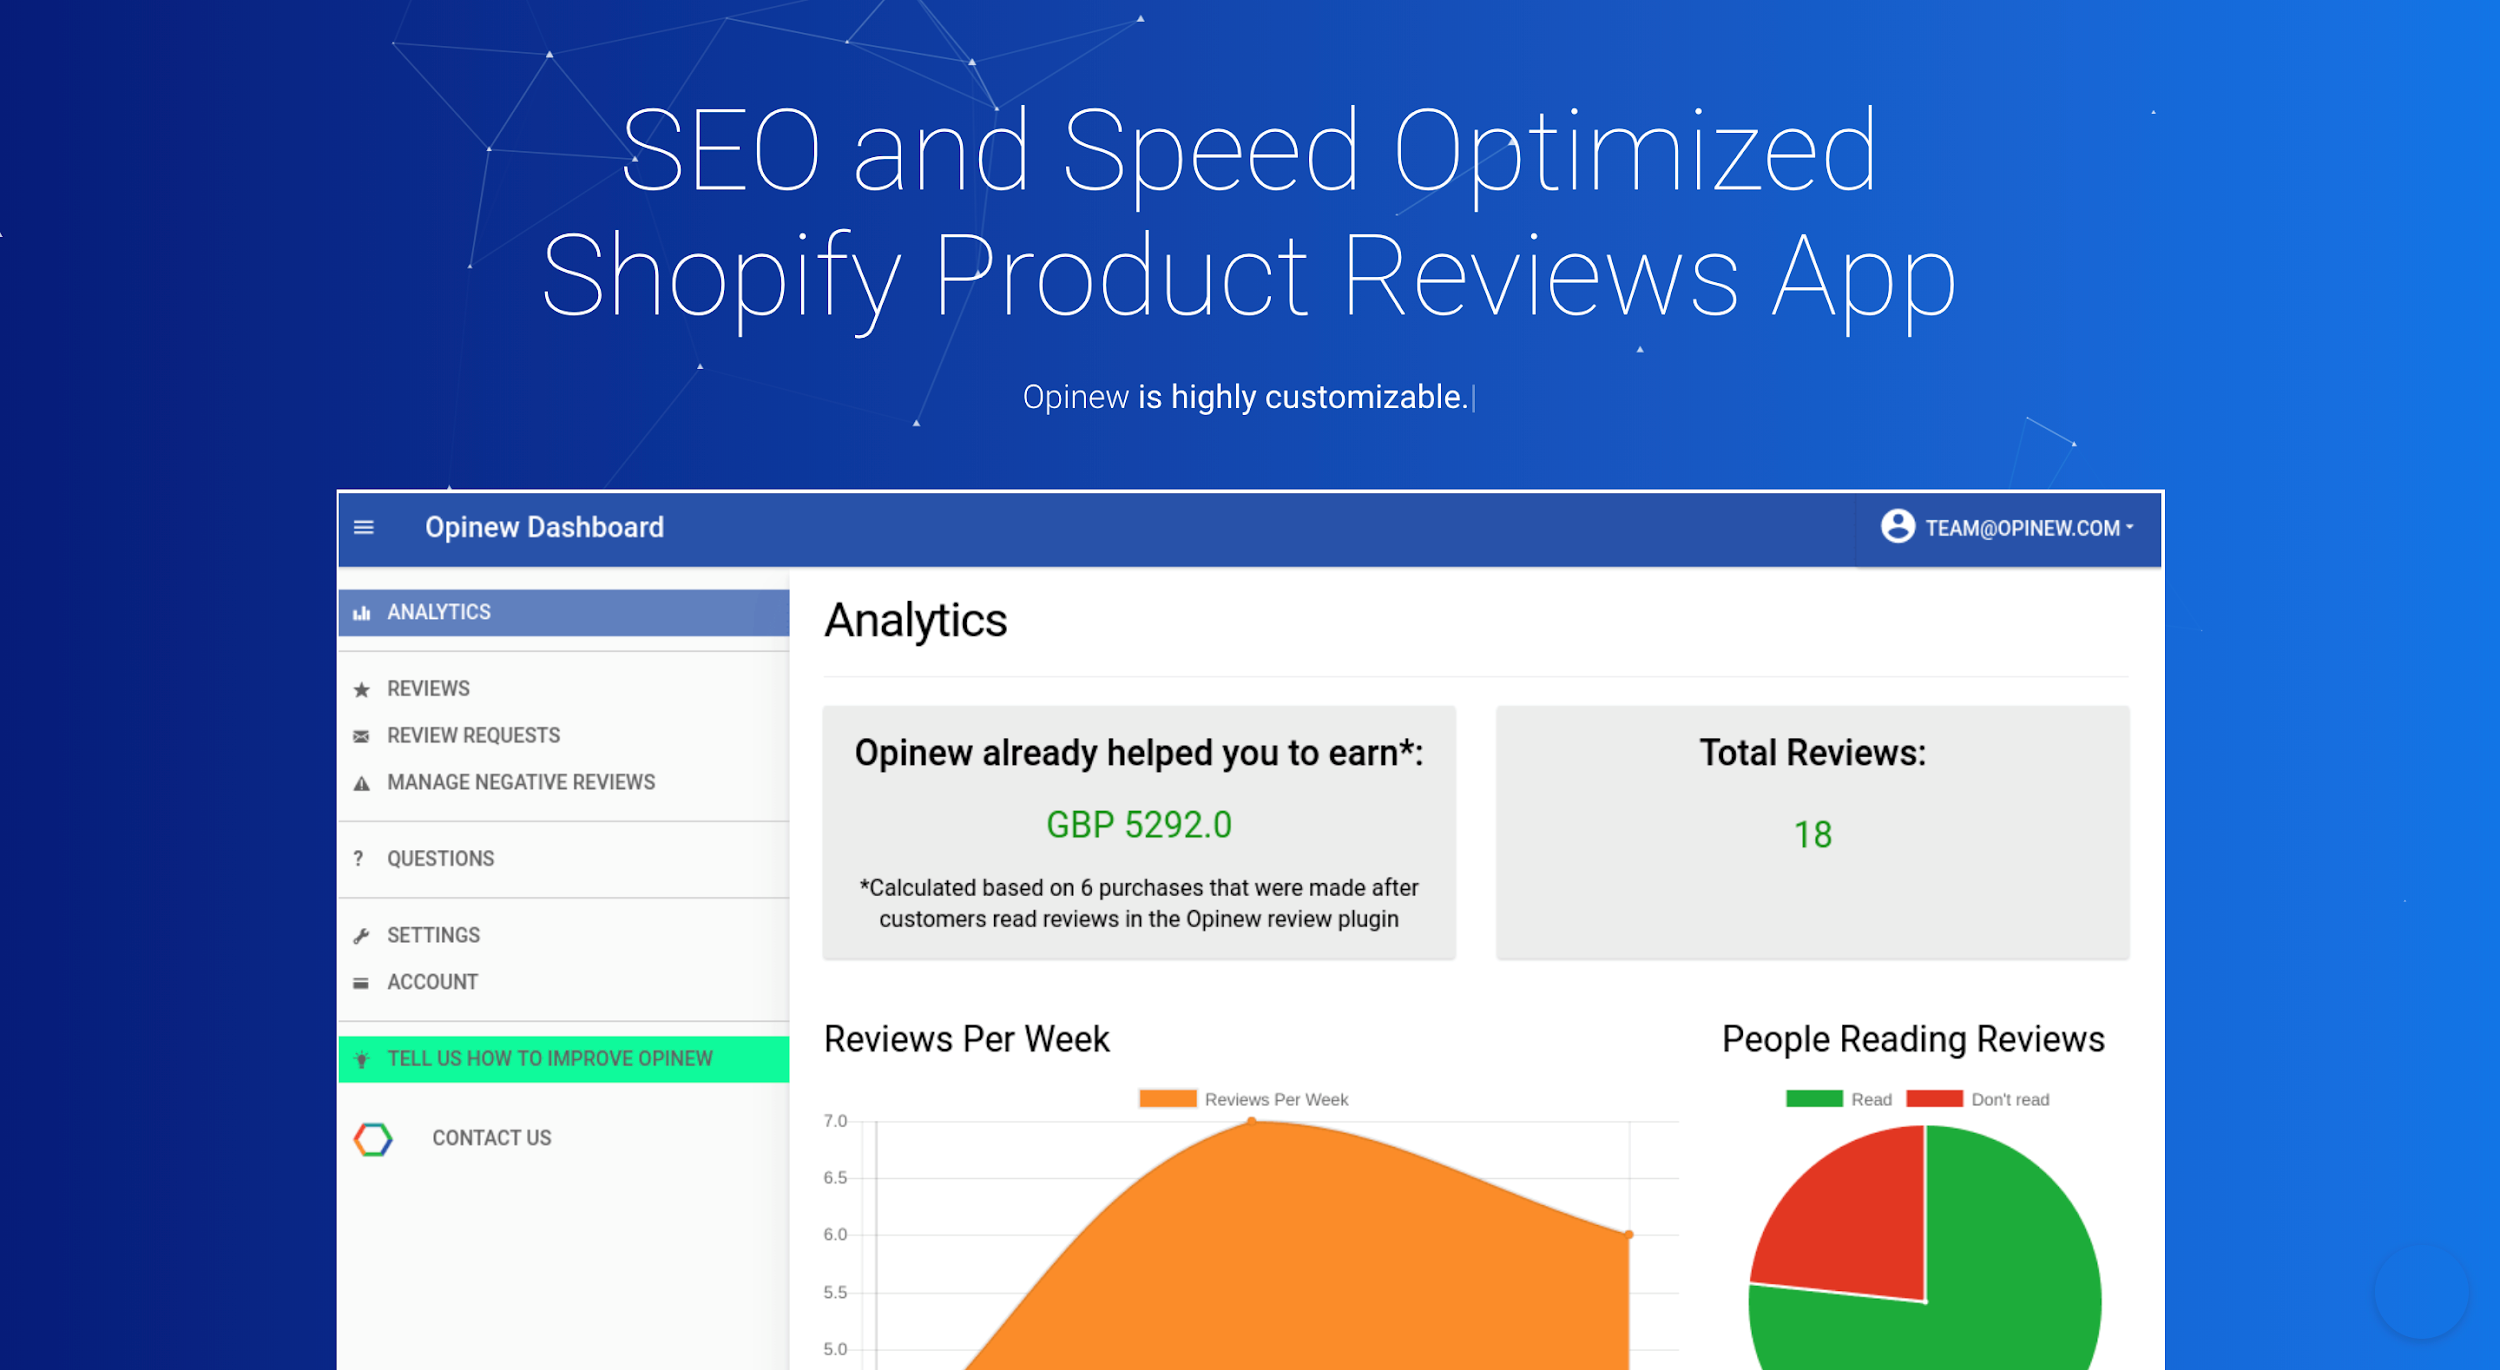
Image credit: Opinew

The Opinew – Shopify
Products Reviews App and Importer
still remains a superb application
for enhancing the productivity, efficiency, as well as the ability to generate
a profit of your Shopify store. Business owners online need to realize how
vital reviews are in the daily operation of their online stores as customers
look to reviews before making a decision on whether or not to purchase a
product. Reviews are very important for every online store as one negative
review will likely result in a negative perception of your business. This
Shopify app, Opinew, will get your search engine optimization while helping you
to rank with your best ratings.

SMS Notifications
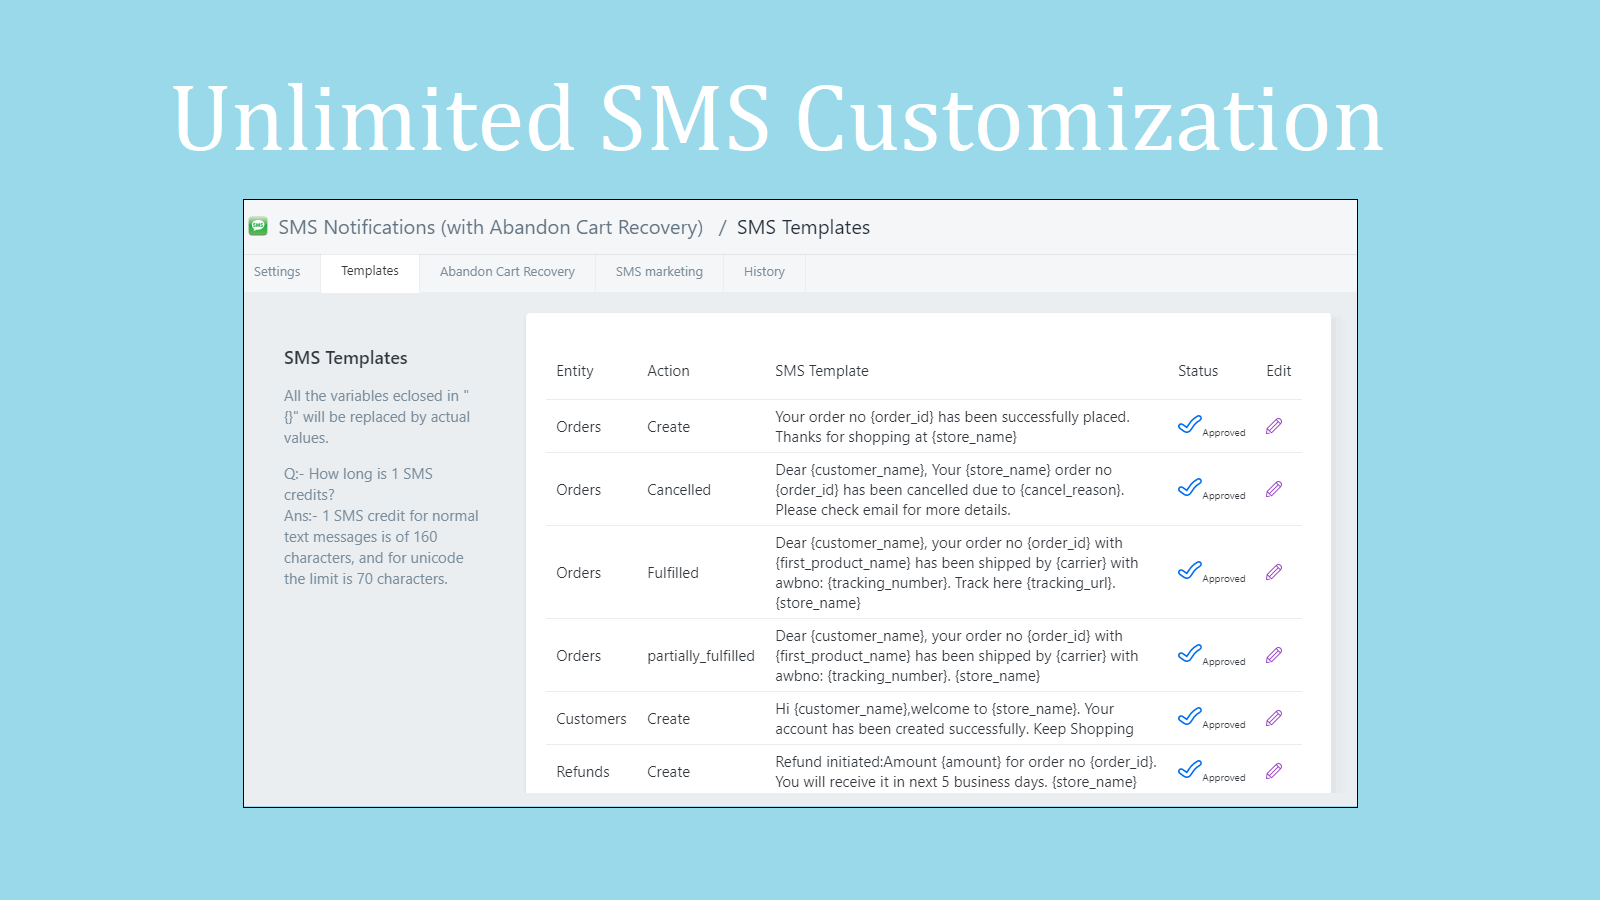
Image credit: Onjection Labs

Abandoned
cart recovery via SMS
is now possible with SMS
Notifications. Now Shopify store owners can perform functions like notifying
their clients using SMS about the status of their order, creating new orders,
alerting customers once an account has been created, as well as send customers
who have abandoned their shopping carts messages. The best part is that SMS
alerts can be forwarded to customers in 220+ countries. If your customers have
abandoned carts in the past, you have nothing to fear as you can require that
revenue with SMS Notifications.

OptiMonk

Image credit: OptiMonk

Lead generation is one of the fundamental private of every
business. First-time visitors have a lot of value which can only be tapped by
converting them as soon as they pay your shop a visit. This is where OptiMonk
comes into play. With this Shopify app, you can capture email subscribers quickly
without so much stress. Emails will continue to be one of the most efficient
ways to get first-time visitors to invest in your products. Many first time
visitors have the habit of exiting your shop without performing any action and
most times do not get to return. With OptiMonk, build email lists of users that
show an interest in your online store products while having the opportunity to
convert them subsequently.

JivoChat

Image credit: JivoChat

A superb live chat for
website
, JivoChat provides online shop owners with the
tools needed to assist their everyday clients in order to increase the level of
sales. When you make use of the widget, you can interact with multiple visitors
at once in an easy manner. it comes with features such as hotkeys, canned
responses, and more which makes interactions very similar including its
translator that is built for more than 90 different languages. Then again, you
will be able to have access to vital info regarding your customers such as their
location and their click source.

SyncSpider
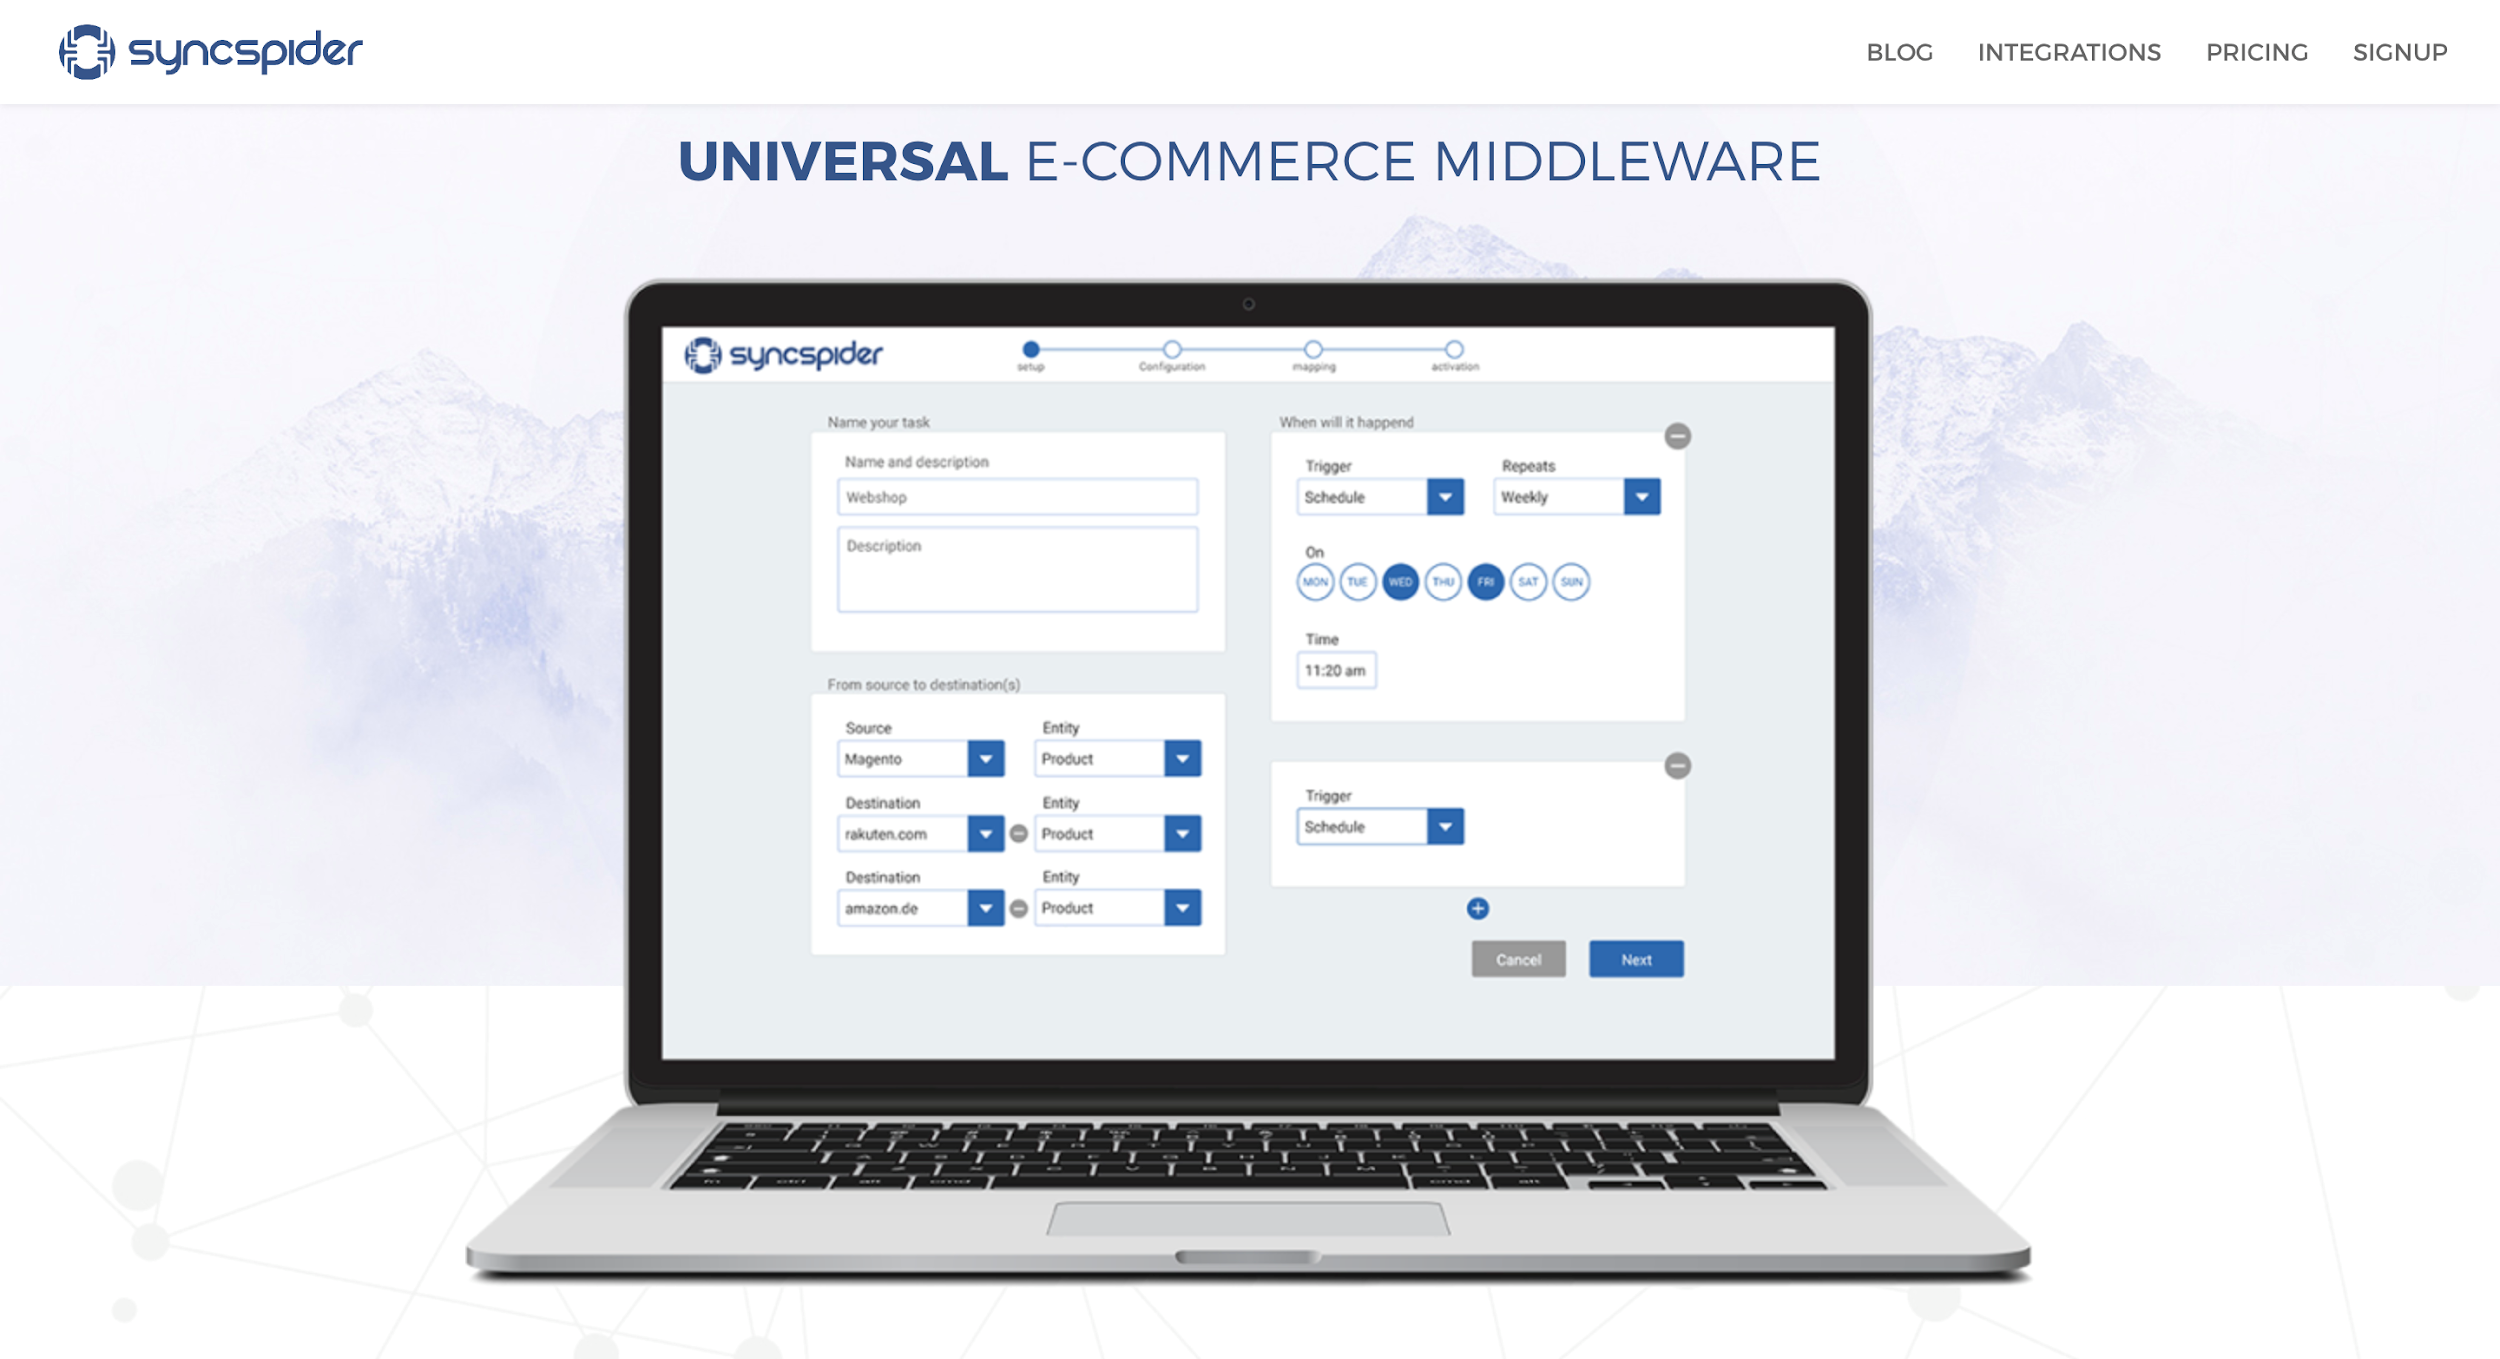
Image credit: SyncSpider

This is one of the best eCommerce
Syncing Software
which has successfully revolutionized
the communication process between various marketplaces, ERP systems, virtual
shop solutions, and more. SyncSpider will help you to sign your ecommerce
platforms and whether you intend to implement importation and exportation or
even synchronize data, this Shopify app is all that you need. Now you no longer
have to battle with the challenges that exist with managing large sets of data
in order to constantly update your records across systems as this app is built
to handle all of that.

DragDropr
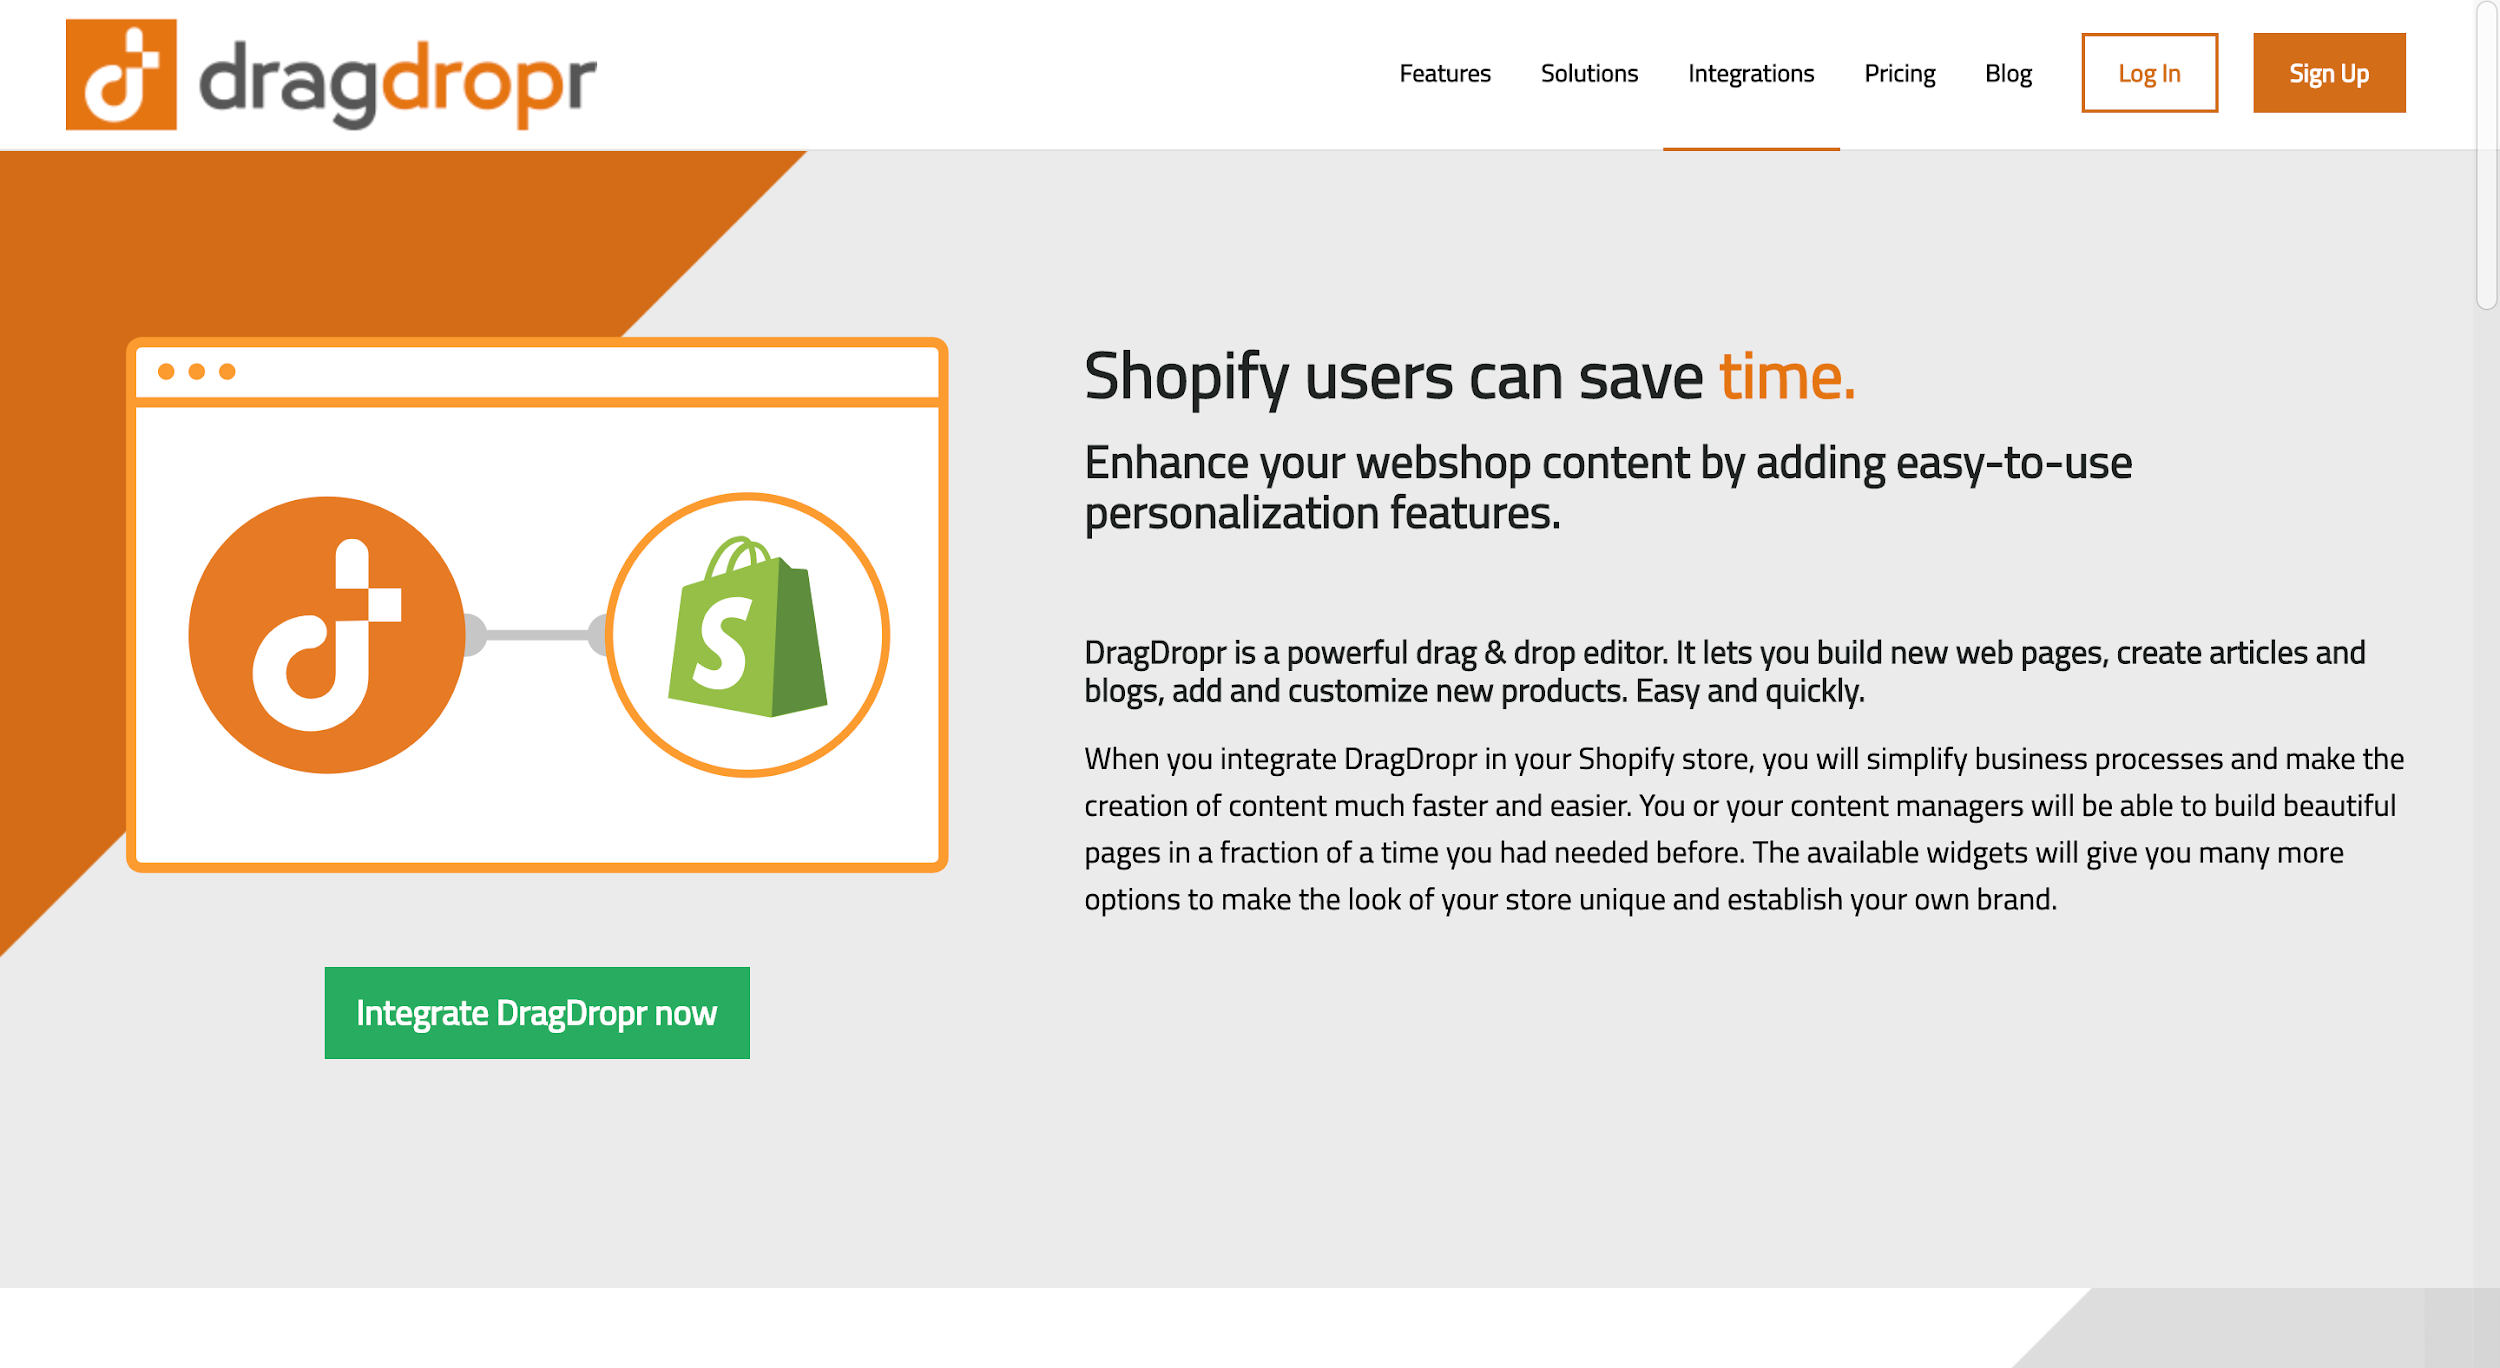
Image credit: DragDropr

The Shopify
page builder
will save you time while optimizing your
webshop content. DragDropr enables you to add personalized features that are
easy to use and it is a highly effective drag and drop tool for editing which
can help you to come up with fresh pages, articles, as well as blogs. You can,
also, get to add customized products in an efficient way. Each widget can be
used to customize your store by tweaking product elements and more.

Takeaways

Email is 40 times more effective at acquiring new
customers than Facebook or Twitter.

Young entrepreneurs are beginning to understand that to grow
their stores, social is not really enough – you need to collect those emails.
And in order to ensure that your online business remains profitable, you need
to make the right investment by acquiring tools and applications to optimize
the experience and performance of your brand.
Should I Use Source Maps in Production?

Post pobrano z: Should I Use Source Maps in Production?

It’s a valid question. A „source map” is a special file that connects a minified/uglified version of an asset (CSS or JavaScript) to the original authored version. Say you’ve got a filed called _header.scss that gets imported into global.scss which is compiled to global.css. That final CSS file is what gets loaded in the browser, so for example, when you inspect an element in DevTools, it might tell you that the <nav> is display: flex; because it says so on line 387 in global.css.

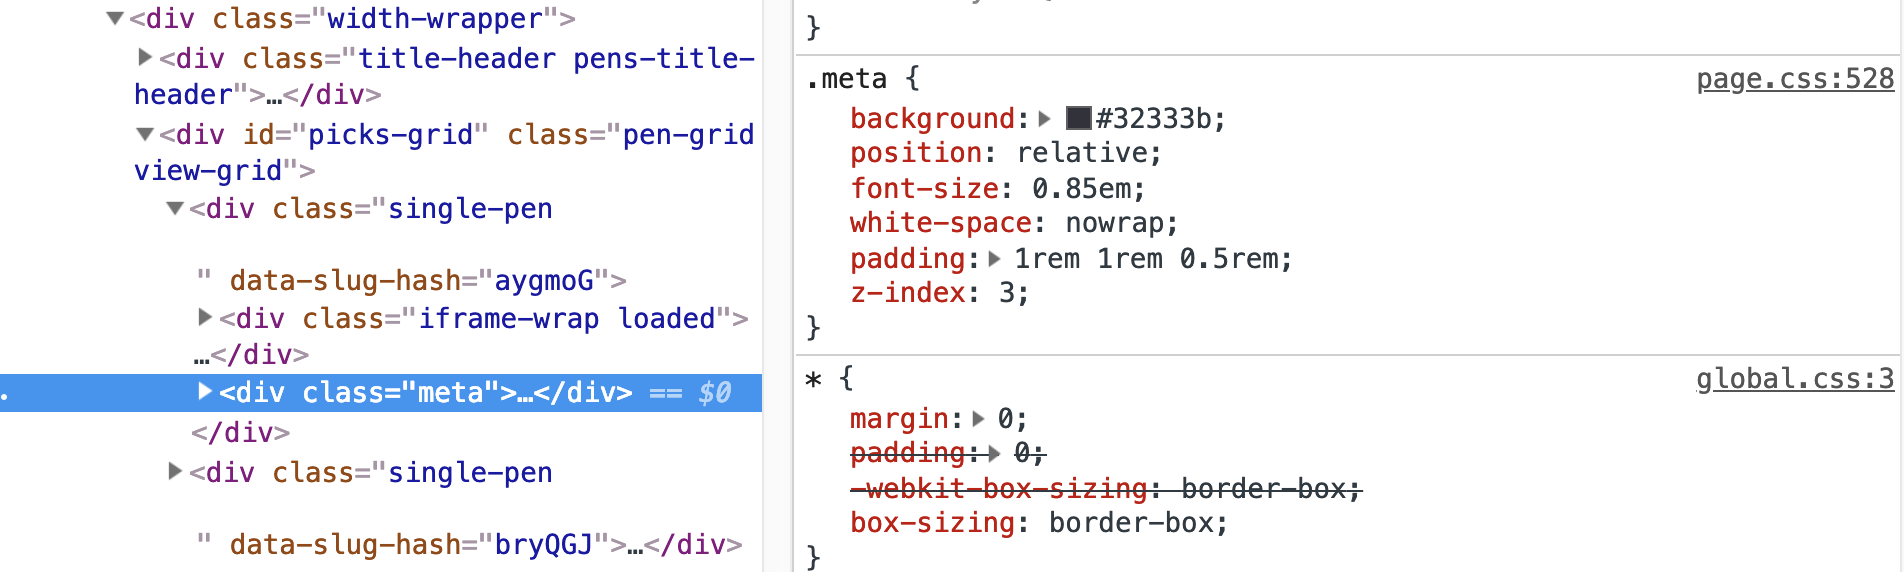
On line 528 of page.css</, we can find out that <code>.meta has position: relative;

But because that final CSS file is probably minified (all whitespace removed), DevTools is likely to tell us that we’ll find the declaration we’re looking for on line 1! Unfortunate, and not helpful for development.

That’s where source maps come in. Like I said up top, source maps are special files that connect that final output file the browser is actually using with the authored files that you actually work with and write code in on your file system.

Typically, source maps are a configuration option from the preprocessor. Here’s Babel’s options. I believe that with Sass, you don’t even have to pass a flag for it in the command or anything because it produces source maps by default.

So, these source maps are for developers. They are particularly useful for you and your team because they help tremendously for debugging issues as well as day-to-day work. I’m sure I make use of them just about every day. I’d say in general, they are used for local development. You might even .gitignore them or skip them in a deployment process in order to serve and store fewer assets to production. But there’s been some recent chatter about making sure they go to production as well.

David Heinemeier Hansson:

But source maps have long been seen merely as a local development tool. Not something you ship to production, although people have also been doing that, such that live debugging would be easier. That in itself is a great reason to ship source maps. […]

Additional, Rails 6 just committed to shipping source maps by default in production, also thanks to Webpack. You’ll be able to turn that feature off, but I hope you won’t. The web is a better place when we allow others to learn from our work.

Check out that issue thread for more interesting conversation about shipping source maps to production. The benefits boil down to these two things:

  1. It might help you track down bugs in production more easily
  2. It helps other people learn from your website more easily

Both are cool. Personally, I’d be opposed to shipping performance-optimized code for learning purposes alone. I wrote about that last year:

I don’t want my source to be human-readable, not for protective reasons, but because I care about web performance more. I want my website to arrive at light speed on a tiny spec of magical network packet dust and blossom into a complete website. Or do whatever computer science deems is the absolute fastest way to send website data between computers. I’m much more worried about the state of web performance than I am about web education. But even if I was very worried about web education, I don’t think it’s the network’s job to deliver teachability.

Shipping source maps to production is a nice middle ground. There’s no hit on performance (source maps don’t get loaded unless you have DevTools open, which is, IMO, irrelevant to a real performance discussion) with the benefit of delivering debugging and learning benefits.

The downsides brought up in recent discussion boil down to:

  1. Sourcemaps require compilation time
  2. It allows people to, I dunno, steal your code or something

I don’t care about #2 (sorry), and #1 seems generally negligible for a small or what we think of as the average site, though I’m afraid I can’t speak for mega sites.

One thing I should add though is that source maps can even be generated for CSS-in-JS tooling, so for those that literally inject styles into the DOM for you, those source maps are injected as well. I’ve seen major slowdowns in those situations, so I would say definitely do not ship source maps to production if you can’t split them out of your main bundles. Otherwise, I’d vote strongly that you do.

The post Should I Use Source Maps in Production? appeared first on CSS-Tricks.

Should I Use Source Maps in Production?

Post pobrano z: Should I Use Source Maps in Production?

It’s a valid question. A „source map” is a special file that connects a minified/uglified version of an asset (CSS or JavaScript) to the original authored version. Say you’ve got a filed called _header.scss that gets imported into global.scss which is compiled to global.css. That final CSS file is what gets loaded in the browser, so for example, when you inspect an element in DevTools, it might tell you that the <nav> is display: flex; because it says so on line 387 in global.css.

On line 528 of page.css</, we can find out that <code>.meta has position: relative;

But because that final CSS file is probably minified (all whitespace removed), DevTools is likely to tell us that we’ll find the declaration we’re looking for on line 1! Unfortunate, and not helpful for development.

That’s where source maps come in. Like I said up top, source maps are special files that connect that final output file the browser is actually using with the authored files that you actually work with and write code in on your file system.

Typically, source maps are a configuration option from the preprocessor. Here’s Babel’s options. I believe that with Sass, you don’t even have to pass a flag for it in the command or anything because it produces source maps by default.

So, these source maps are for developers. They are particularly useful for you and your team because they help tremendously for debugging issues as well as day-to-day work. I’m sure I make use of them just about every day. I’d say in general, they are used for local development. You might even .gitignore them or skip them in a deployment process in order to serve and store fewer assets to production. But there’s been some recent chatter about making sure they go to production as well.

David Heinemeier Hansson:

But source maps have long been seen merely as a local development tool. Not something you ship to production, although people have also been doing that, such that live debugging would be easier. That in itself is a great reason to ship source maps. […]

Additional, Rails 6 just committed to shipping source maps by default in production, also thanks to Webpack. You’ll be able to turn that feature off, but I hope you won’t. The web is a better place when we allow others to learn from our work.

Check out that issue thread for more interesting conversation about shipping source maps to production. The benefits boil down to these two things:

  1. It might help you track down bugs in production more easily
  2. It helps other people learn from your website more easily

Both are cool. Personally, I’d be opposed to shipping performance-optimized code for learning purposes alone. I wrote about that last year:

I don’t want my source to be human-readable, not for protective reasons, but because I care about web performance more. I want my website to arrive at light speed on a tiny spec of magical network packet dust and blossom into a complete website. Or do whatever computer science deems is the absolute fastest way to send website data between computers. I’m much more worried about the state of web performance than I am about web education. But even if I was very worried about web education, I don’t think it’s the network’s job to deliver teachability.

Shipping source maps to production is a nice middle ground. There’s no hit on performance (source maps don’t get loaded unless you have DevTools open, which is, IMO, irrelevant to a real performance discussion) with the benefit of delivering debugging and learning benefits.

The downsides brought up in recent discussion boil down to:

  1. Sourcemaps require compilation time
  2. It allows people to, I dunno, steal your code or something

I don’t care about #2 (sorry), and #1 seems generally negligible for a small or what we think of as the average site, though I’m afraid I can’t speak for mega sites.

One thing I should add though is that source maps can even be generated for CSS-in-JS tooling, so for those that literally inject styles into the DOM for you, those source maps are injected as well. I’ve seen major slowdowns in those situations, so I would say definitely do not ship source maps to production if you can’t split them out of your main bundles. Otherwise, I’d vote strongly that you do.

The post Should I Use Source Maps in Production? appeared first on CSS-Tricks.

Writing Tests for React Applications Using Jest and Enzyme

Post pobrano z: Writing Tests for React Applications Using Jest and Enzyme

While it is important to have a well-tested API, solid test coverage is a must for any React application. Tests increase confidence in the code and helps prevent shipping bugs to users.

That’s why we’re going to focus on testing in this post, specifically for React applications. By the end, you’ll be up and running with tests using Jest and Enzyme.

No worries if those names mean nothing to you because that’s where we’re headed right now!

Installing the test dependencies

Jest is a unit testing framework that makes testing React applications pretty darn easy because it works seamlessly with React (because, well, the Facebook team made it, though it is compatible with other JavaScript frameworks). It serves as a test runner that includes an entire library of predefined tests with the ability to mock functions as well.

Enzyme is designed to test components and it’s a great way to write assertions (or scenarios) that simulate actions that confirm the front-end UI is working correctly. In other words, it seeks out components on the front end, interacts with them, and raises a flag if any of the components aren’t working the way it’s told they should.

So, Jest and Enzyme are distinct tools, but they complement each other well.

For our purposes, we will spin up a new React project using create-react-app because it comes with Jest configured right out of the box.

yarn create react-app my-app

We still need to install enzyme and enzyme-adapter-react-16 (that number should be based on whichever version of React version you’re using).

yarn add enzyme enzyme-adapter-react-16 --dev

OK, that creates our project and gets us both Jest and Enzyme in our project in two commands. Next, we need to create a setup file for our tests. We’ll call this file setupTests.js and place it in the src folder of the project.

Here’s what should be in that file:

import { configure } from 'enzyme';
import Adapter from 'enzyme-adapter-react-16';
configure({ adapter: new Adapter() });

This brings in Enzyme and sets up the adapter for running our tests.

To make things easier on us, we are going to write tests for a React application I have already built. Grab a copy of the app over on GitHub.

Taking snapshots of tests

Snapshot testing is used to keep track of changes in the app UI. If you’re wonder whether we’re dealing with literal images of the UI, the answer is no, but snapshots are super useful because they capture the code of a component at a moment in time so we can compare the component in one state versus any other possible states it might take.

The first time a test runs, a snapshot of the component code is composed and saved in a new __snapshots__ folder in the src directory. On test runs, the current UI is compared to the existing. Here’s a snapshot of a successful test of the sample project’s App component.

it("renders correctly", () => {
  const wrapper = shallow(
    <App />
  );
  expect(wrapper).toMatchSnapshot();
});

Every new snapshot that gets generated when the test suite runs will be saved in the __tests__ folder. What’s great about that Jest will check to see if the component matches is then on subsequent times when we run the test, Jest will check to see if the component matches the snapshot on subsequent tests. Here’s how that files looks.

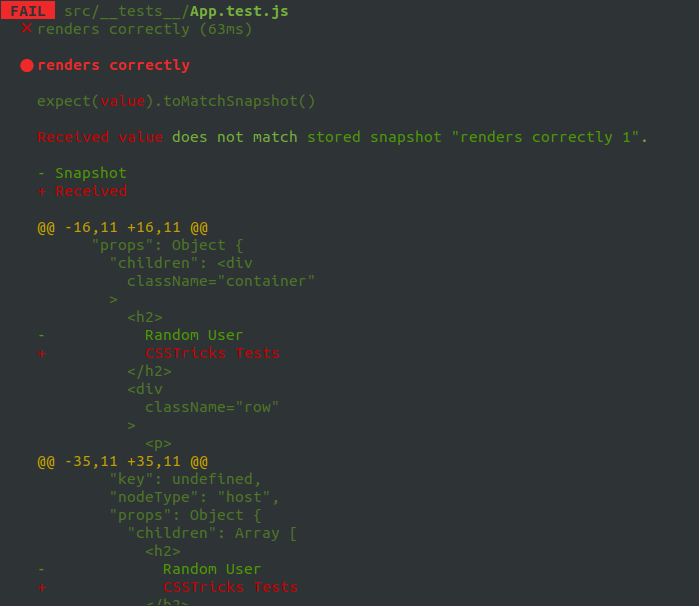
Let’s create a conditions where the test fails. We’ll change the <h2> tag of our component from <h2>Random User</h2> to <h2>CSSTricks Tests</h2> and here’s what we get in the command line when the tests run:

If we want our change to pass the test, we either change the heading to what it was before, or we can update the snapshot file. Jest even provides instructions for how to update the snapshot right from the command line so there’s no need to update the snapshot manually:

Inspect your code changes or press `u` to update them.

So, that’s what we’ll do in this case. We press u to update the snapshot, the test passes, and we move on.

Did you catch the shallow method in our test snapshot? That’s from the Enzyme package and instructs the test to run a single component and nothing else — not even any child components that might be inside it. It’s a nice clean way to isolate code and get better information when debugging and is especially great for simple, non-interactive components.

In addition to shallow, we also have render for snapshot testing. What’s the difference, you ask? While shallow excludes child components when testing a component, render includes them while rendering to static HTML.

There is one more method in the mix to be aware of: mount. This is the most engaging type of test in the bunch because it fully renders components (like shallow and render) and their children (like render) but puts them in the DOM, which means it can fully test any component that interacts with the DOM API as well as any props that are passed to and from it. It’s a comprehensive test for interactivity. It’s also worth noting that, since it does a full mount, we’ll want to make a call to .unmount on the component after the test runs so it doesn’t conflict with other tests.

Testing Component’s Lifecycle Methods

Lifecycle methods are hooks provided by React, which get called at different stages of a component’s lifespan. These methods come in handy when handling things like API calls.
Since they are often used in React components, you can have your test suite cover them to ensure all things work as expected.

We do the fetching of data from the API when the component mounts. We can check if the lifecycle method gets called by making use of jest, which makes it possible for us to mock lifecycle methods used in React applications.

it('calls componentDidMount', () => {
  jest.spyOn(App.prototype, 'componentDidMount')
  const wrapper = shallow(<App />)
  expect(App.prototype.componentDidMount.mock.calls.length).toBe(1)
})

We attach spy to the component’s prototype, and the spy on the componentDidMount() lifecycle method of the component. Next, we assert that the lifecycle method is called once by checking for the call length.

Testing component props

How can you be sure that props from one component are being passed to another? We have a test confirm it, of course! The Enzyme API allows us to create a “mock” function so tests can simulate props being passed between components.

Let’s say we are passing user props from the main App component into a Profile component. In other words, we want the App to inform the Profile with details about user information to render a profile for that user.

First, let’s mock the user props:

const user = {
  name: 'John Doe',
  email: 'johndoe@gmail.com',
  username: 'johndoe',
  image: null
}

Mock functions look a lot like other tests in that they’re wrapped around the components. However, we’re using an additional describe layer that takes the component being tested, then allows us to proceed by telling the test the expected props and values that we expect to be passed.

describe ('<Profile />', () => {
  it ('contains h4', () => {
    const wrapper = mount(<Profile user={user} />)
    const value = wrapper.find('h4').text()
    expect(value).toEqual('John Doe')
  })
  it ('accepts user props', () => {
    const wrapper = mount(<Profile user={user} />);
    expect(wrapper.props().user).toEqual(user)
  })
})

This particular example contains two tests. In the first test, we pass the user props to the mounted Profile component. Then, we check to see if we can find a <h4> element that corresponds to what we have in the Profile component.

In the second test, we want to check if the props we passed to the mounted component equals the mock props we created above. Note that even though we are destructing the props in the Profile component, it does not affect the test.

Mock API calls

There’s a part in the project we’ve been using where an API call is made to fetch a list of users. And guess what? We can test that API call, too!

The slightly tricky thing about testing API calls is that we don’t actually want to hit the API. Some APIs have call limits or even costs for making making calls, so we want to avoid that. Thankfully, we can use Jest to mock axios requests. See this post for a more thorough walkthrough of using axios to make API calls.

First, we’ll create a new folder called __mock__ in the same directory where our __tests__ folder lives. This is where our mock request files will be created when the tests run.

module.exports = {
  get: jest.fn(() => {
    return Promise.resolve({
    data: [
      {
        id: 1,
        name: 'Jane Doe',
        email: 'janedoe@gmail.com',
        username: 'jdoe'
      }
    ]
    })
  })
}

We want to check and see that the GET request is made. We’ll import axios for that:

import axios from 'axios';

Just below the import statements, we need Jest to replace axios with our mock, so we add this:

jest.mock('axios')

The Jest API has a spyOn() method that takes an accessType? argument that can be used to check whether we are able to “get” data from an API call. We use jest.spyOn() to call the spied method, which we implemented in our __mock__ file, and it can be used with the shallow, render and mount tests we covered earlier.

it('fetches a list of users', () => {
  const getSpy = jest.spyOn(axios, 'get')
  const wrapper = shallow(
    <App />
  )
  expect(getSpy).toBeCalled()
})

We passed the test!

That’s a primer into the world of testing in a React application. Hopefully you now see the value that testing adds to a project and how relatively easy it can be to implement, thanks to the heavy lifting done by the joint powers of Jest and Enzyme.

Further reading

How to Make a Photoshop Action to Create a Stitched Jeans Text Effect

Post pobrano z: How to Make a Photoshop Action to Create a Stitched Jeans Text Effect

Final product image
What You’ll Be Creating

In this tutorial, I’ll show you how to create your own denim texture using filters in Adobe Photoshop and then how to create an action for the stitched jeans text effect.

This action is based on Stitched Leather and Jeans Actions from Envato Market.
These actions transform any text or shape into a stitched leather or jeans type.

Leather and jeans actions

Tutorial Assets

The following assets were used during this Photoshop action tutorial:

1. How to Create a Denim Texture

First of all, I’ll show you how you can create your own denim texture using Photoshop filters. If you prefer, you can skip these steps and download the denim texture from the tutorial assets.

Step 1

Start Adobe Photoshop and open a new document (Control-N) with 1024 x 1024 px and a resolution of 72 DPI. Then go to Filter > Filter Gallery… and select Halftone Pattern from the Sketch folder and use these settings:

  • Size: 2
  • Contrast: 20
  • Pattern Type: Dot

Hit OK.

Add halftone pattern

Step 2

Go to Filter > Pixelate > Mezzotint…, set Type to Fine Dots, and hit OK. Then go to Filter > Blur > Motion Blur…, and set the Angle to -45° and the Distance to 20 px. Hit OK.

Add mezzotint and blur

Step 3

Go to Filter > Noise > Add Noise, and set the Amount to 10% and Distribution to Gaussian. Check the Monochromatic box and hit OK. Then go to Filter > Blur > Gaussian Blur, set the Radius to 0.5 px, and hit OK.

Add noise and blur

Step 4

Go to Layer > New Adjustment Layer > Levels and set Inputs to 210.52199 and Outputs to 53163. Then select the Background layer and go to Edit > Define Pattern, change the name to denim-texture, and hit OK.

Done. You have just created your own denim texture which we will use in our Photoshop action. We could finish it with a blue color overlay, but I like to leave it in shades of gray, which lets you change the texture to any color later.

Add levels

2. How to Set the Background and Add Text

For this Photoshop action, I chose the wood planks background, which you can get from the tutorial assets, but it is not mandatory for the action to work.

Step 1

Open the wood planks image (Control-O). Then hit Control-Alt-I, change the Resolution to 72 Pixels/Inch and the Width to 850 px, and hit OK.

Set the background

Step 2

Take your Type tool (T), change the font to Varsity Team Bold, and set the Size to 450 pt. Then write „JB” on your artboard.

Type the text

3. How to Start Recording a Photoshop Action

Now we are going to start recording a Photoshop action. It’s important to follow the steps in order and to avoid unnecessary mouse clicks and keystrokes.

Step 1

Hit Alt-F9 to open your Actions panel. At the bottom of this panel, hit the Create new set icon, name it Jeans Action, and hit OK. Then hit the Create new action icon next to it and name it Start. Now hit the Record button and start recording the Photoshop action.

Start recording an action

Step 2

To start off our Photoshop action, right-click on the JB layer in your Layers panel and select Duplicate Layer, name it jeans-base, and hit OK. Then right-click on the jeans-base layer and select Duplicate Layer again, name it jeans-rim, and hit OK.

Duplicate layers

4. How to Create and Style the Jeans Rim

Step 1

Right-click on the jeans-rim layer and select Blending Options. Then set the Fill Opacity to 0%.

Add blending options

Step 2

Add a Stroke with Size of 16 px, set the Position to Outside, and hit OK. Then right-click the jeans-rim layer and select Convert to Smart Object.

Add a stroke

Step 3

Right-click on the jeans-rim layer and select Blending Options again. Now add a Bevel and Emboss with these settings:

  • Style: Inner Bevel
  • Technique: Smooth
  • Depth: 888%
  • Direction: Down
  • Size: 2 px
  • Soften: 0 px
  • Uncheck the Use Global Light box
  • Angle: 135°
  • Altitude: 30°
  • Highlight Mode: Linear Burn with color #000000
  • Highlight Mode – Opacity: 27%
  • Highlight Mode: Color Dodge with color #ffffff
  • Shadow Mode – Opacity: 44%
Add a bevel and emboss

Step 4

Add a Texture for the Bevel and Emboss with these settings:

  • Pattern: denim-texture (the one you have created before)
  • Scale: 50%
  • Depth: 95%
Add a texture

Step 5

Add an Inner Shadow with these settings:

  • Color: #6b6b6b
  • Uncheck the Use Global Light box
  • Angle: -45°
  • Distance: 6 px
  • Choke: 45%
  • Size: 5 px
  • Check the Anti-aliased box
Add an inner shadow

Step 6

Add a Color Overlay with these settings:

  • Blend Mode: Overlay
  • Color: #224d66
  • Opacity: 80%
Add a color overlay

Step 7

Add a Pattern Overlay with these settings:

  • Blend Mode: Normal
  • Opacity: 100%
  • Pattern: denim-texture
  • Scale: 50%
Add a pattern overlay

Step 8

Finally, add a Drop Shadow to our Photoshop text effect with these settings:

  • Blend Mode: Multiply
  • Color: #000000
  • Opacity: 80%
  • Uncheck the Use Global Light box
  • Angle: 90°
  • Distance: 2 px
  • Spread: 0%
  • Size: 3 px
  • Check the Anti-aliased box

Hit OK to apply the text effect.

Add a drop shadow

This is the result of the text effect applied to our Photoshop action.

Partial result

5. How to Create and Style the Jeans Main Layer

Step 1

Select the jeans-base layer in your Layers panel. Right-click on it and select Blending Options. Now add a Stroke with Size of 15 px, change Position to Outside, and hit OK. Then right-click this layer again and select Convert to Smart Object.

Add a stroke

Step 2

Right-click on the jeans-base layer and select Blending Options again. Now add a Bevel and Emboss with these settings:

  • Style: Inner Bevel
  • Technique: Smooth
  • Depth: 100%
  • Direction: Up
  • Size: 49 px
  • Soften: 0 px
  • Uncheck the Use Global Light box
  • Angle: 180°
  • Altitude: 30°
  • Check the Anti-aliased box
  • Highlight Mode: Color Dodge with color #ffffff
  • Highlight Mode – Opacity: 30%
  • Highlight Mode: Linear Burn with color #000000
  • Shadow Mode – Opacity: 13%
Add a bevel and emboss

Step 3

Add an Inner Shadow with these settings:

  • Blend Mode: Multiply
  • Color: #7a7a7a
  • Uncheck the Use Global Light box
  • Angle: 132°
  • Distance: 0 px
  • Choke: 18%
  • Size: 35 px
  • Check the Anti-aliased box
Add an inner shadow

Step 4

Add an Inner Glow with these settings:

  • Blend Mode: Linear Burn
  • Opacity: 24%
  • Color: #6a6a6a
  • Technique: Softer
  • Source: Edge
  • Choke: 60%
  • Size: 38 px
  • Check the Anti-aliased box
Add an inner glow

Step 5

Add a Satin style with these settings:

  • Blend Mode: Linear Burn
  • Color: #000000
  • Opacity: 13%
  • Angle:
  • Distance: 45 px
  • Size: 46 px
  • Check the Anti-aliased box
  • Check the Invert box
Add a satin

Step 6

Add a Color Overlay with these settings:

  • Blend Mode: Overlay
  • Color: #224d66
  • Opacity: 80%
Add a color overlay

Step 7

Add a Pattern Overlay with these settings:

  • Blend Mode: Normal
  • Opacity: 100%
  • Pattern: denim-texture
  • Scale: 50%
Add a pattern overlay

Step 8

Finally, add a Drop Shadow to our Photoshop text effect with these settings:

  • Blend Mode: Multiply
  • Color: #000000
  • Opacity: 36%
  • Uncheck the Use Global Light box
  • Angle: 105°
  • Distance: 9 px
  • Spread: 11%
  • Size: 8 px
  • Check the Anti-aliased box

Hit OK to apply the text effect.

Add a drop shadow

And this is the result of the text effect applied to our Photoshop action.

Partial result

6. How to Add and Style the Jeans Stitch

We are almost done with our Photoshop action. The last thing we need to add is a cool stitch to this text effect. So let’s do it.

Step 1

Create a new layer by going to Layer > New > Layer and name it stitch. Then Controlclick the jeans-base layer to make a selection. Go to Select > Modify > Contract, set the value to 24 px, and hit OK. Finally, go to your Paths panel and click the Make work path from selection icon at the bottom.

Create a work path

Step 2

Select your Brush Tool (B) and select jeans-stitch from the tutorial assets as your brush. Then right-click on the Work Path layer in Paths panel and select Stroke Path…, choose Brush as your tool, and hit OK. Lastly, hit Delete to delete the work path layer.

Stroke the path

Step 3

Right-click on the stitch layer and select Blending Options. Then add a Bevel and Emboss with these settings:

  • Style: Pillow Emboss
  • Technique: Smooth
  • Depth: 200%
  • Direction: Up
  • Size: 9 px
  • Soften: 5 px
  • Uncheck the Use Global Light box
  • Angle: 90°
  • Altitude: 30°
  • Check the Anti-aliased box
  • Highlight Mode: Linear Dodge (Add) with color #ffffff
  • Highlight Mode – Opacity: 24%
  • Highlight Mode: Linear Burn with color #000000
  • Shadow Mode – Opacity: 18%
Add a bevel and emboss

Step 4

Add a Color Overlay and choose the color #d19f5f. Then hit OK to apply the text effect. Now go back to your Actions panel and hit the Stop button at the bottom to stop recording this Photoshop action.

Add a color overlay

Congratulations! You’re Done!

In this tutorial, you learned how to create a Photoshop action for a jeans text effect and also how to create your own denim texture using Photoshop filters.

We started by creating the main denim texture, and then we recorded an action for the jeans text effect using layer styles and a stitch brush.

Final result

I hope you have enjoyed this Photoshop action tutorial. Please feel free to leave your
comments, suggestions, and outcomes below. The text effect action we just
created is based on Stitched Leather and Jeans Actions.

Leather and jeans actions

Looking for more? I recommend the following tutorials:

How to Make a Photoshop Action to Create a Stitched Jeans Text Effect

Post pobrano z: How to Make a Photoshop Action to Create a Stitched Jeans Text Effect

Final product image
What You’ll Be Creating

In this tutorial, I’ll show you how to create your own denim texture using filters in Adobe Photoshop and then how to create an action for the stitched jeans text effect.

This action is based on Stitched Leather and Jeans Actions from Envato Market.
These actions transform any text or shape into a stitched leather or jeans type.

Leather and jeans actions

Tutorial Assets

The following assets were used during this Photoshop action tutorial:

1. How to Create a Denim Texture

First of all, I’ll show you how you can create your own denim texture using Photoshop filters. If you prefer, you can skip these steps and download the denim texture from the tutorial assets.

Step 1

Start Adobe Photoshop and open a new document (Control-N) with 1024 x 1024 px and a resolution of 72 DPI. Then go to Filter > Filter Gallery… and select Halftone Pattern from the Sketch folder and use these settings:

  • Size: 2
  • Contrast: 20
  • Pattern Type: Dot

Hit OK.

Add halftone pattern

Step 2

Go to Filter > Pixelate > Mezzotint…, set Type to Fine Dots, and hit OK. Then go to Filter > Blur > Motion Blur…, and set the Angle to -45° and the Distance to 20 px. Hit OK.

Add mezzotint and blur

Step 3

Go to Filter > Noise > Add Noise, and set the Amount to 10% and Distribution to Gaussian. Check the Monochromatic box and hit OK. Then go to Filter > Blur > Gaussian Blur, set the Radius to 0.5 px, and hit OK.

Add noise and blur

Step 4

Go to Layer > New Adjustment Layer > Levels and set Inputs to 210.52199 and Outputs to 53163. Then select the Background layer and go to Edit > Define Pattern, change the name to denim-texture, and hit OK.

Done. You have just created your own denim texture which we will use in our Photoshop action. We could finish it with a blue color overlay, but I like to leave it in shades of gray, which lets you change the texture to any color later.

Add levels

2. How to Set the Background and Add Text

For this Photoshop action, I chose the wood planks background, which you can get from the tutorial assets, but it is not mandatory for the action to work.

Step 1

Open the wood planks image (Control-O). Then hit Control-Alt-I, change the Resolution to 72 Pixels/Inch and the Width to 850 px, and hit OK.

Set the background

Step 2

Take your Type tool (T), change the font to Varsity Team Bold, and set the Size to 450 pt. Then write „JB” on your artboard.

Type the text

3. How to Start Recording a Photoshop Action

Now we are going to start recording a Photoshop action. It’s important to follow the steps in order and to avoid unnecessary mouse clicks and keystrokes.

Step 1

Hit Alt-F9 to open your Actions panel. At the bottom of this panel, hit the Create new set icon, name it Jeans Action, and hit OK. Then hit the Create new action icon next to it and name it Start. Now hit the Record button and start recording the Photoshop action.

Start recording an action

Step 2

To start off our Photoshop action, right-click on the JB layer in your Layers panel and select Duplicate Layer, name it jeans-base, and hit OK. Then right-click on the jeans-base layer and select Duplicate Layer again, name it jeans-rim, and hit OK.

Duplicate layers

4. How to Create and Style the Jeans Rim

Step 1

Right-click on the jeans-rim layer and select Blending Options. Then set the Fill Opacity to 0%.

Add blending options

Step 2

Add a Stroke with Size of 16 px, set the Position to Outside, and hit OK. Then right-click the jeans-rim layer and select Convert to Smart Object.

Add a stroke

Step 3

Right-click on the jeans-rim layer and select Blending Options again. Now add a Bevel and Emboss with these settings:

  • Style: Inner Bevel
  • Technique: Smooth
  • Depth: 888%
  • Direction: Down
  • Size: 2 px
  • Soften: 0 px
  • Uncheck the Use Global Light box
  • Angle: 135°
  • Altitude: 30°
  • Highlight Mode: Linear Burn with color #000000
  • Highlight Mode – Opacity: 27%
  • Highlight Mode: Color Dodge with color #ffffff
  • Shadow Mode – Opacity: 44%
Add a bevel and emboss

Step 4

Add a Texture for the Bevel and Emboss with these settings:

  • Pattern: denim-texture (the one you have created before)
  • Scale: 50%
  • Depth: 95%
Add a texture

Step 5

Add an Inner Shadow with these settings:

  • Color: #6b6b6b
  • Uncheck the Use Global Light box
  • Angle: -45°
  • Distance: 6 px
  • Choke: 45%
  • Size: 5 px
  • Check the Anti-aliased box
Add an inner shadow

Step 6

Add a Color Overlay with these settings:

  • Blend Mode: Overlay
  • Color: #224d66
  • Opacity: 80%
Add a color overlay

Step 7

Add a Pattern Overlay with these settings:

  • Blend Mode: Normal
  • Opacity: 100%
  • Pattern: denim-texture
  • Scale: 50%
Add a pattern overlay

Step 8

Finally, add a Drop Shadow to our Photoshop text effect with these settings:

  • Blend Mode: Multiply
  • Color: #000000
  • Opacity: 80%
  • Uncheck the Use Global Light box
  • Angle: 90°
  • Distance: 2 px
  • Spread: 0%
  • Size: 3 px
  • Check the Anti-aliased box

Hit OK to apply the text effect.

Add a drop shadow

This is the result of the text effect applied to our Photoshop action.

Partial result

5. How to Create and Style the Jeans Main Layer

Step 1

Select the jeans-base layer in your Layers panel. Right-click on it and select Blending Options. Now add a Stroke with Size of 15 px, change Position to Outside, and hit OK. Then right-click this layer again and select Convert to Smart Object.

Add a stroke

Step 2

Right-click on the jeans-base layer and select Blending Options again. Now add a Bevel and Emboss with these settings:

  • Style: Inner Bevel
  • Technique: Smooth
  • Depth: 100%
  • Direction: Up
  • Size: 49 px
  • Soften: 0 px
  • Uncheck the Use Global Light box
  • Angle: 180°
  • Altitude: 30°
  • Check the Anti-aliased box
  • Highlight Mode: Color Dodge with color #ffffff
  • Highlight Mode – Opacity: 30%
  • Highlight Mode: Linear Burn with color #000000
  • Shadow Mode – Opacity: 13%
Add a bevel and emboss

Step 3

Add an Inner Shadow with these settings:

  • Blend Mode: Multiply
  • Color: #7a7a7a
  • Uncheck the Use Global Light box
  • Angle: 132°
  • Distance: 0 px
  • Choke: 18%
  • Size: 35 px
  • Check the Anti-aliased box
Add an inner shadow

Step 4

Add an Inner Glow with these settings:

  • Blend Mode: Linear Burn
  • Opacity: 24%
  • Color: #6a6a6a
  • Technique: Softer
  • Source: Edge
  • Choke: 60%
  • Size: 38 px
  • Check the Anti-aliased box
Add an inner glow

Step 5

Add a Satin style with these settings:

  • Blend Mode: Linear Burn
  • Color: #000000
  • Opacity: 13%
  • Angle:
  • Distance: 45 px
  • Size: 46 px
  • Check the Anti-aliased box
  • Check the Invert box
Add a satin

Step 6

Add a Color Overlay with these settings:

  • Blend Mode: Overlay
  • Color: #224d66
  • Opacity: 80%
Add a color overlay

Step 7

Add a Pattern Overlay with these settings:

  • Blend Mode: Normal
  • Opacity: 100%
  • Pattern: denim-texture
  • Scale: 50%
Add a pattern overlay

Step 8

Finally, add a Drop Shadow to our Photoshop text effect with these settings:

  • Blend Mode: Multiply
  • Color: #000000
  • Opacity: 36%
  • Uncheck the Use Global Light box
  • Angle: 105°
  • Distance: 9 px
  • Spread: 11%
  • Size: 8 px
  • Check the Anti-aliased box

Hit OK to apply the text effect.

Add a drop shadow

And this is the result of the text effect applied to our Photoshop action.

Partial result

6. How to Add and Style the Jeans Stitch

We are almost done with our Photoshop action. The last thing we need to add is a cool stitch to this text effect. So let’s do it.

Step 1

Create a new layer by going to Layer > New > Layer and name it stitch. Then Controlclick the jeans-base layer to make a selection. Go to Select > Modify > Contract, set the value to 24 px, and hit OK. Finally, go to your Paths panel and click the Make work path from selection icon at the bottom.

Create a work path

Step 2

Select your Brush Tool (B) and select jeans-stitch from the tutorial assets as your brush. Then right-click on the Work Path layer in Paths panel and select Stroke Path…, choose Brush as your tool, and hit OK. Lastly, hit Delete to delete the work path layer.

Stroke the path

Step 3

Right-click on the stitch layer and select Blending Options. Then add a Bevel and Emboss with these settings:

  • Style: Pillow Emboss
  • Technique: Smooth
  • Depth: 200%
  • Direction: Up
  • Size: 9 px
  • Soften: 5 px
  • Uncheck the Use Global Light box
  • Angle: 90°
  • Altitude: 30°
  • Check the Anti-aliased box
  • Highlight Mode: Linear Dodge (Add) with color #ffffff
  • Highlight Mode – Opacity: 24%
  • Highlight Mode: Linear Burn with color #000000
  • Shadow Mode – Opacity: 18%
Add a bevel and emboss

Step 4

Add a Color Overlay and choose the color #d19f5f. Then hit OK to apply the text effect. Now go back to your Actions panel and hit the Stop button at the bottom to stop recording this Photoshop action.

Add a color overlay

Congratulations! You’re Done!

In this tutorial, you learned how to create a Photoshop action for a jeans text effect and also how to create your own denim texture using Photoshop filters.

We started by creating the main denim texture, and then we recorded an action for the jeans text effect using layer styles and a stitch brush.

Final result

I hope you have enjoyed this Photoshop action tutorial. Please feel free to leave your
comments, suggestions, and outcomes below. The text effect action we just
created is based on Stitched Leather and Jeans Actions.

Leather and jeans actions

Looking for more? I recommend the following tutorials:

How to Make a Photoshop Action to Create a Stitched Jeans Text Effect

Post pobrano z: How to Make a Photoshop Action to Create a Stitched Jeans Text Effect

Final product image
What You’ll Be Creating

In this tutorial, I’ll show you how to create your own denim texture using filters in Adobe Photoshop and then how to create an action for the stitched jeans text effect.

This action is based on Stitched Leather and Jeans Actions from Envato Market.
These actions transform any text or shape into a stitched leather or jeans type.

Leather and jeans actions

Tutorial Assets

The following assets were used during this Photoshop action tutorial:

1. How to Create a Denim Texture

First of all, I’ll show you how you can create your own denim texture using Photoshop filters. If you prefer, you can skip these steps and download the denim texture from the tutorial assets.

Step 1

Start Adobe Photoshop and open a new document (Control-N) with 1024 x 1024 px and a resolution of 72 DPI. Then go to Filter > Filter Gallery… and select Halftone Pattern from the Sketch folder and use these settings:

  • Size: 2
  • Contrast: 20
  • Pattern Type: Dot

Hit OK.

Add halftone pattern

Step 2

Go to Filter > Pixelate > Mezzotint…, set Type to Fine Dots, and hit OK. Then go to Filter > Blur > Motion Blur…, and set the Angle to -45° and the Distance to 20 px. Hit OK.

Add mezzotint and blur

Step 3

Go to Filter > Noise > Add Noise, and set the Amount to 10% and Distribution to Gaussian. Check the Monochromatic box and hit OK. Then go to Filter > Blur > Gaussian Blur, set the Radius to 0.5 px, and hit OK.

Add noise and blur

Step 4

Go to Layer > New Adjustment Layer > Levels and set Inputs to 210.52199 and Outputs to 53163. Then select the Background layer and go to Edit > Define Pattern, change the name to denim-texture, and hit OK.

Done. You have just created your own denim texture which we will use in our Photoshop action. We could finish it with a blue color overlay, but I like to leave it in shades of gray, which lets you change the texture to any color later.

Add levels

2. How to Set the Background and Add Text

For this Photoshop action, I chose the wood planks background, which you can get from the tutorial assets, but it is not mandatory for the action to work.

Step 1

Open the wood planks image (Control-O). Then hit Control-Alt-I, change the Resolution to 72 Pixels/Inch and the Width to 850 px, and hit OK.

Set the background

Step 2

Take your Type tool (T), change the font to Varsity Team Bold, and set the Size to 450 pt. Then write „JB” on your artboard.

Type the text

3. How to Start Recording a Photoshop Action

Now we are going to start recording a Photoshop action. It’s important to follow the steps in order and to avoid unnecessary mouse clicks and keystrokes.

Step 1

Hit Alt-F9 to open your Actions panel. At the bottom of this panel, hit the Create new set icon, name it Jeans Action, and hit OK. Then hit the Create new action icon next to it and name it Start. Now hit the Record button and start recording the Photoshop action.

Start recording an action

Step 2

To start off our Photoshop action, right-click on the JB layer in your Layers panel and select Duplicate Layer, name it jeans-base, and hit OK. Then right-click on the jeans-base layer and select Duplicate Layer again, name it jeans-rim, and hit OK.

Duplicate layers

4. How to Create and Style the Jeans Rim

Step 1

Right-click on the jeans-rim layer and select Blending Options. Then set the Fill Opacity to 0%.

Add blending options

Step 2

Add a Stroke with Size of 16 px, set the Position to Outside, and hit OK. Then right-click the jeans-rim layer and select Convert to Smart Object.

Add a stroke

Step 3

Right-click on the jeans-rim layer and select Blending Options again. Now add a Bevel and Emboss with these settings:

  • Style: Inner Bevel
  • Technique: Smooth
  • Depth: 888%
  • Direction: Down
  • Size: 2 px
  • Soften: 0 px
  • Uncheck the Use Global Light box
  • Angle: 135°
  • Altitude: 30°
  • Highlight Mode: Linear Burn with color #000000
  • Highlight Mode – Opacity: 27%
  • Highlight Mode: Color Dodge with color #ffffff
  • Shadow Mode – Opacity: 44%
Add a bevel and emboss

Step 4

Add a Texture for the Bevel and Emboss with these settings:

  • Pattern: denim-texture (the one you have created before)
  • Scale: 50%
  • Depth: 95%
Add a texture

Step 5

Add an Inner Shadow with these settings:

  • Color: #6b6b6b
  • Uncheck the Use Global Light box
  • Angle: -45°
  • Distance: 6 px
  • Choke: 45%
  • Size: 5 px
  • Check the Anti-aliased box
Add an inner shadow

Step 6

Add a Color Overlay with these settings:

  • Blend Mode: Overlay
  • Color: #224d66
  • Opacity: 80%
Add a color overlay

Step 7

Add a Pattern Overlay with these settings:

  • Blend Mode: Normal
  • Opacity: 100%
  • Pattern: denim-texture
  • Scale: 50%
Add a pattern overlay

Step 8

Finally, add a Drop Shadow to our Photoshop text effect with these settings:

  • Blend Mode: Multiply
  • Color: #000000
  • Opacity: 80%
  • Uncheck the Use Global Light box
  • Angle: 90°
  • Distance: 2 px
  • Spread: 0%
  • Size: 3 px
  • Check the Anti-aliased box

Hit OK to apply the text effect.

Add a drop shadow

This is the result of the text effect applied to our Photoshop action.

Partial result

5. How to Create and Style the Jeans Main Layer

Step 1

Select the jeans-base layer in your Layers panel. Right-click on it and select Blending Options. Now add a Stroke with Size of 15 px, change Position to Outside, and hit OK. Then right-click this layer again and select Convert to Smart Object.

Add a stroke

Step 2

Right-click on the jeans-base layer and select Blending Options again. Now add a Bevel and Emboss with these settings:

  • Style: Inner Bevel
  • Technique: Smooth
  • Depth: 100%
  • Direction: Up
  • Size: 49 px
  • Soften: 0 px
  • Uncheck the Use Global Light box
  • Angle: 180°
  • Altitude: 30°
  • Check the Anti-aliased box
  • Highlight Mode: Color Dodge with color #ffffff
  • Highlight Mode – Opacity: 30%
  • Highlight Mode: Linear Burn with color #000000
  • Shadow Mode – Opacity: 13%
Add a bevel and emboss

Step 3

Add an Inner Shadow with these settings:

  • Blend Mode: Multiply
  • Color: #7a7a7a
  • Uncheck the Use Global Light box
  • Angle: 132°
  • Distance: 0 px
  • Choke: 18%
  • Size: 35 px
  • Check the Anti-aliased box
Add an inner shadow

Step 4

Add an Inner Glow with these settings:

  • Blend Mode: Linear Burn
  • Opacity: 24%
  • Color: #6a6a6a
  • Technique: Softer
  • Source: Edge
  • Choke: 60%
  • Size: 38 px
  • Check the Anti-aliased box
Add an inner glow

Step 5

Add a Satin style with these settings:

  • Blend Mode: Linear Burn
  • Color: #000000
  • Opacity: 13%
  • Angle:
  • Distance: 45 px
  • Size: 46 px
  • Check the Anti-aliased box
  • Check the Invert box
Add a satin

Step 6

Add a Color Overlay with these settings:

  • Blend Mode: Overlay
  • Color: #224d66
  • Opacity: 80%
Add a color overlay

Step 7

Add a Pattern Overlay with these settings:

  • Blend Mode: Normal
  • Opacity: 100%
  • Pattern: denim-texture
  • Scale: 50%
Add a pattern overlay

Step 8

Finally, add a Drop Shadow to our Photoshop text effect with these settings:

  • Blend Mode: Multiply
  • Color: #000000
  • Opacity: 36%
  • Uncheck the Use Global Light box
  • Angle: 105°
  • Distance: 9 px
  • Spread: 11%
  • Size: 8 px
  • Check the Anti-aliased box

Hit OK to apply the text effect.

Add a drop shadow

And this is the result of the text effect applied to our Photoshop action.

Partial result

6. How to Add and Style the Jeans Stitch

We are almost done with our Photoshop action. The last thing we need to add is a cool stitch to this text effect. So let’s do it.

Step 1

Create a new layer by going to Layer > New > Layer and name it stitch. Then Controlclick the jeans-base layer to make a selection. Go to Select > Modify > Contract, set the value to 24 px, and hit OK. Finally, go to your Paths panel and click the Make work path from selection icon at the bottom.

Create a work path

Step 2

Select your Brush Tool (B) and select jeans-stitch from the tutorial assets as your brush. Then right-click on the Work Path layer in Paths panel and select Stroke Path…, choose Brush as your tool, and hit OK. Lastly, hit Delete to delete the work path layer.

Stroke the path

Step 3

Right-click on the stitch layer and select Blending Options. Then add a Bevel and Emboss with these settings:

  • Style: Pillow Emboss
  • Technique: Smooth
  • Depth: 200%
  • Direction: Up
  • Size: 9 px
  • Soften: 5 px
  • Uncheck the Use Global Light box
  • Angle: 90°
  • Altitude: 30°
  • Check the Anti-aliased box
  • Highlight Mode: Linear Dodge (Add) with color #ffffff
  • Highlight Mode – Opacity: 24%
  • Highlight Mode: Linear Burn with color #000000
  • Shadow Mode – Opacity: 18%
Add a bevel and emboss

Step 4

Add a Color Overlay and choose the color #d19f5f. Then hit OK to apply the text effect. Now go back to your Actions panel and hit the Stop button at the bottom to stop recording this Photoshop action.

Add a color overlay

Congratulations! You’re Done!

In this tutorial, you learned how to create a Photoshop action for a jeans text effect and also how to create your own denim texture using Photoshop filters.

We started by creating the main denim texture, and then we recorded an action for the jeans text effect using layer styles and a stitch brush.

Final result

I hope you have enjoyed this Photoshop action tutorial. Please feel free to leave your
comments, suggestions, and outcomes below. The text effect action we just
created is based on Stitched Leather and Jeans Actions.

Leather and jeans actions

Looking for more? I recommend the following tutorials:

How to Make a Photoshop Action to Create a Stitched Jeans Text Effect

Post pobrano z: How to Make a Photoshop Action to Create a Stitched Jeans Text Effect

Final product image
What You’ll Be Creating

In this tutorial, I’ll show you how to create your own denim texture using filters in Adobe Photoshop and then how to create an action for the stitched jeans text effect.

This action is based on Stitched Leather and Jeans Actions from Envato Market.
These actions transform any text or shape into a stitched leather or jeans type.

Leather and jeans actions

Tutorial Assets

The following assets were used during this Photoshop action tutorial:

1. How to Create a Denim Texture

First of all, I’ll show you how you can create your own denim texture using Photoshop filters. If you prefer, you can skip these steps and download the denim texture from the tutorial assets.

Step 1

Start Adobe Photoshop and open a new document (Control-N) with 1024 x 1024 px and a resolution of 72 DPI. Then go to Filter > Filter Gallery… and select Halftone Pattern from the Sketch folder and use these settings:

  • Size: 2
  • Contrast: 20
  • Pattern Type: Dot

Hit OK.

Add halftone pattern

Step 2

Go to Filter > Pixelate > Mezzotint…, set Type to Fine Dots, and hit OK. Then go to Filter > Blur > Motion Blur…, and set the Angle to -45° and the Distance to 20 px. Hit OK.

Add mezzotint and blur

Step 3

Go to Filter > Noise > Add Noise, and set the Amount to 10% and Distribution to Gaussian. Check the Monochromatic box and hit OK. Then go to Filter > Blur > Gaussian Blur, set the Radius to 0.5 px, and hit OK.

Add noise and blur

Step 4

Go to Layer > New Adjustment Layer > Levels and set Inputs to 210.52199 and Outputs to 53163. Then select the Background layer and go to Edit > Define Pattern, change the name to denim-texture, and hit OK.

Done. You have just created your own denim texture which we will use in our Photoshop action. We could finish it with a blue color overlay, but I like to leave it in shades of gray, which lets you change the texture to any color later.

Add levels

2. How to Set the Background and Add Text

For this Photoshop action, I chose the wood planks background, which you can get from the tutorial assets, but it is not mandatory for the action to work.

Step 1

Open the wood planks image (Control-O). Then hit Control-Alt-I, change the Resolution to 72 Pixels/Inch and the Width to 850 px, and hit OK.

Set the background

Step 2

Take your Type tool (T), change the font to Varsity Team Bold, and set the Size to 450 pt. Then write „JB” on your artboard.

Type the text

3. How to Start Recording a Photoshop Action

Now we are going to start recording a Photoshop action. It’s important to follow the steps in order and to avoid unnecessary mouse clicks and keystrokes.

Step 1

Hit Alt-F9 to open your Actions panel. At the bottom of this panel, hit the Create new set icon, name it Jeans Action, and hit OK. Then hit the Create new action icon next to it and name it Start. Now hit the Record button and start recording the Photoshop action.

Start recording an action

Step 2

To start off our Photoshop action, right-click on the JB layer in your Layers panel and select Duplicate Layer, name it jeans-base, and hit OK. Then right-click on the jeans-base layer and select Duplicate Layer again, name it jeans-rim, and hit OK.

Duplicate layers

4. How to Create and Style the Jeans Rim

Step 1

Right-click on the jeans-rim layer and select Blending Options. Then set the Fill Opacity to 0%.

Add blending options

Step 2

Add a Stroke with Size of 16 px, set the Position to Outside, and hit OK. Then right-click the jeans-rim layer and select Convert to Smart Object.

Add a stroke

Step 3

Right-click on the jeans-rim layer and select Blending Options again. Now add a Bevel and Emboss with these settings:

  • Style: Inner Bevel
  • Technique: Smooth
  • Depth: 888%
  • Direction: Down
  • Size: 2 px
  • Soften: 0 px
  • Uncheck the Use Global Light box
  • Angle: 135°
  • Altitude: 30°
  • Highlight Mode: Linear Burn with color #000000
  • Highlight Mode – Opacity: 27%
  • Highlight Mode: Color Dodge with color #ffffff
  • Shadow Mode – Opacity: 44%
Add a bevel and emboss

Step 4

Add a Texture for the Bevel and Emboss with these settings:

  • Pattern: denim-texture (the one you have created before)
  • Scale: 50%
  • Depth: 95%
Add a texture

Step 5

Add an Inner Shadow with these settings:

  • Color: #6b6b6b
  • Uncheck the Use Global Light box
  • Angle: -45°
  • Distance: 6 px
  • Choke: 45%
  • Size: 5 px
  • Check the Anti-aliased box
Add an inner shadow

Step 6

Add a Color Overlay with these settings:

  • Blend Mode: Overlay
  • Color: #224d66
  • Opacity: 80%
Add a color overlay

Step 7

Add a Pattern Overlay with these settings:

  • Blend Mode: Normal
  • Opacity: 100%
  • Pattern: denim-texture
  • Scale: 50%
Add a pattern overlay

Step 8

Finally, add a Drop Shadow to our Photoshop text effect with these settings:

  • Blend Mode: Multiply
  • Color: #000000
  • Opacity: 80%
  • Uncheck the Use Global Light box
  • Angle: 90°
  • Distance: 2 px
  • Spread: 0%
  • Size: 3 px
  • Check the Anti-aliased box

Hit OK to apply the text effect.

Add a drop shadow

This is the result of the text effect applied to our Photoshop action.

Partial result

5. How to Create and Style the Jeans Main Layer

Step 1

Select the jeans-base layer in your Layers panel. Right-click on it and select Blending Options. Now add a Stroke with Size of 15 px, change Position to Outside, and hit OK. Then right-click this layer again and select Convert to Smart Object.

Add a stroke

Step 2

Right-click on the jeans-base layer and select Blending Options again. Now add a Bevel and Emboss with these settings:

  • Style: Inner Bevel
  • Technique: Smooth
  • Depth: 100%
  • Direction: Up
  • Size: 49 px
  • Soften: 0 px
  • Uncheck the Use Global Light box
  • Angle: 180°
  • Altitude: 30°
  • Check the Anti-aliased box
  • Highlight Mode: Color Dodge with color #ffffff
  • Highlight Mode – Opacity: 30%
  • Highlight Mode: Linear Burn with color #000000
  • Shadow Mode – Opacity: 13%
Add a bevel and emboss

Step 3

Add an Inner Shadow with these settings:

  • Blend Mode: Multiply
  • Color: #7a7a7a
  • Uncheck the Use Global Light box
  • Angle: 132°
  • Distance: 0 px
  • Choke: 18%
  • Size: 35 px
  • Check the Anti-aliased box
Add an inner shadow

Step 4

Add an Inner Glow with these settings:

  • Blend Mode: Linear Burn
  • Opacity: 24%
  • Color: #6a6a6a
  • Technique: Softer
  • Source: Edge
  • Choke: 60%
  • Size: 38 px
  • Check the Anti-aliased box
Add an inner glow

Step 5

Add a Satin style with these settings:

  • Blend Mode: Linear Burn
  • Color: #000000
  • Opacity: 13%
  • Angle:
  • Distance: 45 px
  • Size: 46 px
  • Check the Anti-aliased box
  • Check the Invert box
Add a satin

Step 6

Add a Color Overlay with these settings:

  • Blend Mode: Overlay
  • Color: #224d66
  • Opacity: 80%
Add a color overlay

Step 7

Add a Pattern Overlay with these settings:

  • Blend Mode: Normal
  • Opacity: 100%
  • Pattern: denim-texture
  • Scale: 50%
Add a pattern overlay

Step 8

Finally, add a Drop Shadow to our Photoshop text effect with these settings:

  • Blend Mode: Multiply
  • Color: #000000
  • Opacity: 36%
  • Uncheck the Use Global Light box
  • Angle: 105°
  • Distance: 9 px
  • Spread: 11%
  • Size: 8 px
  • Check the Anti-aliased box

Hit OK to apply the text effect.

Add a drop shadow

And this is the result of the text effect applied to our Photoshop action.

Partial result

6. How to Add and Style the Jeans Stitch

We are almost done with our Photoshop action. The last thing we need to add is a cool stitch to this text effect. So let’s do it.

Step 1

Create a new layer by going to Layer > New > Layer and name it stitch. Then Controlclick the jeans-base layer to make a selection. Go to Select > Modify > Contract, set the value to 24 px, and hit OK. Finally, go to your Paths panel and click the Make work path from selection icon at the bottom.

Create a work path

Step 2

Select your Brush Tool (B) and select jeans-stitch from the tutorial assets as your brush. Then right-click on the Work Path layer in Paths panel and select Stroke Path…, choose Brush as your tool, and hit OK. Lastly, hit Delete to delete the work path layer.

Stroke the path

Step 3

Right-click on the stitch layer and select Blending Options. Then add a Bevel and Emboss with these settings:

  • Style: Pillow Emboss
  • Technique: Smooth
  • Depth: 200%
  • Direction: Up
  • Size: 9 px
  • Soften: 5 px
  • Uncheck the Use Global Light box
  • Angle: 90°
  • Altitude: 30°
  • Check the Anti-aliased box
  • Highlight Mode: Linear Dodge (Add) with color #ffffff
  • Highlight Mode – Opacity: 24%
  • Highlight Mode: Linear Burn with color #000000
  • Shadow Mode – Opacity: 18%
Add a bevel and emboss

Step 4

Add a Color Overlay and choose the color #d19f5f. Then hit OK to apply the text effect. Now go back to your Actions panel and hit the Stop button at the bottom to stop recording this Photoshop action.

Add a color overlay

Congratulations! You’re Done!

In this tutorial, you learned how to create a Photoshop action for a jeans text effect and also how to create your own denim texture using Photoshop filters.

We started by creating the main denim texture, and then we recorded an action for the jeans text effect using layer styles and a stitch brush.

Final result

I hope you have enjoyed this Photoshop action tutorial. Please feel free to leave your
comments, suggestions, and outcomes below. The text effect action we just
created is based on Stitched Leather and Jeans Actions.

Leather and jeans actions

Looking for more? I recommend the following tutorials:

How to Make a Photoshop Action to Create a Stitched Jeans Text Effect

Post pobrano z: How to Make a Photoshop Action to Create a Stitched Jeans Text Effect

Final product image
What You’ll Be Creating

In this tutorial, I’ll show you how to create your own denim texture using filters in Adobe Photoshop and then how to create an action for the stitched jeans text effect.

This action is based on Stitched Leather and Jeans Actions from Envato Market.
These actions transform any text or shape into a stitched leather or jeans type.

Leather and jeans actions

Tutorial Assets

The following assets were used during this Photoshop action tutorial:

1. How to Create a Denim Texture

First of all, I’ll show you how you can create your own denim texture using Photoshop filters. If you prefer, you can skip these steps and download the denim texture from the tutorial assets.

Step 1

Start Adobe Photoshop and open a new document (Control-N) with 1024 x 1024 px and a resolution of 72 DPI. Then go to Filter > Filter Gallery… and select Halftone Pattern from the Sketch folder and use these settings:

  • Size: 2
  • Contrast: 20
  • Pattern Type: Dot

Hit OK.

Add halftone pattern

Step 2

Go to Filter > Pixelate > Mezzotint…, set Type to Fine Dots, and hit OK. Then go to Filter > Blur > Motion Blur…, and set the Angle to -45° and the Distance to 20 px. Hit OK.

Add mezzotint and blur

Step 3

Go to Filter > Noise > Add Noise, and set the Amount to 10% and Distribution to Gaussian. Check the Monochromatic box and hit OK. Then go to Filter > Blur > Gaussian Blur, set the Radius to 0.5 px, and hit OK.

Add noise and blur

Step 4

Go to Layer > New Adjustment Layer > Levels and set Inputs to 210.52199 and Outputs to 53163. Then select the Background layer and go to Edit > Define Pattern, change the name to denim-texture, and hit OK.

Done. You have just created your own denim texture which we will use in our Photoshop action. We could finish it with a blue color overlay, but I like to leave it in shades of gray, which lets you change the texture to any color later.

Add levels

2. How to Set the Background and Add Text

For this Photoshop action, I chose the wood planks background, which you can get from the tutorial assets, but it is not mandatory for the action to work.

Step 1

Open the wood planks image (Control-O). Then hit Control-Alt-I, change the Resolution to 72 Pixels/Inch and the Width to 850 px, and hit OK.

Set the background

Step 2

Take your Type tool (T), change the font to Varsity Team Bold, and set the Size to 450 pt. Then write „JB” on your artboard.

Type the text

3. How to Start Recording a Photoshop Action

Now we are going to start recording a Photoshop action. It’s important to follow the steps in order and to avoid unnecessary mouse clicks and keystrokes.

Step 1

Hit Alt-F9 to open your Actions panel. At the bottom of this panel, hit the Create new set icon, name it Jeans Action, and hit OK. Then hit the Create new action icon next to it and name it Start. Now hit the Record button and start recording the Photoshop action.

Start recording an action

Step 2

To start off our Photoshop action, right-click on the JB layer in your Layers panel and select Duplicate Layer, name it jeans-base, and hit OK. Then right-click on the jeans-base layer and select Duplicate Layer again, name it jeans-rim, and hit OK.

Duplicate layers

4. How to Create and Style the Jeans Rim

Step 1

Right-click on the jeans-rim layer and select Blending Options. Then set the Fill Opacity to 0%.

Add blending options

Step 2

Add a Stroke with Size of 16 px, set the Position to Outside, and hit OK. Then right-click the jeans-rim layer and select Convert to Smart Object.

Add a stroke

Step 3

Right-click on the jeans-rim layer and select Blending Options again. Now add a Bevel and Emboss with these settings:

  • Style: Inner Bevel
  • Technique: Smooth
  • Depth: 888%
  • Direction: Down
  • Size: 2 px
  • Soften: 0 px
  • Uncheck the Use Global Light box
  • Angle: 135°
  • Altitude: 30°
  • Highlight Mode: Linear Burn with color #000000
  • Highlight Mode – Opacity: 27%
  • Highlight Mode: Color Dodge with color #ffffff
  • Shadow Mode – Opacity: 44%
Add a bevel and emboss

Step 4

Add a Texture for the Bevel and Emboss with these settings:

  • Pattern: denim-texture (the one you have created before)
  • Scale: 50%
  • Depth: 95%
Add a texture

Step 5

Add an Inner Shadow with these settings:

  • Color: #6b6b6b
  • Uncheck the Use Global Light box
  • Angle: -45°
  • Distance: 6 px
  • Choke: 45%
  • Size: 5 px
  • Check the Anti-aliased box
Add an inner shadow

Step 6

Add a Color Overlay with these settings:

  • Blend Mode: Overlay
  • Color: #224d66
  • Opacity: 80%
Add a color overlay

Step 7

Add a Pattern Overlay with these settings:

  • Blend Mode: Normal
  • Opacity: 100%
  • Pattern: denim-texture
  • Scale: 50%
Add a pattern overlay

Step 8

Finally, add a Drop Shadow to our Photoshop text effect with these settings:

  • Blend Mode: Multiply
  • Color: #000000
  • Opacity: 80%
  • Uncheck the Use Global Light box
  • Angle: 90°
  • Distance: 2 px
  • Spread: 0%
  • Size: 3 px
  • Check the Anti-aliased box

Hit OK to apply the text effect.

Add a drop shadow

This is the result of the text effect applied to our Photoshop action.

Partial result

5. How to Create and Style the Jeans Main Layer

Step 1

Select the jeans-base layer in your Layers panel. Right-click on it and select Blending Options. Now add a Stroke with Size of 15 px, change Position to Outside, and hit OK. Then right-click this layer again and select Convert to Smart Object.

Add a stroke

Step 2

Right-click on the jeans-base layer and select Blending Options again. Now add a Bevel and Emboss with these settings:

  • Style: Inner Bevel
  • Technique: Smooth
  • Depth: 100%
  • Direction: Up
  • Size: 49 px
  • Soften: 0 px
  • Uncheck the Use Global Light box
  • Angle: 180°
  • Altitude: 30°
  • Check the Anti-aliased box
  • Highlight Mode: Color Dodge with color #ffffff
  • Highlight Mode – Opacity: 30%
  • Highlight Mode: Linear Burn with color #000000
  • Shadow Mode – Opacity: 13%
Add a bevel and emboss

Step 3

Add an Inner Shadow with these settings:

  • Blend Mode: Multiply
  • Color: #7a7a7a
  • Uncheck the Use Global Light box
  • Angle: 132°
  • Distance: 0 px
  • Choke: 18%
  • Size: 35 px
  • Check the Anti-aliased box
Add an inner shadow

Step 4

Add an Inner Glow with these settings:

  • Blend Mode: Linear Burn
  • Opacity: 24%
  • Color: #6a6a6a
  • Technique: Softer
  • Source: Edge
  • Choke: 60%
  • Size: 38 px
  • Check the Anti-aliased box
Add an inner glow

Step 5

Add a Satin style with these settings:

  • Blend Mode: Linear Burn
  • Color: #000000
  • Opacity: 13%
  • Angle:
  • Distance: 45 px
  • Size: 46 px
  • Check the Anti-aliased box
  • Check the Invert box
Add a satin

Step 6

Add a Color Overlay with these settings:

  • Blend Mode: Overlay
  • Color: #224d66
  • Opacity: 80%
Add a color overlay

Step 7

Add a Pattern Overlay with these settings:

  • Blend Mode: Normal
  • Opacity: 100%
  • Pattern: denim-texture
  • Scale: 50%
Add a pattern overlay

Step 8

Finally, add a Drop Shadow to our Photoshop text effect with these settings:

  • Blend Mode: Multiply
  • Color: #000000
  • Opacity: 36%
  • Uncheck the Use Global Light box
  • Angle: 105°
  • Distance: 9 px
  • Spread: 11%
  • Size: 8 px
  • Check the Anti-aliased box

Hit OK to apply the text effect.

Add a drop shadow

And this is the result of the text effect applied to our Photoshop action.

Partial result

6. How to Add and Style the Jeans Stitch

We are almost done with our Photoshop action. The last thing we need to add is a cool stitch to this text effect. So let’s do it.

Step 1

Create a new layer by going to Layer > New > Layer and name it stitch. Then Controlclick the jeans-base layer to make a selection. Go to Select > Modify > Contract, set the value to 24 px, and hit OK. Finally, go to your Paths panel and click the Make work path from selection icon at the bottom.

Create a work path

Step 2

Select your Brush Tool (B) and select jeans-stitch from the tutorial assets as your brush. Then right-click on the Work Path layer in Paths panel and select Stroke Path…, choose Brush as your tool, and hit OK. Lastly, hit Delete to delete the work path layer.

Stroke the path

Step 3

Right-click on the stitch layer and select Blending Options. Then add a Bevel and Emboss with these settings:

  • Style: Pillow Emboss
  • Technique: Smooth
  • Depth: 200%
  • Direction: Up
  • Size: 9 px
  • Soften: 5 px
  • Uncheck the Use Global Light box
  • Angle: 90°
  • Altitude: 30°
  • Check the Anti-aliased box
  • Highlight Mode: Linear Dodge (Add) with color #ffffff
  • Highlight Mode – Opacity: 24%
  • Highlight Mode: Linear Burn with color #000000
  • Shadow Mode – Opacity: 18%
Add a bevel and emboss

Step 4

Add a Color Overlay and choose the color #d19f5f. Then hit OK to apply the text effect. Now go back to your Actions panel and hit the Stop button at the bottom to stop recording this Photoshop action.

Add a color overlay

Congratulations! You’re Done!

In this tutorial, you learned how to create a Photoshop action for a jeans text effect and also how to create your own denim texture using Photoshop filters.

We started by creating the main denim texture, and then we recorded an action for the jeans text effect using layer styles and a stitch brush.

Final result

I hope you have enjoyed this Photoshop action tutorial. Please feel free to leave your
comments, suggestions, and outcomes below. The text effect action we just
created is based on Stitched Leather and Jeans Actions.

Leather and jeans actions

Looking for more? I recommend the following tutorials:

How to Make a Photoshop Action to Create a Stitched Jeans Text Effect

Post pobrano z: How to Make a Photoshop Action to Create a Stitched Jeans Text Effect

Final product image
What You’ll Be Creating

In this tutorial, I’ll show you how to create your own denim texture using filters in Adobe Photoshop and then how to create an action for the stitched jeans text effect.

This action is based on Stitched Leather and Jeans Actions from Envato Market.
These actions transform any text or shape into a stitched leather or jeans type.

Leather and jeans actions

Tutorial Assets

The following assets were used during this Photoshop action tutorial:

1. How to Create a Denim Texture

First of all, I’ll show you how you can create your own denim texture using Photoshop filters. If you prefer, you can skip these steps and download the denim texture from the tutorial assets.

Step 1

Start Adobe Photoshop and open a new document (Control-N) with 1024 x 1024 px and a resolution of 72 DPI. Then go to Filter > Filter Gallery… and select Halftone Pattern from the Sketch folder and use these settings:

  • Size: 2
  • Contrast: 20
  • Pattern Type: Dot

Hit OK.

Add halftone pattern

Step 2

Go to Filter > Pixelate > Mezzotint…, set Type to Fine Dots, and hit OK. Then go to Filter > Blur > Motion Blur…, and set the Angle to -45° and the Distance to 20 px. Hit OK.

Add mezzotint and blur

Step 3

Go to Filter > Noise > Add Noise, and set the Amount to 10% and Distribution to Gaussian. Check the Monochromatic box and hit OK. Then go to Filter > Blur > Gaussian Blur, set the Radius to 0.5 px, and hit OK.

Add noise and blur

Step 4

Go to Layer > New Adjustment Layer > Levels and set Inputs to 210.52199 and Outputs to 53163. Then select the Background layer and go to Edit > Define Pattern, change the name to denim-texture, and hit OK.

Done. You have just created your own denim texture which we will use in our Photoshop action. We could finish it with a blue color overlay, but I like to leave it in shades of gray, which lets you change the texture to any color later.

Add levels

2. How to Set the Background and Add Text

For this Photoshop action, I chose the wood planks background, which you can get from the tutorial assets, but it is not mandatory for the action to work.

Step 1

Open the wood planks image (Control-O). Then hit Control-Alt-I, change the Resolution to 72 Pixels/Inch and the Width to 850 px, and hit OK.

Set the background

Step 2

Take your Type tool (T), change the font to Varsity Team Bold, and set the Size to 450 pt. Then write „JB” on your artboard.

Type the text

3. How to Start Recording a Photoshop Action

Now we are going to start recording a Photoshop action. It’s important to follow the steps in order and to avoid unnecessary mouse clicks and keystrokes.

Step 1

Hit Alt-F9 to open your Actions panel. At the bottom of this panel, hit the Create new set icon, name it Jeans Action, and hit OK. Then hit the Create new action icon next to it and name it Start. Now hit the Record button and start recording the Photoshop action.

Start recording an action

Step 2

To start off our Photoshop action, right-click on the JB layer in your Layers panel and select Duplicate Layer, name it jeans-base, and hit OK. Then right-click on the jeans-base layer and select Duplicate Layer again, name it jeans-rim, and hit OK.

Duplicate layers

4. How to Create and Style the Jeans Rim

Step 1

Right-click on the jeans-rim layer and select Blending Options. Then set the Fill Opacity to 0%.

Add blending options

Step 2

Add a Stroke with Size of 16 px, set the Position to Outside, and hit OK. Then right-click the jeans-rim layer and select Convert to Smart Object.

Add a stroke

Step 3

Right-click on the jeans-rim layer and select Blending Options again. Now add a Bevel and Emboss with these settings:

  • Style: Inner Bevel
  • Technique: Smooth
  • Depth: 888%
  • Direction: Down
  • Size: 2 px
  • Soften: 0 px
  • Uncheck the Use Global Light box
  • Angle: 135°
  • Altitude: 30°
  • Highlight Mode: Linear Burn with color #000000
  • Highlight Mode – Opacity: 27%
  • Highlight Mode: Color Dodge with color #ffffff
  • Shadow Mode – Opacity: 44%
Add a bevel and emboss

Step 4

Add a Texture for the Bevel and Emboss with these settings:

  • Pattern: denim-texture (the one you have created before)
  • Scale: 50%
  • Depth: 95%
Add a texture

Step 5

Add an Inner Shadow with these settings:

  • Color: #6b6b6b
  • Uncheck the Use Global Light box
  • Angle: -45°
  • Distance: 6 px
  • Choke: 45%
  • Size: 5 px
  • Check the Anti-aliased box
Add an inner shadow

Step 6

Add a Color Overlay with these settings:

  • Blend Mode: Overlay
  • Color: #224d66
  • Opacity: 80%
Add a color overlay

Step 7

Add a Pattern Overlay with these settings:

  • Blend Mode: Normal
  • Opacity: 100%
  • Pattern: denim-texture
  • Scale: 50%
Add a pattern overlay

Step 8

Finally, add a Drop Shadow to our Photoshop text effect with these settings:

  • Blend Mode: Multiply
  • Color: #000000
  • Opacity: 80%
  • Uncheck the Use Global Light box
  • Angle: 90°
  • Distance: 2 px
  • Spread: 0%
  • Size: 3 px
  • Check the Anti-aliased box

Hit OK to apply the text effect.

Add a drop shadow

This is the result of the text effect applied to our Photoshop action.

Partial result

5. How to Create and Style the Jeans Main Layer

Step 1

Select the jeans-base layer in your Layers panel. Right-click on it and select Blending Options. Now add a Stroke with Size of 15 px, change Position to Outside, and hit OK. Then right-click this layer again and select Convert to Smart Object.

Add a stroke

Step 2

Right-click on the jeans-base layer and select Blending Options again. Now add a Bevel and Emboss with these settings:

  • Style: Inner Bevel
  • Technique: Smooth
  • Depth: 100%
  • Direction: Up
  • Size: 49 px
  • Soften: 0 px
  • Uncheck the Use Global Light box
  • Angle: 180°
  • Altitude: 30°
  • Check the Anti-aliased box
  • Highlight Mode: Color Dodge with color #ffffff
  • Highlight Mode – Opacity: 30%
  • Highlight Mode: Linear Burn with color #000000
  • Shadow Mode – Opacity: 13%
Add a bevel and emboss

Step 3

Add an Inner Shadow with these settings:

  • Blend Mode: Multiply
  • Color: #7a7a7a
  • Uncheck the Use Global Light box
  • Angle: 132°
  • Distance: 0 px
  • Choke: 18%
  • Size: 35 px
  • Check the Anti-aliased box
Add an inner shadow

Step 4

Add an Inner Glow with these settings:

  • Blend Mode: Linear Burn
  • Opacity: 24%
  • Color: #6a6a6a
  • Technique: Softer
  • Source: Edge
  • Choke: 60%
  • Size: 38 px
  • Check the Anti-aliased box
Add an inner glow

Step 5

Add a Satin style with these settings:

  • Blend Mode: Linear Burn
  • Color: #000000
  • Opacity: 13%
  • Angle:
  • Distance: 45 px
  • Size: 46 px
  • Check the Anti-aliased box
  • Check the Invert box
Add a satin

Step 6

Add a Color Overlay with these settings:

  • Blend Mode: Overlay
  • Color: #224d66
  • Opacity: 80%
Add a color overlay

Step 7

Add a Pattern Overlay with these settings:

  • Blend Mode: Normal
  • Opacity: 100%
  • Pattern: denim-texture
  • Scale: 50%
Add a pattern overlay

Step 8

Finally, add a Drop Shadow to our Photoshop text effect with these settings:

  • Blend Mode: Multiply
  • Color: #000000
  • Opacity: 36%
  • Uncheck the Use Global Light box
  • Angle: 105°
  • Distance: 9 px
  • Spread: 11%
  • Size: 8 px
  • Check the Anti-aliased box

Hit OK to apply the text effect.

Add a drop shadow

And this is the result of the text effect applied to our Photoshop action.

Partial result

6. How to Add and Style the Jeans Stitch

We are almost done with our Photoshop action. The last thing we need to add is a cool stitch to this text effect. So let’s do it.

Step 1

Create a new layer by going to Layer > New > Layer and name it stitch. Then Controlclick the jeans-base layer to make a selection. Go to Select > Modify > Contract, set the value to 24 px, and hit OK. Finally, go to your Paths panel and click the Make work path from selection icon at the bottom.

Create a work path

Step 2

Select your Brush Tool (B) and select jeans-stitch from the tutorial assets as your brush. Then right-click on the Work Path layer in Paths panel and select Stroke Path…, choose Brush as your tool, and hit OK. Lastly, hit Delete to delete the work path layer.

Stroke the path

Step 3

Right-click on the stitch layer and select Blending Options. Then add a Bevel and Emboss with these settings:

  • Style: Pillow Emboss
  • Technique: Smooth
  • Depth: 200%
  • Direction: Up
  • Size: 9 px
  • Soften: 5 px
  • Uncheck the Use Global Light box
  • Angle: 90°
  • Altitude: 30°
  • Check the Anti-aliased box
  • Highlight Mode: Linear Dodge (Add) with color #ffffff
  • Highlight Mode – Opacity: 24%
  • Highlight Mode: Linear Burn with color #000000
  • Shadow Mode – Opacity: 18%
Add a bevel and emboss

Step 4

Add a Color Overlay and choose the color #d19f5f. Then hit OK to apply the text effect. Now go back to your Actions panel and hit the Stop button at the bottom to stop recording this Photoshop action.

Add a color overlay

Congratulations! You’re Done!

In this tutorial, you learned how to create a Photoshop action for a jeans text effect and also how to create your own denim texture using Photoshop filters.

We started by creating the main denim texture, and then we recorded an action for the jeans text effect using layer styles and a stitch brush.

Final result

I hope you have enjoyed this Photoshop action tutorial. Please feel free to leave your
comments, suggestions, and outcomes below. The text effect action we just
created is based on Stitched Leather and Jeans Actions.

Leather and jeans actions

Looking for more? I recommend the following tutorials: