The one thing we’ve learnt from past curfews: when couples are forced to stay at home for long periods of time, we’ll see the number of births peak roughly nine months later. German furniture retailer, Porta used this statistic to create a cheeky film with an equally cheeky offer: buy a bed now and with the #StayAtHomeBabies campaign, you can get a free crib nine months later.
The one thing we’ve learnt from past curfews: when couples are forced to stay at home for long periods of time, we’ll see the number of births peak roughly nine months later. German furniture retailer, Porta used this statistic to create a cheeky film with an equally cheeky offer: buy a bed now and with the #StayAtHomeBabies campaign, you can get a free crib nine months later.
The one thing we’ve learnt from past curfews: when couples are forced to stay at home for long periods of time, we’ll see the number of births peak roughly nine months later. German furniture retailer, Porta used this statistic to create a cheeky film with an equally cheeky offer: buy a bed now and with the #StayAtHomeBabies campaign, you can get a free crib nine months later.
In this tutorial, we will have a close look at all the available options to convert a video to a GIF animation, and how to optimize its file size.
What is a GIF File?
Before we start, let’s take a closer look at what is a GIF file. GIF is the standard format for compressing images with large areas of solid colors and crisp details like those in line art, logos, or type. Being an 8 bit-depth image format it would have disappeared from the web after the introduction of the JPEG and PNG file formats, but GIF is still a favored web file format thanks to its frame animation feature.
First of all, you will need to open the video file with Photoshop. Most of the time you won’t need the whole sequence for the GIF animation, so you can trim the video by going to Window > Timeline. Turn on the Loop option and try to find a good place to trim your video.
2. How to Reduce the Image Size
You can either reduce the image size, go to Image > Image Size or hit Atl-Control-I keys combination. Your video layer will have to be turned into a Smart Object if you resize the image, but you don’t have to worry about this, it won’t affect our workflow at all.
3. Hot to Save for WEB the GIF File
Another option to reduce the size of the GIF file is „Save for Web” function, you can find it by going to File > Export > Save for Web or use Alt-Shift-Control-S keys combination. My favorite thing about this workflow is that we don’t have to do any conversion on the Timeline panel to be able to save a frame animation, as the Save for Web dialog box will do the work for us once you select the GIF file format as your output. Notice that the Animation options will appear on the bottom right corner of the dialog box. In case you decide to further reduce the size of your image you can still do it here.
4. How to Reduce the Number of Frames
You can also reduce the size of the GIF animation if you reopen the exported GIF back into Photoshop and delete every second or third frame from the Timeline Panel. Then you should select all remaining frames and increase the duration of them to compensate for the loss of frames. If you don’t do this compensation your animation will be played faster than the original. Once you are ready you can save the new version, which should be much smaller than the original.
5. How to Change the Number of Colors of Animated
The most relevant option to optimize the size of a GIF file is the number of colors used in the Color Table. The maximum amount of colors is 256, which comes from the 8 bit-depth limitation. Generally speaking, it is good to stick with 64 colors or less, but depending on the original video you might need to increase the number of colors to get a better result.
6. How to Choose the Color Reduction Algorithm
Perceptual to create a custom color table by giving priority to colors for which the human eye has greater sensitivity.
Selective to create a color table similar to the Perceptual color table, but favoring broad areas of color and the preservation of Web colors. This color table usually produces images with the greatest color integrity. (Selective is the default choice.)
Adaptive to create a custom color table by sampling colors from the spectrum appearing most commonly in the image. For example, an image with only shades of green and blue produces a color table made primarily of greens and blues. Most images concentrate colors in particular areas of the spectrum.
Restrictive uses the standard, 216‑color, web‑safe color table common to the 8‑bit (256‑color) panels of Windows and Mac OS. This option ensures that no browser dither is applied to colors when the image is displayed using 8‑bit color. If your image has fewer than 216 colors, unused colors are removed from the table.
7. How to Use Dithering to Reduce the GIF File Size
Since GIF files contain a limited number of colors, we may want to imitate the missing colors with available ones using the dithering. From the Dither menu, we choose one of the algorithms for such imitation. The Diffusion method lets us adjust the amount of dither. With the Pattern and Noise algorithms, there is nothing to adjust. The more dithering in an image, the larger the file size. Dithering adds different-colored pixels in close proximity to each other to simulate secondary colors or smooth gradations in color. Some images must contain dithering to look good, but it’s best to use the least amount of dithering possible to keep the smallest file size.
8. How to Use Web Snap, Lossy, Transparency and Interlaced Functions
Web Snap is used to help prevent dithering in a browser. It is done by snapping some of the colors to Web-safe colors. The more Web-safe colors present in a GIF, the less browser dithering will result. A value of 0% won’t change any colors while a value of 100% will change all the colors in the image to Web-safe.
Lossy compression discards visual information, which can reduce the file size.
If the image contains Transparency, select Transparency to preserve transparent pixels; deselect Transparency to fill fully and partially transparent pixels with the matte color.
Interlaced GIF files are loaded in a browser in a few passes (like the progressive JPEG’s).
9. How to Compare the Original and Optimized Version of the GIF File
Once you added a lot of custom changes you can check the difference in file size and quality by using the 2-Up view.
10. How to Use Preview, Save Preset and Optimize to File Size
If you are happy with your settings take a look at your final GIF with the Preview option in a browser and don’t forget to save your settings as presets. You can also specify a file size limit with this additional option from Optimize Menu and once this is applied Photoshop will try to fit the size with the best possible image quality.
Which Way of Optimizing the GIF File do You Prefer to Use?
Now you know ten simple ways to optimize your GIF files. I hope this article was helpful to you and if you are looking for GIF related Photoshop products, then check these awesome actions and templates:
If you want to create glitched and VHS-looking animated Instagram stories or animated GIF files from your static pictures, check this Photoshop template, which is extremely easy to use and suitable for any photo.
This awesome Photoshop action will help you to add the trendy animated zombie/grime effect to your photos. In the main archive, you will find one action file, one pattern file and a link to a video tutorial.
If you are looking for something more bright and magic-looking, Gif Animated Sparkles Photoshop Action is the best choice for you. It gives your photos that fabulous and glowing look in a few simples clicks.
This action is one of my favorites as well. It gives you the possibility to create amazing animated posters in Adobe Photoshop, in a synthwave/retrowave styles. An awesome and handy tool to recreate the atmosphere of the 80s.
Want to learn more about GIF creating and editing in Photoshop? Read these awesome tutorials:
In this tutorial, we will have a close look at all the available options to convert a video to a GIF animation, and how to optimize its file size.
What is a GIF File?
Before we start, let’s take a closer look at what is a GIF file. GIF is the standard format for compressing images with large areas of solid colors and crisp details like those in line art, logos, or type. Being an 8 bit-depth image format it would have disappeared from the web after the introduction of the JPEG and PNG file formats, but GIF is still a favored web file format thanks to its frame animation feature.
First of all, you will need to open the video file with Photoshop. Most of the time you won’t need the whole sequence for the GIF animation, so you can trim the video by going to Window > Timeline. Turn on the Loop option and try to find a good place to trim your video.
2. How to Reduce the Image Size
You can either reduce the image size, go to Image > Image Size or hit Atl-Control-I keys combination. Your video layer will have to be turned into a Smart Object if you resize the image, but you don’t have to worry about this, it won’t affect our workflow at all.
3. Hot to Save for WEB the GIF File
Another option to reduce the size of the GIF file is „Save for Web” function, you can find it by going to File > Export > Save for Web or use Alt-Shift-Control-S keys combination. My favorite thing about this workflow is that we don’t have to do any conversion on the Timeline panel to be able to save a frame animation, as the Save for Web dialog box will do the work for us once you select the GIF file format as your output. Notice that the Animation options will appear on the bottom right corner of the dialog box. In case you decide to further reduce the size of your image you can still do it here.
4. How to Reduce the Number of Frames
You can also reduce the size of the GIF animation if you reopen the exported GIF back into Photoshop and delete every second or third frame from the Timeline Panel. Then you should select all remaining frames and increase the duration of them to compensate for the loss of frames. If you don’t do this compensation your animation will be played faster than the original. Once you are ready you can save the new version, which should be much smaller than the original.
5. How to Change the Number of Colors of Animated
The most relevant option to optimize the size of a GIF file is the number of colors used in the Color Table. The maximum amount of colors is 256, which comes from the 8 bit-depth limitation. Generally speaking, it is good to stick with 64 colors or less, but depending on the original video you might need to increase the number of colors to get a better result.
6. How to Choose the Color Reduction Algorithm
Perceptual to create a custom color table by giving priority to colors for which the human eye has greater sensitivity.
Selective to create a color table similar to the Perceptual color table, but favoring broad areas of color and the preservation of Web colors. This color table usually produces images with the greatest color integrity. (Selective is the default choice.)
Adaptive to create a custom color table by sampling colors from the spectrum appearing most commonly in the image. For example, an image with only shades of green and blue produces a color table made primarily of greens and blues. Most images concentrate colors in particular areas of the spectrum.
Restrictive uses the standard, 216‑color, web‑safe color table common to the 8‑bit (256‑color) panels of Windows and Mac OS. This option ensures that no browser dither is applied to colors when the image is displayed using 8‑bit color. If your image has fewer than 216 colors, unused colors are removed from the table.
7. How to Use Dithering to Reduce the GIF File Size
Since GIF files contain a limited number of colors, we may want to imitate the missing colors with available ones using the dithering. From the Dither menu, we choose one of the algorithms for such imitation. The Diffusion method lets us adjust the amount of dither. With the Pattern and Noise algorithms, there is nothing to adjust. The more dithering in an image, the larger the file size. Dithering adds different-colored pixels in close proximity to each other to simulate secondary colors or smooth gradations in color. Some images must contain dithering to look good, but it’s best to use the least amount of dithering possible to keep the smallest file size.
8. How to Use Web Snap, Lossy, Transparency and Interlaced Functions
Web Snap is used to help prevent dithering in a browser. It is done by snapping some of the colors to Web-safe colors. The more Web-safe colors present in a GIF, the less browser dithering will result. A value of 0% won’t change any colors while a value of 100% will change all the colors in the image to Web-safe.
Lossy compression discards visual information, which can reduce the file size.
If the image contains Transparency, select Transparency to preserve transparent pixels; deselect Transparency to fill fully and partially transparent pixels with the matte color.
Interlaced GIF files are loaded in a browser in a few passes (like the progressive JPEG’s).
9. How to Compare the Original and Optimized Version of the GIF File
Once you added a lot of custom changes you can check the difference in file size and quality by using the 2-Up view.
10. How to Use Preview, Save Preset and Optimize to File Size
If you are happy with your settings take a look at your final GIF with the Preview option in a browser and don’t forget to save your settings as presets. You can also specify a file size limit with this additional option from Optimize Menu and once this is applied Photoshop will try to fit the size with the best possible image quality.
Which Way of Optimizing the GIF File do You Prefer to Use?
Now you know ten simple ways to optimize your GIF files. I hope this article was helpful to you and if you are looking for GIF related Photoshop products, then check these awesome actions and templates:
If you want to create glitched and VHS-looking animated Instagram stories or animated GIF files from your static pictures, check this Photoshop template, which is extremely easy to use and suitable for any photo.
This awesome Photoshop action will help you to add the trendy animated zombie/grime effect to your photos. In the main archive, you will find one action file, one pattern file and a link to a video tutorial.
If you are looking for something more bright and magic-looking, Gif Animated Sparkles Photoshop Action is the best choice for you. It gives your photos that fabulous and glowing look in a few simples clicks.
This action is one of my favorites as well. It gives you the possibility to create amazing animated posters in Adobe Photoshop, in a synthwave/retrowave styles. An awesome and handy tool to recreate the atmosphere of the 80s.
Want to learn more about GIF creating and editing in Photoshop? Read these awesome tutorials:
In this tutorial, we will have a close look at all the available options to convert a video to a GIF animation, and how to optimize its file size.
What is a GIF File?
Before we start, let’s take a closer look at what is a GIF file. GIF is the standard format for compressing images with large areas of solid colors and crisp details like those in line art, logos, or type. Being an 8 bit-depth image format it would have disappeared from the web after the introduction of the JPEG and PNG file formats, but GIF is still a favored web file format thanks to its frame animation feature.
First of all, you will need to open the video file with Photoshop. Most of the time you won’t need the whole sequence for the GIF animation, so you can trim the video by going to Window > Timeline. Turn on the Loop option and try to find a good place to trim your video.
2. How to Reduce the Image Size
You can either reduce the image size, go to Image > Image Size or hit Atl-Control-I keys combination. Your video layer will have to be turned into a Smart Object if you resize the image, but you don’t have to worry about this, it won’t affect our workflow at all.
3. Hot to Save for WEB the GIF File
Another option to reduce the size of the GIF file is „Save for Web” function, you can find it by going to File > Export > Save for Web or use Alt-Shift-Control-S keys combination. My favorite thing about this workflow is that we don’t have to do any conversion on the Timeline panel to be able to save a frame animation, as the Save for Web dialog box will do the work for us once you select the GIF file format as your output. Notice that the Animation options will appear on the bottom right corner of the dialog box. In case you decide to further reduce the size of your image you can still do it here.
4. How to Reduce the Number of Frames
You can also reduce the size of the GIF animation if you reopen the exported GIF back into Photoshop and delete every second or third frame from the Timeline Panel. Then you should select all remaining frames and increase the duration of them to compensate for the loss of frames. If you don’t do this compensation your animation will be played faster than the original. Once you are ready you can save the new version, which should be much smaller than the original.
5. How to Change the Number of Colors of Animated
The most relevant option to optimize the size of a GIF file is the number of colors used in the Color Table. The maximum amount of colors is 256, which comes from the 8 bit-depth limitation. Generally speaking, it is good to stick with 64 colors or less, but depending on the original video you might need to increase the number of colors to get a better result.
6. How to Choose the Color Reduction Algorithm
Perceptual to create a custom color table by giving priority to colors for which the human eye has greater sensitivity.
Selective to create a color table similar to the Perceptual color table, but favoring broad areas of color and the preservation of Web colors. This color table usually produces images with the greatest color integrity. (Selective is the default choice.)
Adaptive to create a custom color table by sampling colors from the spectrum appearing most commonly in the image. For example, an image with only shades of green and blue produces a color table made primarily of greens and blues. Most images concentrate colors in particular areas of the spectrum.
Restrictive uses the standard, 216‑color, web‑safe color table common to the 8‑bit (256‑color) panels of Windows and Mac OS. This option ensures that no browser dither is applied to colors when the image is displayed using 8‑bit color. If your image has fewer than 216 colors, unused colors are removed from the table.
7. How to Use Dithering to Reduce the GIF File Size
Since GIF files contain a limited number of colors, we may want to imitate the missing colors with available ones using the dithering. From the Dither menu, we choose one of the algorithms for such imitation. The Diffusion method lets us adjust the amount of dither. With the Pattern and Noise algorithms, there is nothing to adjust. The more dithering in an image, the larger the file size. Dithering adds different-colored pixels in close proximity to each other to simulate secondary colors or smooth gradations in color. Some images must contain dithering to look good, but it’s best to use the least amount of dithering possible to keep the smallest file size.
8. How to Use Web Snap, Lossy, Transparency and Interlaced Functions
Web Snap is used to help prevent dithering in a browser. It is done by snapping some of the colors to Web-safe colors. The more Web-safe colors present in a GIF, the less browser dithering will result. A value of 0% won’t change any colors while a value of 100% will change all the colors in the image to Web-safe.
Lossy compression discards visual information, which can reduce the file size.
If the image contains Transparency, select Transparency to preserve transparent pixels; deselect Transparency to fill fully and partially transparent pixels with the matte color.
Interlaced GIF files are loaded in a browser in a few passes (like the progressive JPEG’s).
9. How to Compare the Original and Optimized Version of the GIF File
Once you added a lot of custom changes you can check the difference in file size and quality by using the 2-Up view.
10. How to Use Preview, Save Preset and Optimize to File Size
If you are happy with your settings take a look at your final GIF with the Preview option in a browser and don’t forget to save your settings as presets. You can also specify a file size limit with this additional option from Optimize Menu and once this is applied Photoshop will try to fit the size with the best possible image quality.
Which Way of Optimizing the GIF File do You Prefer to Use?
Now you know ten simple ways to optimize your GIF files. I hope this article was helpful to you and if you are looking for GIF related Photoshop products, then check these awesome actions and templates:
If you want to create glitched and VHS-looking animated Instagram stories or animated GIF files from your static pictures, check this Photoshop template, which is extremely easy to use and suitable for any photo.
This awesome Photoshop action will help you to add the trendy animated zombie/grime effect to your photos. In the main archive, you will find one action file, one pattern file and a link to a video tutorial.
If you are looking for something more bright and magic-looking, Gif Animated Sparkles Photoshop Action is the best choice for you. It gives your photos that fabulous and glowing look in a few simples clicks.
This action is one of my favorites as well. It gives you the possibility to create amazing animated posters in Adobe Photoshop, in a synthwave/retrowave styles. An awesome and handy tool to recreate the atmosphere of the 80s.
Want to learn more about GIF creating and editing in Photoshop? Read these awesome tutorials:
In this tutorial, we will have a close look at all the available options to convert a video to a GIF animation, and how to optimize its file size.
What is a GIF File?
Before we start, let’s take a closer look at what is a GIF file. GIF is the standard format for compressing images with large areas of solid colors and crisp details like those in line art, logos, or type. Being an 8 bit-depth image format it would have disappeared from the web after the introduction of the JPEG and PNG file formats, but GIF is still a favored web file format thanks to its frame animation feature.
First of all, you will need to open the video file with Photoshop. Most of the time you won’t need the whole sequence for the GIF animation, so you can trim the video by going to Window > Timeline. Turn on the Loop option and try to find a good place to trim your video.
2. How to Reduce the Image Size
You can either reduce the image size, go to Image > Image Size or hit Atl-Control-I keys combination. Your video layer will have to be turned into a Smart Object if you resize the image, but you don’t have to worry about this, it won’t affect our workflow at all.
3. Hot to Save for WEB the GIF File
Another option to reduce the size of the GIF file is „Save for Web” function, you can find it by going to File > Export > Save for Web or use Alt-Shift-Control-S keys combination. My favorite thing about this workflow is that we don’t have to do any conversion on the Timeline panel to be able to save a frame animation, as the Save for Web dialog box will do the work for us once you select the GIF file format as your output. Notice that the Animation options will appear on the bottom right corner of the dialog box. In case you decide to further reduce the size of your image you can still do it here.
4. How to Reduce the Number of Frames
You can also reduce the size of the GIF animation if you reopen the exported GIF back into Photoshop and delete every second or third frame from the Timeline Panel. Then you should select all remaining frames and increase the duration of them to compensate for the loss of frames. If you don’t do this compensation your animation will be played faster than the original. Once you are ready you can save the new version, which should be much smaller than the original.
5. How to Change the Number of Colors of Animated
The most relevant option to optimize the size of a GIF file is the number of colors used in the Color Table. The maximum amount of colors is 256, which comes from the 8 bit-depth limitation. Generally speaking, it is good to stick with 64 colors or less, but depending on the original video you might need to increase the number of colors to get a better result.
6. How to Choose the Color Reduction Algorithm
Perceptual to create a custom color table by giving priority to colors for which the human eye has greater sensitivity.
Selective to create a color table similar to the Perceptual color table, but favoring broad areas of color and the preservation of Web colors. This color table usually produces images with the greatest color integrity. (Selective is the default choice.)
Adaptive to create a custom color table by sampling colors from the spectrum appearing most commonly in the image. For example, an image with only shades of green and blue produces a color table made primarily of greens and blues. Most images concentrate colors in particular areas of the spectrum.
Restrictive uses the standard, 216‑color, web‑safe color table common to the 8‑bit (256‑color) panels of Windows and Mac OS. This option ensures that no browser dither is applied to colors when the image is displayed using 8‑bit color. If your image has fewer than 216 colors, unused colors are removed from the table.
7. How to Use Dithering to Reduce the GIF File Size
Since GIF files contain a limited number of colors, we may want to imitate the missing colors with available ones using the dithering. From the Dither menu, we choose one of the algorithms for such imitation. The Diffusion method lets us adjust the amount of dither. With the Pattern and Noise algorithms, there is nothing to adjust. The more dithering in an image, the larger the file size. Dithering adds different-colored pixels in close proximity to each other to simulate secondary colors or smooth gradations in color. Some images must contain dithering to look good, but it’s best to use the least amount of dithering possible to keep the smallest file size.
8. How to Use Web Snap, Lossy, Transparency and Interlaced Functions
Web Snap is used to help prevent dithering in a browser. It is done by snapping some of the colors to Web-safe colors. The more Web-safe colors present in a GIF, the less browser dithering will result. A value of 0% won’t change any colors while a value of 100% will change all the colors in the image to Web-safe.
Lossy compression discards visual information, which can reduce the file size.
If the image contains Transparency, select Transparency to preserve transparent pixels; deselect Transparency to fill fully and partially transparent pixels with the matte color.
Interlaced GIF files are loaded in a browser in a few passes (like the progressive JPEG’s).
9. How to Compare the Original and Optimized Version of the GIF File
Once you added a lot of custom changes you can check the difference in file size and quality by using the 2-Up view.
10. How to Use Preview, Save Preset and Optimize to File Size
If you are happy with your settings take a look at your final GIF with the Preview option in a browser and don’t forget to save your settings as presets. You can also specify a file size limit with this additional option from Optimize Menu and once this is applied Photoshop will try to fit the size with the best possible image quality.
Which Way of Optimizing the GIF File do You Prefer to Use?
Now you know ten simple ways to optimize your GIF files. I hope this article was helpful to you and if you are looking for GIF related Photoshop products, then check these awesome actions and templates:
If you want to create glitched and VHS-looking animated Instagram stories or animated GIF files from your static pictures, check this Photoshop template, which is extremely easy to use and suitable for any photo.
This awesome Photoshop action will help you to add the trendy animated zombie/grime effect to your photos. In the main archive, you will find one action file, one pattern file and a link to a video tutorial.
If you are looking for something more bright and magic-looking, Gif Animated Sparkles Photoshop Action is the best choice for you. It gives your photos that fabulous and glowing look in a few simples clicks.
This action is one of my favorites as well. It gives you the possibility to create amazing animated posters in Adobe Photoshop, in a synthwave/retrowave styles. An awesome and handy tool to recreate the atmosphere of the 80s.
Want to learn more about GIF creating and editing in Photoshop? Read these awesome tutorials:
Looking to create an awesome banner design (or Twitch offline banner) for your Twitch channel? Well, we’ve got the perfect tool for you, a Twitch banner maker! This Twitch Banner Maker from Placeit offers terrific banner templates and Twitch offline banners that will help you create your very own profile or offline banner quickly and easily.
The templates from this online banner maker are all sized optimally at 1200 x 380 pixels for profile banners and 1920 x 1080 pixels for offline banners and contain all the controls you need to easily customise your template. Let me show you how.
Want to know how to create a Twitch banner without using Photoshop? Check out this video tutorial from our Envato Tuts+ YouTube channel on how to use a Twitch banner maker.
2. Review the Twitch bannertemplates (or Twitch offline banners) on offer and select the one you like the most.
3. Use the Twitch banner template provided by the digital banner maker to make your very own banner design.
Starting with the controls on the left, you can add your own text and change the font style.
Moving to the controls below the text options, you can change the graphics used in the design or add your own.
Moving to the controls on the right, you can change your background image, add your own custom image if you’d like, or opt to use no background image at all.
Now use the controls highlighted on the online banner maker below to change the colour of the text, graphics, background, and social media icons.
4. You can resize any of your text or graphics and move them around to find the layout that’s right for you.
If you’re not happy with the changes you’ve made, you can reset the layout to return the design to its original layout.
5. Once you’re satisfied with your banner design, hit the download button at the top of the screen and download your custom banner design for a small fee.
If you regularly need to create banners, logos, flyers, posters, social media banners, etc., then the monthly plan may be the best deal for you.
That’s how to make a banner in five simple steps using a digital banner maker.
If you’re looking for a banner design with a bit of sophistication, check out this beautifully designed offline banner template which features a gorgeous speed of light effect overlaid by bold text and a beautiful background of clean lines with subtle shadow effects.
This template offers an alternative take on the previous design. Gone is the speed of light effect, and the subtle, understated tones of the background are replaced with brighter contrasting colours designed to arrest the eye and stimulate the senses.
If you’re looking for a more playful theme, this may be more your cup of tea. The template’s background image incorporates Japanese references with Mount Fuji and cherry blossoms.
This template incorporates lovely wireframe shapes in warm and cool colours against a gorgeous midnight blue background. The shapes frame the text beautifully so that the eye is focused on it.
What better way to reference gaming culture than with Tetris shapes in riotous colour? Just add your text, customise the colours, and your template is ready to use.
If your taste tends towards simplicity, this minimalist banner may appeal to you. It features clean, bold text, striking lines and circles at the top and bottom of the design, and a solid background—which you can change to any colour that suits your needs.
A template with a whole lot of attitude, this banner features an eye-catching retro font, a flare accent, and a gorgeous textured background with bold colours.
Use this classic gaming font surrounded by colourful geometric shapes to bring a vintage flair to your banner. Customisation is as easy as adding your text and selecting your colours.
This template offers a different take on the space theme, with speeding light trails in riveting, engaging colours. Just add your text, select a font, add your colour scheme, and your template is ready to download.
What could be cooler than this exploding galaxy background? If it’s not to your taste, no problem. The template offers loads of other terrific backgrounds that are bound to appeal.
The aurora borealis has been mesmerising people for centuries, and this banner design uses its stunning patterns tastefully to show off some pretty awesome graphics and fonts.
Riffing off the idea of buildings silhouetted against the skyline, this template uses stacked rectangle shapes to create a gorgeous backdrop for your information. Add your text, change the font and colours if you want, and your job is done.
16 Best Twitch Profile Banners
Before we jump into the free Twitch banners, let’s have a look at some of the many Twitch banner designs available. These give you more customising options than the free Twitch banners and will give you a more unique design to your channel.
The sister banner to Twitch Offline Banner Maker With Tech Images above, this profile banner uses a similarly stunning aurora borealis background paired with similar awesome graphics and fonts.
If action adventure is your thing, there’s no better way to let your potential followers know that than with this cool custom banner maker featuring a terrific selection of background images and bold, attention-getting fonts.
A bright, colourful and fun banner your Twitch audiences will love. Choose one of the terrific backgrounds, add your text, change font style and colour, and then add your social media profiles to complete your customisation.
This gaming banner lets you add any number of backgrounds from a wide selection of images or upload your own image if you prefer. Change your text and your banner is ready to use.
If you’re looking for a fun, colourful gaming theme for your profile banner, this is it. Swap out backgrounds and change colours and fonts to make this great theme your very own.
The perfect design for Twitch users looking for a profile banner template. The template features a beautiful gradient background, gorgeous graphics, and a stylish font. This highly customisable template offers you several options for changing the graphics and adding an image to the background if you so desire.
Looking for a profile banner with a nightmarish edge? Then this is the perfect custom banner maker for you. The template offers a great selection of exciting images and clever fonts you can experiment with to help give the template your own unique stamp.
An intergalactic theme for a space age profile banner. The template offers lots of choice of fabulous backgrounds, graphics, and fonts to customise your design.
Another profile banner for those who like to keep things light, this banner features gorgeous geometric shapes in beautiful bright colours and an awesome Tetris-style font.
Create any number of awesome banners with this geometric themed profile banner. Just enter your text, select your font style and colour, and you’re set.
Wonderfully versatile, this profile banner template features a great range of backgrounds, fonts, and graphic elements to enhance your design. Mix and match them and you’ve got a terrific banner in minutes.
Free Twitch Banners
Placeit offers some free Twitch banners which may change from time to time. As of the day of publishing, this is currently their offering of free Twitch banners ready for you to download.
Use the Digital Banner Maker and Create Your Own Banner Design
Online banner makers are a terrific tool to help you make a banner for your Twitch channel quickly and easily, with minimal cost.
These 32 Twitch banners/Twitch offline banners are just a few of the banners that you can create with the custom banner maker at Placeit. I hope they have given you tons of banner ideas and you now feel confident that you know how to make a banner for your Twitch channel. Use your favourite template to make your own banner and share it with us here. We’d love to see what you come up with.
And if you’re interested in designing other resources like flyers, movie posters, magazine covers, etc., here are some great templates for you:
Looking to create an awesome banner design (or Twitch offline banner) for your Twitch channel? Well, we’ve got the perfect tool for you, a Twitch banner maker! This Twitch Banner Maker from Placeit offers terrific banner templates and Twitch offline banners that will help you create your very own profile or offline banner quickly and easily.
The templates from this online banner maker are all sized optimally at 1200 x 380 pixels for profile banners and 1920 x 1080 pixels for offline banners and contain all the controls you need to easily customise your template. Let me show you how.
Want to know how to create a Twitch banner without using Photoshop? Check out this video tutorial from our Envato Tuts+ YouTube channel on how to use a Twitch banner maker.
2. Review the Twitch bannertemplates (or Twitch offline banners) on offer and select the one you like the most.
3. Use the Twitch banner template provided by the digital banner maker to make your very own banner design.
Starting with the controls on the left, you can add your own text and change the font style.
Moving to the controls below the text options, you can change the graphics used in the design or add your own.
Moving to the controls on the right, you can change your background image, add your own custom image if you’d like, or opt to use no background image at all.
Now use the controls highlighted on the online banner maker below to change the colour of the text, graphics, background, and social media icons.
4. You can resize any of your text or graphics and move them around to find the layout that’s right for you.
If you’re not happy with the changes you’ve made, you can reset the layout to return the design to its original layout.
5. Once you’re satisfied with your banner design, hit the download button at the top of the screen and download your custom banner design for a small fee.
If you regularly need to create banners, logos, flyers, posters, social media banners, etc., then the monthly plan may be the best deal for you.
That’s how to make a banner in five simple steps using a digital banner maker.
If you’re looking for a banner design with a bit of sophistication, check out this beautifully designed offline banner template which features a gorgeous speed of light effect overlaid by bold text and a beautiful background of clean lines with subtle shadow effects.
This template offers an alternative take on the previous design. Gone is the speed of light effect, and the subtle, understated tones of the background are replaced with brighter contrasting colours designed to arrest the eye and stimulate the senses.
If you’re looking for a more playful theme, this may be more your cup of tea. The template’s background image incorporates Japanese references with Mount Fuji and cherry blossoms.
This template incorporates lovely wireframe shapes in warm and cool colours against a gorgeous midnight blue background. The shapes frame the text beautifully so that the eye is focused on it.
What better way to reference gaming culture than with Tetris shapes in riotous colour? Just add your text, customise the colours, and your template is ready to use.
If your taste tends towards simplicity, this minimalist banner may appeal to you. It features clean, bold text, striking lines and circles at the top and bottom of the design, and a solid background—which you can change to any colour that suits your needs.
A template with a whole lot of attitude, this banner features an eye-catching retro font, a flare accent, and a gorgeous textured background with bold colours.
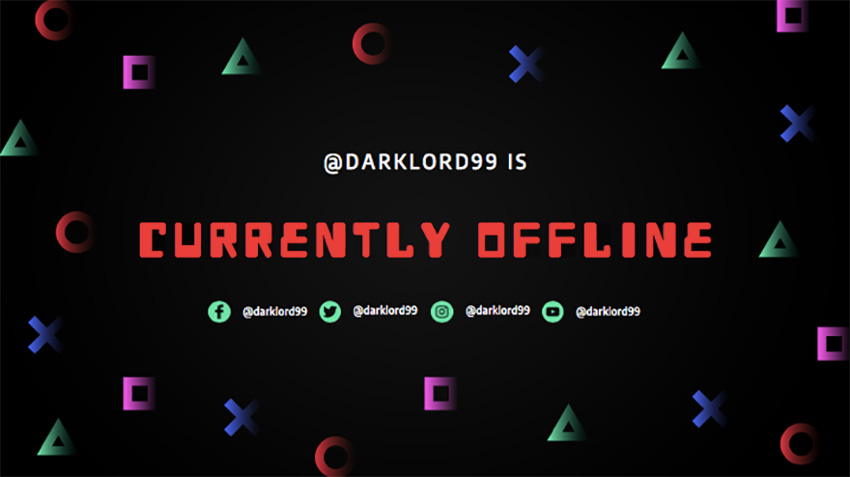
Use this classic gaming font surrounded by colourful geometric shapes to bring a vintage flair to your banner. Customisation is as easy as adding your text and selecting your colours.
This template offers a different take on the space theme, with speeding light trails in riveting, engaging colours. Just add your text, select a font, add your colour scheme, and your template is ready to download.
What could be cooler than this exploding galaxy background? If it’s not to your taste, no problem. The template offers loads of other terrific backgrounds that are bound to appeal.
The aurora borealis has been mesmerising people for centuries, and this banner design uses its stunning patterns tastefully to show off some pretty awesome graphics and fonts.
Riffing off the idea of buildings silhouetted against the skyline, this template uses stacked rectangle shapes to create a gorgeous backdrop for your information. Add your text, change the font and colours if you want, and your job is done.
16 Best Twitch Profile Banners
Before we jump into the free Twitch banners, let’s have a look at some of the many Twitch banner designs available. These give you more customising options than the free Twitch banners and will give you a more unique design to your channel.
The sister banner to Twitch Offline Banner Maker With Tech Images above, this profile banner uses a similarly stunning aurora borealis background paired with similar awesome graphics and fonts.
If action adventure is your thing, there’s no better way to let your potential followers know that than with this cool custom banner maker featuring a terrific selection of background images and bold, attention-getting fonts.
A bright, colourful and fun banner your Twitch audiences will love. Choose one of the terrific backgrounds, add your text, change font style and colour, and then add your social media profiles to complete your customisation.
This gaming banner lets you add any number of backgrounds from a wide selection of images or upload your own image if you prefer. Change your text and your banner is ready to use.
If you’re looking for a fun, colourful gaming theme for your profile banner, this is it. Swap out backgrounds and change colours and fonts to make this great theme your very own.
The perfect design for Twitch users looking for a profile banner template. The template features a beautiful gradient background, gorgeous graphics, and a stylish font. This highly customisable template offers you several options for changing the graphics and adding an image to the background if you so desire.
Looking for a profile banner with a nightmarish edge? Then this is the perfect custom banner maker for you. The template offers a great selection of exciting images and clever fonts you can experiment with to help give the template your own unique stamp.
An intergalactic theme for a space age profile banner. The template offers lots of choice of fabulous backgrounds, graphics, and fonts to customise your design.
Another profile banner for those who like to keep things light, this banner features gorgeous geometric shapes in beautiful bright colours and an awesome Tetris-style font.
Create any number of awesome banners with this geometric themed profile banner. Just enter your text, select your font style and colour, and you’re set.
Wonderfully versatile, this profile banner template features a great range of backgrounds, fonts, and graphic elements to enhance your design. Mix and match them and you’ve got a terrific banner in minutes.
Free Twitch Banners
Placeit offers some free Twitch banners which may change from time to time. As of the day of publishing, this is currently their offering of free Twitch banners ready for you to download.
Use the Digital Banner Maker and Create Your Own Banner Design
Online banner makers are a terrific tool to help you make a banner for your Twitch channel quickly and easily, with minimal cost.
These 32 Twitch banners/Twitch offline banners are just a few of the banners that you can create with the custom banner maker at Placeit. I hope they have given you tons of banner ideas and you now feel confident that you know how to make a banner for your Twitch channel. Use your favourite template to make your own banner and share it with us here. We’d love to see what you come up with.
And if you’re interested in designing other resources like flyers, movie posters, magazine covers, etc., here are some great templates for you:
Looking to create an awesome banner design (or Twitch offline banner) for your Twitch channel? Well, we’ve got the perfect tool for you, a Twitch banner maker! This Twitch Banner Maker from Placeit offers terrific banner templates and Twitch offline banners that will help you create your very own profile or offline banner quickly and easily.
The templates from this online banner maker are all sized optimally at 1200 x 380 pixels for profile banners and 1920 x 1080 pixels for offline banners and contain all the controls you need to easily customise your template. Let me show you how.
Want to know how to create a Twitch banner without using Photoshop? Check out this video tutorial from our Envato Tuts+ YouTube channel on how to use a Twitch banner maker.
2. Review the Twitch bannertemplates (or Twitch offline banners) on offer and select the one you like the most.
3. Use the Twitch banner template provided by the digital banner maker to make your very own banner design.
Starting with the controls on the left, you can add your own text and change the font style.
Moving to the controls below the text options, you can change the graphics used in the design or add your own.
Moving to the controls on the right, you can change your background image, add your own custom image if you’d like, or opt to use no background image at all.
Now use the controls highlighted on the online banner maker below to change the colour of the text, graphics, background, and social media icons.
4. You can resize any of your text or graphics and move them around to find the layout that’s right for you.
If you’re not happy with the changes you’ve made, you can reset the layout to return the design to its original layout.
5. Once you’re satisfied with your banner design, hit the download button at the top of the screen and download your custom banner design for a small fee.
If you regularly need to create banners, logos, flyers, posters, social media banners, etc., then the monthly plan may be the best deal for you.
That’s how to make a banner in five simple steps using a digital banner maker.
If you’re looking for a banner design with a bit of sophistication, check out this beautifully designed offline banner template which features a gorgeous speed of light effect overlaid by bold text and a beautiful background of clean lines with subtle shadow effects.
This template offers an alternative take on the previous design. Gone is the speed of light effect, and the subtle, understated tones of the background are replaced with brighter contrasting colours designed to arrest the eye and stimulate the senses.
If you’re looking for a more playful theme, this may be more your cup of tea. The template’s background image incorporates Japanese references with Mount Fuji and cherry blossoms.
This template incorporates lovely wireframe shapes in warm and cool colours against a gorgeous midnight blue background. The shapes frame the text beautifully so that the eye is focused on it.
What better way to reference gaming culture than with Tetris shapes in riotous colour? Just add your text, customise the colours, and your template is ready to use.
If your taste tends towards simplicity, this minimalist banner may appeal to you. It features clean, bold text, striking lines and circles at the top and bottom of the design, and a solid background—which you can change to any colour that suits your needs.
A template with a whole lot of attitude, this banner features an eye-catching retro font, a flare accent, and a gorgeous textured background with bold colours.
Use this classic gaming font surrounded by colourful geometric shapes to bring a vintage flair to your banner. Customisation is as easy as adding your text and selecting your colours.
This template offers a different take on the space theme, with speeding light trails in riveting, engaging colours. Just add your text, select a font, add your colour scheme, and your template is ready to download.
What could be cooler than this exploding galaxy background? If it’s not to your taste, no problem. The template offers loads of other terrific backgrounds that are bound to appeal.
The aurora borealis has been mesmerising people for centuries, and this banner design uses its stunning patterns tastefully to show off some pretty awesome graphics and fonts.
Riffing off the idea of buildings silhouetted against the skyline, this template uses stacked rectangle shapes to create a gorgeous backdrop for your information. Add your text, change the font and colours if you want, and your job is done.
16 Best Twitch Profile Banners
Before we jump into the free Twitch banners, let’s have a look at some of the many Twitch banner designs available. These give you more customising options than the free Twitch banners and will give you a more unique design to your channel.
The sister banner to Twitch Offline Banner Maker With Tech Images above, this profile banner uses a similarly stunning aurora borealis background paired with similar awesome graphics and fonts.
If action adventure is your thing, there’s no better way to let your potential followers know that than with this cool custom banner maker featuring a terrific selection of background images and bold, attention-getting fonts.
A bright, colourful and fun banner your Twitch audiences will love. Choose one of the terrific backgrounds, add your text, change font style and colour, and then add your social media profiles to complete your customisation.
This gaming banner lets you add any number of backgrounds from a wide selection of images or upload your own image if you prefer. Change your text and your banner is ready to use.
If you’re looking for a fun, colourful gaming theme for your profile banner, this is it. Swap out backgrounds and change colours and fonts to make this great theme your very own.
The perfect design for Twitch users looking for a profile banner template. The template features a beautiful gradient background, gorgeous graphics, and a stylish font. This highly customisable template offers you several options for changing the graphics and adding an image to the background if you so desire.
Looking for a profile banner with a nightmarish edge? Then this is the perfect custom banner maker for you. The template offers a great selection of exciting images and clever fonts you can experiment with to help give the template your own unique stamp.
An intergalactic theme for a space age profile banner. The template offers lots of choice of fabulous backgrounds, graphics, and fonts to customise your design.
Another profile banner for those who like to keep things light, this banner features gorgeous geometric shapes in beautiful bright colours and an awesome Tetris-style font.
Create any number of awesome banners with this geometric themed profile banner. Just enter your text, select your font style and colour, and you’re set.
Wonderfully versatile, this profile banner template features a great range of backgrounds, fonts, and graphic elements to enhance your design. Mix and match them and you’ve got a terrific banner in minutes.
Free Twitch Banners
Placeit offers some free Twitch banners which may change from time to time. As of the day of publishing, this is currently their offering of free Twitch banners ready for you to download.
Use the Digital Banner Maker and Create Your Own Banner Design
Online banner makers are a terrific tool to help you make a banner for your Twitch channel quickly and easily, with minimal cost.
These 32 Twitch banners/Twitch offline banners are just a few of the banners that you can create with the custom banner maker at Placeit. I hope they have given you tons of banner ideas and you now feel confident that you know how to make a banner for your Twitch channel. Use your favourite template to make your own banner and share it with us here. We’d love to see what you come up with.
And if you’re interested in designing other resources like flyers, movie posters, magazine covers, etc., here are some great templates for you: