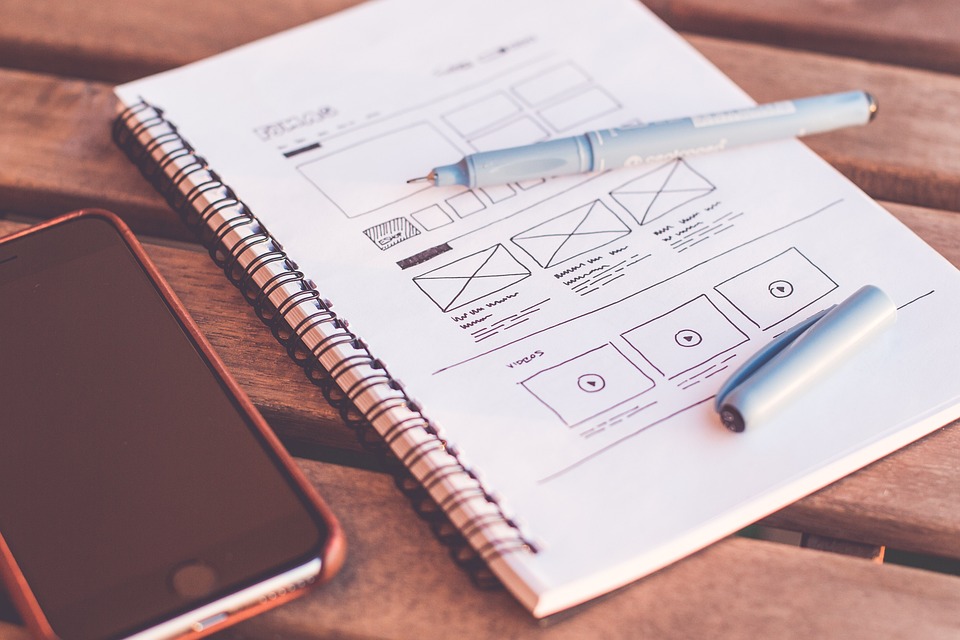
In today’s ever-changing business world, website owners are often asked to hire a web design agency or an individual freelancer when they need a new site built or updated. With the advancement of technology and corporate downsizing, more individuals find it necessary to strike out on their own and become freelancers. This article will detail the difference between how freelancers and agencies compare, along with which one to choose.
Freelancer Designer
A freelancer is an individual web designer or developer who works independently and is usually available on an hourly basis. They are often better suited for smaller projects with shorter timelines. They can usually work faster than an agency due to fewer team members and processes.
Advantages of Hiring a Freelancer
Cost-effective: Hiring a freelancer can be more cost-effective than hiring a full-time employee or an agency. This is because freelancers typically charge as per the work that needs to be done.
Flexibility: Freelancers have the flexibility to work on your project when you need it to be completed within a short timeframe.
Specialized skills: Freelancers have a specific area of expertise, so you can find a freelancer who specializes in the exact skills you need for your web design project.
Personalized service: Working with a freelancer can provide a more personalized service as they are more accessible, can provide more hands-on attention, and can be more responsive to your needs.
Disadvantages of Hiring a Freelancer
Limited availability: Freelancers may not always be available to work on your project, especially if they have multiple clients.
Lack of accountability: Freelancers are not employees, so they may not have the same level of accountability as a full-time employee. This can make it more difficult to ensure that deadlines are met and that the work is of a high standard.
Lack of support: Freelancers work independently, so you may not have access to the same level of support as you would with a full-time employee or an agency.
Limited scalability: Freelancers work on a project-by-project basis, so it can be difficult to scale up the work if your business grows.
Web Design Agency
A web design agency specializes in creating, developing and maintaining websites for clients. Web design agencies offer a range of services such as hosting, maintenance, and digital marketing campaigns. They work with clients from different industries such as e-commerce, healthcare, and education.
Advantages of Hiring an Agency
Expertise and experience: Web design agencies employ a team of professionals with a wide range of expertise and experience in web design and development. This allows them to provide a high level of quality and expertise in their work.
Scalability: Agencies have the resources and expertise to handle projects of any size, whether it’s a simple brochure website or a complex e-commerce platform to match the needs of their clients.
Multiple services: Multiple services offered by agencies such as web design development, allows clients to get all their web-related needs met under one roof.
Disadvantages of Hiring an Agency
Cost: Hiring a web design agency can be more expensive than working with a freelancer, as agencies charge higher rates and require a long-term commitment.
Limited flexibility: Agencies have a set team and process in place, which can make it difficult for them to adapt to clients’ specific needs and requirements.
Limited control: Clients may have limited control over the design and development process when working with an agency, as the agency will be making many of the decisions.
Making the Right Decision Between a Freelancer and an Agency
Before choosing a freelancer or an agency, consider the advantages and disadvantages of each option. If you’re looking for a simple and low-cost solution, hiring a freelancer may be the best choice for you. Freelancers charge less for their services than agencies, and you may be able to get a faster turnaround time on projects.
On the other hand, if you’re looking for a professional solution with more robust features and a long-term relationship, an agency may be the right fit. Agencies have more experienced staff, can handle larger projects, and often have better customer services. However, agencies usually charge more for their services, making the process more complex. When deciding which option is suitable for your web design project, take some time to evaluate your budget, timeline, and goals. If you’re looking for an agency who can develop a web design for you that empowers and optimizes your business, consider hiring Bizango.
Endnote
Whether to hire a freelancer or an agency for web design depends on your specific needs and goals. Freelancers are cost-effective options and offer flexibility, and specialized skills. On the other hand, agencies offer expertise, experience, scalability, and multiple services. The decision should be based on your budget, project scope, timeline, and the level of control you want over the design and development process.
A successful marketing campaign always requires powerful branding and well-designed websites. By fostering trust, a good website can encourage users to take action.
To create a great user experience, an optimized website design for usability and ease of navigation is vital. Your software should go through several tests during the development process to perform the intended function.
Software testing experts provide usability testing services such as checking the functionality of the design, verifying usability, proper navigation, and many other vital aspects to create a well-designed website.
You will learn the following:
The Basic Principles of Creating a Good Website Design
The Importance of a Good Web Design
The Basic Principles of Creating a Good Website Design
To address what we believe to be the most critical factors in developing a website that generates large numbers of conversions, we have outlined the seven fundamental principles of good web design.
Developed with Usability and Functionality in Mind
Functionality and usability work together in website design to influence customers’ decisions more than any other design factor. Technical and design procedures create a distinct, simple, and invariably prompt path to conversions.
When users first encounter the design, they should be able to carry out simple tasks without any trouble. When not considering the user’s convenience, one can sabotage a project’s great idea after investing many hours in its development. Users can save time and reduce errors by using an intuitive user interface.
Unique But Not Distracting
An impressive design requires a creative mind as well as natural talent. Use design features and whitespace creatively to create a less disorienting and more enticing design that attracts visitors. A website that is simple and uncluttered is more effective.
Cohesive
It emphasizes entity and uniqueness in your brand. Making every component a perception of your brand identity is necessary to convey the distinctive qualities of your company through design. A design must work flawlessly as a whole to sustain the aesthetic of your brand.
Navigation
It is the signage system that users interact with on websites. Seamless navigation is required to keep visitors on a website. They will abandon it if the navigation is hard to navigate and seek information elsewhere. The objective is to keep navigation clear, simple, and consistent across all pages.
Placement of Visual Components to Draw User Attention
A big part of a well-designed website is the combination of visual elements. Design elements serve as guides that help people look where they need to look. One design element to focus on and carefully placing calls to action are two critical steps for a high conversion rate.
Simple to Understand
Every term, text, and phrase on the website should be clear and without ambiguity to the user. It must clearly and neatly organize the visual element and site content. Any deviation serves only to obstruct conversion.
Focus on What Matters
The main point of your presentation should be that your organization is the place to go to solve a specific problem or meet a particular need. One aspect of this process is finding the right balance between words and images. To get the attention of your target audience, you need to focus on what your consumer wants most. Use these ideas to make a presentation focusing on your brand.
Why Is Good Website Design Important?
As stated, a well-designed website helps brands to rise over competitors. Here is the significance of a good website design:
It creates a favorable first impression.
A website’s design can affect how users feel when they first visit it. When a website is well-designed, offers vibrant colors, and is inviting to visitors, they are more likely to stay for a while.
Strengthen SEO strategies.
A modern, up-to-date website design that prioritizes the user’s needs is an excellent place to start discovering user experience and how to improve it. Google prefers top-ranked pages with fast-loading images, a good user experience, and SEO-friendly blogs. As a result, you should make the most of increasing the loading speed, optimizing the UX, etc.
Increases brand trust
The design of your website can build trust with your audience and potential clients by using intense, clean, and exciting visuals.
It can reflect a brand without anything to hide through a clean, straightforward web design. Concise headings and buttons that lead users through the website leave them feeling taken care of, which can help establish and grow that trust.
Set yourself apart from competitors
A dynamic and well-designed website sets you apart from the competition. Concise fonts, beautiful colors, and an easy-to-navigate layout and page elements can boost strong branding and showcase your company’s professional image.
The Takeaway
Good web design has never been more critical, especially in today’s world, where everyone is socially isolated and everything is online.
Thus, a good website design affects the brand reputation, conversion, user experience, and others.
Following the basic principles for creating good website designs mentioned above can help you strategize your decision, whether you are planning to update your website or begin building a brand online.
User Interface Design is intended to help organize the user’s interaction with a device or program. It is what the user encounters when looking at a device or screen: the arrangement of graphical interface elements, buttons, and navigation. How much to charge for UI design?
How user-friendly the user interface determines a person’s desire to use a website or app. User loyalty depends largely on the convenience and attractiveness of the interface. A bright appearance attracts people and makes them go to the program or site. Therefore, it is important that the UI design is intuitive.
To understand UX and UI design, imagine a chair. His framework conventionally calls it UX, because the man with the help of the chair solves the user’s problem. At the same time, the conditional UI of a product is the number of legs, the shape of the back, or the upholstery. A good UI considers the practicality of the exterior design, in the example of a chair, this means choosing not only beautiful but also wear-resistant material for the product.
Thus, UI is aimed at creating the necessary emotional perception of the product. And UX is based on the user’s assistance in working with the resource.
Because of the interaction between UI and UX, the user receives a single impression of the aesthetics of the visual interface and the ease of passing to the desired action on the page.
What does the price of UI design depend on?
The number of UI concepts. The more of them, the higher it is.
The type of device for which the interface is being developed. This can be an Android interface, an IOS interface, or a web app.
The presence of generated UX rules. If we have to work out the rules – the price goes up.
The need to create illustrations. They can be graphic and animated. Also, the price depends on their quantity. The more illustrations required, the higher the cost of UI design.
It is better to order the development of the visualization of the user interface from real professionals. Only an experienced designer can make the design bring you more profit.
UI design: the stages
Task setting. Defining the goals for which the interface will be used; analyzing user needs; choosing the platform on which to implement the project.
Development of interface sketches.
Creating a prototype to evaluate the convenience of the interface.
Analysis of the data and the selection of the best options.
The UI interface includes the following elements:
information architecture;
interaction design;
graphic features.
Creating UI design: the rules
The appearance of app elements should be as simple and understandable as possible.
The user should not have to perform complex actions or long chains of transitions.
It is desirable to use familiar controls and clear visual images.
Logically related elements should be combined into menus and forms.
The most important elements of the user interface should come first.
The interface should be designed in the same style.
When developing the UI design of a mobile or web app, the “aesthetic-usability effect” must be considered. Being under its influence, a person thinks that the app interface that looks better is more convenient. Therefore, developing the user interface should harmoniously combine beauty and usability.
Peculiarities of app interface development
Depending on the purpose of the project and the purpose of the interface, the designer selects the color scheme and design. The psychology of color and how it affects people should be considered. When designing a UI interface, color can be used to emphasize the quality of the app. Red is associated with strength and passion; green with nature and prosperity; blue with peace, and purple with creativity and wisdom.
It is necessary to work out the details of the project at an early stage and follow the main principles of mobile interface development. Among the latest trends is developing apps that would work on both Android and iOS. However, it is better to develop UI design separately for each mobile app. This way, you can avoid mistakes and malfunctions.
The UI interface has the following tasks
Provide interaction between the user and the app.
Give emotional satisfaction to the user while working.
Look attractive.
Components of UI
Visual design, or VD, is important for the quality display of colors, fonts, and other elements of a website, as this is what creates the aesthetics of the site. A good UI can only exist in the combination of the page’s content and functionality. Also, VD aims to attract users and build their trust in the product or service.
Design system – the design of the user interface through a system of individual interface elements. They are needed to develop reusable templates.
A prototype is a working example of a designed user interface. The mock operation gives an idea of the response of the interface elements before they are directly developed.
Content. Gadgets have accustomed users to multitasking, so when designing a user interface it is important to quickly and correctly demonstrate the main content and functionality of the app, and move all the secondary to the background or remove it.
Feedback communication is using a different design or animation of the program’s response to the user’s action. This gives a person the understanding that everything is under control and functions correctly.
Working with one hand. A well-designed interface must be adapted to one-handed operation. It is easiest to control the program when the necessary navigation elements are located in the lower left corner. A user-friendly interface also includes large buttons, indentation, and eye-catching design of important elements for easy interaction with them.
Quick input. Forms to be filled out should: require a minimum amount of information from the user; offer variants of answers. For example, if you want to know the user’s age, it is better to use a drop-down list and find out the address through synchronization with geolocation. General recommendation – minimum manual input.
UI design will bring you:
An aesthetically pleasing interface. Elements and colors will be chosen according to the concept of the app.
Simplicity and clarity of use. People will easily understand how to interact with the interface.
Consistency. Elements that act in the same way should be given consistency. This will make it easier to use the app.
UI design is an important element of the interface. It brings the program and the user into contact with each other. So try not to save on this important component of a successful project and make every effort to get the most convenient and thoughtful UI design.
Website security is vital because it protects your site from hackers that might steal your information.
Keeping your website secure will also help you attract new customers, retain old ones, and keep them returning for more. This can help you boost your sales and market share. Hence, you must establish a secure website so that no one can hack into it and steal valuable information about you or your business.
Here are six steps to help you out creating a secure website:
1. Select A Reputable Web Host
It’s essential to ensure that you’re using a reputable web host because they’ll be responsible for managing your site throughout its lifespan. This way, you can rest assured that your site is correctly secured without worrying about technical issues.
There are many factors to consider when choosing a host, such as reliability, security, website management, scalability, and accessibility. This means that you should ensure that the website hosting company has been around for some time and can provide you with all of these features at an affordable price.
2. Identify Website Threats
Once you have a web hosting provider in mind, it’s essential to identify which security threats they might face. Some common hazards include denial of service (DOS), malware, or phishing attacks. These are common types of attacks that can happen to any website and, if addressed, will make it easier for your site to operate correctly.
You can do this by reading how other websites have been attacked. You may research their steps to protect themselves from those attacks too. This can help you understand how to defend your website against these attacks.
3. Secure Your Server
After knowing website threats, you must ensure a secure server. This doesn’t allow anyone to connect to it without authorization. This means that when someone types in the URL of your website, the site will prompt them for their username and password before they can access any content on your site.
You may secure your web server by installing security patches on time so that hackers won’t be able to compromise your website. You can also monitor the server frequently to get alerts if there are any signs of weaknesses that make your site susceptible to attacks.
4. Install An SSL Certificate
Once you secure your web server, it’s time to install a secure sockets layer (SSL) certificate. This protects your website by encrypting all information between your browser and the server. With an SSL, no one can intercept your system even if the hacker’s using a malicious program on their computer.
You can choose from many options when installing an SSL certificate on your website. You can purchase an SSL certificate directly from a certificate authority or through a third-party provider.
If you go with the latter, make sure there’s no limit on how many certificates you can get per domain name. In addition, check if the providers allow auto-renewal so that when the original expiration date arrives, you don’t have to worry about renewing it manually every few months.
5. Leverage A Firewall
A firewall acts as a filter for all traffic entering and leaving your network. When someone attempts to connect to your server, it’ll automatically route their request through the firewall. This prevents unauthorized users from accessing your server and downloading sensitive data.
When purchasing a new firewall for your website, ensure the provider offers built-in features. These may include in-depth inspection, anti-virus protection, and spam filtering. You should consider the visibility of your web applications as well by only allowing access to those who are relevant to the apps. This way, you can monitor any suspicious activity related to these apps and quickly take action if needed.
6. Use A Secure Payment Gateway
Another critical step to creating a secure website is to use a secure payment gateway. This can help ensure that the merchant processes all transactions safely and securely.
You can do this by checking the security of the provider. So, ensure they comply with security standards like level-1 payment card industry data security standards (PCI DSS). This ensures that you can safeguard the transaction information of your consumers at all times.
Key Takeaway
Every site owner needs to know how to ensure the safety of their website and how to limit its exposure of it. This way, they can avoid cyber threats that might expose their data.
The goal of this guide was to provide an overview of the security procedures you should follow to create a secure website. Once you follow these steps, you can prevent security breaches from happening on your site. This keeps your website trustworthy, which can help you generate more leads.
It is commonly believed that RV solar panels are fragile since they are exposed to the elements, but this is not always the case. Solar panels are constructed from extremely resilient materials and are designed to resist a variety of climatic conditions. The panel is composed of a durable material, such as tempered glass, that is resistant to environmental conditions such as wind, rain, and sun damage.
In addition, the cells that comprise the panel are constructed of durable silicone rubber and can withstand temperatures between -40°F and 176°F without degrading. These materials allow solar panels to function in hostile settings while still delivering dependable electricity.
It is crucial to note that although solar panels are constructed to be durable, they still require regular cleaning and inspection for signs of damage and wear. Overall, solar panels for RVs may appear fragile, but they are actually quite durable and may provide consistent electricity for many years with proper care.
Are Solar Panels Vulnerable to Damage from Hail?
Solar panels are an excellent renewable energy source, but many individuals are concerned about their susceptibility to hail damage. It depends on the size and severity of the hail, but solar panels can often tolerate damage from hail.
The solar cells contained within the panels are normally unaffected by hail since they are composed of a highly robust material. However, if the hail is sufficiently large and falls at a particularly high velocity, it may cause some damage to the panel or even break through the protective glass layer covering the cells.
In general, solar panels can tolerate hail damage better than typical roofing materials, but you should always get your system evaluated to ensure there is no concealed damage. Overall, the susceptibility of solar panels to hail damage relies on various parameters, including the size and velocity of the hail.
Snow or dust storms may cause damage to solar panels.
Snow and dust storms have the potential to harm solar panels, and their installation should take this into account. In the event of a snowstorm, snow accumulation on a solar panel’s surface might prevent the sun’s rays from reaching the panel, so reducing its effectiveness.
Dust storms can potentially damage solar panels by coating them with dust that blocks the absorption of sunlight. In addition, storm dust and sand particles can scrape or erode the surface of solar panels, lowering their efficiency. There are, fortunately, solutions to preserve solar panels from adverse weather conditions.
Install solar panels in locations where they will not be directly exposed to considerable amounts of snow or dust, such as at least four feet above the ground and facing away from the prevailing winds. Additionally, regular cleaning of your solar panels may assist limit any damage they might receive due to storms.
Can Solar Flares Damage Solar Panels?
Solar flares are intense blasts of radiation that are capable of interrupting electrical equipment and causing damage to solar panels. Solar flares have the ability to generate destructive voltage surges in solar panels, which can result in a drop in efficiency or even total failure.
The extent of damage depends on the intensity of the solar flare and other variables, such as the type and age of the solar panel. When a solar flare is sufficiently large, it is possible for the surge to exceed the solar panel’s maximum input rating, which could result in irreversible damage.
Even if there is not an extreme spike, regular exposure to flares may eventually inflict wear and tear on the solar panel’s components, resulting in a gradual decrease in efficiency.
Those who utilize solar panels must therefore take precautions against potential harm from solar flares, such as utilizing surge protection devices or unplugging their panels at times when flares are predicted.
Which conditions necessitate solar panel hail protection?
When hail storms are in the region, it is vital to safeguard solar panels using hail guards. Solar panels are susceptible to hail damage, and protecting your solar panel system is one of the greatest methods to ensure that it functions effectively.
As an additional layer of protection from hail, you can add hail protection to your solar panels. This additional layer of protection can aid in preventing severe damage during a hailstorm. If you reside in a location that has frequent hailstorms, it is essential to install additional layers of protection to your solar panels to safeguard them from damage. This will lessen the likelihood of costly repairs or replacements due to hail damage and maintain the functionality of your solar panel system.
It is crucial to remember that while choosing high-quality equipment is essential, protecting your solar panel system from hail can also be quite advantageous in guaranteeing its durability.
How Can Hail Damage To Solar Panels Be Prevented?
There are several techniques to safeguard solar panels against hail damage. Installing a robust solar panel protection system is one of the most efficient methods. In order to prevent hail damage to solar panels, this type of technology is capable of adjusting the angle of the solar panels automatically.
Using a system of anti-hail netting that covers the entire surface of the solar panels is another method of protecting them against hail. This netting serves as a screen against hail, thereby preventing hail damage to solar panels. Additionally, you can cover your solar panel array with a roof of some sort.
This covering will decrease the impact of falling hail and provide additional protection against other potential threats, such as wind and precipitation. By taking these measures, you may safeguard your solar panel array from hail damage and prolong its service life.
How can Solar Panels be protected from Hail?
There are various options available for hail protection for solar panels. Installing solar modules with the greatest level of proven hail protection is one method of protecting solar panels from hail. In the event of a hailstorm, the modules will be able to endure the impact and preserve your solar panels.
Installing a hail protection system on your home is another option to safeguard your solar panels. These systems utilize netting or other materials to offer an additional layer of protection around the panels, thereby reducing hailstorm damage. In addition, you can utilize a panel-level protection system, which consists of specific films or coatings that serve as a screen against hail and other particles that can damage the solar panel surface.
These solutions can be used alone or in conjunction with other approaches to provide optimal protection for your home’s solar panels. Regardless of the strategy you choose, it is essential to identify the most effective way to shield your solar panels from hail in order to preserve their continued efficiency and functionality over time.
How much can solar panels withstand hail?
Solar panels are composed of solar cells that turn sunlight into electricity and are interconnected. These solar cells are extremely delicate and susceptible to damage by hail, so it is essential to shield the solar panels from any potential hail damage. The majority of solar panels can, thankfully, tolerate a certain quantity of hail before being damaged.
The exact hail size and velocity required to cause damage depends on the type of solar panel and its construction, but in general, conventional solar panels can withstand hailstones up to 1 inch in diameter and speeds up to 50 miles per hour without being damaged.
Larger hailstones or greater speeds can cause severe damage to the panel and should be avoided if feasible. There are, thankfully, precautionary steps that can be performed to safeguard your solar panels against extreme weather occurrences such as hailstorms.
How fragile are solar panels?
Due to the robust materials used in their manufacturing, solar panels are highly durable and difficult to damage. This is because they are built to survive extreme weather conditions and long durations of exposure to the elements. The solar cells in solar panels are comprised of tempered glass, which is extremely durable and offers excellent protection against impacts and scratches.
In addition, solar panels have a protective layer on their surface that safeguards them against damage caused by hail or wind-borne debris. Overall, solar panels are constructed for maximum endurance and are not readily damaged when properly mounted with an appropriate mounting mechanism.
Are Solar Panels Vulnerable to Hail Damage?
Solar panels are an excellent way to harness solar energy, but they can be damaged by hail. Hail can cause structural damage to solar panel systems, including dents and cracks. This kind of damage might lower the quantity of electricity generated by the solar panel. In addition, hail can cause severe damage to the solar cells of a solar panel system.
If enough solar cells are destroyed, the energy production of a solar panel system might be drastically reduced or even eliminated. Consequently, hail cannot fully destroy a solar panel system, but it can negatively impact its performance. To avoid any potential damage from hail storms, it is necessary to properly maintain your solar panel system so that it is less prone to any form of physical harm.
Are Solar Panels Insurable?
Solar panels are becoming an increasingly popular means of generating electricity and reducing energy costs. As with any other home renovation, you may want to consider preserving your investment by insuring your solar panels. Solar panel insurance can give coverage for damage to your solar panels and liability in the event that someone is hurt on your roof.
It is crucial to be aware that certain homeowner’s insurance policies may not cover solar panels if you elect to install them. That’s why it’s a smart idea to look into specialized solar panel insurance packages. These policies may cover the expense of repairing or replacing solar panels damaged by fire, theft, vandalism, hail, or other perils. It may also include insurance against third-party claims should someone be hurt while the panels are on your roof.
Solar panel insurance is a key aspect when determining whether or not to install solar panels; therefore, you should investigate your alternatives prior to deciding whether or not solar panels are good for you.
A solar panel is an important component in a home solar system. It produces electricity from the sun’s energy. The amount of power a solar panel can produce depends on its size and the wattage rating. A 200-watt solar panel will produce about 10 amps at 18 volts, which is enough to power most household appliances.
The voltage output of a solar panel is determined by the size of the solar panel and how much power it can generate. Generally, larger panels will produce more volts than smaller ones, but they may not be as efficient at producing power. If you want to know how many amps your solar panel produces, you should check the power rating listed on the product label.
This will give you an accurate measurement of the power output from your solar panel. With a 200-watt solar panel, you can expect to generate around 10 amps at 18 volts for your home’s solar system. This means that it’s capable of producing enough power for most households without having to worry about too much power generation or too little voltage output.
What Affects Solar Panel Efficiency?
Solar panel efficiency is determined by the amount of voltage and power that a solar panel can produce. Generally, the higher the wattage per unit area, the more efficient the solar panel. This means that for every square meter of solar panel, more watts are produced.
The power output is determined by the voltage output of the solar panel combined with direct sunlight and ambient temperature when it comes to solar power production. All of these factors affect how much power a solar panel can produce and its overall efficiency.
To maximize your solar power production, you need to make sure your solar panels are installed in an area that gets plenty of direct sunlight and at a temperature that allows for maximum efficiency. With proper installation and maintenance, your solar panels will be able to produce optimal amounts of electricity for years to come.
What Can You Power With a Solar Panel?
A solar panel is a device that converts the sun’s energy into usable electricity. It does this by capturing the light from the sun and converting it into direct current (DC) electricity. Solar power output from a single solar panel can range from as low as 10 watts to over 350 watts, depending on the type, size, and efficiency of the solar panel.
The voltage output of a solar panel is typically in the range of 18 to 36 volts DC. The overall power output of a solar panel depends on how much sunlight it receives and its efficiency rating. With enough solar panels, you can power many things such as lights, small appliances, pumps, motors and even entire homes.
How Many Amps Does a 250-Watt Solar Panel Produce?
A 250-watt solar panel is a powerful solar panel that produces a great amount of power. When these panels are exposed to direct sunlight, they produce around 2 amps of electrical current. While this may not sound like a lot, many amps of electricity produced from just one solar panel can make a huge difference in powering up electronic devices or even homes.
The exact amperage produced by the panel depends on the amount of direct sunlight it receives and other environmental factors. In general, however, most 250-watt solar panels will produce around 2 amps in direct sunlight. So if you’re looking for an efficient and reliable way to power your home or business, then consider investing in a high quality 250-watt solar panel!
What Can Influence How Many Amps a 250-Watt Solar Panel Can Produce?
The number of amps a 250-watt solar panel can produce depends on a variety of factors. Direct sunlight is the primary factor that influences how many amps the solar panel can produce, as more direct sunlight allows for the production of more power and thus more amps.
The amount of power produced by the solar panel also depends on its location, such as whether it’s placed on an RV or in a fixed location; an RV typically has less direct sunlight than a fixed location. Additionally, the quality and condition of the solar panel will also affect how many amps it can produce; if there is any damage to the panels, it will likely reduce their efficiency and output.
Finally, some other environmental factors such as clouds or nearby buildings may also reduce the amount of direct sunlight that reaches the panel and thus reduce the number of amps it can produce. In short, multiple factors can influence how many amps a 250-watt solar panel can produce.
Why is Knowing the Amps Important?
Knowing the amps or amperage is important because it helps us understand how much power a device or appliance requires. It also tells us how much power can be supplied by a source such as a solar panel. The amp measure is used to calculate the number of watts, which is the unit of measurement for power.
For example, if you have a solar panel that produces 10 amps, then you know it can supply 10 amps of power per hour, meaning you will need many amps to provide enough power for an entire house.
Knowing the amps helps us determine what size and type of solar panel we need to produce the wattage we require. This knowledge also enables us to make sure our devices are getting the right amount of voltage and current to operate safely and efficiently.
Do You Need to Pair a Battery with a Solar Panel?
Pairing a battery with a solar panel is essential for using solar power to charge your RV. The battery stores the energy that is produced by the solar panel, giving you access to power when the sun isn’t out. Without the battery, you wouldn’t be able to use much power when the sun is not shining.
To pair a battery and solar panel, you will need a charge controller in addition to the two components. The charge controller ensures that the battery doesn’t overcharge or become damaged from too much power being charged into it at once.
With these three components, you can effectively use solar power to keep your RV running smoothly and efficiently.
How Do You Know How Many Watts You Need in a Solar Panel?
When it comes to solar panel power, it’s all about watts. To determine how many watts you need in a solar panel, you must first decide how much power your RV needs. You need to know the amount of amps that are required for the items you plan to use on a daily basis.
For example, if you have 6 amps worth of items that need to be powered each day, then you will need at least 6 amps of power from your solar panel. The size of the solar panel will determine how many amps the solar panel can produce, and it typically produces around 5-7 amps per hour of direct sunlight.
Additionally, the voltage applied to the number of amps produced by the solar panel will also impact how much power is available for use each day. So when looking for a solar panel for your RV, make sure to consider these factors so you know exactly how many watts your solar panel needs to provide.
Are you looking for ways to charge your car battery, but don’t want to rely on the grid? Solar panels may be the answer. In this blog post, we’ll cover the basics of charging a car battery with solar panels and what you need to get started. So read on and let’s get started!
What is the Best Way to Charge a Car Battery With a Solar Panel?
Using a solar panel to charge your car battery is a great way to save money and be more environmentally friendly. But it’s important to know the best way to go about it in order to ensure maximum efficiency and safety. The best way to charge a car battery with a solar charger is to use a solar charge controller.
This device regulates the amount of current being drawn from the solar panel, preventing overcharging and ensuring your battery stays in top condition. It also provides extra protection against short circuits or other electrical mishaps. With the right setup, you can maximize the energy output of your solar panel and ensure your car’s battery will remain charged for years to come.
How Long Does it Take to Charge a Car Battery With a Solar Panel?
As we have discussed, you can charge your car battery with a solar panel. But, how long does it take to charge the battery? This depends on the size of the battery and the size of the solar panel. Generally, it can take anywhere from a few hours to a few days to fully charge a car battery with a solar panel.
The larger the battery and the greater the capacity of the solar charger, the faster the charge time. If you are using a battery with a lower amp-hour rating, then you may need to use multiple solar panels in order to charge it more quickly. Additionally, the amount of sunlight available will also affect how quickly the battery can be charged.
How Much Voltage Does a Solar Panel Provide?
Now that you know that you can indeed charge your car battery with a solar panel, you may be wondering how much voltage a solar panel can provide. The answer is that it depends on the type of solar panel, as each one has a different voltage rating.
Generally, a solar panel can charge a 12v battery, meaning it can provide up to 12V of electricity to charge your car battery. If the solar panel is rated below 12V, it will not be able to charge your car battery and so it is important to take this into consideration when choosing a solar panel for your charging purposes.
What Are the Benefits of Charging a Car Battery With a Solar Panel?
Using a solar panel to charge a car battery is a great way to save money on fuel costs and reduce your environmental impact. Solar energy is free and renewable, so you can use it to power your car without having to worry about running out of fuel or spending money on gasoline.
Solar panels are also easy to install and maintain, so you can be sure that your car will always have enough power for your needs. Additionally, charging your car battery with a solar panel can help you to stay safe in case of an emergency, as it will allow you to jumpstart your car even if there is no power in the area.
What Are the Drawbacks of Charging a Car Battery With a Solar Panel?
While charging a car battery with a solar panel is convenient and cost-effective, there are some drawbacks to consider. One of the major drawbacks is that solar power does not always provide consistent power output. Solar panels are dependent on the amount of sunlight available, so if it’s cloudy or raining, the power output can be very low. Additionally, solar panels are not as efficient at night or in low-light conditions, making it difficult to charge a car battery without supplemental power.
In addition, solar charger systems require an initial investment in equipment and installation costs that can be quite expensive. If you don’t have access to a suitable area for installation or can’t afford the setup costs, then you may want to consider other options for charging your car battery.
What Are the Safety Considerations When Charging a Car Battery With a Solar Panel?
Safety should always be a top priority when charging a car battery with a solar panel. This is especially true if you are using a charging system that is not connected to your car’s electrical system. To ensure the safety of your car, it’s important to use a solar charge controller in order to regulate the amount of electricity that is being sent to the battery.
Additionally, you should make sure that your solar panel is rated for 12V and that all of the wiring is in proper working order. If done correctly, charging your car battery with a solar panel can be a safe and efficient process.
How Do I Maximize the Efficiency of My Solar Panel Charging System?
Once you’ve determined the best way to charge your car battery with a solar panel, it’s important to consider how to maximize the efficiency of your charging system. A key factor in maximizing efficiency is the size of the solar panel. If you have a large enough panel, you can charge your battery at a faster rate.
However, if your solar panel is too small for your battery, it will take much longer to charge. Additionally, you will need to use an appropriate charge controller and maintain proper voltage levels. Installing a voltage sensitive relay (VSR) can also help maximize the efficiency of your system by allowing you to charge your battery while driving. With these tips in mind, you can ensure that your solar panel charging system is working at its best capacity.
What Type of Battery Can Be Charged With a Solar Panel?
If you’re considering charging your car battery with a solar panel, you’ll need to make sure that the solar panel is rated at 12V. That’s because car batteries are usually 12V, and anything less than 12V won’t be able to charge your battery properly. You can also use a solar panel to charge other 12 volt battery as well, such as those used in golf carts and electric bicycles.
For these batteries, you’ll need to make sure that the solar panel is appropriately sized and rated. Additionally, you’ll want to use a solar charge controller, which is a safety device that helps regulate the charging process. With the right setup, you can easily charge your car battery with a solar panel.
Are you trying to maximize the use of your pool? Have you been contemplating solar heating for your pool, but are unsure where to begin? You need look no further! Here, we will discuss the advantages of solar pool heating and the numerous ways to get started.
Understand the Benefits of Solar Heating for Pools
Solar pool heating can be an effective and efficient method for year-round pool enjoyment. In addition to providing warm water for swimming, it reduces energy expenses by utilizing the sun’s natural energy. Solar pool heaters are simple to install and maintain, as well as far less expensive than conventional heating systems. Here are some of the primary advantages of solar pool heating:
Solar pool heating system is significantly less expensive than conventional heating systems, making them an excellent option to save money on your energy expenses.
Solar pool heaters utilize the sun’s natural energy, which is free and sustainable. This reduces your carbon footprint and increases the eco-friendliness of your pool.
Using a solar heater, the swimming season can be extended by up to two months. This allows you to use your pool during the cooler months.
Solar pool heaters are straightforward to install and need little upkeep. This makes them perfect for people who lack the resources or time to implement more complex systems.
Choose the Appropriate Solar Pool Heaters
Choosing the appropriate solar heater for your pool is crucial to ensure that it is heated efficiently and safely. Consider the size of your pool, the environment where you reside, and your budget when picking a solar heater.
You may need to invest in a more powerful solar warmer for larger pools. In frigid climates, you may need to invest in a solar heating system that is more sophisticated and intended to withstand extreme temperatures. There are still choices available that can deliver enough heat to keep your pool comfortable without breaking the bank if you are on a tight budget.
Before making a final decision, you should conduct research and check user reviews. Ensure that you are aware of the characteristics and limitations of each product, and that it is compatible with your pool and environment. Additionally, it is essential to evaluate the installation process and whether or not you will want expert assistance.
Once you’ve selected the ideal solar heater for your pool, you’ll be able to enjoy year-round warm swimming!
Solar Pool Heater Installation
The installation of a solar pool heater is a pretty straightforward process that can be accomplished within two days. Before beginning, it is essential to understand the system’s fundamental components and how they interact. Install the solar collectors on the roof or another suitable location where they will get direct sunlight. Ensure that the collectors are secured securely so that they do not shift or move over time.
Next, connect the pump and filter system to guarantee that the hot water created by the collectors circulates throughout the pool properly. Finally, you must connect the solar collectors to the pool itself using pipes. Installing a solar pool heater can allow you to enjoy longer swimming seasons and reduced energy expenditures.
Maintain and Clean the Solar Heater
Maintaining and cleaning your solar heater is essential to ensuring that it continues to heat your pool efficiently and effectively. Regularly examining your solar heater for signs of deterioration and removing any buildup of dirt and debris can help maintain its optimal performance. Inspect the seals on the pipes, valves, and other solar system components to ensure they are in good shape.
By carefully maintaining your solar heater, you can ensure that it functions as efficiently as possible for many years. To get the most out of your solar heater, you must frequently inspect it and remove any debris or buildup from the panels and pipes. This will help maintain your pool water warm and appealing throughout the entire season.
Insulate the Swimming Pool and Piping to Preserve Heat
When heating a swimming pool using a solar heater, it is crucial to insulate the pool and pipe system. Insulation reduces heat loss from the pool and piping system and increases the efficiency of your solar heater. Foam insulation is the most frequent type of insulation for pools and piping systems because it provides excellent protection against heat loss without requiring excessive space.
A reflective substance, such as aluminum foil, can also be used to reflect the solar heater’s heat back into the pool and pipework. With sufficient insulation, you may enjoy a comfortable and warm swimming pool for longer durations.
Adjust the Solar Heater’s Temperature Settings
Adjusting the temperature settings on your solar pool heater is essential for achieving efficient pool heating. The solar heater should be set to a suitable swimming temperature, and the temperature should be adjusted seasonally to allow for changing weather.
Once the desired temperature has been set, you will need to monitor it to verify that it is continuously maintained. You can do this manually by monitoring the pool thermometer, or you can invest in a pool automation system that enables remote temperature control and monitoring.
In addition, ensure that the solar heater is not set too high, since this might cause excessive evaporation and lengthen the time required to heat the pool. With the correct temperature settings, you may have a pleasant swimming experience throughout the entire season.
Examine the Pool and Piping System for Leaks
The proper operation of your solar heating system requires that you inspect your pool and pipe system for leaks. Pool and pipe leaks can lead to decreased efficiency and increased energy expenses. To check for leaks, you should routinely inspect the pool and its piping. Check for indicators of water loss, such as moist areas or algae growth.
If you detect any leaks in your solar heating system, it is crucial to repair them immediately to prevent further harm. Before undertaking any repairs, you should first turn off the pump and heater. Then, using a patch kit, plug the pool or pipe leak. If the repair fails, it may be necessary to replace the damaged section of pipe or liner.
Additionally, it is essential to examine all connections between the solar heating system and the pool or pipe. Ensure that all connections are tight and clear of any dirt or debris that could lead to a leak. Additionally, you must ensure that all valves are closed when not in use and open when water flow is desired.
By routinely inspecting for and correcting any leaks, you can ensure that your solar heating system is operating effectively and efficiently.
Extend Swimming Season with a Solar Heater
The optimal solar pool heater can lengthen the swimming season. A solar heater may keep your pool warm during the cooler months by utilizing the sun’s free energy. Solar heaters are inexpensive, simple to install and maintain, and temperature-adjustable. With the correct solar heater, you may swim in your pool throughout the year.
Optimize the Performance of Your SolarPool Heater
Maximizing the effectiveness of a solar heater is crucial for maintaining a regularly heated pool and minimal heating costs. Understanding how a system operates and taking efforts to enhance it are essential for optimizing efficiency.
You may enhance efficiency and reduce energy expenses by properly insulating the pool and piping system, adjusting the temperature settings on the heater, and checking for leaks. In addition, regular cleaning and maintenance of the solar heater will contribute to its continued functionality. With a few easy measures, you can maintain your solar heater’s efficiency and enjoy a warm pool throughout the year.
Compare Costs of Solar vs. Traditional Heating Systems
When it comes to pool heating, you may ask if a solar heater is the best option for you. It is essential to evaluate the prices of a solar heating system with a conventional heater. Typically, solar pool heaters are more expensive to install than conventional warmers. However, they are frequently more economical in the long run.
Solar pool heaters require no energy source other than the sun, so you do not have to worry about burning expensive fuels or purchasing expensive power. Solar pool heaters can also save maintenance expenses. Solar heaters, unlike conventional heaters, include no moving parts, thus they do not require frequent repairs or replacements. In addition to extending the swimming season and reducing energy expenditures over time, solar heaters can lengthen the swimming season.
Consider considerations such as installation costs, maintenance expenses, and energy savings when comparing the prices of solar and conventional heating systems. Ensure that you conduct research and consult with a specialist to identify the best solution for your needs. With the proper system, you may enjoy a warmer pool while saving money over time.
But animating these grid properties only recently gained supported by all three major browsers. Shall we take a look at a few examples to get the creative juices flowing?
A simple two-column grid. Now, before, you might not have built this using CSS Grid because animations and transitions weren’t supported, but what if you wanted the left column — perhaps a sidebar navigation — to expand on hover? Well, now that’s possible.
I know what you’re thinking: “Animating a CSS property? Easy peasy, I’ve been doing it for years!” Me too. However, I ran into an interesting snag while experimenting with a particular use case.
So, we want to transition the grid itself (specifically grid-template-columns, which is set on the .grid class in the example). But the left column (.left) is the selector that requires the :hover pseudo-class. While JavaScript can solve this conundrum easily — thanks, but no thanks — we can accomplish it with CSS alone.
Let’s walk through the whole thing, starting with the HTML. Pretty standard stuff really… a grid with two columns.
Putting the cosmetic CSS aside, you’ll first need to set display: grid on the parent container (.grid).
.grid {
  display: grid;
}
Next, we can define and size the two columns using the grid-template-columns property. We’ll make the left column super narrow, and later increase its width on hover. The right column takes up the rest of the remaining space, thanks to the auto keyword.
We know we’re going to animate this thing, so let’s go ahead and throw a transition in there while we’re at it so the change between states is smooth and noticeable.
That’s it for the .grid! All that’s left is to apply the hover state. Specifically, we’re going to override the grid-template-columns property so that the left column takes up a greater amount of space on hover.
This alone isn’t all that interesting, although it’s awesome that animations and transitions are supported now in CSS Grid. What’s more interesting is that we can use the relatively new :has()pseudo-class to style the parent container (.grid) while the child (.left) is hovered.
.grid:has(.left:hover) {
  /* Hover styles */
}
In plain English this is saying, “Do something to the .grid container if it contains an element named .left inside of it that is in a hover state.” That’s why :has() is often referred to as a “parent” selector. We can finally select a parent based on the children it contains — no JavaScript required!
So, let’s increase the width of the .left column to 30% when it is hovered. The .right column will continue to take up all the leftover space:
We could use CSS variables as well, which may or may not look cleaner depending on your personal preferences (or you might be using CSS variables in your project anyway):
I love that CSS grids can be animated now, but the fact that we can build this particular example with just nine lines of CSS is even more astounding.
Here’s another example by Olivia Ng — similar concept, but with content (click on the nav icon):
CodePen Embed Fallback
Example 2: Expanding Panels
CodePen Embed Fallback
This example transitions the grid container (the column widths) but also the individual columns (their background colors). It’s ideal for providing more content on hover.
It’s worth remembering that the repeat() function sometimes produces buggy transitions, which is why I set the width of each column individually (i.e. grid-template-columns: 1fr 1fr 1fr).
Example 3: Adding Rows and Columns
CodePen Embed Fallback
This example animatedly “adds” a column to the grid. However — you guessed it — this scenario has a pitfall too. The requirement is that the “new” column mustn’t be hidden (i.e. set to display: none), and CSS Grid must acknowledge its existence while setting its width to 0fr.
So, for a three-column grid — grid-template-columns: 1fr 1fr 0fr (yes, the unit must be declared even though the value is 0!) transitions into grid-template-columns: 1fr 1fr 1fr correctly, but grid-template-columns: 1fr 1fr doesn’t. In hindsight, this actually makes perfect sense considering what we know about how transitions work.
Here’s another example by Michelle Barker — same concept, but with an extra column and lot more pizzazz. Make sure to run this one in full-screen mode because it’s actually responsive (no trickery, just good design!).
CodePen Embed Fallback
A few more examples
Because why not?
This “Animated Mondrian” is the original proof of concept for animated CSS grids by Chrome DevRel. The grid-row‘s and grid-column‘s utilize the span keyword to create the layout you see before you, and then the grid-template-row’s and grid-template-column‘s are animated using a CSS animation. It’s nowhere near as complex as it looks!
CodePen Embed Fallback
Same concept, but with more of that Michelle Barker pizzazz. Could make a nice loading spinner?
CodePen Embed Fallback
Wrapping up with a bit of nostalgia (showing my age here), the not-very-griddy animated CSS grid by Andrew Harvard. Again — same concept — it’s just that you can’t see the other grid items. But don’t worry, they’re there.
SvelteKit is the latest of what I’d call next-gen application frameworks. It, of course, scaffolds an application for you, with the file-based routing, deployment, and server-side rendering that Next has done forever. But SvelteKit also supports nested layouts, server mutations that sync up the data on your page, and some other niceties we’ll get into.
This post is meant to be a high-level introduction to hopefully build some excitement for anyone who’s never used SvelteKit. It’ll be a relaxed tour. If you like what you see, the full docs are here.
In some ways this is a challenging post to write. SvelteKit is an application framework. It exists to help you build… well, applications. That makes it hard to demo. It’s not feasible to build an entire application in a blog post. So instead, we’ll use our imaginations a bit. We’ll build the skeleton of an application, have some empty UI placeholders, and hard-coded static data. The goal isn’t to build an actual application, but instead to show you how SvelteKit’s moving pieces work so you can build an application of your own.
To that end, we’ll build the tried and true To-Do application as an example. But don’t worry, this will be much, much more about seeing how SvelteKit works than creating yet another To-Do app.
Spinning up a new SvelteKit project is simple enough. Run npm create svelte@latest your-app-name in the terminal and answer the question prompts. Be sure to pick “Skeleton Project” but otherwise make whatever selections you want for TypeScript, ESLint, etc.
Once the project is created, run npm i and npm run dev and a dev server should start running. Fire up localhost:5173 in the browser and you’ll get the placeholder page for the skeleton app.
Basic routing
Notice the routes folder under src. That holds code for all of our routes. There’s already a +page.svelte file in there with content for the root / route. No matter where in the file hierarchy you are, the actual page for that path always has the name +page.svelte. With that in mind, let’s create pages for /list, /details, /admin/user-settings and admin/paid-status, and also add some text placeholders for each page.
Your file layout should look something like this:
You should be able to navigate around by changing URL paths in the browser address bar.
Layouts
We’ll want navigation links in our app, but we certainly don’t want to copy the markup for them on each page we create. So, let’s create a +layout.svelte file in the root of our routes folder, which SvelteKit will treat as a global template for all pages. Let’s and add some content to it:
Some rudimentary navigation with some basic styles. Of particular importance is the <slot /> tag. This is notthe slot you use with web components and shadow DOM, but rather a Svelte feature indicating where to put our content. When a page renders, the page content will slide in where the slot is.
And now we have some navigation! We won’t win any design competitions, but we’re not trying to.
Nested layouts
What if we wanted all our admin pages to inherit the normal layout we just built but also share some things common to all admin pages (but only admin pages)? No problem, we add another +layout.svelte file in our root admin directory, which will be inherited by everything underneath it. Let’s do that and add this content:
<div>This is an admin page</div>

<slot />

<style>
  div {
    padding: 15px;
    margin: 10px 0;
    background-color: red;
    color: white;
  }
</style>
We add a red banner indicating this is an admin page and then, like before, a <slot /> denoting where we want our page content to go.
Our root layout from before renders. Inside of the root layout is a <slot /> tag. The nested layout’s content goes into the root layout’s <slot />. And finally, the nested layout defines its own <slot />, into which the page content renders.
If you navigate to the admin pages, you should see the new red banner:
Defining our data
OK, let’s render some actual data — or at least, see how we can render some actual data. There’s a hundred ways to create and connect to a database. This post is about SvelteKit though, not managing DynamoDB, so we’ll “load” some static data instead. But, we’ll use all the same machinery to read and update it that you’d use for real data. For a real web app, swap out the functions returning static data with functions connecting and querying to whatever database you happen to use.
Let’s create a dirt-simple module in lib/data/todoData.ts that returns some static data along with artificial delays to simulate real queries. You’ll see this lib folder imported elsewhere via $lib. This is a SvelteKit feature for that particular folder, and you can even add your own aliases.
A function to return a flat array of our to-do items, a lookup of our tags, and a function to fetch a single to-do (we’ll use that last one in our Details page).
Loading our data
How do we get that data into our Svelte pages? There’s a number of ways, but for now, let’s create a +page.server.js file in our list folder, and put this content in it:
import { getTodos, getTags } from "$lib/data/todoData";

export function load() {
  const todos = getTodos();
  const tags = getTags();

  return {
    todos,
    tags,
  };
}
We’ve defined a load() function that pulls in the data needed for the page. Notice that we are notawait-ing calls to our getTodos and getTags async functions. Doing so would create a data loading waterfall as we wait for our to-do items to come in before loading our tags. Instead, we return the raw promises from load, and SvelteKit does the necessary work to await them.
So, how do we access this data from our page component? SvelteKit provides a data prop for our component with data on it. We’ll access our to-do items and tags from it using a reactive assignment.
Before we move on to the Details page and mutate data, let’s take a peek at a really neat SvelteKit feature: layout groups. We’ve already seen nested layouts for all admin pages, but what if we wanted to share a layout between arbitrary pages at the same level of our file system? In particular, what if we wanted to share a layout between only our List page and our Details page? We already have a global layout at that level. Instead, we can create a new directory, but with a name that’s in parenthesis, like this:
We now have a layout group that covers our List and Details pages. I named it (todo-management) but you can name it anything you like. To be clear, this name will not affect the URLs of the pages inside of the layout group. The URLs will remain the same; layout groups allow you to add shared layouts to pages without them all comprising the entirety of a directory in routes.
We could add a +layout.svelte file and some silly <div> banner saying, “Hey we’re managing to-dos”. But let’s do something more interesting. Layouts can define load() functions in order to provide data for all routes underneath them. Let’s use this functionality to load our tags — since we’ll be using our tags in our details page — in addition to the list page we already have.
In reality, forcing a layout group just to provide a single piece of data is almost certainly not worth it; it’s better to duplicate that data in the load() function for each page. But for this post, it’ll provide the excuse we need to see a new SvelteKit feature!
First, let’s go into our list page’s +page.server.js file and remove the tags from it.
import { getTodos, getTags } from "$lib/data/todoData";

export function load() {
  const todos = getTodos();

  return {
    todos,
  };
}
Our List page should now produce an error since there is no tags object. Let’s fix this by adding a +layout.server.js file in our layout group, then define a load() function that loads our tags.
import { getTags } from "$lib/data/todoData";

export function load() {
  const tags = getTags();

  return {
    tags,
  };
}
And, just like that, our List page is rendering again!
We’re loading data from multiple locations
Let’s put a fine point on what’s happening here:
We defined a load() function for our layout group, which we put in +layout.server.js.
This provides data for all of the pages the layout serves — which in this case means our List and Details pages.
Our List page also defines a load() function that goes in its +page.server.js file.
SvelteKit does the grunt work of taking the results of these data sources, merging them together, and making both available in data.
Our Details page
We’ll use our Details page to edit a to-do item. First, let’s add a column to the table in our List page that links to the Details page with the to-do item’s ID in the query string.
<td><a href="/details?id={t.id}">Edit</a></td>
Now let’s build out our Details page. First, we’ll add a loader to grab the to-do item we’re editing. Create a +page.server.js in /details, with this content:
import { getTodo, updateTodo, wait } from "$lib/data/todoData";

export function load({ url }) {
  const id = url.searchParams.get("id");

  console.log(id);
  const todo = getTodo(id);

  return {
    todo,
  };
}
Our loader comes with a url property from which we can pull query string values. This makes it easy to look up the to-do item we’re editing. Let’s render that to-do, along with functionality to edit it.
SvelteKit has wonderful built-in mutation capabilities, so long as you use forms. Remember forms? Here’s our Details page. I’ve elided the styles for brevity.
We’re grabbing the tags as before from our layout group’s loader and the to-do item from our page’s loader. We’re grabbing the actual tag objects from the to-do’s list of tag IDs and then rendering everything. We create a form with a hidden input for the ID and a real input for the title. We display the tags and then provide a button to submit the form.
If you noticed the use:enhance, that simply tells SvelteKit to use progressive enhancement and Ajax to submit our form. You’ll likely always use that.
How do we save our edits?
Notice the action="?/editTodo" attribute on the form itself? This tells us where we want to submit our edited data. For our case, we want to submit to an editTodo “action.”
Let’s create it by adding the following to the +page.server.js file we already have for Details (which currently has a load() function, to grab our to-do):
Form actions give us a request object, which provides access to our formData, which has a get method for our various form fields. We added that hidden input for the ID value so we could grab it here in order to look up the to-do item we’re editing. We simulate a delay, call a new updateTodo() method, then redirect the user back to the /list page. The updateTodo() method merely updates our static data; in real life you’d run some sort of update in whatever datastore you’re using.
export async function updateTodo(id, newTitle) {
  const todo = todos.find(t => t.id == id);
  Object.assign(todo, { title: newTitle });
}
Let’s try it out. We’ll go to the List page first:
Now let’s click the Edit button for one of the to-do items to bring up the editing page in /details.
We’re going to add a new title:
Now, click Save. That should get us back to our /list page, with the new to-do title applied.
How did the new title show up like that? It was automatic. Once we redirected to the /list page, SvelteKit automatically re-ran all of our loaders just like it would have done regardless. This is the key advancement that next-gen application frameworks, like SvelteKit, Remix, and Next 13 provide. Rather than giving you a convenient way to render pages then wishing you the best of luck fetching whatever endpoints you might have to update data, they integrate data mutation alongside data loading, allowing the two to work in tandem.
A few things you might be wondering…
This mutation update doesn’t seem too impressive. The loaders will re-run whenever you navigate. What if we hadn’t added a redirect in our form action, but stayed on the current page? SvelteKit would perform the update in the form action, like before, but would still re-run all of the loaders for the current page, including the loaders in the page layout(s).
Can we have more targeted means of invalidating our data? For example, our tags were not edited, so in real life we wouldn’t want to re-query them. Yes, what I showed you is just the default forms behavior in SvelteKit. You can turn the default behavior off by providing a callback to use:enhance. Then SvelteKit provides manual invalidation functions.
Loading data on every navigation is potentially expensive, and unnecessary. Can I cache this data like I do with tools like react-query? Yes, just differently. SvelteKit lets you set (and then respect) the cache-control headers the web already provides. And I’ll be covering cache invalidation mechanisms in a follow-on post.
Everything we’ve done throughout this article uses static data and modifies values in memory. If you need to revert everything and start over, stop and restart the npm run dev Node process.
Wrapping up
We’ve barely scratched the surface of SvelteKit, but hopefully you’ve seen enough to get excited about it. I can’t remember the last time I’ve found web development this much fun. With things like bundling, routing, SSR, and deployment all handled out of the box, I get to spend more time coding than configuring.
Here are a few more resources you can use as next steps learning SvelteKit: