Wszystkie wpisy, których autorem jest admin

Focusing a `background-image` on a Precise Location with Percentages

Post pobrano z: Focusing a `background-image` on a Precise Location with Percentages

Let’s say you have an element with a background-image, where only part of the image is visible, because the image is bigger than the element itself. The rest is cropped away, outside the element.

Now you want to move that background-image such that you’re focusing the center of the element on a specific point in it. You also want to do that with percentage values rather than pixels. We’re going to have to get clever.

This is going to involve some math.

Let’s use this as our image, which has markers for sizing:

And here’s our element, with that background-image applied. Notice we can only see the (top) left of the image:

See the Pen Background Focus: no position by Jay (@jsit) on CodePen.

Now let’s say we want to align a specific point on the image with the center of that element. Say, the point at 300px in from the left.

Since we’re asking for this position in pixels, it’s straightforward. With no position defined, the background-image „starts” with the point at 100 pixels at the center, so you need to move it to the left by 200 pixels:

See the Pen Background Focus: pixel position by Jay (@jsit) on CodePen.

Let’s formalize it.

The x value you’re using for background-position is calculated like so:

(0.5 × [bounding box width]) - [x-coordinate]
             0.5 × 200px -              300px
                   100px -              300px = -200px

It takes a second to figure out, but it’s nothing too taxing. You could have probably figured that out intuitively without needing to use a formula.

But what if you wanted to (or had to) express background-position as a percentage? Shouldn’t be too hard, right? Let’s try using a percentage to get ourselves centered at 300px again. We had a background-position-x of -200px, so let’s convert that to percent: -200 / 800 = -25%, so:

See the Pen Background Focus: percentage (1st attempt) by Jay (@jsit) on CodePen.

Hm. That didn’t work at all. Maybe we need to use a positive value?

See the Pen Background Focus: percentage (2nd attempt) by Jay (@jsit) on CodePen.

That’s better, but it’s centered at, like… 250px? How about as a percentage of the bounding box width: 300 / 200 = 150%. That can’t be right…

See the Pen Background Focus: percentage (3rd attempt) by Jay (@jsit) on CodePen.

Yeah, that’s not right.

Let’s back up. What happens if we do this?

See the Pen Background Focus: percentage (4th attempt) by Jay (@jsit) on CodePen.

That feels like it kind of makes sense; background-position: 100% 0; makes the background-image flush-right and centered at 700px, or 7/8 the width of the image. But what if we wanted to center it at 100%? I guess we’d have to do… 9/8?

See the Pen Background Focus: percentage (5th attempt) by Jay (@jsit) on CodePen.

At this point, I’m not surprised that didn’t work.

This doesn’t feel like the right path. Let’s back up.

What does the spec say?

For example, with a value pair of '0% 0%’, the upper left corner of the image is aligned with the upper left corner of, usually, the box’s padding edge. A value pair of ‘100% 100%’ places the lower right corner of the image in the lower right corner of the area. With a value pair of '75% 50%’, the point 75% across and 50% down the image is to be placed at the point 75% across and 50% down the area.

Maybe we can reverse-engineer this.

On that last one, 112.5%, it was aligning the point at 112.5% across the background-image with the point at 112.5% across the bounding box. That kind makes sense. The spec seems written to make it easy for only three values: 0%, 50%, and 100%. Any other value isn’t so intuitive.

With background-position: 0;, we were focused on 100px, or 12.5%. With background-position: 100% 0;, we were focused on 700px, or 87.5%. How does background-position: 50% 0; look, exactly?

See the Pen Background Focus: percentage (6th attempt) by Jay (@jsit) on CodePen.

50% is kind of like our „anchor” here; it’s the point at which our desired focal point and the corresponding background-position values are equal.

Let’s pretend we want to focus on 700px or 87.5%. We go 100% of the way from the center: 50% + 50%.

See the Pen Background Focus: percentage (4th attempt) by Jay (@jsit) on CodePen.

With background-position set to 100%, the center of our bonding box has „panned” from the center of the image, 3/4 of the way to the rightmost edge (from 400px to 700px). If we want to „pan” to the rightmost edge, we need to go that extra 1/4, or 200px. 1/4 is 1/3 of 3/4, so we need to go a third more than we did a moment ago, or a total of 66.667% from the center:

See the Pen Background Focus: percentage (7th attempt) by Jay (@jsit) on CodePen.

Whew! So to focus on the rightmost edge of a background-image that is 4 times the size of our bounding box, we need to set background-position: 116.667% 0;.

How the heck are we supposed to figure that out?

It’s a difference of 16.667% from the 100% we might expect. So if we wanted to focus on our original goal of 300px (or, 37.5%), we’d, uh, add 16.667%? There’s no way this is going to work:

See the Pen Background Focus: percentage (8th attempt) by Jay (@jsit) on CodePen.

Nope.

If we wanted to focus on the leftmost edge, we’d probably subtract 16.667% from 0%, right? That sounds like it could be right.

See the Pen Background Focus: percentage (9th attempt) by Jay (@jsit) on CodePen.

Cool!

To focus at 100% or 0%, you have to „overshoot” those values by a certain amount, when measured from the center.

So if we want to focus on 0%, or „100% of the way to the left of the center,” we have to subtract 66.667% from 50%. If we want to focus on 100%, or „100% of the way to the right of the center,” we have to add 66.667% to 50%.

I might have expected to have to add or subtract 50% to or from 50% to get to those edges: a 1:1 ratio of „how far I want to go from the center” to „what my background-position value should be.” But instead, we have to use a 4:3 ratio. In other words, we have to use a value four-thirds more „away from the center.”

Things are getting a little hairy here, so let’s introduce some terms:

  • c: Desired focal point (in percent) from leftmost edge of background image
  • z: Zoom factor (background width ÷ bounding box width)
  • p: background-position, to focus on c, given z

So we take a focal point’s distance from the center (c − 50), multiply it by 4/3, then add that result to „the center,” or 50.

If you wanted to focus on the point at 600px (or 75%), my background-position value should be:

(75% − 50%) × 4/3 + 50% = 83.333%

Yes, that sounds like it could work! Please please please:

See the Pen Background Focus: percentage (10th attempt) by Jay (@jsit) on CodePen.

Awesome!

And if you wanted to focus on 200px, or 25%, you would do:

(25% − 50%) × 4/3 + 50% = 16.667%

See the Pen Background Focus: percentage (11th attempt) by Jay (@jsit) on CodePen.

Wow.

Let’s generalize this:

(c − 50%) × 4/3 + 50% = p

So why 4/3? 4 is the ratio of our background-image width to our bounding box width; and 3 is… 1 less than 4. Could it be that simple? Let’s try a larger background-image, this time 1000px wide, or 5 times the width of our bounding box. And let’s again try to focus on the point at 200px. Here our equation would be:

(20% − 50%) × 5/4 + 50% = 12.5%

See the Pen Background Focus: percentage (12th attempt) by Jay (@jsit) on CodePen.

Oh my god. It works!

So to revisit our equation, with a variable background-to-bounding-box ratio:

(c − 50%) × z/(z − 1) + 50% = p

Let’s turn this into English:

Given a point on a background-image at location c…

  1. with c expressed as a percentage of the width of the image
  2. where c is intended to lie in the horizontal center of the background image’s bounding box
  3. and where the background-image is z times as wide as its bounding box

the correct background-position p (expressed as a percentage) is given by the following formula:

(c − 50%) × z/(z − 1) + 50% = p

Can we generalize this even more?

What if we wanted to align the point at 25% of the background-image with the point at 75% of the bounding box? Yikes!

Let’s revisit our original formula:

(c − 50%) × z/(z − 1) + 50% = p

Now let’s introduce some new terms:

  • b: Desired focal point (in percent) from the leftmost edge of the bounding box. Earlier we had assumed this to always be 50% so that the center of the bounding box would be focused on our target in the background-image.
  • d: background-image focal point (in percent) to align to bounding box’s midpoint in order to get c to align to b in the bounding box; if d of the background-image aligns with 50% of the bounding box, then c of the background-image will align with b of the bounding box.

Let’s think of it this way

To want to align position c of a background-image with position b of a bounding box is to want to align some other position, d, of a background-image with the center of the bounding box – and we already know how to do that. So can we figure out a way to derive d, the spot we need to be at 50%, from c, b, and z? Sure!

With our 800px wide background-image, in a 200px-wide bounding box (z = 4), if we want to focus the rightmost edge of the bounding box (b = 100%) on the position at 600px (c = 75%) in the image, we would want the center of the bounding box to be focused on the point at 500px (d = 62.5%).

How do we get from c (75%) to d (62.5%)? Where does that -12.5% difference come from?

Well, our b was 100%, 50% greater than our old „default” b of 50%. And 12.5% is 1/4 of that; 1/4 is the inverse of our z of 4. Is that where our d comes from? That would be:

d = c + (50% - b)/z

Looks promising. Now we can substitute d in for c in the original formula:

(d − 50%) × z/(z − 1) + 50% = p

Or:

(c + (50% − b)/z - 50%) × z/(z − 1) + 50% = p

Whew! Let’s test this. Let’s try to align the position at 25% in our background-image (200px) with the position at 75% in our bounding box. This would be:

p = (25% + (50% - 75%)/4 - 50%) × 4/(4 - 1) + 50%
p = -31.25% × 1.333 + 50%
p = 8.333%

See the Pen Background Focus: percentage (13th attempt) by Jay (@jsit) on CodePen.

Unbelievable! Let’s double check. How about the point at 87.5% in our background-image (700px) aligned with the position at 33.333% in our bounding box:

p = (87.5% + (50% - 33.333%)/4 - 50%) × 4/(4 - 1) + 50%
p = 41.6667% × 1.333 + 50%
p = 105.555%

See the Pen Background Focus: percentage (14th attempt) by Jay (@jsit) on CodePen.

Looks good enough to me!

I’m sure there is something intuitive about this to certain types of people, but I am not one of those people.

Let’s build a Sass function that will do all this ridiculous math for us.

See the Pen Background Focus: percentage (final Sass function) by Jay (@jsit) on CodePen.

My head is spinning.

When I began tackling this problem I did not expect it to be this difficult, but what a journey. I hope guiding you through my thought process has been enlightening, and that you may at some point find value in our little Sass function.

All the Pens embedded in this article can be found in this collection.


Focusing a `background-image` on a Precise Location with Percentages is a post from CSS-Tricks

Photicular

Post pobrano z: Photicular

I was on vacation this past week and at some little beach gift shop they were selling this really cool big thick book called Ocean: A Photicular Book. You’ve probably seen something like it before… a plastic card that shows different images depending on how you are looking at it. This book is extremely well done in that the image are very high quality, and the design of the book makes the images move as you turn the pages.

Here’s a quick video:

check this book it's the coolest pic.twitter.com/isRLATp9im

— Chris Coyier (@chriscoyier) April 13, 2017

Here’s an explanation by Dan Kainen:

Photicular, also known as Lenticular, or Integrated Photography, was first conceived in the early 20th century, but the basic concept has been around since 1692 when a French painter created paintings that revealed one, and then the other as the observer walked by. The simplest form of it is to cut two images into thin vertical strips and interleave them, placing in front of the composite image a plane of bars, like a picket fence, which only allows one to see one image at a time through the gaps. Instead of bars, lenses can be used, and more than two images – as many as dozens – can be interleaved.

The end result is really neat in the Ocean book. After mentioning this one on Twitter, I’ve heard good things about the Safari one as well. I’m sure they are all awesome. It’s almost like the newspapers and paintings in Harry Potter!

Of course, it made me think about how we might do something Photicular-like on the web. We have videos and GIFs on the web, so it’s not exactly hard to make images move. But it’s not just in the movement itself that made these books cool, it was that it moves along with your actions (of turning the page).

Perhaps we could page through a GIF as a user scrolled. Can you programmatically control which frame of GIF is currently being shown? Sorrrrrrta. There is no simple native technology for that, but there are some alternatives.

Dennis Gaebel wrote about a technique he saw on the Capser Mattress site last year.

Rather than a GIF, you can use an image sprite, and swap out which part of the image you are showing as you scroll. His final demo is here:

See the Pen How to Animate a Coffee Drinking Sprite With ScrollMagic by Envato Tuts+ (@tutsplus) on CodePen.

If you really wanted to stick with a GIF, BuzzFeed actually created a JavaScript library called libgif-js specifically for exerting control over GIFs in this way. Through this lib, you can jump to certain frames, pause and start the GIF like you can with video, and even make the GIFs „rubbable”, meaning dragging left-and-right on them scrub the GIF backward and forwards.

To get super meta, here’s a GIF of me playing with a „rubbable” GIF:

The squishing is just what the GIF is of, it’s the ability to scrub through the GIFs frames that is interesting here. Well, squishing Steve Buscemi’s head is interesting too, but you know what I mean.

Related

A decade ago, I remember my old boss Tim Chatman designing a paper flip book thing for a client of ours.

It’s not Photicular, but it uses the same kind of slotted paper tabs you pull to make the images change.

I’m also reminded of one of my own favorite childhood books, Dinnertime, where different animals pop out at you as you turn the pages.


Photicular is a post from CSS-Tricks

ES6 modules support lands in browsers: is it time to rethink bundling?

Post pobrano z: ES6 modules support lands in browsers: is it time to rethink bundling?

Modules, as in, this kind of syntax right in JavaScript:

import { myCounter, someOtherThing } from 'utilities';

Which we’d normally use Webpack to bundle, but now is supported in Safari Technology Preview, Firefox Nightly (flag), and Edge.

It’s designed to support progressive enhancement, as you can safely link to a bundled version and a non-bundled version without having browsers download both.

Stefan Judis shows:

<!-- in case ES6 modules are supported -->
<script src="app/index.js" type="module"></script>
<!-- in case ES6 modules aren't supported -->
<script src="dist/bundle.js" defer nomodule></script>

Not bundling means simpler build processes, which is great, but forgoing all the other cool stuff a tool like Webpack can do, like „tree shaking”. Also, all those imports are individual HTTP requests, which may not be as big of a deal in HTTP/2, but still isn’t great:

Khan Academy discovered the same thing a while ago when experimenting with HTTP/2. The idea of shipping smaller files is great to guarantee perfect cache hit ratios, but at the end, it’s always a tradeoff and it’s depending on several factors. For a large code base splitting the code into several chunks (a vendor and an app bundle) makes sense, but shipping thousands of tiny files that can’t be compressed properly is not the right approach.

Preprocessing build steps are likely here to stay. Native tech can learn from them, but we might as well leverage what both are good at.

Direct Link to Article — Permalink


ES6 modules support lands in browsers: is it time to rethink bundling? is a post from CSS-Tricks

What graphic designers can take from contemporary art

Post pobrano z: What graphic designers can take from contemporary art
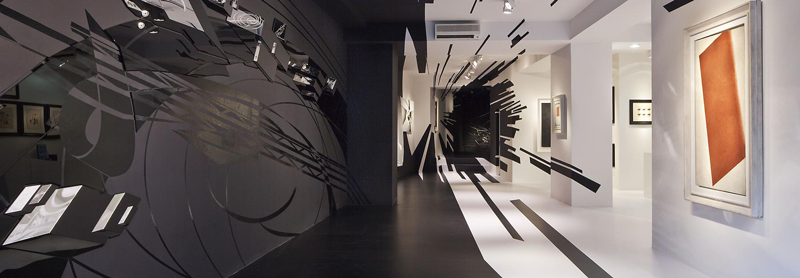
first image of the post

A graphic artist who is constantly looking for new sources of inspiration can find it in the most diverse places, from a piece of graffiti glimpsed from a train to an artist’s signature in the corner of a picture.

The world of contemporary art provides a rich variety of great ideas for reasons that are implicit in its name. It is always offering something new, inspirational and innovative. As such, contemporary art can serve as an important influence for graphic designers in the following five ways:

  • It challenges conventional thinking.
  • It offers new approaches to creative design.
  • It provides unique sources of inspiration.
  • It allows for a blending of cultural concepts.
  • It helps graphic designers embrace the latest art trends.

Where to look

There is no shortage of contemporary art galleries in every major city where you can seek inspiration. However, if you wish to find something a little out of the ordinary and truly cutting edge, then it is always a good idea to venture a bit off the beaten track.

For example, no visitor to Zurich should miss Galerie Gmurzynska on Paradeplatz. Originally established in 1960s Cologne, the gallery has a reputation for consistently featuring art that is rather unusual. As a case in point, while it loosely specializes in Russian avant-garde exhibits, it is currently hosting an exhibition on American icons.

This is just one example of the hidden treasures that you can find throughout Europe if you look beyond the usual tourist trails and well-known galleries such as the Tate Modern.

Drawing inspiration

If you are a graphic designer who is new to contemporary art, then you may have some doubts as to what you can take out of it. You might be reluctant to admit it, but you would not be the first to say that you don’t “get” a piece of art. Just keep in mind that every piece of art is not designed to appeal to everyone in the world.

Even if a piece of art does not strike a chord with you, there is much to be learned from considering what inspired the artist to create it and what it says to other people who view it. The range and diversity of what is loosely labeled as contemporary art provides a perfect opportunity to examine it from different viewpoints and perspectives.

The most common criticism of modern art is that it “does not look like anything,” but it is not quite that simple. What people actually mean is that it does not look like anything else, because unlike a portrait or a landscape, it is not attempting to recreate something that already exists. Put another way, is it more artistic to paint a representation of a church or create something entirely new?

The idea is that contemporary art challenges conventional thinking and helps you approach the entire sphere of graphic design from a new angle.

Give it a try

If preconceived notions about what you do and do not appreciate have so far prevented you from entering a contemporary art gallery, then take the plunge and give it a try. It will broaden your perspectives and inspire you to create better designs. And you never know — you might just like it too!

Between the Lines

Post pobrano z: Between the Lines

Media queries are great for changing values in sudden snaps at different screen sizes. But, combining the power of calc() and viewport units like vw and vh , we can get an awful lot of fluidity across our layouts. For this we’ll use a technique called linear interpolation.

Linear interpolation is a formula used to find a value between two points on a line. In our case those two points are CSS values, like font-sizes, margins or widths, that we want to interpolate between over a set of viewport widths.

The reason we might want to interpolate between values over a set of viewport widths is to avoid having to create multiple breakpoints to control the flow of our content when the viewport changes. Instead, we let the user’s browser calculate, according to our instructions, what values it gets. Let me explain.

The following snippet is a Sass function based on linear interpolation that we, at Aranja, have been calling between.

/**
 * Computes a CSS calc function that betweens a value from
 * A to B over viewport-width A to viewport-width B.
 * Requires a media query to cap the value at B.
 */

@function between($to, $from, $toWidth, $fromWidth) {
  $slope: ($to - $from) / ($toWidth - $fromWidth);
  $base: $from - $slope * $fromWidth;

  @return calc(#{$base} + #{100vw * $slope});
}

The function is used like so:

$small: 400px; 
$large: 1000px;

.Container {
  /* The base (smallest) value. */
  padding: 20px;

  /* In $small it should be 20px and in $large it should be 100px,  */
  /* In viewports between that its padding should be calculated */
  @media (min-width: $small) {
    padding: between(20px, 100px, $small, $large);
  }

/* In $large we cap the value at 100px */
  @media (min-width: $large) {
    padding: 100px;
  }
}

The code example above shows how we can between a container’s padding from being 20px in “mobile”-size to being 100px in “desktop”-size. Any size between that would get a calculated amount of padding ranging between 20 and 100 pixels. To prevent the padding from exceeding the maximum value we cap it with a breakpoint.

Try resizing the following demo to see the example in action:

See the Pen

The between function excels in solving spacing problems. Problems that previously we would have solved by hand using different media queries.

Example layout

The talented Carly Sylvester lent me the following wireframe she designed for a volunteer firefighter website so I get to demonstrate this technique on a real-world layout.

The design document consists of a desktop, tablet and mobile versions of the website, at 1440px, 720px and 324px respectively.
In reality, the lines between these different devices are not so clear-cut, so we’ll use the given values as target points and interpolate between them using our function.

Notice how the layout of the desktop and tablet versions are similar except for the use of white-space and font-sizes–which we’ll be able to interpolate between smoothly. When we get to our smallest target point we snap the layout into a classic full-width mobile layout.

See the Pen

For comparison, let’s see the implementation done the usual way, where the 3 main breakpoints are used to snap the layout their new values.

See the Pen

Videos of Demos

Resizing layout with between
Resizing layout without between

Try browsing the demos in different screen sizes and the benefits of our function should be clear. To make the „regular” version of the website better we’d need to add more breakpoints in addition to the original three from the design document, resulting in more jumps.

Combined with the power of rem

A powerful technique we can do with the function is to between the root font-size and base our styles on rems:

See the Pen

The rem unit refers to the root font-size (the font size set on the :root or html element) to determine its value and the root font-size refers to the viewport width to determine its value. We set the root font-size to be 10px at the smallest and 18px at the largest and the result is a smooth transition between the two. The smallest the card in the demo ever gets is 245px, at our $small breakpoint, and it gradually grows until it reaches its peak, 440px, at our $large breakpoint.

Closing

I am convinced that by utilizing this technique we can make the web a better experience for users browsing on devices that don’t fit into the generalization of „mobile” or „tablet” sizes. For me, at least, it also makes the development process more enjoyable as there are fewer layout-related bugs on my table.

Regarding browser support–the fact that we only need calc() and vw for the technique to work puts it at around 97% in USA and Europe, and around 84% globally.

In the demos above, for example, unsupported browsers (Which are mainly Opera Mini and UC Browser) will either use our lowest (base) values or our highest (capped) values, depending on the viewport width.


Between the Lines is a post from CSS-Tricks
Design deals for the week

Post pobrano z: Design deals for the week
first image of the post

Every week, we’ll give you an overview of the best deals for designers, make sure you don’t miss any by subscribing to our deals feed. You can also follow the recently launched website Type Deals if you are looking for free fonts or font deals.

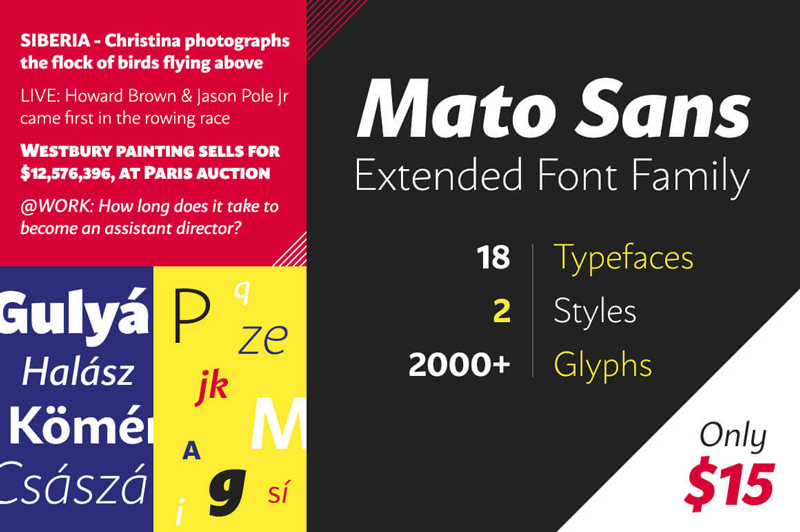
Mato Sans font family

This large font family features 18 fonts, each in 2 unique styles, as well as more than 2,000 glyphs per font! Toss in plenty of OpenType features and extended language sets for Latin and Cyrillic characters.

$15 instead of $290 – Get it now!

Lifetime Access to DesignBold’s Library of 6,000+ Templates

DesignBold can help you create beautiful designs in just a few short minutes! Whip up graphics for any social media account, blog posts, banners, advertisements, invitations, you name it. Fully customizable, this Mighty Deal gets you lifetime access to DesignBold’s extensive library of more than 6,000 templates.

$37 instead of $1140 – Get it now!

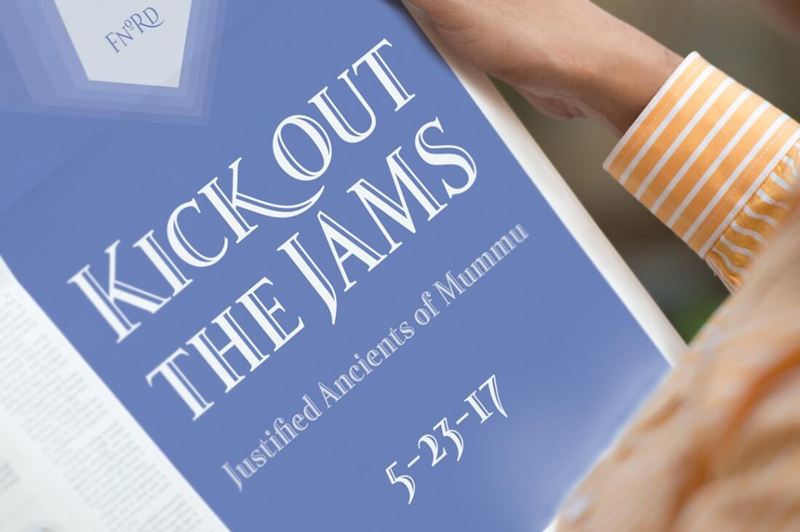
Fnord Type Family of 23 Unique Fonts

The Fnord Type Family is a contemporary humanist serif typeface containing 23 unique fonts! That’s 4 styles in 5 weights, plus an additional 3 display styles! With more than 650 glyphs per font, a full European character set and loads of extra features, this family has you covered and then some.

$17 instead of $230 – Get it now!

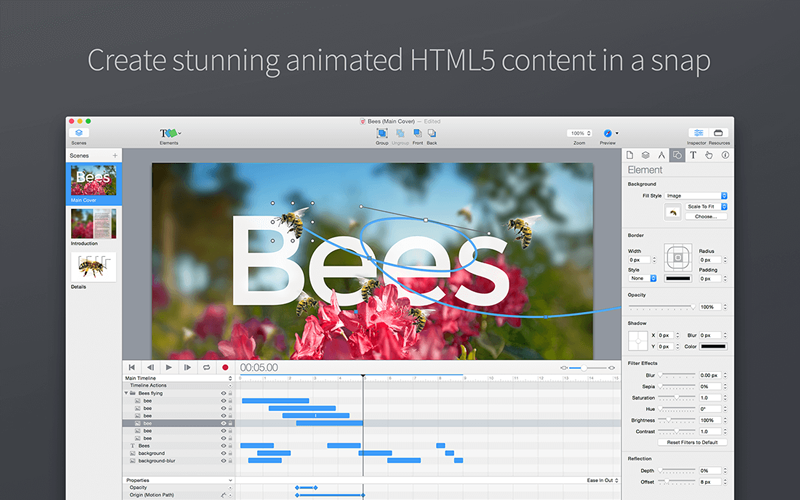
Tumult Hype for Mac

Animations can turn the ordinary into the extraordinary! With Tumult Hype 3.6, even the extraordinary levels up! This amazing Mac app lets you easily and quickly whip up beautiful HTML5 animations that work on timelines or based on user interactions. These animations can be built with keyframes and will display across all of today’s modern screen sizes. And if you act now, you can get Tumult Hype today for less than half price!

$24 instead of $49 – Get it now!

Bundle of 400+ High Quality Vector Textures from Ultrashock

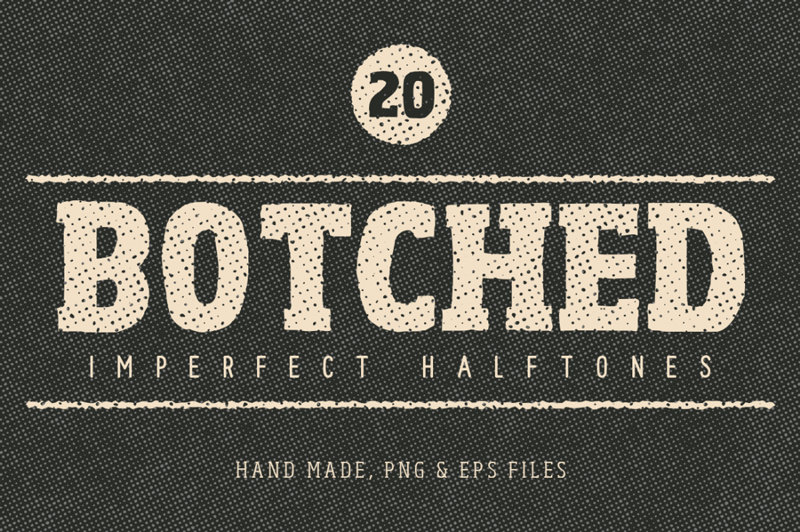
Stock up on a ton of creative items now with Ultrashock’s latest Creative Bundle which contains 418 brand new vector textures including Slick Tones (smooth halftone patterns with subtle gradients), Scratches and Scuffs, Retropress (distressed halftone scuffs), Subtle Grit Volume 01 and 02, Authentic Wood Grain, Noise Volume 01 and 02, Fine Grit, Retro Textures, Rusty Metal, Destructive Forces Backgrounds, Botched Imperfect Halftones, Granite Textures and more all with amazing value!

$24 instead of $674 – Get it now!

Nissan Frontier CloudCatcher saves village

Post pobrano z: Nissan Frontier CloudCatcher saves village

Nissan Brasil is promoting the new Nissan Frontier four wheel drive pickup with The CloudCatcher (O Caçador de Nuvens), a commercial in which two young farmers take drastic action to save their village from drought. The men are despairing over their dried-up crops when one of them has a bright idea: although their village is parched, there’s a stubborn rain cloud around a nearby mountain that refuses to move. They devise an ingenious scheme involving their Nissan Frontier truck, some ropes and a makeshift parachute that will eventually bring a piece of cloud down to the village. The commercial was filmed in Picotes, a village in Paraíba, northeastern Brazil, where it hadn’t rained for six years. Just as a the final rain scene was about to be shot, it actually started raining. The CloudCatcher campaign, with the tagline “#ÉMaisQueForça” (More than Force) is also made up of magazine and newspaper ads, a microsite, social media pieces and CRM.

Nissan Frontier Cloudcatcher

Nissan Frontier CloudCatcher Credits

The Nissan Frontier CloudCatcher campaign was developed at LewLara/TBWA by chief creative officer Felipe Luchi, creative directors Sthefan Ko and Gustavo Diehl, creatives Sthefan Ko, Fabio Santoro, Pedro Paes, Guilherme Possobon and Renato Simon, RTV team Luzia Oliveira and Cristiane Marinari, planners Renata d’Avila, Luciana Mussato, Maria Fernanda Haddad, Murilo Chagas and Luiz Menezes, media team Luiz Ritton, Thiago Ferraz, Suellen Kiss, Daniele Farhat, Bruna Dantas and Renato Pierote, general account director Wilson Negrini, account team Xiko Coutinho, Raiza Scatena and Caio Bottan, working with Nissan Brasil marketing team Arnaud Charpentier, Humberto Campusano, Mariana Lemos, Fabio Lima, Juliano Fortini and Murilo Almeida.

Filming was shot by director Rodrigo Saavedra via Landia, Sao Paulo, with executive producers Carol Dantas and Sebastian Hall, director of photography Javier Juliá, and production designer Julian Romera.

Film director Rodrigo Saavedra said, “4×4 and pick-up truck ads are generally all about power, all about being aggressive and tackling any terrain that comes your way. What struck me about this film was the fact that it actually has quite an emotional story at it’s core. It tells the story of two farmers struggling with a drought and then goes into a fantastic tale which nonetheless requires some extremely hard work from their Nissan Frontier.”

Visual effects were produced at Clan VFX. Colour grading was by Marla Colour Grading.

Sound and music were produced at Supersonica, by sound designer Vinicius Villani, account director Cristiane Marquesi, composers Antonio Pinto and Gabriel Ferreira, and voiceover artist Denis Garcia.

MIA Onlus Shelter Box helps Milan Homeless

Post pobrano z: MIA Onlus Shelter Box helps Milan Homeless

Milano in Azione Onlus (MIA Onlus) has launched the Shelter Box, a project designed to help the approximately 3,000 homeless people living in Milan. Over winter the number of beds in emergency shelters is increased in a temporary “cold floor” housing plan. However, come March 31, many find themselves back on the streets. “When winter ends, the emergency continues”. Some of these people have been on the streets for years, while others are recent arrivals, having lost their job, their home and love. MIA Onlus is distributing the Shelter Box that serves as a bed, chair, table and portable bag, providing shelter from the elements while sleeping, and storage of possessions during the day. The following commercial raises awareness of the post-Winter realities, and calls for financial support in extending the Shelter Box program.

MIA Onlus Shelter Box

The MIA Onlus Shelter Box is a design product made of quality cardboard, durable and lightweight, able to provide maximum insulation from moisture. This box is composed of a telescopic structure of three elements that interlock and allow the product to easily turn into a bed, a chair, a table or a backpack. It can be transported as a container to be reused over time.

At the end of the “cold Municipal Plan” (March 31), when many homeless people have had to leave their bed and get back on the road, MIA Milan in Action Fund has distributed the first modules to some of its clients but is now looking for financial support to grow the program.

Shelter Box Credits

The MIA Onlus Shelter Box campaign was developed at Leo Burnett Italia, Milan, by executive creative directors Francesco Bozza and Alessandro Antonini, creative director Nicoletta Zanterino, art directors/designers Filippo Formentini and Marco Zilioli, copywriters Alejandra Gumucio and Andrea Zanino, product designer Andrea Longoni, and producer Alessandra Caldi.

Filming was shot by director Claudio Gallinella via Bedeschifilm.