Amberley Romo read a ton about PWAs in order to form her own solid understanding.
“Progressive web app” (PWA) is both a general term for a new philosophy toward building websites and a specific term with an established set of three explicit, testable, baseline requirements.
As a general term, the PWA approach is characterized by striving to satisfy the following set of attributes:
.filter is a built-in array iteration method that accepts a predicate which is called against each of its values, and returns a subset of all values that return a truthy value.
That is a lot to unpack in one statement! Let’s take a look at that statement piece-by-piece.
„Built-in” simply means that it is part of the language—you don’t need to add any libraries to get access to this functionality.
„Iteration methods” accept a function that are run against each item of the array. Both .map and .reduce are other examples of iteration methods.
A „predicate” is a function that returns a boolean.
A „truthy value” is any value that evaluates to true when coerced to a boolean. Almost all values are truthy, with the exceptions of: undefined, null, false, 0, NaN, or "" (empty string).
To see .filter in action, let’s take a look at this array of restaurants.
isBurger is the predicate, and burgerJoints is a new array which is a subset of restaurants. It is important to note that restaurants remained unchanged from the .filter.
Here is a simple example of two lists being rendered—one of the original restaurants array, and one of the filtered burgerJoints array.
For every predicate there is an equal and opposite negated predicate.
A predicate is a function that returns a boolean. Since there are only two possible boolean values, that means it is easy to „flip” the value of a predicate.
A few hours have passed since I’ve eaten my burger, and now I’m hungry again. This time, I want to filter out burgers to try something new. One option is to write a new isNotBurger predicate from scratch.
However, look at the amount of similarities between the two predicates. This is not very DRY code. Another option is to call the isBurger predicate and flip the result.
This is better! If the definition of a burger changes, you will only need to change the logic in one place. However, what if we have a number of predicates that we’d like to negate? Since this is something that we’d likely want to do often, it may be a good idea to write a negate function.
The arguments object is a local variable available within all (non-arrow) functions. You can refer to a function’s arguments within the function by using the arguments object.
Why return an old-school function instead of a newer, cooler arrow function?
In this case, returning a traditional function is necessary because the arguments object is only available on traditional functions.
Returning Predicates
As we saw with our negate function, it is easy for a function to return a new function in JavaScript. This can be useful for writing „predicate creators.” For example, let’s look back at our isBurger and isPizza predicates.
Now the isCheap and isExpensive are DRY, and isPizza and isBurger are DRY—but isPrice and isCuisine share their logic! Luckily, there are no rules for how many functions deep you can return.
const isKeyEqualToValue = key => value => object => object[key] === value;

// these can be rewritten
const isCuisine = isKeyEqualToValue('cuisine');
const isPrice = isKeyEqualToValue('price');

// these don't need to change
const isBurger = isCuisine('burger');
const isPizza = isCuisine('pizza');
const isCheap = isPrice('cheap');
const isExpensive = isPrice('expensive');
This, to me, is the beauty of arrow functions. In a single line, you can elegantly create a third-order function. isKeyEqualToValue is a function that returns the function isPrice which returns the function isCheap.
See how easy it is to create multiple filtered lists from the original restaurants array?
What if you are fine with either pizza or burgers?
const either = (predicate1, predicate2) => value =>
  predicate1(value) || predicate2(value);

const isDelicious = either(isBurger, isPizza);
const deliciousFood = restaurants.filter(isDelicious);
This is a step in the right direction, but what if you have more than two foods you’d like to include? This isn’t a very scalable approach. There are two built-in array methods that come in handy here. .every and .some are both predicate methods that also accept predicates. .every checks if each member of an array passes a predicate, while .some checks to see if any member of an array passes a predicate.
isEvery and isAny both accept an array of predicates and return a single predicate.
Since all of these predicates are easily created by higher order functions, it isn’t too difficult to create and apply these predicates based on a user’s interaction. Taking all of the lessons we have learned, here is an example of an app that searches restaurants by applying filters based on button clicks.
Filters are an essential part of JavaScript development. Whether you’re sorting out bad data from an API response or responding to user interactions, there are countless times when you would want a subset of an array’s values. I hope this overview helped with ways that you can manipulate predicates to write more readable and maintainable code.
Refs make it possible to access DOM nodes directly within React. This comes in handy in situations where, just as one example, you want to change the child of a component. Let’s say you want to change the value of an <input> element, but without using props or re-rendering the whole component.
That’s the sort of thing refs are good for and what we’ll be digging into in this post.
How to create a ref
createRef() is a new API that shipped with React 16.3. You can create a ref by calling React.createRef() and attaching a React element to it using the ref attribute on the element.
class Example extends React.Component {
  constructor(props) {
    super(props)

    // Create the ref
    this.exampleRef = React.createRef()
  }

  render() {
    return (
      <div>
        // Call the ref with the `ref` attribute
        <input type="text" ref={this.exampleRef} />
      </div>
    )
  }
}
We can „refer” to the node of the ref created in the render method with access to the current attribute of the ref. From the example above, that would be this.exampleRef.current.
class App extends React.Component {
  constructor(props) {
    super(props)

    // Create the ref
    this.textInput = React.createRef();
    this.state = {
      value: ''
    }
  }

  // Set the state for the ref
  handleSubmit = e => {
    e.preventDefault();
    this.setState({ value: this.textInput.current.value})
  };

  render() {
    return (
      <div>
        <h1>React Ref - createRef</h1>
        // This is what will update
        <h3>Value: {this.state.value}</h3>
        <form onSubmit={this.handleSubmit}>
          // Call the ref on <input> so we can use it to update the <h3> value
          <input type="text" ref={this.textInput} />
          <button>Submit</button>
        </form>
      </div>
    );
  }
}
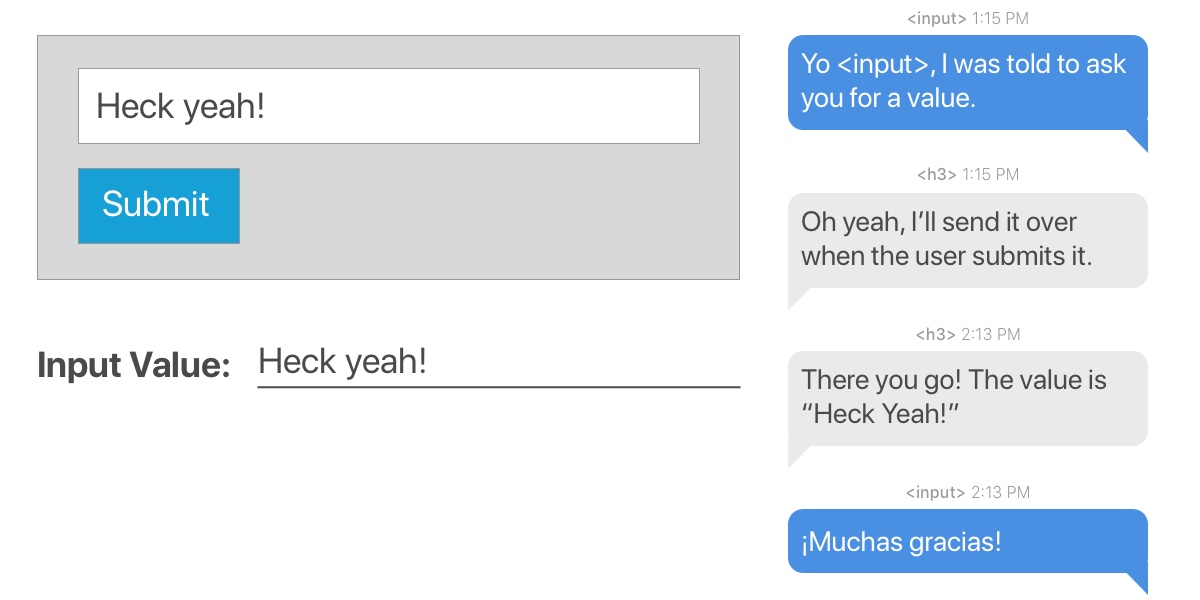
How a conversation between a child component and an element containing the ref might go down.
This is a component that renders some text, an input field and a button. The ref is created in the constructor and then attached to the input element when it renders. When the button is clicked, the value submitted from the input element (which has the ref attached) is used to update the state of the text (contained in an H3 tag). We make use of this.textInput.current.value to access the value and the new state is then rendered to the screen.
Passing a callback function to ref
React allows you to create a ref by passing a callback function to the ref attribute of a component. Here is how it looks:
When you make use of callback like we did above, React will call the ref callback with the DOM node when the component mounts, when the component un-mounts, it will call it with null.
It is also possible to pass ref from a parent component to a child component using callbacks.
In the App component, we want to obtain the text that is entered in the input field (which is in the child component) so we can render it. The ref is created using a callback like we did in the first example of this section. The key lies in how we access the DOM of the input element in the Input component from the App component. If you look closely, we access it using this.inputElement. So, when updating the state of value in the App component, we get the text that was entered in the input field using this.inputElement.value.
The ref attribute as a string
This is the old way of creating a ref and it will likely be removed in a future release because of some issues associated with it. The React team advises against using it, going so far as to label it as „legacy” in the documentation. We’re including it here anyway because there’s a chance you could come across it in a codebase.
The component is initialized and we start with a default state value set to an empty string (value='’). The component renders the text and form, as usual and, like before, the H3 text updates its state when the form is submitted with the contents entered in the input field.
We created a ref by setting the ref prop of the input field to textInput. That gives us access to the value of the input in the handleSubmit() method using this.refs.textInput.value.
Forwarding a ref from one component to another
**Ref forwarding is the technique of passing a ref from a component to a child component by making use of the React.forwardRef() method.
We’ve created the ref in this example with inputRef, which we want to pass to the child component as a ref attribute that we can use to update the state of our text.
We all know that form validation is super difficult but something React is well-suited for. You know, things like making sure a form cannot be submitted with an empty input value. Or requiring a password with at least six characters. Refs can come in handy for these types of situations.
class App extends React.Component {
  constructor(props) {
    super(props);

    this.username = React.createRef();
    this.password = React.createRef();
    this.state = {
      errors: []
    };
  }

  handleSubmit = (event) => {
    event.preventDefault();
    const username = this.username.current.value;
    const password = this.password.current.value;
    const errors = this.handleValidation(username, password);

    if (errors.length > 0) {
      this.setState({ errors });
      return;
    }
    // Submit data
  };

  handleValidation = (username, password) => {
    const errors = [];
    // Require username to have a value on submit
    if (username.length === 0) {
      errors.push("Username cannot be empty");
    }

    // Require at least six characters for the password
    if (password.length < 6) {
      errors.push("Password should be at least 6 characters long");
    }

    // If those conditions are met, then return error messaging
    return errors;
  };

  render() {
    const { errors } = this.state;
    return (
      <div>
        <h1>React Ref Example</h1>
        <form onSubmit={this.handleSubmit}>
          // If requirements are not met, then display errors
          {errors.map(error => <p key={error}>{error}</p>)}
          <div>
            <label>Username:</label>
            // Input for username containing the ref
            <input type="text" ref={this.username} />
          </div>
          <div>
            <label>Password:</label>
            // Input for password containing the ref
            <input type="text" ref={this.password} />
          </div>
          <div>
            <button>Submit</button>
          </div>
        </form>
      </div>
    );
  }
}
We used the createRef() to create refs for the inputs which we then passed as parameters to the validation method. We populate the errors array when either of the input has an error, which we then display to the user.
That’s a ref… er, a wrap!
Hopefully this walkthrough gives you a good understanding of how powerful refs can be. They’re an excellent way to update part of a component without the need to re-render the entire thing. That’s convenient for writing leaner code and getting better performance.
At the same time, it’s worth heeding the advice of the React docs themselves and avoid using ref too much:
Your first inclination may be to use refs to „make things happen” in your app. If this is the case, take a moment and think more critically about where state should be owned in the component hierarchy. Often, it becomes clear that the proper place to „own” that state is at a higher level in the hierarchy.
If you are new to React, and perhaps have only played with building to-do and counter apps, you may not yet have run across a need to pull in data for your app. There will likely come a time when you’ll need to do this, as React apps are most well suited for situations where you’re handling both data and state.
The first set of data you may need to handle might be hard-coded into your React application, like we did for this demo from our Error Boundary tutorial:
What if you want to handle data from an API? That’s the purpose of this tutorial. Specifically, we’ll make use of the Fetch API and axios as examples for how to request and use data.
The Fetch API
The Fetch API provides an interface for fetching resources. We’ll use it to fetch data from a third-party API and see how to use it when fetching data from an API built in-house.
We will be fetching random users from JSONPlaceholder, a fake online REST API for testing. Let’s start by creating our component and declaring some default state.
There is bound to be a delay when data is being requested by the network. It could be a few seconds or maybe a few milliseconds. Either way, during this delay, it’s good practice to let users know that something is happening while the request is processing.
To do that we’ll make use of isLoading to either display the loading message or the requested data. The data will be displayed when isLoading is false, else a loading message will be shown on the screen. So the render() method will look like this:
render() {
  const { isLoading, users, error } = this.state;
  return (
    <React.Fragment>
      <h1>Random User</h1>
      // Display a message if we encounter an error
      {error ? <p>{error.message}</p> : null}
      // Here's our data check
      {!isLoading ? (
        users.map(user => {
          const { username, name, email } = user;
          return (
            <div key={username}>
              <p>Name: {name}</p>
              <p>Email Address: {email}</p>
              <hr />
            </div>
          );
        })
      // If there is a delay in data, let's let the user know it's loading
      ) : (
        <h3>Loading...</h3>
      )}
    </React.Fragment>
  );
}
The code is basically doing this:
De-structures isLoading, users and error from the application state so we don’t have to keep typing this.state.
Prints a message if the application encounters an error establishing a connection
Checks to see if data is loading
If loading is not happening, then we must have the data, so we display it
If loading is happening, then we must still be working on it and display „Loading…” while the app is working
For Steps 3-5 to work, we need to make the request to fetch data from an API. This is where the JSONplaceholder API will come in handy for our example.
fetchUsers() {
  // Where we're fetching data from
  fetch(`https://jsonplaceholder.typicode.com/users`)
    // We get the API response and receive data in JSON format...
    .then(response => response.json())
    // ...then we update the users state
    .then(data =>
      this.setState({
        users: data,
        isLoading: false,
      })
    )
    // Catch any errors we hit and update the app
    .catch(error => this.setState({ error, isLoading: false }));
}
We create a method called fetchUser() and use it to do exactly what you might think: request user data from the API endpoint and fetch it for our app. Fetch is a promise-based API which returns a response object. So, we make use of the json() method to get the response object which is stored in data and used to update the state of users in our application. We also need to change the state of isLoading to false so that our application knows that loading has completed and all is clear to render the data.
The fact that Fetch is promise-based means we can also catch errors using the .catch() method. Any error encountered is used a value to update our error’s state. Handy!
The first time the application renders, the data won’t have been received — it can take seconds. We want to trigger the method to fetch the users when the application state can be accessed for an update and the application re-rendered. React’s componentDidMount() is the best place for this, so we’ll place the fetchUsers() method in it.
componentDidMount() {
  this.fetchUsers();
}
Using Fetch With Self-Owned API
So far, we’ve looked at how to put someone else’s data to use in an application. But what if we’re working with our own data in our own API? That’s what we’re going to cover right now.
Our method for looping through the data will be different from the one we used before but only because of the data’s structure, which is going to be different. You can see the difference between our data structure here and the one we obtained from JSONPlaceholder.
Here is how the render() method will look like for our API:
When isLoading is not true, we return an array, map through it and pass the information to the Post component as props. Otherwise, we display a „Loading…” message while the application is at work. Very similar to before.
The method to fetch posts will look like the one used in the first part.
fetchPosts() {
  // The API where we're fetching data from
  fetch(`https://s3-us-west-2.amazonaws.com/s.cdpn.io/3/posts.json`)
    // We get a response and receive the data in JSON format...
    .then(response => response.json())
    // ...then we update the state of our application
    .then(
      data =>
        this.setState({
          posts: data,
          isLoading: false,
        })
    )
    // If we catch errors instead of a response, let's update the app
    .catch(error => this.setState({ error, isLoading: false }));
}
Now we can call the fetchPosts method inside a componentDidMount() method
componentDidMount() {
  this.fetchPosts();
}
In the Post component, we map through the props we received and render the title and content for each post:
const Post = ({ body }) => {
  return (
    <div>
      {body.map(post => {
        const { _id, title, content } = post;
        return (
          <div key={_id}>
            <h2>Using data in React with the Fetch API and axios</h2>
            <p>{content}</p>
            <hr />
          </div>
        );
      })}
    </div>
  );
};
There we have it! Now we know how to use the Fetch API to request data from different sources and put it to use in an application. High fives. ✋
axios
OK, so we’ve spent a good amount of time looking at the Fetch API and now we’re going to turn our attention to axios.
Like the Fetch API, axios is a way we can make a request for data to use in our application. Where axios shines is how it allows you to send an asynchronous request to REST endpoints. This comes in handy when working with the REST API in a React project, say a headless WordPress CMS.
There’s ongoing debate about whether Fetch is better than axios and vice versa. We’re not going to dive into that here because, well, you can pick the right tool for the right job. If you’re curious about the points from each side, you can read here and here.
The idea is still the same: check to see if loading is in process and either render the data we get back or let the user know things are still loading.
To make the request to the API, we’ll need to create a function. We’ll call the function getUsers(). Inside it, we’ll make the request to the API using axios. Let’s see how that looks like before explaining further.
getUsers() {
  // We're using axios instead of Fetch
  axios
    // The API we're requesting data from
    .get("https://randomuser.me/api/?results=5")
    // Once we get a response, we'll map the API endpoints to our props
    .then(response =>
      response.data.results.map(user => ({
        name: `${user.name.first} ${user.name.last}`,
        username: `${user.login.username}`,
        email: `${user.email}`,
        image: `${user.picture.thumbnail}`
      }))
    )
    // Let's make sure to change the loading state to display the data
    .then(users => {
      this.setState({
        users,
        isLoading: false
      });
    })
    // We can still use the `.catch()` method since axios is promise-based
    .catch(error => this.setState({ error, isLoading: false }));
}
Quite different from the Fetch examples, right? The basic structure is actually pretty similar, but now we’re in the business of mapping data between endpoints.
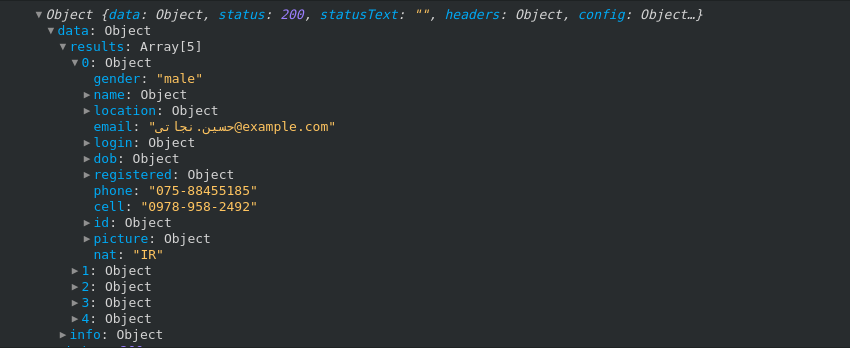
The GET request is passed from the API URL as a parameter. The response we get from the API contains an object called data and that contains other objects. The information we want is available in data.results, which is an array of objects containing the data of individual users.
Here we go again with calling our method inside of the componentDidMount() method:
componentDidMount() {
  this.getUsers();
}
Alternatively, you can do this instead and basically combine these first two steps:
Your console should get something similar to this:
We map through the results array to obtain the information we need for each user. The array of users is then used to set a new value for our users state. With that done, we can then change the value of isLoading.
By default, isLoading is set to true. When the state of users is updated, we want to change the value of isLoading to false since this is the cue our app is looking for to make the switch from „Loading…” to rendered data.
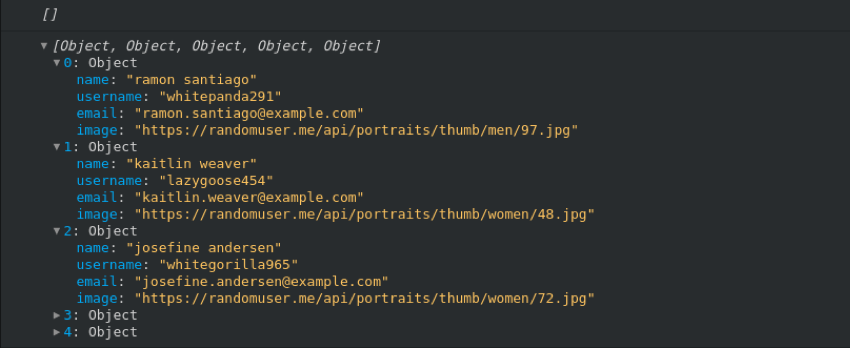
If you log the users state to the console, you will see that it is an array of objects:
The empty array shows the value before the data was obtained. The returned data contains only the name, username, email address and image of individual users because those are the endpoints we mapped out. There is a lot more data available from the API, of course, but we’d have to add those to our getUsers method.
You have seen how to use axios with a third-party API but we can look at what it’s like to request data from our own API, just like we did with the Fetch API. In fact, let’s use same JSON file we used for Fetch so we can see the difference between the two approaches.
Here is everything put together:
class App extends React.Component {
  // State will apply to the posts object which is set to loading by default
  state = {
    posts: [],
    isLoading: true,
    errors: null
  };
  // Now we're going to make a request for data using axios
  getPosts() {
    axios
      // This is where the data is hosted
      .get("https://s3-us-west-2.amazonaws.com/s.cdpn.io/3/posts.json")
      // Once we get a response and store data, let's change the loading state
      .then(response => {
        this.setState({
          posts: response.data.posts,
          isLoading: false
        });
      })
      // If we catch any errors connecting, let's update accordingly
      .catch(error => this.setState({ error, isLoading: false }));
  }
  // Let's our app know we're ready to render the data
  componentDidMount() {
    this.getPosts();
  }
  // Putting that data to use
  render() {
    const { isLoading, posts } = this.state;
    return (
      <React.Fragment>
        <h2>Random Post</h2>
        <div>
          {!isLoading ? (
            posts.map(post => {
              const { _id, title, content } = post;
              return (
                <div key={_id}>
                  <h2>Using data in React with the Fetch API and axios</h2>
                  <p>{content}</p>
                  <hr />
                </div>
              );
            })
          ) : (
            <p>Loading...</p>
          )}
        </div>
      </React.Fragment>
    );
  }
}
The main difference between this method and using axios to fetch from a third-party is how the data is formatted. We’re getting straight-up JSON this way rather than mapping endpoints.
The posts data we get from the API is used to update the value of the component’s posts state. With this, we can map through the array of posts in render(). We then obtain the id, title and content of each post using ES6 de-structuring, which is then rendered to the user.
Like we did before, what is displayed depends on the value of isLoading. When we set a new state for posts using the data obtained from the API, we had to set a new state for isLoading, too. Then we can finally let the user know data is loading or render the data we’ve received.
async and await
Another thing the promise-based nate of axios allows us to do is take advantage of is async and await . Using this, the getPosts() function will look like this.
As you build React applications, you will run into lots of scenarios where you want to handle data from an API. Hopefully you know feel armed and ready to roll with data from a variety of sources with options for how to request it.
I am a VS Code extension snob. I like to hunt down the most obscure extensions for VS Code — the ones that nobody knows about — and impress people at parties with my knowledge of finely aged and little-known VS Code capabilities… then watch as they look around desperately for someone else to talk to. It’s like the “Sideways” of VS Code.
In my endless pursuit of the perfect VS Code setup, I reached out to my colleagues here on the Azure team and asked them to share their favorite extension in their own words. So clear your pallet and breathe in the aromatic flavors of productivity; I am your VS Code Extension Sommelier.
I cannot live without this extension. If you use multiple machines (especially on multiple platforms, where a sym-linked Dropbox folder won’t really work), this extension is for you. It syncs your extensions, settings file, keybinding file, launch file, snippets folder, extension settings, and workspaces folder. This means that when you login to a new machine, you can quickly get back to work with your own settings and workflow tools in just a few minutes.
Consuming an endpoint that produces JSON is like breathing, but no one wants to choke on the hand cranking of an object by looking back and forth between JSON and the target language. This is a long loved feature in Visual Studio for .NET developers, but now you too can copy the JSON and paste that class into the editor as your target language and save a ton of time. Currently supports C#, Go, C++, Java, TypeScript, Swift, Elm, and JSON Schema.
I find myself authoring blog posts, articles, and documentation almost every day. After embracing the power of Markdown (it is, after all, what is used to drive our own https://docs.com), I began writing my content in Visual Studio Code. It has a built-in preview window so I can edit the Markdown source and see the rendered result side-by-side. As much as I’ve written over the years, mastering the fine art of spelling still eludes me. Maybe it’s because I’m lazy, and this extension doesn’t help at all. With Spell Right, I get to reunite with my same favorite red squiggly lines that I first met in Word. It does a great job of catching spelling mistakes in real time, then illuminates my mistakes with a handy light bulb with alternative suggestions that give me single-click corrections. It enables me to be highly productive and look like I know what I’m doing. I recommend this for anyone who uses Code to write.
I live in VS Code and use it for everything from code and content to its integrated terminal. This extension enables first-class support for IntelliSense, testing, refactoring and more, making Code the best place to me to write Go. And it turns out I’m not the only one who thinks so; it helped to make Code the most popular editor amongst Gophers, just ahead of vim-go, as of the Go 2017 Survey!
This extension was created by one of our community members, and it’s a great companion to the official C# extension from Microsoft. The “New Class|Interface” actions make it easy to add new types, and takes some of the hassle out of fixing up the namespaces. It also comes with a few interesting refactorings like „Initialize fields from constructors,” which I use pretty often. Whenever I’m teaching a C# course, I always have my students that are using Visual Studio Code install this extension.
Pair programming just got way better. Gone are the days where I need to set up screen sharing to review code with coworkers. Instead I fire up a live share session, invite the other party and we can all view and edit code directly from our editors. I’ve used it in a situations where I review someone else’s C# code on my machine while it runs on THEIR machine! I didn’t have anything installed on my Mac for C# and yet I could debug their code!
I write a lot of text, and sometimes I just want (or need) to write in a plain-text environment. Easy reflowing of text is essential. (Surprised this isn’t built in, in fact.)
At a glance, GitLens shows me contextual information from Git about the line of code and the file I’m working in. It adds some useful commands to view history and diffs, search commits, and browse local and remote branches… all without leaving VS Code.
I used to write with Markdown, we all make mistakes. The solution to my Markdown mistake is AsciiDoc, especially if you write a lot of code snippets as I do. Out of the box it let’s you add line numbers, annotate and highlight lines and provides an incredible amount of customization. Plus, as a bonus it also can convert your blog posts into PDFs, ePubs, Mobis which is perfect for ebooks.
Once you start with AsciiDoc it’s hard to go back to Markdown and this plugin lets you preview your AsciiDoc right inside the editor.
With Visual Studio Code Tools for AI, I can finally use machines I need but might never have access to in order to build the next Skynet — all within the comfort of my favorite lightweight editor. We live in amazing times, friends…
Ionide is an awesome Visual Studio Code extension for cross-platform F# development. It’s open-source and it was created by the F# Community. I use it every day on multiple machines I have. It runs perfectly on both my Mac and Linux machines. Ionide conveniently integrates with Paket, Project Scaffold, and you can experiment away as much as you want in F# Interactive!
There’s an old joke that goes: “How do you know if a developer uses vim? They’ll tell you.” Well, I use vim! But… I want more. I want to tell everybody I use vim and I want to use all the great features and extensions that VS Code offers. (I mean, look at the list here!) So that’s where VSCodeVim saves the day for me. It puts a full-featured vim emulator into my VS Code editor, letting me edit files super fast by typing esoteric commands like h, 10 k, i, and u (lots and lots of u) and I still get to use all the awesome features of VS Code.
If you like it put a container on it. Yeah, containers are the latest craze, but in a constantly evolving containerization world, it’s nice to have great tooling make it easy to use containers. Enter the Docker extension for VS Code. It handles the complete container development and deployment lifecycle! Start by generating docker files to your project, create an image, run it, and even push it to a container registry. If you’re like me, you like to make sure you still have complete control over your code and your app, even when they are inside of containers. Accessing the files, showing logs, and debugging the running container are all essential tools for development. This extension puts all of this within your reach without having to learn the docker command line!
My favorite extension for VS Code is Arduino. I’m pretty sure anyone who knows me wouldn’t be surprised about that. Traditionally, developing programs for Arduino-compatible micro-controller boards has been done in the Arduino IDE. It’s a powerful program which smooths over the compilation and uploading experiences for dozens of boards. It is, however, not a full code IDE. It’s missing some of the features you love, such as autocomplete, a file tree, and fine-grained tuning of the editor itself.
The good news is that the Arduino extension allows you to finally develop freely for all of your favorite micro-controller boards without leaving VS Code!
Here are some of my favorite things about the extension:
It’s open source! So reporting bugs and contributing improvements is a straightforward experience.
The Command Palette integration is so handy. Compile and upload your code to an Arduino with one simple shortcut.
Access all the great tools from the Arduino IDE right in VS Code. Yes, that even means board / library management and the serial monitor!
Scaffolding brand new Arduino projects is a command away. No more copy + pasting older project directories to get set up.
Serverless is like Hansel — so hot right now. But Serverless shouldn’t be a black box. The Azure Functions extensions for VS Code puts Serverless right inside of the editor. I love it because it lets me create new Serverless projects, new functions for all of the available trigger types (http, timer, blob storage, etc.), and most importantly, I can run them locally and debug them. Not that I would ever need to debug. My code is always perfect.
From deploying static sites and blogging platforms to managing multiple client websites, DigitalOcean provides a flexible platform for developers and their teams to deliver an unparalleled end-user experience with a lightning-fast network, pre-configured applications, and a 99.99% uptime SLA. Simply let us know your needs and our solutions engineers will provide the best options available.
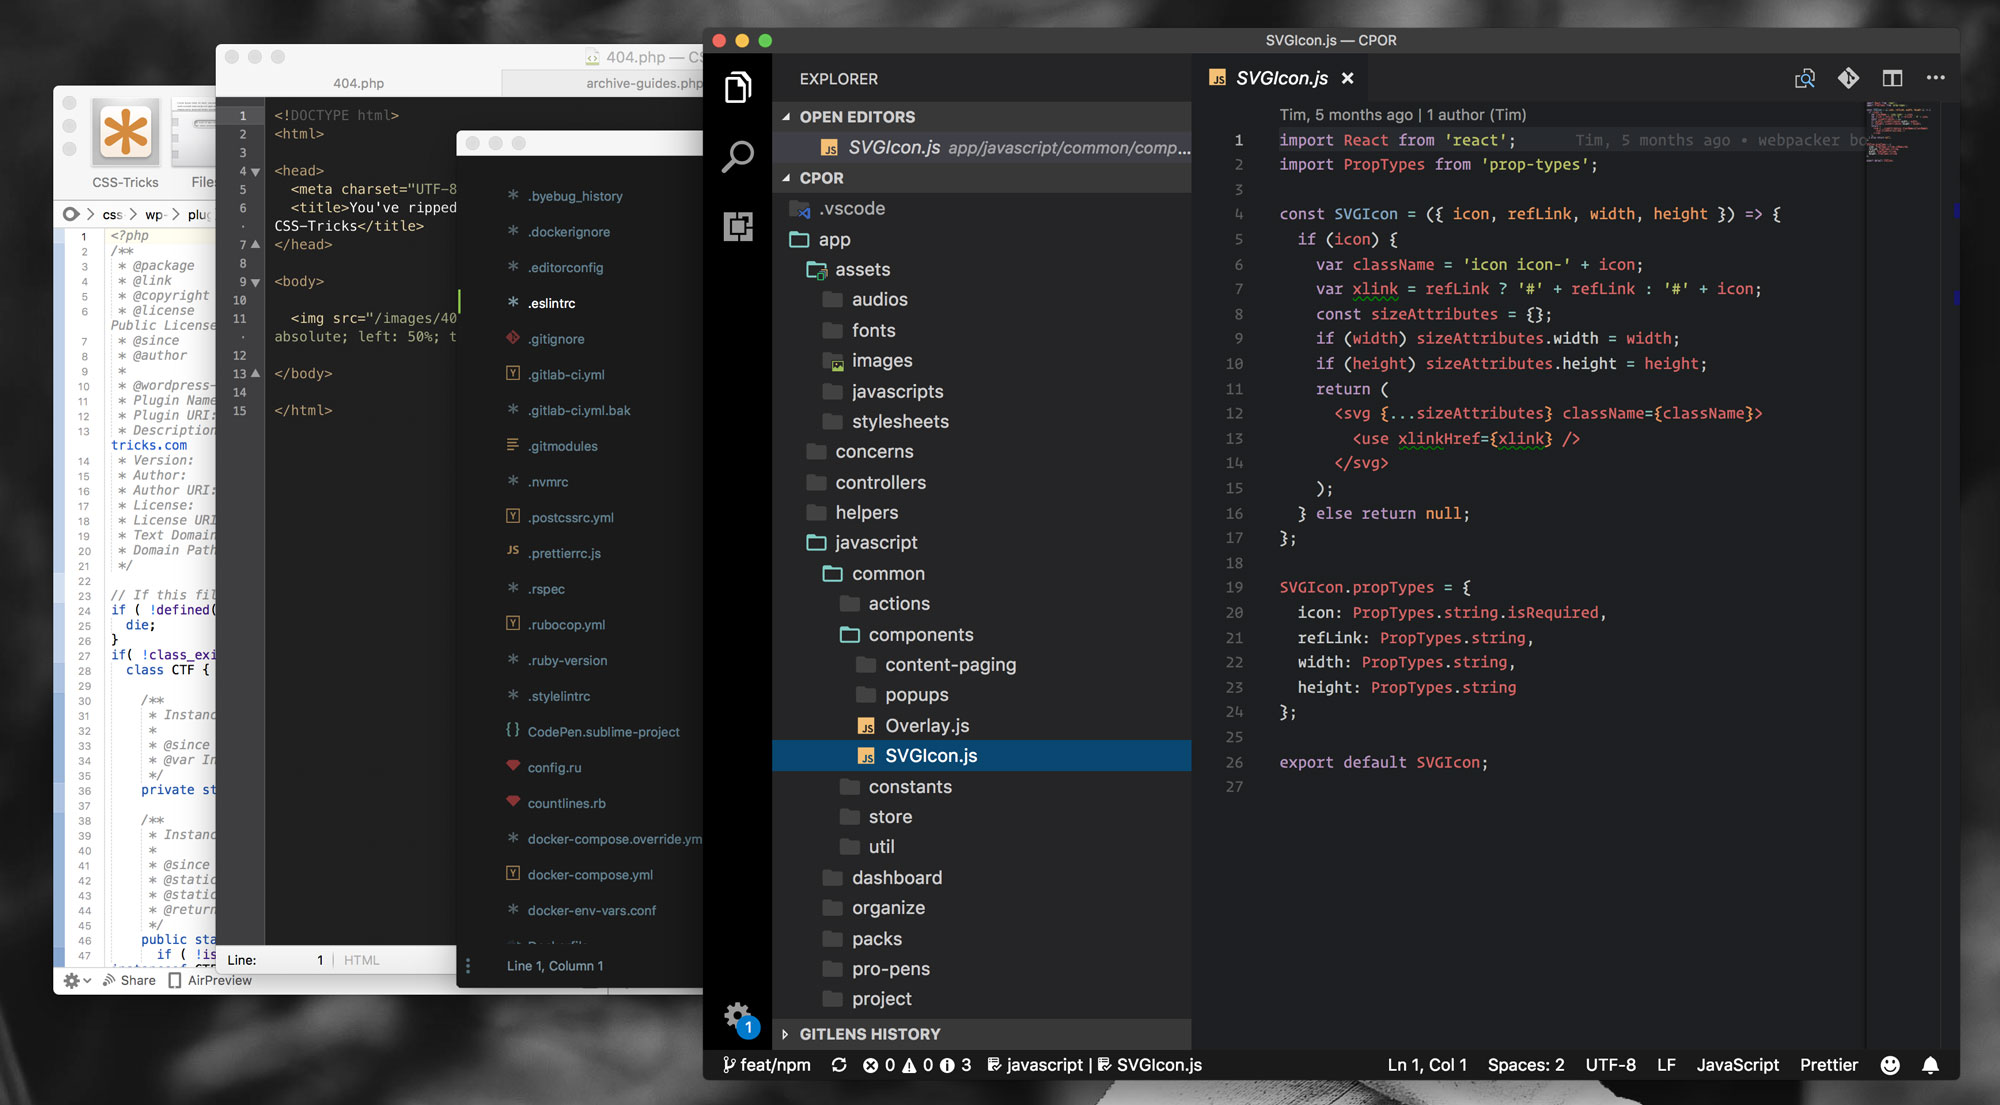
I’m sure a lot of you are like me and have switched code editors a number of times. I think my first major editor was Coda. Then I moved to TextMate when I started working primarily on local. Then Sublime Text. And, most recently, VS Code. I bet your journey was different. I know lots of folks that quite love Atom, Brackets, WebStorm, and even BBedit. You do you!
For me, that’s four changes in a dozen years, or a change every three years. Moving isn’t something I do quickly. Here’s a collection of thoughts around the idea of changing editors.
When moving, I have to take time to make sure it works pretty much like the old one.
Otherwise, I’ll just end up disliking it to the point that I switch back a day or two later. It’s happened to me every time I switch. I have little false-starts after a switch where I go back to the old editor because something bugged me too much or it affected my productivity and I gave up. (Now that I know I do this, I don’t let a single false-start make me feel like the editor I’m trying is never a possibility.)
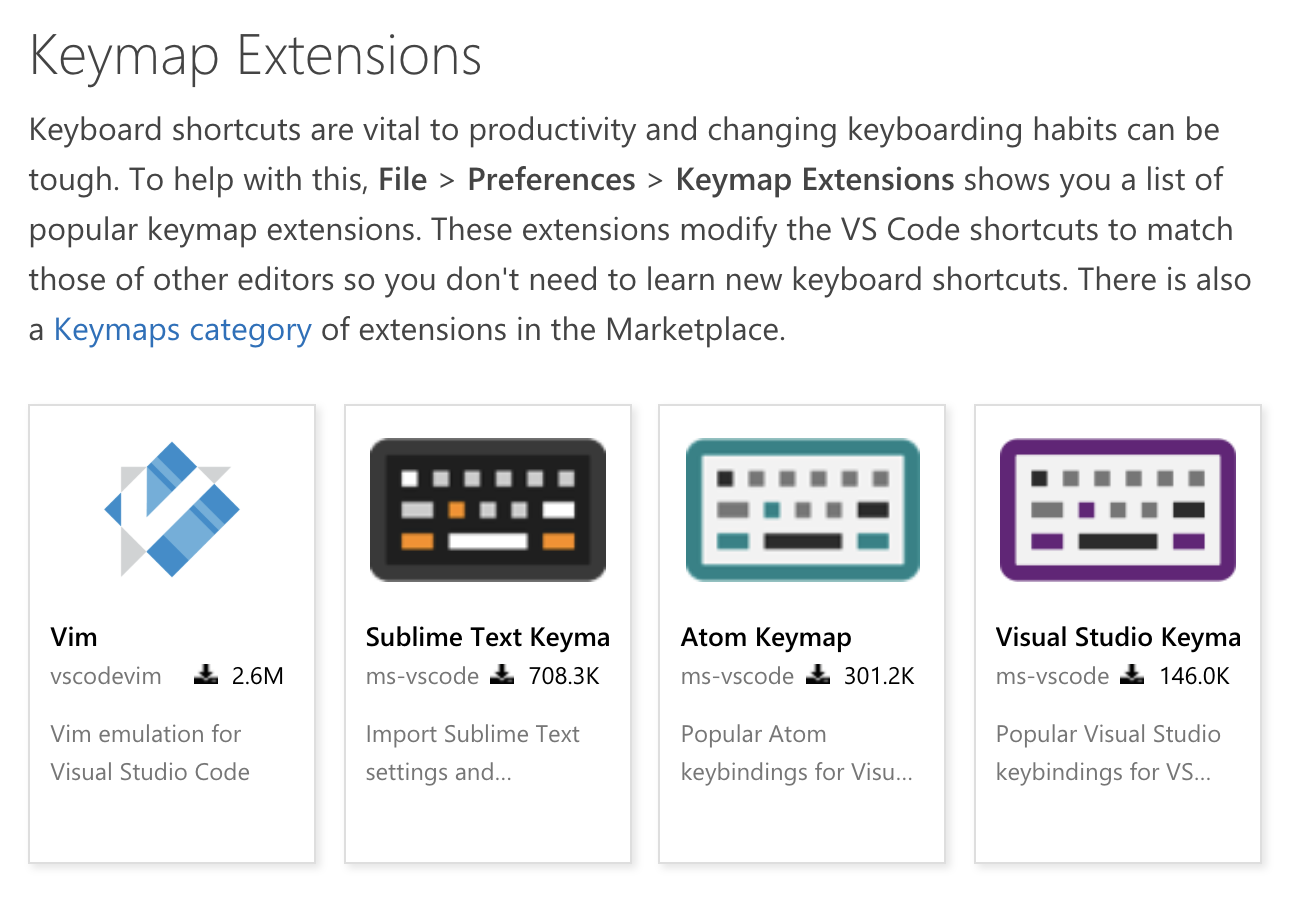
My latest switch was from Sublime Text to VS Code. I’d become become very used to the key bindings (e.g. CMD+Shift+d to duplicate a line) in Sublime Text, so thankfully VS Code has that covered.
I was amazed to find even my VIM friends happy and comfortable in VS Code. (Fun fact: we have key bindings choices in CodePen, too.)
Nothing can be too obnoxious.
In one of my first attempts at switching, I found the UI in VS code to be too cluttered and the find-in-project feature to be a little slow and awkward. Those things bugged me to the point they caused false-starts and I went back to Sublime Text.
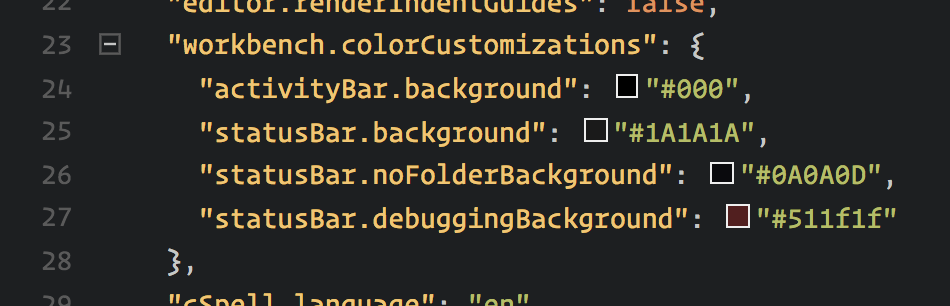
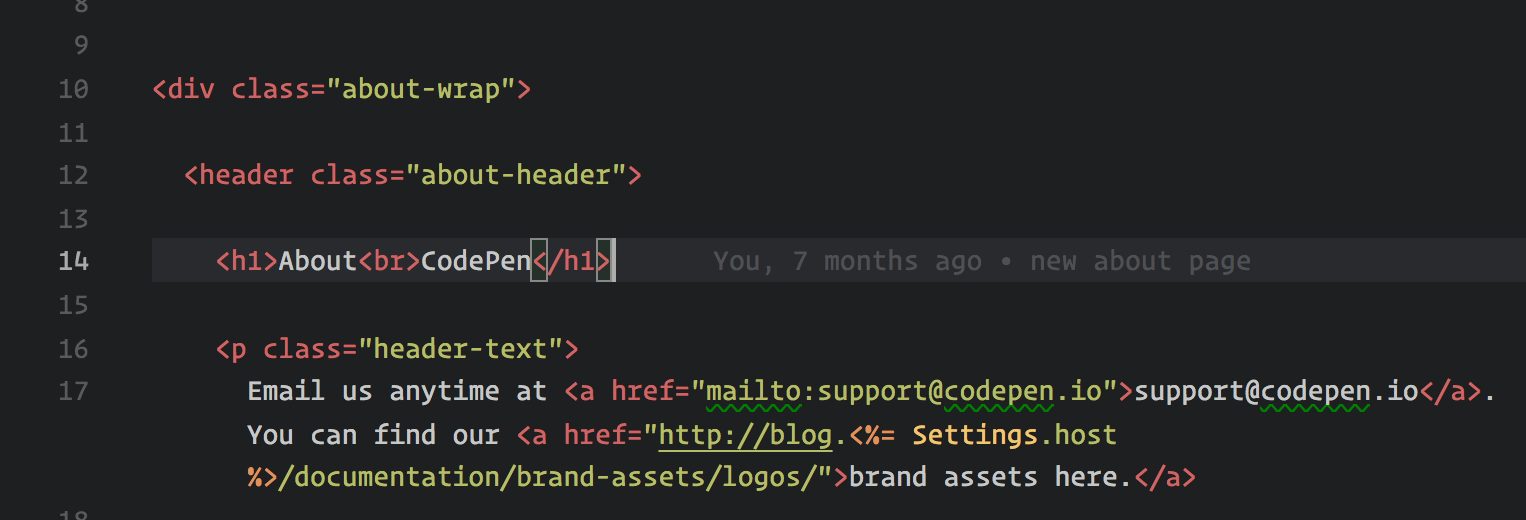
On this last switch attempt (my 3rd or 4th maybe?) I finally have a theme I quite like (customized a smidge), found some settings to clean up the UI (I removed the whitespace indicators which were overwhelming to me, and overrode that intense blue footer with something more chill).
In working with find-in-project a bit more, I’ve grown to get used to it. I finally might even like it more than Sublime, as the sidebar approach is more consistent than opening a new tab of results. I find the jump-to-line feature works more consistently and search feels more the first-class citizen it should be.
Another factor would be Emmet. I’m quite sure that I’d be too annoyed writing HTML and CSS in an editor without Emmet, and I’d just give up and use something else that had it. Emmet isn’t even an extension in VS Code, it’s built in.
I’m cool with making small changes after a successful switch.
Once I’ve actually done it, and made the switch to full-time use, then I can make some changes. Maybe I’ll learn some new key commands. Maybe I’ll add an extension that adds functionality I’ve never had before. Maybe the editor affects some workflow thing in a way I’m now willing to try.
The new editor better have some killer feature that incentivizes me to switch.
If it’s exactly the same, why bother?
The new editor needs to be faster (or feel just as fast). Or should look better. Or it should have some awesome package that is only available on it. Ideally all of that.
Meaning that anyone can write code to extend the editor. I’m fairly certain that having a plugin architecture (plus a healthy amount of community momentum) is what is key to any editor’s success. Sublime’s package manager, and the subsequent built-in packages feature of VS Code, seem crucial. Not only for functionality but even just for the look of the editor. I wouldn’t use an editor with a look I hate, but I’d be tempted to if the functionality was awesome. That’s a non-issue with a plugin-based editor. Open source seems smart as well.
Careful for those GOTCHAs.
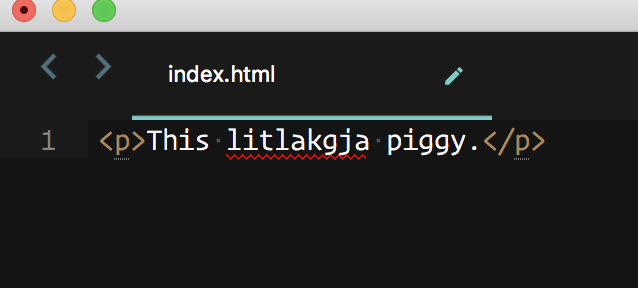
One of those was spell-checking for me. In Sublime Text, it was an option under the View menu. I had it checked all the time, and it spell-checked all the time.
This is not a thing in VS Code. That was dangerous after switching because, who knows, I may have been committing typos all over the place. Fortunately, this extension seems to be doing the trick. Thank jeepers for extensions!
Your thoughts!
I thought it might be interesting to ask what y’all think about when switching code editors. There were lots of responses. I picked out as many as I could here and focused on one thing that you mentioned.
Find what you love. Don’t worry about needing to learn every language, technique or tool. Start with what interests you, and carve your own niche. And then use your powers for good!
And my own:
Buy a domain name. Figure out how to put an HTML file up there. Isn’t that a powerful feeling? Now you’ve got table stakes. Build something.
Definitely, go read other A Book Apart author answers because they are all great. My other favorite is just three words.
You know those tedious tasks you have to do at work: Updating configuration files, copying and pasting files, updating Jira tickets.
Time adds up after a while. This was very much the case when I worked for an online games company back in 2016. The job could be very rewarding at times when I had to build configurable templates for games, but about 70% of my time was spent on making copies of those templates and deploying re-skinned implementations.
What is a reskin?
The definition of a reskin at the company was using the same game mechanics, screens and positioning of elements, but changing the visual aesthetics such as color and assets. So in the context of a simple game like ‘Rock Paper Scissors,’ we would create a template with basic assets like below.
But when we create a reskin of this, we would use different assets and the game would still work. If you look at games like Candy Crush or Angry Birds, you’ll find that they have many varieties of the same game. Usually Halloween, Christmas or Easter releases. From a business perspective it makes perfect sense.
Now… back to our implementation. Each of our games would share the same bundled JavaScript file, and load in a JSON file that had different content and asset paths. The result?
The good thing about extracting configurable values into a JSON file is that you can modify the properties without having to recompile/build the game again. Using Node.js and the original breakout game created by Mozilla, we will make a very simple example of how you can create a configurable template, and make releases from it by using the command line.
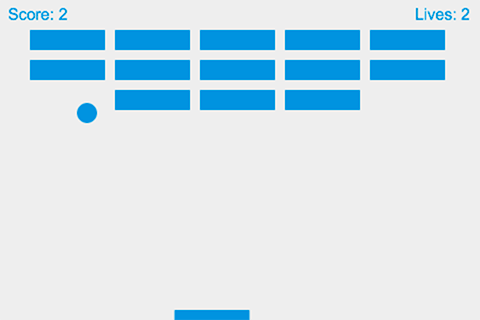
Gameplay screen from the game MDN Breakout where you can use your paddle to bounce the ball and destroy the brick field, with keeping the score and lives.
The primary color will paint the text, paddle, ball and blocks, and the secondary color will paint the background. We will proceed with an example of a dark blue background and a light sky blue for the foreground objects.
You have ran npm install in the root of the nobot-examples project.
Finally, you run the local server by running npm run gameServe in the root of the project via a terminal.
We have tweaked the original Firefox implementation so that we first read in the JSON file and then build the game using HTML Canvas. The game will read in a primary color, and a secondary color from our game.json file.
We will be using example 20 from the book Automating with Node.js. The source code can be found here.
Open up a new command line (CMD for Windows, Terminal for Unix-like Operating systems) and change into the following directory once you have cloned the repository locally.
$ cd nobot-examples/examples/020
Remember the game server should be running in a separate terminal.
Our JSON file sits beside an index.html file inside a directory called template. This is the directory that we will copy from whenever we want to do a new release/copy.
You see above that every game we release will point to the same core bundle JavaScript file. Let’s have a look at our JavaScript implementation under the core directory.
Don’t look too much into the mechanics of how the game works, more so how we inject values into the game to make it configurable.
(function boot(document) {
  function runGame(config) {
    const canvas = document.getElementById('game');
    canvas.style.backgroundColor = config.secondaryColor;
    // rest of game source code gets executed... hidden for brevity
    // source can be found here: https://git.io/vh1Te
  }

  function loadConfig() {
    fetch('game.json')
      .then(response => response.json())
      .then(runGame);
  }

  document.addEventListener('DOMContentLoaded', () => {
    loadConfig();
  });
}(document));
The source code is using ES6 features and may not work in older browsers. Run through Babel if this is a problem for you.
You can see that we are waiting for the DOM content to load, and then we are invoking a method called loadConfig. This is going to make an AJAX request to game.json, fetch our JSON values, and once it has retrieved them, it will initiate the game and assign the styles in the source code.
Here is an example of the configuration setting the background color.
const canvas = document.getElementById('game');
canvas.style.backgroundColor = config.secondaryColor; // overriding color here
So, now that we have a template that can be configurable, we can move on to creating a Node.js script that will allow the user to either pass the name of the game and the colors as options to our new script, or will prompt the user for: the name of the game, the primary color, and then the secondary color. Our script will enforce validation to make sure that both colors are in the format of a hex code (e.g. #101b6b).
When we want to create a new game reskin, we should be able to run this command to generate it:
The command above will build the game immediately, because it has the three values it needs to release the reskin.
We will create this script new-reskin.js, and this file carries out the following steps:
It will read in the options passed in the command line and store them as variables. Options can be read in by looking in the process object (process.argv).
It will validate the values making sure that the game name, and the colors are not undefined.
If there are any validation issues, it will prompt the user to re-enter it correctly before proceeding.
Now that it has the values, it will make a copy of the template directory and place a copy of it into the releases directory and name the new directory with the name of the game we gave it.
It will then read the JSON file just recently created under the releases directory and override the values with the values we passed (the colors).
At the end, it will prompt the user to see if they would like to open the game in a browser. It adds some convenience, rather than us trying to remember what the URL is.
Here is the full script. We will walk through it afterwards.
require('colors');
const argv = require('minimist')(process.argv.slice(2));
const path = require('path');
const readLineSync = require('readline-sync');
const fse = require('fs-extra');
const open = require('opn');
const GAME_JSON_FILENAME = 'game.json';

let { gameName, gamePrimaryColor, gameSecondaryColor } = argv;

if (gameName === undefined) {
  gameName = readLineSync.question('What is the name of the new reskin? ', {
    limit: input => input.trim().length > 0,
    limitMessage: 'The project has to have a name, try again'
  });
}

const confirmColorInput = (color, colorType = 'primary') => {
  const hexColorRegex = /^#([A-Fa-f0-9]{6}|[A-Fa-f0-9]{3})$/;
  if (hexColorRegex.test(color)) {
    return color;
  }
  return readLineSync.question(`Enter a Hex Code for the game ${colorType} color `, {
    limit: hexColorRegex,
    limitMessage: 'Enter a valid hex code: #efefef'
  });
};

gamePrimaryColor = confirmColorInput(gamePrimaryColor, 'primary');
gameSecondaryColor = confirmColorInput(gameSecondaryColor, 'secondary');

console.log(`Creating a new reskin '${gameName}' with skin color: Primary: '${gamePrimaryColor}' Secondary: '${gameSecondaryColor}'`);

const src = path.join(__dirname, 'template');
const destination = path.join(__dirname, 'releases', gameName);
const configurationFilePath = path.join(destination, GAME_JSON_FILENAME);
const projectToOpen = path.join('http://localhost:8080', 'releases', gameName, 'index.html');

fse.copy(src, destination)
  .then(() => {
    console.log(`Successfully created ${destination}`.green);
    return fse.readJson(configurationFilePath);
  })
  .then((config) => {
    const newConfig = config;
    newConfig.primaryColor = gamePrimaryColor;
    newConfig.secondaryColor = gameSecondaryColor;
    return fse.writeJson(configurationFilePath, newConfig);
  })
  .then(() => {
    console.log(`Updated configuration file ${configurationFilePath}`green);
    openGameIfAgreed(projectToOpen);
  })
  .catch(console.error);

const openGameIfAgreed = (fileToOpen) => {
  const isOpeningGame = readLineSync.keyInYN('Would you like to open the game? ');
  if (isOpeningGame) {
    open(fileToOpen);
  }
};
At the top of the script, we require the packages needed to carry out the process.
colors to be used to signify success or failure using green or red text.
minimist to make it easier to pass arguments to our script and to parse them optionally. Pass input without being prompted to enter.
path to construct paths to the template and the destination of the new game.
readline-sync to prompt user for information if it’s missing.
fs-extra so we can copy and paste our game template. An extension of the native fs module.
opn is a library that is cross platform and will open up our game in a browser upon completion.
The majority of the modules above would’ve been downloaded/installed when you ran npm install in the root of the nobot-examples repository. The rest are native to Node.
We check if the game name was passed as an option through the command line, and if it hasn’t been, we prompt the user for it.
// name of our JSON file. We store it as a constant
const GAME_JSON_FILENAME = 'game.json';

// Retrieved from the command line --gameName='my-game' etc.
let { gameName, gamePrimaryColor, gameSecondaryColor } = argv;

// was the gameName passed?
if (gameName === undefined) {
  gameName = readLineSync.question('What is the name of the new reskin? ', {
    limit: input => input.trim().length > 0,
    limitMessage: 'The project has to have a name, try again'
  });
}
Because two of our values need to be hex codes, we create a function that can do the check for both colors: the primary and the secondary. If the color supplied by the user does not pass our validation, we prompt for the color until it does.
// Does the color passed in meet our validation requirements?
const confirmColorInput = (color, colorType = 'primary') => {
  const hexColorRegex = /^#([A-Fa-f0-9]{6}|[A-Fa-f0-9]{3})$/;
  if (hexColorRegex.test(color)) {
    return color;
  }
  return readLineSync.question(`Enter a Hex Code for the game ${colorType} color `, {
    limit: hexColorRegex,
    limitMessage: 'Enter a valid hex code: #efefef'
  });
};
We use the function above to obtain both the primary and secondary colors.
In the next block of code, we are printing to standard output (console.log) to confirm the values that will be used in the process of building the game. The statements that follow are preparing the paths to the relevant files and directories.
The src will point to the template directory. The destination will point to a new directory under releases. The configuration file that will have its values updated will reside under this new game directory we are creating. And finally, to preview our new game, we construct the URL using the path to the local server we booted up earlier on.
Below is the function that gets invoked when the copying has completed. It will then prompt the user to see if they would like to open up the game in the browser. The user responds with y or n
const openGameIfAgreed = (fileToOpen) => {
  const isOpeningGame = readLineSync.keyInYN('Would you like to open the game? ');
  if (isOpeningGame) {
    open(fileToOpen);
  }
};
Let’s see it in action when we don’t pass any arguments. You can see it doesn’t break, and instead prompts the user for the values it needs.
$ node new-reskin.js
What is the name of the new reskin? blue-reskin
Enter a Hex Code for the game primary color #76cad8
Enter a Hex Code for the game secondary color #10496b
Creating a new reskin 'blue-reskin' with skin color: Primary: '#76cad8' Secondary: '#10496b'
Successfully created nobot-examples\examples\020\releases\blue-reskin
Updated configuration file nobot-examples\examples\020\releases\blue-reskin\game.json
Would you like to open the game? [y/n]: y
(opens game in browser)
My game opens on my localhost server automatically and the game commences, with the new colors. Sweet!
Oh… I’ve lost a life already. Now if you navigate to the releases directory, you will see a new directory called blue-reskin This contains the values in the JSON file we entered during the script execution.
Below are a few more releases I made by running the same command. You can imagine if you were releasing games that could configure different: images, sounds, labels, content and fonts, you would have a rich library of games based on the same mechanics.
Even better, if the stakeholders and designers had all of this information in a Jira ticket, you could integrate the Jira API into the Node script to inject these values in without the user having to provide any input. Winning!
This is one of many examples that can be found in Automating with Node.js. In this book, we will be looking at a more advanced example using „Rock Paper Scissors” as the basis of a build tool created from scratch.