If you know how to make Photoshop actions, you have a powerful tool in your hands. Actions let you create magical Photoshop effects with a single click, saving you a lot of time and effort. In this tutorial, I will show you how to create an action in Photoshop so that you can design your own effects for pictures.
Open the Actions panel. You can find it under Window > Actions.
Step 3
To create a new action, click the white card icon on the bottom of the panel.
Step 4
Give the action a name. If you want to be able to play this action with a press of a button, you can assign a Function Key to it.
Step 5
The action is being recorded now. But don’t worry, there’s no hurry. Photoshop only records your actions, and it doesn’t care how much time passes between them.
Let’s show Photoshop which actions we want it to save for later. First, create a New Layer.
You’ll notice that your action has been automatically added to the list in the Actions panel.
Step 6
Let’s fill this layer with some color. When creating an action, it’s better to avoid tools that are based on clicking on the canvas, because if you play the action on an image with a different size, it may not work properly. Always try to use something as universal and fool-proof as possible—so instead of using the Paint Bucket Tool to fill the canvas, go to Edit > Fill.
Step 7
Let’s do something fun with this layer. Right click it and select Blending Options. This panel is often used in actions, because it’s full of switches and sliders that you can use to heavily modify the layer, without having to point at anything on the canvas.
First, drag Fill Opacity down to zero. This will make the fill color invisible.
Step 8
Check Gradient Overlay and click it to see its settings.
Step 9
Change the gradient to a rainbow.
Step 10
Change the Angle of the gradient to something more interesting.
Step 11
Finally, change the Blend Mode to Color.
This method lets you apply the colors of the gradient to the image below without modifying it.
Step 12
If you like the effect, press OK and stop recording by clicking the first button in the Actions panel.
Step 13
And that’s it, our action has been recorded and saved! If you want to use it, just click the play button.
You can test it on many different images. A properly created action will give you the same results regardless of the photo you use!
To give you a better idea of how Photoshop actions can be used, here are a few examples from Envato Elements.
Painting Photoshop Action
If you want to turn a photo into a painting, it can be done with a single click, too! This action uses custom brushes and patterns to create a convincing effect of an oil painting. It also organizes the layer neatly, so that you can customize the effect afterwards.
This action is a good example of a selective photo effect. Before you play the action, you must show the program which area you want to be affected. This is especially useful for portraits, to create a different effect for the person and the background.
Photoshop actions can also be used to create a comic book effect. You don’t have to be able to draw to create something that looks like a nicely stylized drawing! Just find a good photo, select the character, and click play!
If you want to give your photo a vintage feel, it can be easily done with many types of actions. This set has 20 of them, and each of these actions will give your photo a unique style that brings old cameras to mind.
But photo effects don’t need to be all about photos. You can create a real poster from start to finish with a carefully prepared action. This action turns a photo into a neat illustration that can be used as a retro style poster.
Now you know how to create a Photoshop action step by step. If you want to learn more about Photoshop actions and photo effects in general, you can try these tutorials as well:
If you know how to make Photoshop actions, you have a powerful tool in your hands. Actions let you create magical Photoshop effects with a single click, saving you a lot of time and effort. In this tutorial, I will show you how to create an action in Photoshop so that you can design your own effects for pictures.
Open the Actions panel. You can find it under Window > Actions.
Step 3
To create a new action, click the white card icon on the bottom of the panel.
Step 4
Give the action a name. If you want to be able to play this action with a press of a button, you can assign a Function Key to it.
Step 5
The action is being recorded now. But don’t worry, there’s no hurry. Photoshop only records your actions, and it doesn’t care how much time passes between them.
Let’s show Photoshop which actions we want it to save for later. First, create a New Layer.
You’ll notice that your action has been automatically added to the list in the Actions panel.
Step 6
Let’s fill this layer with some color. When creating an action, it’s better to avoid tools that are based on clicking on the canvas, because if you play the action on an image with a different size, it may not work properly. Always try to use something as universal and fool-proof as possible—so instead of using the Paint Bucket Tool to fill the canvas, go to Edit > Fill.
Step 7
Let’s do something fun with this layer. Right click it and select Blending Options. This panel is often used in actions, because it’s full of switches and sliders that you can use to heavily modify the layer, without having to point at anything on the canvas.
First, drag Fill Opacity down to zero. This will make the fill color invisible.
Step 8
Check Gradient Overlay and click it to see its settings.
Step 9
Change the gradient to a rainbow.
Step 10
Change the Angle of the gradient to something more interesting.
Step 11
Finally, change the Blend Mode to Color.
This method lets you apply the colors of the gradient to the image below without modifying it.
Step 12
If you like the effect, press OK and stop recording by clicking the first button in the Actions panel.
Step 13
And that’s it, our action has been recorded and saved! If you want to use it, just click the play button.
You can test it on many different images. A properly created action will give you the same results regardless of the photo you use!
To give you a better idea of how Photoshop actions can be used, here are a few examples from Envato Elements.
Painting Photoshop Action
If you want to turn a photo into a painting, it can be done with a single click, too! This action uses custom brushes and patterns to create a convincing effect of an oil painting. It also organizes the layer neatly, so that you can customize the effect afterwards.
This action is a good example of a selective photo effect. Before you play the action, you must show the program which area you want to be affected. This is especially useful for portraits, to create a different effect for the person and the background.
Photoshop actions can also be used to create a comic book effect. You don’t have to be able to draw to create something that looks like a nicely stylized drawing! Just find a good photo, select the character, and click play!
If you want to give your photo a vintage feel, it can be easily done with many types of actions. This set has 20 of them, and each of these actions will give your photo a unique style that brings old cameras to mind.
But photo effects don’t need to be all about photos. You can create a real poster from start to finish with a carefully prepared action. This action turns a photo into a neat illustration that can be used as a retro style poster.
Now you know how to create a Photoshop action step by step. If you want to learn more about Photoshop actions and photo effects in general, you can try these tutorials as well:
If you know how to make Photoshop actions, you have a powerful tool in your hands. Actions let you create magical Photoshop effects with a single click, saving you a lot of time and effort. In this tutorial, I will show you how to create an action in Photoshop so that you can design your own effects for pictures.
Open the Actions panel. You can find it under Window > Actions.
Step 3
To create a new action, click the white card icon on the bottom of the panel.
Step 4
Give the action a name. If you want to be able to play this action with a press of a button, you can assign a Function Key to it.
Step 5
The action is being recorded now. But don’t worry, there’s no hurry. Photoshop only records your actions, and it doesn’t care how much time passes between them.
Let’s show Photoshop which actions we want it to save for later. First, create a New Layer.
You’ll notice that your action has been automatically added to the list in the Actions panel.
Step 6
Let’s fill this layer with some color. When creating an action, it’s better to avoid tools that are based on clicking on the canvas, because if you play the action on an image with a different size, it may not work properly. Always try to use something as universal and fool-proof as possible—so instead of using the Paint Bucket Tool to fill the canvas, go to Edit > Fill.
Step 7
Let’s do something fun with this layer. Right click it and select Blending Options. This panel is often used in actions, because it’s full of switches and sliders that you can use to heavily modify the layer, without having to point at anything on the canvas.
First, drag Fill Opacity down to zero. This will make the fill color invisible.
Step 8
Check Gradient Overlay and click it to see its settings.
Step 9
Change the gradient to a rainbow.
Step 10
Change the Angle of the gradient to something more interesting.
Step 11
Finally, change the Blend Mode to Color.
This method lets you apply the colors of the gradient to the image below without modifying it.
Step 12
If you like the effect, press OK and stop recording by clicking the first button in the Actions panel.
Step 13
And that’s it, our action has been recorded and saved! If you want to use it, just click the play button.
You can test it on many different images. A properly created action will give you the same results regardless of the photo you use!
To give you a better idea of how Photoshop actions can be used, here are a few examples from Envato Elements.
Painting Photoshop Action
If you want to turn a photo into a painting, it can be done with a single click, too! This action uses custom brushes and patterns to create a convincing effect of an oil painting. It also organizes the layer neatly, so that you can customize the effect afterwards.
This action is a good example of a selective photo effect. Before you play the action, you must show the program which area you want to be affected. This is especially useful for portraits, to create a different effect for the person and the background.
Photoshop actions can also be used to create a comic book effect. You don’t have to be able to draw to create something that looks like a nicely stylized drawing! Just find a good photo, select the character, and click play!
If you want to give your photo a vintage feel, it can be easily done with many types of actions. This set has 20 of them, and each of these actions will give your photo a unique style that brings old cameras to mind.
But photo effects don’t need to be all about photos. You can create a real poster from start to finish with a carefully prepared action. This action turns a photo into a neat illustration that can be used as a retro style poster.
Now you know how to create a Photoshop action step by step. If you want to learn more about Photoshop actions and photo effects in general, you can try these tutorials as well:
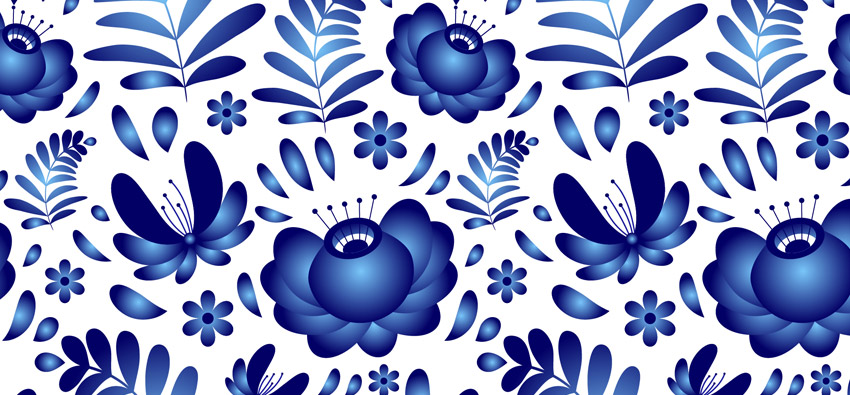
In this tutorial, you will learn how to create and use an Art Brush in Adobe Illustrator to create a vector traditional Russian pottery design called Gzhel!
Along the way, you will learn how to create a seamless pattern from any elements. Our Gzhel pottery flowers and decorations can be used in any Russian style designs.
Elegant and decorative, Gzhel was created in the 17th century in the village with the same name. That village had deposits of high-quality clay and was famous for its pottery, tiles, and simple children’s toys made from clay. The Gzhel pottery design is traditionally blue, with floral curls, leaves, and flower.
You can find awesome ready-to-use Gzhel vector ornaments on GraphicRiver. Check them for inspiration.
In this tutorial, I’ll show you how to create a beautiful floral design in traditional Russian Gzhel style. Let’s start!
1. How to Make the First Flower
Step 1
Create a New Document (File > New) with these settings:
Number of Artboards: 1
Width: 1000 px
Height: 1000 px
Units: Pixels
Color Mode: RGB
Step 2
Show Ruler (Command-R or View > Rulers > Show Rulers) and drag the vertical ruler to your artboard. Our flower will be symmetrical, so we need a center guideline.
Step 3
Make a 200 x 200 px circle; you can set the size in the Transform panel (Window > Transform). To draw a perfect circle, use the Ellipse Tool (L) and hold Shift. Color it to a Gradient (Window > Gradient), type Radial, and use the colors #78C5F8and #030065. To edit an object’s gradient, you can select your circle, press G, and drag the sliders.
Step 4
Create another ellipse with the Ellipse Tool (L) and color it in #030065. Select your new ellipse, copy (Command-C) and paste to front (Command-F). Hold Alt and make it smaller. Color it with the same gradient as the big circle, but the gradient’s type is Linear. To pick the same color or gradient, use the Eye Dropper Tool (I) and click on the object with the desired style.
Step 5
Create a new ellipse, color it to white (#ffffff), copy (Command-C) and paste in front (Command-F). Hold Alt and make it smaller. Color the new ellipse in #030065.
Select the bottom ellipse with a linear gradient, copy (Command-C) and paste in front (Command-F). Bring to front (Command-Shift-]). Select the top three ellipses and click Crop from the Pathfinder panel (Window > Pathfinder).
Object > Path > Clean Up to delete any unwanted objects after using the Crop Tool.
Step 6
Draw an ellipse and color it with the radial gradient (pick it with the Eye Dropper Tool (I) from the big circle). With the Direct Selection Tool (A), select the bottom anchor point, and convert this point to a corner with the button from the top panel.
Step 7
Send this leaf to the back (Command-Shift-[) and move it under the main shape. With the Selection Tool (V), you can transform and rotate it.
Copy the leaf and paste it to the back (Command-B), and then move the new leaf under the first one and rotate it. Repeat with the other leaves.
Step 8
Select all leaves, copy (Command-C) and paste to front (Command-F). From the Transform panel menu (Window > Transform), select Flip Horizontal. Or right-click on your selected objects and select Transform > Reflect.
Move your reflected copy to make a nice symmetrical flower. Create an ellipse with the same linear gradient, send it to back (Command-Shift-[), and place it in the center.
Step 9
With the Pen Tool (P), create a line with 2 px Weight and #030065 color. To change the stroke’s parameters, use the Stroke panel (Window > Stroke). On the top of your stroke, add the small, dark blue circle. Select the circle and line, copy (Command-C), paste to front (Command-F), and flip it horizontally. Move it to the right place.
Double-click on the Blend Tool from the Tools panel to open its settings. Select Spacing: Specified Steps, 3 steps. Press OK. Choose the Blend Tool, click on the first circle, and click the second. Now we have five circles.
Release the tool (I usually simply activate the Selection Tool (V) and choose the necessary tool again) and repeat with the lines.
Step 10
Select the anchor point with the Direct Selection Tool (A) from the big circle and convert it to a corner, as we did with the leaves. Move and transform it a bit to make it look nice. Also, I’ve moved the flower’s inner part to the bottom. To select several objects (or anchor points), hold Shift.
Select all the elements and Group (Command-G) them.
Congratulations—our first element is ready!
2. How to Make the Drop Art Brush
Step 1
To hide and unhide the guidelines, use Command-;.
Draw an ellipse with a color of #030065. With the Direct Selection Tool (A), select the bottom anchor point and convert it to a corner. With the same tool, select the two middle anchor points (hold Shift to select several points) and move them up. You can use the keyboard arrows to move anchor points.
Step 2
Open the Brush panel (Window > Brushes) and simply move your drop inside the open panel. Choose the Art Brush type.
In the brush options that appear, name your brush and select Stretch to Fit Stroke Length.
Step 3
Time to check the new brush. With the Pencil Tool (N), draw random strokes and apply them to our drop brush. Be sure that the fill color (the top square) is empty.
Looks nice!
3. How to Make a Branch With Leaves
Step 1
With the Line Segment Tool (\), draw a line. With the Pencil Tool (N), add some branches. Select your branches, copy (Command-C), paste to front (Command-F), and flip it horizontally. Move it to the right place. We have something like a tree now.
Step 2
Duplicate our Drop brush (select the appropriate brush in the Brushes panel, go to the panel menu, and select Duplicate Brush). Double-click on the copy, rename the brush, and change the width to 40%.
Step 3
Select your branch lines (except the vertical line) and apply to them your Drop brush 2.
Step 4
Select the vertical line in the Stroke panel (Window > Stroke). Set 8 px Weight and smooth corner and cap. Select the Width Tool from the Tools panel (Shift-W), select the bottom anchor point, and make it narrower (drag to the side).
Step 5
Select all the branch’s elements and go to Object > Expand Appearance, Object > Path > Outline Stroke, Object > Path > Clean Up. Select all and click Unite from the Pathfinder panel (Window > Pathfinder).
Step 6
Now we have a lot of unnecessary points. Go to Object > Path > Simplify and edit your parameters to have a nice look without excess points. Unite it again with the Pathfinder panel.
Select your branch and move it to the open brush panel. Create a new Art Brush. Choose the Scale Proportionately option.
Step 7
Check your new brush with random strokes. Looks nice!
Step 8
To color your branches with gradients, select them and go to Object > Expand Appearance, Object > Path > Clean Up. To edit the gradient, use the Gradient Tool (G) and move the white gradient tool. Be sure that the active color is the fill color (top square).
4. How to Make the Second Flower
Step 1
Unhide the guidelines (Command-;). You can use the old guideline or click on the vertical ruler and drag it to your artboard. With Drop brush 2, draw a stroke (B key for the Brush Tool). Set 2 px Stroke Weight.
Step 2
Draw other leaves. Set 1.5 pxStroke Weight for the second and 1 pxStroke Weight for the others.
Step 3
Select all the leaves and go to Object > Expand Appearance, Object > Path > Clean Up. Color all leaves except the first to Radial Gradient like the first big flower we did before, using the Eye Dropper Tool (I). Arrange the objects by sending them back. Simply select the relevant leaf and use the Command-Shift-[ shortcut. The dark blue leaf (the first) is on the top.
Step 4
Select all leaves, copy (Command-C), paste to front (Command-F), and flip them horizontally. Move if necessary. In the center, add a small circle with the same Radial Gradient. Use the Ellipse Tool (L) while holding Shift to create a perfect circle.
Step 5
With the Pencil Tool (N), draw several strokes with a color of dark blue #030065 and Stroke Weight of 3 px. On the top of your strokes, add some dark blue circles. Select the strokes and circles and send them to back (Command-Shift-[). Select all the elements of your flower and group them (Command-G).
5. How to Make a Small Additional Flower
Step 1
With the Polygon Tool (this tool is located in the same spot as the Rectangle or Ellipse Tool on the Tools panel—right-click on it and you will see all variants), draw a polygon with six corners. Use the up and down keyboard arrows to change the corners amount while drawing it.
Step 2
Select your polygon, go to Effects > Distort & Transform > Pucker & Bloat, and set the parameters to have a nice flower shape. Object > Expand Appearance afterwards.
Step 3
Color the flower with a Radial Gradient and add a small dark blue circle to the center. To align the circle and flower, use the Align panel (Window > Align), selecting Horizontal Align Center and Vertical Align Center. Group (Command-G) the flower and inner circle. We are done with the small flower.
6. How to Make the Pattern
Step 1
We’ve finished all our pattern elements, so now we can assemble the design.
Randomly put your objects on the artboard (artboard size 1000 px x 1000 px). Rotate them and change their size if you need with the Selection Tool (V). It’s OK if some elements go beyond the borders. With the Drop Brush, draw several drops, changing the Stroke Weight if necessary (I used 0.5 px and 0.75 px). Draw branches with the branch brush.
Step 2
Select an object that goes beyond the border (I chose the big flower from the left side) and press Enter. Set Horizontal (or Vertical if you need to copy it vertically) to 1000 px (our artboard width) and press Copy. Our object is copied to the right place now.
If you need to move an object to the right (or above), use negative values like -1000px.
Step 3
Repeat this action with all overlapping objects.
Edit your composition, adding drop strokes. I also edited the branches. With the Direct Selection Tool (A), select the anchor point and move it to have nice bend in the branch.
Step 4
With the Magic Wand Tool (Y), click on any brush stroke. Now all drops and branches are selected. Go to Object > Expand Appearance and Object > Path > Clean Up. Keeping the selection, color it with a Radial Gradient (use the Eye Dropper Tool (I)). Again, I edited the size and rotation of some drops and elements. Pay attention to the location so as not to break the pattern.
Step 5
SelecttheRectangle Tool (M) and click on the artboard. In the window that appears, set the size to 1000 x 1000 px.
Step 6
Color the new big square in white#ffffff and send it back (Command-Shift-[). Open the Transform panel (Window > Transform) and set x: 0 px and y: 0 px. In this panel, you can also edit an object’s size.
Step 7
Copy (Command-C) the white square, paste to front (Command-F), and bring it to front (Command-Shift-]). Select all elements and right-click on them. Select Make Clipping Mask.
Step 8
We have our pattern cropped. To check the pattern, select it and press Enter. Copy and move it horizontally and vertically by 1000px. Looks nice!
Congratulations! Our Russian Gzhel Style Pattern Is Finished!
In this tutorial, we’ve learned some simple Adobe Illustrator tricks and created a fancy folk-style pattern. With this method, you can create any pattern with different elements. I hope you’ve discovered some useful things in this tutorial and learned how to create a traditional Russian floral pottery design!
Share your great results here in comments, and check our other great Adobe Illustrator tutorials to learn some more pro tips!
In this tutorial, you will learn how to create and use an Art Brush in Adobe Illustrator to create a vector traditional Russian pottery design called Gzhel!
Along the way, you will learn how to create a seamless pattern from any elements. Our Gzhel pottery flowers and decorations can be used in any Russian style designs.
Elegant and decorative, Gzhel was created in the 17th century in the village with the same name. That village had deposits of high-quality clay and was famous for its pottery, tiles, and simple children’s toys made from clay. The Gzhel pottery design is traditionally blue, with floral curls, leaves, and flower.
You can find awesome ready-to-use Gzhel vector ornaments on GraphicRiver. Check them for inspiration.
In this tutorial, I’ll show you how to create a beautiful floral design in traditional Russian Gzhel style. Let’s start!
1. How to Make the First Flower
Step 1
Create a New Document (File > New) with these settings:
Number of Artboards: 1
Width: 1000 px
Height: 1000 px
Units: Pixels
Color Mode: RGB
Step 2
Show Ruler (Command-R or View > Rulers > Show Rulers) and drag the vertical ruler to your artboard. Our flower will be symmetrical, so we need a center guideline.
Step 3
Make a 200 x 200 px circle; you can set the size in the Transform panel (Window > Transform). To draw a perfect circle, use the Ellipse Tool (L) and hold Shift. Color it to a Gradient (Window > Gradient), type Radial, and use the colors #78C5F8and #030065. To edit an object’s gradient, you can select your circle, press G, and drag the sliders.
Step 4
Create another ellipse with the Ellipse Tool (L) and color it in #030065. Select your new ellipse, copy (Command-C) and paste to front (Command-F). Hold Alt and make it smaller. Color it with the same gradient as the big circle, but the gradient’s type is Linear. To pick the same color or gradient, use the Eye Dropper Tool (I) and click on the object with the desired style.
Step 5
Create a new ellipse, color it to white (#ffffff), copy (Command-C) and paste in front (Command-F). Hold Alt and make it smaller. Color the new ellipse in #030065.
Select the bottom ellipse with a linear gradient, copy (Command-C) and paste in front (Command-F). Bring to front (Command-Shift-]). Select the top three ellipses and click Crop from the Pathfinder panel (Window > Pathfinder).
Object > Path > Clean Up to delete any unwanted objects after using the Crop Tool.
Step 6
Draw an ellipse and color it with the radial gradient (pick it with the Eye Dropper Tool (I) from the big circle). With the Direct Selection Tool (A), select the bottom anchor point, and convert this point to a corner with the button from the top panel.
Step 7
Send this leaf to the back (Command-Shift-[) and move it under the main shape. With the Selection Tool (V), you can transform and rotate it.
Copy the leaf and paste it to the back (Command-B), and then move the new leaf under the first one and rotate it. Repeat with the other leaves.
Step 8
Select all leaves, copy (Command-C) and paste to front (Command-F). From the Transform panel menu (Window > Transform), select Flip Horizontal. Or right-click on your selected objects and select Transform > Reflect.
Move your reflected copy to make a nice symmetrical flower. Create an ellipse with the same linear gradient, send it to back (Command-Shift-[), and place it in the center.
Step 9
With the Pen Tool (P), create a line with 2 px Weight and #030065 color. To change the stroke’s parameters, use the Stroke panel (Window > Stroke). On the top of your stroke, add the small, dark blue circle. Select the circle and line, copy (Command-C), paste to front (Command-F), and flip it horizontally. Move it to the right place.
Double-click on the Blend Tool from the Tools panel to open its settings. Select Spacing: Specified Steps, 3 steps. Press OK. Choose the Blend Tool, click on the first circle, and click the second. Now we have five circles.
Release the tool (I usually simply activate the Selection Tool (V) and choose the necessary tool again) and repeat with the lines.
Step 10
Select the anchor point with the Direct Selection Tool (A) from the big circle and convert it to a corner, as we did with the leaves. Move and transform it a bit to make it look nice. Also, I’ve moved the flower’s inner part to the bottom. To select several objects (or anchor points), hold Shift.
Select all the elements and Group (Command-G) them.
Congratulations—our first element is ready!
2. How to Make the Drop Art Brush
Step 1
To hide and unhide the guidelines, use Command-;.
Draw an ellipse with a color of #030065. With the Direct Selection Tool (A), select the bottom anchor point and convert it to a corner. With the same tool, select the two middle anchor points (hold Shift to select several points) and move them up. You can use the keyboard arrows to move anchor points.
Step 2
Open the Brush panel (Window > Brushes) and simply move your drop inside the open panel. Choose the Art Brush type.
In the brush options that appear, name your brush and select Stretch to Fit Stroke Length.
Step 3
Time to check the new brush. With the Pencil Tool (N), draw random strokes and apply them to our drop brush. Be sure that the fill color (the top square) is empty.
Looks nice!
3. How to Make a Branch With Leaves
Step 1
With the Line Segment Tool (\), draw a line. With the Pencil Tool (N), add some branches. Select your branches, copy (Command-C), paste to front (Command-F), and flip it horizontally. Move it to the right place. We have something like a tree now.
Step 2
Duplicate our Drop brush (select the appropriate brush in the Brushes panel, go to the panel menu, and select Duplicate Brush). Double-click on the copy, rename the brush, and change the width to 40%.
Step 3
Select your branch lines (except the vertical line) and apply to them your Drop brush 2.
Step 4
Select the vertical line in the Stroke panel (Window > Stroke). Set 8 px Weight and smooth corner and cap. Select the Width Tool from the Tools panel (Shift-W), select the bottom anchor point, and make it narrower (drag to the side).
Step 5
Select all the branch’s elements and go to Object > Expand Appearance, Object > Path > Outline Stroke, Object > Path > Clean Up. Select all and click Unite from the Pathfinder panel (Window > Pathfinder).
Step 6
Now we have a lot of unnecessary points. Go to Object > Path > Simplify and edit your parameters to have a nice look without excess points. Unite it again with the Pathfinder panel.
Select your branch and move it to the open brush panel. Create a new Art Brush. Choose the Scale Proportionately option.
Step 7
Check your new brush with random strokes. Looks nice!
Step 8
To color your branches with gradients, select them and go to Object > Expand Appearance, Object > Path > Clean Up. To edit the gradient, use the Gradient Tool (G) and move the white gradient tool. Be sure that the active color is the fill color (top square).
4. How to Make the Second Flower
Step 1
Unhide the guidelines (Command-;). You can use the old guideline or click on the vertical ruler and drag it to your artboard. With Drop brush 2, draw a stroke (B key for the Brush Tool). Set 2 px Stroke Weight.
Step 2
Draw other leaves. Set 1.5 pxStroke Weight for the second and 1 pxStroke Weight for the others.
Step 3
Select all the leaves and go to Object > Expand Appearance, Object > Path > Clean Up. Color all leaves except the first to Radial Gradient like the first big flower we did before, using the Eye Dropper Tool (I). Arrange the objects by sending them back. Simply select the relevant leaf and use the Command-Shift-[ shortcut. The dark blue leaf (the first) is on the top.
Step 4
Select all leaves, copy (Command-C), paste to front (Command-F), and flip them horizontally. Move if necessary. In the center, add a small circle with the same Radial Gradient. Use the Ellipse Tool (L) while holding Shift to create a perfect circle.
Step 5
With the Pencil Tool (N), draw several strokes with a color of dark blue #030065 and Stroke Weight of 3 px. On the top of your strokes, add some dark blue circles. Select the strokes and circles and send them to back (Command-Shift-[). Select all the elements of your flower and group them (Command-G).
5. How to Make a Small Additional Flower
Step 1
With the Polygon Tool (this tool is located in the same spot as the Rectangle or Ellipse Tool on the Tools panel—right-click on it and you will see all variants), draw a polygon with six corners. Use the up and down keyboard arrows to change the corners amount while drawing it.
Step 2
Select your polygon, go to Effects > Distort & Transform > Pucker & Bloat, and set the parameters to have a nice flower shape. Object > Expand Appearance afterwards.
Step 3
Color the flower with a Radial Gradient and add a small dark blue circle to the center. To align the circle and flower, use the Align panel (Window > Align), selecting Horizontal Align Center and Vertical Align Center. Group (Command-G) the flower and inner circle. We are done with the small flower.
6. How to Make the Pattern
Step 1
We’ve finished all our pattern elements, so now we can assemble the design.
Randomly put your objects on the artboard (artboard size 1000 px x 1000 px). Rotate them and change their size if you need with the Selection Tool (V). It’s OK if some elements go beyond the borders. With the Drop Brush, draw several drops, changing the Stroke Weight if necessary (I used 0.5 px and 0.75 px). Draw branches with the branch brush.
Step 2
Select an object that goes beyond the border (I chose the big flower from the left side) and press Enter. Set Horizontal (or Vertical if you need to copy it vertically) to 1000 px (our artboard width) and press Copy. Our object is copied to the right place now.
If you need to move an object to the right (or above), use negative values like -1000px.
Step 3
Repeat this action with all overlapping objects.
Edit your composition, adding drop strokes. I also edited the branches. With the Direct Selection Tool (A), select the anchor point and move it to have nice bend in the branch.
Step 4
With the Magic Wand Tool (Y), click on any brush stroke. Now all drops and branches are selected. Go to Object > Expand Appearance and Object > Path > Clean Up. Keeping the selection, color it with a Radial Gradient (use the Eye Dropper Tool (I)). Again, I edited the size and rotation of some drops and elements. Pay attention to the location so as not to break the pattern.
Step 5
SelecttheRectangle Tool (M) and click on the artboard. In the window that appears, set the size to 1000 x 1000 px.
Step 6
Color the new big square in white#ffffff and send it back (Command-Shift-[). Open the Transform panel (Window > Transform) and set x: 0 px and y: 0 px. In this panel, you can also edit an object’s size.
Step 7
Copy (Command-C) the white square, paste to front (Command-F), and bring it to front (Command-Shift-]). Select all elements and right-click on them. Select Make Clipping Mask.
Step 8
We have our pattern cropped. To check the pattern, select it and press Enter. Copy and move it horizontally and vertically by 1000px. Looks nice!
Congratulations! Our Russian Gzhel Style Pattern Is Finished!
In this tutorial, we’ve learned some simple Adobe Illustrator tricks and created a fancy folk-style pattern. With this method, you can create any pattern with different elements. I hope you’ve discovered some useful things in this tutorial and learned how to create a traditional Russian floral pottery design!
Share your great results here in comments, and check our other great Adobe Illustrator tutorials to learn some more pro tips!
In this tutorial, you will learn how to create and use an Art Brush in Adobe Illustrator to create a vector traditional Russian pottery design called Gzhel!
Along the way, you will learn how to create a seamless pattern from any elements. Our Gzhel pottery flowers and decorations can be used in any Russian style designs.
Elegant and decorative, Gzhel was created in the 17th century in the village with the same name. That village had deposits of high-quality clay and was famous for its pottery, tiles, and simple children’s toys made from clay. The Gzhel pottery design is traditionally blue, with floral curls, leaves, and flower.
You can find awesome ready-to-use Gzhel vector ornaments on GraphicRiver. Check them for inspiration.
In this tutorial, I’ll show you how to create a beautiful floral design in traditional Russian Gzhel style. Let’s start!
1. How to Make the First Flower
Step 1
Create a New Document (File > New) with these settings:
Number of Artboards: 1
Width: 1000 px
Height: 1000 px
Units: Pixels
Color Mode: RGB
Step 2
Show Ruler (Command-R or View > Rulers > Show Rulers) and drag the vertical ruler to your artboard. Our flower will be symmetrical, so we need a center guideline.
Step 3
Make a 200 x 200 px circle; you can set the size in the Transform panel (Window > Transform). To draw a perfect circle, use the Ellipse Tool (L) and hold Shift. Color it to a Gradient (Window > Gradient), type Radial, and use the colors #78C5F8and #030065. To edit an object’s gradient, you can select your circle, press G, and drag the sliders.
Step 4
Create another ellipse with the Ellipse Tool (L) and color it in #030065. Select your new ellipse, copy (Command-C) and paste to front (Command-F). Hold Alt and make it smaller. Color it with the same gradient as the big circle, but the gradient’s type is Linear. To pick the same color or gradient, use the Eye Dropper Tool (I) and click on the object with the desired style.
Step 5
Create a new ellipse, color it to white (#ffffff), copy (Command-C) and paste in front (Command-F). Hold Alt and make it smaller. Color the new ellipse in #030065.
Select the bottom ellipse with a linear gradient, copy (Command-C) and paste in front (Command-F). Bring to front (Command-Shift-]). Select the top three ellipses and click Crop from the Pathfinder panel (Window > Pathfinder).
Object > Path > Clean Up to delete any unwanted objects after using the Crop Tool.
Step 6
Draw an ellipse and color it with the radial gradient (pick it with the Eye Dropper Tool (I) from the big circle). With the Direct Selection Tool (A), select the bottom anchor point, and convert this point to a corner with the button from the top panel.
Step 7
Send this leaf to the back (Command-Shift-[) and move it under the main shape. With the Selection Tool (V), you can transform and rotate it.
Copy the leaf and paste it to the back (Command-B), and then move the new leaf under the first one and rotate it. Repeat with the other leaves.
Step 8
Select all leaves, copy (Command-C) and paste to front (Command-F). From the Transform panel menu (Window > Transform), select Flip Horizontal. Or right-click on your selected objects and select Transform > Reflect.
Move your reflected copy to make a nice symmetrical flower. Create an ellipse with the same linear gradient, send it to back (Command-Shift-[), and place it in the center.
Step 9
With the Pen Tool (P), create a line with 2 px Weight and #030065 color. To change the stroke’s parameters, use the Stroke panel (Window > Stroke). On the top of your stroke, add the small, dark blue circle. Select the circle and line, copy (Command-C), paste to front (Command-F), and flip it horizontally. Move it to the right place.
Double-click on the Blend Tool from the Tools panel to open its settings. Select Spacing: Specified Steps, 3 steps. Press OK. Choose the Blend Tool, click on the first circle, and click the second. Now we have five circles.
Release the tool (I usually simply activate the Selection Tool (V) and choose the necessary tool again) and repeat with the lines.
Step 10
Select the anchor point with the Direct Selection Tool (A) from the big circle and convert it to a corner, as we did with the leaves. Move and transform it a bit to make it look nice. Also, I’ve moved the flower’s inner part to the bottom. To select several objects (or anchor points), hold Shift.
Select all the elements and Group (Command-G) them.
Congratulations—our first element is ready!
2. How to Make the Drop Art Brush
Step 1
To hide and unhide the guidelines, use Command-;.
Draw an ellipse with a color of #030065. With the Direct Selection Tool (A), select the bottom anchor point and convert it to a corner. With the same tool, select the two middle anchor points (hold Shift to select several points) and move them up. You can use the keyboard arrows to move anchor points.
Step 2
Open the Brush panel (Window > Brushes) and simply move your drop inside the open panel. Choose the Art Brush type.
In the brush options that appear, name your brush and select Stretch to Fit Stroke Length.
Step 3
Time to check the new brush. With the Pencil Tool (N), draw random strokes and apply them to our drop brush. Be sure that the fill color (the top square) is empty.
Looks nice!
3. How to Make a Branch With Leaves
Step 1
With the Line Segment Tool (\), draw a line. With the Pencil Tool (N), add some branches. Select your branches, copy (Command-C), paste to front (Command-F), and flip it horizontally. Move it to the right place. We have something like a tree now.
Step 2
Duplicate our Drop brush (select the appropriate brush in the Brushes panel, go to the panel menu, and select Duplicate Brush). Double-click on the copy, rename the brush, and change the width to 40%.
Step 3
Select your branch lines (except the vertical line) and apply to them your Drop brush 2.
Step 4
Select the vertical line in the Stroke panel (Window > Stroke). Set 8 px Weight and smooth corner and cap. Select the Width Tool from the Tools panel (Shift-W), select the bottom anchor point, and make it narrower (drag to the side).
Step 5
Select all the branch’s elements and go to Object > Expand Appearance, Object > Path > Outline Stroke, Object > Path > Clean Up. Select all and click Unite from the Pathfinder panel (Window > Pathfinder).
Step 6
Now we have a lot of unnecessary points. Go to Object > Path > Simplify and edit your parameters to have a nice look without excess points. Unite it again with the Pathfinder panel.
Select your branch and move it to the open brush panel. Create a new Art Brush. Choose the Scale Proportionately option.
Step 7
Check your new brush with random strokes. Looks nice!
Step 8
To color your branches with gradients, select them and go to Object > Expand Appearance, Object > Path > Clean Up. To edit the gradient, use the Gradient Tool (G) and move the white gradient tool. Be sure that the active color is the fill color (top square).
4. How to Make the Second Flower
Step 1
Unhide the guidelines (Command-;). You can use the old guideline or click on the vertical ruler and drag it to your artboard. With Drop brush 2, draw a stroke (B key for the Brush Tool). Set 2 px Stroke Weight.
Step 2
Draw other leaves. Set 1.5 pxStroke Weight for the second and 1 pxStroke Weight for the others.
Step 3
Select all the leaves and go to Object > Expand Appearance, Object > Path > Clean Up. Color all leaves except the first to Radial Gradient like the first big flower we did before, using the Eye Dropper Tool (I). Arrange the objects by sending them back. Simply select the relevant leaf and use the Command-Shift-[ shortcut. The dark blue leaf (the first) is on the top.
Step 4
Select all leaves, copy (Command-C), paste to front (Command-F), and flip them horizontally. Move if necessary. In the center, add a small circle with the same Radial Gradient. Use the Ellipse Tool (L) while holding Shift to create a perfect circle.
Step 5
With the Pencil Tool (N), draw several strokes with a color of dark blue #030065 and Stroke Weight of 3 px. On the top of your strokes, add some dark blue circles. Select the strokes and circles and send them to back (Command-Shift-[). Select all the elements of your flower and group them (Command-G).
5. How to Make a Small Additional Flower
Step 1
With the Polygon Tool (this tool is located in the same spot as the Rectangle or Ellipse Tool on the Tools panel—right-click on it and you will see all variants), draw a polygon with six corners. Use the up and down keyboard arrows to change the corners amount while drawing it.
Step 2
Select your polygon, go to Effects > Distort & Transform > Pucker & Bloat, and set the parameters to have a nice flower shape. Object > Expand Appearance afterwards.
Step 3
Color the flower with a Radial Gradient and add a small dark blue circle to the center. To align the circle and flower, use the Align panel (Window > Align), selecting Horizontal Align Center and Vertical Align Center. Group (Command-G) the flower and inner circle. We are done with the small flower.
6. How to Make the Pattern
Step 1
We’ve finished all our pattern elements, so now we can assemble the design.
Randomly put your objects on the artboard (artboard size 1000 px x 1000 px). Rotate them and change their size if you need with the Selection Tool (V). It’s OK if some elements go beyond the borders. With the Drop Brush, draw several drops, changing the Stroke Weight if necessary (I used 0.5 px and 0.75 px). Draw branches with the branch brush.
Step 2
Select an object that goes beyond the border (I chose the big flower from the left side) and press Enter. Set Horizontal (or Vertical if you need to copy it vertically) to 1000 px (our artboard width) and press Copy. Our object is copied to the right place now.
If you need to move an object to the right (or above), use negative values like -1000px.
Step 3
Repeat this action with all overlapping objects.
Edit your composition, adding drop strokes. I also edited the branches. With the Direct Selection Tool (A), select the anchor point and move it to have nice bend in the branch.
Step 4
With the Magic Wand Tool (Y), click on any brush stroke. Now all drops and branches are selected. Go to Object > Expand Appearance and Object > Path > Clean Up. Keeping the selection, color it with a Radial Gradient (use the Eye Dropper Tool (I)). Again, I edited the size and rotation of some drops and elements. Pay attention to the location so as not to break the pattern.
Step 5
SelecttheRectangle Tool (M) and click on the artboard. In the window that appears, set the size to 1000 x 1000 px.
Step 6
Color the new big square in white#ffffff and send it back (Command-Shift-[). Open the Transform panel (Window > Transform) and set x: 0 px and y: 0 px. In this panel, you can also edit an object’s size.
Step 7
Copy (Command-C) the white square, paste to front (Command-F), and bring it to front (Command-Shift-]). Select all elements and right-click on them. Select Make Clipping Mask.
Step 8
We have our pattern cropped. To check the pattern, select it and press Enter. Copy and move it horizontally and vertically by 1000px. Looks nice!
Congratulations! Our Russian Gzhel Style Pattern Is Finished!
In this tutorial, we’ve learned some simple Adobe Illustrator tricks and created a fancy folk-style pattern. With this method, you can create any pattern with different elements. I hope you’ve discovered some useful things in this tutorial and learned how to create a traditional Russian floral pottery design!
Share your great results here in comments, and check our other great Adobe Illustrator tutorials to learn some more pro tips!
In this tutorial, you will learn how to create and use an Art Brush in Adobe Illustrator to create a vector traditional Russian pottery design called Gzhel!
Along the way, you will learn how to create a seamless pattern from any elements. Our Gzhel pottery flowers and decorations can be used in any Russian style designs.
Elegant and decorative, Gzhel was created in the 17th century in the village with the same name. That village had deposits of high-quality clay and was famous for its pottery, tiles, and simple children’s toys made from clay. The Gzhel pottery design is traditionally blue, with floral curls, leaves, and flower.
You can find awesome ready-to-use Gzhel vector ornaments on GraphicRiver. Check them for inspiration.
In this tutorial, I’ll show you how to create a beautiful floral design in traditional Russian Gzhel style. Let’s start!
1. How to Make the First Flower
Step 1
Create a New Document (File > New) with these settings:
Number of Artboards: 1
Width: 1000 px
Height: 1000 px
Units: Pixels
Color Mode: RGB
Step 2
Show Ruler (Command-R or View > Rulers > Show Rulers) and drag the vertical ruler to your artboard. Our flower will be symmetrical, so we need a center guideline.
Step 3
Make a 200 x 200 px circle; you can set the size in the Transform panel (Window > Transform). To draw a perfect circle, use the Ellipse Tool (L) and hold Shift. Color it to a Gradient (Window > Gradient), type Radial, and use the colors #78C5F8and #030065. To edit an object’s gradient, you can select your circle, press G, and drag the sliders.
Step 4
Create another ellipse with the Ellipse Tool (L) and color it in #030065. Select your new ellipse, copy (Command-C) and paste to front (Command-F). Hold Alt and make it smaller. Color it with the same gradient as the big circle, but the gradient’s type is Linear. To pick the same color or gradient, use the Eye Dropper Tool (I) and click on the object with the desired style.
Step 5
Create a new ellipse, color it to white (#ffffff), copy (Command-C) and paste in front (Command-F). Hold Alt and make it smaller. Color the new ellipse in #030065.
Select the bottom ellipse with a linear gradient, copy (Command-C) and paste in front (Command-F). Bring to front (Command-Shift-]). Select the top three ellipses and click Crop from the Pathfinder panel (Window > Pathfinder).
Object > Path > Clean Up to delete any unwanted objects after using the Crop Tool.
Step 6
Draw an ellipse and color it with the radial gradient (pick it with the Eye Dropper Tool (I) from the big circle). With the Direct Selection Tool (A), select the bottom anchor point, and convert this point to a corner with the button from the top panel.
Step 7
Send this leaf to the back (Command-Shift-[) and move it under the main shape. With the Selection Tool (V), you can transform and rotate it.
Copy the leaf and paste it to the back (Command-B), and then move the new leaf under the first one and rotate it. Repeat with the other leaves.
Step 8
Select all leaves, copy (Command-C) and paste to front (Command-F). From the Transform panel menu (Window > Transform), select Flip Horizontal. Or right-click on your selected objects and select Transform > Reflect.
Move your reflected copy to make a nice symmetrical flower. Create an ellipse with the same linear gradient, send it to back (Command-Shift-[), and place it in the center.
Step 9
With the Pen Tool (P), create a line with 2 px Weight and #030065 color. To change the stroke’s parameters, use the Stroke panel (Window > Stroke). On the top of your stroke, add the small, dark blue circle. Select the circle and line, copy (Command-C), paste to front (Command-F), and flip it horizontally. Move it to the right place.
Double-click on the Blend Tool from the Tools panel to open its settings. Select Spacing: Specified Steps, 3 steps. Press OK. Choose the Blend Tool, click on the first circle, and click the second. Now we have five circles.
Release the tool (I usually simply activate the Selection Tool (V) and choose the necessary tool again) and repeat with the lines.
Step 10
Select the anchor point with the Direct Selection Tool (A) from the big circle and convert it to a corner, as we did with the leaves. Move and transform it a bit to make it look nice. Also, I’ve moved the flower’s inner part to the bottom. To select several objects (or anchor points), hold Shift.
Select all the elements and Group (Command-G) them.
Congratulations—our first element is ready!
2. How to Make the Drop Art Brush
Step 1
To hide and unhide the guidelines, use Command-;.
Draw an ellipse with a color of #030065. With the Direct Selection Tool (A), select the bottom anchor point and convert it to a corner. With the same tool, select the two middle anchor points (hold Shift to select several points) and move them up. You can use the keyboard arrows to move anchor points.
Step 2
Open the Brush panel (Window > Brushes) and simply move your drop inside the open panel. Choose the Art Brush type.
In the brush options that appear, name your brush and select Stretch to Fit Stroke Length.
Step 3
Time to check the new brush. With the Pencil Tool (N), draw random strokes and apply them to our drop brush. Be sure that the fill color (the top square) is empty.
Looks nice!
3. How to Make a Branch With Leaves
Step 1
With the Line Segment Tool (\), draw a line. With the Pencil Tool (N), add some branches. Select your branches, copy (Command-C), paste to front (Command-F), and flip it horizontally. Move it to the right place. We have something like a tree now.
Step 2
Duplicate our Drop brush (select the appropriate brush in the Brushes panel, go to the panel menu, and select Duplicate Brush). Double-click on the copy, rename the brush, and change the width to 40%.
Step 3
Select your branch lines (except the vertical line) and apply to them your Drop brush 2.
Step 4
Select the vertical line in the Stroke panel (Window > Stroke). Set 8 px Weight and smooth corner and cap. Select the Width Tool from the Tools panel (Shift-W), select the bottom anchor point, and make it narrower (drag to the side).
Step 5
Select all the branch’s elements and go to Object > Expand Appearance, Object > Path > Outline Stroke, Object > Path > Clean Up. Select all and click Unite from the Pathfinder panel (Window > Pathfinder).
Step 6
Now we have a lot of unnecessary points. Go to Object > Path > Simplify and edit your parameters to have a nice look without excess points. Unite it again with the Pathfinder panel.
Select your branch and move it to the open brush panel. Create a new Art Brush. Choose the Scale Proportionately option.
Step 7
Check your new brush with random strokes. Looks nice!
Step 8
To color your branches with gradients, select them and go to Object > Expand Appearance, Object > Path > Clean Up. To edit the gradient, use the Gradient Tool (G) and move the white gradient tool. Be sure that the active color is the fill color (top square).
4. How to Make the Second Flower
Step 1
Unhide the guidelines (Command-;). You can use the old guideline or click on the vertical ruler and drag it to your artboard. With Drop brush 2, draw a stroke (B key for the Brush Tool). Set 2 px Stroke Weight.
Step 2
Draw other leaves. Set 1.5 pxStroke Weight for the second and 1 pxStroke Weight for the others.
Step 3
Select all the leaves and go to Object > Expand Appearance, Object > Path > Clean Up. Color all leaves except the first to Radial Gradient like the first big flower we did before, using the Eye Dropper Tool (I). Arrange the objects by sending them back. Simply select the relevant leaf and use the Command-Shift-[ shortcut. The dark blue leaf (the first) is on the top.
Step 4
Select all leaves, copy (Command-C), paste to front (Command-F), and flip them horizontally. Move if necessary. In the center, add a small circle with the same Radial Gradient. Use the Ellipse Tool (L) while holding Shift to create a perfect circle.
Step 5
With the Pencil Tool (N), draw several strokes with a color of dark blue #030065 and Stroke Weight of 3 px. On the top of your strokes, add some dark blue circles. Select the strokes and circles and send them to back (Command-Shift-[). Select all the elements of your flower and group them (Command-G).
5. How to Make a Small Additional Flower
Step 1
With the Polygon Tool (this tool is located in the same spot as the Rectangle or Ellipse Tool on the Tools panel—right-click on it and you will see all variants), draw a polygon with six corners. Use the up and down keyboard arrows to change the corners amount while drawing it.
Step 2
Select your polygon, go to Effects > Distort & Transform > Pucker & Bloat, and set the parameters to have a nice flower shape. Object > Expand Appearance afterwards.
Step 3
Color the flower with a Radial Gradient and add a small dark blue circle to the center. To align the circle and flower, use the Align panel (Window > Align), selecting Horizontal Align Center and Vertical Align Center. Group (Command-G) the flower and inner circle. We are done with the small flower.
6. How to Make the Pattern
Step 1
We’ve finished all our pattern elements, so now we can assemble the design.
Randomly put your objects on the artboard (artboard size 1000 px x 1000 px). Rotate them and change their size if you need with the Selection Tool (V). It’s OK if some elements go beyond the borders. With the Drop Brush, draw several drops, changing the Stroke Weight if necessary (I used 0.5 px and 0.75 px). Draw branches with the branch brush.
Step 2
Select an object that goes beyond the border (I chose the big flower from the left side) and press Enter. Set Horizontal (or Vertical if you need to copy it vertically) to 1000 px (our artboard width) and press Copy. Our object is copied to the right place now.
If you need to move an object to the right (or above), use negative values like -1000px.
Step 3
Repeat this action with all overlapping objects.
Edit your composition, adding drop strokes. I also edited the branches. With the Direct Selection Tool (A), select the anchor point and move it to have nice bend in the branch.
Step 4
With the Magic Wand Tool (Y), click on any brush stroke. Now all drops and branches are selected. Go to Object > Expand Appearance and Object > Path > Clean Up. Keeping the selection, color it with a Radial Gradient (use the Eye Dropper Tool (I)). Again, I edited the size and rotation of some drops and elements. Pay attention to the location so as not to break the pattern.
Step 5
SelecttheRectangle Tool (M) and click on the artboard. In the window that appears, set the size to 1000 x 1000 px.
Step 6
Color the new big square in white#ffffff and send it back (Command-Shift-[). Open the Transform panel (Window > Transform) and set x: 0 px and y: 0 px. In this panel, you can also edit an object’s size.
Step 7
Copy (Command-C) the white square, paste to front (Command-F), and bring it to front (Command-Shift-]). Select all elements and right-click on them. Select Make Clipping Mask.
Step 8
We have our pattern cropped. To check the pattern, select it and press Enter. Copy and move it horizontally and vertically by 1000px. Looks nice!
Congratulations! Our Russian Gzhel Style Pattern Is Finished!
In this tutorial, we’ve learned some simple Adobe Illustrator tricks and created a fancy folk-style pattern. With this method, you can create any pattern with different elements. I hope you’ve discovered some useful things in this tutorial and learned how to create a traditional Russian floral pottery design!
Share your great results here in comments, and check our other great Adobe Illustrator tutorials to learn some more pro tips!
Standard paper sizes can be confusing. If your head’s in a whirl trying to pick the right size for your flyer or poster, we’ve got you covered.
Here you’ll find all the most commonly used standard sizes for flyers and posters in the US and Canada (known as the ANSI standard) and internationally(ISO 216).
Don’t start designing your flyer or poster before you’ve checked out the size guide below. Skip ahead to find links to poster and flyer design tutorials for Photoshop and InDesign, so you can start creating awesome layouts right away!
These are the standard sizes for flyers used across the States and Canada.
Half Sheet
This is a small flyer size, at 5.5 by 8.5 inches (139.5 x 216 mm), usually used for non-folded promotional flyers. It’s also very cheap to print.
Standard Flyer
Equivalent to a US Letter page size, at 8.5 by 11 inches (216 x 279.5 mm), this flyer is widely used across the States and Canada and is considered the industry standard.
This versatile size can be folded in half (to create a half-fold flyer), twice (to create a tri-fold, z-fold or gate-fold flyer) or three times (to create a four-panel accordion fold).
Large Format Flyer (Tabloid)
The tabloid format can, as its name implies, be used for small-format newspapers, but it can also be folded to create a large format flyer. It measures in at 11 by 17 inches (279.5 x 432 mm).
Do you want to learn how to make a high-quality flyer in Photoshop, in under an hour? Then take our new short course, How to Make a Flyer.
US and Canada Sizes (ANSI) for Posters
These are the standard sizes for posters used in the USA and Canada.
Medium Posters
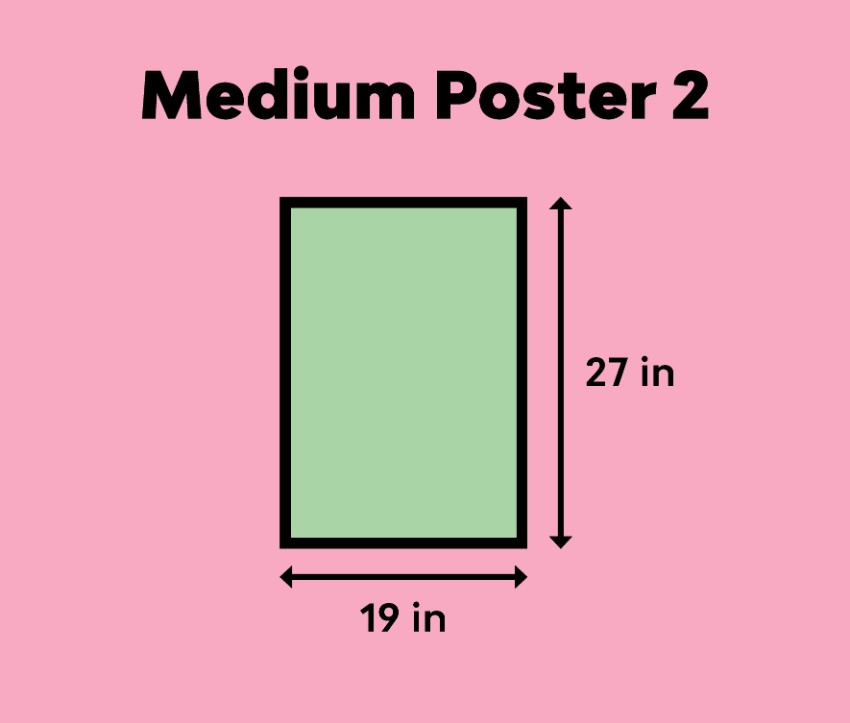
These two poster sizes, 18 by 24 inches (457 x 609.5 mm) and 19 by 27 inches (482.5 x 686 mm), are commonly used in colleges and schools and are the perfect size for showcasing charts or photographs.
Large Posters
These large poster sizes, 24 by 36 inches (609.5 x 914.5 mm) and 27 by 39 inches (686 x 990.5 mm), are used for marketing and outdoor advertising. They are also commonly used at trade shows and exhibitions, and in retail as well.
One Sheet
This is traditionally the standard movie poster size in the US. It’s used to promote new film releases—you’ll see the one sheet size, 27 by 40 inches (686 x 1016 mm), at theaters and posted up in retail areas.
Looking for an eye-catching poster style to promote a club night, festival, or music gig? This Memphis-inspired design is quick to create in InDesign and has…
International Sizes (ISO 216) for Flyers
These are the standard sizes for flyers used internationally (except Canada and the United States [see above], Mexico, Colombia, and the Dominican Republic).
DL
DL stands for ‘dimension lengthwise’. This compact flyer size is one-third of a sheet of A4 (99 x 210 mm). The DL term can be confusing, as this means that the flyer is designed to fit inside a DL envelope (which is a bit larger, at 110 by 120 mm).
This format is tall and slim, and it works well for pamphlets promoting a single offer.
A5
Slightly wider than a DL size, at 148 by 210 mm, this petite size is also often used for pamphlets and cheap-to-print flyers.
A4
Moving up the A-format scale, A4 (210 by 297 mm) is the European sister of the Letter size in the US. This size can be folded in various ways, and it can also be printed from most home and office printers.
This stylish flyer is the perfect way to promote club nights, music gigs or festivals this summer. Quick and easy to create using InDesign and Photoshop,…
International Sizes (ISO 216) for Posters
These are the standard sizes for posters used internationally.
A3
The sizes for posters move upwards through the A sizes. Because A3 (297 by 420 mm) can be printed from many home and office printers, you’ll see this size used for school, college, and community posters.
A2
Twice the size of an A3 sheet at 420 by 594 mm, A2 is used for marketing purposes and to promote music events.
A1
A large A-size at 594 by 841 mm, this can be used for a wide variety of purposes.
A0
A generous poster size at 841 by 1189 mm, again this is used widely for marketing and advertising purposes.
One Sheet
This standard US movie poster size, which measures up at 27 by 40 inches (686 x 1016 mm), is sometimes used to promote movies in some other countries, such as the UK and Australia.
Learn how to create an abstract but impactful poster in Adobe Photoshop by using compelling imagery and typography.
Conclusion
Choosing a suitable size for your flyer or poster doesn’t need to put your head in a spin. You’re sure to find a paper size to suit you from the options above.
Now that you’ve discovered the right size for your flyer, it’s time to start designing!
Standard paper sizes can be confusing. If your head’s in a whirl trying to pick the right size for your flyer or poster, we’ve got you covered.
Here you’ll find all the most commonly used standard sizes for flyers and posters in the US and Canada (known as the ANSI standard) and internationally(ISO 216).
Don’t start designing your flyer or poster before you’ve checked out the size guide below. Skip ahead to find links to poster and flyer design tutorials for Photoshop and InDesign, so you can start creating awesome layouts right away!
These are the standard sizes for flyers used across the States and Canada.
Half Sheet
This is a small flyer size, at 5.5 by 8.5 inches (139.5 x 216 mm), usually used for non-folded promotional flyers. It’s also very cheap to print.
Standard Flyer
Equivalent to a US Letter page size, at 8.5 by 11 inches (216 x 279.5 mm), this flyer is widely used across the States and Canada and is considered the industry standard.
This versatile size can be folded in half (to create a half-fold flyer), twice (to create a tri-fold, z-fold or gate-fold flyer) or three times (to create a four-panel accordion fold).
Large Format Flyer (Tabloid)
The tabloid format can, as its name implies, be used for small-format newspapers, but it can also be folded to create a large format flyer. It measures in at 11 by 17 inches (279.5 x 432 mm).
Do you want to learn how to make a high-quality flyer in Photoshop, in under an hour? Then take our new short course, How to Make a Flyer.
US and Canada Sizes (ANSI) for Posters
These are the standard sizes for posters used in the USA and Canada.
Medium Posters
These two poster sizes, 18 by 24 inches (457 x 609.5 mm) and 19 by 27 inches (482.5 x 686 mm), are commonly used in colleges and schools and are the perfect size for showcasing charts or photographs.
Large Posters
These large poster sizes, 24 by 36 inches (609.5 x 914.5 mm) and 27 by 39 inches (686 x 990.5 mm), are used for marketing and outdoor advertising. They are also commonly used at trade shows and exhibitions, and in retail as well.
One Sheet
This is traditionally the standard movie poster size in the US. It’s used to promote new film releases—you’ll see the one sheet size, 27 by 40 inches (686 x 1016 mm), at theaters and posted up in retail areas.
Looking for an eye-catching poster style to promote a club night, festival, or music gig? This Memphis-inspired design is quick to create in InDesign and has…
International Sizes (ISO 216) for Flyers
These are the standard sizes for flyers used internationally (except Canada and the United States [see above], Mexico, Colombia, and the Dominican Republic).
DL
DL stands for ‘dimension lengthwise’. This compact flyer size is one-third of a sheet of A4 (99 x 210 mm). The DL term can be confusing, as this means that the flyer is designed to fit inside a DL envelope (which is a bit larger, at 110 by 120 mm).
This format is tall and slim, and it works well for pamphlets promoting a single offer.
A5
Slightly wider than a DL size, at 148 by 210 mm, this petite size is also often used for pamphlets and cheap-to-print flyers.
A4
Moving up the A-format scale, A4 (210 by 297 mm) is the European sister of the Letter size in the US. This size can be folded in various ways, and it can also be printed from most home and office printers.
This stylish flyer is the perfect way to promote club nights, music gigs or festivals this summer. Quick and easy to create using InDesign and Photoshop,…
International Sizes (ISO 216) for Posters
These are the standard sizes for posters used internationally.
A3
The sizes for posters move upwards through the A sizes. Because A3 (297 by 420 mm) can be printed from many home and office printers, you’ll see this size used for school, college, and community posters.
A2
Twice the size of an A3 sheet at 420 by 594 mm, A2 is used for marketing purposes and to promote music events.
A1
A large A-size at 594 by 841 mm, this can be used for a wide variety of purposes.
A0
A generous poster size at 841 by 1189 mm, again this is used widely for marketing and advertising purposes.
One Sheet
This standard US movie poster size, which measures up at 27 by 40 inches (686 x 1016 mm), is sometimes used to promote movies in some other countries, such as the UK and Australia.
Learn how to create an abstract but impactful poster in Adobe Photoshop by using compelling imagery and typography.
Conclusion
Choosing a suitable size for your flyer or poster doesn’t need to put your head in a spin. You’re sure to find a paper size to suit you from the options above.
Now that you’ve discovered the right size for your flyer, it’s time to start designing!
Standard paper sizes can be confusing. If your head’s in a whirl trying to pick the right size for your flyer or poster, we’ve got you covered.
Here you’ll find all the most commonly used standard sizes for flyers and posters in the US and Canada (known as the ANSI standard) and internationally(ISO 216).
Don’t start designing your flyer or poster before you’ve checked out the size guide below. Skip ahead to find links to poster and flyer design tutorials for Photoshop and InDesign, so you can start creating awesome layouts right away!
These are the standard sizes for flyers used across the States and Canada.
Half Sheet
This is a small flyer size, at 5.5 by 8.5 inches (139.5 x 216 mm), usually used for non-folded promotional flyers. It’s also very cheap to print.
Standard Flyer
Equivalent to a US Letter page size, at 8.5 by 11 inches (216 x 279.5 mm), this flyer is widely used across the States and Canada and is considered the industry standard.
This versatile size can be folded in half (to create a half-fold flyer), twice (to create a tri-fold, z-fold or gate-fold flyer) or three times (to create a four-panel accordion fold).
Large Format Flyer (Tabloid)
The tabloid format can, as its name implies, be used for small-format newspapers, but it can also be folded to create a large format flyer. It measures in at 11 by 17 inches (279.5 x 432 mm).
Do you want to learn how to make a high-quality flyer in Photoshop, in under an hour? Then take our new short course, How to Make a Flyer.
US and Canada Sizes (ANSI) for Posters
These are the standard sizes for posters used in the USA and Canada.
Medium Posters
These two poster sizes, 18 by 24 inches (457 x 609.5 mm) and 19 by 27 inches (482.5 x 686 mm), are commonly used in colleges and schools and are the perfect size for showcasing charts or photographs.
Large Posters
These large poster sizes, 24 by 36 inches (609.5 x 914.5 mm) and 27 by 39 inches (686 x 990.5 mm), are used for marketing and outdoor advertising. They are also commonly used at trade shows and exhibitions, and in retail as well.
One Sheet
This is traditionally the standard movie poster size in the US. It’s used to promote new film releases—you’ll see the one sheet size, 27 by 40 inches (686 x 1016 mm), at theaters and posted up in retail areas.
Looking for an eye-catching poster style to promote a club night, festival, or music gig? This Memphis-inspired design is quick to create in InDesign and has…
International Sizes (ISO 216) for Flyers
These are the standard sizes for flyers used internationally (except Canada and the United States [see above], Mexico, Colombia, and the Dominican Republic).
DL
DL stands for ‘dimension lengthwise’. This compact flyer size is one-third of a sheet of A4 (99 x 210 mm). The DL term can be confusing, as this means that the flyer is designed to fit inside a DL envelope (which is a bit larger, at 110 by 120 mm).
This format is tall and slim, and it works well for pamphlets promoting a single offer.
A5
Slightly wider than a DL size, at 148 by 210 mm, this petite size is also often used for pamphlets and cheap-to-print flyers.
A4
Moving up the A-format scale, A4 (210 by 297 mm) is the European sister of the Letter size in the US. This size can be folded in various ways, and it can also be printed from most home and office printers.
This stylish flyer is the perfect way to promote club nights, music gigs or festivals this summer. Quick and easy to create using InDesign and Photoshop,…
International Sizes (ISO 216) for Posters
These are the standard sizes for posters used internationally.
A3
The sizes for posters move upwards through the A sizes. Because A3 (297 by 420 mm) can be printed from many home and office printers, you’ll see this size used for school, college, and community posters.
A2
Twice the size of an A3 sheet at 420 by 594 mm, A2 is used for marketing purposes and to promote music events.
A1
A large A-size at 594 by 841 mm, this can be used for a wide variety of purposes.
A0
A generous poster size at 841 by 1189 mm, again this is used widely for marketing and advertising purposes.
One Sheet
This standard US movie poster size, which measures up at 27 by 40 inches (686 x 1016 mm), is sometimes used to promote movies in some other countries, such as the UK and Australia.
Learn how to create an abstract but impactful poster in Adobe Photoshop by using compelling imagery and typography.
Conclusion
Choosing a suitable size for your flyer or poster doesn’t need to put your head in a spin. You’re sure to find a paper size to suit you from the options above.
Now that you’ve discovered the right size for your flyer, it’s time to start designing!


 Photoshop ActionsHow to Create a Pastel Photo Effect Action in Adobe PhotoshopMarko Kožokar
 Photoshop ActionsHow to Create Pop Art Photo Effects With Photoshop ActionsJohn Negoita
 Photoshop ActionsHow to Create a GTA V Photo Effect Action in Adobe PhotoshopMarko Kožokar
 Photoshop ActionsHow to Create a Photo to Pencil Drawing Effect in PhotoshopMarko Kožokar
 Photoshop ActionsHow to Create a Colored Pencil Sketch Effect Action in Adobe PhotoshopMarko Kožokar