So you’re learning how to use Photoshop, you’re testing the tools, and suddenly „marching ants” appear—tiny lines moving rhythmically over the screen. They can be pretty annoying because after they’ve appeared, nothing works the way it used to. So you may be wondering how to get rid of marching ants in Photoshop.
You may also know very well what these moving lines are, and you have a different problem with them—how to hide marching ants in Photoshop, so that you can benefit from their presence without them covering a part of your picture.
In this short tutorial, I’ll answer both of these questions!
What You’ll Learn in This Marching Ants Photoshop Tutorial
What are marching ants in Photoshop?
How to get rid of marching ants in Photoshop
How to hide marching ants in Photoshop
What You’ll Need
You can use any photo for this tutorial, but if you like the picture of a cute ant that I’ve used, you can find it here:
In Photoshop, you may often want to select one area of the image and edit it separately from the rest—or remove that part, copy it to a different layer, etc. Marching ants indicate the border of that selected area. So to bring the ants onto the screen for the purpose of this tutorial, you can use any of the selection tools:
Here, I’ve used the Lasso Tool (L) to outline the head of the ant:
Now, I can use the Move Tool (V) to move the selected area somewhere else:
Or change the color of the head with the Hue/Saturation (Control-U) adjustment:
2. How to Get Rid of Marching Ants in Photoshop
OK, so you’ve edited your selected area, and now you want to get rid of the marching ants. How can you do it?
It’s very simple: go to Select > Deselect, or use the Control-D shortcut.
3. How to Hide Marching Ants in Photoshop
As you can see, the marching ants are very useful because they’re showing you which area has been selected. However, if you want to see what the image will look like after editing, these ants may stand in the way. So if you want to hide the marching ants without removing the selection, use the Control-H shortcut.
By hiding the borders of the selection area, you get a direct preview of your edits
Caution: always remember to deselect (Control-D) after editing, or make the ants come back by pressing Control-H again. Otherwise, the invisible selection will stay there, leading to a lot of confusion later.
Good Job!
Now you know how to get rid of marching ants in Photoshop, as well as how to temporarily hide them when needed.
Recommended Tutorials
If you liked this marching ants Photoshop tutorial, you may also enjoy our other tutorials for beginners:
Did you know that you can create multi-layered artwork in Adobe Illustrator, and then turn layers on and off in InDesign? Importing Illustrator files into InDesign isn’t as hard as you think. Learn how in this quick tutorial.
Work with multi-layered illustrations like this one on InDesign.
If you’re constantly working on Illustrator and InDesign projects, Envato Elements could be a great source of creative resources for you. You’ll find all kinds of graphic templates, vector illustrations, logos, and more. Once you learn how to convert your designs from Illustrator to InDesign, you’ll have more template alternatives to work with.
What You’ll Learn in This Tutorial on Multi-Layered Illustrator Artwork in InDesign
Wondering how to import Illustrator files into InDesign? You’ll discover that importing Illustrator files into InDesign is quite easy! Here’s what we’ll cover in this tutorial:
How to create artwork with multiple layers
How to open Illustrator files in InDesign
How to turn layers on and off to customize the illustration to match your design
Let’s get started!
1. How to Create Artwork With Multiple Layers
Step 1
Create some artwork in Adobe Illustrator that contains multiple layers. I’ve created a map that contains nine layers. Note that these are top-level layers. You cannot manipulate Illustrator sublayers in InDesign. The layers that are visible here are the layers that will be visible when the Illustrator file is placed in InDesign.
Be sure that all of your artwork fits on the Illustrator artboard. Any artwork that extends off the artboard will be cropped when the artwork is placed in InDesign.
Step 2
Adobe Illustrator AI format is the preferred format for importing Illustrator artwork into InDesign. AI format works better than EPS for a variety of reasons. You must use AI format if you wish to manipulate the Illustrator layers in InDesign.
Choose File > Save As. Choose Adobe Illustrator (AI) for the file format, and then click the Save button.
Fill in the Illustrator Options dialog as shown below, and then click the OK button. You can choose a later version of Illustrator, of course, but the Create PDF Compatible File option must be selected.
2. How to Open Illustrator Files in InDesign
Now, open an Illustrator file in InDesign. Choose File > Place. In the Place dialog box, check Show Import Options, then select the Illustrator file you saved in Step 2, and click the Open button.
A Place PDF dialog will appear on your screen. You may think, „Huh? I’m not placing a PDF, I’m placing an Illustrator (AI) file.” Actually, InDesign sees this AI file as a PDF file.
There are many powerful options for placing Illustrator artwork in the Place PDF dialog boxes. You can use the page selector to choose which page of an Illustrator file with multiple artboards should be placed. You can choose how to crop the image, and whether or not you want the image to have a transparent background.
For this tutorial, we’re primarily concerned with the Layers section of the dialog. In this section, you can choose which layers in the Illustrator file you’d like to have displayed or hidden in the InDesign file. Click on the eyeball icon to hide or display a layer. Click the OK button when you’re finished.
When you see the loaded graphics cursor in InDesign, click to place the Illustrator artwork in your InDesign layout. The Illustrator artwork should look just like it did in Illustrator, unless you changed the layer visibility above.
What if you want to change the visibility of Illustrator layers after the artwork is already on the page? You can do that too!
Use the Selection Tool (black arrow) in InDesign to select the placed Illustrator file, and choose Object > Object Layer Options. In the dialog box that appears, click on the eyeball icon next to a layer name to hide or display a layer.
Click the OK button, and the appearance of the artwork will change on the InDesign page.
You’re all set! Now you know how to import Illustrator files into InDesign. You could even convert your designs from Illustrator to InDesign.
Want to Learn More?
Are you just getting started with InDesign? Learning how to import files from Illustrator into InDesign is a good trick to have. Get some pro tutorials, tips, and tricks from the Envato Tuts+ YouTube channel. We highly recommend going for this InDesign for Beginners free course to get you started:
We also have useful tutorials and articles for you to dive into—not only Illustrator to InDesign tricks, but also a variety of beginner and advanced content. Take a look at this selection we’ve made for you:
This Illustrator into InDesign technique is extremely valuable for using several variations of artwork in different places, all by placing a single file.
Take your company logo, for example. You may have many variations, all stored as separate files: color, grayscale, with tagline, without tagline, etc. Instead, you could have all these variations as separate layers in a single Illustrator file. Then you can convert from Illustrator to InDesign and design more efficiently. Think about how this might affect your workflow…I’m convinced you will find a use for it!
Editorial Note: This post has been updated with contributions from Janila Castañeda. Janila is a staff writer with Envato Tuts+.
Check out the best cursive calligraphy fonts inspired by handwriting, calligraphy brushes, and much more.
In this article, we’ll answer the questions „What is a cursive font?” and „What is a calligraphy font?” These two words are often used interchangeably, and while there are similarities between these two styles, it’s important to know what they’re all about. Let’s take a look at their definitions and see some examples of awesome calligraphy cursive fonts!
The cursive style of font resembles the style that some of us learned in school. The purpose of this style is to write quickly and as legibly as possible, without lifting the pen off the paper. Therefore, all the letters are connected. Cursive fonts are simpler than calligraphy since there’s no stroke contrast.
What Is a Calligraphy Font?
The calligraphy style of fonts contains characters that use specific strokes. Both of these styles of fonts are usually based on real handwriting, but the pen and the construction of the calligraphic character are different. The purpose of calligraphy is different to the cursive style because in calligraphy, lifting up the pen is not a problem, and many different pens can be used. Fonts can be cursive and calligraphic at the same time, and vice versa.
Unlimited Cursive & Calligraphy Fonts at Envato Elements
When you need amazing calligraphy fonts, Envato Elements should be your go-to resource. Elements offers thousands of premium mockups, graphic templates, logos, photos, fonts, and much more. And you can download as many of these digital assets as you like, as often as you like, for one low monthly fee.
Vendetta is a cursive calligraphy font with an authentic handwritten style. The end strokes of the characters have a good balance of movement and a relaxed feel. This is a great font for branding, logos, and social media designs.
Saltacrus is a signature style font that’s modern, and you can sense the flow of the ink in each character. This calligraphy cursive font is great to enhance a photography studio’s branding or to use as a signature for a wedding invitation or a logo. It’s unique and full of energy.
This handwritten font can be used as a cursive calligraphy tattoo font, and it is legible and distinctive. The pack contains a large number of ligatures and punctuation. Use this sophisticated font for branding, wedding invitations, or cards.
If you’re looking for an energetic font, Southland letter is a great option. This calligraphy cursive alphabet font has signature-style ascendants, very tall and slim. The pack contains uppercase, lowercase, and numeral characters.
Add a modern touch to your design with Randelion. This calligraphy feminine cursive tattoo font is vibrant and loud. This font is suitable for social media posts, branding, and apparel design.
Cursive handwriting calligraphy fonts with high-quality line work are hard to come by. Edinburgh is a modern script font perfect for projects that need a feminine touch. Suitable for social media posts, branding, and posters.
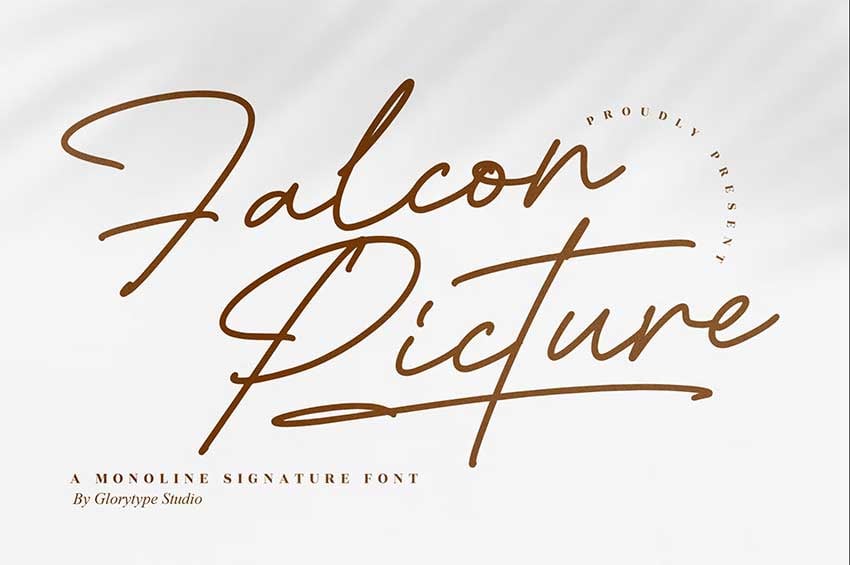
This monoline font has cursive calligraphy font traits. Cursive fonts are based on pen strokes: a single line with no contrast. Falcon has a good balance of cursive and calligraphy style fonts.
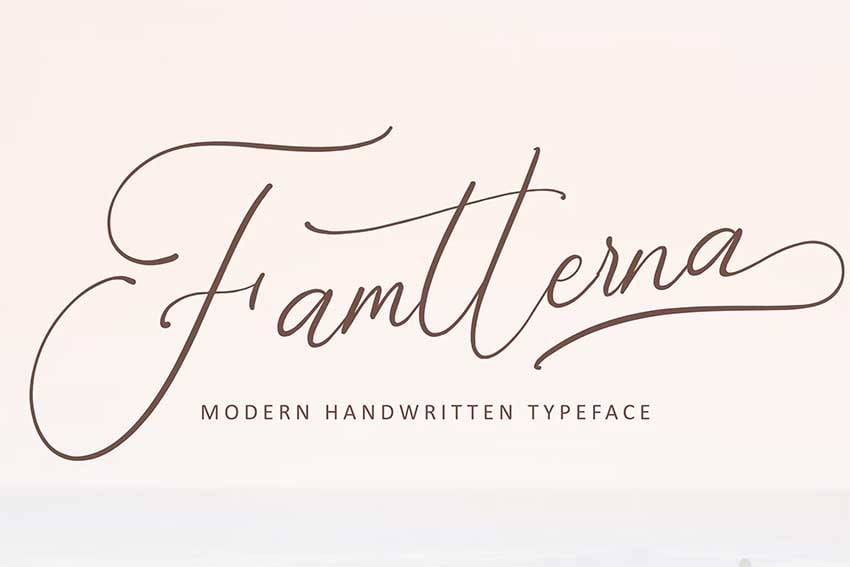
Famtterna is a modern calligraphy cursive font. It has the intricacies of the calligraphy style and the fluidity of cursives. This font is suitable for wedding invitations, headers, and branding.
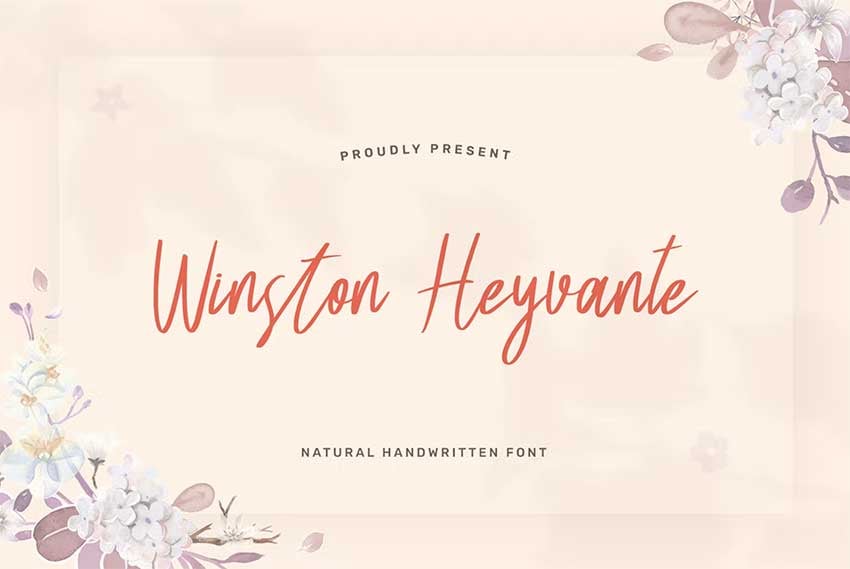
Winston Heyvante is a calligraphy cursive alphabet font with a decorative flair. It is suitable for wedding invitations, blog branding, and book covers. The pack contains multiple stylistic alternatives to elevate your designs.
This cursive handwriting calligraphy font is energetic but extremely legible. While it’s expressive, the characters have a high contrast in the strokes, which makes it look more elegant. Summit Foxes includes ligatures and alternates to mix up different characters and get different looks.
Pueriel is a vintage cursive calligraphy font with a traditional flair. If you’re looking at vintage-inspired fonts that can help you recreate objects and letters from that era, this is a great choice. Pueriel comes with over 200 glyphs that can help you create a natural vintage look.
Fragmentix is a font with very little contrast between the characters. Packed with tons of ligatures and alternates, this font is suitable for anything from book covers to movie titles. Mix it up with a serif or sans serif font to achieve an edgy look.
Butter Milky has plenty of calligraphy cursive alphabet font alternates that make it suitable for multiple design projects. This handwritten style is very vintage from the 50s and 60s. It can add a nice touch to vintage-inspired projects.
If you’re looking for an expressive cursive calligraphy font, Maistoray is a stunning choice. This font is suitable for brand design, book covers, and social media. The strokes resemble a flat ribbon moving in the air, and the font has a beautiful air of elegance.
Herittage is a signature-style cursive font. It’s versatile and suitable for a wide range of projects, from posters to wedding invitations and branding. The strokes on the font have a relaxed look, perfect for vacation-themed projects.
Asterika is a handwritten cursive calligraphy font with elegant curves. The font has a heavy ink look, and the curves flow nicely. This script font is suitable for wedding invitations, social media, and packaging.
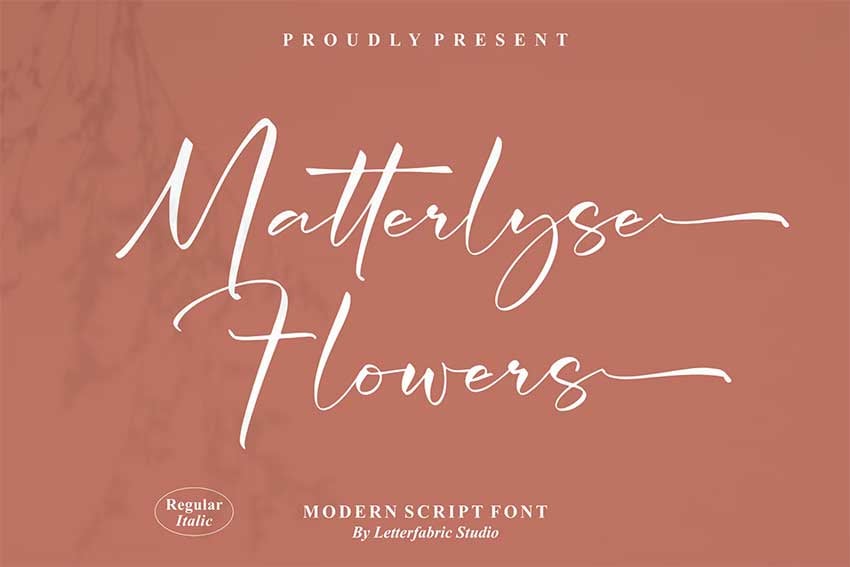
If you’re looking for a looser and more organic font, Matterlyse can get the job done. This font is suitable for print projects as well as websites. Use it for branding, social media posts, and book covers.
Ronatalia is a romantic font that resembles cursive calligraphy fonts. The characters have a high contrast between the strokes and look expertly crafted. This font is suitable for social media posts, branding, and personal projects.
If you’re looking for the ultimate high-end elegance, Blanchard is a regal option. This font is calligraphy oriented, expertly made, and looks expensive. It’s suitable for brand design for high-end brands, social media, and invitation cards.
Gillbert Hittola is an easygoing font that communicates fun and stability. It’s one of the fonts that, regardless of its application, can be classic and confident. Gillbert Hittola is suitable for printed designs, branding, and posters.
Ametta is an elegant and fashionable cursive calligraphy font. The energetic characters are great for projects that require a great deal of personality. The pack comes with alternate characters and ligatures to make every word special.
If you’re looking for a sharp, elegant, and all-around regal font, Ranlikha is all that. The characters have beautiful swirls that also look romantic. Mix this font with a serif to get a classic look suitable for restaurant branding.
Malliandra is a calligraphy feminine cursive tattoo font inspired by handwriting. This font is also suitable for wedding invitations, packaging design, labels, and book covers. The pack contains multilingual options and many beautiful swashes and ligatures.
If you’re looking for a more formal old style of calligraphic cursive font, Ofinitti is inspired by real brush strokes. The brush strokes look realistic, and the character shapes are clean. This font is suitable for branding and quotes.
Mattinha is a font with strokes that look heavily inked. This is a nice touch if you’re going for a handmade look in your design projects. Pair it with a sans serif font for a modern look in your wedding invitations.
Fonts created with a flat pen can give off a very classic look. Kidnatting is a good-looking font with characters that look energetic. The strokes change in thickness the same way real handwriting does.
Sellicite is a modern handwritten font using a thin stroke that almost looks monoline. The low contrast in the strokes keeps the font subdued and classic. Sellicite is suitable for enhancing and accompanying sans serif fonts.
Another monoline font that comes in a signature style is Breaket. This font is wider than it is tall, and the counters inside some of the vowels are non-existent. This last feature helps enhance that signature style. Breaket is suitable for invitations, brand design, and quote posters.
Hellow Script is a feminine-style cursive calligraphy font. The characters feature elegant swirly strokes that enhance the girly look. This font is suitable for brand design, packaging, and book covers.
If you’re looking for a true handwritten cursive font, Marina Bullock is a great option. This authentic handwriting font is great for projects that need a human touch and an organic look. The pack comes with a variation of glyphs to achieve an even more natural look.
Lenteras is a thick monoline cursive font that resembles the style of middle-school handwriting. Since the stroke is thicker than most monoline fonts, Lenteras looks fun, laidback, and young. This font is suitable for book covers, movie posters, and social media.
This cursive calligraphic font, Qitamesa, is inspired by brushes, with a slight contrast between the strokes. Use this modern script font on business cards, brand design, and posters.
Kaytha is a romantic monoline font with simple strokes. This cursive calligraphy style font features swirls at the end of each character, which makes it look modern and stylish. The pack comes with many stylistic sets, swashes, and ligatures to customize the characters as much as you would like.
Questario is a stylish script font inspired by brush calligraphy. The font is edgy, modern, and gives out a confident personality. Questario is suitable for branding, social media, and posters.
If you’re looking for a classic yet impactful font, Kiramba brings those two attributes to the table. The contrast between the strokes is high, and the swashes on the strokes have a tear-shaped end, which adds a contemporary feel. The font is suitable for stationery, invitations, and logos.
Brush pen calligraphy has been around for a while, but never in the high quality in which Azkia is presented. This script font was based on real analog sketches and later redrawn on a computer. The pack contains 1,200 glyphs, more than enough to bring variation and uniqueness to your design projects.
If you’re looking for an elementary school feel, Lazy Ride is a cool font for that. This cursive calligraphy font started out as a logo and is now extended into a font. With more than 670 glyphs, Lazy Ride can cover anything from brand design to quotes and posters.
Fanland is a cursive calligraphy font with an elegant touch. It’s romantic, classy, and beautiful, perfect for a wedding invitation. The pack comes with multiple stylistic sets to make the characters just different enough that they look handwritten.
A feminine font like Ashfall is perfect for projects that need a feminine touch. Suitable for branding for restaurants, flower shops, and skincare brands, Ashfall features a smooth texture and beautifully balanced characters.
If you’re on the lookout for an elegant font, Moranhill is the perfect cursive calligraphy font. It has a low contrast in the strokes and gives off stability and class. The pack contains many ligatures and stylistic alternates.
Raffiator is a modern, smooth, and classic font, with simple lines. The font features a high contrast in the strokes and slightly open counters, making it look handwritten. Raffiator is suitable for wedding invitations, newsletters, and book covers.
Metalurdo is an elegant cursive calligraphy font with style. This font has a classic look that can make any project travel back in time. Metalurdo is suitable for product labels, wedding invitations, and social media posts.
Donatellia is a font that exudes luxury, perfect for high-end branding projects. The font features beautiful lines that make it look like a true handwritten font. The tear shape at the end of the strokes resembles pooling ink, enhancing the handwritten effect even more.
Playlist is an energetic, dramatic, and stylish font. Made with modern calligraphy in mind, this handwritten style font features characters that look true to real handwriting. Playlist is suitable for any music-related projects, band logos, merchandising, and poster design.
Bellanaisa is a modern calligraphic font featuring a high contrast in the strokes. Dramatic, classic, and fresh, this font is great for book cover designs, wedding invitations, and letterpress style posters. The pack contains multiple language support and many stylistic alternates.
That’s It!
Now that you know the differences and similarities between cursive and calligraphy fonts, you’re ready to explore. Which one of these fonts was your favorite?
And remember, when you need cursive handwriting calligraphy fonts, Envato Elements should be your go-to resource. Elements offers thousands of premium mockups, graphic templates, logos, photos, fonts, and much more. And you can download as many of these digital assets as you like, as often as you like, for one low monthly fee.
Line patterns bring movement and texture to design that can direct the eye and heighten visual interest.
If you are looking for awesome line patterns for your next project, check out these terrific designs from Envato Elements.
Unlimited Cool Line Patterns & Stripe Backgrounds
Envato Elements offers thousands of top-quality patterns, backgrounds, mockups, logos, photos, fonts, and much more.
And for one low monthly fee, you can download as many of these digital assets as you like, as often as you like. Let’s take a look at some of the terrific line patterns and stripe background textures available from Envato Elements.
When you need a cool background with stripes for your next project, look no further than this stunning collection. It contains 24 different backgrounds which are easy to customise by adjusting the hue and saturation controls.
Floral Background With Stripes offers exactly what it says in the title: a collection of six backgrounds that combine horizontal stripes and flowers. You can modify the files to suit your needs and resize them without loss of quality.
Line Pattern Texture contains 40 hand-drawn lines created with pens, brushes, and ink that offer an authentic craft feel. The files are offered inseamless vector patterns.
When you need a stylish and eye-catching background for a special project, choose Waves Texture Background Lines. The pack contains ten vector files that are fully editable in Photoshop and Illustrator.
Looking for texture lines with a touch of grunge? How about Stripe Vector Background? It includes six different backgrounds that are perfect for posters, banners, websites, presentations, etc.
Line Pattern Design is quite a bit more subtle than the other textures we’ve shared so far. This one offers a monochromatic look that relies on light and shadow to create that sense of texture in 3D.
Black and Grey Striped Background functions in a similar way to the pattern above. The biggest difference is that it uses different tones of grey to create a sense of texture and contrast.
Watercolour is simply irresistible, and when you want to create a dreamy background for your projects, Watercolour Horizontal Stripe Pattern is an excellent choice. The files are all vectors and are very easy to customise.
Every great project needs a great background, and that’s exactly what Abstract Stripes Texture offers. Use the 12 files included to create backgrounds for your print and web projects.
Retro Geometric Stripe Pattern deviates a bit from the theme but is still relevant to it. This collection features colourful and seamless patterns that you can customise using your favourite software.
This collection of 40 seamless hand-drawn patterns includes 20 digital papers with gold textured patterns. Use this collection as backdrops to your special projects or apply them in whatever way supports your design.
Feast your eyes on this terrific abstract geometric pattern that presents a kaleidoscope of colours. The collection contains ten different styles that will bring a bit of pizazz to your projects.
When you need the nuance of stripes rather than an obviously striped effect, choose Abstract Line Texture Backgrounds. The backgrounds are offered in 12 colour combinations that will increase the visual interest in your projects.
This digital art pack of six bold and captivating patterns is just what you need to take your designs to the next level. Use it for fabric, gift paper, flyers, posters, etc.
Black and grey—or white—is a winning combination, and this pack offers 15 different ways to please you with its exciting range of black and grey designs.
How about Colour Stripe Vector Background for those times when you want to create terrific gift wrap, wallpaper, covers for notebooks, crafting projects, etc. There are 24 design variations in the collection, so you’ll have plenty of variety to keep you happy.
Black and white never looked so good as in this collection of 12 Seamless Stripe Patterns. The files are offered in AI, EPS, JPG, PNG, and PSD, so choose your favourite software and get to work customising your designs.
Turquoise and Light Slate Blue are a dreamy colour combination, and that’s just one of the ten different backgrounds presented in Abstract Stripe Texture Backgrounds. Download the pack, choose the one you love the most, and get to work incorporating it into your design.
With a whopping 39 backgrounds made up of three unique backgrounds and 13 colour variations each, Line Patterns is a great choice for mobile and desktop wallpaper, websites, packaging, and more.
Who says stripes need to be straight? No one! And that’s why we’ve included this bold collection. Have fun creating your own projects with this unique background.
This collection offers two variations of the three tileable line patterns of chevrons, waves, and straight lines shown in the photo. The files are offered in both PNG and EPS formats.
Need background patterns for scrapbooking? Check out this collection of 12 watercolour patterns. The package includes six seamless striped patterns and six seamless patterns of flowers, leaves, feathers, and hearts.
Go metallic when you use this collection of cool metallic pattern stripe backgrounds. The set contains six high-res files that can be used for print and web.
Blue, Red and Grey Line Pattern Texture is a bit of a departure from the other stripe vectors shared here so far, and that’s why we’ve included it. A great tech corporate background for relevant projects.
Texture Background Lines is just what you need when you want to harness the vibe of the future. There are ten vector and hi-res JPGs included in the collection.
It doesn’t get more modern and cool than the Geometric Stripe Pattern Collection. It offers six patterns in both black and white in AI, EPS, and JPG format.
Black & Grey Line Pattern Texture may not be as trendy as some of the other backgrounds shown here, but that’s what makes it so successful. It balances visual interest with subtlety to create a great foil for the main attractions of your work.
Glitch Line Pattern Design captures the dynamic motion of light rays combined with gradients. The collection offers this one concept in ten different colour schemes.
Create a colourful spark in your own design when you use Colorful Spark Backgrounds for your background. This stunning multicoloured starburst of lines is a great choice for your project.
The Colorful Background Stripes PSD looks like a crazy and colourful slide, and that dynamic will transfer to your work when you incorporate it into your projects.
With three unique backgrounds and 13 colour variations, this collection of line textures is a great addition to your projects. The templates can be used in a wide variety of ways, so don’t hesitate to download them and get to work.
Choose Your Favourite Striped Background Pattern
Now that you know where to find the best striped background patterns when you need them, head to Envato Elements and download your favourite pattern today.
If you’re interested in learning how to create your own background patterns from scratch, or you want to find more patterned templates, check out these articles from Envato Tuts+:
Being able to cut super small things with your Cricut machine is one of the most fun things to do, and it’s probably a large reason why many people buy these machines. But it can also be so frustrating when you don’t get it right, so I am here to help you to get the best cut and to show you some of the best fonts to use on Cricut for small letters.
There are many different factors to successfully cutting small letters with your Cricut out of vinyl, and so there are also many different things that can go wrong. Some of the factors can include the type of vinyl, the mat you are using, as well as the cut settings you are using.
The same vinyl, different approaches – this shows the difference these techniques can make!
Some of these things will make a very small difference in your cutting project, but those small differences could mean the difference between a good result, and a great result. Other factors and changes will make or break your project when cutting small vinyl letters with your Cricut.
What We’ll Cover In This Guide on How to Cut Small Letters on Cricut
Do you have a dirty blade?
Have you checked to see if you have a blunt blade?
Is your mat dirty?
The brayer: a game changer!
Test your cut settings!
What vinyl are you using?
Do you know about weeding boxes?
10+ best fonts for small vinyl cutting on your Cricut
Do You Have a Dirty Blade?
This is the first thing that many people check when it comes to cutting small letters with your Cricut. It is also the easiest thing to check and the quickest one to fix.
When cutting things with your Cricut, whether it’s paper or vinyl, little fibres or adhesive from the vinyl end up sticking to the blade, which can affect how you cut small letters on your Cricut. So one of the first things you want to do is to clean your blade.
Check how far the blade can extend. This blade also has a lot of debris on it
The best way to clean your blade is to use some rubbing alcohol swabs, so you will need to remove your blade from your machine. Press the top part of the blade housing in, and the blade gets pushed out at the bottom.
Once the blade has been pushed out at the bottom, you can easily clean it with your alcohol swab, or replace it if your blade is old and blunt.
Have You Checked to See if You Have a Blunt Blade?
If your blade is blunt, you will see that the blade kind of „skips” over the vinyl and drags it, and no amount of other changes will improve this. This probably means that it is time to get a new blade. Luckily, you don’t have to buy an entirely new blade housing, but rather just buy a replacement blade.
Many people will tell you to pierce a ball of foil to sharpen your blade, but this unfortunately doesn’t work in the way most people think it does. What it does do is clean some of the debris off your blade, but it is not nearly as effective as the method that we mentioned before, which is to clean it with rubbing alcohol.
Is Your Mat Dirty?
Many people don’t realise that having a mat that isn’t very clean can also affect your cuts, and it can turn the best font for small vinyl cutting into the worst! With regular mat usage, little bits of debris, sand, hair, and dust can build up on the mat over time. With little grains landing on your mat, it does create a bit of a tent over that grain, and that means the blade will move a bit when it hits these grains.
You can see in the circles some places where there is dirt under the vinyl
Luckily, you can quite easily see when you have something on your mat that will affect your cuts, as that little tent catches the light quite nicely. So you will just need to lift up the vinyl, remove the little culprit, and you are then good to go!
In addition to debris on your mat, a mat that is quite old and isn’t as sticky anymore will definitely affect your cut. If you have lost quite a bit of stick on your mat, your vinyl will move around while you are trying to cut, which will definitely compromise how the vinyl cuts. Any movement of the vinyl will mean the blade doesn’t cut in the exact place it should, and you will get a wonky cut, which isn’t good for intricate cuts!
This mat is verging on too dirty to use for very intricate cuts
The Brayer: A Game Changer!
This is a tool I didn’t know I needed until I had one. It is not only a real game changer for paper crafts, but also has an incredible effect on how to cut small letters on your Cricut.
The Cricut brayer is a real game changer when it comes to crafting with a mat!
What this little tool allows you to do is to ensure that the vinyl you are going to cut is completely stuck down to your mat. It has a soft roller on it, which means that it won’t scratch the vinyl in any way, but by applying even pressure, you are able to more effectively stick your vinyl down onto your cutting mat.
Test Your Cut Settings!
This is the most important part of cutting small vinyl letters with Cricut, and it will mean the difference between impossible weeding and having your vinyl ripping up while cutting. Test cuts are mandatory when it comes to working with the best fonts for small vinyl cutting on your Cricut.
When you are selecting something to cut, you need to choose a material type, and this material type is linked to a pressure setting in Cricut Design Space. A thinner material like crepe paper will need a lower pressure in order to cut through, and a much thicker material like metallic vinyl will need a much higher pressure setting to cut through.
All three of these words have been cut with different cut settings, the lowest at the bottom. The difference between the cuts is small, but they get darker as the cuts go higher up.
When your vinyl isn’t cutting through, it means that your pressure setting isn’t high enough, and you will need to increase the pressure to cut through properly. If you find that your vinyl moves around too much while it is being cut, then your pressure is too high.
While your machine is connected, you can view the material settings. If you click on the three lines in the top left-hand corner, you can click on Manage Custom Materials and see the different pressure settings for the different materials.
Click on the three lines in the top left, and you will find your custom settings
A long list of materials will pop up, and each will have a number to the right of the name—this is the pressure setting. If you use a particular setting and you find that your vinyl is not cutting through, you can either adjust this setting or pick another material type that has a higher pressure setting.
Here are a few examples of vinyl settings and the pressure they use
What Vinyl Are You Using?
Not all vinyls are created equal, so the type of vinyl you use can make a big impact on your project. Each brand and type of vinyl will be slightly different—some are a bit more stretchy than others, some vinyls have a paper backing, and some have a more waxy backing than others. Some of these differences are going to be barely visible to the naked eye, so we may not even think that they are a possible cause of our project not succeeding, but they are.
Because of all of these different factors, you will have different results with the very same cut settings. The Cricut vinyl has been specifically formulated for use with the Cricut machines and tends to produce the best results the most easily.
All three of these vinyls are different, and each requires a different approach
Oracal and Grafitack are two examples of widely used brands that tend to be a lot more cost-effective when it comes to working with large volumes of decals, and they can make it a bit more difficult to cut some of the very small letters with your Cricut.
I have found that I have to use different cut settings with the different brands of vinyl I use, and I spend a bit of time when I get a new brand of vinyl to make sure that I have the right cut setting for the best font for cutting small letters on my Cricut.
Do You Know About Weeding Boxes?
When cutting on your Cricut, I find that when it comes time to weeding (removing the excess vinyl), I often struggle when I have quite a few things to cut. Using weeding boxes when cutting small vinyl letters with Cricut really helps!
What this means is putting a box around parts of the text to allow you to weed the text in parts, and not have to remove the entire sheet of excess vinyl around in one go.
10+ Best Fonts for Small Vinyl Cutting on Your Cricut
When looking for the best fonts for cutting small text on your Cricut, there are many different kinds of fonts you can use and approaches you can take. Very often, the very thin and swishy fonts are difficult to cut, but hopefully after following all of these tips and tricks, you will find it as easy to cut very thin fonts.
Many script fonts are very tricky to cut, but with these tips you will be cutting the finest of fonts available!
But if you’re wondering where to find the best fonts for small text in Cricut, Envato Elements is a great option. This subscription-based marketplace offers you unlimited downloads for a flat monthly fee! Here are some of the best fonts for small text in Cricut:
This font is a great introduction to cutting some fonts with swashes, as those are always the parts that challenge cutting some of the best Cricut fonts for small text.
If you want to learn how to cut small letters on Cricut, this is a great font to learn on. The flourishes will challenge you a little bit, but it still works nicely at a small scale.
This is one of the best fonts to use on Cricut for small letters as these letters aren’t very thick. So if you aren’t looking for a challenge, this is a fantastic font to use!
This is a particularly challenging yet extremely beautiful font that you can use when you’re looking for the best font for small vinyl cutting on your Cricut. The lines are all very thin, with long, wispy flourishes, and it is a very good font to test your skills!
When cutting small vinyl letters with Cricut, this will also be another good font for a beginner to try as it is a little bit challenging, but with not too many flourishes, it won’t be too challenging.
This is another one of the best fonts for small vinyl cutting if you aren’t looking for a challenge. It’s great if you need to have a font work easily, and you aren’t able to tick or correct all of the boxes we covered in this article.
Give this elegant calligraphy font a try for your next Cricut project. Those extravagant flourishes could be a challenge to cut, but you can also simplify things by not using too many of the ligatures and alternates provided.
Another great option when looking for the best fonts for cutting small text with your Cricut, this font has simple clean lines and is very thin. So while it doesn’t have too many flourishes, it still provides a nice challenge.
This font is particularly challenging as not only does it have many flourishes, but it also is a slightly textured outline, so it will be challenging to cut in a few different ways. This could be the best font to use on Cricut for small letters!
Looking for the best Cricut font for small text? This type of font is always a fan favourite for cutting small vinyl letters due to the flourishes and thin, clean, classic lines, and it comes with a few extras too!
With many glyphs and gorgeous flourishes, you could make this font more challenging, but the base of this font is a perfect way of testing out how your machine and cut settings are set up. Definitely, this is one of the best fonts for cutting small letters on Cricut!
This could also qualify as the best font for cutting small letters on Cricut as it has nice thick letters, which makes it an easier font to use when cutting small letters out of vinyl.
Discover More Cricut Tutorials and Resources
If you’re looking for some new skills to learn to apply in Cricut Design Space, below are some amazing articles you can check out to learn some new skills and improve your projects!
Stucco is a type of mixture that, when applied to a wall, gives it a nice, rough texture. If you want to recreate the effect of this texture in your digital project, in this tutorial I’ll show you how to create a stucco brush in Photoshop—both from a photo and from a stucco texture made from scratch.
And if you want to save time, you can also download a brush set from Envato Elements! One subscription gives you access to millions of creative assets, including this set of stone stamp brushes:
What You’ll Learn in This Stucco Brush Photoshop Tutorial
How to create a Photoshop stucco texture brush
How to create a stucco texture in Photoshop
How to make a stucco texture brush seamless
What You’ll Need
Your stucco Photoshop brush will be most realistic if you make it out of a photo. Here’s the one I’ve used, but you can use your own photo, or a different photo from Envato Elements.
Download the stucco texture and open it in Photoshop. Take the Crop Tool (C) and crop the edges slightly—their level of brightness breaks the uniformity of the whole texture.
Step 2
Go to Edit > Define Brush Preset and give the brush a name.
Step 3
The stucco brush Photoshop is done, so you can now apply the same texture to any background. However, if you just apply it straight away, you may get a „dirty” result like this:
To fix this, change the Blend Mode to Overlay…
… then duplicate the layer (Control-J) and change its Blend Mode to Multiply. Adjust the Opacity to create the level of brightness that looks best on this background.
2. How to Create a Stucco Texture in Photoshop
Step 1
You can also create a stucco Photoshop brush from scratch, without using a photo. Create a New File with these dimensions: 3000 x 3000 px.
Step 2
Go to Filter > Noise > Add Noise, and add as much noise as possible.
Step 3
Go to Filter > Blur > Gaussian Blur, and make the noise slightly blurry, so that the individual points are no longer visible.
Step 4
Go to the Channels tab and take the selection from the RGB channel by Control-clicking its thumbnail.
Step 5
Invert the selection with Control-Shift-I, create a New Layer, and fill it with black.
Step 6
Create a New Layer below and fill it with white.
Step 7
Double-clickLayer 1 and add the following Bevel & Emboss settings:
Style: Inner Bevel
Technique: Chisel Soft
Depth: 1000%
Direction: Up
Size: 13 px
Soften: 5 px
Angle: 90
Altitude: 30
Highlights: Screen, white, 100%
Shadows: Multiply, black, 100%
You can use a different Gloss Contour for a different type of stucco texture!
Step 8
Add a Stroke as well:
Size: 1 px
Position: Center
Blend Mode: Normal
Opacity: 67%
Fill Type: Color
Color: white
Step 9
The stucco texture is done! Now you can just create a brush out of it, like before.
3. How to Create a Seamless Stucco Texture Brush
Step 1
What if you want to paint more freely with your stucco Photoshop brush, without having to worry about the edges? Then you need to create a seamless brush. First, open your stucco texture (the photo or the one we’ve just created). Then make the texture seamless, for example using the method described in this tutorial:
This time, instead of creating a brush right away, go to Edit > Define Pattern.
Step 3
Create a New File—make it quite big.
Step 4
Open the Brushes panel and go to Dry Media Brushes > Kyle’s Ultimate Pastel Palooza.
Step 5
Go to the Brush Settings. Go to the Texture tab and select the stucco texture we’ve just created. Then adjust the settings until the brush works as you expect it to.
Here are the settings I’ve used:
Scale: 190% (it can be smaller, if you have a bigger area to cover)
Brightness: 0
Contrast: -25
Texture Each Tip: checked
Mode: Height
Depth: 7%
Minimum Depth & Depth Jitter: 0%
Step 6
When you’re done, create a new brush by clicking the plus icon on the bottom. Your seamless Photoshop stucco texture brush is all done now! However, keep in mind that this texture has fewer shades of gray than a normal stamp brush, so the effect may look less convincing.
Good Job!
Now you know how to create a stucco texture in Photoshop, as well as how to create a stamp or a seamless brush from it.
Textured Photoshop Brushes Available to Download
Photoshop brushes are really powerful, and they can save you a lot of time—but having to create them first often defeats the purpose. Fortunately, on Envato Elements, you’ll find plenty of professional brushes, ready to download and use! Here are a few great options:
Do you need more control over the chaos? These 20 brushes will work great with a graphics tablet—with them, you can turn every stroke into a detailed texture.
These brushes may look simple, but you’d be surprised what effects you can achieve with them! You can use them to add noise, make a surface look more detailed, or turn smooth surfaces into rough ones.
Realistic photo textures are the best way to quickly add some grunge style to a photo. This set contains as many as 24 brushes based on hand-drafted texture—you just can’t go wrong with them!
If you want to quickly make your image less „clean”, a simple spray brush may be exactly what you need. This set contains 12 of them, each with a slightly different look, but they all come in a high resolution and are easy to control.
More Photoshop Brush Tutorials
If you’re interested in Photoshop brushes, you may also enjoy these tutorials:


 Ultimate Guide: How to Rotate in Photoshop
 Monika Zagrobelna19 Oct 2021
 How to Remove a Background in Photoshop
 How to Remove Shadows in Photoshop
 Marko Kožokar13 Jun 2022
 Quick Tip: Layer Mask vs. the Eraser Tool in Adobe Photoshop
 How to Smooth Edges in Photoshop
 Jamie Evan25 May 2022