Archiwum kategorii: Web Tools

How to Create a Kaleidoscope Effect in Adobe Photoshop

Post pobrano z: How to Create a Kaleidoscope Effect in Adobe Photoshop

Final product image
What You’ll Be Creating

As we continue with our series on effects inspired by music videos, one of the effects I’ve always been fascinated with was the kaleidoscope mirror effect. The best examples of this effect can be seen in the visually rich Pillow Talk video by Zayn. Check it out at 1:20, 1:55, 2:26, and 3:12.

The challenge is to find a way to create the effect easily and not by manually placing dozens of copies. 

Fortunately, Photoshop has a couple of useful features to make this task significantly easier. First is the frequently overlooked Scripted Fill, which makes short work of creating kaleidoscope patterns and has enough options to keep you busy experimenting for hours! Paired with that is the Transform Again feature, which is a fun way to create repetitive objects similar to the way the old Spirograph used to work. 

If you’re looking for a Photoshop action to create a mirror effect, check out our roundup of the best reflection and mirror effects available on Envato Market and Envato Elements.

Follow along with our tutorial over on our Envato Tuts+ YouTube channel:

1. Create the Pattern

The scripted fill is extremely useful for this type of effect, but it has to use a predefined pattern to work. Patterns that are not square tend to work best, so we will start out by extracting a musical artist from the background and creating a pattern to use.

Step 1

This technique will work with almost any image, but for this project let’s work with a musician image to best imitate the source effect from the video. Specifically, we’ll use this image of a sensual girl next to a rocky wall from Envato Market.

sensual girl on the rocks image
Credit: Envato Market

Step 2

Grab the Quick Selection Tool (W) and paint along the model to create a selection that completely surrounds her. If the tool grabs a background area, hold down the Alt key and paint along that background to deselect it.

create a selection around the subject

Step 3

Press the Refine Edge button to launch the dialogue box. Adjust the Radius to 2 px and check the Smart Radius option. Then use the Refine Radius Tool to brush along the edges of the model’s hair to create a better selection for those long locks. Then press the OK button to return to the main Photoshop interface.

using the select and mask option to refine the image selection

Step 4

Use the selection as a layer mask by going to Layer > Layer Mask > Reveal Selection.

use the selection as a mask

Step 5

Click on the layer thumbnail to make sure the focus is on the layer and not the layer mask. Then go to Edit > Define Pattern. Give the pattern a name of girl.

define a pattern

2. Scripted Fill Fun

With our custom pattern defined and ready to go, it’s time to use the Scripted Fill to create the kaleidoscope pattern. There are several options to experiment with; the ones listed here are just a suggestion to get you started. Feel free to craft your own patterned effect.

Step 1

Create a new document with File > New. Set the Width and Height both to 2500 px. Set the Background Contents to Other and specify the color to be black (#000000).

setting up a new document

Step 2

Create a new layer with Layer > New > Layer (Shift-Control-N) and name the new layer Scripted Fill.

creating a new layer

Step 3

Go to Edit > Fill and change the Contents to Pattern and set the Custom Pattern to the Guitarist pattern you created earlier. Then check the Script option box and select Symmetry Fill.

edit fill settings

In the Symmetry Fill dialogue box, choose the following settings:

  • Symmetry type: 32 wallpaperP6 symmetry
  • Pattern Scale: 0.75
  • Pattern translation along width: 25% of width
  • Pattern translation along height: –40% of height
symmetry fill settings

Step 4

Add a Hue/Saturation adjustment layer and choose the following settings:

  • Hue: 0
  • Saturation: -57
  • Lightness: -62
adding a hue saturation adjustment layer

Step 5

Use the Ellipse Tool (U) set to Path and draw out a circle (800 x 800 px) centered in the middle of the canvas. Holding down the Shift key while drawing the circle keeps the shape as a perfect circle.

draw a circular path

Step 6

Add a new layer named girl circle and go to Edit > Fill again. Change the scripted fill to Place Along Path. Then, in the Place Along Path dialogue box, apply the following settings:

  • Pattern Scale to 0.45
  • Spacing to -720 pixels
  • Check the Adjust spacing to fit option
  • Distance from path to 360 pixels
  • Scale progression to 100%
  • Color and Brightness randomness both to 0
place along path settings

At this point, the image should look similar to this:

image with pattern along path added

3. Transform Shortcuts

To create the „blossom” effect, we will use a fun feature called Transform Again. This feature feels more like a happy accident than an intended feature. Regardless of why it’s in the program, it is certainly useful for quickly creating math-based patterns! 

Step 1

Hold down the Alt key and go to Edit > Transform (Control-T). This will generate a copy of the girl circle layer. In the Options Bar, set the Width and Height scale to be 80% and the rotation to be 20 degrees.

transform a copy of the girl circle

Step 2

Hold down the Alt-Shift-Control keys and press the T key. This is the Transform Again command that can be found in the Edit > Transform menu. It makes another copy of the layer and applies the previous transformation. Continue pressing the same key combination until there are three copies of the girl circle layer.

adding more copies of the girl circle

Step 3

Add a new layer named gradient at the top of the layer stack. Make sure the foreground color is set to black and grab the Gradient Tool (G). Use the Foreground to Transparent preset and Radial gradient shape. Then draw out a gradient starting at the center of the canvas.

adding a gradient

4. Finish With Some Line Art

The final stage is using the same techniques from before but on some simple lines and shapes to bring the entire effect together into something special.

Step 1

Use the Polygon Tool (U) and set the Sides to 5, Fill to null, Stroke Color to white, and stroke to 4 px. Then draw out a five-sided polygon at the center of the canvas.

create a five sided polygon

Step 2

Go to Layer > Rasterize Shape to turn the vector shape into pixels. Then hold down the Alt key while clicking on the visibility toggle icon (that’s the eyeball) for the Polygon layer. That will make this the only visible layer. Go to Edit > Define Pattern and name this pattern polygon.

turning the polygon into a pattern

Step 3

Alt-click on the visibility toggle icon for the polygon layer again to reveal all the other layers again. Add a new layer over the Hue/Saturation 1 layer and call it background lines.

adding a new layer

Step 4

Use Edit > Fill again and set the Custom Pattern to the polygon pattern you just created. Also set the Script to Symmetry Fill.

In the Symmetry Fill dialogue box, make the following settings:

  • Symmetry Type: 33 wallpaperP6M symmetry
  • Pattern Scale: 0.4
  • Pattern translation along width: 50% of width
  • Pattern translation along height: 50% of height
  • Color randomness: 0
  • Brightness randomness: 0
symmetry fill settings

Then reduce the layer’s Opacity to 25%.

lower the layer opacity

Step 5

Hide the Polygon layer and grab the Polygon Tool (U) again. Set the Sides to 3 and the Stroke to 4 px. Then draw out a triangle in the center of the canvas.

adding the triangle

Step 6

Hold the Alt key while going to Edit > Free Transform. This will create a new copy of the triangle layer to transform. Rotate the copy by around 20 degrees.

rotating a copy of the triangle

Step 7

Use the Transform Again key combination (Alt-Shift-Control-T) about 18 times to create a Spirograph type of effect at the center of the image.

adding the remaining triangles

Step 8

Select all of the triangle layers in the Layers panel by Shift-clicking the first one and the last one. Then group them all together with Layer > Group Layers (Control-G) and name the group Triangles.

grouping the triangle layers

Step 9

Go to Layer > Layer Mask > Hide All to add a layer mask to the group. Then set the foreground color to white and grab the Gradient Tool (G). Use the Foreground to Transparent preset and the Radial gradient shape. Draw out the gradient at the center of the canvas on the group’s mask to fade the triangle artwork into the human circle.

masking the triangles and then revealing them

Step 10

Use the Crop Tool (C) to crop the image just below the center to complete the effect.

You Are Done!

How did your fun kaleidoscope effect turn out? Share it with us in the comments below. Want to try your hand at some other effects inspired by music videos? Then check out some of the other entries in our Music Video Inspired Effects series.

finished project preview

Discover Beautiful Photoshop Effects

Whether you’re into manipulating photos or searching for that special text effect, I’ve taken the time to put together this short list of assets that will bring your Photoshop game to the next level.

Zombie Photoshop Action

Whether it’s Halloween or not, this professional Photoshop action can help you create some amazing-looking zombie effects in seconds, which you can use to turn yourself or your friends into some really spooky-looking creatures.

zombie photoshop action
Zombie Photoshop Action by Envato Elements

Dispersion Photoshop Action

Looking for a Photoshop action to add a dispersion effect to your photos? Well, look no further since this action will blow your mind by helping you create amazing-looking images in a matter of seconds.

dispersion photoshop action
Dispersion Photoshop Action by Envato Elements

Double Light Photoshop Action

Bring your Photoshop game to the next level by using this amazing double light action, which will add a range of emotions to any photo you use it on.

double light photoshop action
Double Light Photoshop Action by Envato Elements

Expand Your Creativity!

Learn more about creating mirror and reflection effects, here on Envato Tuts+:

How to Create a Kaleidoscope Effect in Adobe Photoshop

Post pobrano z: How to Create a Kaleidoscope Effect in Adobe Photoshop

Final product image
What You’ll Be Creating

As we continue with our series on effects inspired by music videos, one of the effects I’ve always been fascinated with was the kaleidoscope mirror effect. The best examples of this effect can be seen in the visually rich Pillow Talk video by Zayn. Check it out at 1:20, 1:55, 2:26, and 3:12.

The challenge is to find a way to create the effect easily and not by manually placing dozens of copies. 

Fortunately, Photoshop has a couple of useful features to make this task significantly easier. First is the frequently overlooked Scripted Fill, which makes short work of creating kaleidoscope patterns and has enough options to keep you busy experimenting for hours! Paired with that is the Transform Again feature, which is a fun way to create repetitive objects similar to the way the old Spirograph used to work. 

If you’re looking for a Photoshop action to create a mirror effect, check out our roundup of the best reflection and mirror effects available on Envato Market and Envato Elements.

Follow along with our tutorial over on our Envato Tuts+ YouTube channel:

1. Create the Pattern

The scripted fill is extremely useful for this type of effect, but it has to use a predefined pattern to work. Patterns that are not square tend to work best, so we will start out by extracting a musical artist from the background and creating a pattern to use.

Step 1

This technique will work with almost any image, but for this project let’s work with a musician image to best imitate the source effect from the video. Specifically, we’ll use this image of a sensual girl next to a rocky wall from Envato Market.

sensual girl on the rocks image
Credit: Envato Market

Step 2

Grab the Quick Selection Tool (W) and paint along the model to create a selection that completely surrounds her. If the tool grabs a background area, hold down the Alt key and paint along that background to deselect it.

create a selection around the subject

Step 3

Press the Refine Edge button to launch the dialogue box. Adjust the Radius to 2 px and check the Smart Radius option. Then use the Refine Radius Tool to brush along the edges of the model’s hair to create a better selection for those long locks. Then press the OK button to return to the main Photoshop interface.

using the select and mask option to refine the image selection

Step 4

Use the selection as a layer mask by going to Layer > Layer Mask > Reveal Selection.

use the selection as a mask

Step 5

Click on the layer thumbnail to make sure the focus is on the layer and not the layer mask. Then go to Edit > Define Pattern. Give the pattern a name of girl.

define a pattern

2. Scripted Fill Fun

With our custom pattern defined and ready to go, it’s time to use the Scripted Fill to create the kaleidoscope pattern. There are several options to experiment with; the ones listed here are just a suggestion to get you started. Feel free to craft your own patterned effect.

Step 1

Create a new document with File > New. Set the Width and Height both to 2500 px. Set the Background Contents to Other and specify the color to be black (#000000).

setting up a new document

Step 2

Create a new layer with Layer > New > Layer (Shift-Control-N) and name the new layer Scripted Fill.

creating a new layer

Step 3

Go to Edit > Fill and change the Contents to Pattern and set the Custom Pattern to the Guitarist pattern you created earlier. Then check the Script option box and select Symmetry Fill.

edit fill settings

In the Symmetry Fill dialogue box, choose the following settings:

  • Symmetry type: 32 wallpaperP6 symmetry
  • Pattern Scale: 0.75
  • Pattern translation along width: 25% of width
  • Pattern translation along height: –40% of height
symmetry fill settings

Step 4

Add a Hue/Saturation adjustment layer and choose the following settings:

  • Hue: 0
  • Saturation: -57
  • Lightness: -62
adding a hue saturation adjustment layer

Step 5

Use the Ellipse Tool (U) set to Path and draw out a circle (800 x 800 px) centered in the middle of the canvas. Holding down the Shift key while drawing the circle keeps the shape as a perfect circle.

draw a circular path

Step 6

Add a new layer named girl circle and go to Edit > Fill again. Change the scripted fill to Place Along Path. Then, in the Place Along Path dialogue box, apply the following settings:

  • Pattern Scale to 0.45
  • Spacing to -720 pixels
  • Check the Adjust spacing to fit option
  • Distance from path to 360 pixels
  • Scale progression to 100%
  • Color and Brightness randomness both to 0
place along path settings

At this point, the image should look similar to this:

image with pattern along path added

3. Transform Shortcuts

To create the „blossom” effect, we will use a fun feature called Transform Again. This feature feels more like a happy accident than an intended feature. Regardless of why it’s in the program, it is certainly useful for quickly creating math-based patterns! 

Step 1

Hold down the Alt key and go to Edit > Transform (Control-T). This will generate a copy of the girl circle layer. In the Options Bar, set the Width and Height scale to be 80% and the rotation to be 20 degrees.

transform a copy of the girl circle

Step 2

Hold down the Alt-Shift-Control keys and press the T key. This is the Transform Again command that can be found in the Edit > Transform menu. It makes another copy of the layer and applies the previous transformation. Continue pressing the same key combination until there are three copies of the girl circle layer.

adding more copies of the girl circle

Step 3

Add a new layer named gradient at the top of the layer stack. Make sure the foreground color is set to black and grab the Gradient Tool (G). Use the Foreground to Transparent preset and Radial gradient shape. Then draw out a gradient starting at the center of the canvas.

adding a gradient

4. Finish With Some Line Art

The final stage is using the same techniques from before but on some simple lines and shapes to bring the entire effect together into something special.

Step 1

Use the Polygon Tool (U) and set the Sides to 5, Fill to null, Stroke Color to white, and stroke to 4 px. Then draw out a five-sided polygon at the center of the canvas.

create a five sided polygon

Step 2

Go to Layer > Rasterize Shape to turn the vector shape into pixels. Then hold down the Alt key while clicking on the visibility toggle icon (that’s the eyeball) for the Polygon layer. That will make this the only visible layer. Go to Edit > Define Pattern and name this pattern polygon.

turning the polygon into a pattern

Step 3

Alt-click on the visibility toggle icon for the polygon layer again to reveal all the other layers again. Add a new layer over the Hue/Saturation 1 layer and call it background lines.

adding a new layer

Step 4

Use Edit > Fill again and set the Custom Pattern to the polygon pattern you just created. Also set the Script to Symmetry Fill.

In the Symmetry Fill dialogue box, make the following settings:

  • Symmetry Type: 33 wallpaperP6M symmetry
  • Pattern Scale: 0.4
  • Pattern translation along width: 50% of width
  • Pattern translation along height: 50% of height
  • Color randomness: 0
  • Brightness randomness: 0
symmetry fill settings

Then reduce the layer’s Opacity to 25%.

lower the layer opacity

Step 5

Hide the Polygon layer and grab the Polygon Tool (U) again. Set the Sides to 3 and the Stroke to 4 px. Then draw out a triangle in the center of the canvas.

adding the triangle

Step 6

Hold the Alt key while going to Edit > Free Transform. This will create a new copy of the triangle layer to transform. Rotate the copy by around 20 degrees.

rotating a copy of the triangle

Step 7

Use the Transform Again key combination (Alt-Shift-Control-T) about 18 times to create a Spirograph type of effect at the center of the image.

adding the remaining triangles

Step 8

Select all of the triangle layers in the Layers panel by Shift-clicking the first one and the last one. Then group them all together with Layer > Group Layers (Control-G) and name the group Triangles.

grouping the triangle layers

Step 9

Go to Layer > Layer Mask > Hide All to add a layer mask to the group. Then set the foreground color to white and grab the Gradient Tool (G). Use the Foreground to Transparent preset and the Radial gradient shape. Draw out the gradient at the center of the canvas on the group’s mask to fade the triangle artwork into the human circle.

masking the triangles and then revealing them

Step 10

Use the Crop Tool (C) to crop the image just below the center to complete the effect.

You Are Done!

How did your fun kaleidoscope effect turn out? Share it with us in the comments below. Want to try your hand at some other effects inspired by music videos? Then check out some of the other entries in our Music Video Inspired Effects series.

finished project preview

Discover Beautiful Photoshop Effects

Whether you’re into manipulating photos or searching for that special text effect, I’ve taken the time to put together this short list of assets that will bring your Photoshop game to the next level.

Zombie Photoshop Action

Whether it’s Halloween or not, this professional Photoshop action can help you create some amazing-looking zombie effects in seconds, which you can use to turn yourself or your friends into some really spooky-looking creatures.

zombie photoshop action
Zombie Photoshop Action by Envato Elements

Dispersion Photoshop Action

Looking for a Photoshop action to add a dispersion effect to your photos? Well, look no further since this action will blow your mind by helping you create amazing-looking images in a matter of seconds.

dispersion photoshop action
Dispersion Photoshop Action by Envato Elements

Double Light Photoshop Action

Bring your Photoshop game to the next level by using this amazing double light action, which will add a range of emotions to any photo you use it on.

double light photoshop action
Double Light Photoshop Action by Envato Elements

Expand Your Creativity!

Learn more about creating mirror and reflection effects, here on Envato Tuts+:

How to Create a Kaleidoscope Effect in Adobe Photoshop

Post pobrano z: How to Create a Kaleidoscope Effect in Adobe Photoshop

Final product image
What You’ll Be Creating

As we continue with our series on effects inspired by music videos, one of the effects I’ve always been fascinated with was the kaleidoscope mirror effect. The best examples of this effect can be seen in the visually rich Pillow Talk video by Zayn. Check it out at 1:20, 1:55, 2:26, and 3:12.

The challenge is to find a way to create the effect easily and not by manually placing dozens of copies. 

Fortunately, Photoshop has a couple of useful features to make this task significantly easier. First is the frequently overlooked Scripted Fill, which makes short work of creating kaleidoscope patterns and has enough options to keep you busy experimenting for hours! Paired with that is the Transform Again feature, which is a fun way to create repetitive objects similar to the way the old Spirograph used to work. 

If you’re looking for a Photoshop action to create a mirror effect, check out our roundup of the best reflection and mirror effects available on Envato Market and Envato Elements.

Follow along with our tutorial over on our Envato Tuts+ YouTube channel:

1. Create the Pattern

The scripted fill is extremely useful for this type of effect, but it has to use a predefined pattern to work. Patterns that are not square tend to work best, so we will start out by extracting a musical artist from the background and creating a pattern to use.

Step 1

This technique will work with almost any image, but for this project let’s work with a musician image to best imitate the source effect from the video. Specifically, we’ll use this image of a sensual girl next to a rocky wall from Envato Market.

sensual girl on the rocks image
Credit: Envato Market

Step 2

Grab the Quick Selection Tool (W) and paint along the model to create a selection that completely surrounds her. If the tool grabs a background area, hold down the Alt key and paint along that background to deselect it.

create a selection around the subject

Step 3

Press the Refine Edge button to launch the dialogue box. Adjust the Radius to 2 px and check the Smart Radius option. Then use the Refine Radius Tool to brush along the edges of the model’s hair to create a better selection for those long locks. Then press the OK button to return to the main Photoshop interface.

using the select and mask option to refine the image selection

Step 4

Use the selection as a layer mask by going to Layer > Layer Mask > Reveal Selection.

use the selection as a mask

Step 5

Click on the layer thumbnail to make sure the focus is on the layer and not the layer mask. Then go to Edit > Define Pattern. Give the pattern a name of girl.

define a pattern

2. Scripted Fill Fun

With our custom pattern defined and ready to go, it’s time to use the Scripted Fill to create the kaleidoscope pattern. There are several options to experiment with; the ones listed here are just a suggestion to get you started. Feel free to craft your own patterned effect.

Step 1

Create a new document with File > New. Set the Width and Height both to 2500 px. Set the Background Contents to Other and specify the color to be black (#000000).

setting up a new document

Step 2

Create a new layer with Layer > New > Layer (Shift-Control-N) and name the new layer Scripted Fill.

creating a new layer

Step 3

Go to Edit > Fill and change the Contents to Pattern and set the Custom Pattern to the Guitarist pattern you created earlier. Then check the Script option box and select Symmetry Fill.

edit fill settings

In the Symmetry Fill dialogue box, choose the following settings:

  • Symmetry type: 32 wallpaperP6 symmetry
  • Pattern Scale: 0.75
  • Pattern translation along width: 25% of width
  • Pattern translation along height: –40% of height
symmetry fill settings

Step 4

Add a Hue/Saturation adjustment layer and choose the following settings:

  • Hue: 0
  • Saturation: -57
  • Lightness: -62
adding a hue saturation adjustment layer

Step 5

Use the Ellipse Tool (U) set to Path and draw out a circle (800 x 800 px) centered in the middle of the canvas. Holding down the Shift key while drawing the circle keeps the shape as a perfect circle.

draw a circular path

Step 6

Add a new layer named girl circle and go to Edit > Fill again. Change the scripted fill to Place Along Path. Then, in the Place Along Path dialogue box, apply the following settings:

  • Pattern Scale to 0.45
  • Spacing to -720 pixels
  • Check the Adjust spacing to fit option
  • Distance from path to 360 pixels
  • Scale progression to 100%
  • Color and Brightness randomness both to 0
place along path settings

At this point, the image should look similar to this:

image with pattern along path added

3. Transform Shortcuts

To create the „blossom” effect, we will use a fun feature called Transform Again. This feature feels more like a happy accident than an intended feature. Regardless of why it’s in the program, it is certainly useful for quickly creating math-based patterns! 

Step 1

Hold down the Alt key and go to Edit > Transform (Control-T). This will generate a copy of the girl circle layer. In the Options Bar, set the Width and Height scale to be 80% and the rotation to be 20 degrees.

transform a copy of the girl circle

Step 2

Hold down the Alt-Shift-Control keys and press the T key. This is the Transform Again command that can be found in the Edit > Transform menu. It makes another copy of the layer and applies the previous transformation. Continue pressing the same key combination until there are three copies of the girl circle layer.

adding more copies of the girl circle

Step 3

Add a new layer named gradient at the top of the layer stack. Make sure the foreground color is set to black and grab the Gradient Tool (G). Use the Foreground to Transparent preset and Radial gradient shape. Then draw out a gradient starting at the center of the canvas.

adding a gradient

4. Finish With Some Line Art

The final stage is using the same techniques from before but on some simple lines and shapes to bring the entire effect together into something special.

Step 1

Use the Polygon Tool (U) and set the Sides to 5, Fill to null, Stroke Color to white, and stroke to 4 px. Then draw out a five-sided polygon at the center of the canvas.

create a five sided polygon

Step 2

Go to Layer > Rasterize Shape to turn the vector shape into pixels. Then hold down the Alt key while clicking on the visibility toggle icon (that’s the eyeball) for the Polygon layer. That will make this the only visible layer. Go to Edit > Define Pattern and name this pattern polygon.

turning the polygon into a pattern

Step 3

Alt-click on the visibility toggle icon for the polygon layer again to reveal all the other layers again. Add a new layer over the Hue/Saturation 1 layer and call it background lines.

adding a new layer

Step 4

Use Edit > Fill again and set the Custom Pattern to the polygon pattern you just created. Also set the Script to Symmetry Fill.

In the Symmetry Fill dialogue box, make the following settings:

  • Symmetry Type: 33 wallpaperP6M symmetry
  • Pattern Scale: 0.4
  • Pattern translation along width: 50% of width
  • Pattern translation along height: 50% of height
  • Color randomness: 0
  • Brightness randomness: 0
symmetry fill settings

Then reduce the layer’s Opacity to 25%.

lower the layer opacity

Step 5

Hide the Polygon layer and grab the Polygon Tool (U) again. Set the Sides to 3 and the Stroke to 4 px. Then draw out a triangle in the center of the canvas.

adding the triangle

Step 6

Hold the Alt key while going to Edit > Free Transform. This will create a new copy of the triangle layer to transform. Rotate the copy by around 20 degrees.

rotating a copy of the triangle

Step 7

Use the Transform Again key combination (Alt-Shift-Control-T) about 18 times to create a Spirograph type of effect at the center of the image.

adding the remaining triangles

Step 8

Select all of the triangle layers in the Layers panel by Shift-clicking the first one and the last one. Then group them all together with Layer > Group Layers (Control-G) and name the group Triangles.

grouping the triangle layers

Step 9

Go to Layer > Layer Mask > Hide All to add a layer mask to the group. Then set the foreground color to white and grab the Gradient Tool (G). Use the Foreground to Transparent preset and the Radial gradient shape. Draw out the gradient at the center of the canvas on the group’s mask to fade the triangle artwork into the human circle.

masking the triangles and then revealing them

Step 10

Use the Crop Tool (C) to crop the image just below the center to complete the effect.

You Are Done!

How did your fun kaleidoscope effect turn out? Share it with us in the comments below. Want to try your hand at some other effects inspired by music videos? Then check out some of the other entries in our Music Video Inspired Effects series.

finished project preview

Discover Beautiful Photoshop Effects

Whether you’re into manipulating photos or searching for that special text effect, I’ve taken the time to put together this short list of assets that will bring your Photoshop game to the next level.

Zombie Photoshop Action

Whether it’s Halloween or not, this professional Photoshop action can help you create some amazing-looking zombie effects in seconds, which you can use to turn yourself or your friends into some really spooky-looking creatures.

zombie photoshop action
Zombie Photoshop Action by Envato Elements

Dispersion Photoshop Action

Looking for a Photoshop action to add a dispersion effect to your photos? Well, look no further since this action will blow your mind by helping you create amazing-looking images in a matter of seconds.

dispersion photoshop action
Dispersion Photoshop Action by Envato Elements

Double Light Photoshop Action

Bring your Photoshop game to the next level by using this amazing double light action, which will add a range of emotions to any photo you use it on.

double light photoshop action
Double Light Photoshop Action by Envato Elements

Expand Your Creativity!

Learn more about creating mirror and reflection effects, here on Envato Tuts+:

How to Create a Kaleidoscope Effect in Adobe Photoshop

Post pobrano z: How to Create a Kaleidoscope Effect in Adobe Photoshop

Final product image
What You’ll Be Creating

As we continue with our series on effects inspired by music videos, one of the effects I’ve always been fascinated with was the kaleidoscope mirror effect. The best examples of this effect can be seen in the visually rich Pillow Talk video by Zayn. Check it out at 1:20, 1:55, 2:26, and 3:12.

The challenge is to find a way to create the effect easily and not by manually placing dozens of copies. 

Fortunately, Photoshop has a couple of useful features to make this task significantly easier. First is the frequently overlooked Scripted Fill, which makes short work of creating kaleidoscope patterns and has enough options to keep you busy experimenting for hours! Paired with that is the Transform Again feature, which is a fun way to create repetitive objects similar to the way the old Spirograph used to work. 

If you’re looking for a Photoshop action to create a mirror effect, check out our roundup of the best reflection and mirror effects available on Envato Market and Envato Elements.

Follow along with our tutorial over on our Envato Tuts+ YouTube channel:

1. Create the Pattern

The scripted fill is extremely useful for this type of effect, but it has to use a predefined pattern to work. Patterns that are not square tend to work best, so we will start out by extracting a musical artist from the background and creating a pattern to use.

Step 1

This technique will work with almost any image, but for this project let’s work with a musician image to best imitate the source effect from the video. Specifically, we’ll use this image of a sensual girl next to a rocky wall from Envato Market.

sensual girl on the rocks image
Credit: Envato Market

Step 2

Grab the Quick Selection Tool (W) and paint along the model to create a selection that completely surrounds her. If the tool grabs a background area, hold down the Alt key and paint along that background to deselect it.

create a selection around the subject

Step 3

Press the Refine Edge button to launch the dialogue box. Adjust the Radius to 2 px and check the Smart Radius option. Then use the Refine Radius Tool to brush along the edges of the model’s hair to create a better selection for those long locks. Then press the OK button to return to the main Photoshop interface.

using the select and mask option to refine the image selection

Step 4

Use the selection as a layer mask by going to Layer > Layer Mask > Reveal Selection.

use the selection as a mask

Step 5

Click on the layer thumbnail to make sure the focus is on the layer and not the layer mask. Then go to Edit > Define Pattern. Give the pattern a name of girl.

define a pattern

2. Scripted Fill Fun

With our custom pattern defined and ready to go, it’s time to use the Scripted Fill to create the kaleidoscope pattern. There are several options to experiment with; the ones listed here are just a suggestion to get you started. Feel free to craft your own patterned effect.

Step 1

Create a new document with File > New. Set the Width and Height both to 2500 px. Set the Background Contents to Other and specify the color to be black (#000000).

setting up a new document

Step 2

Create a new layer with Layer > New > Layer (Shift-Control-N) and name the new layer Scripted Fill.

creating a new layer

Step 3

Go to Edit > Fill and change the Contents to Pattern and set the Custom Pattern to the Guitarist pattern you created earlier. Then check the Script option box and select Symmetry Fill.

edit fill settings

In the Symmetry Fill dialogue box, choose the following settings:

  • Symmetry type: 32 wallpaperP6 symmetry
  • Pattern Scale: 0.75
  • Pattern translation along width: 25% of width
  • Pattern translation along height: –40% of height
symmetry fill settings

Step 4

Add a Hue/Saturation adjustment layer and choose the following settings:

  • Hue: 0
  • Saturation: -57
  • Lightness: -62
adding a hue saturation adjustment layer

Step 5

Use the Ellipse Tool (U) set to Path and draw out a circle (800 x 800 px) centered in the middle of the canvas. Holding down the Shift key while drawing the circle keeps the shape as a perfect circle.

draw a circular path

Step 6

Add a new layer named girl circle and go to Edit > Fill again. Change the scripted fill to Place Along Path. Then, in the Place Along Path dialogue box, apply the following settings:

  • Pattern Scale to 0.45
  • Spacing to -720 pixels
  • Check the Adjust spacing to fit option
  • Distance from path to 360 pixels
  • Scale progression to 100%
  • Color and Brightness randomness both to 0
place along path settings

At this point, the image should look similar to this:

image with pattern along path added

3. Transform Shortcuts

To create the „blossom” effect, we will use a fun feature called Transform Again. This feature feels more like a happy accident than an intended feature. Regardless of why it’s in the program, it is certainly useful for quickly creating math-based patterns! 

Step 1

Hold down the Alt key and go to Edit > Transform (Control-T). This will generate a copy of the girl circle layer. In the Options Bar, set the Width and Height scale to be 80% and the rotation to be 20 degrees.

transform a copy of the girl circle

Step 2

Hold down the Alt-Shift-Control keys and press the T key. This is the Transform Again command that can be found in the Edit > Transform menu. It makes another copy of the layer and applies the previous transformation. Continue pressing the same key combination until there are three copies of the girl circle layer.

adding more copies of the girl circle

Step 3

Add a new layer named gradient at the top of the layer stack. Make sure the foreground color is set to black and grab the Gradient Tool (G). Use the Foreground to Transparent preset and Radial gradient shape. Then draw out a gradient starting at the center of the canvas.

adding a gradient

4. Finish With Some Line Art

The final stage is using the same techniques from before but on some simple lines and shapes to bring the entire effect together into something special.

Step 1

Use the Polygon Tool (U) and set the Sides to 5, Fill to null, Stroke Color to white, and stroke to 4 px. Then draw out a five-sided polygon at the center of the canvas.

create a five sided polygon

Step 2

Go to Layer > Rasterize Shape to turn the vector shape into pixels. Then hold down the Alt key while clicking on the visibility toggle icon (that’s the eyeball) for the Polygon layer. That will make this the only visible layer. Go to Edit > Define Pattern and name this pattern polygon.

turning the polygon into a pattern

Step 3

Alt-click on the visibility toggle icon for the polygon layer again to reveal all the other layers again. Add a new layer over the Hue/Saturation 1 layer and call it background lines.

adding a new layer

Step 4

Use Edit > Fill again and set the Custom Pattern to the polygon pattern you just created. Also set the Script to Symmetry Fill.

In the Symmetry Fill dialogue box, make the following settings:

  • Symmetry Type: 33 wallpaperP6M symmetry
  • Pattern Scale: 0.4
  • Pattern translation along width: 50% of width
  • Pattern translation along height: 50% of height
  • Color randomness: 0
  • Brightness randomness: 0
symmetry fill settings

Then reduce the layer’s Opacity to 25%.

lower the layer opacity

Step 5

Hide the Polygon layer and grab the Polygon Tool (U) again. Set the Sides to 3 and the Stroke to 4 px. Then draw out a triangle in the center of the canvas.

adding the triangle

Step 6

Hold the Alt key while going to Edit > Free Transform. This will create a new copy of the triangle layer to transform. Rotate the copy by around 20 degrees.

rotating a copy of the triangle

Step 7

Use the Transform Again key combination (Alt-Shift-Control-T) about 18 times to create a Spirograph type of effect at the center of the image.

adding the remaining triangles

Step 8

Select all of the triangle layers in the Layers panel by Shift-clicking the first one and the last one. Then group them all together with Layer > Group Layers (Control-G) and name the group Triangles.

grouping the triangle layers

Step 9

Go to Layer > Layer Mask > Hide All to add a layer mask to the group. Then set the foreground color to white and grab the Gradient Tool (G). Use the Foreground to Transparent preset and the Radial gradient shape. Draw out the gradient at the center of the canvas on the group’s mask to fade the triangle artwork into the human circle.

masking the triangles and then revealing them

Step 10

Use the Crop Tool (C) to crop the image just below the center to complete the effect.

You Are Done!

How did your fun kaleidoscope effect turn out? Share it with us in the comments below. Want to try your hand at some other effects inspired by music videos? Then check out some of the other entries in our Music Video Inspired Effects series.

finished project preview

Discover Beautiful Photoshop Effects

Whether you’re into manipulating photos or searching for that special text effect, I’ve taken the time to put together this short list of assets that will bring your Photoshop game to the next level.

Zombie Photoshop Action

Whether it’s Halloween or not, this professional Photoshop action can help you create some amazing-looking zombie effects in seconds, which you can use to turn yourself or your friends into some really spooky-looking creatures.

zombie photoshop action
Zombie Photoshop Action by Envato Elements

Dispersion Photoshop Action

Looking for a Photoshop action to add a dispersion effect to your photos? Well, look no further since this action will blow your mind by helping you create amazing-looking images in a matter of seconds.

dispersion photoshop action
Dispersion Photoshop Action by Envato Elements

Double Light Photoshop Action

Bring your Photoshop game to the next level by using this amazing double light action, which will add a range of emotions to any photo you use it on.

double light photoshop action
Double Light Photoshop Action by Envato Elements

Expand Your Creativity!

Learn more about creating mirror and reflection effects, here on Envato Tuts+:

How to Create a Kaleidoscope Effect in Adobe Photoshop

Post pobrano z: How to Create a Kaleidoscope Effect in Adobe Photoshop

Final product image
What You’ll Be Creating

As we continue with our series on effects inspired by music videos, one of the effects I’ve always been fascinated with was the kaleidoscope mirror effect. The best examples of this effect can be seen in the visually rich Pillow Talk video by Zayn. Check it out at 1:20, 1:55, 2:26, and 3:12.

The challenge is to find a way to create the effect easily and not by manually placing dozens of copies. 

Fortunately, Photoshop has a couple of useful features to make this task significantly easier. First is the frequently overlooked Scripted Fill, which makes short work of creating kaleidoscope patterns and has enough options to keep you busy experimenting for hours! Paired with that is the Transform Again feature, which is a fun way to create repetitive objects similar to the way the old Spirograph used to work. 

If you’re looking for a Photoshop action to create a mirror effect, check out our roundup of the best reflection and mirror effects available on Envato Market and Envato Elements.

Follow along with our tutorial over on our Envato Tuts+ YouTube channel:

1. Create the Pattern

The scripted fill is extremely useful for this type of effect, but it has to use a predefined pattern to work. Patterns that are not square tend to work best, so we will start out by extracting a musical artist from the background and creating a pattern to use.

Step 1

This technique will work with almost any image, but for this project let’s work with a musician image to best imitate the source effect from the video. Specifically, we’ll use this image of a sensual girl next to a rocky wall from Envato Market.

sensual girl on the rocks image
Credit: Envato Market

Step 2

Grab the Quick Selection Tool (W) and paint along the model to create a selection that completely surrounds her. If the tool grabs a background area, hold down the Alt key and paint along that background to deselect it.

create a selection around the subject

Step 3

Press the Refine Edge button to launch the dialogue box. Adjust the Radius to 2 px and check the Smart Radius option. Then use the Refine Radius Tool to brush along the edges of the model’s hair to create a better selection for those long locks. Then press the OK button to return to the main Photoshop interface.

using the select and mask option to refine the image selection

Step 4

Use the selection as a layer mask by going to Layer > Layer Mask > Reveal Selection.

use the selection as a mask

Step 5

Click on the layer thumbnail to make sure the focus is on the layer and not the layer mask. Then go to Edit > Define Pattern. Give the pattern a name of girl.

define a pattern

2. Scripted Fill Fun

With our custom pattern defined and ready to go, it’s time to use the Scripted Fill to create the kaleidoscope pattern. There are several options to experiment with; the ones listed here are just a suggestion to get you started. Feel free to craft your own patterned effect.

Step 1

Create a new document with File > New. Set the Width and Height both to 2500 px. Set the Background Contents to Other and specify the color to be black (#000000).

setting up a new document

Step 2

Create a new layer with Layer > New > Layer (Shift-Control-N) and name the new layer Scripted Fill.

creating a new layer

Step 3

Go to Edit > Fill and change the Contents to Pattern and set the Custom Pattern to the Guitarist pattern you created earlier. Then check the Script option box and select Symmetry Fill.

edit fill settings

In the Symmetry Fill dialogue box, choose the following settings:

  • Symmetry type: 32 wallpaperP6 symmetry
  • Pattern Scale: 0.75
  • Pattern translation along width: 25% of width
  • Pattern translation along height: –40% of height
symmetry fill settings

Step 4

Add a Hue/Saturation adjustment layer and choose the following settings:

  • Hue: 0
  • Saturation: -57
  • Lightness: -62
adding a hue saturation adjustment layer

Step 5

Use the Ellipse Tool (U) set to Path and draw out a circle (800 x 800 px) centered in the middle of the canvas. Holding down the Shift key while drawing the circle keeps the shape as a perfect circle.

draw a circular path

Step 6

Add a new layer named girl circle and go to Edit > Fill again. Change the scripted fill to Place Along Path. Then, in the Place Along Path dialogue box, apply the following settings:

  • Pattern Scale to 0.45
  • Spacing to -720 pixels
  • Check the Adjust spacing to fit option
  • Distance from path to 360 pixels
  • Scale progression to 100%
  • Color and Brightness randomness both to 0
place along path settings

At this point, the image should look similar to this:

image with pattern along path added

3. Transform Shortcuts

To create the „blossom” effect, we will use a fun feature called Transform Again. This feature feels more like a happy accident than an intended feature. Regardless of why it’s in the program, it is certainly useful for quickly creating math-based patterns! 

Step 1

Hold down the Alt key and go to Edit > Transform (Control-T). This will generate a copy of the girl circle layer. In the Options Bar, set the Width and Height scale to be 80% and the rotation to be 20 degrees.

transform a copy of the girl circle

Step 2

Hold down the Alt-Shift-Control keys and press the T key. This is the Transform Again command that can be found in the Edit > Transform menu. It makes another copy of the layer and applies the previous transformation. Continue pressing the same key combination until there are three copies of the girl circle layer.

adding more copies of the girl circle

Step 3

Add a new layer named gradient at the top of the layer stack. Make sure the foreground color is set to black and grab the Gradient Tool (G). Use the Foreground to Transparent preset and Radial gradient shape. Then draw out a gradient starting at the center of the canvas.

adding a gradient

4. Finish With Some Line Art

The final stage is using the same techniques from before but on some simple lines and shapes to bring the entire effect together into something special.

Step 1

Use the Polygon Tool (U) and set the Sides to 5, Fill to null, Stroke Color to white, and stroke to 4 px. Then draw out a five-sided polygon at the center of the canvas.

create a five sided polygon

Step 2

Go to Layer > Rasterize Shape to turn the vector shape into pixels. Then hold down the Alt key while clicking on the visibility toggle icon (that’s the eyeball) for the Polygon layer. That will make this the only visible layer. Go to Edit > Define Pattern and name this pattern polygon.

turning the polygon into a pattern

Step 3

Alt-click on the visibility toggle icon for the polygon layer again to reveal all the other layers again. Add a new layer over the Hue/Saturation 1 layer and call it background lines.

adding a new layer

Step 4

Use Edit > Fill again and set the Custom Pattern to the polygon pattern you just created. Also set the Script to Symmetry Fill.

In the Symmetry Fill dialogue box, make the following settings:

  • Symmetry Type: 33 wallpaperP6M symmetry
  • Pattern Scale: 0.4
  • Pattern translation along width: 50% of width
  • Pattern translation along height: 50% of height
  • Color randomness: 0
  • Brightness randomness: 0
symmetry fill settings

Then reduce the layer’s Opacity to 25%.

lower the layer opacity

Step 5

Hide the Polygon layer and grab the Polygon Tool (U) again. Set the Sides to 3 and the Stroke to 4 px. Then draw out a triangle in the center of the canvas.

adding the triangle

Step 6

Hold the Alt key while going to Edit > Free Transform. This will create a new copy of the triangle layer to transform. Rotate the copy by around 20 degrees.

rotating a copy of the triangle

Step 7

Use the Transform Again key combination (Alt-Shift-Control-T) about 18 times to create a Spirograph type of effect at the center of the image.

adding the remaining triangles

Step 8

Select all of the triangle layers in the Layers panel by Shift-clicking the first one and the last one. Then group them all together with Layer > Group Layers (Control-G) and name the group Triangles.

grouping the triangle layers

Step 9

Go to Layer > Layer Mask > Hide All to add a layer mask to the group. Then set the foreground color to white and grab the Gradient Tool (G). Use the Foreground to Transparent preset and the Radial gradient shape. Draw out the gradient at the center of the canvas on the group’s mask to fade the triangle artwork into the human circle.

masking the triangles and then revealing them

Step 10

Use the Crop Tool (C) to crop the image just below the center to complete the effect.

You Are Done!

How did your fun kaleidoscope effect turn out? Share it with us in the comments below. Want to try your hand at some other effects inspired by music videos? Then check out some of the other entries in our Music Video Inspired Effects series.

finished project preview

Discover Beautiful Photoshop Effects

Whether you’re into manipulating photos or searching for that special text effect, I’ve taken the time to put together this short list of assets that will bring your Photoshop game to the next level.

Zombie Photoshop Action

Whether it’s Halloween or not, this professional Photoshop action can help you create some amazing-looking zombie effects in seconds, which you can use to turn yourself or your friends into some really spooky-looking creatures.

zombie photoshop action
Zombie Photoshop Action by Envato Elements

Dispersion Photoshop Action

Looking for a Photoshop action to add a dispersion effect to your photos? Well, look no further since this action will blow your mind by helping you create amazing-looking images in a matter of seconds.

dispersion photoshop action
Dispersion Photoshop Action by Envato Elements

Double Light Photoshop Action

Bring your Photoshop game to the next level by using this amazing double light action, which will add a range of emotions to any photo you use it on.

double light photoshop action
Double Light Photoshop Action by Envato Elements

Expand Your Creativity!

Learn more about creating mirror and reflection effects, here on Envato Tuts+:

How to Create a Kaleidoscope Effect in Adobe Photoshop

Post pobrano z: How to Create a Kaleidoscope Effect in Adobe Photoshop

Final product image
What You’ll Be Creating

As we continue with our series on effects inspired by music videos, one of the effects I’ve always been fascinated with was the kaleidoscope mirror effect. The best examples of this effect can be seen in the visually rich Pillow Talk video by Zayn. Check it out at 1:20, 1:55, 2:26, and 3:12.

The challenge is to find a way to create the effect easily and not by manually placing dozens of copies. 

Fortunately, Photoshop has a couple of useful features to make this task significantly easier. First is the frequently overlooked Scripted Fill, which makes short work of creating kaleidoscope patterns and has enough options to keep you busy experimenting for hours! Paired with that is the Transform Again feature, which is a fun way to create repetitive objects similar to the way the old Spirograph used to work. 

If you’re looking for a Photoshop action to create a mirror effect, check out our roundup of the best reflection and mirror effects available on Envato Market and Envato Elements.

Follow along with our tutorial over on our Envato Tuts+ YouTube channel:

1. Create the Pattern

The scripted fill is extremely useful for this type of effect, but it has to use a predefined pattern to work. Patterns that are not square tend to work best, so we will start out by extracting a musical artist from the background and creating a pattern to use.

Step 1

This technique will work with almost any image, but for this project let’s work with a musician image to best imitate the source effect from the video. Specifically, we’ll use this image of a sensual girl next to a rocky wall from Envato Market.

sensual girl on the rocks image
Credit: Envato Market

Step 2

Grab the Quick Selection Tool (W) and paint along the model to create a selection that completely surrounds her. If the tool grabs a background area, hold down the Alt key and paint along that background to deselect it.

create a selection around the subject

Step 3

Press the Refine Edge button to launch the dialogue box. Adjust the Radius to 2 px and check the Smart Radius option. Then use the Refine Radius Tool to brush along the edges of the model’s hair to create a better selection for those long locks. Then press the OK button to return to the main Photoshop interface.

using the select and mask option to refine the image selection

Step 4

Use the selection as a layer mask by going to Layer > Layer Mask > Reveal Selection.

use the selection as a mask

Step 5

Click on the layer thumbnail to make sure the focus is on the layer and not the layer mask. Then go to Edit > Define Pattern. Give the pattern a name of girl.

define a pattern

2. Scripted Fill Fun

With our custom pattern defined and ready to go, it’s time to use the Scripted Fill to create the kaleidoscope pattern. There are several options to experiment with; the ones listed here are just a suggestion to get you started. Feel free to craft your own patterned effect.

Step 1

Create a new document with File > New. Set the Width and Height both to 2500 px. Set the Background Contents to Other and specify the color to be black (#000000).

setting up a new document

Step 2

Create a new layer with Layer > New > Layer (Shift-Control-N) and name the new layer Scripted Fill.

creating a new layer

Step 3

Go to Edit > Fill and change the Contents to Pattern and set the Custom Pattern to the Guitarist pattern you created earlier. Then check the Script option box and select Symmetry Fill.

edit fill settings

In the Symmetry Fill dialogue box, choose the following settings:

  • Symmetry type: 32 wallpaperP6 symmetry
  • Pattern Scale: 0.75
  • Pattern translation along width: 25% of width
  • Pattern translation along height: –40% of height
symmetry fill settings

Step 4

Add a Hue/Saturation adjustment layer and choose the following settings:

  • Hue: 0
  • Saturation: -57
  • Lightness: -62
adding a hue saturation adjustment layer

Step 5

Use the Ellipse Tool (U) set to Path and draw out a circle (800 x 800 px) centered in the middle of the canvas. Holding down the Shift key while drawing the circle keeps the shape as a perfect circle.

draw a circular path

Step 6

Add a new layer named girl circle and go to Edit > Fill again. Change the scripted fill to Place Along Path. Then, in the Place Along Path dialogue box, apply the following settings:

  • Pattern Scale to 0.45
  • Spacing to -720 pixels
  • Check the Adjust spacing to fit option
  • Distance from path to 360 pixels
  • Scale progression to 100%
  • Color and Brightness randomness both to 0
place along path settings

At this point, the image should look similar to this:

image with pattern along path added

3. Transform Shortcuts

To create the „blossom” effect, we will use a fun feature called Transform Again. This feature feels more like a happy accident than an intended feature. Regardless of why it’s in the program, it is certainly useful for quickly creating math-based patterns! 

Step 1

Hold down the Alt key and go to Edit > Transform (Control-T). This will generate a copy of the girl circle layer. In the Options Bar, set the Width and Height scale to be 80% and the rotation to be 20 degrees.

transform a copy of the girl circle

Step 2

Hold down the Alt-Shift-Control keys and press the T key. This is the Transform Again command that can be found in the Edit > Transform menu. It makes another copy of the layer and applies the previous transformation. Continue pressing the same key combination until there are three copies of the girl circle layer.

adding more copies of the girl circle

Step 3

Add a new layer named gradient at the top of the layer stack. Make sure the foreground color is set to black and grab the Gradient Tool (G). Use the Foreground to Transparent preset and Radial gradient shape. Then draw out a gradient starting at the center of the canvas.

adding a gradient

4. Finish With Some Line Art

The final stage is using the same techniques from before but on some simple lines and shapes to bring the entire effect together into something special.

Step 1

Use the Polygon Tool (U) and set the Sides to 5, Fill to null, Stroke Color to white, and stroke to 4 px. Then draw out a five-sided polygon at the center of the canvas.

create a five sided polygon

Step 2

Go to Layer > Rasterize Shape to turn the vector shape into pixels. Then hold down the Alt key while clicking on the visibility toggle icon (that’s the eyeball) for the Polygon layer. That will make this the only visible layer. Go to Edit > Define Pattern and name this pattern polygon.

turning the polygon into a pattern

Step 3

Alt-click on the visibility toggle icon for the polygon layer again to reveal all the other layers again. Add a new layer over the Hue/Saturation 1 layer and call it background lines.

adding a new layer

Step 4

Use Edit > Fill again and set the Custom Pattern to the polygon pattern you just created. Also set the Script to Symmetry Fill.

In the Symmetry Fill dialogue box, make the following settings:

  • Symmetry Type: 33 wallpaperP6M symmetry
  • Pattern Scale: 0.4
  • Pattern translation along width: 50% of width
  • Pattern translation along height: 50% of height
  • Color randomness: 0
  • Brightness randomness: 0
symmetry fill settings

Then reduce the layer’s Opacity to 25%.

lower the layer opacity

Step 5

Hide the Polygon layer and grab the Polygon Tool (U) again. Set the Sides to 3 and the Stroke to 4 px. Then draw out a triangle in the center of the canvas.

adding the triangle

Step 6

Hold the Alt key while going to Edit > Free Transform. This will create a new copy of the triangle layer to transform. Rotate the copy by around 20 degrees.

rotating a copy of the triangle

Step 7

Use the Transform Again key combination (Alt-Shift-Control-T) about 18 times to create a Spirograph type of effect at the center of the image.

adding the remaining triangles

Step 8

Select all of the triangle layers in the Layers panel by Shift-clicking the first one and the last one. Then group them all together with Layer > Group Layers (Control-G) and name the group Triangles.

grouping the triangle layers

Step 9

Go to Layer > Layer Mask > Hide All to add a layer mask to the group. Then set the foreground color to white and grab the Gradient Tool (G). Use the Foreground to Transparent preset and the Radial gradient shape. Draw out the gradient at the center of the canvas on the group’s mask to fade the triangle artwork into the human circle.

masking the triangles and then revealing them

Step 10

Use the Crop Tool (C) to crop the image just below the center to complete the effect.

You Are Done!

How did your fun kaleidoscope effect turn out? Share it with us in the comments below. Want to try your hand at some other effects inspired by music videos? Then check out some of the other entries in our Music Video Inspired Effects series.

finished project preview

Discover Beautiful Photoshop Effects

Whether you’re into manipulating photos or searching for that special text effect, I’ve taken the time to put together this short list of assets that will bring your Photoshop game to the next level.

Zombie Photoshop Action

Whether it’s Halloween or not, this professional Photoshop action can help you create some amazing-looking zombie effects in seconds, which you can use to turn yourself or your friends into some really spooky-looking creatures.

zombie photoshop action
Zombie Photoshop Action by Envato Elements

Dispersion Photoshop Action

Looking for a Photoshop action to add a dispersion effect to your photos? Well, look no further since this action will blow your mind by helping you create amazing-looking images in a matter of seconds.

dispersion photoshop action
Dispersion Photoshop Action by Envato Elements

Double Light Photoshop Action

Bring your Photoshop game to the next level by using this amazing double light action, which will add a range of emotions to any photo you use it on.

double light photoshop action
Double Light Photoshop Action by Envato Elements

Expand Your Creativity!

Learn more about creating mirror and reflection effects, here on Envato Tuts+:

How to Create a Dripping Paint Photoshop Effect Action

Post pobrano z: How to Create a Dripping Paint Photoshop Effect Action

Final product image
What You’ll Be Creating

In this tutorial you will learn how to create an amazing, artistic paint drip effect Photoshop action. I will try to explain everything in so much detail that everyone can create it, even those who have just opened Photoshop for the first time.

The effect shown above is the one I will show you how to create in this tutorial. If you would like to create the even more
advanced effect shown below, a sketch with a dripping paint and 3D pop-out effect, using just a single click, then check out my Wet Paint Photoshop Action.

Wet Paint Photoshop Action

Follow along with us over on our Envato Tuts+ YouTube channel:

What You’ll Need

To recreate the design above, you will need the following photo:

1. Let’s Get Started

Step 1

First, open the photo that you want to work with. To open your photo, go to File > Open, choose your photo, and click Open. Now, before we get started, just check a couple of things:

  1. Your photo should be in RGB Color mode, 8 Bits/Channel. To check this, go to Image > Mode.
  2. For best results, your photo size should be 1500–4000 px wide/high. To check this, go to Image > Image Size.
  3. Your photo should be the Background layer. If it is not, go to Layer > New > Background from Layer.
Checking the image size and mode

Step 2

If you are using a different stock photo from mine, you should firstly follow the Unfinished Coloured Pencil Sketch Effect
tutorial to get a sketch effect that is the base for this effect. Then I
suggest that you merge all sketch layers into one layer named Sketch Effect so that it’s easier for you to follow this tutorial. 

If you are using the same stock photo as I do, go to File > Place Embedded, select the Sketch Effect file attached, click Place, and place it so it fits the canvas as shown below:

Placing Sketch Effect

2. How to Create Brushes

Step 1

In this section, we are going to create brushes that we will need for this effect. Go to File > New to create a new file, name it Dripping Brushes, and use the settings below:

Creating a new file

Step 2

Go to Layer > New > Layer to create a new layer and name it Brush_1. Then, while this layer is selected, choose the Pen Tool (P), select the Shape tool mode, set the Fill color to #000000, and draw a dripping shape. If you prefer some other tools for drawing, feel free to use them.

Drawing dripping shape

Step 3

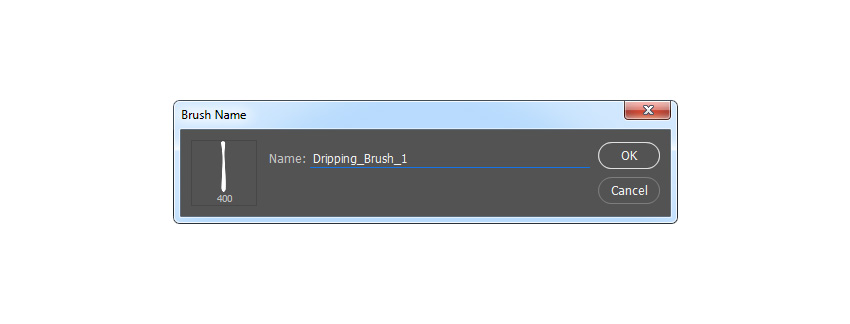
Now go to Edit > Define Brush Preset to define this shape as a brush and name it Dripping_Brush_1.

Defining dripping brush

Step 4

Go to Layer > New > Layer to create a new layer and name it Brush_2. Then, while this layer is selected, draw another dripping shape in the same way and hide the Brush 1 layer.

Drawing dripping shape

Step 5

Now go to Edit > Define Brush Preset to define this shape as a brush and name it Dripping_Brush_2.

Defining dripping brush

Step 6

Go to Layer > New > Layer to create a new layer and name it Brush_3. Then, while this layer is selected, draw another dripping shape in the same way and hide the Brush 2 layer.

Drawing dripping shape

Step 7

Now go to Edit > Define Brush Preset to define this shape as a brush and name it Dripping_Brush_3.

Defining dripping brush

Step 8

Go to Layer > New > Layer to create a new layer and name it Brush_4. Then, while this layer is selected, draw a drop shape in the same way and hide the Brush 3 layer.

Drawing dripping shape

Step 9

Now go to Edit > Define Brush Preset to define this shape as a brush and name it Dripping_Brush_4.

Defining dripping brush

Step 10

Go to Layer > New > Layer to create a new layer and name it Brush_5. Then, while this layer is selected, draw a drop shape in the same way and hide the Brush 4 layer.

Drawing dripping shape

Step 11

Now go to Edit > Define Brush Preset to define this shape as a brush and name it Dripping_Brush_5. After that, you can close the Dripping Brushes file window.

Defining dripping brush

3. How to Create a Painting Effect

Step 1

In this section, we are going to create a painting effect from a specific area of the photo. Go to Layer > New > Layer to create a new layer and name it Painting.

Creating a new layer

Step 2

Now hide the Sketch Effect layer, and while the Painting layer is selected, choose the Brush Tool (B), pick a soft brush, and brush over the areas that you want to turn into a painting.

Brushing over photo

Step 3

Control-click on this layer thumbnail to make a selection of this layer. Then hide this layer, select the Background layer, and press Control-J on your keyboard to create a new layer using a selection. Show the Sketch Effect layer and drag this new layer just above it in the Layers panel.

Creating a new layer using selection

Step 4

Now name this layer Subject, go to Image > Adjustments > Shadows/Highlights, and set the Shadows to 20% and the Highlights to 5% as shown below:

Adjusting shadows and highlights

Step 5

Press Control-J on your keyboard to duplicate this layer, go to Filter > Sharpen > Sharpen, and then go to Filter > Other > High Pass and set the Radius to 2 px as shown below:

Adding high pass filter

Step 6

Go to Filter > Sharpen > Sharpen again and then press Control-Shift-U on your keyboard to desaturate this layer. After that, change this layer blending mode to Soft Light, Control-click on the Subject layer to select both layers at the same time, and press Control-E on your keyboard to merge these two layers into one layer.

Sharpening desaturating and merging-layers

Step 7

Now go to Filter > Sharpen > Unsharp Mask and set the Amount to 100%, Radius to 2.5 px and Threshold to 1 level as shown below:

Adding unsharp mask filter

Step 8

Go to Filter > Stylize > Diffuse and choose Anisotropic Mode as shown below. Then go to Edit > Transform > Rotate 90° clockwise to rotate this layer 90° clockwise.

Adding diffuse filter

Step 9

Now repeat the previous filter again, so go to Filter > Stylize > Diffuse and choose Anisotropic Mode. Then go to Edit > Transform > Rotate 90° clockwise to rotate this layer 90° clockwise once more. After that, go to Filter > Stylize > Diffuse and choose Anisotropic Mode for a last time, and go to Edit > Transform > Rotate 180° to rotate this layer 180° and return it to the original position.

Adding diffuse filter

Step 10

Name this layer Subject, and then go to Filter > Noise > Reduce Noise and use the settings below:

Adding reduce noise filter

Step 11

Now we are going to add a contrast to the Subject layer. Press D on your keyboard to reset the swatches, and then go to Layer > New Adjustment Layer > Gradient Map to create a new gradient map adjustment layer and name it Subject_Contrast.

Creating a gradient map adjustment layer

Step 12

Press Control-Alt-G on your keyboard to create a clipping mask, and then change this layer blending mode to Soft Light and set the Opacity to 35%.

Changing blending mode and opacity

Step 13

Go to Layer > New Adjustment Layer > Hue/Saturation to create a new hue/saturation adjustment layer and name it Subject_Saturation.

Creating huesaturation adjustment layer

Step 14

Press Control-Alt-G on your keyboard to create a clipping mask, and then Double-click on this layer thumbnail, and in the Properties panel enter the settings below:

Adjusting saturation

Step 15

Now go to Layer > New Adjustment Layer > Levels to create a new levels adjustment layer and name it Overall Brightness.

Creating levels adjustment layer

Step 16

Press Control-Alt-G on your keyboard to create a clipping mask, and then Double-click on this layer thumbnail, and in the Properties panel enter the settings below:

Adjusting brightness

Step 17

Now select the Subject layer, and then hold the Alt button on your keyboard and drag this layer just above the Subject_Brightness layer to duplicate this layer and place it on top of the visible layers in the Layers panel. Then go to Filter > Other > High Pass and set the Radius to 5 px as shown below:

Adding high pass filter

Step 18

Press Control-Alt-G on your keyboard to create a clipping mask and then press Control-Shift-U to desaturate this layer. After that, change this layer blending mode to Hard Light and name it Subject_Sharpening.

Creating clipping mask and changing blending mode

4. How to Create the Paint Drops

Step 1

In this section, we are going to create the paint drops using the brushes that we made in the beginning of the tutorial. Go to Layer > New > Layer to create a new layer and name it Paint Drops.

Creating a new layer

Step 2

Now you need to decide where you are going to place the first dripping brush. After that,
using the Eyedropper Tool (I), click on the area of your subject where the drop will start to drip from to set that color as your foreground color, choose the Brush Tool (B), pick some of the dripping brushes, and position them where you want.

Creating paint drop

Step 3

Repeat
the same process to create more paint drops. Keep changing the brushes and brush size to get a diverse effect. Here is my
result:

Creating more paint drops

Step 4

Now go to Layer > Layer Mask > Reveal All to create a blank layer mask. Then press D on your keyboard to reset the swatches and then X to invert them. After that, choose the Brush Tool (B), pick a soft brush, and brush over the top area of paint drops where needed to make them better blend with the subject.

Brushing into layer mask

5. How to Create a Vignette

Step 1

In this section, we are going to create a vignette effect. Go to Layer > New > Layer to create a new layer and name it Vignette.

Creating a new layer

Step 2

Press D on your keyboard to reset the swatches, go to Edit > Fill, and set Contents to Foreground Color, Mode to Normal and Opacity to 100% as shown below:

Filling layer with foreground color

Step 3

Now press Control-A on your keyboard to make a selection of the canvas and go to Layer > Layer Mask > Hide Selection to create a layer mask that hides the selected area of the layer. Then click on the link icon between the layer mask and layer thumbnail to unlink them.

Adding layer mask

Step 4

While the layer mask is selected, press Control-T on your keyboard to transform it, and set Width and Height to 85% as shown below:

Transforming layer mask

Step 5

Now go to Filter > Blur > Gaussian Blur and set Radius to 100 px as shown below:

Adding gaussian blur filter

Step 6

Set the Opacity of this layer to 20%.

Changing opacity of the layer

6. How to Create a Color Look

Step 1

In this section, we are going create a color look. Go to Layer > New Adjustment Layer > Curves to create a new curves adjustment layer and name it Color Look.

Creating curves adjustment layer

Step 2

Now Double-click on this layer thumbnail, and in the Properties panel make the settings below:

Adjusting color look

You Made It!

Congratulations, you have succeeded! Here is our final result:

Final Result

If you would like to create the even more advanced effect as shown below, a sketch with a
dripping paint and 3D pop-out effect, using just a single click, then
check out my Wet Paint Photoshop Action.

Action final result

How to Create a Dripping Paint Photoshop Effect Action

Post pobrano z: How to Create a Dripping Paint Photoshop Effect Action

Final product image
What You’ll Be Creating

In this tutorial you will learn how to create an amazing, artistic paint drip effect Photoshop action. I will try to explain everything in so much detail that everyone can create it, even those who have just opened Photoshop for the first time.

The effect shown above is the one I will show you how to create in this tutorial. If you would like to create the even more
advanced effect shown below, a sketch with a dripping paint and 3D pop-out effect, using just a single click, then check out my Wet Paint Photoshop Action.

Wet Paint Photoshop Action

Follow along with us over on our Envato Tuts+ YouTube channel:

What You’ll Need

To recreate the design above, you will need the following photo:

1. Let’s Get Started

Step 1

First, open the photo that you want to work with. To open your photo, go to File > Open, choose your photo, and click Open. Now, before we get started, just check a couple of things:

  1. Your photo should be in RGB Color mode, 8 Bits/Channel. To check this, go to Image > Mode.
  2. For best results, your photo size should be 1500–4000 px wide/high. To check this, go to Image > Image Size.
  3. Your photo should be the Background layer. If it is not, go to Layer > New > Background from Layer.
Checking the image size and mode

Step 2

If you are using a different stock photo from mine, you should firstly follow the Unfinished Coloured Pencil Sketch Effect
tutorial to get a sketch effect that is the base for this effect. Then I
suggest that you merge all sketch layers into one layer named Sketch Effect so that it’s easier for you to follow this tutorial. 

If you are using the same stock photo as I do, go to File > Place Embedded, select the Sketch Effect file attached, click Place, and place it so it fits the canvas as shown below:

Placing Sketch Effect

2. How to Create Brushes

Step 1

In this section, we are going to create brushes that we will need for this effect. Go to File > New to create a new file, name it Dripping Brushes, and use the settings below:

Creating a new file

Step 2

Go to Layer > New > Layer to create a new layer and name it Brush_1. Then, while this layer is selected, choose the Pen Tool (P), select the Shape tool mode, set the Fill color to #000000, and draw a dripping shape. If you prefer some other tools for drawing, feel free to use them.

Drawing dripping shape

Step 3

Now go to Edit > Define Brush Preset to define this shape as a brush and name it Dripping_Brush_1.

Defining dripping brush

Step 4

Go to Layer > New > Layer to create a new layer and name it Brush_2. Then, while this layer is selected, draw another dripping shape in the same way and hide the Brush 1 layer.

Drawing dripping shape

Step 5

Now go to Edit > Define Brush Preset to define this shape as a brush and name it Dripping_Brush_2.

Defining dripping brush

Step 6

Go to Layer > New > Layer to create a new layer and name it Brush_3. Then, while this layer is selected, draw another dripping shape in the same way and hide the Brush 2 layer.

Drawing dripping shape

Step 7

Now go to Edit > Define Brush Preset to define this shape as a brush and name it Dripping_Brush_3.

Defining dripping brush

Step 8

Go to Layer > New > Layer to create a new layer and name it Brush_4. Then, while this layer is selected, draw a drop shape in the same way and hide the Brush 3 layer.

Drawing dripping shape

Step 9

Now go to Edit > Define Brush Preset to define this shape as a brush and name it Dripping_Brush_4.

Defining dripping brush

Step 10

Go to Layer > New > Layer to create a new layer and name it Brush_5. Then, while this layer is selected, draw a drop shape in the same way and hide the Brush 4 layer.

Drawing dripping shape

Step 11

Now go to Edit > Define Brush Preset to define this shape as a brush and name it Dripping_Brush_5. After that, you can close the Dripping Brushes file window.

Defining dripping brush

3. How to Create a Painting Effect

Step 1

In this section, we are going to create a painting effect from a specific area of the photo. Go to Layer > New > Layer to create a new layer and name it Painting.

Creating a new layer

Step 2

Now hide the Sketch Effect layer, and while the Painting layer is selected, choose the Brush Tool (B), pick a soft brush, and brush over the areas that you want to turn into a painting.

Brushing over photo

Step 3

Control-click on this layer thumbnail to make a selection of this layer. Then hide this layer, select the Background layer, and press Control-J on your keyboard to create a new layer using a selection. Show the Sketch Effect layer and drag this new layer just above it in the Layers panel.

Creating a new layer using selection

Step 4

Now name this layer Subject, go to Image > Adjustments > Shadows/Highlights, and set the Shadows to 20% and the Highlights to 5% as shown below:

Adjusting shadows and highlights

Step 5

Press Control-J on your keyboard to duplicate this layer, go to Filter > Sharpen > Sharpen, and then go to Filter > Other > High Pass and set the Radius to 2 px as shown below:

Adding high pass filter

Step 6

Go to Filter > Sharpen > Sharpen again and then press Control-Shift-U on your keyboard to desaturate this layer. After that, change this layer blending mode to Soft Light, Control-click on the Subject layer to select both layers at the same time, and press Control-E on your keyboard to merge these two layers into one layer.

Sharpening desaturating and merging-layers

Step 7

Now go to Filter > Sharpen > Unsharp Mask and set the Amount to 100%, Radius to 2.5 px and Threshold to 1 level as shown below:

Adding unsharp mask filter

Step 8

Go to Filter > Stylize > Diffuse and choose Anisotropic Mode as shown below. Then go to Edit > Transform > Rotate 90° clockwise to rotate this layer 90° clockwise.

Adding diffuse filter

Step 9

Now repeat the previous filter again, so go to Filter > Stylize > Diffuse and choose Anisotropic Mode. Then go to Edit > Transform > Rotate 90° clockwise to rotate this layer 90° clockwise once more. After that, go to Filter > Stylize > Diffuse and choose Anisotropic Mode for a last time, and go to Edit > Transform > Rotate 180° to rotate this layer 180° and return it to the original position.

Adding diffuse filter

Step 10

Name this layer Subject, and then go to Filter > Noise > Reduce Noise and use the settings below:

Adding reduce noise filter

Step 11

Now we are going to add a contrast to the Subject layer. Press D on your keyboard to reset the swatches, and then go to Layer > New Adjustment Layer > Gradient Map to create a new gradient map adjustment layer and name it Subject_Contrast.

Creating a gradient map adjustment layer

Step 12

Press Control-Alt-G on your keyboard to create a clipping mask, and then change this layer blending mode to Soft Light and set the Opacity to 35%.

Changing blending mode and opacity

Step 13

Go to Layer > New Adjustment Layer > Hue/Saturation to create a new hue/saturation adjustment layer and name it Subject_Saturation.

Creating huesaturation adjustment layer

Step 14

Press Control-Alt-G on your keyboard to create a clipping mask, and then Double-click on this layer thumbnail, and in the Properties panel enter the settings below:

Adjusting saturation

Step 15

Now go to Layer > New Adjustment Layer > Levels to create a new levels adjustment layer and name it Overall Brightness.

Creating levels adjustment layer

Step 16

Press Control-Alt-G on your keyboard to create a clipping mask, and then Double-click on this layer thumbnail, and in the Properties panel enter the settings below:

Adjusting brightness

Step 17

Now select the Subject layer, and then hold the Alt button on your keyboard and drag this layer just above the Subject_Brightness layer to duplicate this layer and place it on top of the visible layers in the Layers panel. Then go to Filter > Other > High Pass and set the Radius to 5 px as shown below:

Adding high pass filter

Step 18

Press Control-Alt-G on your keyboard to create a clipping mask and then press Control-Shift-U to desaturate this layer. After that, change this layer blending mode to Hard Light and name it Subject_Sharpening.

Creating clipping mask and changing blending mode

4. How to Create the Paint Drops

Step 1

In this section, we are going to create the paint drops using the brushes that we made in the beginning of the tutorial. Go to Layer > New > Layer to create a new layer and name it Paint Drops.

Creating a new layer

Step 2

Now you need to decide where you are going to place the first dripping brush. After that,
using the Eyedropper Tool (I), click on the area of your subject where the drop will start to drip from to set that color as your foreground color, choose the Brush Tool (B), pick some of the dripping brushes, and position them where you want.

Creating paint drop

Step 3

Repeat
the same process to create more paint drops. Keep changing the brushes and brush size to get a diverse effect. Here is my
result:

Creating more paint drops

Step 4

Now go to Layer > Layer Mask > Reveal All to create a blank layer mask. Then press D on your keyboard to reset the swatches and then X to invert them. After that, choose the Brush Tool (B), pick a soft brush, and brush over the top area of paint drops where needed to make them better blend with the subject.

Brushing into layer mask

5. How to Create a Vignette

Step 1

In this section, we are going to create a vignette effect. Go to Layer > New > Layer to create a new layer and name it Vignette.

Creating a new layer

Step 2

Press D on your keyboard to reset the swatches, go to Edit > Fill, and set Contents to Foreground Color, Mode to Normal and Opacity to 100% as shown below:

Filling layer with foreground color

Step 3

Now press Control-A on your keyboard to make a selection of the canvas and go to Layer > Layer Mask > Hide Selection to create a layer mask that hides the selected area of the layer. Then click on the link icon between the layer mask and layer thumbnail to unlink them.

Adding layer mask

Step 4

While the layer mask is selected, press Control-T on your keyboard to transform it, and set Width and Height to 85% as shown below:

Transforming layer mask

Step 5

Now go to Filter > Blur > Gaussian Blur and set Radius to 100 px as shown below:

Adding gaussian blur filter

Step 6

Set the Opacity of this layer to 20%.

Changing opacity of the layer

6. How to Create a Color Look

Step 1

In this section, we are going create a color look. Go to Layer > New Adjustment Layer > Curves to create a new curves adjustment layer and name it Color Look.

Creating curves adjustment layer

Step 2

Now Double-click on this layer thumbnail, and in the Properties panel make the settings below:

Adjusting color look

You Made It!

Congratulations, you have succeeded! Here is our final result:

Final Result

If you would like to create the even more advanced effect as shown below, a sketch with a
dripping paint and 3D pop-out effect, using just a single click, then
check out my Wet Paint Photoshop Action.

Action final result

How to Create a Dripping Paint Photoshop Effect Action

Post pobrano z: How to Create a Dripping Paint Photoshop Effect Action

Final product image
What You’ll Be Creating

In this tutorial you will learn how to create an amazing, artistic paint drip effect Photoshop action. I will try to explain everything in so much detail that everyone can create it, even those who have just opened Photoshop for the first time.

The effect shown above is the one I will show you how to create in this tutorial. If you would like to create the even more
advanced effect shown below, a sketch with a dripping paint and 3D pop-out effect, using just a single click, then check out my Wet Paint Photoshop Action.

Wet Paint Photoshop Action

Follow along with us over on our Envato Tuts+ YouTube channel:

What You’ll Need

To recreate the design above, you will need the following photo:

1. Let’s Get Started

Step 1

First, open the photo that you want to work with. To open your photo, go to File > Open, choose your photo, and click Open. Now, before we get started, just check a couple of things:

  1. Your photo should be in RGB Color mode, 8 Bits/Channel. To check this, go to Image > Mode.
  2. For best results, your photo size should be 1500–4000 px wide/high. To check this, go to Image > Image Size.
  3. Your photo should be the Background layer. If it is not, go to Layer > New > Background from Layer.
Checking the image size and mode

Step 2

If you are using a different stock photo from mine, you should firstly follow the Unfinished Coloured Pencil Sketch Effect
tutorial to get a sketch effect that is the base for this effect. Then I
suggest that you merge all sketch layers into one layer named Sketch Effect so that it’s easier for you to follow this tutorial. 

If you are using the same stock photo as I do, go to File > Place Embedded, select the Sketch Effect file attached, click Place, and place it so it fits the canvas as shown below:

Placing Sketch Effect

2. How to Create Brushes

Step 1

In this section, we are going to create brushes that we will need for this effect. Go to File > New to create a new file, name it Dripping Brushes, and use the settings below:

Creating a new file

Step 2

Go to Layer > New > Layer to create a new layer and name it Brush_1. Then, while this layer is selected, choose the Pen Tool (P), select the Shape tool mode, set the Fill color to #000000, and draw a dripping shape. If you prefer some other tools for drawing, feel free to use them.

Drawing dripping shape

Step 3

Now go to Edit > Define Brush Preset to define this shape as a brush and name it Dripping_Brush_1.

Defining dripping brush

Step 4

Go to Layer > New > Layer to create a new layer and name it Brush_2. Then, while this layer is selected, draw another dripping shape in the same way and hide the Brush 1 layer.

Drawing dripping shape

Step 5

Now go to Edit > Define Brush Preset to define this shape as a brush and name it Dripping_Brush_2.

Defining dripping brush

Step 6

Go to Layer > New > Layer to create a new layer and name it Brush_3. Then, while this layer is selected, draw another dripping shape in the same way and hide the Brush 2 layer.

Drawing dripping shape

Step 7

Now go to Edit > Define Brush Preset to define this shape as a brush and name it Dripping_Brush_3.

Defining dripping brush

Step 8

Go to Layer > New > Layer to create a new layer and name it Brush_4. Then, while this layer is selected, draw a drop shape in the same way and hide the Brush 3 layer.

Drawing dripping shape

Step 9

Now go to Edit > Define Brush Preset to define this shape as a brush and name it Dripping_Brush_4.

Defining dripping brush

Step 10

Go to Layer > New > Layer to create a new layer and name it Brush_5. Then, while this layer is selected, draw a drop shape in the same way and hide the Brush 4 layer.

Drawing dripping shape

Step 11

Now go to Edit > Define Brush Preset to define this shape as a brush and name it Dripping_Brush_5. After that, you can close the Dripping Brushes file window.

Defining dripping brush

3. How to Create a Painting Effect

Step 1

In this section, we are going to create a painting effect from a specific area of the photo. Go to Layer > New > Layer to create a new layer and name it Painting.

Creating a new layer

Step 2

Now hide the Sketch Effect layer, and while the Painting layer is selected, choose the Brush Tool (B), pick a soft brush, and brush over the areas that you want to turn into a painting.

Brushing over photo

Step 3

Control-click on this layer thumbnail to make a selection of this layer. Then hide this layer, select the Background layer, and press Control-J on your keyboard to create a new layer using a selection. Show the Sketch Effect layer and drag this new layer just above it in the Layers panel.

Creating a new layer using selection

Step 4

Now name this layer Subject, go to Image > Adjustments > Shadows/Highlights, and set the Shadows to 20% and the Highlights to 5% as shown below:

Adjusting shadows and highlights

Step 5

Press Control-J on your keyboard to duplicate this layer, go to Filter > Sharpen > Sharpen, and then go to Filter > Other > High Pass and set the Radius to 2 px as shown below:

Adding high pass filter

Step 6

Go to Filter > Sharpen > Sharpen again and then press Control-Shift-U on your keyboard to desaturate this layer. After that, change this layer blending mode to Soft Light, Control-click on the Subject layer to select both layers at the same time, and press Control-E on your keyboard to merge these two layers into one layer.

Sharpening desaturating and merging-layers

Step 7

Now go to Filter > Sharpen > Unsharp Mask and set the Amount to 100%, Radius to 2.5 px and Threshold to 1 level as shown below:

Adding unsharp mask filter

Step 8

Go to Filter > Stylize > Diffuse and choose Anisotropic Mode as shown below. Then go to Edit > Transform > Rotate 90° clockwise to rotate this layer 90° clockwise.

Adding diffuse filter

Step 9

Now repeat the previous filter again, so go to Filter > Stylize > Diffuse and choose Anisotropic Mode. Then go to Edit > Transform > Rotate 90° clockwise to rotate this layer 90° clockwise once more. After that, go to Filter > Stylize > Diffuse and choose Anisotropic Mode for a last time, and go to Edit > Transform > Rotate 180° to rotate this layer 180° and return it to the original position.

Adding diffuse filter

Step 10

Name this layer Subject, and then go to Filter > Noise > Reduce Noise and use the settings below:

Adding reduce noise filter

Step 11

Now we are going to add a contrast to the Subject layer. Press D on your keyboard to reset the swatches, and then go to Layer > New Adjustment Layer > Gradient Map to create a new gradient map adjustment layer and name it Subject_Contrast.

Creating a gradient map adjustment layer

Step 12

Press Control-Alt-G on your keyboard to create a clipping mask, and then change this layer blending mode to Soft Light and set the Opacity to 35%.

Changing blending mode and opacity

Step 13

Go to Layer > New Adjustment Layer > Hue/Saturation to create a new hue/saturation adjustment layer and name it Subject_Saturation.

Creating huesaturation adjustment layer

Step 14

Press Control-Alt-G on your keyboard to create a clipping mask, and then Double-click on this layer thumbnail, and in the Properties panel enter the settings below:

Adjusting saturation

Step 15

Now go to Layer > New Adjustment Layer > Levels to create a new levels adjustment layer and name it Overall Brightness.

Creating levels adjustment layer

Step 16

Press Control-Alt-G on your keyboard to create a clipping mask, and then Double-click on this layer thumbnail, and in the Properties panel enter the settings below:

Adjusting brightness

Step 17

Now select the Subject layer, and then hold the Alt button on your keyboard and drag this layer just above the Subject_Brightness layer to duplicate this layer and place it on top of the visible layers in the Layers panel. Then go to Filter > Other > High Pass and set the Radius to 5 px as shown below:

Adding high pass filter

Step 18

Press Control-Alt-G on your keyboard to create a clipping mask and then press Control-Shift-U to desaturate this layer. After that, change this layer blending mode to Hard Light and name it Subject_Sharpening.

Creating clipping mask and changing blending mode

4. How to Create the Paint Drops

Step 1

In this section, we are going to create the paint drops using the brushes that we made in the beginning of the tutorial. Go to Layer > New > Layer to create a new layer and name it Paint Drops.

Creating a new layer

Step 2

Now you need to decide where you are going to place the first dripping brush. After that,
using the Eyedropper Tool (I), click on the area of your subject where the drop will start to drip from to set that color as your foreground color, choose the Brush Tool (B), pick some of the dripping brushes, and position them where you want.

Creating paint drop

Step 3

Repeat
the same process to create more paint drops. Keep changing the brushes and brush size to get a diverse effect. Here is my
result:

Creating more paint drops

Step 4

Now go to Layer > Layer Mask > Reveal All to create a blank layer mask. Then press D on your keyboard to reset the swatches and then X to invert them. After that, choose the Brush Tool (B), pick a soft brush, and brush over the top area of paint drops where needed to make them better blend with the subject.

Brushing into layer mask

5. How to Create a Vignette

Step 1

In this section, we are going to create a vignette effect. Go to Layer > New > Layer to create a new layer and name it Vignette.

Creating a new layer

Step 2

Press D on your keyboard to reset the swatches, go to Edit > Fill, and set Contents to Foreground Color, Mode to Normal and Opacity to 100% as shown below:

Filling layer with foreground color

Step 3

Now press Control-A on your keyboard to make a selection of the canvas and go to Layer > Layer Mask > Hide Selection to create a layer mask that hides the selected area of the layer. Then click on the link icon between the layer mask and layer thumbnail to unlink them.

Adding layer mask

Step 4

While the layer mask is selected, press Control-T on your keyboard to transform it, and set Width and Height to 85% as shown below:

Transforming layer mask

Step 5

Now go to Filter > Blur > Gaussian Blur and set Radius to 100 px as shown below:

Adding gaussian blur filter

Step 6

Set the Opacity of this layer to 20%.

Changing opacity of the layer

6. How to Create a Color Look

Step 1

In this section, we are going create a color look. Go to Layer > New Adjustment Layer > Curves to create a new curves adjustment layer and name it Color Look.

Creating curves adjustment layer

Step 2

Now Double-click on this layer thumbnail, and in the Properties panel make the settings below:

Adjusting color look

You Made It!

Congratulations, you have succeeded! Here is our final result:

Final Result

If you would like to create the even more advanced effect as shown below, a sketch with a
dripping paint and 3D pop-out effect, using just a single click, then
check out my Wet Paint Photoshop Action.

Action final result

21 Awesome Funny T-Shirt Designs (And How to Make Your Own)

Post pobrano z: 21 Awesome Funny T-Shirt Designs (And How to Make Your Own)

Laughter is the best medicine, they say. If you think so too and are looking to create your own line of witty T-shirts but don’t know how to create T-shirt designs, let me introduce you to the Placeit T-shirt design maker. You’ll also discover 21 awesome T-shirt designs you can make with it that are guaranteed to tickle everyone’s funny bone. 

21 Awesome Funny T-Shirt Designs
Awesome Funny T-Shirt Designs from Placeit

Make Your Own T-Shirt Design

If you don’t know how to make T-shirt designs, here is a quick guide to get you started with the T-shirt design maker at Placeit. 

1. Navigate to Placeit’s T-Shirt Design Maker Page

Navigate to Placeits T-Shirt Design Maker Page

2. Select a Funny T-Shirt Design

Select a Family T-Shirt Design You Like

3. Start With the Controls on the Right 

When you find a design you like, click on it and the T-shirt design maker will open up. Starting on the right of the T-shirt design maker, add your text and/or change your font and its colour.

Starting With the Controls On The Right

4. Move to the Controls on the Left

Using the controls on the left of the T-shirt design maker, change the background of your T-shirt design to match the proposed colour of your T-shirt, and swap out the original for any other you prefer. 

Move to the Controls on the Left

If you get stuck or need new ideas, check out the set of presets found under every design, which offer you other options.

Check out the set of presets found under every design

5. Download Your Funny T-Shirt Design 

And just like that, you can easily make your own T-shirt design online, which you can download to send off to your T-shirt printer. 

Download Your Funny T Shirt Design

21 Awesome Funny T-Shirt Designs

1. Patriotic T-Shirt Design Template With a United Kingdom Map Illustration

Patriotic T-Shirt Design Template with a United Kingdom Map Illustration

If you’re British or just a lover of all things British, you’ll love this awesome T-shirt design, but get this, if you’re not British, but from India, Italy, Australia or somewhere else entirely, you can customise the map with your country’s shape and colours to reflect your patriotic zeal. 

2. T-Shirt Design Generator Featuring a Spaceship

T-Shirt Design Generator Featuring a Spaceship

If you’re a sci-fi buff, then this cool T-shirt design with a spaceship beaming up an old black and white TV might appeal to you. If you can think of a better caption, or like the design but not the colour, no worries. Just use the T-shirt design maker to design your shirt just the way you like it. 

3. Pride Tee Design Maker for Pride Parades

Pride Tee Design Maker for Pride Parades

If you’re looking for a funny T-shirt design with a pride angle, you’ll love this template with its lighthearted and playful graphics and fonts. Use as is or swap out the graphics, add your own text, and change the fonts and colours. 

4. Illustrated Dachshund Dog With Heart-Shape Glasses T-Shirt Design Maker

Illustrated Dachshund Dog with Heart-Shape Glasses T-Shirt Design Maker

This awesome T-shirt design is all about the cool dog, and there are plenty more equally funny and eye-catching pooches to choose from if this one doesn’t appeal. Just review the selection and click on the image that you prefer to see if it works for you. 

5. Pure Luck T-Shirt Design Creator for Cat Lovers

Pure Luck T-Shirt Design Creator for Cat Lovers

If cats are your thing then this template, the feline version of the canine one above, may just be your cup of tea. Again, there are many amazing versions to choose from, so take a look and try them all to see which appeals the most. 

6. T-Shirt Design Generator With a Serious-Looking Kitten Doodle

T-Shirt Design Generator with a Serious-Looking Kitten Doodle

More T-shirt design ideas for cat lovers. This template uses a looser, more casual drawing style and font, while the text plays with the reputation cats have of being aloof. Customise your design by using the T-shirt design maker to change the colours, fonts, and graphics.

7. T-Shirt Maker for Cute Designs

T-Shirt Maker for Cute Designs

This template is all about the text and the gorgeous, textured backgrounds. Use as is or come up with your own funny caption, changing the text and the font as you wish. Then add any of the luscious background textures on offer.

8. T-Shirt Design Template Featuring a Downward Facing Dog

T-Shirt Design Template Featuring a Downward Facing Dog

Yoga lovers, this one is for you. You can design your own tee shirt with an ever so cute and ever so funny, yoga-performing dog. Use one of the presets that come with the template and change up the colour and text if you like, or customise the design completely by selecting one of the dogs performing any number of yoga positions and adding your own text. 

9. Funny T-Shirt Design Template Featuring a Blanket Ghost Trick-or-Treating

Funny T-Shirt Design Template Featuring a Blanket Ghost Trick-or-Treating

This template offers a plethora of T-shirt design ideas for Halloween. The graphics available with the template couldn’t any spookier, with vampires, witches, Frankenstein and a bloodthirsty Elvis as just a few examples of the offerings.

10. T-Shirt Maker With a Sassy Cat Illustration

T-Shirt Maker with a Sassy Cat Illustration

Another play on the aloof nature of cats, this funny T-shirt design offers a number of gorgeous drawings of cats to which you can add your own twist.

11. T-Shirt Design Template With an Exotic Cat Illustration

T-Shirt Design Template with an Exotic Cat Illustration

Okay, so this cat does look a bit ferocious, but the drawing pairs really well with the caption, right? If you’re not convinced, don’t worry—there are plenty more drawings to choose from and lots of gorgeous presets with different text and animal pairings to keep you happy. 

12. T-Shirt Design Template Featuring a Zombie Executive

T-Shirt Design Template Featuring a Zombie Executive

A T-shirt design that’s great for Halloween—or any time of the year, for that matter. This template offers loads of customisation for the lovers of horror. 

13. Sci-Fi T-Shirt Design Template

Sci-Fi T-Shirt Design Template

More T-shirt design ideas for horror lovers. This one combines horror with sci-fi in a number of truly wonderful graphics that reference Hollywood classics like Alien, E.T., and The Matrix.

14. Negative Space Typography T-Shirt Template for Graphic Tees

Negative Space Typography T-shirt Template for Graphic Tees

Bold text and a grungy background make a powerful and eye-catching pairing. Use as is or use the T-shirt design maker to modify the font, change the backgrounds and colours, or create your own unique text. 

15. Valentine’s T-Shirt Design Generator With Bacon and Egg Graphic

Valentines T-Shirt Design Generator with Bacon and Egg Graphic

A fun and playful way to comment on love, this template offers graphics with as many clever pairings as you can stand: Netflix and pizza, milk and cookies, beer and nachos. Pick your poison. 

16. T-Shirt Design Generator for Valentine’s Day

T-Shirt Design Generator for Valentines Day

And just to show you how the previous design can be customised to lend your own spin to the same basic idea, here’s a clever variation. It uses a coffee and donut graphic, different colours, and a new font with slightly different text. The recombinations are endless. 

17. Illustrated T-Shirt Design Maker Featuring a Grumpy Cat by a Rainy Window

Illustrated T-Shirt Design Maker Featuring a Grumpy Cat by a Rainy Window

Okay, so we have a soft spot for cats, but don’t get as grumpy as the pink fella above—we have room in our hearts for dogs as well. That’s why we’re showing you this template. It has loads of sweet dog illustrations that you can use to replace oh grumpy one here.

18. T-Shirt Design Templates With Vintage Memes

 T-Shirt Design Templates with Vintage Memes

Vintage all the way here. Use the T-shirt design maker to design your T-shirt in vintage style. It takes no time at all, and you can change every aspect of this design to truly make it your own. 

19. Father’s Day T-Shirt Design Template With Dinosaur Clipart

Fathers Day T-Shirt Design Template with Dinosaur Clipart

Dinosaurs are cute, especially when they’re in 2D form. This kid-friendly template is the perfect choice for those who want to help their kids create a T-shirt for whatever occasion. As is the case with other templates here, customisation is easy peasy.

20. Alien Illustration T-Shirt Design Template

Alien Illustration T-Shirt Design Template

Another somewhat scary sci-fi horror combo template. This one suggests that behind every alien there’s really a cat. Could be a fair point. Use the template as is or modify it as much or as little as you like. 

21. Illustrated T-Shirt Design Maker Featuring a Dog Wearing a Raincoat

Illustrated T-Shirt Design Maker Featuring a Dog Wearing a Raincoat

We thought it only fair we should end our funny T-shirt designs with a dog, and a rather adorable drawing of one at that. The template offers a plethora of other great drawings, so take a look and choose the one that appeals most. Then customise the template as much as you like.

Create Your Own Funny T-Shirt Design Online Today

We hope you’ve found a bunch of T-shirt design ideas you can use and you are excited about using the T-shirt design maker to create your own T-shirt design online. Get to work creating your own unique design and share it with us in the comments below. 

And remember, these 21 funny T-shirt designs are only a fraction of the awesome designs available at Placeit, so if you haven’t found exactly what you need here, head on over to the site and browse the large collection of t-shirt designs to be found there. 

If you’re interested in other kinds of designs and mockups, here are some great suggestions for you: