Archiwum kategorii: Web Tools

21 Awesome Funny T-Shirt Designs (And How to Make Your Own)

Post pobrano z: 21 Awesome Funny T-Shirt Designs (And How to Make Your Own)

Laughter is the best medicine, they say. If you think so too and are looking to create your own line of witty T-shirts but don’t know how to create T-shirt designs, let me introduce you to the Placeit T-shirt design maker. You’ll also discover 21 awesome T-shirt designs you can make with it that are guaranteed to tickle everyone’s funny bone. 

21 Awesome Funny T-Shirt Designs
Awesome Funny T-Shirt Designs from Placeit

Make Your Own T-Shirt Design

If you don’t know how to make T-shirt designs, here is a quick guide to get you started with the T-shirt design maker at Placeit. 

1. Navigate to Placeit’s T-Shirt Design Maker Page

Navigate to Placeits T-Shirt Design Maker Page

2. Select a Funny T-Shirt Design

Select a Family T-Shirt Design You Like

3. Start With the Controls on the Right 

When you find a design you like, click on it and the T-shirt design maker will open up. Starting on the right of the T-shirt design maker, add your text and/or change your font and its colour.

Starting With the Controls On The Right

4. Move to the Controls on the Left

Using the controls on the left of the T-shirt design maker, change the background of your T-shirt design to match the proposed colour of your T-shirt, and swap out the original for any other you prefer. 

Move to the Controls on the Left

If you get stuck or need new ideas, check out the set of presets found under every design, which offer you other options.

Check out the set of presets found under every design

5. Download Your Funny T-Shirt Design 

And just like that, you can easily make your own T-shirt design online, which you can download to send off to your T-shirt printer. 

Download Your Funny T Shirt Design

21 Awesome Funny T-Shirt Designs

1. Patriotic T-Shirt Design Template With a United Kingdom Map Illustration

Patriotic T-Shirt Design Template with a United Kingdom Map Illustration

If you’re British or just a lover of all things British, you’ll love this awesome T-shirt design, but get this, if you’re not British, but from India, Italy, Australia or somewhere else entirely, you can customise the map with your country’s shape and colours to reflect your patriotic zeal. 

2. T-Shirt Design Generator Featuring a Spaceship

T-Shirt Design Generator Featuring a Spaceship

If you’re a sci-fi buff, then this cool T-shirt design with a spaceship beaming up an old black and white TV might appeal to you. If you can think of a better caption, or like the design but not the colour, no worries. Just use the T-shirt design maker to design your shirt just the way you like it. 

3. Pride Tee Design Maker for Pride Parades

Pride Tee Design Maker for Pride Parades

If you’re looking for a funny T-shirt design with a pride angle, you’ll love this template with its lighthearted and playful graphics and fonts. Use as is or swap out the graphics, add your own text, and change the fonts and colours. 

4. Illustrated Dachshund Dog With Heart-Shape Glasses T-Shirt Design Maker

Illustrated Dachshund Dog with Heart-Shape Glasses T-Shirt Design Maker

This awesome T-shirt design is all about the cool dog, and there are plenty more equally funny and eye-catching pooches to choose from if this one doesn’t appeal. Just review the selection and click on the image that you prefer to see if it works for you. 

5. Pure Luck T-Shirt Design Creator for Cat Lovers

Pure Luck T-Shirt Design Creator for Cat Lovers

If cats are your thing then this template, the feline version of the canine one above, may just be your cup of tea. Again, there are many amazing versions to choose from, so take a look and try them all to see which appeals the most. 

6. T-Shirt Design Generator With a Serious-Looking Kitten Doodle

T-Shirt Design Generator with a Serious-Looking Kitten Doodle

More T-shirt design ideas for cat lovers. This template uses a looser, more casual drawing style and font, while the text plays with the reputation cats have of being aloof. Customise your design by using the T-shirt design maker to change the colours, fonts, and graphics.

7. T-Shirt Maker for Cute Designs

T-Shirt Maker for Cute Designs

This template is all about the text and the gorgeous, textured backgrounds. Use as is or come up with your own funny caption, changing the text and the font as you wish. Then add any of the luscious background textures on offer.

8. T-Shirt Design Template Featuring a Downward Facing Dog

T-Shirt Design Template Featuring a Downward Facing Dog

Yoga lovers, this one is for you. You can design your own tee shirt with an ever so cute and ever so funny, yoga-performing dog. Use one of the presets that come with the template and change up the colour and text if you like, or customise the design completely by selecting one of the dogs performing any number of yoga positions and adding your own text. 

9. Funny T-Shirt Design Template Featuring a Blanket Ghost Trick-or-Treating

Funny T-Shirt Design Template Featuring a Blanket Ghost Trick-or-Treating

This template offers a plethora of T-shirt design ideas for Halloween. The graphics available with the template couldn’t any spookier, with vampires, witches, Frankenstein and a bloodthirsty Elvis as just a few examples of the offerings.

10. T-Shirt Maker With a Sassy Cat Illustration

T-Shirt Maker with a Sassy Cat Illustration

Another play on the aloof nature of cats, this funny T-shirt design offers a number of gorgeous drawings of cats to which you can add your own twist.

11. T-Shirt Design Template With an Exotic Cat Illustration

T-Shirt Design Template with an Exotic Cat Illustration

Okay, so this cat does look a bit ferocious, but the drawing pairs really well with the caption, right? If you’re not convinced, don’t worry—there are plenty more drawings to choose from and lots of gorgeous presets with different text and animal pairings to keep you happy. 

12. T-Shirt Design Template Featuring a Zombie Executive

T-Shirt Design Template Featuring a Zombie Executive

A T-shirt design that’s great for Halloween—or any time of the year, for that matter. This template offers loads of customisation for the lovers of horror. 

13. Sci-Fi T-Shirt Design Template

Sci-Fi T-Shirt Design Template

More T-shirt design ideas for horror lovers. This one combines horror with sci-fi in a number of truly wonderful graphics that reference Hollywood classics like Alien, E.T., and The Matrix.

14. Negative Space Typography T-Shirt Template for Graphic Tees

Negative Space Typography T-shirt Template for Graphic Tees

Bold text and a grungy background make a powerful and eye-catching pairing. Use as is or use the T-shirt design maker to modify the font, change the backgrounds and colours, or create your own unique text. 

15. Valentine’s T-Shirt Design Generator With Bacon and Egg Graphic

Valentines T-Shirt Design Generator with Bacon and Egg Graphic

A fun and playful way to comment on love, this template offers graphics with as many clever pairings as you can stand: Netflix and pizza, milk and cookies, beer and nachos. Pick your poison. 

16. T-Shirt Design Generator for Valentine’s Day

T-Shirt Design Generator for Valentines Day

And just to show you how the previous design can be customised to lend your own spin to the same basic idea, here’s a clever variation. It uses a coffee and donut graphic, different colours, and a new font with slightly different text. The recombinations are endless. 

17. Illustrated T-Shirt Design Maker Featuring a Grumpy Cat by a Rainy Window

Illustrated T-Shirt Design Maker Featuring a Grumpy Cat by a Rainy Window

Okay, so we have a soft spot for cats, but don’t get as grumpy as the pink fella above—we have room in our hearts for dogs as well. That’s why we’re showing you this template. It has loads of sweet dog illustrations that you can use to replace oh grumpy one here.

18. T-Shirt Design Templates With Vintage Memes

 T-Shirt Design Templates with Vintage Memes

Vintage all the way here. Use the T-shirt design maker to design your T-shirt in vintage style. It takes no time at all, and you can change every aspect of this design to truly make it your own. 

19. Father’s Day T-Shirt Design Template With Dinosaur Clipart

Fathers Day T-Shirt Design Template with Dinosaur Clipart

Dinosaurs are cute, especially when they’re in 2D form. This kid-friendly template is the perfect choice for those who want to help their kids create a T-shirt for whatever occasion. As is the case with other templates here, customisation is easy peasy.

20. Alien Illustration T-Shirt Design Template

Alien Illustration T-Shirt Design Template

Another somewhat scary sci-fi horror combo template. This one suggests that behind every alien there’s really a cat. Could be a fair point. Use the template as is or modify it as much or as little as you like. 

21. Illustrated T-Shirt Design Maker Featuring a Dog Wearing a Raincoat

Illustrated T-Shirt Design Maker Featuring a Dog Wearing a Raincoat

We thought it only fair we should end our funny T-shirt designs with a dog, and a rather adorable drawing of one at that. The template offers a plethora of other great drawings, so take a look and choose the one that appeals most. Then customise the template as much as you like.

Create Your Own Funny T-Shirt Design Online Today

We hope you’ve found a bunch of T-shirt design ideas you can use and you are excited about using the T-shirt design maker to create your own T-shirt design online. Get to work creating your own unique design and share it with us in the comments below. 

And remember, these 21 funny T-shirt designs are only a fraction of the awesome designs available at Placeit, so if you haven’t found exactly what you need here, head on over to the site and browse the large collection of t-shirt designs to be found there. 

If you’re interested in other kinds of designs and mockups, here are some great suggestions for you:

21 Awesome Funny T-Shirt Designs (And How to Make Your Own)

Post pobrano z: 21 Awesome Funny T-Shirt Designs (And How to Make Your Own)

Laughter is the best medicine, they say. If you think so too and are looking to create your own line of witty T-shirts but don’t know how to create T-shirt designs, let me introduce you to the Placeit T-shirt design maker. You’ll also discover 21 awesome T-shirt designs you can make with it that are guaranteed to tickle everyone’s funny bone. 

21 Awesome Funny T-Shirt Designs
Awesome Funny T-Shirt Designs from Placeit

Make Your Own T-Shirt Design
If you don’t know how to make T-shirt designs, here is a quick guide to get you started with the T-shirt design maker at Placeit. 

1. Navigate to Placeit’s T-Shirt Design Maker Page

Navigate to Placeits T-Shirt Design Maker Page

2. Select a Funny T-Shirt Design

Select a Family T-Shirt Design You Like

3. Start With the Controls on the Right 

When you find a design you like, click on it and the T-shirt design maker will open up. Starting on the right of the T-shirt design maker, add your text and/or change your font and its colour.

Starting With the Controls On The Right

4. Move to the Controls on the Left

Using the controls on the left of the T-shirt design maker, change the background of your T-shirt design to match the proposed colour of your T-shirt, and swap out the original for any other you prefer. 

Move to the Controls on the Left

If you get stuck or need new ideas, check out the set of presets found under every design, which offer you other options.

Check out the set of presets found under every design

5. Download Your Funny T-Shirt Design 

And just like that, you can easily make your own T-shirt design online, which you can download to send off to your T-shirt printer. 

Download Your Funny T Shirt Design

21 Awesome Funny T-Shirt Designs

1. Patriotic T-Shirt Design Template With a United Kingdom Map Illustration

Patriotic T-Shirt Design Template with a United Kingdom Map Illustration

If you’re British or just a lover of all things British, you’ll love this awesome T-shirt design, but get this, if you’re not British, but from India, Italy, Australia or somewhere else entirely, you can customise the map with your country’s shape and colours to reflect your patriotic zeal. 

2. T-Shirt Design Generator Featuring a Spaceship

T-Shirt Design Generator Featuring a Spaceship

If you’re a sci-fi buff, then this cool T-shirt design with a spaceship beaming up an old black and white TV might appeal to you. If you can think of a better caption, or like the design but not the colour, no worries. Just use the T-shirt design maker to design your shirt just the way you like it. 

3. Pride Tee Design Maker for Pride Parades

Pride Tee Design Maker for Pride Parades

If you’re looking for a funny T-shirt design with a pride angle, you’ll love this template with its lighthearted and playful graphics and fonts. Use as is or swap out the graphics, add your own text, and change the fonts and colours. 

4. Illustrated Dachshund Dog With Heart-Shape Glasses T-Shirt Design Maker

Illustrated Dachshund Dog with Heart-Shape Glasses T-Shirt Design Maker

This awesome T-shirt design is all about the cool dog, and there are plenty more equally funny and eye-catching pooches to choose from if this one doesn’t appeal. Just review the selection and click on the image that you prefer to see if it works for you. 

5. Pure Luck T-Shirt Design Creator for Cat Lovers

Pure Luck T-Shirt Design Creator for Cat Lovers

If cats are your thing then this template, the feline version of the canine one above, may just be your cup of tea. Again, there are many amazing versions to choose from, so take a look and try them all to see which appeals the most. 

6. T-Shirt Design Generator With a Serious-Looking Kitten Doodle

T-Shirt Design Generator with a Serious-Looking Kitten Doodle

More T-shirt design ideas for cat lovers. This template uses a looser, more casual drawing style and font, while the text plays with the reputation cats have of being aloof. Customise your design by using the T-shirt design maker to change the colours, fonts, and graphics.

7. T-Shirt Maker for Cute Designs

T-Shirt Maker for Cute Designs

This template is all about the text and the gorgeous, textured backgrounds. Use as is or come up with your own funny caption, changing the text and the font as you wish. Then add any of the luscious background textures on offer.

8. T-Shirt Design Template Featuring a Downward Facing Dog

T-Shirt Design Template Featuring a Downward Facing Dog

Yoga lovers, this one is for you. You can design your own tee shirt with an ever so cute and ever so funny, yoga-performing dog. Use one of the presets that come with the template and change up the colour and text if you like, or customise the design completely by selecting one of the dogs performing any number of yoga positions and adding your own text. 

9. Funny T-Shirt Design Template Featuring a Blanket Ghost Trick-or-Treating

Funny T-Shirt Design Template Featuring a Blanket Ghost Trick-or-Treating

This template offers a plethora of T-shirt design ideas for Halloween. The graphics available with the template couldn’t any spookier, with vampires, witches, Frankenstein and a bloodthirsty Elvis as just a few examples of the offerings.

10. T-Shirt Maker With a Sassy Cat Illustration

T-Shirt Maker with a Sassy Cat Illustration

Another play on the aloof nature of cats, this funny T-shirt design offers a number of gorgeous drawings of cats to which you can add your own twist.

11. T-Shirt Design Template With an Exotic Cat Illustration

T-Shirt Design Template with an Exotic Cat Illustration

Okay, so this cat does look a bit ferocious, but the drawing pairs really well with the caption, right? If you’re not convinced, don’t worry—there are plenty more drawings to choose from and lots of gorgeous presets with different text and animal pairings to keep you happy. 

12. T-Shirt Design Template Featuring a Zombie Executive

T-Shirt Design Template Featuring a Zombie Executive

A T-shirt design that’s great for Halloween—or any time of the year, for that matter. This template offers loads of customisation for the lovers of horror. 

13. Sci-Fi T-Shirt Design Template

Sci-Fi T-Shirt Design Template

More T-shirt design ideas for horror lovers. This one combines horror with sci-fi in a number of truly wonderful graphics that reference Hollywood classics like Alien, E.T., and The Matrix.

14. Negative Space Typography T-Shirt Template for Graphic Tees

Negative Space Typography T-shirt Template for Graphic Tees

Bold text and a grungy background make a powerful and eye-catching pairing. Use as is or use the T-shirt design maker to modify the font, change the backgrounds and colours, or create your own unique text. 

15. Valentine’s T-Shirt Design Generator With Bacon and Egg Graphic

Valentines T-Shirt Design Generator with Bacon and Egg Graphic

A fun and playful way to comment on love, this template offers graphics with as many clever pairings as you can stand: Netflix and pizza, milk and cookies, beer and nachos. Pick your poison. 

16. T-Shirt Design Generator for Valentine’s Day

T-Shirt Design Generator for Valentines Day

And just to show you how the previous design can be customised to lend your own spin to the same basic idea, here’s a clever variation. It uses a coffee and donut graphic, different colours, and a new font with slightly different text. The recombinations are endless. 

17. Illustrated T-Shirt Design Maker Featuring a Grumpy Cat by a Rainy Window

Illustrated T-Shirt Design Maker Featuring a Grumpy Cat by a Rainy Window

Okay, so we have a soft spot for cats, but don’t get as grumpy as the pink fella above—we have room in our hearts for dogs as well. That’s why we’re showing you this template. It has loads of sweet dog illustrations that you can use to replace oh grumpy one here.

18. T-Shirt Design Templates With Vintage Memes

 T-Shirt Design Templates with Vintage Memes

Vintage all the way here. Use the T-shirt design maker to design your T-shirt in vintage style. It takes no time at all, and you can change every aspect of this design to truly make it your own. 

19. Father’s Day T-Shirt Design Template With Dinosaur Clipart

Fathers Day T-Shirt Design Template with Dinosaur Clipart

Dinosaurs are cute, especially when they’re in 2D form. This kid-friendly template is the perfect choice for those who want to help their kids create a T-shirt for whatever occasion. As is the case with other templates here, customisation is easy peasy.

20. Alien Illustration T-Shirt Design Template

Alien Illustration T-Shirt Design Template

Another somewhat scary sci-fi horror combo template. This one suggests that behind every alien there’s really a cat. Could be a fair point. Use the template as is or modify it as much or as little as you like. 

21. Illustrated T-Shirt Design Maker Featuring a Dog Wearing a Raincoat

Illustrated T-Shirt Design Maker Featuring a Dog Wearing a Raincoat

We thought it only fair we should end our funny T-shirt designs with a dog, and a rather adorable drawing of one at that. The template offers a plethora of other great drawings, so take a look and choose the one that appeals most. Then customise the template as much as you like.

Create Your Own Funny T-Shirt Design Online Today

We hope you’ve found a bunch of T-shirt design ideas you can use and you are excited about using the T-shirt design maker to create your own T-shirt design online. Get to work creating your own unique design and share it with us in the comments below. 

And remember, these 21 funny T-shirt designs are only a fraction of the awesome designs available at Placeit, so if you haven’t found exactly what you need here, head on over to the site and browse the large collection of t-shirt designs to be found there. 

If you’re interested in other kinds of designs and mockups, here are some great suggestions for you:

21 Awesome Funny T-Shirt Designs (And How to Make Your Own)

Post pobrano z: 21 Awesome Funny T-Shirt Designs (And How to Make Your Own)

Laughter is the best medicine, they say. If you think so too and are looking to create your own line of witty T-shirts but don’t know how to create T-shirt designs, let me introduce you to the Placeit T-shirt design maker. You’ll also discover 21 awesome T-shirt designs you can make with it that are guaranteed to tickle everyone’s funny bone. 

21 Awesome Funny T-Shirt Designs
Awesome Funny T-Shirt Designs from Placeit

Make Your Own T-Shirt Design

If you don’t know how to make T-shirt designs, here is a quick guide to get you started with the T-shirt design maker at Placeit. 

1. Navigate to Placeit’s T-Shirt Design Maker Page

Navigate to Placeits T-Shirt Design Maker Page

2. Select a Funny T-Shirt Design

Select a Family T-Shirt Design You Like

3. Start With the Controls on the Right 

When you find a design you like, click on it and the T-shirt design maker will open up. Starting on the right of the T-shirt design maker, add your text and/or change your font and its colour.

Starting With the Controls On The Right

4. Move to the Controls on the Left

Using the controls on the left of the T-shirt design maker, change the background of your T-shirt design to match the proposed colour of your T-shirt, and swap out the original for any other you prefer. 

Move to the Controls on the Left

If you get stuck or need new ideas, check out the set of presets found under every design, which offer you other options.

Check out the set of presets found under every design

5. Download Your Funny T-Shirt Design 

And just like that, you can easily make your own T-shirt design online, which you can download to send off to your T-shirt printer. 

Download Your Funny T Shirt Design

21 Awesome Funny T-Shirt Designs

1. Patriotic T-Shirt Design Template With a United Kingdom Map Illustration

Patriotic T-Shirt Design Template with a United Kingdom Map Illustration

If you’re British or just a lover of all things British, you’ll love this awesome T-shirt design, but get this, if you’re not British, but from India, Italy, Australia or somewhere else entirely, you can customise the map with your country’s shape and colours to reflect your patriotic zeal. 

2. T-Shirt Design Generator Featuring a Spaceship

T-Shirt Design Generator Featuring a Spaceship

If you’re a sci-fi buff, then this cool T-shirt design with a spaceship beaming up an old black and white TV might appeal to you. If you can think of a better caption, or like the design but not the colour, no worries. Just use the T-shirt design maker to design your shirt just the way you like it. 

3. Pride Tee Design Maker for Pride Parades

Pride Tee Design Maker for Pride Parades

If you’re looking for a funny T-shirt design with a pride angle, you’ll love this template with its lighthearted and playful graphics and fonts. Use as is or swap out the graphics, add your own text, and change the fonts and colours. 

4. Illustrated Dachshund Dog With Heart-Shape Glasses T-Shirt Design Maker

Illustrated Dachshund Dog with Heart-Shape Glasses T-Shirt Design Maker

This awesome T-shirt design is all about the cool dog, and there are plenty more equally funny and eye-catching pooches to choose from if this one doesn’t appeal. Just review the selection and click on the image that you prefer to see if it works for you. 

5. Pure Luck T-Shirt Design Creator for Cat Lovers

Pure Luck T-Shirt Design Creator for Cat Lovers

If cats are your thing then this template, the feline version of the canine one above, may just be your cup of tea. Again, there are many amazing versions to choose from, so take a look and try them all to see which appeals the most. 

6. T-Shirt Design Generator With a Serious-Looking Kitten Doodle

T-Shirt Design Generator with a Serious-Looking Kitten Doodle

More T-shirt design ideas for cat lovers. This template uses a looser, more casual drawing style and font, while the text plays with the reputation cats have of being aloof. Customise your design by using the T-shirt design maker to change the colours, fonts, and graphics.

7. T-Shirt Maker for Cute Designs

T-Shirt Maker for Cute Designs

This template is all about the text and the gorgeous, textured backgrounds. Use as is or come up with your own funny caption, changing the text and the font as you wish. Then add any of the luscious background textures on offer.

8. T-Shirt Design Template Featuring a Downward Facing Dog

T-Shirt Design Template Featuring a Downward Facing Dog

Yoga lovers, this one is for you. You can design your own tee shirt with an ever so cute and ever so funny, yoga-performing dog. Use one of the presets that come with the template and change up the colour and text if you like, or customise the design completely by selecting one of the dogs performing any number of yoga positions and adding your own text. 

9. Funny T-Shirt Design Template Featuring a Blanket Ghost Trick-or-Treating

Funny T-Shirt Design Template Featuring a Blanket Ghost Trick-or-Treating

This template offers a plethora of T-shirt design ideas for Halloween. The graphics available with the template couldn’t any spookier, with vampires, witches, Frankenstein and a bloodthirsty Elvis as just a few examples of the offerings.

10. T-Shirt Maker With a Sassy Cat Illustration

T-Shirt Maker with a Sassy Cat Illustration

Another play on the aloof nature of cats, this funny T-shirt design offers a number of gorgeous drawings of cats to which you can add your own twist.

11. T-Shirt Design Template With an Exotic Cat Illustration

T-Shirt Design Template with an Exotic Cat Illustration

Okay, so this cat does look a bit ferocious, but the drawing pairs really well with the caption, right? If you’re not convinced, don’t worry—there are plenty more drawings to choose from and lots of gorgeous presets with different text and animal pairings to keep you happy. 

12. T-Shirt Design Template Featuring a Zombie Executive

T-Shirt Design Template Featuring a Zombie Executive

A T-shirt design that’s great for Halloween—or any time of the year, for that matter. This template offers loads of customisation for the lovers of horror. 

13. Sci-Fi T-Shirt Design Template

Sci-Fi T-Shirt Design Template

More T-shirt design ideas for horror lovers. This one combines horror with sci-fi in a number of truly wonderful graphics that reference Hollywood classics like Alien, E.T., and The Matrix.

14. Negative Space Typography T-Shirt Template for Graphic Tees

Negative Space Typography T-shirt Template for Graphic Tees

Bold text and a grungy background make a powerful and eye-catching pairing. Use as is or use the T-shirt design maker to modify the font, change the backgrounds and colours, or create your own unique text. 

15. Valentine’s T-Shirt Design Generator With Bacon and Egg Graphic

Valentines T-Shirt Design Generator with Bacon and Egg Graphic

A fun and playful way to comment on love, this template offers graphics with as many clever pairings as you can stand: Netflix and pizza, milk and cookies, beer and nachos. Pick your poison. 

16. T-Shirt Design Generator for Valentine’s Day

T-Shirt Design Generator for Valentines Day

And just to show you how the previous design can be customised to lend your own spin to the same basic idea, here’s a clever variation. It uses a coffee and donut graphic, different colours, and a new font with slightly different text. The recombinations are endless. 

17. Illustrated T-Shirt Design Maker Featuring a Grumpy Cat by a Rainy Window

Illustrated T-Shirt Design Maker Featuring a Grumpy Cat by a Rainy Window

Okay, so we have a soft spot for cats, but don’t get as grumpy as the pink fella above—we have room in our hearts for dogs as well. That’s why we’re showing you this template. It has loads of sweet dog illustrations that you can use to replace oh grumpy one here.

18. T-Shirt Design Templates With Vintage Memes

 T-Shirt Design Templates with Vintage Memes

Vintage all the way here. Use the T-shirt design maker to design your T-shirt in vintage style. It takes no time at all, and you can change every aspect of this design to truly make it your own. 

19. Father’s Day T-Shirt Design Template With Dinosaur Clipart

Fathers Day T-Shirt Design Template with Dinosaur Clipart

Dinosaurs are cute, especially when they’re in 2D form. This kid-friendly template is the perfect choice for those who want to help their kids create a T-shirt for whatever occasion. As is the case with other templates here, customisation is easy peasy.

20. Alien Illustration T-Shirt Design Template

Alien Illustration T-Shirt Design Template

Another somewhat scary sci-fi horror combo template. This one suggests that behind every alien there’s really a cat. Could be a fair point. Use the template as is or modify it as much or as little as you like. 

21. Illustrated T-Shirt Design Maker Featuring a Dog Wearing a Raincoat

Illustrated T-Shirt Design Maker Featuring a Dog Wearing a Raincoat

We thought it only fair we should end our funny T-shirt designs with a dog, and a rather adorable drawing of one at that. The template offers a plethora of other great drawings, so take a look and choose the one that appeals most. Then customise the template as much as you like.

Create Your Own Funny T-Shirt Design Online Today

We hope you’ve found a bunch of T-shirt design ideas you can use and you are excited about using the T-shirt design maker to create your own T-shirt design online. Get to work creating your own unique design and share it with us in the comments below. 

And remember, these 21 funny T-shirt designs are only a fraction of the awesome designs available at Placeit, so if you haven’t found exactly what you need here, head on over to the site and browse the large collection of t-shirt designs to be found there. 

If you’re interested in other kinds of designs and mockups, here are some great suggestions for you:

21 Awesome Funny T-Shirt Designs (And How to Make Your Own)

Post pobrano z: 21 Awesome Funny T-Shirt Designs (And How to Make Your Own)

Laughter is the best medicine, they say. If you think so too and are looking to create your own line of witty T-shirts but don’t know how to create T-shirt designs, let me introduce you to the Placeit T-shirt design maker. You’ll also discover 21 awesome T-shirt designs you can make with it that are guaranteed to tickle everyone’s funny bone. 

21 Awesome Funny T-Shirt Designs
Awesome Funny T-Shirt Designs from Placeit

Make Your Own T-Shirt Design

If you don’t know how to make T-shirt designs, here is a quick guide to get you started with the T-shirt design maker at Placeit. 

1. Navigate to Placeit’s T-Shirt Design Maker Page

Navigate to Placeits T-Shirt Design Maker Page

2. Select a Funny T-Shirt Design

Select a Family T-Shirt Design You Like

3. Start With the Controls on the Right 

When you find a design you like, click on it and the T-shirt design maker will open up. Starting on the right of the T-shirt design maker, add your text and/or change your font and its colour.

Starting With the Controls On The Right

4. Move to the Controls on the Left

Using the controls on the left of the T-shirt design maker, change the background of your T-shirt design to match the proposed colour of your T-shirt, and swap out the original for any other you prefer. 

Move to the Controls on the Left

If you get stuck or need new ideas, check out the set of presets found under every design, which offer you other options.

Check out the set of presets found under every design

5. Download Your Funny T-Shirt Design 

And just like that, you can easily make your own T-shirt design online, which you can download to send off to your T-shirt printer. 

Download Your Funny T Shirt Design

21 Awesome Funny T-Shirt Designs

1. Patriotic T-Shirt Design Template With a United Kingdom Map Illustration

Patriotic T-Shirt Design Template with a United Kingdom Map Illustration

If you’re British or just a lover of all things British, you’ll love this awesome T-shirt design, but get this, if you’re not British, but from India, Italy, Australia or somewhere else entirely, you can customise the map with your country’s shape and colours to reflect your patriotic zeal. 

2. T-Shirt Design Generator Featuring a Spaceship

T-Shirt Design Generator Featuring a Spaceship

If you’re a sci-fi buff, then this cool T-shirt design with a spaceship beaming up an old black and white TV might appeal to you. If you can think of a better caption, or like the design but not the colour, no worries. Just use the T-shirt design maker to design your shirt just the way you like it. 

3. Pride Tee Design Maker for Pride Parades

Pride Tee Design Maker for Pride Parades

If you’re looking for a funny T-shirt design with a pride angle, you’ll love this template with its lighthearted and playful graphics and fonts. Use as is or swap out the graphics, add your own text, and change the fonts and colours. 

4. Illustrated Dachshund Dog With Heart-Shape Glasses T-Shirt Design Maker

Illustrated Dachshund Dog with Heart-Shape Glasses T-Shirt Design Maker

This awesome T-shirt design is all about the cool dog, and there are plenty more equally funny and eye-catching pooches to choose from if this one doesn’t appeal. Just review the selection and click on the image that you prefer to see if it works for you. 

5. Pure Luck T-Shirt Design Creator for Cat Lovers

Pure Luck T-Shirt Design Creator for Cat Lovers

If cats are your thing then this template, the feline version of the canine one above, may just be your cup of tea. Again, there are many amazing versions to choose from, so take a look and try them all to see which appeals the most. 

6. T-Shirt Design Generator With a Serious-Looking Kitten Doodle

T-Shirt Design Generator with a Serious-Looking Kitten Doodle

More T-shirt design ideas for cat lovers. This template uses a looser, more casual drawing style and font, while the text plays with the reputation cats have of being aloof. Customise your design by using the T-shirt design maker to change the colours, fonts, and graphics.

7. T-Shirt Maker for Cute Designs

T-Shirt Maker for Cute Designs

This template is all about the text and the gorgeous, textured backgrounds. Use as is or come up with your own funny caption, changing the text and the font as you wish. Then add any of the luscious background textures on offer.

8. T-Shirt Design Template Featuring a Downward Facing Dog

T-Shirt Design Template Featuring a Downward Facing Dog

Yoga lovers, this one is for you. You can design your own tee shirt with an ever so cute and ever so funny, yoga-performing dog. Use one of the presets that come with the template and change up the colour and text if you like, or customise the design completely by selecting one of the dogs performing any number of yoga positions and adding your own text. 

9. Funny T-Shirt Design Template Featuring a Blanket Ghost Trick-or-Treating

Funny T-Shirt Design Template Featuring a Blanket Ghost Trick-or-Treating

This template offers a plethora of T-shirt design ideas for Halloween. The graphics available with the template couldn’t any spookier, with vampires, witches, Frankenstein and a bloodthirsty Elvis as just a few examples of the offerings.

10. T-Shirt Maker With a Sassy Cat Illustration

T-Shirt Maker with a Sassy Cat Illustration

Another play on the aloof nature of cats, this funny T-shirt design offers a number of gorgeous drawings of cats to which you can add your own twist.

11. T-Shirt Design Template With an Exotic Cat Illustration

T-Shirt Design Template with an Exotic Cat Illustration

Okay, so this cat does look a bit ferocious, but the drawing pairs really well with the caption, right? If you’re not convinced, don’t worry—there are plenty more drawings to choose from and lots of gorgeous presets with different text and animal pairings to keep you happy. 

12. T-Shirt Design Template Featuring a Zombie Executive

T-Shirt Design Template Featuring a Zombie Executive

A T-shirt design that’s great for Halloween—or any time of the year, for that matter. This template offers loads of customisation for the lovers of horror. 

13. Sci-Fi T-Shirt Design Template

Sci-Fi T-Shirt Design Template

More T-shirt design ideas for horror lovers. This one combines horror with sci-fi in a number of truly wonderful graphics that reference Hollywood classics like Alien, E.T., and The Matrix.

14. Negative Space Typography T-Shirt Template for Graphic Tees

Negative Space Typography T-shirt Template for Graphic Tees

Bold text and a grungy background make a powerful and eye-catching pairing. Use as is or use the T-shirt design maker to modify the font, change the backgrounds and colours, or create your own unique text. 

15. Valentine’s T-Shirt Design Generator With Bacon and Egg Graphic

Valentines T-Shirt Design Generator with Bacon and Egg Graphic

A fun and playful way to comment on love, this template offers graphics with as many clever pairings as you can stand: Netflix and pizza, milk and cookies, beer and nachos. Pick your poison. 

16. T-Shirt Design Generator for Valentine’s Day

T-Shirt Design Generator for Valentines Day

And just to show you how the previous design can be customised to lend your own spin to the same basic idea, here’s a clever variation. It uses a coffee and donut graphic, different colours, and a new font with slightly different text. The recombinations are endless. 

17. Illustrated T-Shirt Design Maker Featuring a Grumpy Cat by a Rainy Window

Illustrated T-Shirt Design Maker Featuring a Grumpy Cat by a Rainy Window

Okay, so we have a soft spot for cats, but don’t get as grumpy as the pink fella above—we have room in our hearts for dogs as well. That’s why we’re showing you this template. It has loads of sweet dog illustrations that you can use to replace oh grumpy one here.

18. T-Shirt Design Templates With Vintage Memes

 T-Shirt Design Templates with Vintage Memes

Vintage all the way here. Use the T-shirt design maker to design your T-shirt in vintage style. It takes no time at all, and you can change every aspect of this design to truly make it your own. 

19. Father’s Day T-Shirt Design Template With Dinosaur Clipart

Fathers Day T-Shirt Design Template with Dinosaur Clipart

Dinosaurs are cute, especially when they’re in 2D form. This kid-friendly template is the perfect choice for those who want to help their kids create a T-shirt for whatever occasion. As is the case with other templates here, customisation is easy peasy.

20. Alien Illustration T-Shirt Design Template

Alien Illustration T-Shirt Design Template

Another somewhat scary sci-fi horror combo template. This one suggests that behind every alien there’s really a cat. Could be a fair point. Use the template as is or modify it as much or as little as you like. 

21. Illustrated T-Shirt Design Maker Featuring a Dog Wearing a Raincoat

Illustrated T-Shirt Design Maker Featuring a Dog Wearing a Raincoat

We thought it only fair we should end our funny T-shirt designs with a dog, and a rather adorable drawing of one at that. The template offers a plethora of other great drawings, so take a look and choose the one that appeals most. Then customise the template as much as you like.

Create Your Own Funny T-Shirt Design Online Today

We hope you’ve found a bunch of T-shirt design ideas you can use and you are excited about using the T-shirt design maker to create your own T-shirt design online. Get to work creating your own unique design and share it with us in the comments below. 

And remember, these 21 funny T-shirt designs are only a fraction of the awesome designs available at Placeit, so if you haven’t found exactly what you need here, head on over to the site and browse the large collection of t-shirt designs to be found there. 

If you’re interested in other kinds of designs and mockups, here are some great suggestions for you:

How to Install and Use Procreate Brushes

Post pobrano z: How to Install and Use Procreate Brushes

Final product image
What You’ll Be Creating

Found some of the best Procreate brushes, but not sure how to install or use them? In this tutorial, we’ll look at installing and utilizing Procreate brushes, as well as some customization basics. We’ll wrap up with a demo of a newly installed brush set.

Please keep in mind that Procreate and an iPad Pro are required for this tutorial. For reference, I’m using an Apple Pencil. 

What You Will Need

You will need the following resource in order to complete this project:

Ready to get drawing? Let’s begin!

1. How to Install Procreate Brushes

Step 1

First, you’ll want to download your brush—let’s dig into how to download Procreate brushes, because it’s not always as straightforward as you might think. I know I found myself scratching my head a few times, the first time I did it. 

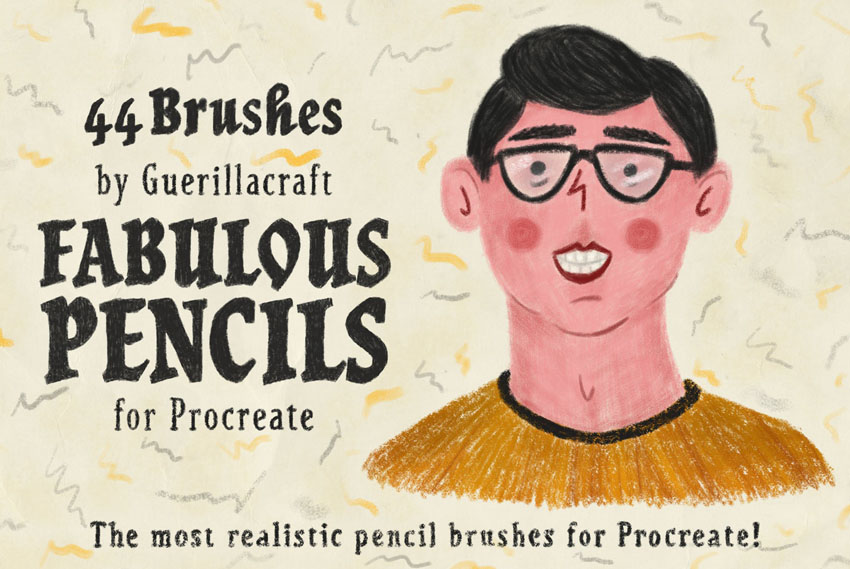
As an example for this tutorial, I’ll be using Fabulous Pencils for Procreate, a lovely, textured brush set by guerillacraft. You’re welcome to follow along with this brush set, or try another one!

Pencil Procreate Brushes

Step 2

Downloading things on an iPad is a little different from a desktop or laptop, so let’s start there—especially if your brush file is distributed in a zip file. 

In my example, below, I’m going to tap to download—this will vary, depending on the brush you want to install and where you’re installing it from. However, the process should be generally similar!

Downloading a brush

Step 3

Once you’ve accepted any download terms that may be applicable to your brush, your file will download.

This is what my browser gives me. Select Open in „Files”

Open in Files

Step 4

Now, I’m going to save the zip file, containing my brushes, somewhere on my iPad.

On a side note, I personally like to have some kind of cloud saving service handy, so that if I find a brush that I want to try out while I’m on my laptop, desktop computer, or smartphone, I can easily access it on my iPad, too!

In this case, I’m going to choose On My iPad.

Saving the file

Step 5

Now, locate the file on your iPad. 

Here’s an example of what mine looks like, on my device. I saved the zip file associated with this brush set to my Files, in a folder called Procreate. 

Locating files

Step 6

Since it’s likely that any brush you’ve downloaded has come in some kind of compressed zip file, let’s go through that process, too. 

You’ll know if it’s a zip file because the file itself has a big „ZIP” on it. If you see the Procreate logo instead, then it’s likely a Procreate Brush file. You can then jump ahead to Step 9.

Tap on the zip file. You’ll notice that it then gives you the option to „Preview Content”.

Tap on Preview Content.

Preview Content

Step 7

Then, you can swipe to preview the contents of the zip file, if you like. There’s nothing to visually preview with the brush file itself, so it just displays the file name. 

Tap on the Share Button.

Share Button

Step 8

This opens up a list of places where we can send our brush file. I chose Save to Files to unzip the Procreate brush set to my iPad’s storage.

You’ll be prompted to save the file wherever you like—this could, for example, be your favorite cloud service or your iPad’s storage. Your choice there—just make sure to note where you put it. 

Save to Files

Step 9

Now, here’s the Procreate brush file. Simply tap on it, and it will automatically load right up into Procreate! Easy, right? 

Procreate Brush file

Step 10

So, how do we find our newly installed Procreate brushes? 

Open up your Brush Library and look at the list—there it is, in its own new section. They’re all installed and ready to use.

Brush Library

2. How to Customize Procreate Brushes

Step 1

Using a brush is more than just installing it—we need to know how to work with it via the many Procreate brush settings. So here’s a brief overview of how to customize your newly installed brushes, so you can get the most out of them! 

First, keep the two sliders on the left-hand side of your screen in mind. The top slider is your Brush Size. The bottom slider is your Brush Opacity

These are two settings that I adjust frequently, while I’m drawing. 

Size and Opacity Sliders

Step 2

Looking at your brushes, you can customize a brush by tapping on it. 

Let’s try this out with our newly installed brush set, Fabulous Pencils for Procreate. I selected that group of brushes, and now I’m going to customize Velvet Text Shader.

Tap on the brush to customize its settings. 

Selecting a Brush

Step 3

Now, we’re „inside” the brush—this is where you can adjust and fine-tune the brush to your liking. While these brushes are wonderful just as they are, you might find little things that you’d like to tweak, like the brush’s maximum size, for example.

Brush Settings

Step 4

You’ll notice that there are a lot of options here to go through. Procreate lets you do some wonderful, in-depth customizations when it comes to brushes.

I could write a whole separate tutorial on this subject—and I did! If you’d like a more in-depth look at how to create and customize Procreate Brushes, I’ve written another tutorial on that! Feel free to check it out!

I’ve also written up a tutorial specifically about Procreate Layers, if you’d like a more in-depth look at that part of the software!

3. How to Use Procreate Brushes

Step 1

Now, let’s take a look at how to use the Procreate Brushes that we just installed!

In this demonstration, I’ll be using the Fabulous Pencils for Procreate brush set, from earlier in this tutorial. 

I’ll specify which brush from the set I tried out, by name, so if you’re interested, you can try out that brush too. Remember, you can find these brushes in a group, in your Brush Library

First, I started out with a rough sketch using Sussie B’s Pencil. It’s a really nice brush with an organic, graphite feel. I really like it!

Initial Sketch

Step 2

Then, I used the Big Chunky Lead brush to fill in the shapes I’d drawn on a New Layer. This way, I can save my sketch, but still use it as a guideline.  

I like to isolate different pieces of my colors on separate layers, for organization purposes.

Flat colors

Step 3

However, some features, like the general placement of the facial features, were covered up by my initial, flat colors. So I lowered the opacity on my flat colors so that I could, again, refer to my initial sketch. 

Lowering the opacity

Step 4

This allowed me to put down a more refined version of the facial features. I tried out Frankie & Bonnie’s Pencil from this Procreate brush set for this part!

Adding the facial features

Step 5

At this point, I started to refine my work. I created a New Layer and refined the shapes until I came up with something I was happy with—added some more hair, adjusted the shape of the face. 

I found these brushes to feel very organic and easy to work with. It felt very much like working with real media—but with the benefit of layers and undo!

Refining the face

Step 6

I added a rough background using Big 4B Lead, one of the larger brushes in this Procreate brush set. 

Adding a background

Step 7

Now, time to experiment with some lighting! I decided to add a shadow on the right-hand side, and I settled on a blue-ish color. I used the Big Chunky Lead brush!

I did this on a New Layer with the Blending Mode set to Multiply. This way, the blue affects my flat colors. 

If you’re curious about Procreate Layers and Blending Modes, check out this tutorial! 

Adding Shadows

Step 8

Then, I wanted some light on the opposite side. I decided on a yellowish color. 

Again, I did this on a New Layer. Sussie B’s Pencil was a great fit for this one, at a larger brush size. 

Adding lighting

Step 9

I added a little reflected light on the right-hand side, again using the Big Chunky Lead brush. 

I like to use the Eyedropper Tool to lift surrounding colors and paint on top of my work—as I did here with the fluffy, afro hair. I found Soft Pencil Lead to be a nice brush for blending, and Sussie B’s Brush works well, at larger sizes, for harder lines. 

Reflected light and refinements

Step 10

I decided to change up the background, to better work with the colors I was experimenting with—a cool blue on the right, yellow on the left. Big Flat Lead was a great choice for this. I really enjoyed how easily these brushes blend. 

I also added some subtle light to the facial area using Sussie B’s Pencil—can you tell I’m really fond of that one, in particular?

The background and face

Step 11

I added some stars in the background. They’re rough little pencil marks—just placed about for an extra touch of night sky. I tried out Trisha’s Pencil for this one!

Adding stars

Step 12

When I was happy with my work, I flattened the character art and cleaned it up with the eraser. I decided I wanted to keep things relatively relaxed and textured, but there were a few places I thought just needed a little tidying up!

Cleaning up the artwork

And There You Have It!

Thanks so much for exploring how to install and use Procreate brushes with me! I had a lot of fun with this demonstration—and honestly, I’m excited to use this brush set again! It was really user-friendly and fun to use. 

Good luck with your creative projects, and happy drawing!

If you’d like to follow the process of this illustration, it’s available on the Envato Tuts+ YouTube channel:

If you enjoyed working with this Procreate Brush, here are some others to check out and experiment with!

Oil Paint Brushes for Procreate

These Procreate Brushes are a lovely addition to any collection, especially if you’re a fan of texture! They’re by the same author as the artist who made the brushes we experimented with in this tutorial, too!

Shader Brushes for Procreate

I absolutely love the texture in these Procreate shader brushes. They could work for such a wide variety of styles and projects! 

Procreate Brushes

Auld Inks for Procreate

62 brushes—that is a lot of brushes to experiment with, right? And with such interesting texture, these ink Procreate brushes are so much fun to experiment with.

Procreate Brushes

Fabric and Paper Procreate Brushes

I love texture—it’s so fun to experiment with. This set is all about texturing with fabric and paper. There are plenty of versatile applications with this one, a great addition to anyone’s collection!

Procreate Brushes

Procreate Brush Calligraphy

I love hand-drawn type—and Procreate is an awesome tool for experimenting with it, too. This brush set is right up your alley, if calligraphy is your jam!

Procreate Brushes

If you enjoyed this tutorial, here are some others to check out!

How to Install and Use Procreate Brushes

Post pobrano z: How to Install and Use Procreate Brushes

Final product image
What You’ll Be Creating

Found some of the best Procreate brushes, but not sure how to install or use them? In this tutorial, we’ll look at installing and utilizing Procreate brushes, as well as some customization basics. We’ll wrap up with a demo of a newly installed brush set.

Please keep in mind that Procreate and an iPad Pro are required for this tutorial. For reference, I’m using an Apple Pencil. 

What You Will Need

You will need the following resource in order to complete this project:

Ready to get drawing? Let’s begin!

1. How to Install Procreate Brushes

Step 1

First, you’ll want to download your brush—let’s dig into how to download Procreate brushes, because it’s not always as straightforward as you might think. I know I found myself scratching my head a few times, the first time I did it. 

As an example for this tutorial, I’ll be using Fabulous Pencils for Procreate, a lovely, textured brush set by guerillacraft. You’re welcome to follow along with this brush set, or try another one!

Pencil Procreate Brushes

Step 2

Downloading things on an iPad is a little different from a desktop or laptop, so let’s start there—especially if your brush file is distributed in a zip file. 

In my example, below, I’m going to tap to download—this will vary, depending on the brush you want to install and where you’re installing it from. However, the process should be generally similar!

Downloading a brush

Step 3

Once you’ve accepted any download terms that may be applicable to your brush, your file will download.

This is what my browser gives me. Select Open in „Files”

Open in Files

Step 4

Now, I’m going to save the zip file, containing my brushes, somewhere on my iPad.

On a side note, I personally like to have some kind of cloud saving service handy, so that if I find a brush that I want to try out while I’m on my laptop, desktop computer, or smartphone, I can easily access it on my iPad, too!

In this case, I’m going to choose On My iPad.

Saving the file

Step 5

Now, locate the file on your iPad. 

Here’s an example of what mine looks like, on my device. I saved the zip file associated with this brush set to my Files, in a folder called Procreate. 

Locating files

Step 6

Since it’s likely that any brush you’ve downloaded has come in some kind of compressed zip file, let’s go through that process, too. 

You’ll know if it’s a zip file because the file itself has a big „ZIP” on it. If you see the Procreate logo instead, then it’s likely a Procreate Brush file. You can then jump ahead to Step 9.

Tap on the zip file. You’ll notice that it then gives you the option to „Preview Content”.

Tap on Preview Content.

Preview Content

Step 7

Then, you can swipe to preview the contents of the zip file, if you like. There’s nothing to visually preview with the brush file itself, so it just displays the file name. 

Tap on the Share Button.

Share Button

Step 8

This opens up a list of places where we can send our brush file. I chose Save to Files to unzip the Procreate brush set to my iPad’s storage.

You’ll be prompted to save the file wherever you like—this could, for example, be your favorite cloud service or your iPad’s storage. Your choice there—just make sure to note where you put it. 

Save to Files

Step 9

Now, here’s the Procreate brush file. Simply tap on it, and it will automatically load right up into Procreate! Easy, right? 

Procreate Brush file

Step 10

So, how do we find our newly installed Procreate brushes? 

Open up your Brush Library and look at the list—there it is, in its own new section. They’re all installed and ready to use.

Brush Library

2. How to Customize Procreate Brushes

Step 1

Using a brush is more than just installing it—we need to know how to work with it via the many Procreate brush settings. So here’s a brief overview of how to customize your newly installed brushes, so you can get the most out of them! 

First, keep the two sliders on the left-hand side of your screen in mind. The top slider is your Brush Size. The bottom slider is your Brush Opacity

These are two settings that I adjust frequently, while I’m drawing. 

Size and Opacity Sliders

Step 2

Looking at your brushes, you can customize a brush by tapping on it. 

Let’s try this out with our newly installed brush set, Fabulous Pencils for Procreate. I selected that group of brushes, and now I’m going to customize Velvet Text Shader.

Tap on the brush to customize its settings. 

Selecting a Brush

Step 3

Now, we’re „inside” the brush—this is where you can adjust and fine-tune the brush to your liking. While these brushes are wonderful just as they are, you might find little things that you’d like to tweak, like the brush’s maximum size, for example.

Brush Settings

Step 4

You’ll notice that there are a lot of options here to go through. Procreate lets you do some wonderful, in-depth customizations when it comes to brushes.

I could write a whole separate tutorial on this subject—and I did! If you’d like a more in-depth look at how to create and customize Procreate Brushes, I’ve written another tutorial on that! Feel free to check it out!

I’ve also written up a tutorial specifically about Procreate Layers, if you’d like a more in-depth look at that part of the software!

3. How to Use Procreate Brushes

Step 1

Now, let’s take a look at how to use the Procreate Brushes that we just installed!

In this demonstration, I’ll be using the Fabulous Pencils for Procreate brush set, from earlier in this tutorial. 

I’ll specify which brush from the set I tried out, by name, so if you’re interested, you can try out that brush too. Remember, you can find these brushes in a group, in your Brush Library

First, I started out with a rough sketch using Sussie B’s Pencil. It’s a really nice brush with an organic, graphite feel. I really like it!

Initial Sketch

Step 2

Then, I used the Big Chunky Lead brush to fill in the shapes I’d drawn on a New Layer. This way, I can save my sketch, but still use it as a guideline.  

I like to isolate different pieces of my colors on separate layers, for organization purposes.

Flat colors

Step 3

However, some features, like the general placement of the facial features, were covered up by my initial, flat colors. So I lowered the opacity on my flat colors so that I could, again, refer to my initial sketch. 

Lowering the opacity

Step 4

This allowed me to put down a more refined version of the facial features. I tried out Frankie & Bonnie’s Pencil from this Procreate brush set for this part!

Adding the facial features

Step 5

At this point, I started to refine my work. I created a New Layer and refined the shapes until I came up with something I was happy with—added some more hair, adjusted the shape of the face. 

I found these brushes to feel very organic and easy to work with. It felt very much like working with real media—but with the benefit of layers and undo!

Refining the face

Step 6

I added a rough background using Big 4B Lead, one of the larger brushes in this Procreate brush set. 

Adding a background

Step 7

Now, time to experiment with some lighting! I decided to add a shadow on the right-hand side, and I settled on a blue-ish color. I used the Big Chunky Lead brush!

I did this on a New Layer with the Blending Mode set to Multiply. This way, the blue affects my flat colors. 

If you’re curious about Procreate Layers and Blending Modes, check out this tutorial! 

Adding Shadows

Step 8

Then, I wanted some light on the opposite side. I decided on a yellowish color. 

Again, I did this on a New Layer. Sussie B’s Pencil was a great fit for this one, at a larger brush size. 

Adding lighting

Step 9

I added a little reflected light on the right-hand side, again using the Big Chunky Lead brush. 

I like to use the Eyedropper Tool to lift surrounding colors and paint on top of my work—as I did here with the fluffy, afro hair. I found Soft Pencil Lead to be a nice brush for blending, and Sussie B’s Brush works well, at larger sizes, for harder lines. 

Reflected light and refinements

Step 10

I decided to change up the background, to better work with the colors I was experimenting with—a cool blue on the right, yellow on the left. Big Flat Lead was a great choice for this. I really enjoyed how easily these brushes blend. 

I also added some subtle light to the facial area using Sussie B’s Pencil—can you tell I’m really fond of that one, in particular?

The background and face

Step 11

I added some stars in the background. They’re rough little pencil marks—just placed about for an extra touch of night sky. I tried out Trisha’s Pencil for this one!

Adding stars

Step 12

When I was happy with my work, I flattened the character art and cleaned it up with the eraser. I decided I wanted to keep things relatively relaxed and textured, but there were a few places I thought just needed a little tidying up!

Cleaning up the artwork

And There You Have It!

Thanks so much for exploring how to install and use Procreate brushes with me! I had a lot of fun with this demonstration—and honestly, I’m excited to use this brush set again! It was really user-friendly and fun to use. 

Good luck with your creative projects, and happy drawing!

If you’d like to follow the process of this illustration, it’s available on the Envato Tuts+ YouTube channel:

If you enjoyed working with this Procreate Brush, here are some others to check out and experiment with!

Oil Paint Brushes for Procreate

These Procreate Brushes are a lovely addition to any collection, especially if you’re a fan of texture! They’re by the same author as the artist who made the brushes we experimented with in this tutorial, too!

Shader Brushes for Procreate

I absolutely love the texture in these Procreate shader brushes. They could work for such a wide variety of styles and projects! 

Procreate Brushes

Auld Inks for Procreate

62 brushes—that is a lot of brushes to experiment with, right? And with such interesting texture, these ink Procreate brushes are so much fun to experiment with.

Procreate Brushes

Fabric and Paper Procreate Brushes

I love texture—it’s so fun to experiment with. This set is all about texturing with fabric and paper. There are plenty of versatile applications with this one, a great addition to anyone’s collection!

Procreate Brushes

Procreate Brush Calligraphy

I love hand-drawn type—and Procreate is an awesome tool for experimenting with it, too. This brush set is right up your alley, if calligraphy is your jam!

Procreate Brushes

If you enjoyed this tutorial, here are some others to check out!

How to Install and Use Procreate Brushes

Post pobrano z: How to Install and Use Procreate Brushes

Final product image
What You’ll Be Creating

Found some of the best Procreate brushes, but not sure how to install or use them? In this tutorial, we’ll look at installing and utilizing Procreate brushes, as well as some customization basics. We’ll wrap up with a demo of a newly installed brush set.

Please keep in mind that Procreate and an iPad Pro are required for this tutorial. For reference, I’m using an Apple Pencil. 

What You Will Need

You will need the following resource in order to complete this project:

Ready to get drawing? Let’s begin!

1. How to Install Procreate Brushes

Step 1

First, you’ll want to download your brush—let’s dig into how to download Procreate brushes, because it’s not always as straightforward as you might think. I know I found myself scratching my head a few times, the first time I did it. 

As an example for this tutorial, I’ll be using Fabulous Pencils for Procreate, a lovely, textured brush set by guerillacraft. You’re welcome to follow along with this brush set, or try another one!

Pencil Procreate Brushes

Step 2

Downloading things on an iPad is a little different from a desktop or laptop, so let’s start there—especially if your brush file is distributed in a zip file. 

In my example, below, I’m going to tap to download—this will vary, depending on the brush you want to install and where you’re installing it from. However, the process should be generally similar!

Downloading a brush

Step 3

Once you’ve accepted any download terms that may be applicable to your brush, your file will download.

This is what my browser gives me. Select Open in „Files”

Open in Files

Step 4

Now, I’m going to save the zip file, containing my brushes, somewhere on my iPad.

On a side note, I personally like to have some kind of cloud saving service handy, so that if I find a brush that I want to try out while I’m on my laptop, desktop computer, or smartphone, I can easily access it on my iPad, too!

In this case, I’m going to choose On My iPad.

Saving the file

Step 5

Now, locate the file on your iPad. 

Here’s an example of what mine looks like, on my device. I saved the zip file associated with this brush set to my Files, in a folder called Procreate. 

Locating files

Step 6

Since it’s likely that any brush you’ve downloaded has come in some kind of compressed zip file, let’s go through that process, too. 

You’ll know if it’s a zip file because the file itself has a big „ZIP” on it. If you see the Procreate logo instead, then it’s likely a Procreate Brush file. You can then jump ahead to Step 9.

Tap on the zip file. You’ll notice that it then gives you the option to „Preview Content”.

Tap on Preview Content.

Preview Content

Step 7

Then, you can swipe to preview the contents of the zip file, if you like. There’s nothing to visually preview with the brush file itself, so it just displays the file name. 

Tap on the Share Button.

Share Button

Step 8

This opens up a list of places where we can send our brush file. I chose Save to Files to unzip the Procreate brush set to my iPad’s storage.

You’ll be prompted to save the file wherever you like—this could, for example, be your favorite cloud service or your iPad’s storage. Your choice there—just make sure to note where you put it. 

Save to Files

Step 9

Now, here’s the Procreate brush file. Simply tap on it, and it will automatically load right up into Procreate! Easy, right? 

Procreate Brush file

Step 10

So, how do we find our newly installed Procreate brushes? 

Open up your Brush Library and look at the list—there it is, in its own new section. They’re all installed and ready to use.

Brush Library

2. How to Customize Procreate Brushes

Step 1

Using a brush is more than just installing it—we need to know how to work with it via the many Procreate brush settings. So here’s a brief overview of how to customize your newly installed brushes, so you can get the most out of them! 

First, keep the two sliders on the left-hand side of your screen in mind. The top slider is your Brush Size. The bottom slider is your Brush Opacity

These are two settings that I adjust frequently, while I’m drawing. 

Size and Opacity Sliders

Step 2

Looking at your brushes, you can customize a brush by tapping on it. 

Let’s try this out with our newly installed brush set, Fabulous Pencils for Procreate. I selected that group of brushes, and now I’m going to customize Velvet Text Shader.

Tap on the brush to customize its settings. 

Selecting a Brush

Step 3

Now, we’re „inside” the brush—this is where you can adjust and fine-tune the brush to your liking. While these brushes are wonderful just as they are, you might find little things that you’d like to tweak, like the brush’s maximum size, for example.

Brush Settings

Step 4

You’ll notice that there are a lot of options here to go through. Procreate lets you do some wonderful, in-depth customizations when it comes to brushes.

I could write a whole separate tutorial on this subject—and I did! If you’d like a more in-depth look at how to create and customize Procreate Brushes, I’ve written another tutorial on that! Feel free to check it out!

I’ve also written up a tutorial specifically about Procreate Layers, if you’d like a more in-depth look at that part of the software!

3. How to Use Procreate Brushes

Step 1

Now, let’s take a look at how to use the Procreate Brushes that we just installed!

In this demonstration, I’ll be using the Fabulous Pencils for Procreate brush set, from earlier in this tutorial. 

I’ll specify which brush from the set I tried out, by name, so if you’re interested, you can try out that brush too. Remember, you can find these brushes in a group, in your Brush Library

First, I started out with a rough sketch using Sussie B’s Pencil. It’s a really nice brush with an organic, graphite feel. I really like it!

Initial Sketch

Step 2

Then, I used the Big Chunky Lead brush to fill in the shapes I’d drawn on a New Layer. This way, I can save my sketch, but still use it as a guideline.  

I like to isolate different pieces of my colors on separate layers, for organization purposes.

Flat colors

Step 3

However, some features, like the general placement of the facial features, were covered up by my initial, flat colors. So I lowered the opacity on my flat colors so that I could, again, refer to my initial sketch. 

Lowering the opacity

Step 4

This allowed me to put down a more refined version of the facial features. I tried out Frankie & Bonnie’s Pencil from this Procreate brush set for this part!

Adding the facial features

Step 5

At this point, I started to refine my work. I created a New Layer and refined the shapes until I came up with something I was happy with—added some more hair, adjusted the shape of the face. 

I found these brushes to feel very organic and easy to work with. It felt very much like working with real media—but with the benefit of layers and undo!

Refining the face

Step 6

I added a rough background using Big 4B Lead, one of the larger brushes in this Procreate brush set. 

Adding a background

Step 7

Now, time to experiment with some lighting! I decided to add a shadow on the right-hand side, and I settled on a blue-ish color. I used the Big Chunky Lead brush!

I did this on a New Layer with the Blending Mode set to Multiply. This way, the blue affects my flat colors. 

If you’re curious about Procreate Layers and Blending Modes, check out this tutorial! 

Adding Shadows

Step 8

Then, I wanted some light on the opposite side. I decided on a yellowish color. 

Again, I did this on a New Layer. Sussie B’s Pencil was a great fit for this one, at a larger brush size. 

Adding lighting

Step 9

I added a little reflected light on the right-hand side, again using the Big Chunky Lead brush. 

I like to use the Eyedropper Tool to lift surrounding colors and paint on top of my work—as I did here with the fluffy, afro hair. I found Soft Pencil Lead to be a nice brush for blending, and Sussie B’s Brush works well, at larger sizes, for harder lines. 

Reflected light and refinements

Step 10

I decided to change up the background, to better work with the colors I was experimenting with—a cool blue on the right, yellow on the left. Big Flat Lead was a great choice for this. I really enjoyed how easily these brushes blend. 

I also added some subtle light to the facial area using Sussie B’s Pencil—can you tell I’m really fond of that one, in particular?

The background and face

Step 11

I added some stars in the background. They’re rough little pencil marks—just placed about for an extra touch of night sky. I tried out Trisha’s Pencil for this one!

Adding stars

Step 12

When I was happy with my work, I flattened the character art and cleaned it up with the eraser. I decided I wanted to keep things relatively relaxed and textured, but there were a few places I thought just needed a little tidying up!

Cleaning up the artwork

And There You Have It!

Thanks so much for exploring how to install and use Procreate brushes with me! I had a lot of fun with this demonstration—and honestly, I’m excited to use this brush set again! It was really user-friendly and fun to use. 

Good luck with your creative projects, and happy drawing!

If you’d like to follow the process of this illustration, it’s available on the Envato Tuts+ YouTube channel:

If you enjoyed working with this Procreate Brush, here are some others to check out and experiment with!

Oil Paint Brushes for Procreate

These Procreate Brushes are a lovely addition to any collection, especially if you’re a fan of texture! They’re by the same author as the artist who made the brushes we experimented with in this tutorial, too!

Shader Brushes for Procreate

I absolutely love the texture in these Procreate shader brushes. They could work for such a wide variety of styles and projects! 

Procreate Brushes

Auld Inks for Procreate

62 brushes—that is a lot of brushes to experiment with, right? And with such interesting texture, these ink Procreate brushes are so much fun to experiment with.

Procreate Brushes

Fabric and Paper Procreate Brushes

I love texture—it’s so fun to experiment with. This set is all about texturing with fabric and paper. There are plenty of versatile applications with this one, a great addition to anyone’s collection!

Procreate Brushes

Procreate Brush Calligraphy

I love hand-drawn type—and Procreate is an awesome tool for experimenting with it, too. This brush set is right up your alley, if calligraphy is your jam!

Procreate Brushes

If you enjoyed this tutorial, here are some others to check out!

How to Install and Use Procreate Brushes

Post pobrano z: How to Install and Use Procreate Brushes

Final product image
What You’ll Be Creating

Found some of the best Procreate brushes, but not sure how to install or use them? In this tutorial, we’ll look at installing and utilizing Procreate brushes, as well as some customization basics. We’ll wrap up with a demo of a newly installed brush set.

Please keep in mind that Procreate and an iPad Pro are required for this tutorial. For reference, I’m using an Apple Pencil. 

What You Will Need

You will need the following resource in order to complete this project:

Ready to get drawing? Let’s begin!

1. How to Install Procreate Brushes

Step 1

First, you’ll want to download your brush—let’s dig into how to download Procreate brushes, because it’s not always as straightforward as you might think. I know I found myself scratching my head a few times, the first time I did it. 

As an example for this tutorial, I’ll be using Fabulous Pencils for Procreate, a lovely, textured brush set by guerillacraft. You’re welcome to follow along with this brush set, or try another one!

Pencil Procreate Brushes

Step 2

Downloading things on an iPad is a little different from a desktop or laptop, so let’s start there—especially if your brush file is distributed in a zip file. 

In my example, below, I’m going to tap to download—this will vary, depending on the brush you want to install and where you’re installing it from. However, the process should be generally similar!

Downloading a brush

Step 3

Once you’ve accepted any download terms that may be applicable to your brush, your file will download.

This is what my browser gives me. Select Open in „Files”

Open in Files

Step 4

Now, I’m going to save the zip file, containing my brushes, somewhere on my iPad.

On a side note, I personally like to have some kind of cloud saving service handy, so that if I find a brush that I want to try out while I’m on my laptop, desktop computer, or smartphone, I can easily access it on my iPad, too!

In this case, I’m going to choose On My iPad.

Saving the file

Step 5

Now, locate the file on your iPad. 

Here’s an example of what mine looks like, on my device. I saved the zip file associated with this brush set to my Files, in a folder called Procreate. 

Locating files

Step 6

Since it’s likely that any brush you’ve downloaded has come in some kind of compressed zip file, let’s go through that process, too. 

You’ll know if it’s a zip file because the file itself has a big „ZIP” on it. If you see the Procreate logo instead, then it’s likely a Procreate Brush file. You can then jump ahead to Step 9.

Tap on the zip file. You’ll notice that it then gives you the option to „Preview Content”.

Tap on Preview Content.

Preview Content

Step 7

Then, you can swipe to preview the contents of the zip file, if you like. There’s nothing to visually preview with the brush file itself, so it just displays the file name. 

Tap on the Share Button.

Share Button

Step 8

This opens up a list of places where we can send our brush file. I chose Save to Files to unzip the Procreate brush set to my iPad’s storage.

You’ll be prompted to save the file wherever you like—this could, for example, be your favorite cloud service or your iPad’s storage. Your choice there—just make sure to note where you put it. 

Save to Files

Step 9

Now, here’s the Procreate brush file. Simply tap on it, and it will automatically load right up into Procreate! Easy, right? 

Procreate Brush file

Step 10

So, how do we find our newly installed Procreate brushes? 

Open up your Brush Library and look at the list—there it is, in its own new section. They’re all installed and ready to use.

Brush Library

2. How to Customize Procreate Brushes

Step 1

Using a brush is more than just installing it—we need to know how to work with it via the many Procreate brush settings. So here’s a brief overview of how to customize your newly installed brushes, so you can get the most out of them! 

First, keep the two sliders on the left-hand side of your screen in mind. The top slider is your Brush Size. The bottom slider is your Brush Opacity

These are two settings that I adjust frequently, while I’m drawing. 

Size and Opacity Sliders

Step 2

Looking at your brushes, you can customize a brush by tapping on it. 

Let’s try this out with our newly installed brush set, Fabulous Pencils for Procreate. I selected that group of brushes, and now I’m going to customize Velvet Text Shader.

Tap on the brush to customize its settings. 

Selecting a Brush

Step 3

Now, we’re „inside” the brush—this is where you can adjust and fine-tune the brush to your liking. While these brushes are wonderful just as they are, you might find little things that you’d like to tweak, like the brush’s maximum size, for example.

Brush Settings

Step 4

You’ll notice that there are a lot of options here to go through. Procreate lets you do some wonderful, in-depth customizations when it comes to brushes.

I could write a whole separate tutorial on this subject—and I did! If you’d like a more in-depth look at how to create and customize Procreate Brushes, I’ve written another tutorial on that! Feel free to check it out!

I’ve also written up a tutorial specifically about Procreate Layers, if you’d like a more in-depth look at that part of the software!

3. How to Use Procreate Brushes

Step 1

Now, let’s take a look at how to use the Procreate Brushes that we just installed!

In this demonstration, I’ll be using the Fabulous Pencils for Procreate brush set, from earlier in this tutorial. 

I’ll specify which brush from the set I tried out, by name, so if you’re interested, you can try out that brush too. Remember, you can find these brushes in a group, in your Brush Library

First, I started out with a rough sketch using Sussie B’s Pencil. It’s a really nice brush with an organic, graphite feel. I really like it!

Initial Sketch

Step 2

Then, I used the Big Chunky Lead brush to fill in the shapes I’d drawn on a New Layer. This way, I can save my sketch, but still use it as a guideline.  

I like to isolate different pieces of my colors on separate layers, for organization purposes.

Flat colors

Step 3

However, some features, like the general placement of the facial features, were covered up by my initial, flat colors. So I lowered the opacity on my flat colors so that I could, again, refer to my initial sketch. 

Lowering the opacity

Step 4

This allowed me to put down a more refined version of the facial features. I tried out Frankie & Bonnie’s Pencil from this Procreate brush set for this part!

Adding the facial features

Step 5

At this point, I started to refine my work. I created a New Layer and refined the shapes until I came up with something I was happy with—added some more hair, adjusted the shape of the face. 

I found these brushes to feel very organic and easy to work with. It felt very much like working with real media—but with the benefit of layers and undo!

Refining the face

Step 6

I added a rough background using Big 4B Lead, one of the larger brushes in this Procreate brush set. 

Adding a background

Step 7

Now, time to experiment with some lighting! I decided to add a shadow on the right-hand side, and I settled on a blue-ish color. I used the Big Chunky Lead brush!

I did this on a New Layer with the Blending Mode set to Multiply. This way, the blue affects my flat colors. 

If you’re curious about Procreate Layers and Blending Modes, check out this tutorial! 

Adding Shadows

Step 8

Then, I wanted some light on the opposite side. I decided on a yellowish color. 

Again, I did this on a New Layer. Sussie B’s Pencil was a great fit for this one, at a larger brush size. 

Adding lighting

Step 9

I added a little reflected light on the right-hand side, again using the Big Chunky Lead brush. 

I like to use the Eyedropper Tool to lift surrounding colors and paint on top of my work—as I did here with the fluffy, afro hair. I found Soft Pencil Lead to be a nice brush for blending, and Sussie B’s Brush works well, at larger sizes, for harder lines. 

Reflected light and refinements

Step 10

I decided to change up the background, to better work with the colors I was experimenting with—a cool blue on the right, yellow on the left. Big Flat Lead was a great choice for this. I really enjoyed how easily these brushes blend. 

I also added some subtle light to the facial area using Sussie B’s Pencil—can you tell I’m really fond of that one, in particular?

The background and face

Step 11

I added some stars in the background. They’re rough little pencil marks—just placed about for an extra touch of night sky. I tried out Trisha’s Pencil for this one!

Adding stars

Step 12

When I was happy with my work, I flattened the character art and cleaned it up with the eraser. I decided I wanted to keep things relatively relaxed and textured, but there were a few places I thought just needed a little tidying up!

Cleaning up the artwork

And There You Have It!

Thanks so much for exploring how to install and use Procreate brushes with me! I had a lot of fun with this demonstration—and honestly, I’m excited to use this brush set again! It was really user-friendly and fun to use. 

Good luck with your creative projects, and happy drawing!

If you’d like to follow the process of this illustration, it’s available on the Envato Tuts+ YouTube channel:

If you enjoyed working with this Procreate Brush, here are some others to check out and experiment with!

Oil Paint Brushes for Procreate

These Procreate Brushes are a lovely addition to any collection, especially if you’re a fan of texture! They’re by the same author as the artist who made the brushes we experimented with in this tutorial, too!

Shader Brushes for Procreate

I absolutely love the texture in these Procreate shader brushes. They could work for such a wide variety of styles and projects! 

Procreate Brushes

Auld Inks for Procreate

62 brushes—that is a lot of brushes to experiment with, right? And with such interesting texture, these ink Procreate brushes are so much fun to experiment with.

Procreate Brushes

Fabric and Paper Procreate Brushes

I love texture—it’s so fun to experiment with. This set is all about texturing with fabric and paper. There are plenty of versatile applications with this one, a great addition to anyone’s collection!

Procreate Brushes

Procreate Brush Calligraphy

I love hand-drawn type—and Procreate is an awesome tool for experimenting with it, too. This brush set is right up your alley, if calligraphy is your jam!

Procreate Brushes

If you enjoyed this tutorial, here are some others to check out!

An Introduction to Adobe Fresco and How It Compares to Procreate

Post pobrano z: An Introduction to Adobe Fresco and How It Compares to Procreate

Final product image
What You’ll Be Creating

Has Procreate met its match? Fresco, Adobe’s new drawing program for iPad, is here—how does it compare to Procreate or Photoshop? Is it a worthwhile competitor, or something you should pass up? Here’s an overview, first impressions, and some comparisons for your consideration.

I’m an artist—art, design, game development and content creation are what I do professionally. I spend a lot of time in Adobe Photoshop, but I also really enjoy Procreate. 

That said, I was pretty excited to get my hands on Fresco. When it comes to my iPad, Procreate is a really wonderful, enjoyable application. The price is right, and it’s very user friendly. So how does Adobe Fresco hold up, at launch? 

Follow along with us over on our Envato Tuts+ YouTube channel:

1. A Tour of Adobe Fresco

First Impressions

My first impression of Adobe Fresco was generally optimistic. I really enjoy many of the „out the box” brushes. I spent some time just casually sketching, and it did feel really natural and comfortable. 

I wanted Fresco to be an awesome application that I fell in love with. 

So… how did my first date with Fresco go? Let’s take a look at the tools themselves. You can find the tools, by default, on the left-hand side of the visible work area.

Adobe Fresco Tools

Pixel Brushes

Pixel Brushes are your standard raster brushes, very much like those in Photoshop. I do a lot of drawing in Photoshop, so I was really excited at the prospect of having all of my usual Photoshop brushes on my iPad. 

Below, I’ve tested out one of the ink brushes, and I’ve doodled an apple with some of the sketch brushes. 

Pixel Brushes

Importing Brushes

Your imported brushes are listed as „Library Brushes” at the bottom of your available Pixel Brushes. Doesn’t seem like there’s any sorting or reordering things, at this time.

I can’t remove any brushes I’ve imported within the app either—and it seems like I’m not the only one out there having that issue. That’s a bummer, but not a deal breaker.

Importing Brushes

Lovely, Right Out the Box

The Pixel Brushes that come with Fresco, however, are lovely. They have beautiful textures, and the sensitivity felt on point, without any adjustments—I didn’t have to tweak anything there to create really beautiful lines and textures. The Cezanne and Impressionist brushes were particularly fun and full of personality.

Painting Brushes

Live Brushes

Fresco also has Live Brushes—and they’re really cool. I had a lot of fun trying out the watercolor brushes, in particular. The way the colors bleed and run into each other really feels as if you’re working with paint. 

This isn’t the way I usually draw, digitally, but it was a lot of fun to play with. I’d say that this, right here, is probably one of Fresco’s coolest features. You’ve got Watercolor and Oil brushes, 11 brushes total. 

Fresco Live Brushes

Vector Brushes

The Vector Brushes are rather nice too! It’s really simple to just dig in and create some really lovely, clean, vector lines. There are five different brushes to choose from, which did feel a little odd to me. Still, the five here are pretty versatile. 

However, there’s no editing these vector lines with something like anchor points. Not a deal breaker, but it’s something that would have been nice.

Vector Brushes

The Eraser

The Eraser surprised me, because I expected to have the same Brush Options as the other brush tools. You can „Erase with Brush”, but I found this to be confusing—you don’t use the Eraser to erase like this.

For example, if I want to erase with a soft round brush, I have to, instead, go to the Pixel Brush Tool, select my soft round brush, and then tap and hold the Touch Shortcut while drawing—a circle on the screen that can be used to alter how some tools behave. 

The line on the left is drawn with the Eraser tool, while the line on the right is drawn with the Pixel Brush Tool, using the Touch Shortcut. 

Eraser Tool

The Other Tools

You can use the Move Tool to move your work, as well as flip content horizontally or vertically.

The Selection Tools are used to select a specific area. Simply tap and drag—this was quite straightforward and easy to use. 

Then, you have a Paint Bucket Tool. Tap to add a fill color—the color currently active.

The Eyedropper is used to select color, but I found myself rarely using it. Instead, tap and hold on a color in your document to „pick up the color”. This is a standard action that will be familiar to those who have used Procreate. 

There is also the ability to Import content, right from the tools. 

One note there, however. I did really like that you can directly open your camera from Fresco, and then import. As a teacher, you could potentially photograph content, import, and directly draw on top of it, for example. That’s pretty cool. 

Additional Tools

Sharing Your Creations

Adobe Fresco has pretty straightforward export options. We can publish and export to a variety of formats, including PSD, PNG, JPG, and PDF. We can also export a time-lapse process video, which is genuinely fun to watch. 

Fresco also allows the user to export as a Behance project, and there’s a Quick Export, which allows you to export a snapshot of your work. I found myself thinking it was kind of like a screenshot tool. 

Export Options

The Price Tag

I have a paid Creative Cloud plan already—I use Photoshop, InDesign, Dreamweaver, After Effects, and many other members of the Creative Cloud family on the regular. If you’re in the same boat as I am, it means you can download the fully featured version of Adobe Fresco without any additional fee. That’s appreciated. 

However, if you don’t, Adobe Fresco’s price tag is $9.99 a month—after the first six months, which act as an initial, free trial. 

If you don’t want to pay the subscription fee, Adobe Fresco is still available to use, but it’s generally a freemium app with limited features. For example, you’ll only be able to export flattened, low-res imagery, and not all brushes will be available. 

Fresco Pricing

2. Adobe Fresco vs. Photoshop

A Replacement? A Companion? Something Else?

In a dream world, I would love to see a completely mobile version of Photoshop—the same functionality as Photoshop, but I can take it with me on my iPad. Fresco has potential, and the Live Brushes are quite fun to experiment with, but that’s not what Fresco is.

I think it’s important to note how Adobe describes Fresco:

Adobe Fresco brings together the world’s largest brush collection with revolutionary new technology to deliver a natural painting and drawing experience

That said, I found myself enjoying Fresco the most when I viewed it as an attempt to simulate real media—not as a Procreate competitor or as a companion/partner to Photoshop.

Adobe Fresco Painting

The Limitations

There are obvious limitations here, with Fresco—Photoshop is more than exclusively an illustration tool. We have a full range of tools for photo manipulation, adjustments, and more. 

But as an illustration tool, Fresco isn’t as powerful as Photoshop. I expected that, honestly. However, the Brush Settings in Fresco have less than half of the Brush Settings available in Photoshop.

Comparing Brush Settings

Importing Photoshop Brushes

This was one of the features I was most excited about: importing and using my Photoshop brushes in a mobile application. It sounds too good to be true!

It works, although it wasn’t without hiccups. Fresco has an Import from File feature, but I couldn’t get my brushes loaded up this way.

Instead, go to the brush file itself and choose Open In, then Fresco—so, if you have similar trouble, give this alternate method a try!

Loading Fresco Brushes

Photoshop Brush Settings

The Photoshop brush itself worked, once I had it imported. I had to go back in and tweak what settings are available in Fresco accordingly—like the Transfer and the Shape Dynamics. The Brush Settings are located at the bottom of the Tools panel. 

You can test the brush out, in the preview above these settings—a setting that will be familiar for Procreate users, too. 

Brush Settings

The Compatibility

One of the appealing things about Fresco, for me, was the ability to easily jump back and forth from Photoshop to Fresco and back to Photoshop. 

This is possible because you can save and export as a PSD in both programs. Fresco essentially saves your work as a cloud document, which you can then open up in Photoshop. 

However, I need to note that this is also achievable with most cloud services—I regularly jump from Procreate to Photoshop and back this way. 

Cloud Saving

3. Adobe Fresco vs. Procreate

The Functionality

Ultimately, Procreate and Adobe Fresco both do a lot of the same things. However, that’s the big deal here—this feels particularly jarring when you look at the price difference. 

Let’s look at Procreate Bushes and Adobe Fresco Brushes, as an example (specifically, Pixel Brushes). 

In Procreate, I can easily duplicate brushes and customize them to my liking. I can tap and drag to rearrange them—both the brushes themselves and the sets in my brush library.

In Fresco, however, I can’t seem to duplicate any of the default brushes. I’m left customizing the original, and then reverting to the original, if I want to go to back to the vanilla version. This is a huge bummer. You can favorite brushes, but there’s no rearranging them—the categories or the brushes themselves. 

Procreate Brushes versus Fresco Brushes

Customizing Brushes

That said, check out the difference between brush customization in Fresco and in Procreate. 

In Fresco, the customization options seem to vary, based on the brush. When I looked at the 14px pencil, under Sketching, I was left with Pressure and Velocity Dynamics.

In Procreate, the brush options are relatively universal from brush to brush, and they are pretty robust. 

Brush Customization

The Interface

Procreate’s UI is quite minimal, and it’s nice—it keeps the emphasis on the artwork itself.

Fresco isn’t necessarily cluttered, but I did find myself feeling rather „boxed in”, especially on the right-hand side. Procreate puts its layers here too, but I appreciate that these menus are collapsible. 

I did, however, appreciate that Fresco allows you to expand the canvas and hide almost all of your tools. It feels refreshing, clean, and very welcoming to draw this way—really reminiscent of a traditional sketchbook. This feels great; just doodling with the sketch brushes on an open surface like this is a very nice experience. 

Different Application Views
Procreate (Left), Adobe Fresco, Default View (Center), Adobe Fresco, Minimal View (Right)

Working With Color

I love that Procreate has customizable color palettes. Saving colors and color schemes is a normal part of my workflow.

In Fresco, when looking at the color picker, we have the option to save recent colors, by tapping on the plus sign in the Recent expandable menu. This works, but it doesn’t necessarily work well. I can’t rearrange any of these colors, and I can’t seem to delete them either. These recently saved colors also seem to be document specific. 

Color Palettes

Exporting Artwork

Both Adobe Fresco and Procreate can export artwork to PSD files, which is important for me, as someone who works in Photoshop a lot. I often find myself drawing in Procreate, jumping over to Photoshop, and then going back to Procreate. I could easily do the same in Fresco, but it wasn’t necessarily a process that was vastly improved.

They can both export time-lapse video, as well.

Procreate, however, can export as additional file types, such as animated GIFs, TIFF files, and animated PNGs. 

Exporting Work

The Price

Let’s be real here—price matters, and it’s probably one of the first factors on everybody’s mind, when it comes to whether or not Fresco is for them. 

Fresco comes with a $9.99 monthly fee, if you don’t already have a Creative Cloud subscription. Procreate, on the other hand, costs $9.99—and it’s a one-time fee. 

And that’s a pretty big difference, especially if viewing Fresco as a possible Procreate competitor. 

Honestly, I can’t say it has a world of content that Procreate doesn’t have. In fact, Fresco doesn’t have all of Procreate’s features, although some of them are listed as „coming soon” (such as perspective drawing and symmetry tools). 

Ultimately, this means Procreate is $9.99 USD (and a one-time fee), while Adobe Fresco is potentially $119.98 USD per year. Wow! Of course, if you’re already a Creative Cloud subscriber, it’s included. Honestly, that’s the deal maker there, for me. Adobe has promised some updates here, so only time will tell on that.  

Procreate vs Adobe Fresco

But Those Live Brushes

I have to admit, however—Adobe Fresco’s Live Brushes are a genuinely fun experience. Sitting back and painting fluffy clouds and just watching the paint blend and smear was pretty neat. I know I presented plenty of things about Fresco that weren’t so hot, but I’d be lying if I said I didn’t genuinely have a good time sitting back in my favorite chair and painting some clouds. It was a really organic and relaxing experience.

I drew the following, below, using the Watercolor Live Brushes. Holding down the Touch Shortcut, when using this brush, gives you „Pure Water”, instead of an eraser—it’s just really fun to push paint around and experiment with layering. 

I’m really curious to see where Adobe takes this feature in the future.

Adobe Fresco Painting

Who Wins the Battle Royale?

And the Winner Is…

Adobe Fresco isn’t a fundamentally bad application. It has a lot of potential, and some of the brushes are really very enjoyable to use. At launch, it’s just not everything it could be, just yet. I really hope this changes in the future, because the potential is there. Adobe has mentioned a bunch of additional features coming soon—I just wish „soon” was sooner!

In my opinion, there just isn’t enough here to dethrone Procreate, especially when Procreate has such a universally accessible price tag. As an „extra”, included with Creative Cloud, it’s fun to experiment with—but I wouldn’t call Fresco a significant addition to my normal workflow. 

Adobe Fresco vs Procreate

The Final Verdict

At the end of the day, Procreate has become a larger and larger part of my professional life. There have been times I’ve considered completely switching to Procreate as my preferred illustration tool—it’s genuinely awesome. 

Fresco feels like an application that wants to compete, but just isn’t there yet. Adobe’s promised a bunch of updates, however—so we’ll see what happens! If nothing else, I’ve got myself a new set of watercolors without the mess… and that’s pretty neat.

Adobe Fresco Painting

Thanks for exploring Adobe Fresco and Procreate with me! If you enjoyed this article, here are some others that you might enjoy, too!

An Introduction to Adobe Fresco and How It Compares to Procreate

Post pobrano z: An Introduction to Adobe Fresco and How It Compares to Procreate

Final product image
What You’ll Be Creating

Has Procreate met its match? Fresco, Adobe’s new drawing program for iPad, is here—how does it compare to Procreate or Photoshop? Is it a worthwhile competitor, or something you should pass up? Here’s an overview, first impressions, and some comparisons for your consideration.

I’m an artist—art, design, game development and content creation are what I do professionally. I spend a lot of time in Adobe Photoshop, but I also really enjoy Procreate. 

That said, I was pretty excited to get my hands on Fresco. When it comes to my iPad, Procreate is a really wonderful, enjoyable application. The price is right, and it’s very user friendly. So how does Adobe Fresco hold up, at launch? 

Follow along with us over on our Envato Tuts+ YouTube channel:

1. A Tour of Adobe Fresco

First Impressions

My first impression of Adobe Fresco was generally optimistic. I really enjoy many of the „out the box” brushes. I spent some time just casually sketching, and it did feel really natural and comfortable. 

I wanted Fresco to be an awesome application that I fell in love with. 

So… how did my first date with Fresco go? Let’s take a look at the tools themselves. You can find the tools, by default, on the left-hand side of the visible work area.

Adobe Fresco Tools

Pixel Brushes

Pixel Brushes are your standard raster brushes, very much like those in Photoshop. I do a lot of drawing in Photoshop, so I was really excited at the prospect of having all of my usual Photoshop brushes on my iPad. 

Below, I’ve tested out one of the ink brushes, and I’ve doodled an apple with some of the sketch brushes. 

Pixel Brushes

Importing Brushes

Your imported brushes are listed as „Library Brushes” at the bottom of your available Pixel Brushes. Doesn’t seem like there’s any sorting or reordering things, at this time.

I can’t remove any brushes I’ve imported within the app either—and it seems like I’m not the only one out there having that issue. That’s a bummer, but not a deal breaker.

Importing Brushes

Lovely, Right Out the Box

The Pixel Brushes that come with Fresco, however, are lovely. They have beautiful textures, and the sensitivity felt on point, without any adjustments—I didn’t have to tweak anything there to create really beautiful lines and textures. The Cezanne and Impressionist brushes were particularly fun and full of personality.

Painting Brushes

Live Brushes

Fresco also has Live Brushes—and they’re really cool. I had a lot of fun trying out the watercolor brushes, in particular. The way the colors bleed and run into each other really feels as if you’re working with paint. 

This isn’t the way I usually draw, digitally, but it was a lot of fun to play with. I’d say that this, right here, is probably one of Fresco’s coolest features. You’ve got Watercolor and Oil brushes, 11 brushes total. 

Fresco Live Brushes

Vector Brushes

The Vector Brushes are rather nice too! It’s really simple to just dig in and create some really lovely, clean, vector lines. There are five different brushes to choose from, which did feel a little odd to me. Still, the five here are pretty versatile. 

However, there’s no editing these vector lines with something like anchor points. Not a deal breaker, but it’s something that would have been nice.

Vector Brushes

The Eraser

The Eraser surprised me, because I expected to have the same Brush Options as the other brush tools. You can „Erase with Brush”, but I found this to be confusing—you don’t use the Eraser to erase like this.

For example, if I want to erase with a soft round brush, I have to, instead, go to the Pixel Brush Tool, select my soft round brush, and then tap and hold the Touch Shortcut while drawing—a circle on the screen that can be used to alter how some tools behave. 

The line on the left is drawn with the Eraser tool, while the line on the right is drawn with the Pixel Brush Tool, using the Touch Shortcut. 

Eraser Tool

The Other Tools

You can use the Move Tool to move your work, as well as flip content horizontally or vertically.

The Selection Tools are used to select a specific area. Simply tap and drag—this was quite straightforward and easy to use. 

Then, you have a Paint Bucket Tool. Tap to add a fill color—the color currently active.

The Eyedropper is used to select color, but I found myself rarely using it. Instead, tap and hold on a color in your document to „pick up the color”. This is a standard action that will be familiar to those who have used Procreate. 

There is also the ability to Import content, right from the tools. 

One note there, however. I did really like that you can directly open your camera from Fresco, and then import. As a teacher, you could potentially photograph content, import, and directly draw on top of it, for example. That’s pretty cool. 

Additional Tools

Sharing Your Creations

Adobe Fresco has pretty straightforward export options. We can publish and export to a variety of formats, including PSD, PNG, JPG, and PDF. We can also export a time-lapse process video, which is genuinely fun to watch. 

Fresco also allows the user to export as a Behance project, and there’s a Quick Export, which allows you to export a snapshot of your work. I found myself thinking it was kind of like a screenshot tool. 

Export Options

The Price Tag

I have a paid Creative Cloud plan already—I use Photoshop, InDesign, Dreamweaver, After Effects, and many other members of the Creative Cloud family on the regular. If you’re in the same boat as I am, it means you can download the fully featured version of Adobe Fresco without any additional fee. That’s appreciated. 

However, if you don’t, Adobe Fresco’s price tag is $9.99 a month—after the first six months, which act as an initial, free trial. 

If you don’t want to pay the subscription fee, Adobe Fresco is still available to use, but it’s generally a freemium app with limited features. For example, you’ll only be able to export flattened, low-res imagery, and not all brushes will be available. 

Fresco Pricing

2. Adobe Fresco vs. Photoshop

A Replacement? A Companion? Something Else?

In a dream world, I would love to see a completely mobile version of Photoshop—the same functionality as Photoshop, but I can take it with me on my iPad. Fresco has potential, and the Live Brushes are quite fun to experiment with, but that’s not what Fresco is.

I think it’s important to note how Adobe describes Fresco:

Adobe Fresco brings together the world’s largest brush collection with revolutionary new technology to deliver a natural painting and drawing experience

That said, I found myself enjoying Fresco the most when I viewed it as an attempt to simulate real media—not as a Procreate competitor or as a companion/partner to Photoshop.

Adobe Fresco Painting

The Limitations

There are obvious limitations here, with Fresco—Photoshop is more than exclusively an illustration tool. We have a full range of tools for photo manipulation, adjustments, and more. 

But as an illustration tool, Fresco isn’t as powerful as Photoshop. I expected that, honestly. However, the Brush Settings in Fresco have less than half of the Brush Settings available in Photoshop.

Comparing Brush Settings

Importing Photoshop Brushes

This was one of the features I was most excited about: importing and using my Photoshop brushes in a mobile application. It sounds too good to be true!

It works, although it wasn’t without hiccups. Fresco has an Import from File feature, but I couldn’t get my brushes loaded up this way.

Instead, go to the brush file itself and choose Open In, then Fresco—so, if you have similar trouble, give this alternate method a try!

Loading Fresco Brushes

Photoshop Brush Settings

The Photoshop brush itself worked, once I had it imported. I had to go back in and tweak what settings are available in Fresco accordingly—like the Transfer and the Shape Dynamics. The Brush Settings are located at the bottom of the Tools panel. 

You can test the brush out, in the preview above these settings—a setting that will be familiar for Procreate users, too. 

Brush Settings

The Compatibility

One of the appealing things about Fresco, for me, was the ability to easily jump back and forth from Photoshop to Fresco and back to Photoshop. 

This is possible because you can save and export as a PSD in both programs. Fresco essentially saves your work as a cloud document, which you can then open up in Photoshop. 

However, I need to note that this is also achievable with most cloud services—I regularly jump from Procreate to Photoshop and back this way. 

Cloud Saving

3. Adobe Fresco vs. Procreate

The Functionality

Ultimately, Procreate and Adobe Fresco both do a lot of the same things. However, that’s the big deal here—this feels particularly jarring when you look at the price difference. 

Let’s look at Procreate Bushes and Adobe Fresco Brushes, as an example (specifically, Pixel Brushes). 

In Procreate, I can easily duplicate brushes and customize them to my liking. I can tap and drag to rearrange them—both the brushes themselves and the sets in my brush library.

In Fresco, however, I can’t seem to duplicate any of the default brushes. I’m left customizing the original, and then reverting to the original, if I want to go to back to the vanilla version. This is a huge bummer. You can favorite brushes, but there’s no rearranging them—the categories or the brushes themselves. 

Procreate Brushes versus Fresco Brushes

Customizing Brushes

That said, check out the difference between brush customization in Fresco and in Procreate. 

In Fresco, the customization options seem to vary, based on the brush. When I looked at the 14px pencil, under Sketching, I was left with Pressure and Velocity Dynamics.

In Procreate, the brush options are relatively universal from brush to brush, and they are pretty robust. 

Brush Customization

The Interface

Procreate’s UI is quite minimal, and it’s nice—it keeps the emphasis on the artwork itself.

Fresco isn’t necessarily cluttered, but I did find myself feeling rather „boxed in”, especially on the right-hand side. Procreate puts its layers here too, but I appreciate that these menus are collapsible. 

I did, however, appreciate that Fresco allows you to expand the canvas and hide almost all of your tools. It feels refreshing, clean, and very welcoming to draw this way—really reminiscent of a traditional sketchbook. This feels great; just doodling with the sketch brushes on an open surface like this is a very nice experience. 

Different Application Views
Procreate (Left), Adobe Fresco, Default View (Center), Adobe Fresco, Minimal View (Right)

Working With Color

I love that Procreate has customizable color palettes. Saving colors and color schemes is a normal part of my workflow.

In Fresco, when looking at the color picker, we have the option to save recent colors, by tapping on the plus sign in the Recent expandable menu. This works, but it doesn’t necessarily work well. I can’t rearrange any of these colors, and I can’t seem to delete them either. These recently saved colors also seem to be document specific. 

Color Palettes

Exporting Artwork

Both Adobe Fresco and Procreate can export artwork to PSD files, which is important for me, as someone who works in Photoshop a lot. I often find myself drawing in Procreate, jumping over to Photoshop, and then going back to Procreate. I could easily do the same in Fresco, but it wasn’t necessarily a process that was vastly improved.

They can both export time-lapse video, as well.

Procreate, however, can export as additional file types, such as animated GIFs, TIFF files, and animated PNGs. 

Exporting Work

The Price

Let’s be real here—price matters, and it’s probably one of the first factors on everybody’s mind, when it comes to whether or not Fresco is for them. 

Fresco comes with a $9.99 monthly fee, if you don’t already have a Creative Cloud subscription. Procreate, on the other hand, costs $9.99—and it’s a one-time fee. 

And that’s a pretty big difference, especially if viewing Fresco as a possible Procreate competitor. 

Honestly, I can’t say it has a world of content that Procreate doesn’t have. In fact, Fresco doesn’t have all of Procreate’s features, although some of them are listed as „coming soon” (such as perspective drawing and symmetry tools). 

Ultimately, this means Procreate is $9.99 USD (and a one-time fee), while Adobe Fresco is potentially $119.98 USD per year. Wow! Of course, if you’re already a Creative Cloud subscriber, it’s included. Honestly, that’s the deal maker there, for me. Adobe has promised some updates here, so only time will tell on that.  

Procreate vs Adobe Fresco

But Those Live Brushes

I have to admit, however—Adobe Fresco’s Live Brushes are a genuinely fun experience. Sitting back and painting fluffy clouds and just watching the paint blend and smear was pretty neat. I know I presented plenty of things about Fresco that weren’t so hot, but I’d be lying if I said I didn’t genuinely have a good time sitting back in my favorite chair and painting some clouds. It was a really organic and relaxing experience.

I drew the following, below, using the Watercolor Live Brushes. Holding down the Touch Shortcut, when using this brush, gives you „Pure Water”, instead of an eraser—it’s just really fun to push paint around and experiment with layering. 

I’m really curious to see where Adobe takes this feature in the future.

Adobe Fresco Painting

Who Wins the Battle Royale?

And the Winner Is…

Adobe Fresco isn’t a fundamentally bad application. It has a lot of potential, and some of the brushes are really very enjoyable to use. At launch, it’s just not everything it could be, just yet. I really hope this changes in the future, because the potential is there. Adobe has mentioned a bunch of additional features coming soon—I just wish „soon” was sooner!

In my opinion, there just isn’t enough here to dethrone Procreate, especially when Procreate has such a universally accessible price tag. As an „extra”, included with Creative Cloud, it’s fun to experiment with—but I wouldn’t call Fresco a significant addition to my normal workflow. 

Adobe Fresco vs Procreate

The Final Verdict

At the end of the day, Procreate has become a larger and larger part of my professional life. There have been times I’ve considered completely switching to Procreate as my preferred illustration tool—it’s genuinely awesome. 

Fresco feels like an application that wants to compete, but just isn’t there yet. Adobe’s promised a bunch of updates, however—so we’ll see what happens! If nothing else, I’ve got myself a new set of watercolors without the mess… and that’s pretty neat.

Adobe Fresco Painting

Thanks for exploring Adobe Fresco and Procreate with me! If you enjoyed this article, here are some others that you might enjoy, too!