Archiwum kategorii: Web Tools

How to Create a Realistic Embroidery Text Effect in Adobe Photoshop

Post pobrano z: How to Create a Realistic Embroidery Text Effect in Adobe Photoshop
Final product image
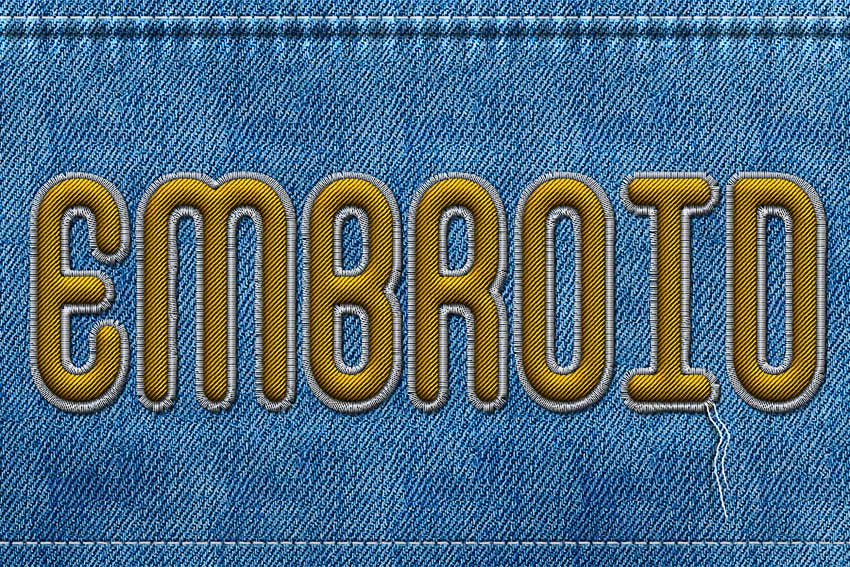
What You’ll Be Creating

In this tutorial, I will show you how to create a realistic embroidery text effect in Photoshop using stitch brushes and layer styles. The end result will be a font that looks like embroidery! 

This is part of my embroidery effect Photoshop action, which is part of the Embroidery and Stitching Photoshop Creation Kit from my portfolio on Envato Market

Embroidery and Stitching Photoshop Actions embroidery effect photoshop
Embroidery and Stitching Photoshop Actions

Tutorial Assets

The following assets were used during the production of this tutorial:

1. Create the Jeans Background

Step 1

Create a new 1100 x 600 px document, and create a new layer called Jeans Background. Copy and Paste the Jeans Texture on this layer. Make sure you use the large texture (2000 x 1500 px). 

Create Jeans Background

Step 2

Create a new layer called Textured and Fill it with white. Make sure you have the Foreground Color set to white and the Background Color set to black. Go to Filter > Render > Clouds.

Add Clouds Filter

Step 3

Go to Filter > Brush Strokes > Crosshatch. Set the Stroke Length to 15, Sharpness to 16, and Strength to 2. You can, of course, change the settings to your liking. 

Add Crosshatch Filter

Step 4

Set the blend mode of the Textured layer to Soft Light and around 50% Opacity. If you want, you can change the color of the jeans; add a Color Overlay style to the Textured layer with blend mode Color and simply pick a color that you like. 

Change Jeans Color

2. Create the Stitch Brushes

Step 1

In order to finish the jeans background and to start creating the stitched embroidery effect, we need some stitch brushes that we are going to make from scratch.

Create a new PSD file, size 27 x 5 px. Fill the canvas with color black. Go to Edit > Define Brush Preset. Set the brush name to „stitch” and click OK

Define Brush Preset

You can now close the new PSD file without saving and return to the initial PSD file (the one with the jeans background). 

Step 2

Now we are going to modify the brush that we just made, to create a custom brush. Choose the Brush Tool and select the „stitch” brush from the Brush Preset Picker. Toggle the Brush Panel and make the following settings: Angle 90, Roundness 50%, Spacing 87%, and set the Angle Jitter to Direction.

Create Custom Brush

Step 3

Click on the top right corner of the Brush Panel and choose New Brush Preset. Name the new brush „stitch1”

Create Stitch Brush

Step 4

Now we’ll create the second brush. Again choose the Brush Tool and select the „stitch” brush from the Brush Preset Picker. Toggle the Brush Panel and make the following settings: Spacing 750% and set the Angle Jitter to Direction.

Create Dashed Brush

Step 5

Click on the top right corner of the Brush Panel and choose New Brush Preset. Name the new brush „stitch2”

Create Dashed Line Brush

3. Add Sewing Details

Step 1

Use the Rectangle Tool and draw a shape as shown in the preview image. Make sure it exceeds the canvas on the top and left/right edges. Name this layer Jeans Border.

Draw Rectangle

Step 2

Go to Filter > Distort > Wave and set the Wavelength, Amplitude and Scale to create a wavy border. Also go to Filter > Blur > Gaussian Blur and set the Radius to 0.7 pixels.

Filter Distort Wave

Step 3

Add this layer style to the Jeans Border layer: Drop Shadow (color #131e26), Inner Shadow (color #131e26), Inner Glow (color #ffffff), Bevel and Emboss (colors: #ffffff and #131e26).

Drop Shadow
Inner Shadow
Inner Glow
Bevel and Emboss

Step 4

Create a new layer and call it Stitch. Pick the Brush Tool and choose the „stitch2” brush. Set the size to around 13 px and the color to #ffffff. Keep the Shift key pressed to draw a straight line. Add another line on the bottom of the jeans background in the same way.

Add Stitch

Step 5

Add this layer style to the Stitch layer: Drop Shadow, Inner Glow, Bevel and Emboss, Stroke.

Drop Shadow
Inner Glow
Bevel and Emboss
Stroke

Step 6

Go to Filter > Distort > Ripple and set the Amount 30% and Size Small. Your result should now look like this.

Filter Distort Ripple

Step 7

Create a new layer and call it Ripple Edge. Take the Brush Tool and pick the Soft Round Brush which is a default Adobe Photoshop brush that you should have in your list. Toggle the Brush panel to customize the brush and make these settings: Size 50 px, Angle 90, Roundness 45%, Spacing 150%

Create Custom Brush

Step 8

Draw two lines using this custom brush and color white. Set the blend mode of the Ripple Edge layer to Overlay, 40% opacity level. Also add a Drop Shadow layer style (color #0f1114).

Add Line Border

4. How to Create an Embroidery Effect in Photoshop

Step 1

Create a new text layer and call it Embroidered Text. Type your text using the False Positive font. Click on the Toggle the Character and Paragraph Panels button and set the Font Size to around 230 px, Vertically/Horizontally Scale, etc., as shown in the preview.

False Positive Font

You can of course use any font type you want or even combine text and vector shapes. In this last case you will have to convert the layers into a smart object.

Step 2

Add a Stroke layer style to the Embroidered Text layer. I am doing that to make the text a little thinner. Right click on the layer and Convert to Smart Object.

Add Stroke

Step 3

Again, add this layer style to the Embroidered Text smart object: Drop Shadow (color #000000), Inner Shadow (color #000000), Bevel and Emboss (colors #ffffff and #000000Bevel and Emboss – Texture (Pattern „pixel-pattern-diagonal”), Color Overlay (color #686565)

Drop Shadow
Inner Shadow
Bevel and Emboss
Bevel and Emboss Texture
Color Overlay

Step 4

Convert the layer into a smart object one more time to be able to add another layer style without rasterizing the effects. Press Control-T to transform the smart object and scale it to 130% on both the horizontal and vertical scales.

Convert to Smart Object

Step 5

Duplicate the Embroidered Text smart object and call it Shadow. Move this layer below the Embroidered Text smart object. 

Step 6

Now we’ll add layer styles for each of these two layers. Let’s start with the Embroidered Text smart object. Add an Inner Shadow (color #000000), Bevel and Emboss (colors #ffffff and #000000), Color Overlay (color #ffc000) and Gradient Overlay (colors #ffffff and #ffffff). You can choose any Color Overlay you like, but just make sure to also adjust the Gradient Overlay opacity if you want a darker or lighter color tone.

Inner Shadow
Bevel and Emboss
Color Overlay
Gradient Overlay

Step 7

To make the effect more realistic, let’s add a Filter > Distort > Ripple and a Filter > Distort > Noise effect. These two effects are added as Smart Filters so you can edit them at any time by double clicking on the Filter name

Filter Distort Ripple and Noise

Step 8

Go to the Shadow Layer and set the Fill to 0%. Next, add a Bevel and Emboss (colors #ffffff and #000000) layer style. The embroidered text should now look like this.

Embroidered Text

Step 9

Create a new layer just below the Shadow layer and name it Stitched Border. Keep the Control key pressed and click on the Embroidered Text layer thumbnail to make a selection. Go to Select > Modify > Expand and expand by 5 pixels. 

Expand Selection

Step 10

Go to the Paths tab and choose Make Work Path.

Make Work Path

Step 11

Select the Brush Tool, color #ffffff, and pick the „stitch1” brush. Again from the Paths tab, choose Stroke Path. Press Delete to remove the work path. 

Stroke Path

Step 12

Add a Drop Shadow (color #000000) layer style to the Stitched Border layer. Convert this layer to a smart object. 

Drop Shadow

Step 13

Finally, let’s add a layer style to the Stitched Border smart object: Drop Shadow (color #161616), Inner Shadow (color #161616), Bevel and Emboss (color #ffffff and #161616), Color Overlay (color #f5f5f5—you can choose any color you want for the stitch)

Drop Shadow
Inner Shadow
Bevel and Emboss
Color Overlay

Congratulations! You’re Done!

In this tutorial you learned how to create an embroidered text effect in Adobe Photoshop. I hope you’ve enjoyed this tutorial. 

The Embroidered text effect is a part of Embroidery and Stitching Photoshop Creation Kit from my portfolio on Envato Market.

Embroidered Text in Photoshop embroidery effect Photoshop action

How to Create a Realistic Embroidery Text Effect in Adobe Photoshop

Post pobrano z: How to Create a Realistic Embroidery Text Effect in Adobe Photoshop

Final product image
What You’ll Be Creating

In this tutorial, I will show you how to create a realistic embroidery text effect in Photoshop using stitch brushes and layer styles. The end result will be a font that looks like embroidery! 

This is part of my embroidery effect Photoshop action, which is part of the Embroidery and Stitching Photoshop Creation Kit from my portfolio on Envato Market

Embroidery and Stitching Photoshop Actions embroidery effect photoshop
Embroidery and Stitching Photoshop Actions

Tutorial Assets

The following assets were used during the production of this tutorial:

1. Create the Jeans Background

Step 1

Create a new 1100 x 600 px document, and create a new layer called Jeans Background. Copy and Paste the Jeans Texture on this layer. Make sure you use the large texture (2000 x 1500 px). 

Create Jeans Background

Step 2

Create a new layer called Textured and Fill it with white. Make sure you have the Foreground Color set to white and the Background Color set to black. Go to Filter > Render > Clouds.

Add Clouds Filter

Step 3

Go to Filter > Brush Strokes > Crosshatch. Set the Stroke Length to 15, Sharpness to 16, and Strength to 2. You can, of course, change the settings to your liking. 

Add Crosshatch Filter

Step 4

Set the blend mode of the Textured layer to Soft Light and around 50% Opacity. If you want, you can change the color of the jeans; add a Color Overlay style to the Textured layer with blend mode Color and simply pick a color that you like. 

Change Jeans Color

2. Create the Stitch Brushes

Step 1

In order to finish the jeans background and to start creating the stitched embroidery effect, we need some stitch brushes that we are going to make from scratch.

Create a new PSD file, size 27 x 5 px. Fill the canvas with color black. Go to Edit > Define Brush Preset. Set the brush name to „stitch” and click OK

Define Brush Preset

You can now close the new PSD file without saving and return to the initial PSD file (the one with the jeans background). 

Step 2

Now we are going to modify the brush that we just made, to create a custom brush. Choose the Brush Tool and select the „stitch” brush from the Brush Preset Picker. Toggle the Brush Panel and make the following settings: Angle 90, Roundness 50%, Spacing 87%, and set the Angle Jitter to Direction.

Create Custom Brush

Step 3

Click on the top right corner of the Brush Panel and choose New Brush Preset. Name the new brush „stitch1”

Create Stitch Brush

Step 4

Now we’ll create the second brush. Again choose the Brush Tool and select the „stitch” brush from the Brush Preset Picker. Toggle the Brush Panel and make the following settings: Spacing 750% and set the Angle Jitter to Direction.

Create Dashed Brush

Step 5

Click on the top right corner of the Brush Panel and choose New Brush Preset. Name the new brush „stitch2”

Create Dashed Line Brush

3. Add Sewing Details

Step 1

Use the Rectangle Tool and draw a shape as shown in the preview image. Make sure it exceeds the canvas on the top and left/right edges. Name this layer Jeans Border.

Draw Rectangle

Step 2

Go to Filter > Distort > Wave and set the Wavelength, Amplitude and Scale to create a wavy border. Also go to Filter > Blur > Gaussian Blur and set the Radius to 0.7 pixels.

Filter Distort Wave

Step 3

Add this layer style to the Jeans Border layer: Drop Shadow (color #131e26), Inner Shadow (color #131e26), Inner Glow (color #ffffff), Bevel and Emboss (colors: #ffffff and #131e26).

Drop Shadow
Inner Shadow
Inner Glow
Bevel and Emboss

Step 4

Create a new layer and call it Stitch. Pick the Brush Tool and choose the „stitch2” brush. Set the size to around 13 px and the color to #ffffff. Keep the Shift key pressed to draw a straight line. Add another line on the bottom of the jeans background in the same way.

Add Stitch

Step 5

Add this layer style to the Stitch layer: Drop Shadow, Inner Glow, Bevel and Emboss, Stroke.

Drop Shadow
Inner Glow
Bevel and Emboss
Stroke

Step 6

Go to Filter > Distort > Ripple and set the Amount 30% and Size Small. Your result should now look like this.

Filter Distort Ripple

Step 7

Create a new layer and call it Ripple Edge. Take the Brush Tool and pick the Soft Round Brush which is a default Adobe Photoshop brush that you should have in your list. Toggle the Brush panel to customize the brush and make these settings: Size 50 px, Angle 90, Roundness 45%, Spacing 150%

Create Custom Brush

Step 8

Draw two lines using this custom brush and color white. Set the blend mode of the Ripple Edge layer to Overlay, 40% opacity level. Also add a Drop Shadow layer style (color #0f1114).

Add Line Border

4. How to Create an Embroidery Effect in Photoshop

Step 1

Create a new text layer and call it Embroidered Text. Type your text using the False Positive font. Click on the Toggle the Character and Paragraph Panels button and set the Font Size to around 230 px, Vertically/Horizontally Scale, etc., as shown in the preview.

False Positive Font

You can of course use any font type you want or even combine text and vector shapes. In this last case you will have to convert the layers into a smart object.

Step 2

Add a Stroke layer style to the Embroidered Text layer. I am doing that to make the text a little thinner. Right click on the layer and Convert to Smart Object.

Add Stroke

Step 3

Again, add this layer style to the Embroidered Text smart object: Drop Shadow (color #000000), Inner Shadow (color #000000), Bevel and Emboss (colors #ffffff and #000000Bevel and Emboss – Texture (Pattern „pixel-pattern-diagonal”), Color Overlay (color #686565)

Drop Shadow
Inner Shadow
Bevel and Emboss
Bevel and Emboss Texture
Color Overlay

Step 4

Convert the layer into a smart object one more time to be able to add another layer style without rasterizing the effects. Press Control-T to transform the smart object and scale it to 130% on both the horizontal and vertical scales.

Convert to Smart Object

Step 5

Duplicate the Embroidered Text smart object and call it Shadow. Move this layer below the Embroidered Text smart object. 

Step 6

Now we’ll add layer styles for each of these two layers. Let’s start with the Embroidered Text smart object. Add an Inner Shadow (color #000000), Bevel and Emboss (colors #ffffff and #000000), Color Overlay (color #ffc000) and Gradient Overlay (colors #ffffff and #ffffff). You can choose any Color Overlay you like, but just make sure to also adjust the Gradient Overlay opacity if you want a darker or lighter color tone.

Inner Shadow
Bevel and Emboss
Color Overlay
Gradient Overlay

Step 7

To make the effect more realistic, let’s add a Filter > Distort > Ripple and a Filter > Distort > Noise effect. These two effects are added as Smart Filters so you can edit them at any time by double clicking on the Filter name

Filter Distort Ripple and Noise

Step 8

Go to the Shadow Layer and set the Fill to 0%. Next, add a Bevel and Emboss (colors #ffffff and #000000) layer style. The embroidered text should now look like this.

Embroidered Text

Step 9

Create a new layer just below the Shadow layer and name it Stitched Border. Keep the Control key pressed and click on the Embroidered Text layer thumbnail to make a selection. Go to Select > Modify > Expand and expand by 5 pixels. 

Expand Selection

Step 10

Go to the Paths tab and choose Make Work Path.

Make Work Path

Step 11

Select the Brush Tool, color #ffffff, and pick the „stitch1” brush. Again from the Paths tab, choose Stroke Path. Press Delete to remove the work path. 

Stroke Path

Step 12

Add a Drop Shadow (color #000000) layer style to the Stitched Border layer. Convert this layer to a smart object. 

Drop Shadow

Step 13

Finally, let’s add a layer style to the Stitched Border smart object: Drop Shadow (color #161616), Inner Shadow (color #161616), Bevel and Emboss (color #ffffff and #161616), Color Overlay (color #f5f5f5—you can choose any color you want for the stitch)

Drop Shadow
Inner Shadow
Bevel and Emboss
Color Overlay

Congratulations! You’re Done!

In this tutorial you learned how to create an embroidered text effect in Adobe Photoshop. I hope you’ve enjoyed this tutorial. 

The Embroidered text effect is a part of Embroidery and Stitching Photoshop Creation Kit from my portfolio on Envato Market.

Embroidered Text in Photoshop embroidery effect Photoshop action

How to Create a Realistic Embroidery Text Effect in Adobe Photoshop

Post pobrano z: How to Create a Realistic Embroidery Text Effect in Adobe Photoshop

Final product image
What You’ll Be Creating

In this tutorial, I will show you how to create a realistic embroidery text effect in Photoshop using stitch brushes and layer styles. The end result will be a font that looks like embroidery! 

This is part of my embroidery effect Photoshop action, which is part of the Embroidery and Stitching Photoshop Creation Kit from my portfolio on Envato Market

Embroidery and Stitching Photoshop Actions embroidery effect photoshop
Embroidery and Stitching Photoshop Actions

Tutorial Assets

The following assets were used during the production of this tutorial:

1. Create the Jeans Background

Step 1

Create a new 1100 x 600 px document, and create a new layer called Jeans Background. Copy and Paste the Jeans Texture on this layer. Make sure you use the large texture (2000 x 1500 px). 

Create Jeans Background

Step 2

Create a new layer called Textured and Fill it with white. Make sure you have the Foreground Color set to white and the Background Color set to black. Go to Filter > Render > Clouds.

Add Clouds Filter

Step 3

Go to Filter > Brush Strokes > Crosshatch. Set the Stroke Length to 15, Sharpness to 16, and Strength to 2. You can, of course, change the settings to your liking. 

Add Crosshatch Filter

Step 4

Set the blend mode of the Textured layer to Soft Light and around 50% Opacity. If you want, you can change the color of the jeans; add a Color Overlay style to the Textured layer with blend mode Color and simply pick a color that you like. 

Change Jeans Color

2. Create the Stitch Brushes

Step 1

In order to finish the jeans background and to start creating the stitched embroidery effect, we need some stitch brushes that we are going to make from scratch.

Create a new PSD file, size 27 x 5 px. Fill the canvas with color black. Go to Edit > Define Brush Preset. Set the brush name to „stitch” and click OK

Define Brush Preset

You can now close the new PSD file without saving and return to the initial PSD file (the one with the jeans background). 

Step 2

Now we are going to modify the brush that we just made, to create a custom brush. Choose the Brush Tool and select the „stitch” brush from the Brush Preset Picker. Toggle the Brush Panel and make the following settings: Angle 90, Roundness 50%, Spacing 87%, and set the Angle Jitter to Direction.

Create Custom Brush

Step 3

Click on the top right corner of the Brush Panel and choose New Brush Preset. Name the new brush „stitch1”

Create Stitch Brush

Step 4

Now we’ll create the second brush. Again choose the Brush Tool and select the „stitch” brush from the Brush Preset Picker. Toggle the Brush Panel and make the following settings: Spacing 750% and set the Angle Jitter to Direction.

Create Dashed Brush

Step 5

Click on the top right corner of the Brush Panel and choose New Brush Preset. Name the new brush „stitch2”

Create Dashed Line Brush

3. Add Sewing Details

Step 1

Use the Rectangle Tool and draw a shape as shown in the preview image. Make sure it exceeds the canvas on the top and left/right edges. Name this layer Jeans Border.

Draw Rectangle

Step 2

Go to Filter > Distort > Wave and set the Wavelength, Amplitude and Scale to create a wavy border. Also go to Filter > Blur > Gaussian Blur and set the Radius to 0.7 pixels.

Filter Distort Wave

Step 3

Add this layer style to the Jeans Border layer: Drop Shadow (color #131e26), Inner Shadow (color #131e26), Inner Glow (color #ffffff), Bevel and Emboss (colors: #ffffff and #131e26).

Drop Shadow
Inner Shadow
Inner Glow
Bevel and Emboss

Step 4

Create a new layer and call it Stitch. Pick the Brush Tool and choose the „stitch2” brush. Set the size to around 13 px and the color to #ffffff. Keep the Shift key pressed to draw a straight line. Add another line on the bottom of the jeans background in the same way.

Add Stitch

Step 5

Add this layer style to the Stitch layer: Drop Shadow, Inner Glow, Bevel and Emboss, Stroke.

Drop Shadow
Inner Glow
Bevel and Emboss
Stroke

Step 6

Go to Filter > Distort > Ripple and set the Amount 30% and Size Small. Your result should now look like this.

Filter Distort Ripple

Step 7

Create a new layer and call it Ripple Edge. Take the Brush Tool and pick the Soft Round Brush which is a default Adobe Photoshop brush that you should have in your list. Toggle the Brush panel to customize the brush and make these settings: Size 50 px, Angle 90, Roundness 45%, Spacing 150%

Create Custom Brush

Step 8

Draw two lines using this custom brush and color white. Set the blend mode of the Ripple Edge layer to Overlay, 40% opacity level. Also add a Drop Shadow layer style (color #0f1114).

Add Line Border

4. How to Create an Embroidery Effect in Photoshop

Step 1

Create a new text layer and call it Embroidered Text. Type your text using the False Positive font. Click on the Toggle the Character and Paragraph Panels button and set the Font Size to around 230 px, Vertically/Horizontally Scale, etc., as shown in the preview.

False Positive Font

You can of course use any font type you want or even combine text and vector shapes. In this last case you will have to convert the layers into a smart object.

Step 2

Add a Stroke layer style to the Embroidered Text layer. I am doing that to make the text a little thinner. Right click on the layer and Convert to Smart Object.

Add Stroke

Step 3

Again, add this layer style to the Embroidered Text smart object: Drop Shadow (color #000000), Inner Shadow (color #000000), Bevel and Emboss (colors #ffffff and #000000Bevel and Emboss – Texture (Pattern „pixel-pattern-diagonal”), Color Overlay (color #686565)

Drop Shadow
Inner Shadow
Bevel and Emboss
Bevel and Emboss Texture
Color Overlay

Step 4

Convert the layer into a smart object one more time to be able to add another layer style without rasterizing the effects. Press Control-T to transform the smart object and scale it to 130% on both the horizontal and vertical scales.

Convert to Smart Object

Step 5

Duplicate the Embroidered Text smart object and call it Shadow. Move this layer below the Embroidered Text smart object. 

Step 6

Now we’ll add layer styles for each of these two layers. Let’s start with the Embroidered Text smart object. Add an Inner Shadow (color #000000), Bevel and Emboss (colors #ffffff and #000000), Color Overlay (color #ffc000) and Gradient Overlay (colors #ffffff and #ffffff). You can choose any Color Overlay you like, but just make sure to also adjust the Gradient Overlay opacity if you want a darker or lighter color tone.

Inner Shadow
Bevel and Emboss
Color Overlay
Gradient Overlay

Step 7

To make the effect more realistic, let’s add a Filter > Distort > Ripple and a Filter > Distort > Noise effect. These two effects are added as Smart Filters so you can edit them at any time by double clicking on the Filter name

Filter Distort Ripple and Noise

Step 8

Go to the Shadow Layer and set the Fill to 0%. Next, add a Bevel and Emboss (colors #ffffff and #000000) layer style. The embroidered text should now look like this.

Embroidered Text

Step 9

Create a new layer just below the Shadow layer and name it Stitched Border. Keep the Control key pressed and click on the Embroidered Text layer thumbnail to make a selection. Go to Select > Modify > Expand and expand by 5 pixels. 

Expand Selection

Step 10

Go to the Paths tab and choose Make Work Path.

Make Work Path

Step 11

Select the Brush Tool, color #ffffff, and pick the „stitch1” brush. Again from the Paths tab, choose Stroke Path. Press Delete to remove the work path. 

Stroke Path

Step 12

Add a Drop Shadow (color #000000) layer style to the Stitched Border layer. Convert this layer to a smart object. 

Drop Shadow

Step 13

Finally, let’s add a layer style to the Stitched Border smart object: Drop Shadow (color #161616), Inner Shadow (color #161616), Bevel and Emboss (color #ffffff and #161616), Color Overlay (color #f5f5f5—you can choose any color you want for the stitch)

Drop Shadow
Inner Shadow
Bevel and Emboss
Color Overlay

Congratulations! You’re Done!

In this tutorial you learned how to create an embroidered text effect in Adobe Photoshop. I hope you’ve enjoyed this tutorial. 

The Embroidered text effect is a part of Embroidery and Stitching Photoshop Creation Kit from my portfolio on Envato Market.

Embroidered Text in Photoshop embroidery effect Photoshop action

How to Create a Realistic Embroidery Text Effect in Adobe Photoshop

Post pobrano z: How to Create a Realistic Embroidery Text Effect in Adobe Photoshop

Final product image
What You’ll Be Creating

In this tutorial, I will show you how to create a realistic embroidery text effect in Photoshop using stitch brushes and layer styles. The end result will be a font that looks like embroidery! 

This is part of my embroidery effect Photoshop action, which is part of the Embroidery and Stitching Photoshop Creation Kit from my portfolio on Envato Market

Embroidery and Stitching Photoshop Actions embroidery effect photoshop
Embroidery and Stitching Photoshop Actions

Tutorial Assets

The following assets were used during the production of this tutorial:

1. Create the Jeans Background

Step 1

Create a new 1100 x 600 px document, and create a new layer called Jeans Background. Copy and Paste the Jeans Texture on this layer. Make sure you use the large texture (2000 x 1500 px). 

Create Jeans Background

Step 2

Create a new layer called Textured and Fill it with white. Make sure you have the Foreground Color set to white and the Background Color set to black. Go to Filter > Render > Clouds.

Add Clouds Filter

Step 3

Go to Filter > Brush Strokes > Crosshatch. Set the Stroke Length to 15, Sharpness to 16, and Strength to 2. You can, of course, change the settings to your liking. 

Add Crosshatch Filter

Step 4

Set the blend mode of the Textured layer to Soft Light and around 50% Opacity. If you want, you can change the color of the jeans; add a Color Overlay style to the Textured layer with blend mode Color and simply pick a color that you like. 

Change Jeans Color

2. Create the Stitch Brushes

Step 1

In order to finish the jeans background and to start creating the stitched embroidery effect, we need some stitch brushes that we are going to make from scratch.

Create a new PSD file, size 27 x 5 px. Fill the canvas with color black. Go to Edit > Define Brush Preset. Set the brush name to „stitch” and click OK

Define Brush Preset

You can now close the new PSD file without saving and return to the initial PSD file (the one with the jeans background). 

Step 2

Now we are going to modify the brush that we just made, to create a custom brush. Choose the Brush Tool and select the „stitch” brush from the Brush Preset Picker. Toggle the Brush Panel and make the following settings: Angle 90, Roundness 50%, Spacing 87%, and set the Angle Jitter to Direction.

Create Custom Brush

Step 3

Click on the top right corner of the Brush Panel and choose New Brush Preset. Name the new brush „stitch1”

Create Stitch Brush

Step 4

Now we’ll create the second brush. Again choose the Brush Tool and select the „stitch” brush from the Brush Preset Picker. Toggle the Brush Panel and make the following settings: Spacing 750% and set the Angle Jitter to Direction.

Create Dashed Brush

Step 5

Click on the top right corner of the Brush Panel and choose New Brush Preset. Name the new brush „stitch2”

Create Dashed Line Brush

3. Add Sewing Details

Step 1

Use the Rectangle Tool and draw a shape as shown in the preview image. Make sure it exceeds the canvas on the top and left/right edges. Name this layer Jeans Border.

Draw Rectangle

Step 2

Go to Filter > Distort > Wave and set the Wavelength, Amplitude and Scale to create a wavy border. Also go to Filter > Blur > Gaussian Blur and set the Radius to 0.7 pixels.

Filter Distort Wave

Step 3

Add this layer style to the Jeans Border layer: Drop Shadow (color #131e26), Inner Shadow (color #131e26), Inner Glow (color #ffffff), Bevel and Emboss (colors: #ffffff and #131e26).

Drop Shadow
Inner Shadow
Inner Glow
Bevel and Emboss

Step 4

Create a new layer and call it Stitch. Pick the Brush Tool and choose the „stitch2” brush. Set the size to around 13 px and the color to #ffffff. Keep the Shift key pressed to draw a straight line. Add another line on the bottom of the jeans background in the same way.

Add Stitch

Step 5

Add this layer style to the Stitch layer: Drop Shadow, Inner Glow, Bevel and Emboss, Stroke.

Drop Shadow
Inner Glow
Bevel and Emboss
Stroke

Step 6

Go to Filter > Distort > Ripple and set the Amount 30% and Size Small. Your result should now look like this.

Filter Distort Ripple

Step 7

Create a new layer and call it Ripple Edge. Take the Brush Tool and pick the Soft Round Brush which is a default Adobe Photoshop brush that you should have in your list. Toggle the Brush panel to customize the brush and make these settings: Size 50 px, Angle 90, Roundness 45%, Spacing 150%

Create Custom Brush

Step 8

Draw two lines using this custom brush and color white. Set the blend mode of the Ripple Edge layer to Overlay, 40% opacity level. Also add a Drop Shadow layer style (color #0f1114).

Add Line Border

4. How to Create an Embroidery Effect in Photoshop

Step 1

Create a new text layer and call it Embroidered Text. Type your text using the False Positive font. Click on the Toggle the Character and Paragraph Panels button and set the Font Size to around 230 px, Vertically/Horizontally Scale, etc., as shown in the preview.

False Positive Font

You can of course use any font type you want or even combine text and vector shapes. In this last case you will have to convert the layers into a smart object.

Step 2

Add a Stroke layer style to the Embroidered Text layer. I am doing that to make the text a little thinner. Right click on the layer and Convert to Smart Object.

Add Stroke

Step 3

Again, add this layer style to the Embroidered Text smart object: Drop Shadow (color #000000), Inner Shadow (color #000000), Bevel and Emboss (colors #ffffff and #000000Bevel and Emboss – Texture (Pattern „pixel-pattern-diagonal”), Color Overlay (color #686565)

Drop Shadow
Inner Shadow
Bevel and Emboss
Bevel and Emboss Texture
Color Overlay

Step 4

Convert the layer into a smart object one more time to be able to add another layer style without rasterizing the effects. Press Control-T to transform the smart object and scale it to 130% on both the horizontal and vertical scales.

Convert to Smart Object

Step 5

Duplicate the Embroidered Text smart object and call it Shadow. Move this layer below the Embroidered Text smart object. 

Step 6

Now we’ll add layer styles for each of these two layers. Let’s start with the Embroidered Text smart object. Add an Inner Shadow (color #000000), Bevel and Emboss (colors #ffffff and #000000), Color Overlay (color #ffc000) and Gradient Overlay (colors #ffffff and #ffffff). You can choose any Color Overlay you like, but just make sure to also adjust the Gradient Overlay opacity if you want a darker or lighter color tone.

Inner Shadow
Bevel and Emboss
Color Overlay
Gradient Overlay

Step 7

To make the effect more realistic, let’s add a Filter > Distort > Ripple and a Filter > Distort > Noise effect. These two effects are added as Smart Filters so you can edit them at any time by double clicking on the Filter name

Filter Distort Ripple and Noise

Step 8

Go to the Shadow Layer and set the Fill to 0%. Next, add a Bevel and Emboss (colors #ffffff and #000000) layer style. The embroidered text should now look like this.

Embroidered Text

Step 9

Create a new layer just below the Shadow layer and name it Stitched Border. Keep the Control key pressed and click on the Embroidered Text layer thumbnail to make a selection. Go to Select > Modify > Expand and expand by 5 pixels. 

Expand Selection

Step 10

Go to the Paths tab and choose Make Work Path.

Make Work Path

Step 11

Select the Brush Tool, color #ffffff, and pick the „stitch1” brush. Again from the Paths tab, choose Stroke Path. Press Delete to remove the work path. 

Stroke Path

Step 12

Add a Drop Shadow (color #000000) layer style to the Stitched Border layer. Convert this layer to a smart object. 

Drop Shadow

Step 13

Finally, let’s add a layer style to the Stitched Border smart object: Drop Shadow (color #161616), Inner Shadow (color #161616), Bevel and Emboss (color #ffffff and #161616), Color Overlay (color #f5f5f5—you can choose any color you want for the stitch)

Drop Shadow
Inner Shadow
Bevel and Emboss
Color Overlay

Congratulations! You’re Done!

In this tutorial you learned how to create an embroidered text effect in Adobe Photoshop. I hope you’ve enjoyed this tutorial. 

The Embroidered text effect is a part of Embroidery and Stitching Photoshop Creation Kit from my portfolio on Envato Market.

Embroidered Text in Photoshop embroidery effect Photoshop action

How to Create a Light Leak Photoshop Color Effect

Post pobrano z: How to Create a Light Leak Photoshop Color Effect

Final product image
What You’ll Be Creating

In this tutorial, you will learn how to create Photoshop color effects for pictures using a light leak overlay and how to add an atmospheric fade effect with gradient fills and gradient maps. 

I created my Faded Presets Stories Action with plenty of different light leaks using the same method for my GraphicRiver portfolio.

Faded preset stories action promo image

Tutorial Assets

You will need the following resources in order to complete this tutorial:

1. How to Create a Color Photo Effect Using a Gradient Map

Step 1

To create a color photo effect, we’ll use a gradient map adjustment layer. Press Control-O and select the image you want to use.

Opening the image in photoshop

Step 2

Go to Layer > New Adjustment Layer > Gradient Map.

creating gradient map

Step 3

Double-Click on the gradient map icon and create a gradient with the following settings:

  • Color: #4a595f; Location: 0%
  • Color: #ba8254; Location: 100%
Creating colors for the gradient map

Step 4

Change the Blending Mode of the gradient map to Color.

Changing the blending mode of the gradient map

2. How to Create Light Leaks in Photoshop

Step 1

Now we can start to create the light leaks. Go to Layer > New Fill Layer > Gradient.

Creating gradient fill adjustment layer

Step 2

Double Click on the Gradient Fill layer and use the following settings:

  • Style: Reflected
  • Angle: -50.53°
  • Color: #89515e; Location: 0%
  • Color: #d26348; Location: 46%
  • Color: #ff9f3b; Location: 100%
setting up the parameters for the first gradient fill

Step 3

Change the Blending Mode of the gradient fill to Lighten.

changing the blending mode of the layer

Step 4

Create another gradient fill layer as we just did above, but use the following settings:

  • Style: Reflected
  • Angle: -160°
  • Color: #fd605b; Location: 26%
  • Color: #533664; Location: 46%
  • Color: #e05929; Location: 76%
  • Opacity: 0%; Location: 0%
  • Opacity: 100%; Location: 16%
  • Opacity: 100%; Location: 31%
  • Opacity: 100%; Location: 67%
  • Opacity: 100%; Location: 70%
  • Opacity: 0%; Location: 73%
Creating the second gradient fill layer

Step 5

Change the Blending Mode of the gradient fill to Lighten.

changing the blending mode of the light leak

Step 6

And for the last light leaks, let’s create another gradient fill layer with the following settings:

  • Style: Linear
  • Angle: 140°
  • Color: #454543; Location: 0%
  • Color: #d96331; Location: 52%
  • Color: #d79863; Location: 100%
  • Opacity: 100%; Location: 23%
  • Opacity: 55%; Location: 27%
  • Opacity: 100%; Location: 40%
  • Opacity: 55%; Location: 69%
  • Opacity: 100%; Location: 90%
creating the light leak overlay

Step 7

Change the Blending Mode of the last gradient fill to Lighten.

changing the blending mode of the layer

Step 8

And finally, to make our image look a little more „faded”, we need to create another adjustment layer. Go to Layer > New Adjustment Layer > Exposure and set the Offset to +0.0200.

creating the exposure adjustment layer

Awesome Work, You’re Now Done!

In this simple way, we can create a light leak Photoshop action using gradient maps and gradient fill layers to achieve different Photoshop color effects.

Final Result of the manipulation

I hope you’ve enjoyed this tutorial, and feel free to contact me for any help with it. If you want to create similar effects using Photoshop actions for portraits, check my Faded Presets for Stories Action, which has a lot of fade effect Photoshop presets and light leak overlays, in my portfolio on GraphicRiver.

Faded presets stories action promo image

If you want to learn how to create similar Photoshop effects, be sure to check these tutorials:

How to Create a Light Leak Photoshop Color Effect

Post pobrano z: How to Create a Light Leak Photoshop Color Effect

Final product image
What You’ll Be Creating

In this tutorial, you will learn how to create Photoshop color effects for pictures using a light leak overlay and how to add an atmospheric fade effect with gradient fills and gradient maps. 

I created my Faded Presets Stories Action with plenty of different light leaks using the same method for my GraphicRiver portfolio.

Faded preset stories action promo image

Tutorial Assets

You will need the following resources in order to complete this tutorial:

1. How to Create a Color Photo Effect Using a Gradient Map

Step 1

To create a color photo effect, we’ll use a gradient map adjustment layer. Press Control-O and select the image you want to use.

Opening the image in photoshop

Step 2

Go to Layer > New Adjustment Layer > Gradient Map.

creating gradient map

Step 3

Double-Click on the gradient map icon and create a gradient with the following settings:

  • Color: #4a595f; Location: 0%
  • Color: #ba8254; Location: 100%
Creating colors for the gradient map

Step 4

Change the Blending Mode of the gradient map to Color.

Changing the blending mode of the gradient map

2. How to Create Light Leaks in Photoshop

Step 1

Now we can start to create the light leaks. Go to Layer > New Fill Layer > Gradient.

Creating gradient fill adjustment layer

Step 2

Double Click on the Gradient Fill layer and use the following settings:

  • Style: Reflected
  • Angle: -50.53°
  • Color: #89515e; Location: 0%
  • Color: #d26348; Location: 46%
  • Color: #ff9f3b; Location: 100%
setting up the parameters for the first gradient fill

Step 3

Change the Blending Mode of the gradient fill to Lighten.

changing the blending mode of the layer

Step 4

Create another gradient fill layer as we just did above, but use the following settings:

  • Style: Reflected
  • Angle: -160°
  • Color: #fd605b; Location: 26%
  • Color: #533664; Location: 46%
  • Color: #e05929; Location: 76%
  • Opacity: 0%; Location: 0%
  • Opacity: 100%; Location: 16%
  • Opacity: 100%; Location: 31%
  • Opacity: 100%; Location: 67%
  • Opacity: 100%; Location: 70%
  • Opacity: 0%; Location: 73%
Creating the second gradient fill layer

Step 5

Change the Blending Mode of the gradient fill to Lighten.

changing the blending mode of the light leak

Step 6

And for the last light leaks, let’s create another gradient fill layer with the following settings:

  • Style: Linear
  • Angle: 140°
  • Color: #454543; Location: 0%
  • Color: #d96331; Location: 52%
  • Color: #d79863; Location: 100%
  • Opacity: 100%; Location: 23%
  • Opacity: 55%; Location: 27%
  • Opacity: 100%; Location: 40%
  • Opacity: 55%; Location: 69%
  • Opacity: 100%; Location: 90%
creating the light leak overlay

Step 7

Change the Blending Mode of the last gradient fill to Lighten.

changing the blending mode of the layer

Step 8

And finally, to make our image look a little more „faded”, we need to create another adjustment layer. Go to Layer > New Adjustment Layer > Exposure and set the Offset to +0.0200.

creating the exposure adjustment layer

Awesome Work, You’re Now Done!

In this simple way, we can create a light leak Photoshop action using gradient maps and gradient fill layers to achieve different Photoshop color effects.

Final Result of the manipulation

I hope you’ve enjoyed this tutorial, and feel free to contact me for any help with it. If you want to create similar effects using Photoshop actions for portraits, check my Faded Presets for Stories Action, which has a lot of fade effect Photoshop presets and light leak overlays, in my portfolio on GraphicRiver.

Faded presets stories action promo image

If you want to learn how to create similar Photoshop effects, be sure to check these tutorials:

How to Create a Light Leak Photoshop Color Effect

Post pobrano z: How to Create a Light Leak Photoshop Color Effect

Final product image
What You’ll Be Creating

In this tutorial, you will learn how to create Photoshop color effects for pictures using a light leak overlay and how to add an atmospheric fade effect with gradient fills and gradient maps. 

I created my Faded Presets Stories Action with plenty of different light leaks using the same method for my GraphicRiver portfolio.

Faded preset stories action promo image

Tutorial Assets

You will need the following resources in order to complete this tutorial:

1. How to Create a Color Photo Effect Using a Gradient Map

Step 1

To create a color photo effect, we’ll use a gradient map adjustment layer. Press Control-O and select the image you want to use.

Opening the image in photoshop

Step 2

Go to Layer > New Adjustment Layer > Gradient Map.

creating gradient map

Step 3

Double-Click on the gradient map icon and create a gradient with the following settings:

  • Color: #4a595f; Location: 0%
  • Color: #ba8254; Location: 100%
Creating colors for the gradient map

Step 4

Change the Blending Mode of the gradient map to Color.

Changing the blending mode of the gradient map

2. How to Create Light Leaks in Photoshop

Step 1

Now we can start to create the light leaks. Go to Layer > New Fill Layer > Gradient.

Creating gradient fill adjustment layer

Step 2

Double Click on the Gradient Fill layer and use the following settings:

  • Style: Reflected
  • Angle: -50.53°
  • Color: #89515e; Location: 0%
  • Color: #d26348; Location: 46%
  • Color: #ff9f3b; Location: 100%
setting up the parameters for the first gradient fill

Step 3

Change the Blending Mode of the gradient fill to Lighten.

changing the blending mode of the layer

Step 4

Create another gradient fill layer as we just did above, but use the following settings:

  • Style: Reflected
  • Angle: -160°
  • Color: #fd605b; Location: 26%
  • Color: #533664; Location: 46%
  • Color: #e05929; Location: 76%
  • Opacity: 0%; Location: 0%
  • Opacity: 100%; Location: 16%
  • Opacity: 100%; Location: 31%
  • Opacity: 100%; Location: 67%
  • Opacity: 100%; Location: 70%
  • Opacity: 0%; Location: 73%
Creating the second gradient fill layer

Step 5

Change the Blending Mode of the gradient fill to Lighten.

changing the blending mode of the light leak

Step 6

And for the last light leaks, let’s create another gradient fill layer with the following settings:

  • Style: Linear
  • Angle: 140°
  • Color: #454543; Location: 0%
  • Color: #d96331; Location: 52%
  • Color: #d79863; Location: 100%
  • Opacity: 100%; Location: 23%
  • Opacity: 55%; Location: 27%
  • Opacity: 100%; Location: 40%
  • Opacity: 55%; Location: 69%
  • Opacity: 100%; Location: 90%
creating the light leak overlay

Step 7

Change the Blending Mode of the last gradient fill to Lighten.

changing the blending mode of the layer

Step 8

And finally, to make our image look a little more „faded”, we need to create another adjustment layer. Go to Layer > New Adjustment Layer > Exposure and set the Offset to +0.0200.

creating the exposure adjustment layer

Awesome Work, You’re Now Done!

In this simple way, we can create a light leak Photoshop action using gradient maps and gradient fill layers to achieve different Photoshop color effects.

Final Result of the manipulation

I hope you’ve enjoyed this tutorial, and feel free to contact me for any help with it. If you want to create similar effects using Photoshop actions for portraits, check my Faded Presets for Stories Action, which has a lot of fade effect Photoshop presets and light leak overlays, in my portfolio on GraphicRiver.

Faded presets stories action promo image

If you want to learn how to create similar Photoshop effects, be sure to check these tutorials:

How to Create a Light Leak Photoshop Color Effect

Post pobrano z: How to Create a Light Leak Photoshop Color Effect

Final product image
What You’ll Be Creating

In this tutorial, you will learn how to create Photoshop color effects for pictures using a light leak overlay and how to add an atmospheric fade effect with gradient fills and gradient maps. 

I created my Faded Presets Stories Action with plenty of different light leaks using the same method for my GraphicRiver portfolio.

Faded preset stories action promo image

Tutorial Assets

You will need the following resources in order to complete this tutorial:

1. How to Create a Color Photo Effect Using a Gradient Map

Step 1

To create a color photo effect, we’ll use a gradient map adjustment layer. Press Control-O and select the image you want to use.

Opening the image in photoshop

Step 2

Go to Layer > New Adjustment Layer > Gradient Map.

creating gradient map

Step 3

Double-Click on the gradient map icon and create a gradient with the following settings:

  • Color: #4a595f; Location: 0%
  • Color: #ba8254; Location: 100%
Creating colors for the gradient map

Step 4

Change the Blending Mode of the gradient map to Color.

Changing the blending mode of the gradient map

2. How to Create Light Leaks in Photoshop

Step 1

Now we can start to create the light leaks. Go to Layer > New Fill Layer > Gradient.

Creating gradient fill adjustment layer

Step 2

Double Click on the Gradient Fill layer and use the following settings:

  • Style: Reflected
  • Angle: -50.53°
  • Color: #89515e; Location: 0%
  • Color: #d26348; Location: 46%
  • Color: #ff9f3b; Location: 100%
setting up the parameters for the first gradient fill

Step 3

Change the Blending Mode of the gradient fill to Lighten.

changing the blending mode of the layer

Step 4

Create another gradient fill layer as we just did above, but use the following settings:

  • Style: Reflected
  • Angle: -160°
  • Color: #fd605b; Location: 26%
  • Color: #533664; Location: 46%
  • Color: #e05929; Location: 76%
  • Opacity: 0%; Location: 0%
  • Opacity: 100%; Location: 16%
  • Opacity: 100%; Location: 31%
  • Opacity: 100%; Location: 67%
  • Opacity: 100%; Location: 70%
  • Opacity: 0%; Location: 73%
Creating the second gradient fill layer

Step 5

Change the Blending Mode of the gradient fill to Lighten.

changing the blending mode of the light leak

Step 6

And for the last light leaks, let’s create another gradient fill layer with the following settings:

  • Style: Linear
  • Angle: 140°
  • Color: #454543; Location: 0%
  • Color: #d96331; Location: 52%
  • Color: #d79863; Location: 100%
  • Opacity: 100%; Location: 23%
  • Opacity: 55%; Location: 27%
  • Opacity: 100%; Location: 40%
  • Opacity: 55%; Location: 69%
  • Opacity: 100%; Location: 90%
creating the light leak overlay

Step 7

Change the Blending Mode of the last gradient fill to Lighten.

changing the blending mode of the layer

Step 8

And finally, to make our image look a little more „faded”, we need to create another adjustment layer. Go to Layer > New Adjustment Layer > Exposure and set the Offset to +0.0200.

creating the exposure adjustment layer

Awesome Work, You’re Now Done!

In this simple way, we can create a light leak Photoshop action using gradient maps and gradient fill layers to achieve different Photoshop color effects.

Final Result of the manipulation

I hope you’ve enjoyed this tutorial, and feel free to contact me for any help with it. If you want to create similar effects using Photoshop actions for portraits, check my Faded Presets for Stories Action, which has a lot of fade effect Photoshop presets and light leak overlays, in my portfolio on GraphicRiver.

Faded presets stories action promo image

If you want to learn how to create similar Photoshop effects, be sure to check these tutorials:

22 Best Baseball Fonts

Post pobrano z: 22 Best Baseball Fonts

Make awesome graphics with baseball fonts. Check out this list for inspiration.

22 Best Baseball Fonts

Set up your team to win. Baseball fonts are known for their vintage charm. They have lots of great movement and look great on a new jersey.

And whether you like serif typefaces are unique baseball script fonts, this selection includes the best authentic styles from professional designers.

Grab these amazing vintage baseball fonts from Envato Market and Envato Elements.

Inspired to make a great creative project? Try out this fantastic Photoshop text effect from .

Auckland – Baseball Font

Clean and pretty straight to the point, the Auckland baseball font is a stunner. Its elegant and minimalist design looks wonderful on fabrics and apparel, and it’s great for a team logo. Download it to get five alternates, ligatures, and swashes.

Auckland - Baseball Font

Slugger – Baseball Font

Batter up, slugger! This next baseball font features a classic retro design. Just type out your team name or logo into the font tester to see how it fits. Simple and effective, this modern typeface includes condensed, regular, and even script styles. Try it out!

Slugger - Baseball Font

Cosmoball Baseball Font

Or check out this next baseball typeface, the Cosmoball font. Created by designer wacaksara, this baseball script font is bold and fluid. Its handwritten style gives it a nice casual flair, so it’ll pair wonderfully with eBooks, headlines, and so much more. Give it a try!

Cosmoball Baseball Font

Headster Layered Family

You can also achieve out-of-this-world layering effects with the Headster font family. Mix and match unique design elements for the best combination of vintage label designs. Add extra quick details like shadows or engraved text effects!

Headster Layered Family

Bon Voyage Baseball Font With Tail

Bon voyage! Set up your next flyer with the fantastic Bon Voyage baseball jersey font. Featuring a classic sports look, this retro font duo lets you customize the style with ease. Create limitless combinations for a refreshed sports logo.

Bon Voyage Baseball Font With Tail

Fenway Baseball Font

Inspired by retro typography? Now you can incorporate that authentic Fenway Park experience with this exciting typeface. This baseball jersey font is inspired by real team logos. Use it for posters, invites, or custom graphics.

Fenway Baseball Font

Ballege Typeface

Need a good college logo? Try out the Ballege typeface. Strong and professional, this college-inspired logo definitely commands some space. Test out the regular, oblique and bold variations to see which you prefer. Ten weights included.

Ballege Typeface

Montheim Vintage Baseball Font

The Montheim vintage script is a stunning retro font with a full, medium weight. Included in this download is a complete set of letters, numbers, and punctuation. Inspired by the retro typography movements, this font looks good on just about any vertical or horizontal layout.

Montheim Vintage Baseball Font

Megattor Script

Looking for a quirky script font? Try out the Megattor Script font. Designed by Letterhend Studio, this cheeky font will add a flirty touch to any traditional sports theme. Create perfect hand-lettering posters with a natural handwriting feel. Try it out!

Megattor Script

Mattoa – Vintage Baseball Font

A mix of street and vintage, the Mattoa baseball font is definitely bold. Get 100% access to standard vintage characters, with support for extra characters and ligatures. Make sure to see the preview images to check out the cool swash alternates!

Mattoa - Vintage Baseball Font

Seren Baseball Script Font

A retro font with over 400 glyphs, the Seren baseball script font looks great with added texture. Customize your logos with additional brush effects to make the most of this font. Letters, numbers, and basic punctuation are all included.

Seren Baseball Script Font

Milestone Jersey Font

Complete your jersey with an awesome quote. The Milestone jersey font includes all the standard letter characters along with additional ornaments. Add a quick tail to the end of your brand or customize a team name. Enjoy regular and script versions in this set.

Milestone Jersey Font

Claiborne Baseball Font With Tail

Here’s another fantastic baseball font with a classic tail. Perfect for restaurants or modern corporations, this typeface can be used with clean or rough aesthetics. Add a touch of grit for a grunge feel or keep it regular for a nice result. Add it to your collection!

Claiborne Baseball Font With Tail

Agistha Baseball Jersey Font Style

Some modern baseball fonts feature a unique graffiti vibe. The Agistha baseball font, for instance, is our next example. Easily create creative logotypes or typography by simply installing this font. Use it for graphics, websites, and posters.

Agistha Baseball Jersey Font Style

Westdjava Jersey Font

Some fonts fit many themes, like the Westdjava jersey font. This retro font script is great for sports themes but can also work for weddings, blogs, and more. Use it on various projects for a clean and professional look. Multilingual support is also included.

Westdjava Jersey Font

Battams Jersey Font

Many designers use sports fonts for video game titles, movie intros, and marketing campaigns. The Battams jersey font is made by using a constant line weight with an oval tip line. Customize your titles even further with additional perks like swashes and alternates.

Battams Jersey Font

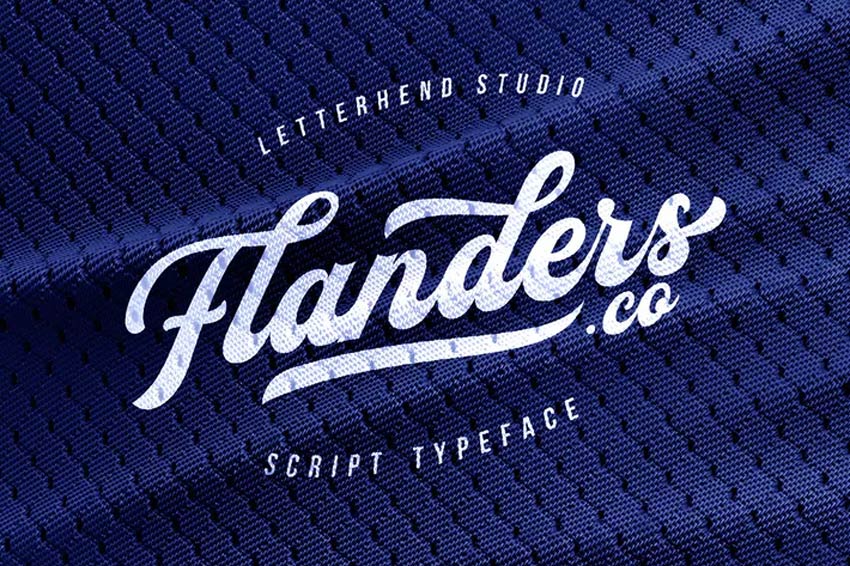
Flanders Baseball Jersey Font Style

This next font is a magnificent script typeface with lots of charisma. Use it for an official logotype or just try it out as a quick test. Bold and modern, this baseball script font is easy to install. Use it on both Macs and PCs.

Flanders Baseball Jersey Font Style

Marsmello Baseball Script Font

Make unique 3D typography with the Marsmello baseball font. This script is clean and subtle, with a casual appearance that mimics old cartoon graphics. Use it by itself or add a quick shadow like the graphic below. Add it to your collection today!

Marsmello Baseball Script Font

Marttabuck Script

Our next bold script font is the Marttabuck typeface. Created by Letterhend Studio, this vintage baseball font has a full and energetic appearance. Use it to announce your brand with a special handwritten look. Try out the regular and special font styles for different effects.

Marttabuck Script

Mourbout – NFC Font Family

Here’s another superb corporate font inspired by college logos and lettering. The Mourbout font family would look stunning as a monogram or logo. An exclusive display typeface with elegant serif details, this type features regular and italic versions.

Mourbout - NFC Font Family

Pipetton Font Duo

This next font duo includes sans and script typefaces. Pipetton is a classic retro font with an incredible baseball feel. A complete set of characters are included, as well as alternates, ligatures, and cool swashes. Give it a try!

Pipetton Font Duo

Frankey Baseball Vintage Font

Or make a long-lasting brand with this incredible vintage typeface. Frankey is an extraordinary baseball font with lots of charm. A mix of old and new, this set includes letters, numbers, and accented characters. Create beautiful designs for web or print work.

Frankey Baseball Vintage Font

More Font Inspiration

Whether you’re looking for a classic baseball font or a more modern aesthetic, these retro typefaces are the best baseball fonts around. Remember to bookmark this post to rediscover your favorites.

Looking for more inspiration? Check out these articles:

Tried any of these assets? Let us know! Tell us your favorites in the comments.

22 Best Baseball Fonts

Post pobrano z: 22 Best Baseball Fonts

Make awesome graphics with baseball fonts. Check out this list for inspiration.

22 Best Baseball Fonts

Set up your team to win. Baseball fonts are known for their vintage charm. They have lots of great movement and look great on a new jersey.

And whether you like serif typefaces are unique baseball script fonts, this selection includes the best authentic styles from professional designers.

Grab these amazing vintage baseball fonts from Envato Market and Envato Elements.

Inspired to make a great creative project? Try out this fantastic Photoshop text effect from .

Auckland – Baseball Font

Clean and pretty straight to the point, the Auckland baseball font is a stunner. Its elegant and minimalist design looks wonderful on fabrics and apparel, and it’s great for a team logo. Download it to get five alternates, ligatures, and swashes.

Auckland - Baseball Font

Slugger – Baseball Font

Batter up, slugger! This next baseball font features a classic retro design. Just type out your team name or logo into the font tester to see how it fits. Simple and effective, this modern typeface includes condensed, regular, and even script styles. Try it out!

Slugger - Baseball Font

Cosmoball Baseball Font

Or check out this next baseball typeface, the Cosmoball font. Created by designer wacaksara, this baseball script font is bold and fluid. Its handwritten style gives it a nice casual flair, so it’ll pair wonderfully with eBooks, headlines, and so much more. Give it a try!

Cosmoball Baseball Font

Headster Layered Family

You can also achieve out-of-this-world layering effects with the Headster font family. Mix and match unique design elements for the best combination of vintage label designs. Add extra quick details like shadows or engraved text effects!

Headster Layered Family

Bon Voyage Baseball Font With Tail

Bon voyage! Set up your next flyer with the fantastic Bon Voyage baseball jersey font. Featuring a classic sports look, this retro font duo lets you customize the style with ease. Create limitless combinations for a refreshed sports logo.

Bon Voyage Baseball Font With Tail

Fenway Baseball Font

Inspired by retro typography? Now you can incorporate that authentic Fenway Park experience with this exciting typeface. This baseball jersey font is inspired by real team logos. Use it for posters, invites, or custom graphics.

Fenway Baseball Font

Ballege Typeface

Need a good college logo? Try out the Ballege typeface. Strong and professional, this college-inspired logo definitely commands some space. Test out the regular, oblique and bold variations to see which you prefer. Ten weights included.

Ballege Typeface

Montheim Vintage Baseball Font

The Montheim vintage script is a stunning retro font with a full, medium weight. Included in this download is a complete set of letters, numbers, and punctuation. Inspired by the retro typography movements, this font looks good on just about any vertical or horizontal layout.

Montheim Vintage Baseball Font

Megattor Script

Looking for a quirky script font? Try out the Megattor Script font. Designed by Letterhend Studio, this cheeky font will add a flirty touch to any traditional sports theme. Create perfect hand-lettering posters with a natural handwriting feel. Try it out!

Megattor Script

Mattoa – Vintage Baseball Font

A mix of street and vintage, the Mattoa baseball font is definitely bold. Get 100% access to standard vintage characters, with support for extra characters and ligatures. Make sure to see the preview images to check out the cool swash alternates!

Mattoa - Vintage Baseball Font

Seren Baseball Script Font

A retro font with over 400 glyphs, the Seren baseball script font looks great with added texture. Customize your logos with additional brush effects to make the most of this font. Letters, numbers, and basic punctuation are all included.

Seren Baseball Script Font

Milestone Jersey Font

Complete your jersey with an awesome quote. The Milestone jersey font includes all the standard letter characters along with additional ornaments. Add a quick tail to the end of your brand or customize a team name. Enjoy regular and script versions in this set.

Milestone Jersey Font

Claiborne Baseball Font With Tail

Here’s another fantastic baseball font with a classic tail. Perfect for restaurants or modern corporations, this typeface can be used with clean or rough aesthetics. Add a touch of grit for a grunge feel or keep it regular for a nice result. Add it to your collection!

Claiborne Baseball Font With Tail

Agistha Baseball Jersey Font Style

Some modern baseball fonts feature a unique graffiti vibe. The Agistha baseball font, for instance, is our next example. Easily create creative logotypes or typography by simply installing this font. Use it for graphics, websites, and posters.

Agistha Baseball Jersey Font Style

Westdjava Jersey Font

Some fonts fit many themes, like the Westdjava jersey font. This retro font script is great for sports themes but can also work for weddings, blogs, and more. Use it on various projects for a clean and professional look. Multilingual support is also included.

Westdjava Jersey Font

Battams Jersey Font

Many designers use sports fonts for video game titles, movie intros, and marketing campaigns. The Battams jersey font is made by using a constant line weight with an oval tip line. Customize your titles even further with additional perks like swashes and alternates.

Battams Jersey Font

Flanders Baseball Jersey Font Style

This next font is a magnificent script typeface with lots of charisma. Use it for an official logotype or just try it out as a quick test. Bold and modern, this baseball script font is easy to install. Use it on both Macs and PCs.

Flanders Baseball Jersey Font Style

Marsmello Baseball Script Font

Make unique 3D typography with the Marsmello baseball font. This script is clean and subtle, with a casual appearance that mimics old cartoon graphics. Use it by itself or add a quick shadow like the graphic below. Add it to your collection today!

Marsmello Baseball Script Font

Marttabuck Script

Our next bold script font is the Marttabuck typeface. Created by Letterhend Studio, this vintage baseball font has a full and energetic appearance. Use it to announce your brand with a special handwritten look. Try out the regular and special font styles for different effects.

Marttabuck Script

Mourbout – NFC Font Family

Here’s another superb corporate font inspired by college logos and lettering. The Mourbout font family would look stunning as a monogram or logo. An exclusive display typeface with elegant serif details, this type features regular and italic versions.

Mourbout - NFC Font Family

Pipetton Font Duo

This next font duo includes sans and script typefaces. Pipetton is a classic retro font with an incredible baseball feel. A complete set of characters are included, as well as alternates, ligatures, and cool swashes. Give it a try!

Pipetton Font Duo

Frankey Baseball Vintage Font

Or make a long-lasting brand with this incredible vintage typeface. Frankey is an extraordinary baseball font with lots of charm. A mix of old and new, this set includes letters, numbers, and accented characters. Create beautiful designs for web or print work.

Frankey Baseball Vintage Font

More Font Inspiration

Whether you’re looking for a classic baseball font or a more modern aesthetic, these retro typefaces are the best baseball fonts around. Remember to bookmark this post to rediscover your favorites.

Looking for more inspiration? Check out these articles:

Tried any of these assets? Let us know! Tell us your favorites in the comments.