Tired of PowerPoint? Don’t worry—you can create great presentations using a free, open-source application: OnlyOffice. Discover how to get the most out of it in our new course, Up and Running With OnlyOffice Presentations.
What You’ll Learn
You can use OnlyOffice online, on every desktop and mobile operating system, self-hosted, or hosted via a cloud service. It supports PPTX, PPT, and ODP file formats, and on top of that it’s open source and can be used completely free of charge on the desktop or when self-hosted.
In this course, instructor Kezz Bracey will tell you everything you need to know to start creating awesome presentations in OnlyOffice.
Here are some free lessons from this course, as a preview of what you can expect:
Interface Overview
This video will give you a quick overview of the OnlyOffice Presentations interface and its key components.
Working With Text in OnlyOffice
In this video, you’ll see how to add text and control its layout and basic styling attributes. You’ll also learn how to work with text boxes and handle some extras, like adding special characters and formatting code examples.
Themes and Colour Schemes
OnlyOffice uses a system of themes and premade color schemes that control how things like new slides, charts, shapes and text look throughout your presentation. Discover how you can use these systems in this video.
Take the Course
You can take our new course straight away with a subscription to Envato Elements. For a single low monthly fee, you get access not only to this course, but also to our growing library of over 1,250 video courses and industry-leading eBooks on Envato Tuts+.
Plus you can download unlimited items from the huge Envato Elements library of more than 1.3 million creative assets. Create with unique fonts, photos, graphics and templates, and deliver better projects faster.
Tired of PowerPoint? Don’t worry—you can create great presentations using a free, open-source application: OnlyOffice. Discover how to get the most out of it in our new course, Up and Running With OnlyOffice Presentations.
What You’ll Learn
You can use OnlyOffice online, on every desktop and mobile operating system, self-hosted, or hosted via a cloud service. It supports PPTX, PPT, and ODP file formats, and on top of that it’s open source and can be used completely free of charge on the desktop or when self-hosted.
In this course, instructor Kezz Bracey will tell you everything you need to know to start creating awesome presentations in OnlyOffice.
Here are some free lessons from this course, as a preview of what you can expect:
Interface Overview
This video will give you a quick overview of the OnlyOffice Presentations interface and its key components.
Working With Text in OnlyOffice
In this video, you’ll see how to add text and control its layout and basic styling attributes. You’ll also learn how to work with text boxes and handle some extras, like adding special characters and formatting code examples.
Themes and Colour Schemes
OnlyOffice uses a system of themes and premade color schemes that control how things like new slides, charts, shapes and text look throughout your presentation. Discover how you can use these systems in this video.
Take the Course
You can take our new course straight away with a subscription to Envato Elements. For a single low monthly fee, you get access not only to this course, but also to our growing library of over 1,250 video courses and industry-leading eBooks on Envato Tuts+.
Plus you can download unlimited items from the huge Envato Elements library of more than 1.3 million creative assets. Create with unique fonts, photos, graphics and templates, and deliver better projects faster.
Tired of PowerPoint? Don’t worry—you can create great presentations using a free, open-source application: OnlyOffice. Discover how to get the most out of it in our new course, Up and Running With OnlyOffice Presentations.
What You’ll Learn
You can use OnlyOffice online, on every desktop and mobile operating system, self-hosted, or hosted via a cloud service. It supports PPTX, PPT, and ODP file formats, and on top of that it’s open source and can be used completely free of charge on the desktop or when self-hosted.
In this course, instructor Kezz Bracey will tell you everything you need to know to start creating awesome presentations in OnlyOffice.
Here are some free lessons from this course, as a preview of what you can expect:
Interface Overview
This video will give you a quick overview of the OnlyOffice Presentations interface and its key components.
Working With Text in OnlyOffice
In this video, you’ll see how to add text and control its layout and basic styling attributes. You’ll also learn how to work with text boxes and handle some extras, like adding special characters and formatting code examples.
Themes and Colour Schemes
OnlyOffice uses a system of themes and premade color schemes that control how things like new slides, charts, shapes and text look throughout your presentation. Discover how you can use these systems in this video.
Take the Course
You can take our new course straight away with a subscription to Envato Elements. For a single low monthly fee, you get access not only to this course, but also to our growing library of over 1,250 video courses and industry-leading eBooks on Envato Tuts+.
Plus you can download unlimited items from the huge Envato Elements library of more than 1.3 million creative assets. Create with unique fonts, photos, graphics and templates, and deliver better projects faster.
In this tutorial, you will learn how to create a Photoshop action to transform a photo to an art text effect. I will explain everything in so much detail that everyone can create it, even those who have just opened Photoshop for the first time.
The photo effect shown above is the one I will show you how to create in this tutorial. If you would like to create the even more advanced typography Photoshop effect shown below, using just a single click and in only a few minutes, then check out my Typography 7 Photoshop Action.
What You’ll Need
To recreate the design above, you will need the following resources:
First, open the photo that you want to work with. To open your photo, go to File > Open, choose your photo, and click Open. Now, before we get started, just check a couple of things:
Your photo should be in RGB Color mode, 8 Bits/Channel. To check this, go to Image > Mode.
For best results, your photo size should be 2000–4000 px wide/high. To check this, go to Image > Image Size.
Your photo should be the Background layer. If it is not, go to Layer > New > Background from Layer.
Step 2
Now go to Window > Actions, and in the Actions panel, click on the menu icon in the top right-hand corner, choose New Set to create a new set, and name it Typography. Then, click on the same menu icon again, choose New Action to create a new action, and name it Typography.
2. How to Select the Subject
Step 1
In this section, we are going to create a base that
determines the subject in our photo. Choose the Quick Selection Tool(W) and select the background of the photo. Use the Shift-Alt buttons on your keyboard to add or subtract some areas from the selection. After you’ve made a perfect selection, press Control-Shift-I on your keyboard to invert the selection.
Step 2
Now go to Select > Modify > Smooth and set the Sample Radius to 5 px. Then, go to Select > Modify > Contract andset Contract By to 2 px. After that, go to Select > Modify > Feather and set the Feather Radius to 2 px as shown below:
Step 3
Go to Layer > New > Layer to create a new layer and name it Base.
Step 4
Now set the foreground color to any color that you like. Then, go to Edit > Fill and set Contents to Foreground Color, Mode to Normal, and Opacity to 100%.
Step 5
Press Control-D on your keyboard to deselect the selection and hide the Base layer. Then, select the Background layer, go to Image > Adjustments > Shadows/Highlights and set the Shadows to 35% and the Highlights to 0%.
Step 6
Now Control-click on the Base layer thumbnail to make a selection of this layer. Then, press Control-J on your keyboard to create a new layer using the selection and name this new layer Subject_1.
3. How to Create the Background
Step 1
In this section we are going to create the background. Select the Background layer, go to Layer > New Fill Layer > Solid Color to create a new solid color fill layer, name it Background Color, and choose the color #f2f2f2.
Step 2
Now Right-click on this layer, choose Blending Options, check Gradient Overlay, and use the settings below:
4. How to Create the Text
Step 1
In this section, we are going to create the text. Hide the Subject_1 layer and choose the Horizontal Type Tool (T). Then, set the font to Montserrat, font style to Black, font size to 80 px, alignment to Center, and color to #000000. In the Character panel, check the All Caps option. After that, click and drag anywhere inside the canvas to create a text box and go to Type > Paste Lorem Ipsum to paste some random text. Feel free to use your own text and font settings.
Step 2
Now Double-click on this layer thumbnail and transform the Text Box as shown below:
Step 3
Choose the Horizontal Type Tool (T), and click on the end of the paragraph. Go to Type > Paste Lorem Ipsum
and repeat this step until you’ve covered the whole canvas with text. Again,
you can use your own text—just make sure it covers the whole canvas.
Step 4
Now name this layer Text.
5. How to Create the Subject From the Text
Step 1
In this section, we are going to create the subject from the text. Hide the Text layer and select and show the Subject_1 layer. Then, press Control-J on your keyboard to duplicate this layer and drag the new layer just below the Subject_1 layer in the Layers panel. Name this layer Subject_2.
Step 2
Now press Control-J on your keyboard to duplicate this layer and drag the new layer just below the Subject_2 layer in the Layers panel. Name this layer Subject_3.
Step 3
Hide all the layers except the Subject_3 layer. Then, press Control-Shift-U on your keyboard to desaturate this layer. After that, go to Image > Auto Tone and then Image > Auto Contrast to make some auto-corrections to the layer’s tone and contrast.
Step 4
Now go to Select > Color Range and set Select to Shadows, Fuzziness to 20%, and Range to 65.
Step 5
Go to Layer > Layer Mask > Reveal Selection to add a layer mask that reveals the selected area of the layer.
Step 6
Now Control-click on this layer thumbnail to make a selection of this layer. Then, select the thumbnail of this layer and set the foreground color to #000000. After that, go to Edit > Fill and set Contents to Foreground Color, Mode to Normal, and Opacity to 100% as shown below:
Step 7
Press Control-D on your keyboard to deselect the selection. Then, change the Opacity of this layer to 50%.
Step 8
Now hide this layer, and select and show the Subject_2 layer. Then, press Control-Shift-U on your keyboard to desaturate this layer. After that, go to Image > Auto Tone and then Image > Auto Contrast to make some auto-corrections to the layer’s tone and contrast.
Step 9
Go to Select > Color Range and set Select to Midtones, Fuzziness to 40%, and Range to 105 and 150.
Step 10
Now go to Layer > Layer Mask > Reveal Selection to add a layer mask that reveals the selected area of the layer.
Step 11
Now Control-click on the layer thumbnail to make a
selection of this layer. Then, select the thumbnail of this layer and set
the foreground color to #000000. After that, go to Edit > Fill and set Contents to Foreground Color, Mode to Normal, and Opacity to 100% as shown below:
Step 12
Change the Opacity of this layer to 10%.
Step 13
Now hide this layer, and select and show the Subject_3 layer. Then, press Control-Shift-U on your keyboard to desaturate this layer. After that,
go to Image > Auto Tone and then Image > Auto Contrast to make some auto-corrections to the layer’s tone and contrast.
Step 14
Go to Filter > Other > High Pass and set the Radius to 30 px.
Step 15
Now change the Blending Mode of this layer to Hard Light. Then, show the Subject_2, Subject_3, Background Color, and Background layers.
Step 16
Select the Text layer, and go to Layer > Layer Mask > Reveal All to add a layer mask that reveals the whole layer. Then, go to Image > Apply Image and use the settings below:
Step 17
Now press Control-I on your keyboard to invert the layer mask. Then, show the Text layer and hide the Subject_1, Subject_2, and Subject_3 layers.
Step 18
Choose the Horizontal Type Tool (T) and click anywhere over the text. Then, press Control-A on your keyboard to select all text and, on the Character panel, set the Leading to 60 and the Tracking to -60.
6. How to Make the Final Adjustments
Step 1
In this section, we are going to make some final adjustments to the design. Select the Background layer and press Control-J on your keyboard to duplicate it. Then, drag this new layer just above the Text layer in the Layers panel.
Step 2
Now Control-click on the Text layer thumbnail to make a selection of this layer. Then, go to Layer > Layer Mask > Reveal Selection to add a layer mask that reveals the selected area of the layer.
Step 3
Change the Blending Mode of this layer to Color and name it Text Color.
Step 4
Now press D on your keyboard to reset the swatches. Then, go to Layer > New Adjustment Layer > Gradient Map to create a new gradient map adjustment layer and name it Overall Contrast.
Step 5
Change the Blending Mode of this layer to Soft Light.
Step 6
Now press Control-Alt-Shift-E on your keyboard to make a screenshot, and then press Control-Shift-U to desaturate this layer. Then, go to Filter > Other > High Pass and set the Radius to 2 px.
Step 7
Change the Blending Mode of this layer to Hard Light and name it Overall Sharpening.
You Made It!
Congratulations, you have
succeeded! You have now learned how to create a typography photo effect Photoshop action to start making amazing Photoshop portrait effects from your photos. Here is our final
result:
If you would like to create the even more advanced typography Photoshop effect
shown below, using just a single click and in only a few minutes, then
check out my Typography 7 Photoshop Action.
With this action, you can create amazing, professional text effects
from your photos with no work at all! Simply fill in your subject with a
color and just play the action. It’s really that simple! The action
will do all the work for you, leaving you fully layered and customizable results that you can further modify.
The text is a fully editable text layer—you can make any changes you want. You can use your own text or change the font, the text color, and much more!
The action comes with a detailed video tutorial that demonstrates how to use the action and customize the results to get the most out of the effect.
You may also want to check out these tutorials on creating typography dispersion image effects, typography Photoshop portrait actions, a logo with text design, a GTA text effect action, or maybe on creating some other Photoshop text effects, fun filters, Photoshop photo filters, and photo art effects. Here is a good start:
In this tutorial you will learn how to create an amazing typography dispersion effect. Firstly we are going to create and define a few patterns and brushes….
In this tutorial you will learn how to create an amazing typography effect. Everything will be explained in so much detail that you can create it even if…
In this tutorial you will learn how to create an amazing text effect inspired by the Grand Theft Auto video game. It’s suitable for Photoshop beginners.
In this tutorial, you will learn how to create a Photoshop action to transform a photo to an art text effect. I will explain everything in so much detail that everyone can create it, even those who have just opened Photoshop for the first time.
The photo effect shown above is the one I will show you how to create in this tutorial. If you would like to create the even more advanced typography Photoshop effect shown below, using just a single click and in only a few minutes, then check out my Typography 7 Photoshop Action.
What You’ll Need
To recreate the design above, you will need the following resources:
First, open the photo that you want to work with. To open your photo, go to File > Open, choose your photo, and click Open. Now, before we get started, just check a couple of things:
Your photo should be in RGB Color mode, 8 Bits/Channel. To check this, go to Image > Mode.
For best results, your photo size should be 2000–4000 px wide/high. To check this, go to Image > Image Size.
Your photo should be the Background layer. If it is not, go to Layer > New > Background from Layer.
Step 2
Now go to Window > Actions, and in the Actions panel, click on the menu icon in the top right-hand corner, choose New Set to create a new set, and name it Typography. Then, click on the same menu icon again, choose New Action to create a new action, and name it Typography.
2. How to Select the Subject
Step 1
In this section, we are going to create a base that
determines the subject in our photo. Choose the Quick Selection Tool(W) and select the background of the photo. Use the Shift-Alt buttons on your keyboard to add or subtract some areas from the selection. After you’ve made a perfect selection, press Control-Shift-I on your keyboard to invert the selection.
Step 2
Now go to Select > Modify > Smooth and set the Sample Radius to 5 px. Then, go to Select > Modify > Contract andset Contract By to 2 px. After that, go to Select > Modify > Feather and set the Feather Radius to 2 px as shown below:
Step 3
Go to Layer > New > Layer to create a new layer and name it Base.
Step 4
Now set the foreground color to any color that you like. Then, go to Edit > Fill and set Contents to Foreground Color, Mode to Normal, and Opacity to 100%.
Step 5
Press Control-D on your keyboard to deselect the selection and hide the Base layer. Then, select the Background layer, go to Image > Adjustments > Shadows/Highlights and set the Shadows to 35% and the Highlights to 0%.
Step 6
Now Control-click on the Base layer thumbnail to make a selection of this layer. Then, press Control-J on your keyboard to create a new layer using the selection and name this new layer Subject_1.
3. How to Create the Background
Step 1
In this section we are going to create the background. Select the Background layer, go to Layer > New Fill Layer > Solid Color to create a new solid color fill layer, name it Background Color, and choose the color #f2f2f2.
Step 2
Now Right-click on this layer, choose Blending Options, check Gradient Overlay, and use the settings below:
4. How to Create the Text
Step 1
In this section, we are going to create the text. Hide the Subject_1 layer and choose the Horizontal Type Tool (T). Then, set the font to Montserrat, font style to Black, font size to 80 px, alignment to Center, and color to #000000. In the Character panel, check the All Caps option. After that, click and drag anywhere inside the canvas to create a text box and go to Type > Paste Lorem Ipsum to paste some random text. Feel free to use your own text and font settings.
Step 2
Now Double-click on this layer thumbnail and transform the Text Box as shown below:
Step 3
Choose the Horizontal Type Tool (T), and click on the end of the paragraph. Go to Type > Paste Lorem Ipsum
and repeat this step until you’ve covered the whole canvas with text. Again,
you can use your own text—just make sure it covers the whole canvas.
Step 4
Now name this layer Text.
5. How to Create the Subject From the Text
Step 1
In this section, we are going to create the subject from the text. Hide the Text layer and select and show the Subject_1 layer. Then, press Control-J on your keyboard to duplicate this layer and drag the new layer just below the Subject_1 layer in the Layers panel. Name this layer Subject_2.
Step 2
Now press Control-J on your keyboard to duplicate this layer and drag the new layer just below the Subject_2 layer in the Layers panel. Name this layer Subject_3.
Step 3
Hide all the layers except the Subject_3 layer. Then, press Control-Shift-U on your keyboard to desaturate this layer. After that, go to Image > Auto Tone and then Image > Auto Contrast to make some auto-corrections to the layer’s tone and contrast.
Step 4
Now go to Select > Color Range and set Select to Shadows, Fuzziness to 20%, and Range to 65.
Step 5
Go to Layer > Layer Mask > Reveal Selection to add a layer mask that reveals the selected area of the layer.
Step 6
Now Control-click on this layer thumbnail to make a selection of this layer. Then, select the thumbnail of this layer and set the foreground color to #000000. After that, go to Edit > Fill and set Contents to Foreground Color, Mode to Normal, and Opacity to 100% as shown below:
Step 7
Press Control-D on your keyboard to deselect the selection. Then, change the Opacity of this layer to 50%.
Step 8
Now hide this layer, and select and show the Subject_2 layer. Then, press Control-Shift-U on your keyboard to desaturate this layer. After that, go to Image > Auto Tone and then Image > Auto Contrast to make some auto-corrections to the layer’s tone and contrast.
Step 9
Go to Select > Color Range and set Select to Midtones, Fuzziness to 40%, and Range to 105 and 150.
Step 10
Now go to Layer > Layer Mask > Reveal Selection to add a layer mask that reveals the selected area of the layer.
Step 11
Now Control-click on the layer thumbnail to make a
selection of this layer. Then, select the thumbnail of this layer and set
the foreground color to #000000. After that, go to Edit > Fill and set Contents to Foreground Color, Mode to Normal, and Opacity to 100% as shown below:
Step 12
Change the Opacity of this layer to 10%.
Step 13
Now hide this layer, and select and show the Subject_3 layer. Then, press Control-Shift-U on your keyboard to desaturate this layer. After that,
go to Image > Auto Tone and then Image > Auto Contrast to make some auto-corrections to the layer’s tone and contrast.
Step 14
Go to Filter > Other > High Pass and set the Radius to 30 px.
Step 15
Now change the Blending Mode of this layer to Hard Light. Then, show the Subject_2, Subject_3, Background Color, and Background layers.
Step 16
Select the Text layer, and go to Layer > Layer Mask > Reveal All to add a layer mask that reveals the whole layer. Then, go to Image > Apply Image and use the settings below:
Step 17
Now press Control-I on your keyboard to invert the layer mask. Then, show the Text layer and hide the Subject_1, Subject_2, and Subject_3 layers.
Step 18
Choose the Horizontal Type Tool (T) and click anywhere over the text. Then, press Control-A on your keyboard to select all text and, on the Character panel, set the Leading to 60 and the Tracking to -60.
6. How to Make the Final Adjustments
Step 1
In this section, we are going to make some final adjustments to the design. Select the Background layer and press Control-J on your keyboard to duplicate it. Then, drag this new layer just above the Text layer in the Layers panel.
Step 2
Now Control-click on the Text layer thumbnail to make a selection of this layer. Then, go to Layer > Layer Mask > Reveal Selection to add a layer mask that reveals the selected area of the layer.
Step 3
Change the Blending Mode of this layer to Color and name it Text Color.
Step 4
Now press D on your keyboard to reset the swatches. Then, go to Layer > New Adjustment Layer > Gradient Map to create a new gradient map adjustment layer and name it Overall Contrast.
Step 5
Change the Blending Mode of this layer to Soft Light.
Step 6
Now press Control-Alt-Shift-E on your keyboard to make a screenshot, and then press Control-Shift-U to desaturate this layer. Then, go to Filter > Other > High Pass and set the Radius to 2 px.
Step 7
Change the Blending Mode of this layer to Hard Light and name it Overall Sharpening.
You Made It!
Congratulations, you have
succeeded! You have now learned how to create a typography photo effect Photoshop action to start making amazing Photoshop portrait effects from your photos. Here is our final
result:
If you would like to create the even more advanced typography Photoshop effect
shown below, using just a single click and in only a few minutes, then
check out my Typography 7 Photoshop Action.
With this action, you can create amazing, professional text effects
from your photos with no work at all! Simply fill in your subject with a
color and just play the action. It’s really that simple! The action
will do all the work for you, leaving you fully layered and customizable results that you can further modify.
The text is a fully editable text layer—you can make any changes you want. You can use your own text or change the font, the text color, and much more!
The action comes with a detailed video tutorial that demonstrates how to use the action and customize the results to get the most out of the effect.
You may also want to check out these tutorials on creating typography dispersion image effects, typography Photoshop portrait actions, a logo with text design, a GTA text effect action, or maybe on creating some other Photoshop text effects, fun filters, Photoshop photo filters, and photo art effects. Here is a good start:
In this tutorial you will learn how to create an amazing typography dispersion effect. Firstly we are going to create and define a few patterns and brushes….
In this tutorial you will learn how to create an amazing typography effect. Everything will be explained in so much detail that you can create it even if…
In this tutorial you will learn how to create an amazing text effect inspired by the Grand Theft Auto video game. It’s suitable for Photoshop beginners.
In this tutorial, you will learn how to create a Photoshop action to transform a photo to an art text effect. I will explain everything in so much detail that everyone can create it, even those who have just opened Photoshop for the first time.
The photo effect shown above is the one I will show you how to create in this tutorial. If you would like to create the even more advanced typography Photoshop effect shown below, using just a single click and in only a few minutes, then check out my Typography 7 Photoshop Action.
What You’ll Need
To recreate the design above, you will need the following resources:
First, open the photo that you want to work with. To open your photo, go to File > Open, choose your photo, and click Open. Now, before we get started, just check a couple of things:
Your photo should be in RGB Color mode, 8 Bits/Channel. To check this, go to Image > Mode.
For best results, your photo size should be 2000–4000 px wide/high. To check this, go to Image > Image Size.
Your photo should be the Background layer. If it is not, go to Layer > New > Background from Layer.
Step 2
Now go to Window > Actions, and in the Actions panel, click on the menu icon in the top right-hand corner, choose New Set to create a new set, and name it Typography. Then, click on the same menu icon again, choose New Action to create a new action, and name it Typography.
2. How to Select the Subject
Step 1
In this section, we are going to create a base that
determines the subject in our photo. Choose the Quick Selection Tool(W) and select the background of the photo. Use the Shift-Alt buttons on your keyboard to add or subtract some areas from the selection. After you’ve made a perfect selection, press Control-Shift-I on your keyboard to invert the selection.
Step 2
Now go to Select > Modify > Smooth and set the Sample Radius to 5 px. Then, go to Select > Modify > Contract andset Contract By to 2 px. After that, go to Select > Modify > Feather and set the Feather Radius to 2 px as shown below:
Step 3
Go to Layer > New > Layer to create a new layer and name it Base.
Step 4
Now set the foreground color to any color that you like. Then, go to Edit > Fill and set Contents to Foreground Color, Mode to Normal, and Opacity to 100%.
Step 5
Press Control-D on your keyboard to deselect the selection and hide the Base layer. Then, select the Background layer, go to Image > Adjustments > Shadows/Highlights and set the Shadows to 35% and the Highlights to 0%.
Step 6
Now Control-click on the Base layer thumbnail to make a selection of this layer. Then, press Control-J on your keyboard to create a new layer using the selection and name this new layer Subject_1.
3. How to Create the Background
Step 1
In this section we are going to create the background. Select the Background layer, go to Layer > New Fill Layer > Solid Color to create a new solid color fill layer, name it Background Color, and choose the color #f2f2f2.
Step 2
Now Right-click on this layer, choose Blending Options, check Gradient Overlay, and use the settings below:
4. How to Create the Text
Step 1
In this section, we are going to create the text. Hide the Subject_1 layer and choose the Horizontal Type Tool (T). Then, set the font to Montserrat, font style to Black, font size to 80 px, alignment to Center, and color to #000000. In the Character panel, check the All Caps option. After that, click and drag anywhere inside the canvas to create a text box and go to Type > Paste Lorem Ipsum to paste some random text. Feel free to use your own text and font settings.
Step 2
Now Double-click on this layer thumbnail and transform the Text Box as shown below:
Step 3
Choose the Horizontal Type Tool (T), and click on the end of the paragraph. Go to Type > Paste Lorem Ipsum
and repeat this step until you’ve covered the whole canvas with text. Again,
you can use your own text—just make sure it covers the whole canvas.
Step 4
Now name this layer Text.
5. How to Create the Subject From the Text
Step 1
In this section, we are going to create the subject from the text. Hide the Text layer and select and show the Subject_1 layer. Then, press Control-J on your keyboard to duplicate this layer and drag the new layer just below the Subject_1 layer in the Layers panel. Name this layer Subject_2.
Step 2
Now press Control-J on your keyboard to duplicate this layer and drag the new layer just below the Subject_2 layer in the Layers panel. Name this layer Subject_3.
Step 3
Hide all the layers except the Subject_3 layer. Then, press Control-Shift-U on your keyboard to desaturate this layer. After that, go to Image > Auto Tone and then Image > Auto Contrast to make some auto-corrections to the layer’s tone and contrast.
Step 4
Now go to Select > Color Range and set Select to Shadows, Fuzziness to 20%, and Range to 65.
Step 5
Go to Layer > Layer Mask > Reveal Selection to add a layer mask that reveals the selected area of the layer.
Step 6
Now Control-click on this layer thumbnail to make a selection of this layer. Then, select the thumbnail of this layer and set the foreground color to #000000. After that, go to Edit > Fill and set Contents to Foreground Color, Mode to Normal, and Opacity to 100% as shown below:
Step 7
Press Control-D on your keyboard to deselect the selection. Then, change the Opacity of this layer to 50%.
Step 8
Now hide this layer, and select and show the Subject_2 layer. Then, press Control-Shift-U on your keyboard to desaturate this layer. After that, go to Image > Auto Tone and then Image > Auto Contrast to make some auto-corrections to the layer’s tone and contrast.
Step 9
Go to Select > Color Range and set Select to Midtones, Fuzziness to 40%, and Range to 105 and 150.
Step 10
Now go to Layer > Layer Mask > Reveal Selection to add a layer mask that reveals the selected area of the layer.
Step 11
Now Control-click on the layer thumbnail to make a
selection of this layer. Then, select the thumbnail of this layer and set
the foreground color to #000000. After that, go to Edit > Fill and set Contents to Foreground Color, Mode to Normal, and Opacity to 100% as shown below:
Step 12
Change the Opacity of this layer to 10%.
Step 13
Now hide this layer, and select and show the Subject_3 layer. Then, press Control-Shift-U on your keyboard to desaturate this layer. After that,
go to Image > Auto Tone and then Image > Auto Contrast to make some auto-corrections to the layer’s tone and contrast.
Step 14
Go to Filter > Other > High Pass and set the Radius to 30 px.
Step 15
Now change the Blending Mode of this layer to Hard Light. Then, show the Subject_2, Subject_3, Background Color, and Background layers.
Step 16
Select the Text layer, and go to Layer > Layer Mask > Reveal All to add a layer mask that reveals the whole layer. Then, go to Image > Apply Image and use the settings below:
Step 17
Now press Control-I on your keyboard to invert the layer mask. Then, show the Text layer and hide the Subject_1, Subject_2, and Subject_3 layers.
Step 18
Choose the Horizontal Type Tool (T) and click anywhere over the text. Then, press Control-A on your keyboard to select all text and, on the Character panel, set the Leading to 60 and the Tracking to -60.
6. How to Make the Final Adjustments
Step 1
In this section, we are going to make some final adjustments to the design. Select the Background layer and press Control-J on your keyboard to duplicate it. Then, drag this new layer just above the Text layer in the Layers panel.
Step 2
Now Control-click on the Text layer thumbnail to make a selection of this layer. Then, go to Layer > Layer Mask > Reveal Selection to add a layer mask that reveals the selected area of the layer.
Step 3
Change the Blending Mode of this layer to Color and name it Text Color.
Step 4
Now press D on your keyboard to reset the swatches. Then, go to Layer > New Adjustment Layer > Gradient Map to create a new gradient map adjustment layer and name it Overall Contrast.
Step 5
Change the Blending Mode of this layer to Soft Light.
Step 6
Now press Control-Alt-Shift-E on your keyboard to make a screenshot, and then press Control-Shift-U to desaturate this layer. Then, go to Filter > Other > High Pass and set the Radius to 2 px.
Step 7
Change the Blending Mode of this layer to Hard Light and name it Overall Sharpening.
You Made It!
Congratulations, you have
succeeded! You have now learned how to create a typography photo effect Photoshop action to start making amazing Photoshop portrait effects from your photos. Here is our final
result:
If you would like to create the even more advanced typography Photoshop effect
shown below, using just a single click and in only a few minutes, then
check out my Typography 7 Photoshop Action.
With this action, you can create amazing, professional text effects
from your photos with no work at all! Simply fill in your subject with a
color and just play the action. It’s really that simple! The action
will do all the work for you, leaving you fully layered and customizable results that you can further modify.
The text is a fully editable text layer—you can make any changes you want. You can use your own text or change the font, the text color, and much more!
The action comes with a detailed video tutorial that demonstrates how to use the action and customize the results to get the most out of the effect.
You may also want to check out these tutorials on creating typography dispersion image effects, typography Photoshop portrait actions, a logo with text design, a GTA text effect action, or maybe on creating some other Photoshop text effects, fun filters, Photoshop photo filters, and photo art effects. Here is a good start:
In this tutorial you will learn how to create an amazing typography dispersion effect. Firstly we are going to create and define a few patterns and brushes….
In this tutorial you will learn how to create an amazing typography effect. Everything will be explained in so much detail that you can create it even if…
In this tutorial you will learn how to create an amazing text effect inspired by the Grand Theft Auto video game. It’s suitable for Photoshop beginners.
In this tutorial, you will learn how to create a Photoshop action to transform a photo to an art text effect. I will explain everything in so much detail that everyone can create it, even those who have just opened Photoshop for the first time.
The photo effect shown above is the one I will show you how to create in this tutorial. If you would like to create the even more advanced typography Photoshop effect shown below, using just a single click and in only a few minutes, then check out my Typography 7 Photoshop Action.
What You’ll Need
To recreate the design above, you will need the following resources:
First, open the photo that you want to work with. To open your photo, go to File > Open, choose your photo, and click Open. Now, before we get started, just check a couple of things:
Your photo should be in RGB Color mode, 8 Bits/Channel. To check this, go to Image > Mode.
For best results, your photo size should be 2000–4000 px wide/high. To check this, go to Image > Image Size.
Your photo should be the Background layer. If it is not, go to Layer > New > Background from Layer.
Step 2
Now go to Window > Actions, and in the Actions panel, click on the menu icon in the top right-hand corner, choose New Set to create a new set, and name it Typography. Then, click on the same menu icon again, choose New Action to create a new action, and name it Typography.
2. How to Select the Subject
Step 1
In this section, we are going to create a base that
determines the subject in our photo. Choose the Quick Selection Tool(W) and select the background of the photo. Use the Shift-Alt buttons on your keyboard to add or subtract some areas from the selection. After you’ve made a perfect selection, press Control-Shift-I on your keyboard to invert the selection.
Step 2
Now go to Select > Modify > Smooth and set the Sample Radius to 5 px. Then, go to Select > Modify > Contract andset Contract By to 2 px. After that, go to Select > Modify > Feather and set the Feather Radius to 2 px as shown below:
Step 3
Go to Layer > New > Layer to create a new layer and name it Base.
Step 4
Now set the foreground color to any color that you like. Then, go to Edit > Fill and set Contents to Foreground Color, Mode to Normal, and Opacity to 100%.
Step 5
Press Control-D on your keyboard to deselect the selection and hide the Base layer. Then, select the Background layer, go to Image > Adjustments > Shadows/Highlights and set the Shadows to 35% and the Highlights to 0%.
Step 6
Now Control-click on the Base layer thumbnail to make a selection of this layer. Then, press Control-J on your keyboard to create a new layer using the selection and name this new layer Subject_1.
3. How to Create the Background
Step 1
In this section we are going to create the background. Select the Background layer, go to Layer > New Fill Layer > Solid Color to create a new solid color fill layer, name it Background Color, and choose the color #f2f2f2.
Step 2
Now Right-click on this layer, choose Blending Options, check Gradient Overlay, and use the settings below:
4. How to Create the Text
Step 1
In this section, we are going to create the text. Hide the Subject_1 layer and choose the Horizontal Type Tool (T). Then, set the font to Montserrat, font style to Black, font size to 80 px, alignment to Center, and color to #000000. In the Character panel, check the All Caps option. After that, click and drag anywhere inside the canvas to create a text box and go to Type > Paste Lorem Ipsum to paste some random text. Feel free to use your own text and font settings.
Step 2
Now Double-click on this layer thumbnail and transform the Text Box as shown below:
Step 3
Choose the Horizontal Type Tool (T), and click on the end of the paragraph. Go to Type > Paste Lorem Ipsum
and repeat this step until you’ve covered the whole canvas with text. Again,
you can use your own text—just make sure it covers the whole canvas.
Step 4
Now name this layer Text.
5. How to Create the Subject From the Text
Step 1
In this section, we are going to create the subject from the text. Hide the Text layer and select and show the Subject_1 layer. Then, press Control-J on your keyboard to duplicate this layer and drag the new layer just below the Subject_1 layer in the Layers panel. Name this layer Subject_2.
Step 2
Now press Control-J on your keyboard to duplicate this layer and drag the new layer just below the Subject_2 layer in the Layers panel. Name this layer Subject_3.
Step 3
Hide all the layers except the Subject_3 layer. Then, press Control-Shift-U on your keyboard to desaturate this layer. After that, go to Image > Auto Tone and then Image > Auto Contrast to make some auto-corrections to the layer’s tone and contrast.
Step 4
Now go to Select > Color Range and set Select to Shadows, Fuzziness to 20%, and Range to 65.
Step 5
Go to Layer > Layer Mask > Reveal Selection to add a layer mask that reveals the selected area of the layer.
Step 6
Now Control-click on this layer thumbnail to make a selection of this layer. Then, select the thumbnail of this layer and set the foreground color to #000000. After that, go to Edit > Fill and set Contents to Foreground Color, Mode to Normal, and Opacity to 100% as shown below:
Step 7
Press Control-D on your keyboard to deselect the selection. Then, change the Opacity of this layer to 50%.
Step 8
Now hide this layer, and select and show the Subject_2 layer. Then, press Control-Shift-U on your keyboard to desaturate this layer. After that, go to Image > Auto Tone and then Image > Auto Contrast to make some auto-corrections to the layer’s tone and contrast.
Step 9
Go to Select > Color Range and set Select to Midtones, Fuzziness to 40%, and Range to 105 and 150.
Step 10
Now go to Layer > Layer Mask > Reveal Selection to add a layer mask that reveals the selected area of the layer.
Step 11
Now Control-click on the layer thumbnail to make a
selection of this layer. Then, select the thumbnail of this layer and set
the foreground color to #000000. After that, go to Edit > Fill and set Contents to Foreground Color, Mode to Normal, and Opacity to 100% as shown below:
Step 12
Change the Opacity of this layer to 10%.
Step 13
Now hide this layer, and select and show the Subject_3 layer. Then, press Control-Shift-U on your keyboard to desaturate this layer. After that,
go to Image > Auto Tone and then Image > Auto Contrast to make some auto-corrections to the layer’s tone and contrast.
Step 14
Go to Filter > Other > High Pass and set the Radius to 30 px.
Step 15
Now change the Blending Mode of this layer to Hard Light. Then, show the Subject_2, Subject_3, Background Color, and Background layers.
Step 16
Select the Text layer, and go to Layer > Layer Mask > Reveal All to add a layer mask that reveals the whole layer. Then, go to Image > Apply Image and use the settings below:
Step 17
Now press Control-I on your keyboard to invert the layer mask. Then, show the Text layer and hide the Subject_1, Subject_2, and Subject_3 layers.
Step 18
Choose the Horizontal Type Tool (T) and click anywhere over the text. Then, press Control-A on your keyboard to select all text and, on the Character panel, set the Leading to 60 and the Tracking to -60.
6. How to Make the Final Adjustments
Step 1
In this section, we are going to make some final adjustments to the design. Select the Background layer and press Control-J on your keyboard to duplicate it. Then, drag this new layer just above the Text layer in the Layers panel.
Step 2
Now Control-click on the Text layer thumbnail to make a selection of this layer. Then, go to Layer > Layer Mask > Reveal Selection to add a layer mask that reveals the selected area of the layer.
Step 3
Change the Blending Mode of this layer to Color and name it Text Color.
Step 4
Now press D on your keyboard to reset the swatches. Then, go to Layer > New Adjustment Layer > Gradient Map to create a new gradient map adjustment layer and name it Overall Contrast.
Step 5
Change the Blending Mode of this layer to Soft Light.
Step 6
Now press Control-Alt-Shift-E on your keyboard to make a screenshot, and then press Control-Shift-U to desaturate this layer. Then, go to Filter > Other > High Pass and set the Radius to 2 px.
Step 7
Change the Blending Mode of this layer to Hard Light and name it Overall Sharpening.
You Made It!
Congratulations, you have
succeeded! You have now learned how to create a typography photo effect Photoshop action to start making amazing Photoshop portrait effects from your photos. Here is our final
result:
If you would like to create the even more advanced typography Photoshop effect
shown below, using just a single click and in only a few minutes, then
check out my Typography 7 Photoshop Action.
With this action, you can create amazing, professional text effects
from your photos with no work at all! Simply fill in your subject with a
color and just play the action. It’s really that simple! The action
will do all the work for you, leaving you fully layered and customizable results that you can further modify.
The text is a fully editable text layer—you can make any changes you want. You can use your own text or change the font, the text color, and much more!
The action comes with a detailed video tutorial that demonstrates how to use the action and customize the results to get the most out of the effect.
You may also want to check out these tutorials on creating typography dispersion image effects, typography Photoshop portrait actions, a logo with text design, a GTA text effect action, or maybe on creating some other Photoshop text effects, fun filters, Photoshop photo filters, and photo art effects. Here is a good start:
In this tutorial you will learn how to create an amazing typography dispersion effect. Firstly we are going to create and define a few patterns and brushes….
In this tutorial you will learn how to create an amazing typography effect. Everything will be explained in so much detail that you can create it even if…
In this tutorial you will learn how to create an amazing text effect inspired by the Grand Theft Auto video game. It’s suitable for Photoshop beginners.
In this tutorial, you will learn how to create a Photoshop action to transform a photo to an art text effect. I will explain everything in so much detail that everyone can create it, even those who have just opened Photoshop for the first time.
The photo effect shown above is the one I will show you how to create in this tutorial. If you would like to create the even more advanced typography Photoshop effect shown below, using just a single click and in only a few minutes, then check out my Typography 7 Photoshop Action.
What You’ll Need
To recreate the design above, you will need the following resources:
First, open the photo that you want to work with. To open your photo, go to File > Open, choose your photo, and click Open. Now, before we get started, just check a couple of things:
Your photo should be in RGB Color mode, 8 Bits/Channel. To check this, go to Image > Mode.
For best results, your photo size should be 2000–4000 px wide/high. To check this, go to Image > Image Size.
Your photo should be the Background layer. If it is not, go to Layer > New > Background from Layer.
Step 2
Now go to Window > Actions, and in the Actions panel, click on the menu icon in the top right-hand corner, choose New Set to create a new set, and name it Typography. Then, click on the same menu icon again, choose New Action to create a new action, and name it Typography.
2. How to Select the Subject
Step 1
In this section, we are going to create a base that
determines the subject in our photo. Choose the Quick Selection Tool(W) and select the background of the photo. Use the Shift-Alt buttons on your keyboard to add or subtract some areas from the selection. After you’ve made a perfect selection, press Control-Shift-I on your keyboard to invert the selection.
Step 2
Now go to Select > Modify > Smooth and set the Sample Radius to 5 px. Then, go to Select > Modify > Contract andset Contract By to 2 px. After that, go to Select > Modify > Feather and set the Feather Radius to 2 px as shown below:
Step 3
Go to Layer > New > Layer to create a new layer and name it Base.
Step 4
Now set the foreground color to any color that you like. Then, go to Edit > Fill and set Contents to Foreground Color, Mode to Normal, and Opacity to 100%.
Step 5
Press Control-D on your keyboard to deselect the selection and hide the Base layer. Then, select the Background layer, go to Image > Adjustments > Shadows/Highlights and set the Shadows to 35% and the Highlights to 0%.
Step 6
Now Control-click on the Base layer thumbnail to make a selection of this layer. Then, press Control-J on your keyboard to create a new layer using the selection and name this new layer Subject_1.
3. How to Create the Background
Step 1
In this section we are going to create the background. Select the Background layer, go to Layer > New Fill Layer > Solid Color to create a new solid color fill layer, name it Background Color, and choose the color #f2f2f2.
Step 2
Now Right-click on this layer, choose Blending Options, check Gradient Overlay, and use the settings below:
4. How to Create the Text
Step 1
In this section, we are going to create the text. Hide the Subject_1 layer and choose the Horizontal Type Tool (T). Then, set the font to Montserrat, font style to Black, font size to 80 px, alignment to Center, and color to #000000. In the Character panel, check the All Caps option. After that, click and drag anywhere inside the canvas to create a text box and go to Type > Paste Lorem Ipsum to paste some random text. Feel free to use your own text and font settings.
Step 2
Now Double-click on this layer thumbnail and transform the Text Box as shown below:
Step 3
Choose the Horizontal Type Tool (T), and click on the end of the paragraph. Go to Type > Paste Lorem Ipsum
and repeat this step until you’ve covered the whole canvas with text. Again,
you can use your own text—just make sure it covers the whole canvas.
Step 4
Now name this layer Text.
5. How to Create the Subject From the Text
Step 1
In this section, we are going to create the subject from the text. Hide the Text layer and select and show the Subject_1 layer. Then, press Control-J on your keyboard to duplicate this layer and drag the new layer just below the Subject_1 layer in the Layers panel. Name this layer Subject_2.
Step 2
Now press Control-J on your keyboard to duplicate this layer and drag the new layer just below the Subject_2 layer in the Layers panel. Name this layer Subject_3.
Step 3
Hide all the layers except the Subject_3 layer. Then, press Control-Shift-U on your keyboard to desaturate this layer. After that, go to Image > Auto Tone and then Image > Auto Contrast to make some auto-corrections to the layer’s tone and contrast.
Step 4
Now go to Select > Color Range and set Select to Shadows, Fuzziness to 20%, and Range to 65.
Step 5
Go to Layer > Layer Mask > Reveal Selection to add a layer mask that reveals the selected area of the layer.
Step 6
Now Control-click on this layer thumbnail to make a selection of this layer. Then, select the thumbnail of this layer and set the foreground color to #000000. After that, go to Edit > Fill and set Contents to Foreground Color, Mode to Normal, and Opacity to 100% as shown below:
Step 7
Press Control-D on your keyboard to deselect the selection. Then, change the Opacity of this layer to 50%.
Step 8
Now hide this layer, and select and show the Subject_2 layer. Then, press Control-Shift-U on your keyboard to desaturate this layer. After that, go to Image > Auto Tone and then Image > Auto Contrast to make some auto-corrections to the layer’s tone and contrast.
Step 9
Go to Select > Color Range and set Select to Midtones, Fuzziness to 40%, and Range to 105 and 150.
Step 10
Now go to Layer > Layer Mask > Reveal Selection to add a layer mask that reveals the selected area of the layer.
Step 11
Now Control-click on the layer thumbnail to make a
selection of this layer. Then, select the thumbnail of this layer and set
the foreground color to #000000. After that, go to Edit > Fill and set Contents to Foreground Color, Mode to Normal, and Opacity to 100% as shown below:
Step 12
Change the Opacity of this layer to 10%.
Step 13
Now hide this layer, and select and show the Subject_3 layer. Then, press Control-Shift-U on your keyboard to desaturate this layer. After that,
go to Image > Auto Tone and then Image > Auto Contrast to make some auto-corrections to the layer’s tone and contrast.
Step 14
Go to Filter > Other > High Pass and set the Radius to 30 px.
Step 15
Now change the Blending Mode of this layer to Hard Light. Then, show the Subject_2, Subject_3, Background Color, and Background layers.
Step 16
Select the Text layer, and go to Layer > Layer Mask > Reveal All to add a layer mask that reveals the whole layer. Then, go to Image > Apply Image and use the settings below:
Step 17
Now press Control-I on your keyboard to invert the layer mask. Then, show the Text layer and hide the Subject_1, Subject_2, and Subject_3 layers.
Step 18
Choose the Horizontal Type Tool (T) and click anywhere over the text. Then, press Control-A on your keyboard to select all text and, on the Character panel, set the Leading to 60 and the Tracking to -60.
6. How to Make the Final Adjustments
Step 1
In this section, we are going to make some final adjustments to the design. Select the Background layer and press Control-J on your keyboard to duplicate it. Then, drag this new layer just above the Text layer in the Layers panel.
Step 2
Now Control-click on the Text layer thumbnail to make a selection of this layer. Then, go to Layer > Layer Mask > Reveal Selection to add a layer mask that reveals the selected area of the layer.
Step 3
Change the Blending Mode of this layer to Color and name it Text Color.
Step 4
Now press D on your keyboard to reset the swatches. Then, go to Layer > New Adjustment Layer > Gradient Map to create a new gradient map adjustment layer and name it Overall Contrast.
Step 5
Change the Blending Mode of this layer to Soft Light.
Step 6
Now press Control-Alt-Shift-E on your keyboard to make a screenshot, and then press Control-Shift-U to desaturate this layer. Then, go to Filter > Other > High Pass and set the Radius to 2 px.
Step 7
Change the Blending Mode of this layer to Hard Light and name it Overall Sharpening.
You Made It!
Congratulations, you have
succeeded! You have now learned how to create a typography photo effect Photoshop action to start making amazing Photoshop portrait effects from your photos. Here is our final
result:
If you would like to create the even more advanced typography Photoshop effect
shown below, using just a single click and in only a few minutes, then
check out my Typography 7 Photoshop Action.
With this action, you can create amazing, professional text effects
from your photos with no work at all! Simply fill in your subject with a
color and just play the action. It’s really that simple! The action
will do all the work for you, leaving you fully layered and customizable results that you can further modify.
The text is a fully editable text layer—you can make any changes you want. You can use your own text or change the font, the text color, and much more!
The action comes with a detailed video tutorial that demonstrates how to use the action and customize the results to get the most out of the effect.
You may also want to check out these tutorials on creating typography dispersion image effects, typography Photoshop portrait actions, a logo with text design, a GTA text effect action, or maybe on creating some other Photoshop text effects, fun filters, Photoshop photo filters, and photo art effects. Here is a good start:
In this tutorial you will learn how to create an amazing typography dispersion effect. Firstly we are going to create and define a few patterns and brushes….
In this tutorial you will learn how to create an amazing typography effect. Everything will be explained in so much detail that you can create it even if…
In this tutorial you will learn how to create an amazing text effect inspired by the Grand Theft Auto video game. It’s suitable for Photoshop beginners.
In this tutorial, you will learn how to create a Photoshop action to transform a photo to an art text effect. I will explain everything in so much detail that everyone can create it, even those who have just opened Photoshop for the first time.
The photo effect shown above is the one I will show you how to create in this tutorial. If you would like to create the even more advanced typography Photoshop effect shown below, using just a single click and in only a few minutes, then check out my Typography 7 Photoshop Action.
What You’ll Need
To recreate the design above, you will need the following resources:
First, open the photo that you want to work with. To open your photo, go to File > Open, choose your photo, and click Open. Now, before we get started, just check a couple of things:
Your photo should be in RGB Color mode, 8 Bits/Channel. To check this, go to Image > Mode.
For best results, your photo size should be 2000–4000 px wide/high. To check this, go to Image > Image Size.
Your photo should be the Background layer. If it is not, go to Layer > New > Background from Layer.
Step 2
Now go to Window > Actions, and in the Actions panel, click on the menu icon in the top right-hand corner, choose New Set to create a new set, and name it Typography. Then, click on the same menu icon again, choose New Action to create a new action, and name it Typography.
2. How to Select the Subject
Step 1
In this section, we are going to create a base that
determines the subject in our photo. Choose the Quick Selection Tool(W) and select the background of the photo. Use the Shift-Alt buttons on your keyboard to add or subtract some areas from the selection. After you’ve made a perfect selection, press Control-Shift-I on your keyboard to invert the selection.
Step 2
Now go to Select > Modify > Smooth and set the Sample Radius to 5 px. Then, go to Select > Modify > Contract andset Contract By to 2 px. After that, go to Select > Modify > Feather and set the Feather Radius to 2 px as shown below:
Step 3
Go to Layer > New > Layer to create a new layer and name it Base.
Step 4
Now set the foreground color to any color that you like. Then, go to Edit > Fill and set Contents to Foreground Color, Mode to Normal, and Opacity to 100%.
Step 5
Press Control-D on your keyboard to deselect the selection and hide the Base layer. Then, select the Background layer, go to Image > Adjustments > Shadows/Highlights and set the Shadows to 35% and the Highlights to 0%.
Step 6
Now Control-click on the Base layer thumbnail to make a selection of this layer. Then, press Control-J on your keyboard to create a new layer using the selection and name this new layer Subject_1.
3. How to Create the Background
Step 1
In this section we are going to create the background. Select the Background layer, go to Layer > New Fill Layer > Solid Color to create a new solid color fill layer, name it Background Color, and choose the color #f2f2f2.
Step 2
Now Right-click on this layer, choose Blending Options, check Gradient Overlay, and use the settings below:
4. How to Create the Text
Step 1
In this section, we are going to create the text. Hide the Subject_1 layer and choose the Horizontal Type Tool (T). Then, set the font to Montserrat, font style to Black, font size to 80 px, alignment to Center, and color to #000000. In the Character panel, check the All Caps option. After that, click and drag anywhere inside the canvas to create a text box and go to Type > Paste Lorem Ipsum to paste some random text. Feel free to use your own text and font settings.
Step 2
Now Double-click on this layer thumbnail and transform the Text Box as shown below:
Step 3
Choose the Horizontal Type Tool (T), and click on the end of the paragraph. Go to Type > Paste Lorem Ipsum
and repeat this step until you’ve covered the whole canvas with text. Again,
you can use your own text—just make sure it covers the whole canvas.
Step 4
Now name this layer Text.
5. How to Create the Subject From the Text
Step 1
In this section, we are going to create the subject from the text. Hide the Text layer and select and show the Subject_1 layer. Then, press Control-J on your keyboard to duplicate this layer and drag the new layer just below the Subject_1 layer in the Layers panel. Name this layer Subject_2.
Step 2
Now press Control-J on your keyboard to duplicate this layer and drag the new layer just below the Subject_2 layer in the Layers panel. Name this layer Subject_3.
Step 3
Hide all the layers except the Subject_3 layer. Then, press Control-Shift-U on your keyboard to desaturate this layer. After that, go to Image > Auto Tone and then Image > Auto Contrast to make some auto-corrections to the layer’s tone and contrast.
Step 4
Now go to Select > Color Range and set Select to Shadows, Fuzziness to 20%, and Range to 65.
Step 5
Go to Layer > Layer Mask > Reveal Selection to add a layer mask that reveals the selected area of the layer.
Step 6
Now Control-click on this layer thumbnail to make a selection of this layer. Then, select the thumbnail of this layer and set the foreground color to #000000. After that, go to Edit > Fill and set Contents to Foreground Color, Mode to Normal, and Opacity to 100% as shown below:
Step 7
Press Control-D on your keyboard to deselect the selection. Then, change the Opacity of this layer to 50%.
Step 8
Now hide this layer, and select and show the Subject_2 layer. Then, press Control-Shift-U on your keyboard to desaturate this layer. After that, go to Image > Auto Tone and then Image > Auto Contrast to make some auto-corrections to the layer’s tone and contrast.
Step 9
Go to Select > Color Range and set Select to Midtones, Fuzziness to 40%, and Range to 105 and 150.
Step 10
Now go to Layer > Layer Mask > Reveal Selection to add a layer mask that reveals the selected area of the layer.
Step 11
Now Control-click on the layer thumbnail to make a
selection of this layer. Then, select the thumbnail of this layer and set
the foreground color to #000000. After that, go to Edit > Fill and set Contents to Foreground Color, Mode to Normal, and Opacity to 100% as shown below:
Step 12
Change the Opacity of this layer to 10%.
Step 13
Now hide this layer, and select and show the Subject_3 layer. Then, press Control-Shift-U on your keyboard to desaturate this layer. After that,
go to Image > Auto Tone and then Image > Auto Contrast to make some auto-corrections to the layer’s tone and contrast.
Step 14
Go to Filter > Other > High Pass and set the Radius to 30 px.
Step 15
Now change the Blending Mode of this layer to Hard Light. Then, show the Subject_2, Subject_3, Background Color, and Background layers.
Step 16
Select the Text layer, and go to Layer > Layer Mask > Reveal All to add a layer mask that reveals the whole layer. Then, go to Image > Apply Image and use the settings below:
Step 17
Now press Control-I on your keyboard to invert the layer mask. Then, show the Text layer and hide the Subject_1, Subject_2, and Subject_3 layers.
Step 18
Choose the Horizontal Type Tool (T) and click anywhere over the text. Then, press Control-A on your keyboard to select all text and, on the Character panel, set the Leading to 60 and the Tracking to -60.
6. How to Make the Final Adjustments
Step 1
In this section, we are going to make some final adjustments to the design. Select the Background layer and press Control-J on your keyboard to duplicate it. Then, drag this new layer just above the Text layer in the Layers panel.
Step 2
Now Control-click on the Text layer thumbnail to make a selection of this layer. Then, go to Layer > Layer Mask > Reveal Selection to add a layer mask that reveals the selected area of the layer.
Step 3
Change the Blending Mode of this layer to Color and name it Text Color.
Step 4
Now press D on your keyboard to reset the swatches. Then, go to Layer > New Adjustment Layer > Gradient Map to create a new gradient map adjustment layer and name it Overall Contrast.
Step 5
Change the Blending Mode of this layer to Soft Light.
Step 6
Now press Control-Alt-Shift-E on your keyboard to make a screenshot, and then press Control-Shift-U to desaturate this layer. Then, go to Filter > Other > High Pass and set the Radius to 2 px.
Step 7
Change the Blending Mode of this layer to Hard Light and name it Overall Sharpening.
You Made It!
Congratulations, you have
succeeded! You have now learned how to create a typography photo effect Photoshop action to start making amazing Photoshop portrait effects from your photos. Here is our final
result:
If you would like to create the even more advanced typography Photoshop effect
shown below, using just a single click and in only a few minutes, then
check out my Typography 7 Photoshop Action.
With this action, you can create amazing, professional text effects
from your photos with no work at all! Simply fill in your subject with a
color and just play the action. It’s really that simple! The action
will do all the work for you, leaving you fully layered and customizable results that you can further modify.
The text is a fully editable text layer—you can make any changes you want. You can use your own text or change the font, the text color, and much more!
The action comes with a detailed video tutorial that demonstrates how to use the action and customize the results to get the most out of the effect.
You may also want to check out these tutorials on creating typography dispersion image effects, typography Photoshop portrait actions, a logo with text design, a GTA text effect action, or maybe on creating some other Photoshop text effects, fun filters, Photoshop photo filters, and photo art effects. Here is a good start:
In this tutorial you will learn how to create an amazing typography dispersion effect. Firstly we are going to create and define a few patterns and brushes….
In this tutorial you will learn how to create an amazing typography effect. Everything will be explained in so much detail that you can create it even if…
In this tutorial you will learn how to create an amazing text effect inspired by the Grand Theft Auto video game. It’s suitable for Photoshop beginners.
Photoshop is clearly our favorite photo editing software. In this article, we have listed 50 best Photoshop tutorial effects that will show you how to perform a wide range of tasks including age progression, Instagram-like effects, lomo effects, and light leaks, as well as vintage and retro effects that you can use to help improve your photo editing workflow.
If you’re looking for a quick way to make pro photo effects, then browse through our premium Photoshop Photo Effects and Photoshop Actions, which can be purchased on GraphicRiver. There are thousands of creative options to choose from. Or find an expert designer on Envato Studio to customize graphics for you.
Now, let’s take a look at these free photo effect tutorials!
50 Best Photoshop Effects Tutorials
Learn how to do just about anything to your photos. From double exposure effects to cut-outs and so much more, dive into these amazing tutorials created just for you from Envato Tuts+.
The tutorials above cover a wide range of effects you can achieve through practice and persistence. But if you’re short on time, you can always turn to the amazing selection of Photoshop Actions on GraphicRiver and Envato Elements for more awesome photo effects.
Here we have a collection of ten premium Photoshop actions guaranteed to transform your photos in a few short clicks. Enjoy!
HDR or High-Dynamic Range photography is an incredible technique that results in powerful imagery. And you can achieve the look of pristine HDR photography with this Photoshop action. Included in this package are 25 adjustable effects, four sharpness levels, and even a starburst generator action as a bonus!
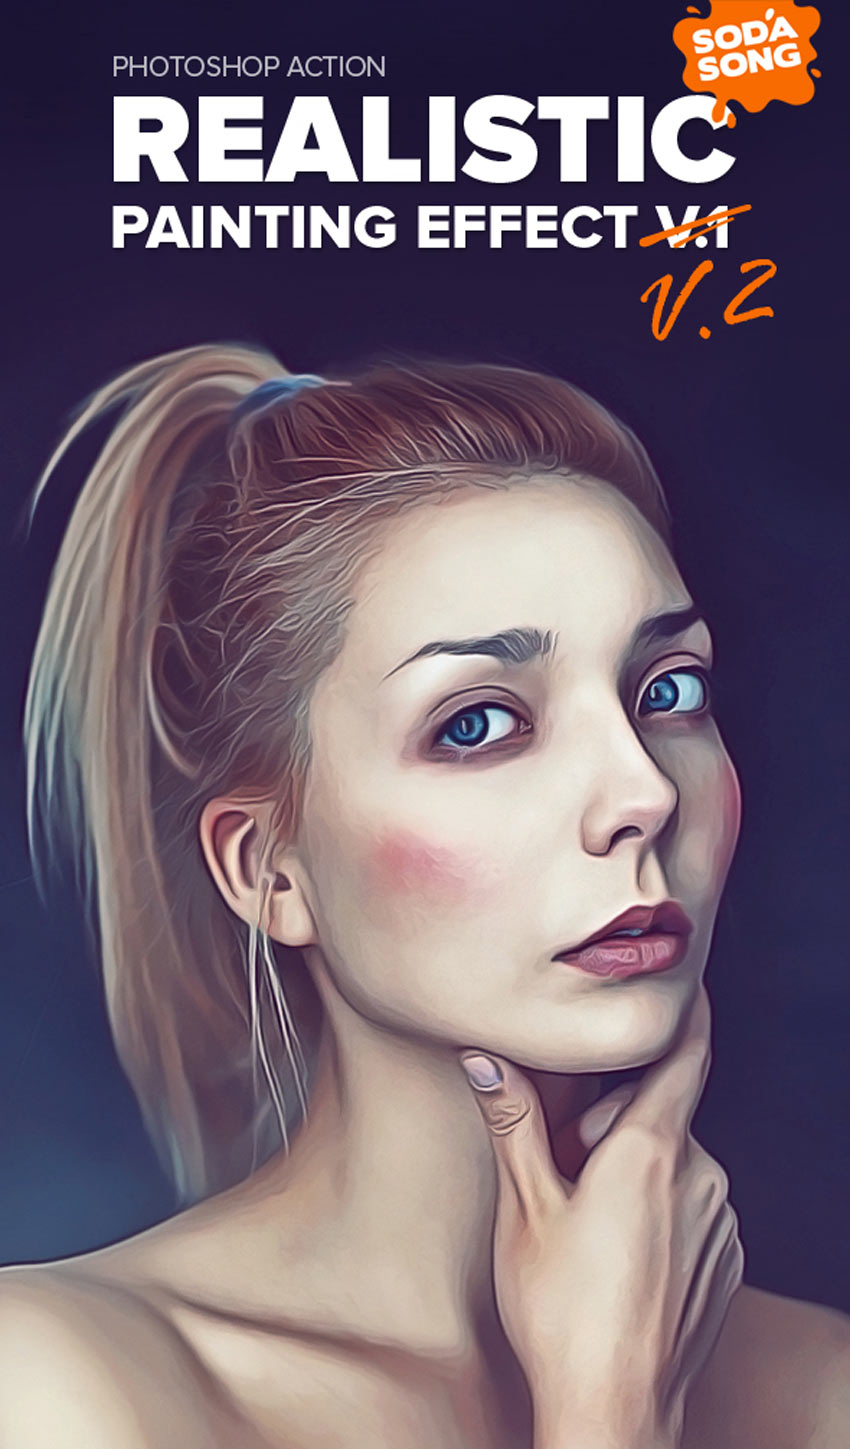
Get artsy with this realistic painting effect. Designed to simulate the look of traditional oil paintings, this set includes three Photoshop actions, fully editable layers, and 15 different color presets. Explore your creative side with just a few simple clicks!
You can never have enough Photoshop actions! And with this set of amazing premium actions, you can download 90 different looks. This package comes complete with retro-vintage effects, stunning black and white results, and so much more!
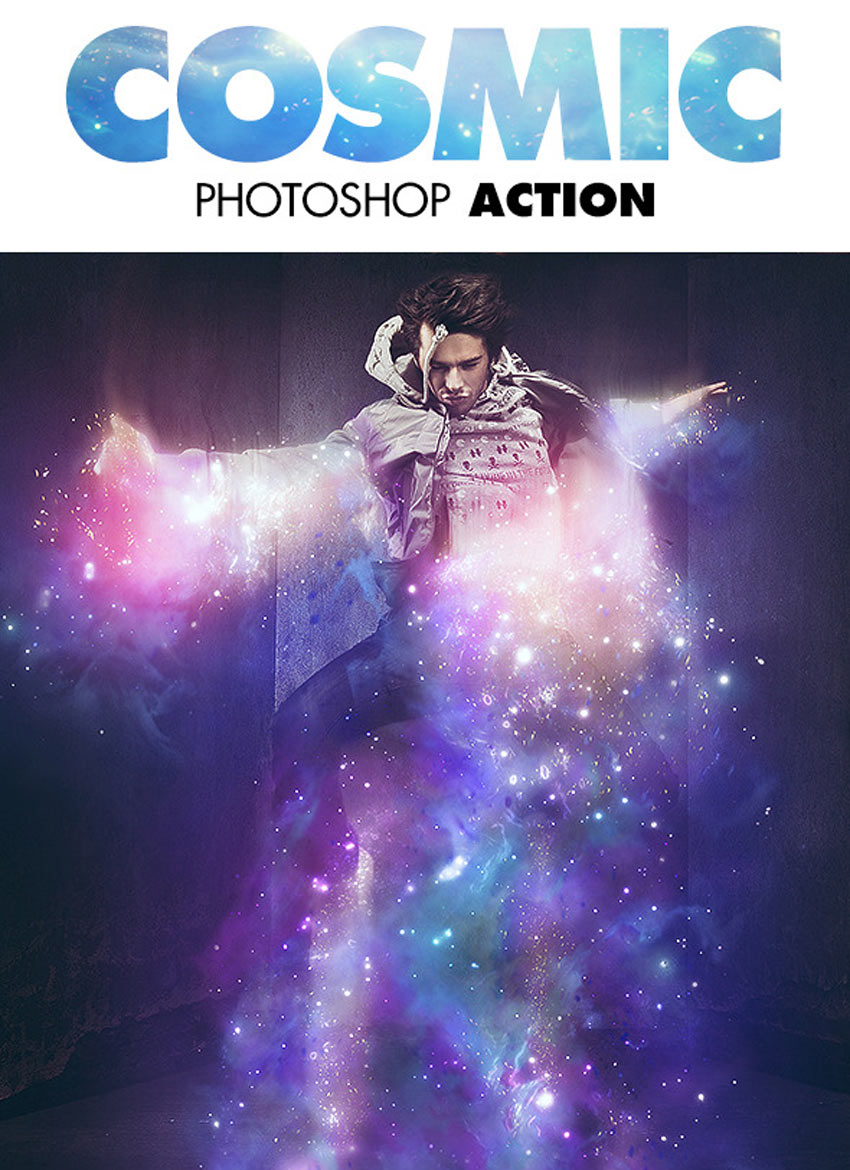
Explore the wonders of the universe with this spacey photo effect. With ten incredible color looks included, simply brush over the area you would like to apply the effect and press play. Enjoy this amazing cosmic effect in only a matter of seconds!
Create a legendary photo effect with this soft focus action. It has well-organized layers and simple instructions, and you’ll even find a video tutorial included for additional help. Download this action to gain access to this professional lighting effect.
Looking for a cinematic photo effect? Well, you can turn your photo into a glamorous movie-style image with this noir-inspired Photoshop action. This package features 12 Photoshop actions along with helpful instructions and fully adjustable effects.
Explode your photos into a million pieces with just a few simple clicks! This incredible package includes eight different glass patterns that can be scaled to various sizes, along with ten color options for even more variety.
Love the look of vintage photography? Explore that matte and faded style with this stunning action set. This set includes 17 amazing Photoshop actions that come in a variety of subdued and faded effects. Get that professional retro look you’ll love in almost no time at all!
If you’re feeling furious then you might want to express it with a powerful Photoshop action. Simply brush over the area where you would like to apply the effect and press play! It’s just that simple! Download this package to gain access to this action and additional instructional materials.
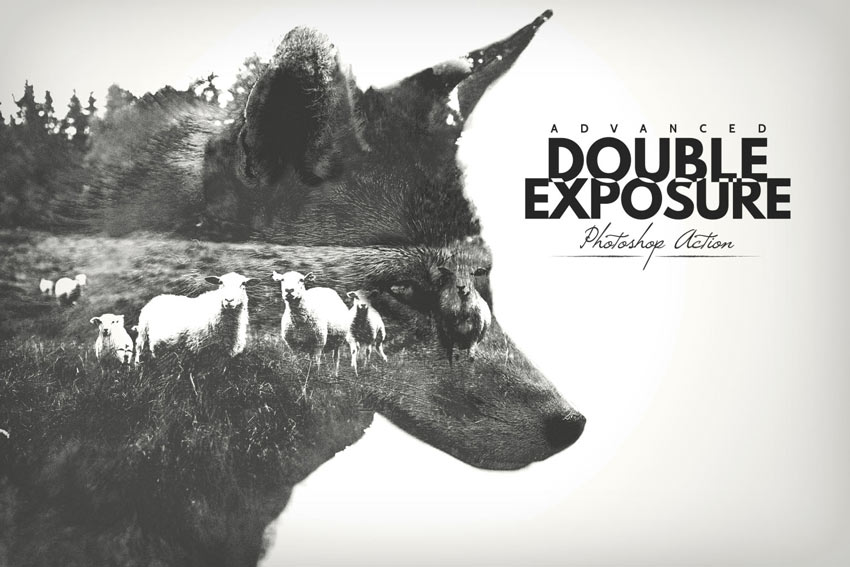
Double exposure photography is a super trendy technique that merges two photos together for an amazing effect. And you can achieve an advanced level of manipulation with this incredible Photoshop action. With 18 color presets included, the effects are outstanding and truly limitless.