Archiwum kategorii: Web Tools

How to Make a Sandstorm Photoshop Action (Special Effect)

Post pobrano z: How to Make a Sandstorm Photoshop Action (Special Effect)

Final product image
What You’ll Be Creating

In this tutorial, you will learn how to create a sandstorm Photoshop action to add amazing special effects to your photos. I will explain everything in so much detail that everyone can create it, even those who have just opened Photoshop for the first time.

Want more sandstorm
Photoshop actions? Don’t forget to check our quick list of five amazing sandstorm special
effects for pictures and Photoshop effect actions in this article that you may want to try.

If you want to check out even more fun filters, Photoshop actions and Photoshop filters as well as other special effects for pictures, jump over to GraphicRiver and/or Envato Elements.

What You’ll Need

To recreate the design above, you will need the following resources:

1. How to Start Creating an Action

Step 1

First, open the photo that you want to work with. To open your photo, go to File > Open, choose your photo, and click Open. Now, before we get started, just check a couple of things:

  1. Your photo should be in RGB Color mode, 8 Bits/Channel. To check this, go to Image > Mode.
  2. For best results, your photo size should be 2000–4000 px wide/high. To check this, go to Image > Image Size.
  3. Your photo should be the Background layer. If it is not, go to Layer > New > Background from Layer.
checking image size and mode

Step 2

Now go to Window > Actions, and in the Actions panel click on the menu icon in the top right-hand corner, choose New Set to create a new set, and name it Sandstorm. Then, click on the same menu icon again, choose New Action to create a new action, and name it Sandstorm as shown below:

creating new action

2. How to Select the Subject

Step 1

In this section, we are going to make a selection of our subject and then copy the subject to a separate layer. Choose the Quick Selection Tool (W) and select the background of the photo. Use the Shift-Alt buttons on your keyboard to add or subtract areas from the selection. After you’ve made a perfect selection, press Control-Shift-I on your keyboard to invert the selection.

making selection

Step 2

Now go to Select > Modify > Smooth and set the Sample Radius to 5 px. Next, go to Select > Modify > Contract and set Contract By to 2 px. Finally, go to Select > Modify > Feather and set Feather Radius to 2 px.

modifying selection

Step 3

Press Control-J on your keyboard to create a new layer using a selection, and name this new layer Subject.

creating new layer using selection

3. How to Create the Background

Step 1

In this section, we are going to create the background. Select the Background layer, go to Layer > New Fill Layer > Solid Color to create a new solid color fill layer, name it Background Color, and choose the color #3c2c1c.

creating new solid color fill layer

Step 2

Now change the Blending Mode of this layer to Multiply and set the Opacity to 80%.

changing blending mode and opacity

4. How to Create the Sand Dispersion Effect

Step 1

In this section, we are going to create the sand dispersion effect. Go to Layer > New > Layer to create a new layer and name it SD_1.

creating new layer

Step 2

Now go to Window > Actions, and in the Actions panel click on the rectangle icon in the bottom left-hand corner to stop recording the action. Then, in the same panel, click on the menu icon in the top right-hand corner and choose Insert Stop to record a stop in the action commands. We are going to do the brushing part manually.

Set the foreground color to #000000, choose the Brush Tool (B), and pick the Dust Brush 5 brush from the first brushes link. Then, adjust the Diameter of the brush as you like, and brush as shown below:

brushing onto layer

Step 3

Go to Window > Actions, and in the Actions panel click on the circle icon in the bottom area of the panel to resume recording the action. Then, change the Opacity of this layer to 69%.

changing opacity

Step 4

Now select the Background Color layer, go to Layer > New > Layer to create a new layer, and name it SD_2.

creating new layer

Step 5

Now stop recording the action and record a stop in the action commands as described previously. We are going to do the brushing part manually again. After you finish brushing, resume the action recording as described previously.

Set the foreground color to #000000, choose the Brush Tool (B), and pick the 18 brush from the second brushes link. Then, adjust the Diameter of the brush as you like, and brush as shown below:

brushing onto layer

Step 6

Repeat this process to create as many sand dispersion layers as you want. Don’t forget to stop recording the action and to record a stop in the action commands before each brushing, and then to resume the action recording after you finish with each brushing. Here is my result:

repeating process

Step 7

Now select the SD_1 layer, go to Layer > New Fill Layer > Solid Color to create a new solid color fill layer, name it SD_1_Color, and choose the color #9a8969.

creating new solid color fill layer

Step 8

Now press Control-Alt-G on your keyboard to create a clipping mask. Then, change the Blending Mode of this layer to Pin Light.

creating clipping mask and changing blending mode

Step 9

Repeat this process to colorize as many sand dispersion layers as you want. Here is my result:

repeating process

Step 10

Now select your last sand dispersion layer and Shift-click on the SD_1 layer to select all layers between. Then, go to Layer > New > Group from Layers to create a new group from the selected layers and name it Sand Dispersion.

creating new group from layers

5. How to Blend the Subject

Step 1

In this section, we are going to blend the subject. Select the Subject layer, and go to Layer > Layer Mask > Reveal All to add a layer mask that reveals the whole layer.

adding layer mask

Step 2

Now set the foreground color to #000000, choose the Brush Tool (B), pick a soft brush, and brush as shown below. Feel free to use different settings for the Opacity of the brush.

brushing onto layer mask

6. How to Make the Final Adjustments

Step 1

In this section, we are going to make the final adjustments. Press D on your keyboard to reset the swatches. Then, go to Layer > New Adjustment Layer > Gradient Map to create a new gradient map adjustment layer and name it Overall Contrast.

creating new gradient map adjustment layer

Step 2

Now change the Blending Mode of this layer to Soft Light and set the Opacity to 23%.

changing blending mode and opacity

Step 3

Go to Layer > New Adjustment Layer > Levels to create a new levels adjustment layer, and name it Overall Brightness.

creating new levels adjustment layer

Step 4

Now Double-click on this layer thumbnail and, in the Properties panel, enter the settings below:

adjusting levels

Step 5

Go to Layer > New Fill Layer > Solid Color to create a new solid color fill layer, name it Color_Look_1, and choose the color #a78b6c.

creating new solid color fill layer

Step 6

Change the Blending Mode of this layer to Color and set the Opacity to 49%.

changing blending mode and opacity

Step 7

Now select the Overall Brightness layer, go to Layer > New Fill Layer > Solid Color to create a new solid color fill layer, name it Color_Look_2, and choose the color #2a2118.

creating new solid color fill layer

Step 8

Change the Blending Mode of this layer to Exclusion and set the Opacity to 53%.

changing blending mode and opacity

Step 9

Go to Layer > New Adjustment Layer > Vibrance to create a new vibrance adjustment layer and name it Overall Vibrance/Saturation.

creating new vibrance adjustment layer

Step 10

Now Double-click on this layer thumbnail and, in the Properties panel, set the Vibrance to +11 and Saturation to +7.

adjusting vibrance and saturation

Step 11

Press Control-Alt-Shift-E on your keyboard to make a screenshot, and then press Control-Shift-U to desaturate this layer. Then, go to Filter > Other > High Pass and set the Radius to 2 px.

adding high pass filter

Step 12

Now change the Blending Mode of this layer to Hard Light and name it Overall Sharpening.

changing blending mode

You Made It!

Congratulations, you have succeeded! You have learned how to create a special effect  Photoshop action to create sandstorm photo effects. Here is our final result:

final result

5 Sandstorm Photoshop Actions

Want more sandstorm
Photoshop actions and fun filters? Here is our quick list of five amazing sandstorm special effects and Photoshop effects/actions you may want to try:

Sandstorm Photoshop Action

Create this highly detailed effect from your photos with just a couple of clicks. Make sure to watch the customization tutorial on how to get the most out of this effect. This action is designed to save you an immense amount of work per photo.

SandStorm Photoshop Action

Animated Sand Photoshop Action

Animated Sand is a pack containing 100 animated sand effects (around the
concept of a sandstorm) and a Photoshop action to place them, very
easily, over your images.

Animated Sand Photoshop Action

SandDust Photoshop Action

SandDust Action creates its effect with sand particles and
rays of light. You can choose a beautiful sky as the background image, or
leave only sand particles on your photos to create an awesome
photorealistic sandstorm on your landscape.

SandDust Photoshop Action

Dustum PS Action

This impressive Photoshop action creates the effect of a sandstorm breaking
and shooting pieces of the object on your photo. It offers four actions with
different directions: up, left, right, and down. You’ll get a highly detailed result, and this one-click action is easy to use, customize, and improve. 

Dustum PS Action

Dust Storm Animation Photoshop Action

The item Dust Storm Animation Photoshop Action is one of the best
in its kind. This product is very useful and has been developed with great care.
The main outstanding feature of this product is its quality. This action
might prove a game changer for you.

Dust Storm Animation Photoshop Action

You may also like:

How to Make a Sandstorm Photoshop Action (Special Effect)

Post pobrano z: How to Make a Sandstorm Photoshop Action (Special Effect)

Final product image
What You’ll Be Creating

In this tutorial, you will learn how to create a sandstorm Photoshop action to add amazing special effects to your photos. I will explain everything in so much detail that everyone can create it, even those who have just opened Photoshop for the first time.

Want more sandstorm
Photoshop actions? Don’t forget to check our quick list of five amazing sandstorm special
effects for pictures and Photoshop effect actions in this article that you may want to try.

If you want to check out even more fun filters, Photoshop actions and Photoshop filters as well as other special effects for pictures, jump over to GraphicRiver and/or Envato Elements.

What You’ll Need

To recreate the design above, you will need the following resources:

1. How to Start Creating an Action

Step 1

First, open the photo that you want to work with. To open your photo, go to File > Open, choose your photo, and click Open. Now, before we get started, just check a couple of things:

  1. Your photo should be in RGB Color mode, 8 Bits/Channel. To check this, go to Image > Mode.
  2. For best results, your photo size should be 2000–4000 px wide/high. To check this, go to Image > Image Size.
  3. Your photo should be the Background layer. If it is not, go to Layer > New > Background from Layer.
checking image size and mode

Step 2

Now go to Window > Actions, and in the Actions panel click on the menu icon in the top right-hand corner, choose New Set to create a new set, and name it Sandstorm. Then, click on the same menu icon again, choose New Action to create a new action, and name it Sandstorm as shown below:

creating new action

2. How to Select the Subject

Step 1

In this section, we are going to make a selection of our subject and then copy the subject to a separate layer. Choose the Quick Selection Tool (W) and select the background of the photo. Use the Shift-Alt buttons on your keyboard to add or subtract areas from the selection. After you’ve made a perfect selection, press Control-Shift-I on your keyboard to invert the selection.

making selection

Step 2

Now go to Select > Modify > Smooth and set the Sample Radius to 5 px. Next, go to Select > Modify > Contract and set Contract By to 2 px. Finally, go to Select > Modify > Feather and set Feather Radius to 2 px.

modifying selection

Step 3

Press Control-J on your keyboard to create a new layer using a selection, and name this new layer Subject.

creating new layer using selection

3. How to Create the Background

Step 1

In this section, we are going to create the background. Select the Background layer, go to Layer > New Fill Layer > Solid Color to create a new solid color fill layer, name it Background Color, and choose the color #3c2c1c.

creating new solid color fill layer

Step 2

Now change the Blending Mode of this layer to Multiply and set the Opacity to 80%.

changing blending mode and opacity

4. How to Create the Sand Dispersion Effect

Step 1

In this section, we are going to create the sand dispersion effect. Go to Layer > New > Layer to create a new layer and name it SD_1.

creating new layer

Step 2

Now go to Window > Actions, and in the Actions panel click on the rectangle icon in the bottom left-hand corner to stop recording the action. Then, in the same panel, click on the menu icon in the top right-hand corner and choose Insert Stop to record a stop in the action commands. We are going to do the brushing part manually.

Set the foreground color to #000000, choose the Brush Tool (B), and pick the Dust Brush 5 brush from the first brushes link. Then, adjust the Diameter of the brush as you like, and brush as shown below:

brushing onto layer

Step 3

Go to Window > Actions, and in the Actions panel click on the circle icon in the bottom area of the panel to resume recording the action. Then, change the Opacity of this layer to 69%.

changing opacity

Step 4

Now select the Background Color layer, go to Layer > New > Layer to create a new layer, and name it SD_2.

creating new layer

Step 5

Now stop recording the action and record a stop in the action commands as described previously. We are going to do the brushing part manually again. After you finish brushing, resume the action recording as described previously.

Set the foreground color to #000000, choose the Brush Tool (B), and pick the 18 brush from the second brushes link. Then, adjust the Diameter of the brush as you like, and brush as shown below:

brushing onto layer

Step 6

Repeat this process to create as many sand dispersion layers as you want. Don’t forget to stop recording the action and to record a stop in the action commands before each brushing, and then to resume the action recording after you finish with each brushing. Here is my result:

repeating process

Step 7

Now select the SD_1 layer, go to Layer > New Fill Layer > Solid Color to create a new solid color fill layer, name it SD_1_Color, and choose the color #9a8969.

creating new solid color fill layer

Step 8

Now press Control-Alt-G on your keyboard to create a clipping mask. Then, change the Blending Mode of this layer to Pin Light.

creating clipping mask and changing blending mode

Step 9

Repeat this process to colorize as many sand dispersion layers as you want. Here is my result:

repeating process

Step 10

Now select your last sand dispersion layer and Shift-click on the SD_1 layer to select all layers between. Then, go to Layer > New > Group from Layers to create a new group from the selected layers and name it Sand Dispersion.

creating new group from layers

5. How to Blend the Subject

Step 1

In this section, we are going to blend the subject. Select the Subject layer, and go to Layer > Layer Mask > Reveal All to add a layer mask that reveals the whole layer.

adding layer mask

Step 2

Now set the foreground color to #000000, choose the Brush Tool (B), pick a soft brush, and brush as shown below. Feel free to use different settings for the Opacity of the brush.

brushing onto layer mask

6. How to Make the Final Adjustments

Step 1

In this section, we are going to make the final adjustments. Press D on your keyboard to reset the swatches. Then, go to Layer > New Adjustment Layer > Gradient Map to create a new gradient map adjustment layer and name it Overall Contrast.

creating new gradient map adjustment layer

Step 2

Now change the Blending Mode of this layer to Soft Light and set the Opacity to 23%.

changing blending mode and opacity

Step 3

Go to Layer > New Adjustment Layer > Levels to create a new levels adjustment layer, and name it Overall Brightness.

creating new levels adjustment layer

Step 4

Now Double-click on this layer thumbnail and, in the Properties panel, enter the settings below:

adjusting levels

Step 5

Go to Layer > New Fill Layer > Solid Color to create a new solid color fill layer, name it Color_Look_1, and choose the color #a78b6c.

creating new solid color fill layer

Step 6

Change the Blending Mode of this layer to Color and set the Opacity to 49%.

changing blending mode and opacity

Step 7

Now select the Overall Brightness layer, go to Layer > New Fill Layer > Solid Color to create a new solid color fill layer, name it Color_Look_2, and choose the color #2a2118.

creating new solid color fill layer

Step 8

Change the Blending Mode of this layer to Exclusion and set the Opacity to 53%.

changing blending mode and opacity

Step 9

Go to Layer > New Adjustment Layer > Vibrance to create a new vibrance adjustment layer and name it Overall Vibrance/Saturation.

creating new vibrance adjustment layer

Step 10

Now Double-click on this layer thumbnail and, in the Properties panel, set the Vibrance to +11 and Saturation to +7.

adjusting vibrance and saturation

Step 11

Press Control-Alt-Shift-E on your keyboard to make a screenshot, and then press Control-Shift-U to desaturate this layer. Then, go to Filter > Other > High Pass and set the Radius to 2 px.

adding high pass filter

Step 12

Now change the Blending Mode of this layer to Hard Light and name it Overall Sharpening.

changing blending mode

You Made It!

Congratulations, you have succeeded! You have learned how to create a special effect  Photoshop action to create sandstorm photo effects. Here is our final result:

final result

5 Sandstorm Photoshop Actions

Want more sandstorm
Photoshop actions and fun filters? Here is our quick list of five amazing sandstorm special effects and Photoshop effects/actions you may want to try:

Sandstorm Photoshop Action

Create this highly detailed effect from your photos with just a couple of clicks. Make sure to watch the customization tutorial on how to get the most out of this effect. This action is designed to save you an immense amount of work per photo.

SandStorm Photoshop Action

Animated Sand Photoshop Action

Animated Sand is a pack containing 100 animated sand effects (around the
concept of a sandstorm) and a Photoshop action to place them, very
easily, over your images.

Animated Sand Photoshop Action

SandDust Photoshop Action

SandDust Action creates its effect with sand particles and
rays of light. You can choose a beautiful sky as the background image, or
leave only sand particles on your photos to create an awesome
photorealistic sandstorm on your landscape.

SandDust Photoshop Action

Dustum PS Action

This impressive Photoshop action creates the effect of a sandstorm breaking
and shooting pieces of the object on your photo. It offers four actions with
different directions: up, left, right, and down. You’ll get a highly detailed result, and this one-click action is easy to use, customize, and improve. 

Dustum PS Action

Dust Storm Animation Photoshop Action

The item Dust Storm Animation Photoshop Action is one of the best
in its kind. This product is very useful and has been developed with great care.
The main outstanding feature of this product is its quality. This action
might prove a game changer for you.

Dust Storm Animation Photoshop Action

You may also like:

How to Make a Sandstorm Photoshop Action (Special Effect)

Post pobrano z: How to Make a Sandstorm Photoshop Action (Special Effect)

Final product image
What You’ll Be Creating

In this tutorial, you will learn how to create a sandstorm Photoshop action to add amazing special effects to your photos. I will explain everything in so much detail that everyone can create it, even those who have just opened Photoshop for the first time.

Want more sandstorm
Photoshop actions? Don’t forget to check our quick list of five amazing sandstorm special
effects for pictures and Photoshop effect actions in this article that you may want to try.

If you want to check out even more fun filters, Photoshop actions and Photoshop filters as well as other special effects for pictures, jump over to GraphicRiver and/or Envato Elements.

What You’ll Need

To recreate the design above, you will need the following resources:

1. How to Start Creating an Action

Step 1

First, open the photo that you want to work with. To open your photo, go to File > Open, choose your photo, and click Open. Now, before we get started, just check a couple of things:

  1. Your photo should be in RGB Color mode, 8 Bits/Channel. To check this, go to Image > Mode.
  2. For best results, your photo size should be 2000–4000 px wide/high. To check this, go to Image > Image Size.
  3. Your photo should be the Background layer. If it is not, go to Layer > New > Background from Layer.
checking image size and mode

Step 2

Now go to Window > Actions, and in the Actions panel click on the menu icon in the top right-hand corner, choose New Set to create a new set, and name it Sandstorm. Then, click on the same menu icon again, choose New Action to create a new action, and name it Sandstorm as shown below:

creating new action

2. How to Select the Subject

Step 1

In this section, we are going to make a selection of our subject and then copy the subject to a separate layer. Choose the Quick Selection Tool (W) and select the background of the photo. Use the Shift-Alt buttons on your keyboard to add or subtract areas from the selection. After you’ve made a perfect selection, press Control-Shift-I on your keyboard to invert the selection.

making selection

Step 2

Now go to Select > Modify > Smooth and set the Sample Radius to 5 px. Next, go to Select > Modify > Contract and set Contract By to 2 px. Finally, go to Select > Modify > Feather and set Feather Radius to 2 px.

modifying selection

Step 3

Press Control-J on your keyboard to create a new layer using a selection, and name this new layer Subject.

creating new layer using selection

3. How to Create the Background

Step 1

In this section, we are going to create the background. Select the Background layer, go to Layer > New Fill Layer > Solid Color to create a new solid color fill layer, name it Background Color, and choose the color #3c2c1c.

creating new solid color fill layer

Step 2

Now change the Blending Mode of this layer to Multiply and set the Opacity to 80%.

changing blending mode and opacity

4. How to Create the Sand Dispersion Effect

Step 1

In this section, we are going to create the sand dispersion effect. Go to Layer > New > Layer to create a new layer and name it SD_1.

creating new layer

Step 2

Now go to Window > Actions, and in the Actions panel click on the rectangle icon in the bottom left-hand corner to stop recording the action. Then, in the same panel, click on the menu icon in the top right-hand corner and choose Insert Stop to record a stop in the action commands. We are going to do the brushing part manually.

Set the foreground color to #000000, choose the Brush Tool (B), and pick the Dust Brush 5 brush from the first brushes link. Then, adjust the Diameter of the brush as you like, and brush as shown below:

brushing onto layer

Step 3

Go to Window > Actions, and in the Actions panel click on the circle icon in the bottom area of the panel to resume recording the action. Then, change the Opacity of this layer to 69%.

changing opacity

Step 4

Now select the Background Color layer, go to Layer > New > Layer to create a new layer, and name it SD_2.

creating new layer

Step 5

Now stop recording the action and record a stop in the action commands as described previously. We are going to do the brushing part manually again. After you finish brushing, resume the action recording as described previously.

Set the foreground color to #000000, choose the Brush Tool (B), and pick the 18 brush from the second brushes link. Then, adjust the Diameter of the brush as you like, and brush as shown below:

brushing onto layer

Step 6

Repeat this process to create as many sand dispersion layers as you want. Don’t forget to stop recording the action and to record a stop in the action commands before each brushing, and then to resume the action recording after you finish with each brushing. Here is my result:

repeating process

Step 7

Now select the SD_1 layer, go to Layer > New Fill Layer > Solid Color to create a new solid color fill layer, name it SD_1_Color, and choose the color #9a8969.

creating new solid color fill layer

Step 8

Now press Control-Alt-G on your keyboard to create a clipping mask. Then, change the Blending Mode of this layer to Pin Light.

creating clipping mask and changing blending mode

Step 9

Repeat this process to colorize as many sand dispersion layers as you want. Here is my result:

repeating process

Step 10

Now select your last sand dispersion layer and Shift-click on the SD_1 layer to select all layers between. Then, go to Layer > New > Group from Layers to create a new group from the selected layers and name it Sand Dispersion.

creating new group from layers

5. How to Blend the Subject

Step 1

In this section, we are going to blend the subject. Select the Subject layer, and go to Layer > Layer Mask > Reveal All to add a layer mask that reveals the whole layer.

adding layer mask

Step 2

Now set the foreground color to #000000, choose the Brush Tool (B), pick a soft brush, and brush as shown below. Feel free to use different settings for the Opacity of the brush.

brushing onto layer mask

6. How to Make the Final Adjustments

Step 1

In this section, we are going to make the final adjustments. Press D on your keyboard to reset the swatches. Then, go to Layer > New Adjustment Layer > Gradient Map to create a new gradient map adjustment layer and name it Overall Contrast.

creating new gradient map adjustment layer

Step 2

Now change the Blending Mode of this layer to Soft Light and set the Opacity to 23%.

changing blending mode and opacity

Step 3

Go to Layer > New Adjustment Layer > Levels to create a new levels adjustment layer, and name it Overall Brightness.

creating new levels adjustment layer

Step 4

Now Double-click on this layer thumbnail and, in the Properties panel, enter the settings below:

adjusting levels

Step 5

Go to Layer > New Fill Layer > Solid Color to create a new solid color fill layer, name it Color_Look_1, and choose the color #a78b6c.

creating new solid color fill layer

Step 6

Change the Blending Mode of this layer to Color and set the Opacity to 49%.

changing blending mode and opacity

Step 7

Now select the Overall Brightness layer, go to Layer > New Fill Layer > Solid Color to create a new solid color fill layer, name it Color_Look_2, and choose the color #2a2118.

creating new solid color fill layer

Step 8

Change the Blending Mode of this layer to Exclusion and set the Opacity to 53%.

changing blending mode and opacity

Step 9

Go to Layer > New Adjustment Layer > Vibrance to create a new vibrance adjustment layer and name it Overall Vibrance/Saturation.

creating new vibrance adjustment layer

Step 10

Now Double-click on this layer thumbnail and, in the Properties panel, set the Vibrance to +11 and Saturation to +7.

adjusting vibrance and saturation

Step 11

Press Control-Alt-Shift-E on your keyboard to make a screenshot, and then press Control-Shift-U to desaturate this layer. Then, go to Filter > Other > High Pass and set the Radius to 2 px.

adding high pass filter

Step 12

Now change the Blending Mode of this layer to Hard Light and name it Overall Sharpening.

changing blending mode

You Made It!

Congratulations, you have succeeded! You have learned how to create a special effect  Photoshop action to create sandstorm photo effects. Here is our final result:

final result

5 Sandstorm Photoshop Actions

Want more sandstorm
Photoshop actions and fun filters? Here is our quick list of five amazing sandstorm special effects and Photoshop effects/actions you may want to try:

Sandstorm Photoshop Action

Create this highly detailed effect from your photos with just a couple of clicks. Make sure to watch the customization tutorial on how to get the most out of this effect. This action is designed to save you an immense amount of work per photo.

SandStorm Photoshop Action

Animated Sand Photoshop Action

Animated Sand is a pack containing 100 animated sand effects (around the
concept of a sandstorm) and a Photoshop action to place them, very
easily, over your images.

Animated Sand Photoshop Action

SandDust Photoshop Action

SandDust Action creates its effect with sand particles and
rays of light. You can choose a beautiful sky as the background image, or
leave only sand particles on your photos to create an awesome
photorealistic sandstorm on your landscape.

SandDust Photoshop Action

Dustum PS Action

This impressive Photoshop action creates the effect of a sandstorm breaking
and shooting pieces of the object on your photo. It offers four actions with
different directions: up, left, right, and down. You’ll get a highly detailed result, and this one-click action is easy to use, customize, and improve. 

Dustum PS Action

Dust Storm Animation Photoshop Action

The item Dust Storm Animation Photoshop Action is one of the best
in its kind. This product is very useful and has been developed with great care.
The main outstanding feature of this product is its quality. This action
might prove a game changer for you.

Dust Storm Animation Photoshop Action

You may also like:

50 Insane Comic-Book Style Photoshop Effects and Cartoon Filters

Post pobrano z: 50 Insane Comic-Book Style Photoshop Effects and Cartoon Filters

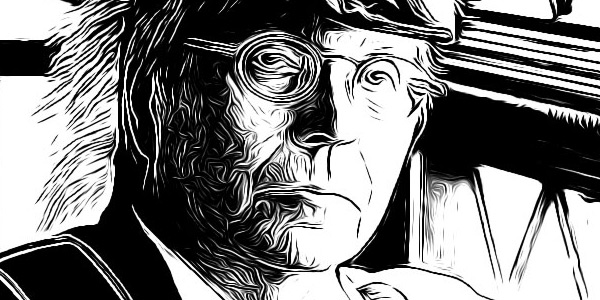
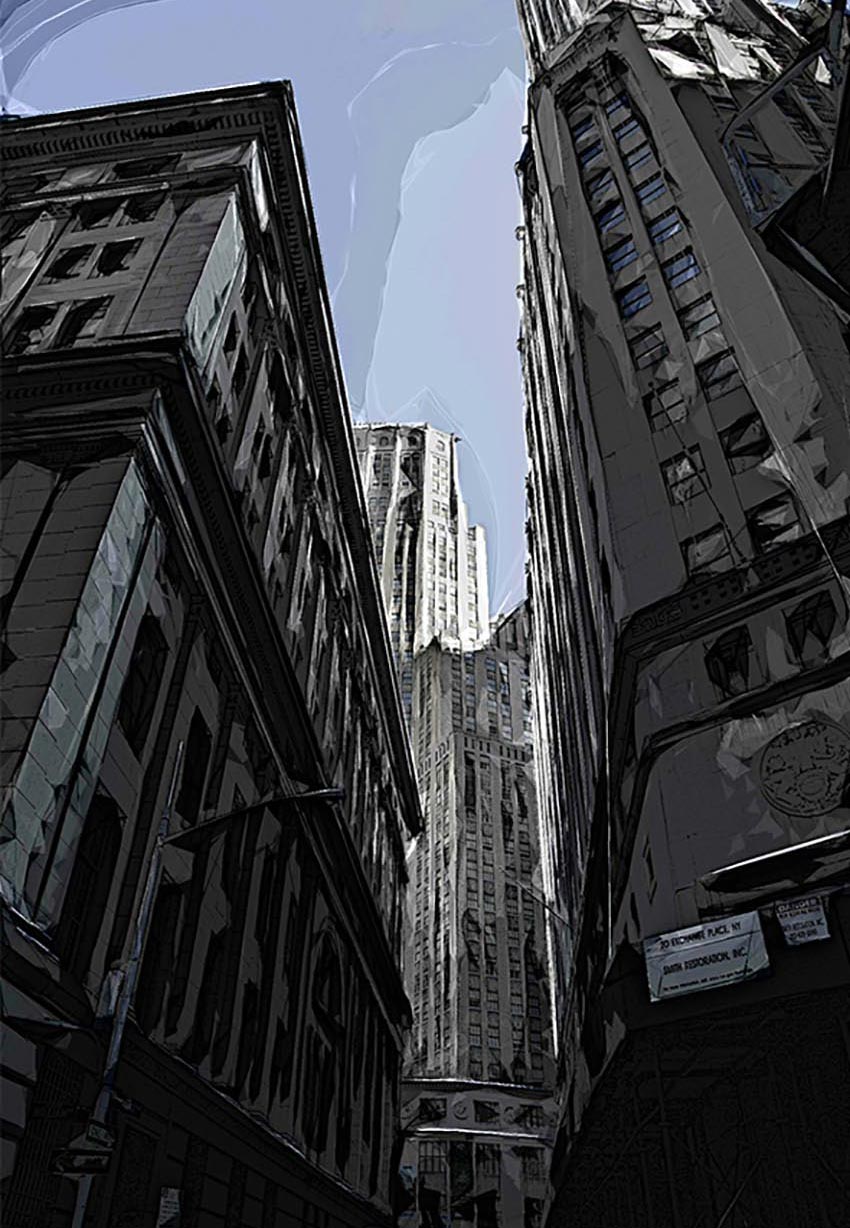
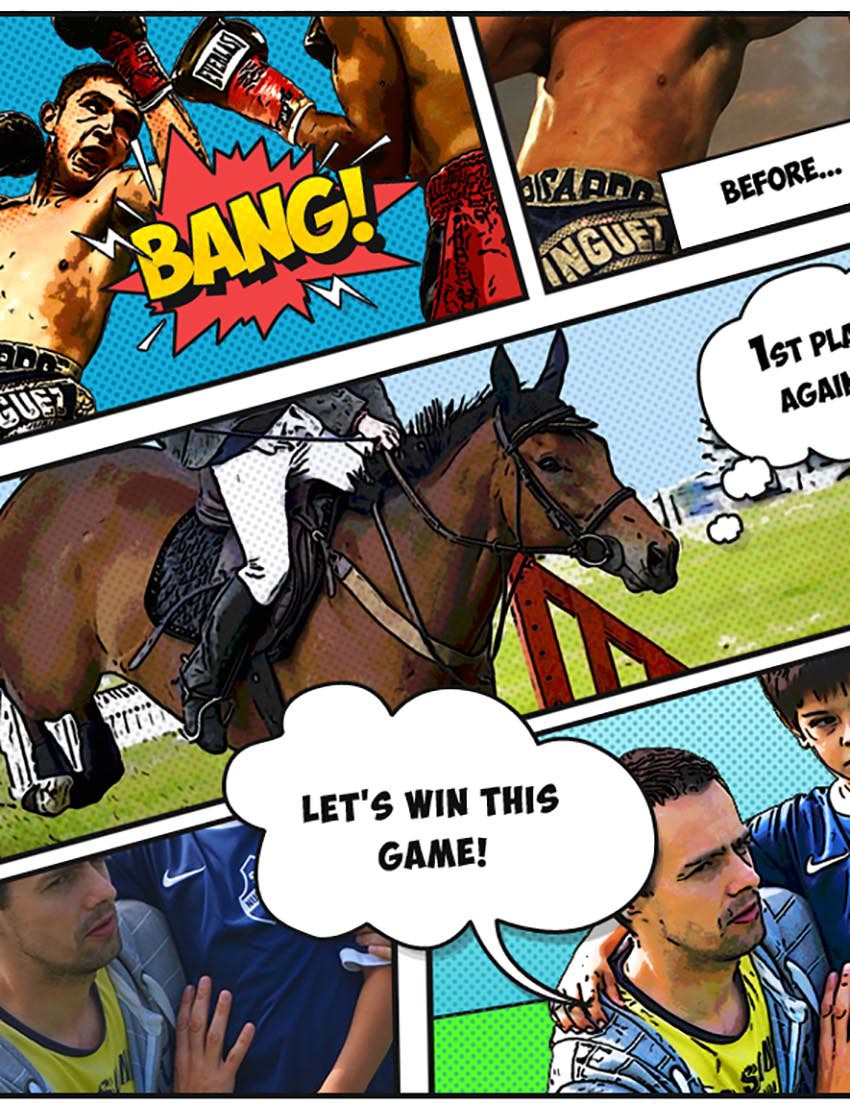
Comic books and graphic novels combine two things every designer aspires to meld: real meaning and pure, unadulterated eye candy. Here we introduce 30 of the best ever tuts on using Photoshop to create stunning comic-book style art, along with 20 insane comic-book style effects.

Although, if you’re looking for premium quality Photoshop Photo Effects, then choose from the assortment of creative options on Envato Elements, such as Painting & Comics Photoshop Actions.

Painting  Comics Photoshop Actions
Painting & Comics Photoshop Actions

15 Photoshop Tutorials From Envato Tuts+

Let’s begin with tutorials from none other than our amazing instructors here at Envato Tuts+. From photo manipulations to fun comic text effects, dive into these incredible tutorials to learn more about comic and cartoon art.

15 Top Tutorials From the Web

The next tutorials hail from all over the web. Learn how to create interesting comic effects and more, using only Adobe Photoshop.

Give Your Photos a Retro Comic Book Effect

Give Your Photos a Retro Comic Book Effect

How to Draw Comics in Adobe Photoshop

How to Draw Comics in Adobe Photoshop

Create a Graphic Novel Effect

Create a Graphic Novel Effect

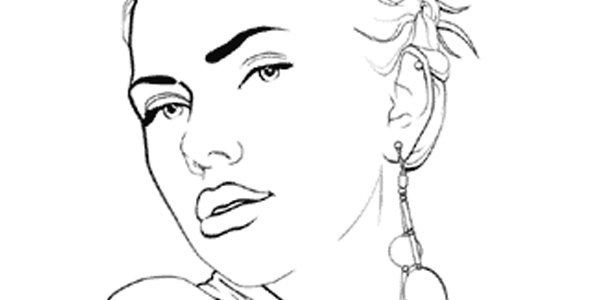
Turn Photos of People into Line Art

Turn Photos of People into Line Art

Create Pop Art Inspired by Lichtenstein

Create Pop Art Inspired by Lichtenstein

Learn How to Color Line Art

Learn How to Color Line Art

Advanced Cell Shading in Adobe Photoshop

Advanced Cell Shading in Adobe Photoshop

Popular Comic Art Tutorial

Popular Comic Art Tutorial

From Sketch to Vector Illustration

From Sketch to Vector Illustration

Comic Book Style Graphic Design

Comic Book Style Graphic Design

Creating a Graphic Novel Look in Photoshop

Creating a Graphic Novel Look in Photoshop

Creating a Comic Book Effect

Creating a Comic Book Effect

Comic Effect Tutorial

Comic Effect Tutorial

Vector Comic Tutorial for Photoshop

Vector Comic Tutorial for Photoshop

Create a Comic Style Digital Painting

Create a Comic Style Digital Painting

9 Comic Style Text Effects

Now for the goodies! Included in this selection are 10 amazing comic-book style Text Effects and Layer Styles taken from GraphicRiver and Envato Elements. Download these awesome assets to get access to these incredible effects.

Comic Book Text Styles

This awesome package comes complete with 8 different comic book style text effects. Apply them easily to your headlines and titles and customize them easily using the fully editable layers.

Comic Book Text Styles

Cartoon and Comic Book Text Styles

If you can’t get enough of some of your favorite cartoon classics, then you’re sure to love these amazing Photoshop styles. Included in this package are 10 amazingly different styles perfect for your next comic book and so much more!

Cartoon and Comic Book Text Styles

Cartoon and Comic Book Photoshop Styles

Pow, wham, and bam your way to the top with these fun Photoshop styles! Designed after that classic comic book look, download this file to get access to six uniquely different comic book text effects.

Cartoon and Comic Book Photoshop Styles

Cartoon Text Effects

Create impressive designs with these gorgeous 3D Photoshop text effects. Inspired by the wonderful charm of old-school cartoons, these text effects are perfect for logos, titles, and so much more!

Cartoon Text Effects

Blockbuster Heroes Style Text Effects

Who doesn’t love a great bundle? Spend your money the smart way with these high-impact Photoshop text effects. They’re designed after blockbuster movies and amazing video game effects, and you’ll definitely want to check out what you can create with these wonderful assets.

Blockbuster Heroes Style Text Effects

Comic Book Text Styles

If you’re looking for that classic comic book look, then you’ll love these vintage text styles. This package features 11 unique text effects, and even includes vector splashes, speech bubbles, and explosions!

Comic Book Text Styles

Vintage Comic Creator

If the allure of retro design is more your style, check out this awesome vintage comic creator. Not only does this package include all the elements you need to create a classic design, but it also includes additional layer styles you can apply to text and more!

Vintage Comic Creator

The Retro Comic Book Tool Kit

Roll up your sleeves and dive into everything comic-related with this amazing comic book tool kit. Among some of the incredible goodies in this package, you’ll also find a bonus set of layer styles to amp up your text effects and bring your designs to a whole new level!

The Retro Comic Book Tool Kit

Retro Vintage Text Effect

Vintage text effects are jam-packed with charming design. And you can get access to this incredible package by downloading this wonderful set of 10 different Photoshop text effects. All backgrounds are included as well as links to free font downloads.

Retro Vintage Text Effect

10 Comic Style Photoshop Actions & Cartoon Filters

Last but not least, let’s throw some incredible Photoshop Actions into the mix as well. From Sin City-inspired effects to amazing cell shading, try out these actions curated from Envato Elements and Envato Market.

Cartoon and Comic-Book Effect Action

Instantly turn your photos into a cool comic book with this awesome Photoshop action. This action can work with any size image and includes a help file along with the download for more helpful information.

Cartoon and Comic-Book Effect Action

ComicBook iT – Comic Book Image Converting Action

Convert your original photos into a creative cartoon style with this fun Photoshop action. Included in this package are four unique Photoshop actions with a full user guide and easy-to-follow instructions.

ComicBook iT - Comic Book Image Converting Action

Comic Book Action

Download and load this amazing Photoshop action to give your photos or artwork that fun comic book look! This action includes many different styles to choose from and is best if completed in RGB Mode before converting to CMYK.

Comic Book Action

All Charles Brown’s Colored Pencil Drawing Bundle

Transform your photos into a work of art with this fun pencil drawing Photoshop action. This bundle features 10 Photoshop actions at a new, remarkably low price. Get access to effects like the image below and so much more!

All Charles Browns Colored Pencil Drawing Bundle

Cell Shader Photoshop Action

If you don’t have the time to learn the technique of cell shading, consider giving this Photoshop action a try! With this Photoshop action, you simply drag a photo onto your document and play the action for a cool cell shading effect.

Cell Shader Photoshop Action

Comics Book Photoshop Creator

Have you ever wanted your own comic book? Well, now you can have it with this amazingly awesome Photoshop action. Perfect for Photoshop beginners, this package includes one incredible Photoshop action, along with 20 vector speech bubbles, and 7 vector comic sound effects.

Comics Book Photoshop Creator

Painting & Comics Photoshop Actions

Looking for that professional retouched look? Download this awesome set of painting and comic-inspired Photoshop actions to transform your photos into a work of art. This set includes 12 professional Photoshop actions as well as fully detailed instructions.

Painting  Comics Photoshop Actions

Cell Shader Photoshop Action

Cell shading is not limited to the drawing elite! You can achieve the same awesome cell shaded look just by downloading this Photoshop action. Simply open up your photo, play the action, and enjoy your new impressive design!

Cell Shader Photoshop Action

Strokes Photoshop Action

Turn your photos into insane works of art with this stroke-based Photoshop action. It’s creatively designed to fit the look of traditional art, so you can upgrade your photography with a new creative look that is sure to impress any viewer.

Strokes Photoshop Action

Conclusion

If you’re looking for premium quality Photoshop Photo Effects, then choose from our assortment of creative assets on GraphicRiver. There are a number of comic book effects to choose from, such as The Comic EffectComic Book Action, Retro Comic Book, and so much more!

And if you need a more hands-on approach to your designs, enlist the help of the amazing design professionals at Envato Studio, to help you with all your creative needs.

50 Insane Comic-Book Style Photoshop Effects and Cartoon Filters

Post pobrano z: 50 Insane Comic-Book Style Photoshop Effects and Cartoon Filters

Comic books and graphic novels combine two things every designer aspires to meld: real meaning and pure, unadulterated eye candy. Here we introduce 30 of the best ever tuts on using Photoshop to create stunning comic-book style art, along with 20 insane comic-book style effects.

Although, if you’re looking for premium quality Photoshop Photo Effects, then choose from the assortment of creative options on Envato Elements, such as Painting & Comics Photoshop Actions.

Painting  Comics Photoshop Actions
Painting & Comics Photoshop Actions

15 Photoshop Tutorials From Envato Tuts+

Let’s begin with tutorials from none other than our amazing instructors here at Envato Tuts+. From photo manipulations to fun comic text effects, dive into these incredible tutorials to learn more about comic and cartoon art.

15 Top Tutorials From the Web

The next tutorials hail from all over the web. Learn how to create interesting comic effects and more, using only Adobe Photoshop.

Give Your Photos a Retro Comic Book Effect

Give Your Photos a Retro Comic Book Effect

How to Draw Comics in Adobe Photoshop

How to Draw Comics in Adobe Photoshop

Create a Graphic Novel Effect

Create a Graphic Novel Effect

Turn Photos of People into Line Art

Turn Photos of People into Line Art

Create Pop Art Inspired by Lichtenstein

Create Pop Art Inspired by Lichtenstein

Learn How to Color Line Art

Learn How to Color Line Art

Advanced Cell Shading in Adobe Photoshop

Advanced Cell Shading in Adobe Photoshop

Popular Comic Art Tutorial

Popular Comic Art Tutorial

From Sketch to Vector Illustration

From Sketch to Vector Illustration

Comic Book Style Graphic Design

Comic Book Style Graphic Design

Creating a Graphic Novel Look in Photoshop

Creating a Graphic Novel Look in Photoshop

Creating a Comic Book Effect

Creating a Comic Book Effect

Comic Effect Tutorial

Comic Effect Tutorial

Vector Comic Tutorial for Photoshop

Vector Comic Tutorial for Photoshop

Create a Comic Style Digital Painting

Create a Comic Style Digital Painting

9 Comic Style Text Effects

Now for the goodies! Included in this selection are 10 amazing comic-book style Text Effects and Layer Styles taken from GraphicRiver and Envato Elements. Download these awesome assets to get access to these incredible effects.

Comic Book Text Styles

This awesome package comes complete with 8 different comic book style text effects. Apply them easily to your headlines and titles and customize them easily using the fully editable layers.

Comic Book Text Styles

Cartoon and Comic Book Text Styles

If you can’t get enough of some of your favorite cartoon classics, then you’re sure to love these amazing Photoshop styles. Included in this package are 10 amazingly different styles perfect for your next comic book and so much more!

Cartoon and Comic Book Text Styles

Cartoon and Comic Book Photoshop Styles

Pow, wham, and bam your way to the top with these fun Photoshop styles! Designed after that classic comic book look, download this file to get access to six uniquely different comic book text effects.

Cartoon and Comic Book Photoshop Styles

Cartoon Text Effects

Create impressive designs with these gorgeous 3D Photoshop text effects. Inspired by the wonderful charm of old-school cartoons, these text effects are perfect for logos, titles, and so much more!

Cartoon Text Effects

Blockbuster Heroes Style Text Effects

Who doesn’t love a great bundle? Spend your money the smart way with these high-impact Photoshop text effects. They’re designed after blockbuster movies and amazing video game effects, and you’ll definitely want to check out what you can create with these wonderful assets.

Blockbuster Heroes Style Text Effects

Comic Book Text Styles

If you’re looking for that classic comic book look, then you’ll love these vintage text styles. This package features 11 unique text effects, and even includes vector splashes, speech bubbles, and explosions!

Comic Book Text Styles

Vintage Comic Creator

If the allure of retro design is more your style, check out this awesome vintage comic creator. Not only does this package include all the elements you need to create a classic design, but it also includes additional layer styles you can apply to text and more!

Vintage Comic Creator

The Retro Comic Book Tool Kit

Roll up your sleeves and dive into everything comic-related with this amazing comic book tool kit. Among some of the incredible goodies in this package, you’ll also find a bonus set of layer styles to amp up your text effects and bring your designs to a whole new level!

The Retro Comic Book Tool Kit

Retro Vintage Text Effect

Vintage text effects are jam-packed with charming design. And you can get access to this incredible package by downloading this wonderful set of 10 different Photoshop text effects. All backgrounds are included as well as links to free font downloads.

Retro Vintage Text Effect

10 Comic Style Photoshop Actions & Cartoon Filters

Last but not least, let’s throw some incredible Photoshop Actions into the mix as well. From Sin City-inspired effects to amazing cell shading, try out these actions curated from Envato Elements and Envato Market.

Cartoon and Comic-Book Effect Action

Instantly turn your photos into a cool comic book with this awesome Photoshop action. This action can work with any size image and includes a help file along with the download for more helpful information.

Cartoon and Comic-Book Effect Action

ComicBook iT – Comic Book Image Converting Action

Convert your original photos into a creative cartoon style with this fun Photoshop action. Included in this package are four unique Photoshop actions with a full user guide and easy-to-follow instructions.

ComicBook iT - Comic Book Image Converting Action

Comic Book Action

Download and load this amazing Photoshop action to give your photos or artwork that fun comic book look! This action includes many different styles to choose from and is best if completed in RGB Mode before converting to CMYK.

Comic Book Action

All Charles Brown’s Colored Pencil Drawing Bundle

Transform your photos into a work of art with this fun pencil drawing Photoshop action. This bundle features 10 Photoshop actions at a new, remarkably low price. Get access to effects like the image below and so much more!

All Charles Browns Colored Pencil Drawing Bundle

Cell Shader Photoshop Action

If you don’t have the time to learn the technique of cell shading, consider giving this Photoshop action a try! With this Photoshop action, you simply drag a photo onto your document and play the action for a cool cell shading effect.

Cell Shader Photoshop Action

Comics Book Photoshop Creator

Have you ever wanted your own comic book? Well, now you can have it with this amazingly awesome Photoshop action. Perfect for Photoshop beginners, this package includes one incredible Photoshop action, along with 20 vector speech bubbles, and 7 vector comic sound effects.

Comics Book Photoshop Creator

Painting & Comics Photoshop Actions

Looking for that professional retouched look? Download this awesome set of painting and comic-inspired Photoshop actions to transform your photos into a work of art. This set includes 12 professional Photoshop actions as well as fully detailed instructions.

Painting  Comics Photoshop Actions

Cell Shader Photoshop Action

Cell shading is not limited to the drawing elite! You can achieve the same awesome cell shaded look just by downloading this Photoshop action. Simply open up your photo, play the action, and enjoy your new impressive design!

Cell Shader Photoshop Action

Strokes Photoshop Action

Turn your photos into insane works of art with this stroke-based Photoshop action. It’s creatively designed to fit the look of traditional art, so you can upgrade your photography with a new creative look that is sure to impress any viewer.

Strokes Photoshop Action

Conclusion

If you’re looking for premium quality Photoshop Photo Effects, then choose from our assortment of creative assets on GraphicRiver. There are a number of comic book effects to choose from, such as The Comic EffectComic Book Action, Retro Comic Book, and so much more!

And if you need a more hands-on approach to your designs, enlist the help of the amazing design professionals at Envato Studio, to help you with all your creative needs.

50 Insane Comic-Book Style Photoshop Effects and Cartoon Filters

Post pobrano z: 50 Insane Comic-Book Style Photoshop Effects and Cartoon Filters

Comic books and graphic novels combine two things every designer aspires to meld: real meaning and pure, unadulterated eye candy. Here we introduce 30 of the best ever tuts on using Photoshop to create stunning comic-book style art, along with 20 insane comic-book style effects.

Although, if you’re looking for premium quality Photoshop Photo Effects, then choose from the assortment of creative options on Envato Elements, such as Painting & Comics Photoshop Actions.

Painting  Comics Photoshop Actions
Painting & Comics Photoshop Actions

15 Photoshop Tutorials From Envato Tuts+

Let’s begin with tutorials from none other than our amazing instructors here at Envato Tuts+. From photo manipulations to fun comic text effects, dive into these incredible tutorials to learn more about comic and cartoon art.

15 Top Tutorials From the Web

The next tutorials hail from all over the web. Learn how to create interesting comic effects and more, using only Adobe Photoshop.

Give Your Photos a Retro Comic Book Effect

Give Your Photos a Retro Comic Book Effect

How to Draw Comics in Adobe Photoshop

How to Draw Comics in Adobe Photoshop

Create a Graphic Novel Effect

Create a Graphic Novel Effect

Turn Photos of People into Line Art

Turn Photos of People into Line Art

Create Pop Art Inspired by Lichtenstein

Create Pop Art Inspired by Lichtenstein

Learn How to Color Line Art

Learn How to Color Line Art

Advanced Cell Shading in Adobe Photoshop

Advanced Cell Shading in Adobe Photoshop

Popular Comic Art Tutorial

Popular Comic Art Tutorial

From Sketch to Vector Illustration

From Sketch to Vector Illustration

Comic Book Style Graphic Design

Comic Book Style Graphic Design

Creating a Graphic Novel Look in Photoshop

Creating a Graphic Novel Look in Photoshop

Creating a Comic Book Effect

Creating a Comic Book Effect

Comic Effect Tutorial

Comic Effect Tutorial

Vector Comic Tutorial for Photoshop

Vector Comic Tutorial for Photoshop

Create a Comic Style Digital Painting

Create a Comic Style Digital Painting

9 Comic Style Text Effects

Now for the goodies! Included in this selection are 10 amazing comic-book style Text Effects and Layer Styles taken from GraphicRiver and Envato Elements. Download these awesome assets to get access to these incredible effects.

Comic Book Text Styles

This awesome package comes complete with 8 different comic book style text effects. Apply them easily to your headlines and titles and customize them easily using the fully editable layers.

Comic Book Text Styles

Cartoon and Comic Book Text Styles

If you can’t get enough of some of your favorite cartoon classics, then you’re sure to love these amazing Photoshop styles. Included in this package are 10 amazingly different styles perfect for your next comic book and so much more!

Cartoon and Comic Book Text Styles

Cartoon and Comic Book Photoshop Styles

Pow, wham, and bam your way to the top with these fun Photoshop styles! Designed after that classic comic book look, download this file to get access to six uniquely different comic book text effects.

Cartoon and Comic Book Photoshop Styles

Cartoon Text Effects

Create impressive designs with these gorgeous 3D Photoshop text effects. Inspired by the wonderful charm of old-school cartoons, these text effects are perfect for logos, titles, and so much more!

Cartoon Text Effects

Blockbuster Heroes Style Text Effects

Who doesn’t love a great bundle? Spend your money the smart way with these high-impact Photoshop text effects. They’re designed after blockbuster movies and amazing video game effects, and you’ll definitely want to check out what you can create with these wonderful assets.

Blockbuster Heroes Style Text Effects

Comic Book Text Styles

If you’re looking for that classic comic book look, then you’ll love these vintage text styles. This package features 11 unique text effects, and even includes vector splashes, speech bubbles, and explosions!

Comic Book Text Styles

Vintage Comic Creator

If the allure of retro design is more your style, check out this awesome vintage comic creator. Not only does this package include all the elements you need to create a classic design, but it also includes additional layer styles you can apply to text and more!

Vintage Comic Creator

The Retro Comic Book Tool Kit

Roll up your sleeves and dive into everything comic-related with this amazing comic book tool kit. Among some of the incredible goodies in this package, you’ll also find a bonus set of layer styles to amp up your text effects and bring your designs to a whole new level!

The Retro Comic Book Tool Kit

Retro Vintage Text Effect

Vintage text effects are jam-packed with charming design. And you can get access to this incredible package by downloading this wonderful set of 10 different Photoshop text effects. All backgrounds are included as well as links to free font downloads.

Retro Vintage Text Effect

10 Comic Style Photoshop Actions & Cartoon Filters

Last but not least, let’s throw some incredible Photoshop Actions into the mix as well. From Sin City-inspired effects to amazing cell shading, try out these actions curated from Envato Elements and Envato Market.

Cartoon and Comic-Book Effect Action

Instantly turn your photos into a cool comic book with this awesome Photoshop action. This action can work with any size image and includes a help file along with the download for more helpful information.

Cartoon and Comic-Book Effect Action

ComicBook iT – Comic Book Image Converting Action

Convert your original photos into a creative cartoon style with this fun Photoshop action. Included in this package are four unique Photoshop actions with a full user guide and easy-to-follow instructions.

ComicBook iT - Comic Book Image Converting Action

Comic Book Action

Download and load this amazing Photoshop action to give your photos or artwork that fun comic book look! This action includes many different styles to choose from and is best if completed in RGB Mode before converting to CMYK.

Comic Book Action

All Charles Brown’s Colored Pencil Drawing Bundle

Transform your photos into a work of art with this fun pencil drawing Photoshop action. This bundle features 10 Photoshop actions at a new, remarkably low price. Get access to effects like the image below and so much more!

All Charles Browns Colored Pencil Drawing Bundle

Cell Shader Photoshop Action

If you don’t have the time to learn the technique of cell shading, consider giving this Photoshop action a try! With this Photoshop action, you simply drag a photo onto your document and play the action for a cool cell shading effect.

Cell Shader Photoshop Action

Comics Book Photoshop Creator

Have you ever wanted your own comic book? Well, now you can have it with this amazingly awesome Photoshop action. Perfect for Photoshop beginners, this package includes one incredible Photoshop action, along with 20 vector speech bubbles, and 7 vector comic sound effects.

Comics Book Photoshop Creator

Painting & Comics Photoshop Actions

Looking for that professional retouched look? Download this awesome set of painting and comic-inspired Photoshop actions to transform your photos into a work of art. This set includes 12 professional Photoshop actions as well as fully detailed instructions.

Painting  Comics Photoshop Actions

Cell Shader Photoshop Action

Cell shading is not limited to the drawing elite! You can achieve the same awesome cell shaded look just by downloading this Photoshop action. Simply open up your photo, play the action, and enjoy your new impressive design!

Cell Shader Photoshop Action

Strokes Photoshop Action

Turn your photos into insane works of art with this stroke-based Photoshop action. It’s creatively designed to fit the look of traditional art, so you can upgrade your photography with a new creative look that is sure to impress any viewer.

Strokes Photoshop Action

Conclusion

If you’re looking for premium quality Photoshop Photo Effects, then choose from our assortment of creative assets on GraphicRiver. There are a number of comic book effects to choose from, such as The Comic EffectComic Book Action, Retro Comic Book, and so much more!

And if you need a more hands-on approach to your designs, enlist the help of the amazing design professionals at Envato Studio, to help you with all your creative needs.

50 Insane Comic-Book Style Photoshop Effects and Cartoon Filters

Post pobrano z: 50 Insane Comic-Book Style Photoshop Effects and Cartoon Filters

Comic books and graphic novels combine two things every designer aspires to meld: real meaning and pure, unadulterated eye candy. Here we introduce 30 of the best ever tuts on using Photoshop to create stunning comic-book style art, along with 20 insane comic-book style effects.

Although, if you’re looking for premium quality Photoshop Photo Effects, then choose from the assortment of creative options on Envato Elements, such as Painting & Comics Photoshop Actions.

Painting  Comics Photoshop Actions
Painting & Comics Photoshop Actions

15 Photoshop Tutorials From Envato Tuts+

Let’s begin with tutorials from none other than our amazing instructors here at Envato Tuts+. From photo manipulations to fun comic text effects, dive into these incredible tutorials to learn more about comic and cartoon art.

15 Top Tutorials From the Web

The next tutorials hail from all over the web. Learn how to create interesting comic effects and more, using only Adobe Photoshop.

Give Your Photos a Retro Comic Book Effect

Give Your Photos a Retro Comic Book Effect

How to Draw Comics in Adobe Photoshop

How to Draw Comics in Adobe Photoshop

Create a Graphic Novel Effect

Create a Graphic Novel Effect

Turn Photos of People into Line Art

Turn Photos of People into Line Art

Create Pop Art Inspired by Lichtenstein

Create Pop Art Inspired by Lichtenstein

Learn How to Color Line Art

Learn How to Color Line Art

Advanced Cell Shading in Adobe Photoshop

Advanced Cell Shading in Adobe Photoshop

Popular Comic Art Tutorial

Popular Comic Art Tutorial

From Sketch to Vector Illustration

From Sketch to Vector Illustration

Comic Book Style Graphic Design

Comic Book Style Graphic Design

Creating a Graphic Novel Look in Photoshop

Creating a Graphic Novel Look in Photoshop

Creating a Comic Book Effect

Creating a Comic Book Effect

Comic Effect Tutorial

Comic Effect Tutorial

Vector Comic Tutorial for Photoshop

Vector Comic Tutorial for Photoshop

Create a Comic Style Digital Painting

Create a Comic Style Digital Painting

9 Comic Style Text Effects

Now for the goodies! Included in this selection are 10 amazing comic-book style Text Effects and Layer Styles taken from GraphicRiver and Envato Elements. Download these awesome assets to get access to these incredible effects.

Comic Book Text Styles

This awesome package comes complete with 8 different comic book style text effects. Apply them easily to your headlines and titles and customize them easily using the fully editable layers.

Comic Book Text Styles

Cartoon and Comic Book Text Styles

If you can’t get enough of some of your favorite cartoon classics, then you’re sure to love these amazing Photoshop styles. Included in this package are 10 amazingly different styles perfect for your next comic book and so much more!

Cartoon and Comic Book Text Styles

Cartoon and Comic Book Photoshop Styles

Pow, wham, and bam your way to the top with these fun Photoshop styles! Designed after that classic comic book look, download this file to get access to six uniquely different comic book text effects.

Cartoon and Comic Book Photoshop Styles

Cartoon Text Effects

Create impressive designs with these gorgeous 3D Photoshop text effects. Inspired by the wonderful charm of old-school cartoons, these text effects are perfect for logos, titles, and so much more!

Cartoon Text Effects

Blockbuster Heroes Style Text Effects

Who doesn’t love a great bundle? Spend your money the smart way with these high-impact Photoshop text effects. They’re designed after blockbuster movies and amazing video game effects, and you’ll definitely want to check out what you can create with these wonderful assets.

Blockbuster Heroes Style Text Effects

Comic Book Text Styles

If you’re looking for that classic comic book look, then you’ll love these vintage text styles. This package features 11 unique text effects, and even includes vector splashes, speech bubbles, and explosions!

Comic Book Text Styles

Vintage Comic Creator

If the allure of retro design is more your style, check out this awesome vintage comic creator. Not only does this package include all the elements you need to create a classic design, but it also includes additional layer styles you can apply to text and more!

Vintage Comic Creator

The Retro Comic Book Tool Kit

Roll up your sleeves and dive into everything comic-related with this amazing comic book tool kit. Among some of the incredible goodies in this package, you’ll also find a bonus set of layer styles to amp up your text effects and bring your designs to a whole new level!

The Retro Comic Book Tool Kit

Retro Vintage Text Effect

Vintage text effects are jam-packed with charming design. And you can get access to this incredible package by downloading this wonderful set of 10 different Photoshop text effects. All backgrounds are included as well as links to free font downloads.

Retro Vintage Text Effect

10 Comic Style Photoshop Actions & Cartoon Filters

Last but not least, let’s throw some incredible Photoshop Actions into the mix as well. From Sin City-inspired effects to amazing cell shading, try out these actions curated from Envato Elements and Envato Market.

Cartoon and Comic-Book Effect Action

Instantly turn your photos into a cool comic book with this awesome Photoshop action. This action can work with any size image and includes a help file along with the download for more helpful information.

Cartoon and Comic-Book Effect Action

ComicBook iT – Comic Book Image Converting Action

Convert your original photos into a creative cartoon style with this fun Photoshop action. Included in this package are four unique Photoshop actions with a full user guide and easy-to-follow instructions.

ComicBook iT - Comic Book Image Converting Action

Comic Book Action

Download and load this amazing Photoshop action to give your photos or artwork that fun comic book look! This action includes many different styles to choose from and is best if completed in RGB Mode before converting to CMYK.

Comic Book Action

All Charles Brown’s Colored Pencil Drawing Bundle

Transform your photos into a work of art with this fun pencil drawing Photoshop action. This bundle features 10 Photoshop actions at a new, remarkably low price. Get access to effects like the image below and so much more!

All Charles Browns Colored Pencil Drawing Bundle

Cell Shader Photoshop Action

If you don’t have the time to learn the technique of cell shading, consider giving this Photoshop action a try! With this Photoshop action, you simply drag a photo onto your document and play the action for a cool cell shading effect.

Cell Shader Photoshop Action

Comics Book Photoshop Creator

Have you ever wanted your own comic book? Well, now you can have it with this amazingly awesome Photoshop action. Perfect for Photoshop beginners, this package includes one incredible Photoshop action, along with 20 vector speech bubbles, and 7 vector comic sound effects.

Comics Book Photoshop Creator

Painting & Comics Photoshop Actions

Looking for that professional retouched look? Download this awesome set of painting and comic-inspired Photoshop actions to transform your photos into a work of art. This set includes 12 professional Photoshop actions as well as fully detailed instructions.

Painting  Comics Photoshop Actions

Cell Shader Photoshop Action

Cell shading is not limited to the drawing elite! You can achieve the same awesome cell shaded look just by downloading this Photoshop action. Simply open up your photo, play the action, and enjoy your new impressive design!

Cell Shader Photoshop Action

Strokes Photoshop Action

Turn your photos into insane works of art with this stroke-based Photoshop action. It’s creatively designed to fit the look of traditional art, so you can upgrade your photography with a new creative look that is sure to impress any viewer.

Strokes Photoshop Action

Conclusion

If you’re looking for premium quality Photoshop Photo Effects, then choose from our assortment of creative assets on GraphicRiver. There are a number of comic book effects to choose from, such as The Comic EffectComic Book Action, Retro Comic Book, and so much more!

And if you need a more hands-on approach to your designs, enlist the help of the amazing design professionals at Envato Studio, to help you with all your creative needs.

50 Insane Comic-Book Style Photoshop Effects and Cartoon Filters

Post pobrano z: 50 Insane Comic-Book Style Photoshop Effects and Cartoon Filters

Comic books and graphic novels combine two things every designer aspires to meld: real meaning and pure, unadulterated eye candy. Here we introduce 30 of the best ever tuts on using Photoshop to create stunning comic-book style art, along with 20 insane comic-book style effects.

Although, if you’re looking for premium quality Photoshop Photo Effects, then choose from the assortment of creative options on Envato Elements, such as Painting & Comics Photoshop Actions.

Painting  Comics Photoshop Actions
Painting & Comics Photoshop Actions

15 Photoshop Tutorials From Envato Tuts+

Let’s begin with tutorials from none other than our amazing instructors here at Envato Tuts+. From photo manipulations to fun comic text effects, dive into these incredible tutorials to learn more about comic and cartoon art.

15 Top Tutorials From the Web

The next tutorials hail from all over the web. Learn how to create interesting comic effects and more, using only Adobe Photoshop.

Give Your Photos a Retro Comic Book Effect

Give Your Photos a Retro Comic Book Effect

How to Draw Comics in Adobe Photoshop

How to Draw Comics in Adobe Photoshop

Create a Graphic Novel Effect

Create a Graphic Novel Effect

Turn Photos of People into Line Art

Turn Photos of People into Line Art

Create Pop Art Inspired by Lichtenstein

Create Pop Art Inspired by Lichtenstein

Learn How to Color Line Art

Learn How to Color Line Art

Advanced Cell Shading in Adobe Photoshop

Advanced Cell Shading in Adobe Photoshop

Popular Comic Art Tutorial

Popular Comic Art Tutorial

From Sketch to Vector Illustration

From Sketch to Vector Illustration

Comic Book Style Graphic Design

Comic Book Style Graphic Design

Creating a Graphic Novel Look in Photoshop

Creating a Graphic Novel Look in Photoshop

Creating a Comic Book Effect

Creating a Comic Book Effect

Comic Effect Tutorial

Comic Effect Tutorial

Vector Comic Tutorial for Photoshop

Vector Comic Tutorial for Photoshop

Create a Comic Style Digital Painting

Create a Comic Style Digital Painting

9 Comic Style Text Effects

Now for the goodies! Included in this selection are 10 amazing comic-book style Text Effects and Layer Styles taken from GraphicRiver and Envato Elements. Download these awesome assets to get access to these incredible effects.

Comic Book Text Styles

This awesome package comes complete with 8 different comic book style text effects. Apply them easily to your headlines and titles and customize them easily using the fully editable layers.

Comic Book Text Styles

Cartoon and Comic Book Text Styles

If you can’t get enough of some of your favorite cartoon classics, then you’re sure to love these amazing Photoshop styles. Included in this package are 10 amazingly different styles perfect for your next comic book and so much more!

Cartoon and Comic Book Text Styles

Cartoon and Comic Book Photoshop Styles

Pow, wham, and bam your way to the top with these fun Photoshop styles! Designed after that classic comic book look, download this file to get access to six uniquely different comic book text effects.

Cartoon and Comic Book Photoshop Styles

Cartoon Text Effects

Create impressive designs with these gorgeous 3D Photoshop text effects. Inspired by the wonderful charm of old-school cartoons, these text effects are perfect for logos, titles, and so much more!

Cartoon Text Effects

Blockbuster Heroes Style Text Effects

Who doesn’t love a great bundle? Spend your money the smart way with these high-impact Photoshop text effects. They’re designed after blockbuster movies and amazing video game effects, and you’ll definitely want to check out what you can create with these wonderful assets.

Blockbuster Heroes Style Text Effects

Comic Book Text Styles

If you’re looking for that classic comic book look, then you’ll love these vintage text styles. This package features 11 unique text effects, and even includes vector splashes, speech bubbles, and explosions!

Comic Book Text Styles

Vintage Comic Creator

If the allure of retro design is more your style, check out this awesome vintage comic creator. Not only does this package include all the elements you need to create a classic design, but it also includes additional layer styles you can apply to text and more!

Vintage Comic Creator

The Retro Comic Book Tool Kit

Roll up your sleeves and dive into everything comic-related with this amazing comic book tool kit. Among some of the incredible goodies in this package, you’ll also find a bonus set of layer styles to amp up your text effects and bring your designs to a whole new level!

The Retro Comic Book Tool Kit

Retro Vintage Text Effect

Vintage text effects are jam-packed with charming design. And you can get access to this incredible package by downloading this wonderful set of 10 different Photoshop text effects. All backgrounds are included as well as links to free font downloads.

Retro Vintage Text Effect

10 Comic Style Photoshop Actions & Cartoon Filters

Last but not least, let’s throw some incredible Photoshop Actions into the mix as well. From Sin City-inspired effects to amazing cell shading, try out these actions curated from Envato Elements and Envato Market.

Cartoon and Comic-Book Effect Action

Instantly turn your photos into a cool comic book with this awesome Photoshop action. This action can work with any size image and includes a help file along with the download for more helpful information.

Cartoon and Comic-Book Effect Action

ComicBook iT – Comic Book Image Converting Action

Convert your original photos into a creative cartoon style with this fun Photoshop action. Included in this package are four unique Photoshop actions with a full user guide and easy-to-follow instructions.

ComicBook iT - Comic Book Image Converting Action

Comic Book Action

Download and load this amazing Photoshop action to give your photos or artwork that fun comic book look! This action includes many different styles to choose from and is best if completed in RGB Mode before converting to CMYK.

Comic Book Action

All Charles Brown’s Colored Pencil Drawing Bundle

Transform your photos into a work of art with this fun pencil drawing Photoshop action. This bundle features 10 Photoshop actions at a new, remarkably low price. Get access to effects like the image below and so much more!

All Charles Browns Colored Pencil Drawing Bundle

Cell Shader Photoshop Action

If you don’t have the time to learn the technique of cell shading, consider giving this Photoshop action a try! With this Photoshop action, you simply drag a photo onto your document and play the action for a cool cell shading effect.

Cell Shader Photoshop Action

Comics Book Photoshop Creator

Have you ever wanted your own comic book? Well, now you can have it with this amazingly awesome Photoshop action. Perfect for Photoshop beginners, this package includes one incredible Photoshop action, along with 20 vector speech bubbles, and 7 vector comic sound effects.

Comics Book Photoshop Creator

Painting & Comics Photoshop Actions

Looking for that professional retouched look? Download this awesome set of painting and comic-inspired Photoshop actions to transform your photos into a work of art. This set includes 12 professional Photoshop actions as well as fully detailed instructions.

Painting  Comics Photoshop Actions

Cell Shader Photoshop Action

Cell shading is not limited to the drawing elite! You can achieve the same awesome cell shaded look just by downloading this Photoshop action. Simply open up your photo, play the action, and enjoy your new impressive design!

Cell Shader Photoshop Action

Strokes Photoshop Action

Turn your photos into insane works of art with this stroke-based Photoshop action. It’s creatively designed to fit the look of traditional art, so you can upgrade your photography with a new creative look that is sure to impress any viewer.

Strokes Photoshop Action

Conclusion

If you’re looking for premium quality Photoshop Photo Effects, then choose from our assortment of creative assets on GraphicRiver. There are a number of comic book effects to choose from, such as The Comic EffectComic Book Action, Retro Comic Book, and so much more!

And if you need a more hands-on approach to your designs, enlist the help of the amazing design professionals at Envato Studio, to help you with all your creative needs.

50 Insane Comic-Book Style Photoshop Effects and Cartoon Filters

Post pobrano z: 50 Insane Comic-Book Style Photoshop Effects and Cartoon Filters

Comic books and graphic novels combine two things every designer aspires to meld: real meaning and pure, unadulterated eye candy. Here we introduce 30 of the best ever tuts on using Photoshop to create stunning comic-book style art, along with 20 insane comic-book style effects.

Although, if you’re looking for premium quality Photoshop Photo Effects, then choose from the assortment of creative options on Envato Elements, such as Painting & Comics Photoshop Actions.

Painting  Comics Photoshop Actions
Painting & Comics Photoshop Actions

15 Photoshop Tutorials From Envato Tuts+

Let’s begin with tutorials from none other than our amazing instructors here at Envato Tuts+. From photo manipulations to fun comic text effects, dive into these incredible tutorials to learn more about comic and cartoon art.

15 Top Tutorials From the Web

The next tutorials hail from all over the web. Learn how to create interesting comic effects and more, using only Adobe Photoshop.

Give Your Photos a Retro Comic Book Effect

Give Your Photos a Retro Comic Book Effect

How to Draw Comics in Adobe Photoshop

How to Draw Comics in Adobe Photoshop

Create a Graphic Novel Effect

Create a Graphic Novel Effect

Turn Photos of People into Line Art

Turn Photos of People into Line Art

Create Pop Art Inspired by Lichtenstein

Create Pop Art Inspired by Lichtenstein

Learn How to Color Line Art

Learn How to Color Line Art

Advanced Cell Shading in Adobe Photoshop

Advanced Cell Shading in Adobe Photoshop

Popular Comic Art Tutorial

Popular Comic Art Tutorial

From Sketch to Vector Illustration

From Sketch to Vector Illustration

Comic Book Style Graphic Design

Comic Book Style Graphic Design

Creating a Graphic Novel Look in Photoshop

Creating a Graphic Novel Look in Photoshop

Creating a Comic Book Effect

Creating a Comic Book Effect

Comic Effect Tutorial

Comic Effect Tutorial

Vector Comic Tutorial for Photoshop

Vector Comic Tutorial for Photoshop

Create a Comic Style Digital Painting

Create a Comic Style Digital Painting

9 Comic Style Text Effects

Now for the goodies! Included in this selection are 10 amazing comic-book style Text Effects and Layer Styles taken from GraphicRiver and Envato Elements. Download these awesome assets to get access to these incredible effects.

Comic Book Text Styles

This awesome package comes complete with 8 different comic book style text effects. Apply them easily to your headlines and titles and customize them easily using the fully editable layers.

Comic Book Text Styles

Cartoon and Comic Book Text Styles

If you can’t get enough of some of your favorite cartoon classics, then you’re sure to love these amazing Photoshop styles. Included in this package are 10 amazingly different styles perfect for your next comic book and so much more!

Cartoon and Comic Book Text Styles

Cartoon and Comic Book Photoshop Styles

Pow, wham, and bam your way to the top with these fun Photoshop styles! Designed after that classic comic book look, download this file to get access to six uniquely different comic book text effects.

Cartoon and Comic Book Photoshop Styles

Cartoon Text Effects

Create impressive designs with these gorgeous 3D Photoshop text effects. Inspired by the wonderful charm of old-school cartoons, these text effects are perfect for logos, titles, and so much more!

Cartoon Text Effects

Blockbuster Heroes Style Text Effects

Who doesn’t love a great bundle? Spend your money the smart way with these high-impact Photoshop text effects. They’re designed after blockbuster movies and amazing video game effects, and you’ll definitely want to check out what you can create with these wonderful assets.

Blockbuster Heroes Style Text Effects

Comic Book Text Styles

If you’re looking for that classic comic book look, then you’ll love these vintage text styles. This package features 11 unique text effects, and even includes vector splashes, speech bubbles, and explosions!

Comic Book Text Styles

Vintage Comic Creator

If the allure of retro design is more your style, check out this awesome vintage comic creator. Not only does this package include all the elements you need to create a classic design, but it also includes additional layer styles you can apply to text and more!

Vintage Comic Creator

The Retro Comic Book Tool Kit

Roll up your sleeves and dive into everything comic-related with this amazing comic book tool kit. Among some of the incredible goodies in this package, you’ll also find a bonus set of layer styles to amp up your text effects and bring your designs to a whole new level!

The Retro Comic Book Tool Kit

Retro Vintage Text Effect

Vintage text effects are jam-packed with charming design. And you can get access to this incredible package by downloading this wonderful set of 10 different Photoshop text effects. All backgrounds are included as well as links to free font downloads.

Retro Vintage Text Effect

10 Comic Style Photoshop Actions & Cartoon Filters

Last but not least, let’s throw some incredible Photoshop Actions into the mix as well. From Sin City-inspired effects to amazing cell shading, try out these actions curated from Envato Elements and Envato Market.

Cartoon and Comic-Book Effect Action

Instantly turn your photos into a cool comic book with this awesome Photoshop action. This action can work with any size image and includes a help file along with the download for more helpful information.

Cartoon and Comic-Book Effect Action

ComicBook iT – Comic Book Image Converting Action

Convert your original photos into a creative cartoon style with this fun Photoshop action. Included in this package are four unique Photoshop actions with a full user guide and easy-to-follow instructions.

ComicBook iT - Comic Book Image Converting Action

Comic Book Action

Download and load this amazing Photoshop action to give your photos or artwork that fun comic book look! This action includes many different styles to choose from and is best if completed in RGB Mode before converting to CMYK.

Comic Book Action

All Charles Brown’s Colored Pencil Drawing Bundle

Transform your photos into a work of art with this fun pencil drawing Photoshop action. This bundle features 10 Photoshop actions at a new, remarkably low price. Get access to effects like the image below and so much more!

All Charles Browns Colored Pencil Drawing Bundle

Cell Shader Photoshop Action

If you don’t have the time to learn the technique of cell shading, consider giving this Photoshop action a try! With this Photoshop action, you simply drag a photo onto your document and play the action for a cool cell shading effect.

Cell Shader Photoshop Action

Comics Book Photoshop Creator

Have you ever wanted your own comic book? Well, now you can have it with this amazingly awesome Photoshop action. Perfect for Photoshop beginners, this package includes one incredible Photoshop action, along with 20 vector speech bubbles, and 7 vector comic sound effects.

Comics Book Photoshop Creator

Painting & Comics Photoshop Actions

Looking for that professional retouched look? Download this awesome set of painting and comic-inspired Photoshop actions to transform your photos into a work of art. This set includes 12 professional Photoshop actions as well as fully detailed instructions.

Painting  Comics Photoshop Actions

Cell Shader Photoshop Action

Cell shading is not limited to the drawing elite! You can achieve the same awesome cell shaded look just by downloading this Photoshop action. Simply open up your photo, play the action, and enjoy your new impressive design!

Cell Shader Photoshop Action

Strokes Photoshop Action

Turn your photos into insane works of art with this stroke-based Photoshop action. It’s creatively designed to fit the look of traditional art, so you can upgrade your photography with a new creative look that is sure to impress any viewer.

Strokes Photoshop Action

Conclusion

If you’re looking for premium quality Photoshop Photo Effects, then choose from our assortment of creative assets on GraphicRiver. There are a number of comic book effects to choose from, such as The Comic EffectComic Book Action, Retro Comic Book, and so much more!

And if you need a more hands-on approach to your designs, enlist the help of the amazing design professionals at Envato Studio, to help you with all your creative needs.

10 Top Tips for Creative Brochure Design

Post pobrano z: 10 Top Tips for Creative Brochure Design

Final product image
What You’ll Be Creating

Designing a relevant and highly effective brochure can contribute to a company’s success. A well-designed brochure can educate your readers, increase credibility, attract a target audience, and ultimately lead consumers to take action.

Creating a quality brochure can be a challenge, so today, we bring you ten tips for creative brochure design. A brochure is commonly seen on racks providing information about a company, product, event, or service. Brochures can come in a variety of formats and sizes, so knowing which one you need can become a challenge of its own. 

In this article, we’ll walk you through everything from preparing copy and images to the final edit of your brochure, providing examples of templates and tutorials along the way. You’re sure to take away some great tips. 

In a hurry? We’ve got amazing brochure templates and InDesign portfolio book templates over at Envato Elements and GraphicRiver. Go check them out! 

1. Prepare Copy and Images

Before you start working directly in the software, it is essential to know how long your copy is and what kind of images you’ll be working with. This will help you decide about layout, brochure format, length, and font size. As designers, we know that getting attached to one solution is a no-no. So be prepared to make changes and be flexible along the way.

Keep in mind that big blocks of text can be overwhelming for readers. People tend to scan pages quickly, so shoot for just the ideal amount of information. Use headlines and sub-headlines to structure the content. Bullet points are useful to make short, quick statements that can get your message across.

If you are designing for a specific brand, make sure the colors and feel are in line with the branding. Are there any specific colors and fonts that should be used? Ask for the brand guidelines, which can help you make some of the decisions. This will create a brochure design that belongs to a specific company rather than a random marketing element. 

Gather the images and make sure you can use them as big you need, especially if you want the brochure to look expensive. People nowadays notice when pixelation occurs. Find a way to tell a cohesive story with your images. 

If you have doubts, try to keep the brochure design clean and simple. For best results, try to do a round of edits to see what elements are absolutely necessary to include. Envato Elements offers high-quality images, and with an ever-growing library, you are sure to find what you need. 

Envato Elements
Envato Elements

2. Know Your Folds

With just over a dozen types of brochure, knowing which type you need is crucial. Think about how users will interact with the piece. 

For a bifold brochure, they will look at the cover and open it to reveal the inside. Then they’ll close it to reveal the back. 

For a trifold brochure, which has three panels, users will unfold each panel separately. Here, you can add some kind of surprise as the brochure unfolds to create an interesting piece. While each panel is seen as a boundary, take advantage of it and span images or text across two panels.

A trifold brochure is the most popular piece used by businesses. This is great if you want to display general information about a company and its services. Take this trifold business brochure as an example. Use imagery and quotes to reinforce your message. Break up the text with graphic elements and white space. Take advantage of using icons and symbols to simplify the message. 

Trifold Brochure
Trifold Brochure

For more extensive brochures, you might want to go for a multi-page document like a booklet or portfolio. Apply careful thought as you’ll want this to be cost-effective. With more pages, you’d need to treat this brochure slightly differently. Pay attention to the pace of each page, making sure you are not overwhelming the reader with information. After all, you want them to get to know you just enough that they can set up a meeting to get to know your business better. 

This architecture portfolio template in InDesign is a multipage document. It’s designed with clean and simple details, allowing the images to shine on their own.

architecture portfolio brochure
Architecture Portfolio Brochure

If you’d like to learn more about brochure formats and dimensions, we’ve got a handy article on that. It includes specific measurements, types of folds, and the uses for each brochure. 

3. Choose Legible and Limited Fonts

If you are designing a business brochure for a specific company, ask what fonts they are using on their logo and brand in general. It is our job as designers to deliver cohesiveness throughout a brand. Typically in a brochure design you’d need a headline, sub-headline, and copy. Stick to using no more than two fonts and take advantage of using the font’s families to highlight certain copy (regular, bold, italic, etc.).

Both brochure ideas below use a serif and a sans serif font. Nowadays, there aren’t really any rules as to what fonts to use for copy. Traditionalists might opt to use serif fonts for a lengthy amount of body copy and sans serif for display copy. Use italics to highlight text or bold sans serif to add quotes on a panel. If you are layering type over a dark background, run a test print to make sure the copy is legible. 

Lumina trifold brochure
LUMINA Trifold Brochure

This proposal brochure template comes with files editable in Adobe InDesign and Word. The clear typographic hierarchy can help guide readers and create a good flow throughout the design.

Proposal brochure design
Proposal Brochure Design

If you are looking for some high-quality fonts, check out Envato Elements. Browse the fonts section to find suitable families for your next marketing brochure.

Envato Elements Fonts

4. Design a User-Friendly Flow

Pacing is something I personally think is important when designing a printed piece. If the piece is interesting enough, users can decide to either read it or put it down. Think about how readers would want to receive the information.

Balance the amount of text and visuals on each business brochure panel. These two elements are meant to work together and support each other for a striking finished product. Opt for a bite-size amount of copy in each panel—large chunks of text can be tiring to read and can appear visually heavy. Use color to create hierarchy within the copy. Highlight the headlines and use dark colors for copy, as in the pamphlet design below. 

Marketing Agency Brochure Trifold

Most cultures read from left to right and top to bottom. Arrange the information in a logical flow so it complements the way a marketing brochure unfolds. If you are not able to use high-quality imagery, use graphics to create movement and depth. Check out this clean template using the minimal amount of images. It is carefully balanced by the amount of graphics and text displayed in each panel.

Maskot business and corporate brochure trifold
Maskot Business and Corporate Brochure Trifold

5. Create an Effective Cover

A cover is prime real estate that will call for your reader’s attention if designed successfully. To design a compelling cover, include only concise information, so that it’s easy and fast to read at a distance, especially if your brochure is placed on a rack. Avoid cluttered covers, and instead use simple and impactful imagery that represents your company/client. Images are sometimes more intuitive than words. 

Check out this minimalist fashion portfolio template. The most important elements—title and image—are placed on the right side of the cover. This makes helps the reader make a connection between the two while keeping the less important information on the opposite side.

Fashion Brochure
Fashion Brochure

This clean booklet design lays a rectangle over the image. This creates a sense of depth while hinting at the kind of company we are about to see. The title and company name are highly visible and free of any visual disturbances.

Corporate Brochure
Corporate Brochure

This medical brochure template tutorial includes a simple but successful cover. Include a big image at the top and concentrate the copy at the bottom, so readers will get the information they need right away.

6. Use High-Quality Imagery

The importance of using high quality images is usually underrated. Consumers can tell how much care you’ve put into creating a brochure design by simply looking at the images used. Use imagery that reflects your intent and communicates your message. 

Once you’ve picked out the right imagery, check the resolution. Make sure the images can be printed to avoid pixelated prints. This can bring down the quality level of your design. Check for color tones and color correction. If you’ve acquired images with different tones, try adding a visual treatment like an overlay. This will give all the images an even look across the board. 

This product brochure template includes an interior design theme. All the images are crisp white and clean, with a consistent yellow color making an appearance. This is another great way to create cohesiveness throughout the design.

Brochure
Brochure

Check out this brochure template tutorial. Using profile pictures of the pets is a great idea! Even better is the consistent use of white background in each photo—it really makes it look as if the designer has put in the effort to arrange for a photo shoot. 

The presentation template is also an awesome example to achieve a cohesive brochure design layout. Add an overlay to all your images and you are set for success. 

7. Embrace Negative Space

If you are choosing to use a multi-panel brochure, try adding elements of surprise for your readership. Alternating panels between a light and a dark color can enhance the look of the brochure. It avoids making the brochure seem monotone and adds visual weight. Use this negative space to highlight certain information you want to add more attention to. Add a quote, or use a call to action over a dark background to communicate a message much more clearly. 

Brochure
Brochure

In addition to highlighting information, try alternating panels between a light and dark background. Treat each panel as if they were separate pages of a book. While the panels need to have a consistent layout (font and type hierarchy), it is a great idea to add something special to each design. Treat them as if they were cousins, not siblings.

Brochure
Brochure

Take a look at this trifold pamphlet template tutorial. This is a great example of how to include colors to make your design pop.

8. Include a Clear Call to Action

Every marketing brochure design out there has a common goal, for the reader to take action. A call to action (CTA) needs to be transparent and stated in a big way. Give your readers a reason to contact you by avoiding having the CTA part of a long paragraph. Instead, make the statement bold and hard to miss, as in the brochure template below. 

Short sentences like “get in touch” or “contact us now” can do the trick. Urge the reader to act right away. Other common offers can include discounts for specific specials, giveaways with limited quantities, or a free gift.

Corporate trifold brochure
Corporate Trifold Brochure

You can also try using other short incentives that communicate achievement. Check out this trifold pamphlet tutorial that very positively states, “Let’s reach your potential.”

9. Make It Easy to Respond

Include vital contact information in the brochure. Readers might not be able to find the information, even if you’ve included all they need. Therefore, place it somewhere highly visible like the back panel or even the cover. 

If you are showing multiple personnel profiles, add contact information for each person. Include a website, email, social media accounts, phone number, and address. QR codes are also popular. With a quick scan, they can take people to a specific website. 

This template has all the necessary information laid out on the back panel. It is clean and clear so readers won’t have a hard time finding it.

trifold brochure
Trifold Brochure

Unlike the example above, this bifold brochure has the contact information on the cover. This is great if there’s ample space that allows you to include everything you need.

Business brochure
Business Brochure

10. Design a Brochure Worth Keeping

Compared to other pieces of printed design, brochures tend to have a short life. They aren’t often seen as something to be kept for a long time and usually end in the trash right after they are delivered to users. Designing not only an eye-catching brochure but one that can double its use can help users wonder, “What else can I use this for?”

Photography portfolios and fashion and furniture brochures have a higher chance of being kept. Readers usually want to go back and take a look at the latest artistic and fashion trends. Furniture catalogues are great inspiration for most users on how to decorate, so consider adding tips along with the content. 

Furniture and interior catalog
Furniture and Interior Catalog

Check out this tutorial on how to make a stylish Adobe InDesign portfolio template. Art and beautiful imagery are a great way to entice readers to keep your brochures, so why not give it a try! 

Designers tend to be collectors, and most people keep things that feel expensive to the touch. It isn’t always necessary to spend more money to design something worth keeping. To add value to a brochure, include useful information that serves a purpose to the user, such as a city guide, a calendar, or emergency numbers.

If the budget allows, try investing in a different paper weight, high-end finishes, and special processes. It might not seem like much, but the way a printed piece feels on the hands can dictate what your users think of the company. Talk to your printer to see what options are available, and they might be able to help you raise the bar on your next marketing brochure design.

Check out this tutorial on how to create a fold-out city guide—it’s a clever idea! 

Now It’s Your Turn! 

Once your brochure is designed, take your time to look at the final product. A round of edits is helpful to see if you can lose some elements that aren’t helping in the design. Make sure there’s a second pair of eyes reading the copy—here you really want to avoid typos and mistakes. Finally, ask yourself the following questions:

  • Does the brochure grab attention?
  • Is the message communicated clearly?
  • Is the call to action clear?
  • Does the brochure represent the brand?

Brochure designs are fun, but there are many considerations to keep in mind. Aim for a long-lasting design, and when in doubt, keep it simple. If you are new to design, pre-designed templates can make your job much easier. Layouts and fonts are figured out for you, and if necessary, you can customise the colors. 

Most of them are easy to edit—simply add your content and images, and you are good to go. If you want to explore InDesign portfolio templates or fashion portfolio templates right away, head over to Envato Elements and GraphicRiver. We’ve got many options!

If you are an experienced designer and are looking to create mockups of your brochure designs, head over to PlaceitThe website provides you with a wide selection of images in which you can apply our own design to quickly mock up projects. 

We’ve gathered some of our favorite tutorials below. If you want to dive into creating your own designs, this is a great place to start: