How to Draw a Festive Winter Landscape With Glowing Lamps in Adobe Illustrator

Post pobrano z: How to Draw a Festive Winter Landscape With Glowing Lamps in Adobe Illustrator

Final product image
What You’ll Be Creating

In this tutorial, you will learn how to use the Mesh Tool in Adobe Illustrator to create a vector evening winter background!

If you want to skip the tutorial and just use this background with some other awesome elements, purchase the Christmas Evening Winter Landscape from GraphicRiver!

Christmas Evening Winter Landscape

1. How to Draw the Background

Step 1

Let’s begin by using Mesh for a bit!

Start by drawing a rectangle and filling it with #4B6471 color and create a Mesh grid for this shape by manually placing nodes with the Mesh Tool (U).

Once your Mesh grid is done, begin coloring it by selecting the bottom row of nodes and the bottom middle node and changing their color to #8A9BA2.

Continue this step by coloring the nodes on the top and on the sides with #253B4B and the middle nodes of the second row from the top with #385260.

Finish by changing the color of the bottom nodes to #D2DAD9.

draw mesh background

Step 2

Let’s move on to drawing the snow hills!

Draw a #F6F7F2 rectangle, and then place some Mesh nodes with the Mesh Tool (U). Move said nodes to create a wavy shape out of the rectangle, trying to recreate the screenshot below.

Finally, color the selected nodes with #D0DFE4. The first hill is done!

mesh snow hill

Step 3

Draw the second hill following the same instructions as before and using these colors:

  1. #E1EBEC
  2. #C0D1D8
  3. #F6F7F2
draw mesh snow

Step 4

Finally, draw the third hill in a similar fashion.

  1. #CBD8DE
  2. #F4F6F1
draw snow hill

Step 5

Place the hills on top of each other, with the first one being in the front and the third one being in the back.

Make them overlap to match the screenshot!

arrange hills

Step 6

Place the hills on the bottom of the background!

place hills

2. How to Draw the Lamps

Step 1

Let’s move on to drawing the lamp.

Draw half an outline of it by using the Pen Tool (P), and then use Object > Transform > Reflect and click Copy to obtain the second half. Move them close to each other for now.

draw half

Step 2

Select the two halves and use Unite in the Pathfinder panel to create a united outline for the lamp.

reflect the lamp

Step 3

Using the Pen Tool (P) and some small ellipses (Ellipse Tool, L), draw the transparent surfaces of the lamp.

Lay the shapes on top of the outline, select all, and use Minus Front in the Pathfinder panel to „crop” them out.

crop out the lamp

Step 4

Select the result and apply a Linear, #2A1800 to #DFCFD9 to #2A1800 Gradient to it.

gradient

Step 5

Using the Pen Tool (P), draw a decorative swirl as can be seen below.

In the Stroke panel, change the Stroke Profile to the one below.

change stroke profile

Step 6

Draw a little ellipse and add it to both ends of the curve.

Selecting the curve, go to Object > Expand Appearance, and then select all objects and Unite them in the Pathfinder panel. Change the result’s color to #453A2E.

finish curve

Step 7

Attach the lamp to our decorative part.

add curve to lamp

Step 8

Let’s draw the lamppost! Use Mesh, just as we learned before.

  1. #100804
  2. #7F7460
  3. #5A503E
draw lamppost with mesh

Step 9

Draw the second part of the lamppost similarly.

  1. #100804
  2. #362C1B
  3. #796F5A
more mesh

Step 10

Draw the base.

  1. #100804
  2. #665B48
  3. #3B2E22
base of post with mesh

Step 11

Draw a #110600 rounded shape, and then bend it with Effect > Warp > Arc, using -20% Bend.

Go to Object > Expand Appearance.

warp object

Step 12

Color the shape with Mesh.

  1. #413629
  2. #6F6452
  3. #54493A
mesh

Step 13

Resize copies of the shape.

three copies

Step 14

Put the post together and add the rings we just created.

join lamppost

Step 15

Finally, attach the actual lamps to the top.

add lamps

3. How to Light Up the Lamps

Step 1

Now that we’ve drawn the outline, it’s time to put lights in these lamps!

Begin by drawing a narrow ellipse and adding a Radial, #FFFF7F to #000000 Gradient to it.

draw ellipse

Step 2

Put another copy of that ellipse on top and tweak the Transparency options, selecting Screen and 79% Opacity.

Create a copy of the result, rotate it, and make it smaller.

more ellipse

Step 3

Draw a very narrow ellipse with the same Gradient as before.

another gradient ellipse

Step 4

Add a copy on top, creating a cross. Change its Opacity to 61% and Transparency to Screen.

add one more

Step 5

Draw a circle, using the same Radial Gradient. Again, use Screen, now with 95% Opacity.

gradient circle

Step 6

Create a flare by placing all the elements on top of each other.

join flare

Step 7

Draw a final ellipse for the light, using Screen and a Radial Gradient from #FFFFFF to #FFB500 to #000000.

gradient ellipse

Step 8

Place the first flare behind the lamp outline and the final ellipse on top of it.

place light

Step 9

Add the lights to both lamps.

both lamps

Step 10

Create a few copies of the lamp for the upcoming landscape.

add copies

4. How to Add the Trees and the Snow

Step 1

Let’s begin drawing the trees!

Learn how to draw the branch we will be copying in the second section of this tutorial. Now draw the trunk, fill it with #544E48, and start adding copies of the branch to it as shown below.

add branches to tree

Step 2

Add more branches to complete the tree.

finish tree

Step 3

Create a copy of the branches without the trunk and draw another one.

another tree

Step 4

Add more branches to the second tree.

add more branches

Step 5

Draw a highlight with a #FCFC98 to #000000 Radial Gradient, change the Opacity to 70% and Transparency to Screen.

gradient highlight

Step 6

Create copies of the trees and add the highlights behind them.

copies of trees

Step 7

Place the trees and the lamps onto the background.

add to background

Step 8

Draw two identical circles. Fill one with #ACB99A and the second with a #020200 to white Radial Gradient.

Set both circles’ transparency to Screen.

two circles

Step 9

Place the green circle under the gradient, and then select both and use Make Mask in the Transparency panel. Check both Clip and Invert Mask.

transparency mask

Step 10

Add these highlights on top of the background.

add highlights

Step 11

To add snow, refer to this tutorial.

add snow

Step 12

Draw a rectangle on top of everything to „frame” all the content you want to be seen in the final picture.

draw outline

Step 13

Select all elements and right-click, after that selecting Make Clipping Mask.

make clipping mask

Step 14

You’re done!

final picture

Awesome Work, You’re Now Done!

What now? You can try any of my other tutorials from my profile, or check out my portfolio on GraphicRiver, as well as the original vector we recreated in this tutorial.

I hope you enjoyed the tutorial, and I would be super happy to see any results in the comments below!


Christmas Evening Winter Landscape
Christmas Evening Winter Background

How to find the right landing page template when working with a free website builder

Post pobrano z: How to find the right landing page template when working with a free website builder
first image of the post

Using a free website builder has become very common even among design professional. The ease-of-use and professionalism of a platform like Wix is unmatched by any other way to build a website. Of course, you may miss on some advanced customization, but the type of things you can achieve with Wix is more than enough for 99% of website creators.

In this article, we will examine one specific aspect of efficient web design: landing pages. If you set goals for your website, it is important to improve its conversion rate, no matter if the conversion goal is a newsletter sign-up or a sale.

What are landing pages and why you need them?

Technically, a landing page is just an entry page to your website. However, it is in fact much more than that. In the world of online marketing, landing pages are key entry points that have been specifically designed for visitors to do a specific task. The most common landing pages are the click-through landing pages or the lead-generation landing pages:

  1. Click-through landing pages are designed to guide you to click towards a specific web page. These are very common on e-commerce websites.
  2. Lead-generation landing pages are built to make the visitors achieve a specific task. The goals of this type of page can be as diverse as making you download an ebook, fill in a request form, or sign-up to a newsletter, among other examples.

Now that online marketing is very common, landing pages are often created from the very beginning to make you act. It can also be just improvements to a page that is very popular on your website.

How to set up a landing page with Wix

As usual, Wix makes things simple for that as well. It provides you with excellent free landing page templates to make it easier for you to build a high-performance website. To set up an efficient landing page, you will need to do the following:

  1. Set your goals for the landing page. If you don’t know where you are going, you will not be able to find the way. Think about how visitors will access it, will they come from search engines or will you send this landing page as a newsletter,
  2. Find a landing page template that speaks your visual language. Wix offers you a wide range of templates to choose from, make sure that it goes well with your website and your message.
  3. Optimize the page. You can customize anything you create with Wix, it goes for landing page templates as well. Make sure to work on te texts and images included in the template to make them yours.
  4. Launch and tweak. Things change quickly on the Internet, don’t be a perfectionist and launch quickly. Monitor the results and tweak the landing page until you have the expected results.

Inspiration: amazing examples of landing pages created with Wix

The advantage of mentioning a product like Wix is that, thanks to its gigantic user base, it’s very easy to find good examples of people who have done it right. In a variety of fields and industries, the following examples are the best display to showcase the flexibility and the power of Wix templates. These examples are also a perfect illustration of the versatility of these templates, as they show it can be used for any type of product or service.

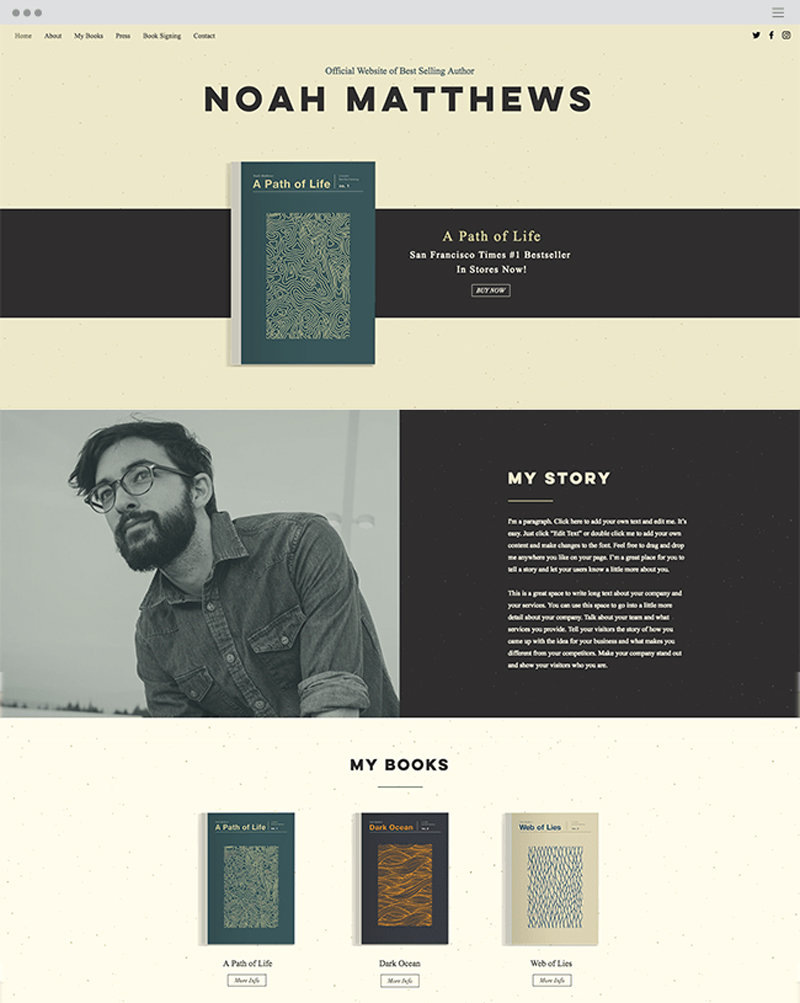
A writer’s website

Here the focus is on the books, with a presentation of the author and his previous books. A very efficient landing page with an elegant layout.

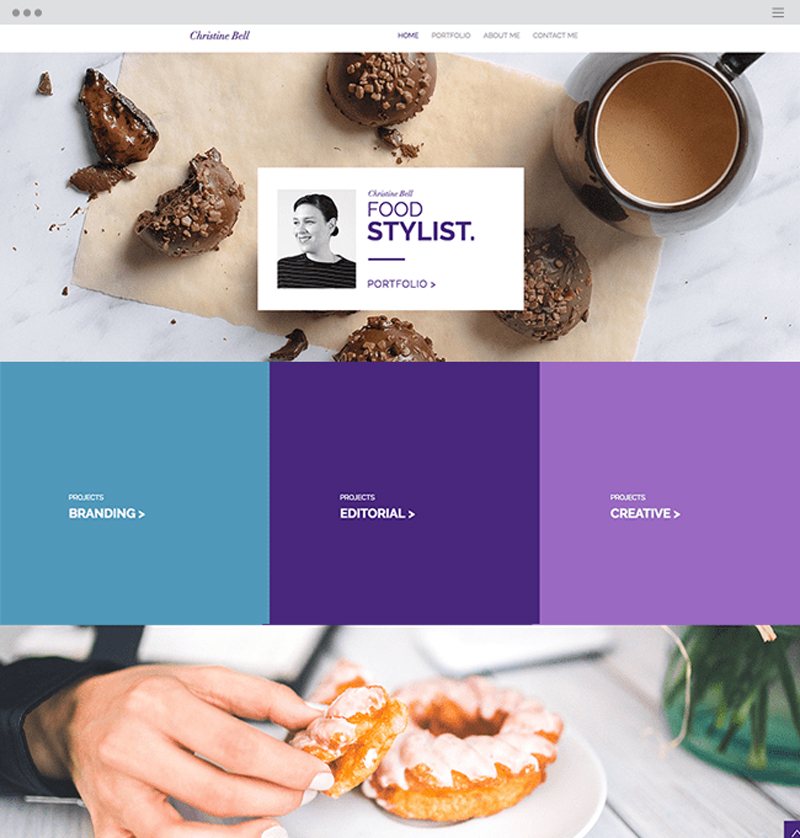
Food stylist website

Another kind of service that need strong visual identity to distinguish itself. Services are very clearly indicated and the global visual identity is strongly influenced by the powerful and tasty background photos of food.

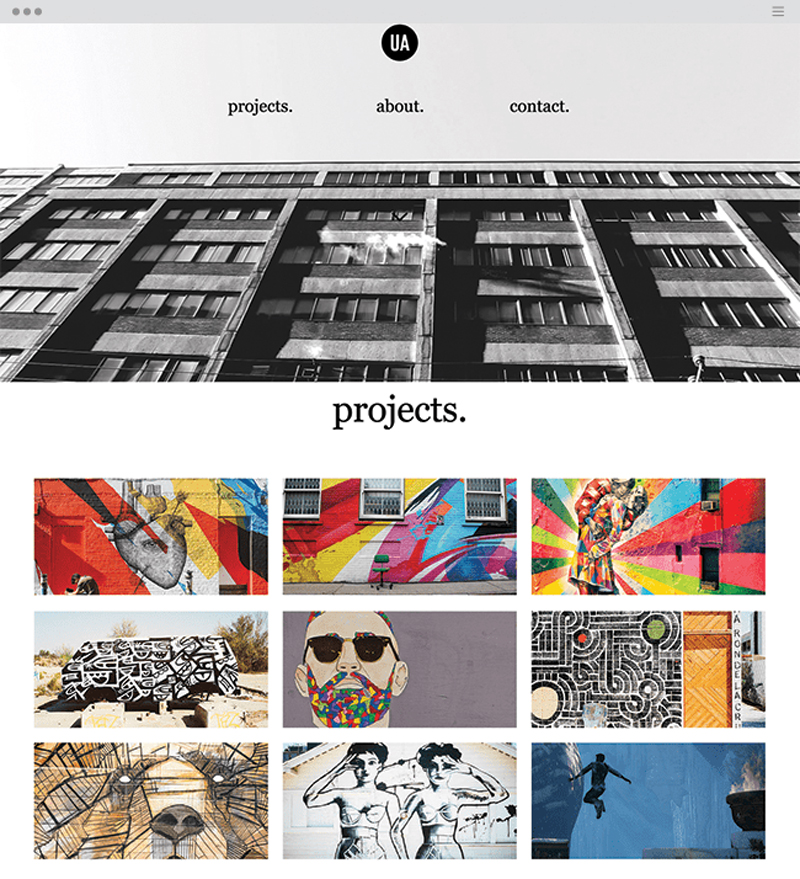
Website for a street artist

A gorgeous showcase of a street artist’s work. The grey photography of the building helps to feel the colors of the artist’s creations even more strongly. The navigation menu is self-explanatory and simple to go straight to the point.

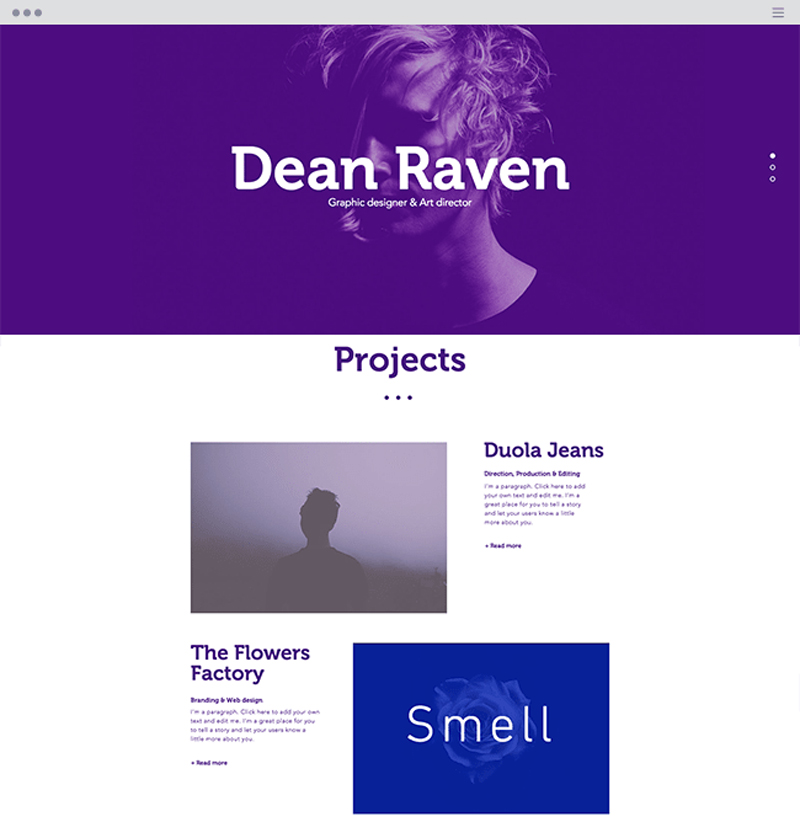
Graphic designer and art director

This website is meant as a portfolio, so the work of this graphic designer and art director is displayed right away.

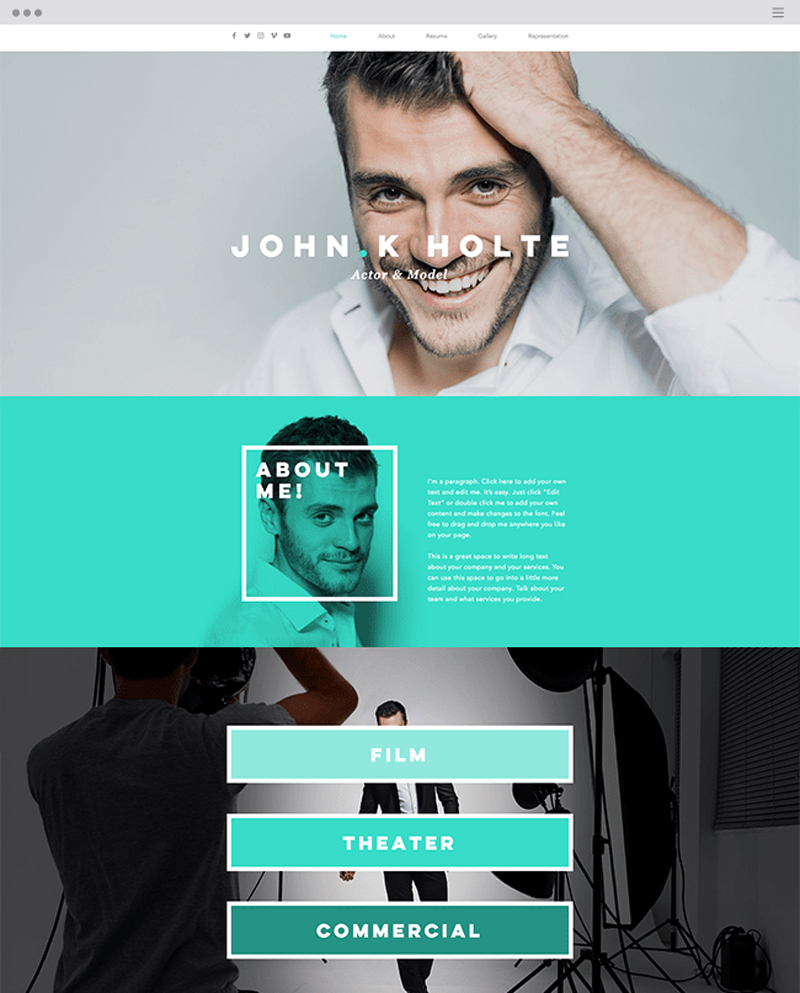
Actor and model website

For actors and models, the product they are selling is themselves, so they need a landing page that makes them look good. This template gives you every info you need with style.

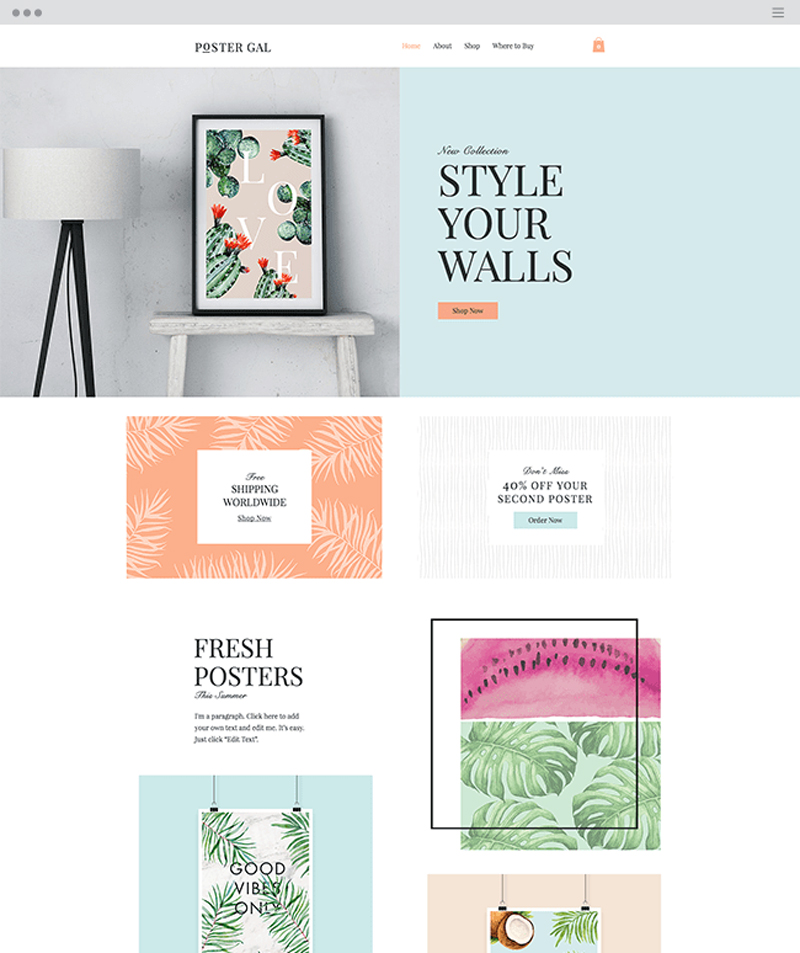
Poster shop landing page

A stylish and well layed out template for a poster shop. The products are at the center of the theme in this efficient template.

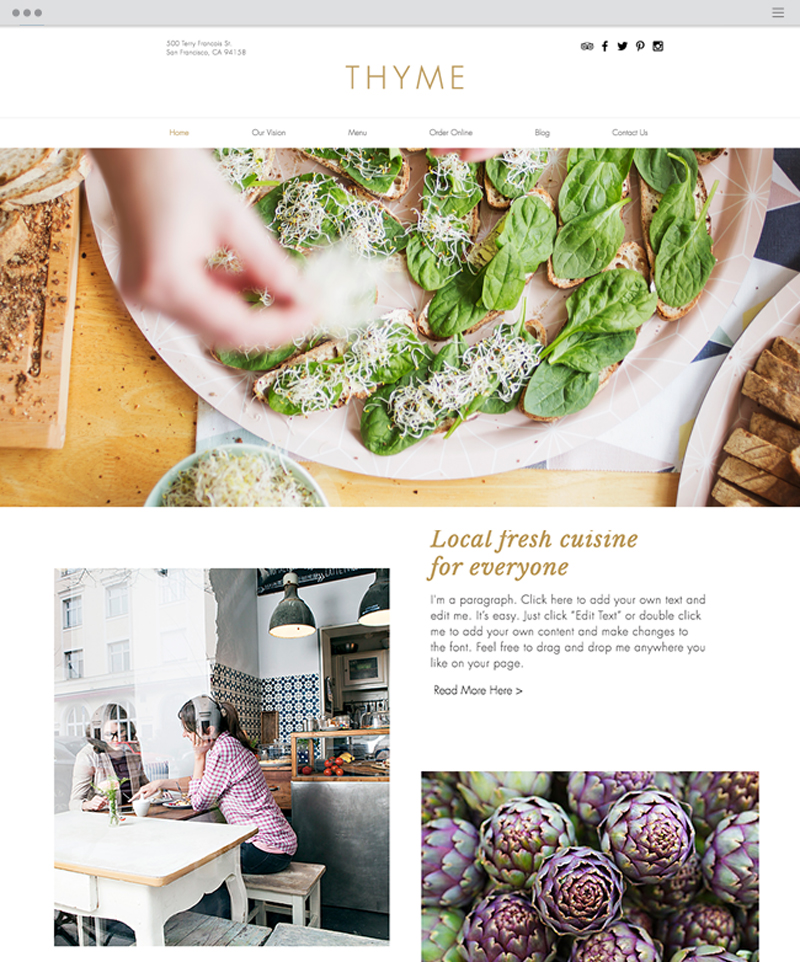
Vegetarian restaurant website template

For restaurant websites, it’s fairly easy to judge whether they are good or not by checking if they are making you want to go there or not. In this case, it’s mostly the good photography and the elegant layout that make it so successful.

How to find the right landing page template when working with a free website builder

Post pobrano z: How to find the right landing page template when working with a free website builder
first image of the post

Using a free website builder has become very common even among design professional. The ease-of-use and professionalism of a platform like Wix is unmatched by any other way to build a website. Of course, you may miss on some advanced customization, but the type of things you can achieve with Wix is more than enough for 99% of website creators.

In this article, we will examine one specific aspect of efficient web design: landing pages. If you set goals for your website, it is important to improve its conversion rate, no matter if the conversion goal is a newsletter sign-up or a sale.

What are landing pages and why you need them?

Technically, a landing page is just an entry page to your website. However, it is in fact much more than that. In the world of online marketing, landing pages are key entry points that have been specifically designed for visitors to do a specific task. The most common landing pages are the click-through landing pages or the lead-generation landing pages:

  1. Click-through landing pages are designed to guide you to click towards a specific web page. These are very common on e-commerce websites.
  2. Lead-generation landing pages are built to make the visitors achieve a specific task. The goals of this type of page can be as diverse as making you download an ebook, fill in a request form, or sign-up to a newsletter, among other examples.

Now that online marketing is very common, landing pages are often created from the very beginning to make you act. It can also be just improvements to a page that is very popular on your website.

How to set up a landing page with Wix

As usual, Wix makes things simple for that as well. It provides you with excellent free landing page templates to make it easier for you to build a high-performance website. To set up an efficient landing page, you will need to do the following:

  1. Set your goals for the landing page. If you don’t know where you are going, you will not be able to find the way. Think about how visitors will access it, will they come from search engines or will you send this landing page as a newsletter,
  2. Find a landing page template that speaks your visual language. Wix offers you a wide range of templates to choose from, make sure that it goes well with your website and your message.
  3. Optimize the page. You can customize anything you create with Wix, it goes for landing page templates as well. Make sure to work on te texts and images included in the template to make them yours.
  4. Launch and tweak. Things change quickly on the Internet, don’t be a perfectionist and launch quickly. Monitor the results and tweak the landing page until you have the expected results.

Inspiration: amazing examples of landing pages created with Wix

The advantage of mentioning a product like Wix is that, thanks to its gigantic user base, it’s very easy to find good examples of people who have done it right. In a variety of fields and industries, the following examples are the best display to showcase the flexibility and the power of Wix templates. These examples are also a perfect illustration of the versatility of these templates, as they show it can be used for any type of product or service.

A writer’s website

Here the focus is on the books, with a presentation of the author and his previous books. A very efficient landing page with an elegant layout.

Food stylist website

Another kind of service that need strong visual identity to distinguish itself. Services are very clearly indicated and the global visual identity is strongly influenced by the powerful and tasty background photos of food.

Website for a street artist

A gorgeous showcase of a street artist’s work. The grey photography of the building helps to feel the colors of the artist’s creations even more strongly. The navigation menu is self-explanatory and simple to go straight to the point.

Graphic designer and art director

This website is meant as a portfolio, so the work of this graphic designer and art director is displayed right away.

Actor and model website

For actors and models, the product they are selling is themselves, so they need a landing page that makes them look good. This template gives you every info you need with style.

Poster shop landing page

A stylish and well layed out template for a poster shop. The products are at the center of the theme in this efficient template.

Vegetarian restaurant website template

For restaurant websites, it’s fairly easy to judge whether they are good or not by checking if they are making you want to go there or not. In this case, it’s mostly the good photography and the elegant layout that make it so successful.

The Three Developers and the Insightful User Tester

Post pobrano z: The Three Developers and the Insightful User Tester

A story by Scott O’Hara:

The first of the developers, why he thought he knew best.
“I’ll get this done ever so quick!” he said, puffing out his chest.

“While the others review wikis, knowledge bases, and specifications,
I’ll lean on my deep knowledge of CSS to circumvent such onerous proclamations.

Specificity will be lax, and BEM classes will be king!
Everyone will marvel at the CSS of this thing.

Direct Link to ArticlePermalink


The Three Developers and the Insightful User Tester is a post from CSS-Tricks

The Three Developers and the Insightful User Tester

Post pobrano z: The Three Developers and the Insightful User Tester

A story by Scott O’Hara:

The first of the developers, why he thought he knew best.
“I’ll get this done ever so quick!” he said, puffing out his chest.

“While the others review wikis, knowledge bases, and specifications,
I’ll lean on my deep knowledge of CSS to circumvent such onerous proclamations.

Specificity will be lax, and BEM classes will be king!
Everyone will marvel at the CSS of this thing.

Direct Link to ArticlePermalink


The Three Developers and the Insightful User Tester is a post from CSS-Tricks

Agregator najlepszych postów o designie, webdesignie, cssie i Internecie