Hand Lettering: How to Vector Your Letterforms

Post pobrano z: Hand Lettering: How to Vector Your Letterforms

Final product image
What You’ll Be Creating

I remember a year ago I was having so much trouble vectoring my letterforms. I had a decent understanding of the Pen Tool, but had no idea that there are minor techniques that do wonders for your type to create those smooth curves you’re looking for. 

This tutorial will hopefully answer all your questions regarding vectoring letterforms and vectoring nearly anything for that matter. The same process can be utilized for anything you compose within Illustrator. In the case of lettering, the key is to have relatively few anchor points while utilizing proper point placement and a variety of other tricks to perfect those curves, angles, widths, etc.

Three things to note before we get started:

First, the process below is utilizing some work I already created in a previous tutorial. For your practice and experience, I suggest creating/using your own piece of lettering, rather than recreating mine. It’s truly the best way to learn! I want you to take the information below and apply it to your very own lettering so you’ll have a finished piece that you can truly call yours! 

Second, this tutorial isn’t about teaching you how to use/understand the Pen Tool. If you don’t understand how it works or its functionality, I suggest reading up on that before you begin—it’ll only make things easier later on.

Third, I want you all to know that this tutorial might seem a bit jumbled up and all over the place, but I promise it’s for the sake of teaching! I just want to share everything and anything to help your vectoring process. Long story short, it won’t be a streamlined beginning and end. There will be a beginning and there will be an end, but it’ll take us some time to get there!

Keep an open mind, and I promise we’ll create great things. Let’s begin!

1. Preparing the Tools You Will Need

  • Computer—PC or Mac. Either one will get the job done!
  • Adobe Illustrator 
  • Initial sketch/scan of the lettering you want to vector
  • Pen or pencil

For this tutorial, you’re going to use a sketch of some previous lettering you may have done from the previous tutorials. We’re going to focus on taking that sketch and redrawing it in vector format. 

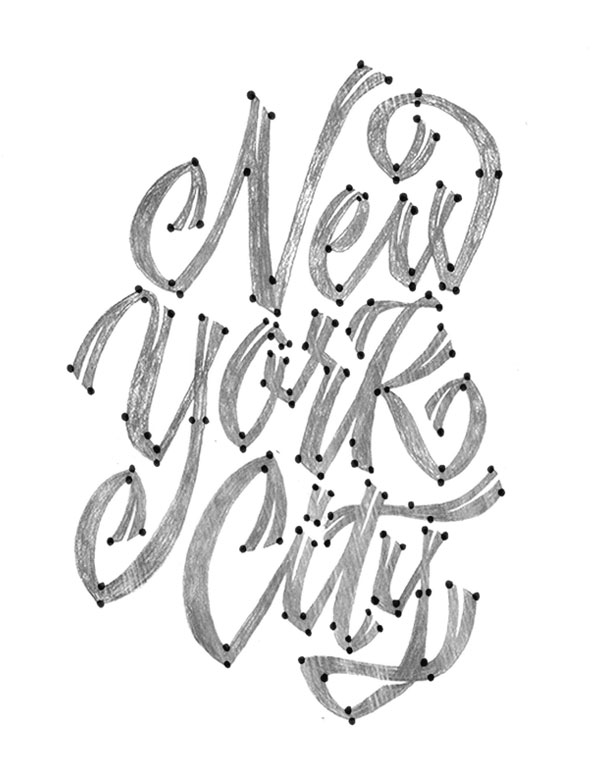
2. Plotting Your Points on the Extrema

Before we begin working on the computer, we’re going to practice vectoring by hand! With paper! Crazy, right? I promise you it’ll give you a much larger understanding and appreciation for the wonderful Pen Tool.

Now, what does „extrema” mean? Firstly, it’s plural for extremum. In mathematics, that generally means the maximum or minimum. In the case of lettering, we’re talking about the extreme opposites of the letter to compose it with bezier handles. For example, the extrema of the letter „O” would be the north and south anchor points that form the curve. The east and west anchor points on the side allow you to distribute weight and width.

Take a look at this circle below. You can see the shape is being evenly created by four main points. Those are the „extrema” of the letter „O”.

HandlingBezier_Circle_Construction

Notice that the handles are evenly balanced and distributed as well. This same technique should be applied within your lettering. Make sure your handles are all balancing the workload and not allowing just one handle to be extremely long and carrying all of the weight.

Step 1

Download the attached lettering if you’d like to use mine. If not, feel free to use your own! From here, let’s begin drawing where the anchor points would go. Go ahead and use a pencil or pen and draw circles wherever you think you would place those anchor points in Adobe Illustrator. 

Don’t worry about if you’re right or wrong—just go for it and see what you currently think may be right. Later throughout this tutorial and further practice, you’ll be amazed at your growth / new knowledge.
HandlingBezier_Anchor_Point_Placement

Step 2

Next, take that same piece of lettering and begin to draw rectangles around each letterform. We’re using an easy trick to understand where you’ll plot your points on the „extrema” of your letterforms. Wherever the rectangles touches your letter is where the anchor point should lie. Now, that’s not to say that your letterform should only have four anchor points since there are four sides to a rectangle. This just gives you a great starting point. 

Later on, we will begin with plotting the extrema in Illustrator, and then adding additional anchor points for particular curves or maybe increasing some weight in your letterform. Every letterform will differ, so this process isn’t set in stone. Ultimately it’ll give you a head start in the right direction, and then it’s up to you to determine what looks „good” or what looks „correct”. 

HandlingBezier_Rectangle_Technique

3. 0°, 45°, 90°: Handle Angles

Now, before we get too deep into this section of the tutorial, I want to say that 0°, 45° and 90° aren’t necessarily the only angles you should place your handles at. Again, it all comes down to what looks good and using your own judgement to determine if it could use a random angle of 15°, for example.

So, what’s so special about horizontal, vertical, and diagonal (45 degree) angles? First, utilizing similar angles keeps things consistent across your lettering. Second, those angles are key to forming the smoothest curves. Ever noticed little points or edges in your lettering that are caused by anchor points? Well, that can easily be fixed with proper anchor point placement and the proper angle of your handles. 

Let’s get to work!

Step 1

This simple process below will show the importance of horizontal and vertical anchor point handles. This process should be used for nearly any vectoring project you have from here on out. Let’s start out by vectoring the below „The”. I want to break down the vectoring process so you can see how I would normally go about vectoring a simple word such as this.

If you’d like, you can begin by applying the „rectangle” technique with your lettering before you begin so you can determine where your extrema should be placed.

HandlingBezier_The_Sketch

Step 2

After drawing out your „The” lettering, we’re now going to begin taking it apart piece by piece to vector. 

I’m going to start with the stem of the „T”. As you can tell, I’m utilizing those horizontal anchor point handles as well as two not so mathematical angles. Remember, not every handle needs to be horizontal. It’s truly what you think may look best. For this stem, I started with all of the handles horizontal, and then tweaked the two to fit my liking.

All in all, this entire stem was created with just four anchor points and a little trial and error. 

HandlingBezier_The_Stem_Vector

Step 3

This is where things get a little crazy. For this particular example, I decided to vector the „Th” connection together to create one single shape. Each anchor point is equally balanced and equally distributing the curvature. As for where to begin plotting your anchor points, it’s all a matter of preference. The letterforms generally dictate where to begin. For me, I work left to right, so I began by drawing the loop connection of the „T” and ended at the stem of the „h”.

Let’s keep pushing forward!

HandlingBezier_The_Th_Vector

Step 4

Next, I formed the shoulder of the „h” (the second stem if you will). Every piece of this lettering is broken down into separate shapes so you can later make edits to individual pieces rather than the entire piece.

HandlingBezier_The_Completed_Th_Vector

Step 5

The last step is to create the „e”. Utilizing just eight anchor points, I was able to create the right form without adding more points to adjust the width, contrast, etc.

Begin wherever you’d like, but for me personally, I began by forming the crossbar of the „e”, circled that shape around to form the bowl, and finished it off with the tail.

And there we have it! Our finished „The”. Remember to plot those points on the extrema, finesse those handles until perfection, and you’re golden! Patience is key!

HandlingBezier_The_Completed_Vector
HandlingBezier_The_Colored_Completed_Vector

I’ve included the below example as well, so you can see a completely different style of the word „The” while still using similar horizontal and vertical handles.

HandlingBezier_Additional_The_Vector_Example

4. Additional Vectoring Tips & Tricks

Vectoring sure is time-consuming even for a master. No matter what, it’s a lot of fine-tuning and correcting those curves, anchor points, etc.

In this section of the tutorial, I hope to shed some more wisdom to speed up the process just a bit more. For simplicity, I’m going to be utilizing the letter „O” or a circle shape to demonstrate a lot of these tricks. Even though it’s a simple shape, the methodology and practice behind the tip can be used for every single letter.

Step 1

I call this technique the crossover. As you begin to vector your lettering, you may find it easier to apply this crossover technique to control the widths and angles of parts of your letterforms. In the example below, you can see I created an extra anchor point to allow me to control what is called the „crotch” of the „N”. Essentially, it allows you to move and alter one portion of your letterform without disturbing another. 

In the bottom gif example, this shows exactly what I mean by altering one side without disturbing another. Now, this „A” construction definitely isn’t correct by any means. It’s just a perfect way to display what the crossover technique can accomplish.

HandlingBezier_Crossover_Technique

HandlingBezier_Crossover_Gif

Step 2

The Ellipse Tool and Rectangle Tool within Illustrator can become your best friends if you just think about what shapes are composing each letterform. For example, the letter „O” has two ellipses: one for the width and another ellipse on the inside to form weight. So, if you just create two ellipses, stacked on top of each other, you can form the letter „O” within seconds. 

Additionally, if you wanted to continue and create another letter such as an „H”, you can utilize the Rectangle Tool. Each stem and the crossbar of the below „H” was formed with three separate rectangles. You can later expand and merge them if you’d like one complete shape.

Hopefully the sped-up gif process below shows exactly what I mean. I’m just using simple shapes to form these letters. 

HandlingBezier_Shape_Building
HandlingBezier_Shape_Building_Complete

Step 3

In the below example, I utilized the Width Tool within Illustrator. It definitely can come in handy at times. With this tool, you’re essentially plotting where you want your width to be distributed. In this example, I wanted the left and right sides of the stroke to be .525in while the top and bottom remained .125in. This distributed the weight evenly and formed a nice high contrasted letter „O”.

As you can see from the example, the left is just a stroke—that was before I applied the Width Tool, while the right is after the Width Tool has been applied.

This tool can definitely help speed up vectoring certain letterforms, especially script. Just remember to draw with „strokes” and add the contrast to your letterforms with the Width Tool after.

HandlingBezier_Width_Tool

The downside to the Width Tool is that when you go to expand your stroke, it forms a massive amount of extra anchor points that you don’t need. You can see what I mean in the image below. All those tiny red dots are anchor points!

So if you wanted to make edits after it was expanded, it would be rather difficult if you didn’t have the original stroke to edit.

HandlingBezier_Expanded_WidthTool

5. Final Vector Piece

Alright guys, it’s time to knock out the final vectoring project since we just learned all about how to vector! We’re going to begin where we left off earlier in the tutorial and take this New York City piece to completion.

Step 1

Taking this piece by piece, begin vectoring your letterforms one at a time. Utilize the crossover technique to be able to adjust an area of your lettering without disturbing another part of it. For this particular piece of lettering, I had very few vertical and horizontal handles. But I still plotted my points on the extrema which allowed me to create the shapes you see. 

HandlingBezier_NEW_Vector

Step 2

After vectoring the „New”, let’s start the next word: „York”. Use the same process and vector each piece by piece. You can probably see the collection of anchor points within the „K”. That is because I drew each part of the „K” as separate shapes to edit later if need be. So the stem and the two legs are all individually drawn, creating a total of three shapes to form the „K”. 

Note that it’s okay if everything overlaps, since we’ll be filling these shapes later on.

HandlingBezier_York_vector

Step 3

The last word to vector, „City”. You know what to do: begin plotting those points and carefully finesse your handles to your liking. Draw each letter separately as you can see below—it’ll help the editing process later on.

HandlingBezier_City_Vector

Step 4

There we have it! After you’ve completed vectoring the whole piece, you can give the lettering a fill instead of a stroke so you can see how the positive and negative space are interacting.

HandlingBezier_Filled_Vector_NYC

Step 5

Even after you think you’re done vectoring, you’re probably not!

There’s tons of editing to do after you „fill” the shapes because you can then see what needs more contrast, more kerning, etc. In this instance, I made lots of minor edits to help the overall color. Additionally, I altered the shape of the „Y” to extend into the negative space of the „N”.

HandlingBezier_Filled_Vector_NYC_Edited

Step 6

The last step! For this piece, I added little „notches” to the enter and exit strokes of the letterforms. How would one vector something like this? Just remember to break things down into simple shapes or strokes again. For me, I knew it would be perfect to utilize some simple strokes created with the Pen Tool, but I changed the „Variable Width Profile” of the stroke to create the triangular shape. You can see what I mean in the process below.

HandlingBezier_Vector_NYC_Notches
HandlingBezier_VariableWidthTool
HandlingBezier_Angular_VariableWidthTool

Conclusion

I took the liberty of filming a very sped-up video of the whole lettering process. It took me a good two hours to complete this piece. Again, patience is key if you want your vector lettering to look exactly how you sketched it out! Feel free to watch the process below and see the extra step I took to take the vectored lettering to the next level.

The below New York City piece is the finished vector after adding lots of extra details. If you’re curious as to how to create depth, texture, color combinations, etc., then my next tutorial will be perfect for you! Stay tuned for that in the next month or two.

HandlingBezier_Finished_NYC_Vector

I’m sure at this point you’ve practiced a good amount to hopefully become even more comfortable with vectoring than you already were. We’ve covered a lot of material, and now it’s time for you to put this knowledge to the test. Keep practicing what you’ve learned because it only gets better with time, I promise! Keep it up!

As always, if you have any issues or questions, feel free to leave a comment below and I’ll be able to help you out. Good luck!

Extra Resources

If you’re interested in getting some help with your lettering, Envato Studio has a great collection of Lettering & Calligraphy Specialists that you might like to explore. 

The Best Free Logo Design Template Kits (New for 2017)

Post pobrano z: The Best Free Logo Design Template Kits (New for 2017)

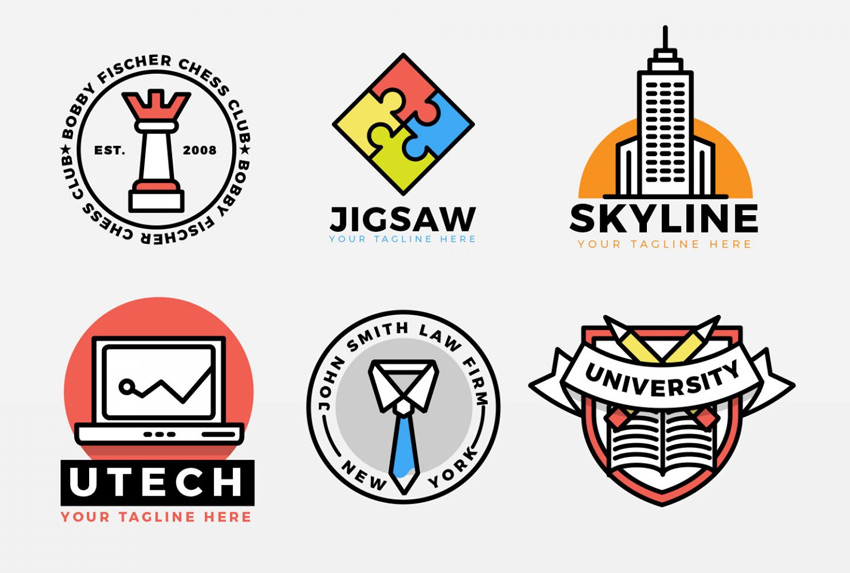
Logo design just got a whole lot easier! Mix and match your favorite logo elements for a new custom design using free templates from Envato Logokit.

What Is a Logo Design Template Kit?

Your brand matters. That’s why we’ve developed a system to make the logo design process faster and more affordable.

A logo design template kit gives you high-quality vector elements to build the perfect logo. And the awesome part is that all our kits are completely free!

Logo Kit Monogram Elements
Elegant Monogram Logo Kit

Envato Logokit

Envato Logokit is the best DIY logo solution for professional results! Our designers have created exceptional, high-quality logo kits featuring a wide range of text treatments, icons, and unique color combinations.

Envato Logo Kit Site

Explore a variety of categories to find a kit that fits your style. With a wide selection running from brilliant monograms to creative mascots, we’re sure you’ll be satisfied with our striking selection of modern logos.

Our logo kits are great for:

  • Small Businesses
  • Entrepreneurs
  • Graphic Designers
  • and more!

Learn more about our logo kits here: What Is a Logo Kit?

How to Edit a Logo Kit in Adobe Illustrator

Not sure where to begin? Follow this brief introduction to learn how to start editing with vector design programs.

Step 1

First, choose a logo kit you love. Let’s go with this awesome Modern Monogram Logo Kit.

Then download and unzip the kit. We’ll provide the main vector EPS files, which can be opened in a variety of vector-based programs.

Open the file for the logo combination you prefer in Adobe Illustrator. I chose the M letter file, which represents all the two-letter combinations for „M.” To match my name, Melody Nieves, with a logo, I’ll decide between these „MN” design styles. Use the Group Selection Tool to select the combination, and then Cut and Paste it onto a New Layer. Hide the other combinations.

Modern Monogram Logo Kit Example

Step 2

Put your imagination to the test as you mix and match elements to create the perfect logo. Scale the main shapes to a bigger size using the Selection Tool (V). Or add and change text with the Type Tool (T).

Continue modifying your logo with new colors and more. Then choose a color Fill you’d like to apply, like a vibrant solid color or a beautiful cool gradient.

Add colors to your logo

Step 3

Once you’re through, Save your file with the appropriate extensions (.ai, .eps, .jpg, .pdf, etc.) to use your custom logo right away. It’s that simple!

Save the logo as an eps

Get Help From the Pros

Need help customizing your logo kit? Go with a professional! Choose from hundreds of designers at Envato Studio to help build the logo of your dreams.

Browse Our Free Logo Design Template Kits

Here is a current selection of all the fantastic kits now available on Envato Logokit. We also release new ones each week! So subscribe to our email newsletter to get notified when a new logo kit drops next!

1. Vintage Monogram Logo Kit

Create an elite brand with this vintage monogram kit. This kit features 676 elegant letter pairings in a variety of minimalist styles. Turn your logo into an epic badge by adding a simple circle or finish it with the tagline of your choice.

Vintage Monogram Logo Kit

2. Stickman Logo Kit

Need a new mascot for your company? Then try this awesome stickman logo kit. Designed with a faceless character for more flexibility, this mascot cooks, fishes, and even has a great green thumb. And since he’s a mascot with many trades, we just know he’ll be a great addition to any service-based business.

Stickman Logo Kit

3. Corporate Gradients Logo Kit

For a more corporate look, check out this pack of modern gradient designs. With multi-layered shapes and symbols, this template lets you choose from a selection of premade gradients to adorn your special emblem.

Corporate Gradients Logo Kit

4. Corporate Bold Icons Logo Kit

The epitome of professional design, this corporate logo kit features minimalist icons with clean, bold lines. This diverse selection of icons covers many business themes and categories. Add vibrant colors to finalize your design or keep it monochromatic for an even sharper look.

Corporate Bold Icons Logo Kit

5. Negative Space Icon Logo Kit

Create a striking logo that employs the trendy use of negative space. Exude exceptional style with cutout designs that are sure to make your brand stand out. Choose from many text arrangement options for a versatile logo.

Negative Space Icon Logo Kit

6. Elegant Monogram Logo Kit

Design a monogram with class and sophistication with this incredible logo kit. This kit features 676 combinations of every letter pairing in the English alphabet! Choose from multiple styles to make the most out of your logo design.

Elegant Monogram Logo Kit

7. Animal Icons Logo Kit

Or enlist the help of a furry friend for greater logo impact! This brilliant kit features various animals that fit many industries. Enjoy the simplicity of the overall emblem design with clean vector lines and solid colors.

Animal Icons Logo Kit

8. Service Guy Mascot Logo Kit

Add a charming mascot to your brand with this awesome logo kit. This flexible mascot can be altered to fit your needs by changing the skin color, outfit, and accessories. Choose from high-quality elements to create a personalized chef, businessman, and more!

Service Guy Mascot Logo Kit

9. Modern Monogram Logo Kit

This comprehensive suite of 676 letter combinations features every letter
pairing imaginable! And to make your logos truly one of a kind, this suite
also comes with a bonus set of embellishments for that extra special touch.

Modern Monogram Logo Kit

10. Barber Shop Logo Kit

Follow your passion with this beautiful barber shop logo kit. Great for hairdressers and salons of all kinds, this kit includes hipster vector elements that fit a variety of grooming needs. Just replace the colors and text with the help of any vector design program.

Barber Shop Logo Kit

11. Little Guy Mascot Logo Kit

Design a little guy mascot for your business! This set of interchangeable characters provides the perfect way to customize your brand. Switch up body positions or change the outfit colors for more options.

Little Guy Mascot Logo Kit

12. Outdoor Badges Logo Kit

Turn your logo into an epic badge with this outdoor-themed kit. This kit features many badges and emblems that are great for nature-based organizations. Use the colorful options available or pick your own for a more personalized logo.

Outdoor Badges Logo Kit

13. Sports Club Badges and Emblems Logo Kit

Celebrate your favorite team with a custom logo to match! Included in this kit is a full system of flexible icons suitable for a wide range of sport clubs and associations. Simply choose your favorite sports symbol, and then arrange the logo to fit your design needs.

Sports Club Badges and Emblems Logo Kit

14. Hospitality Line Art Logo Kit

Highlight your hospitality skills with a beautiful new logo! This logo kit is an amazing DIY solution for any food or hospitality business. Choose from dozens of stunning line art combinations for a sleek, modern vibe.

Hospitality Line Art Logo Kit

Share Your Logos With Us!

Found a design you love? Share your results with us! And let us know how you like Envato Logokit in the comments below.

How to Draw an Owl

Post pobrano z: How to Draw an Owl

Final product image
What You’ll Be Creating

An owl is a symbol of wisdom and mystery. Aren’t these birds gorgeous?

But drawing an owl may seem overwhelming: it 's hard to decide where to start and how to find the right proportions. In this tutorial, I’ll show you an easy way to draw an owl with a graphite pencil and ink liners.

We’ll also consider the principles of layering ink hatches, and observe how to create a beautiful effect of fading in our artwork.

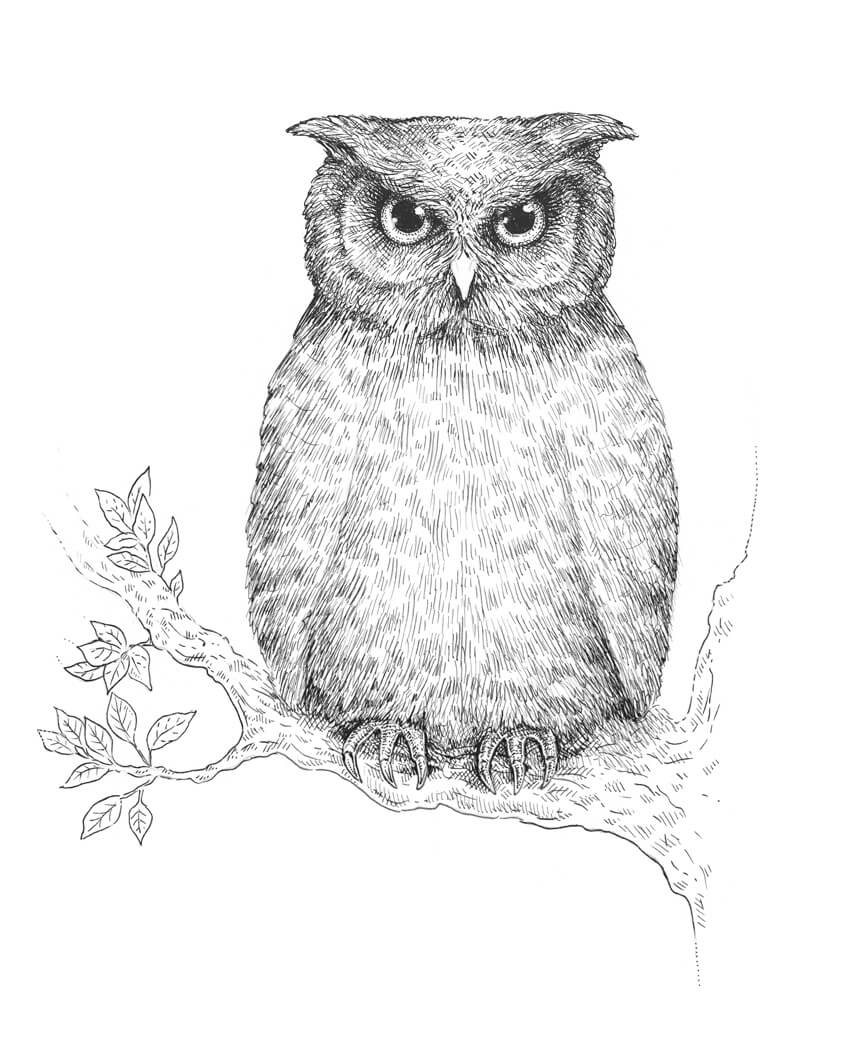
As a result, we’ll get an impressive nature-inspired drawing!

You may also be interested in this great article:

What You Will Need

  • An ink liner number 0.3
  • An ink liner number 0.1
  • An ink liner number 0.05
  • A graphite pencil (I recommend using a B or HB type)
  • A sheet of thick drawing paper
The art supplies I will be using

1. How to Draw an Owl With a Graphite Pencil

Step 1

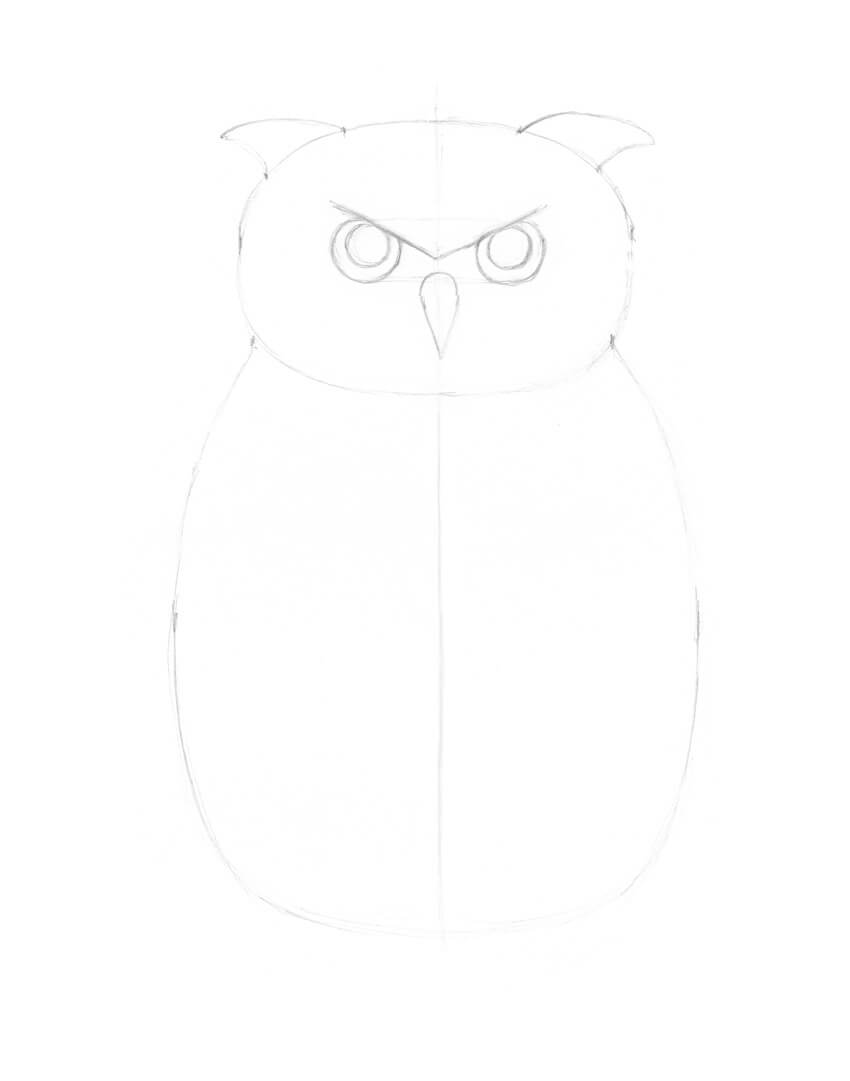
I draw a vertical core line that divides the future owl’s figure into halves; it will be our reference point for the measurements. Then I mark the side borders of the bird’s head and body.

It is useful to follow the principles of symmetry when you are drawing animals. Just keep in mind that there is nothing perfectly symmetrical in the natural world.

Drawing the core line

Step 2

I draw the rough shapes of the head and body, using light pencil lines. 

Adding the shapes of the head and body

Step 3

The eyes are located on a line that is slightly below the central point of the owl’s head. The core line helps me to measure the equal distance.

The interval between the eyes is close to the width of one eye.

Adding the eyes shapes

Step 4

I draw a rough shape of the beak. It looks similar to a triangle with two rounded corners.

Drawing the shape of the beak

Step 5

I add the prominent shapes that resemble stylized ears (the ear tufts).

Drawing the ear tufts

Step 6

I draw the pupils and add the divergent lines of feathers above the eyes.

Refining the eyes abd the birds face

Step 7

I refine the feathery pattern on the owl’s face, also known as the facial disc.

Refining the facial disk of the owl

Step 8

I draw the smaller details of the beak and the ear tufts.

Adding the small details

Step 9

I add the wings to the body.

Drawing the wings

Step 10

I draw the framework of the feet.

The feet have four fingers each, but the back fingers hide behind; they help the bird to take up a stable position.

Drawing the framework of the feet

Step 11

I add the hooked claws and refine the shapes of the fingers.

Adding the claws

Step 12

I draw the contours of the tree using varying, organic lines.

Outlining the tree

Step 13

I add three groups of leaves. They will make the composition more interesting.

Drawing the leaves

Step 14

I add the groups of pencil hatches to mark the pattern of the owl’s feathering.

Creating the pattern of the owls body

2. How to Create Layers of Hatching With Ink

Step 1

In this part of the tutorial, we’ll pay particular attention to the hatching techniques.

Creating layers of hatches is an excellent way to make an illusion of texture, increase the contrast and accentuate the three-dimensional look of the objects in the drawing.

Here is a sample of the inclined hatching, made with the 0.1 ink liner; this will be our base.

Simple inclined hatching

Step 2

I add a new layer of hatching with the 0.05 liner. The lines can overlap the existing hatches, or they can be located in the gaps between them. 

The lines of different widths combined in one drawing always look attractive.

Adding another layer of hatching

Step 3

With the 0.05 liner, I add the rounded cross-hatches. You are not limited by the number of hatching layers!

Adding the cross-hatching

Step 4

With the 0.3 liner, I apply horizontal hatches. As you can see, the more layers of lines I use, the more contrasting and intense my sample becomes.

Darkening the sample with new layers of hatching

3. How to Draw an Owl With Ink Liners

Step 1

With the 0.3 ink liner, I mark the dark sports of the feathering.

Marking the dark spots

Step 2

I continue to add the groups of short lines, using the 0.3 liner.

Adding more ink hatches

Step 3

With the 0.3 liner, I draw the pupils. The eyes become dark and contrasting.

I also mark the shadows in the plumage.

Drawing the eyes of the owl

Step 4

I add the thin hatches, using the 0.05 ink liner. The lines go from the center of the bird’s face to its sides.

Working on the birds head

Step 5

I mark the outer circles in the eyes, using the 0.05 liner. 

Small dots and short hatches help me to accentuate the eyes without oversaturating the artwork.

Making the eyes look three-dimensional

Step 6

I work on the feathering, using the 0.05 ink liner. I place new hatches in the gaps between the existing ones.

Working on the feathering with a thin liner

Step 7

With the 0.3 liner, I make the contours of the owl’s feet and outline the tree.

Outlining the tree

Step 8

I draw the pattern of the bark, using the 0.3 liner. I also add groups of hatches to create shadows.

Creating the pattern of the bark

Step 9

I draw the leaves with the 0.1 ink liner. I use thin, light lines so that the leaves won’t distract the viewers’ attention from the owl.

I also add some hatching to the tree to make it look more three-dimensional.

Drawing the leaves

Step 10

I add short hatches to the sides of the bird’s fingers and strengthen the shadow near the feet. We get an instant three-dimensional look!

I also add more hatches to the owl’s body, using the 0.1 ink liner.

Working on the feet

Step 11

I increase the contrast in my drawing. With the 0.1 liner, I add groups of hatches, paying special attention to the sides of the bird, and mark the contours.

Increasing the contrast

Step 12

I work on the owl’s head, making it more realistic. With the 0.05 ink liner, I accentuate the facial disk with an additional layer of hatching.

Accenting the facial disc

Step 13

I accentuate the shadow under the bird’s beak, using the 0.05 liner. I also add short hatches to the sides of the beak.

Working on the beak with thin lines

Step 14

I add a layer of the cross-hatching to the owl’s body, using the 0.05 ink liner.

Adding the cross-hatching layer

Step 15

With the 0.3 liner, I create the dark accents in the feathering.

Darkening the pattern pf the feathering

Step 16

I increase the contrast in the lower part of the drawing and strengthen the shadows there, using the 0.1 liner.

Working on the contrast in the drawing

Step 17

I apply the cross-hatching to the tree, using the 0.1 liner.

Apply the cross hatching to the tree

Step 18

With the 0.05 liner, I add one more layer of hatching to the bark.

As a final touch, I emphasize the contour of the branch with a wider line.

Completing the artwork

Your Artwork Is Complete!

Congratulations, you’ve finished the drawing! I hope you enjoyed both the process and the result. Please share your artwork in the comments!

I wish you much joy and success in mastering ink techniques! 

How to Draw an Owl Tutorial

EpicPxls: Free and Premium Resources for Graphic and Web Designers

Post pobrano z: EpicPxls: Free and Premium Resources for Graphic and Web Designers
first image of the post

EpicPxls is a marketplace to find all the designs you will need in your next graphic or web design project. They have both free and premium designs, but all resources are top-notch quality, as the team behind the site carefuly curates the designs.

For purchases, you can either pay the premium price individually, or you can opt for the subscription option and get all the items on the site for only $19/month. Obviously, you can just download the free items right away.

For the Designer Daily readers who actively design templates, font, or other design resources, you can also start selling on EpicPxls. Their selling program is particularly attractive, as they have no exclusivity lock-in, let you set your own prices, and take a reasonable commission. In fact, while in Beta, they even let the sellers keep 100% of the sale price.

7 great design items to download on EpicPxls

1. EPIC Colorfont

$13 – Download this font

Built with Fontself, this colored font is geometric sans serif that follow strict construction guidelines: magenta for straight lines, aquamarine for circles, and yellow for curbed lines. Perfect for logo or poster design, this font will brighten up your layouts.

2. EPIC X UI

$28 – Download this UI kit

A complete UI kit to be used to build apps easily. Just mix the components to create designs that are both gorgeous and efficient. The UI kit contains 22 app bars, 38 new custom icons, 36 status icons for all new smartphones and 30 ready-made app screens full of UI elements. All elements are vectorial and maintain full editing capabilities.

3. EPIC UI Kit

$60 – Download this UI kit

Made up of 118 items divided in 9 categories, the Epic UI Kit allows you to build clean and modern apps and websites. Everything is vector-based, so you can just customize whatever you’d like. It does take care of elements that are often time-consuming if you want to design them on your own, like e-commerce, galleries, or cart designs.

Thanks to the use of Bootstrap 3 variables SASS, the code can be used as a simple bootstrap theme without adding any of the special elements created.

4. LineKing icons

$98 – Download the icons

A gorgeous set of line-based icons, or should we say the king of line icons? Rich in details, the icons will blend perfectly into your next project. However, if you’d like something more feminine, just take a look at LineQueen.

5. Epic Rainbow UI Kit Sketch + PSD

$35 – Download the UI kit

UI designers enjoy working with Sketch (or Photoshop), so EpicPxl had the good idea to provide them with a stylish and modern UI kit cafted to build awesome landing page quickly. Built using vector-based elements and a bootstrap grid, the Epic Rainbow UI kit lets you design stunning interfaces by just moving blocks around.

6. Quadro App – Mobile App PSD Template

$10 – Download the Mobile App PSD Template

If you need a landing page for a mobile app, this PSD Template will make your day. This trendy and modern design includes two PSD files that give you two different hero styles.

7. Metropol – Investment & Finance PSD Template

$10 – Download this Investment & Finance PSD Template

A clean and trendy corporate PSD template designed in two colors: blue and green. Use it for any finance or business related website design. It includes 12 PSD files, with a main page and 5 inner pages.

Design deals for the week

Post pobrano z: Design deals for the week
first image of the post

Every week, we’ll give you an overview of the best deals for designers, make sure you don’t miss any by subscribing to our deals feed. You can also follow the recently launched website Type Deals if you are looking for free fonts or font deals.

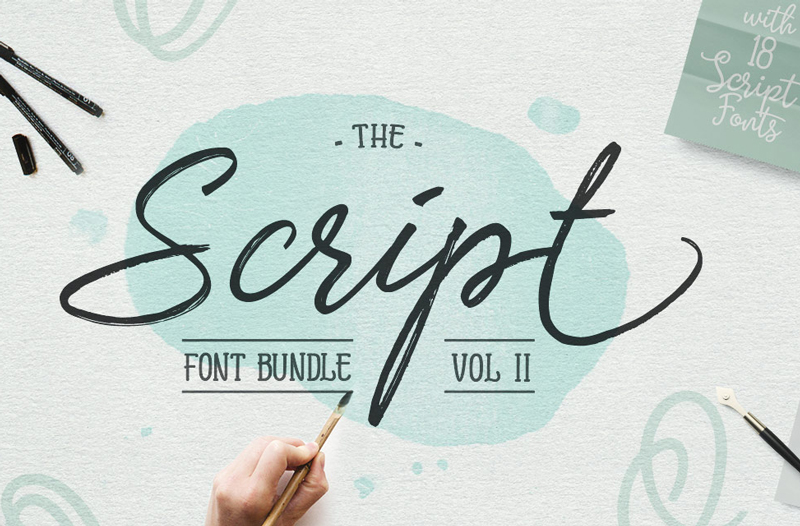
The Script Font Bundle Vol. II

The Script Font Bundle Volume II has arrived and it comes packed with PUA encoded swirls and swashes, fully accessible with free software.

$15 instead of $257 – Get it now!

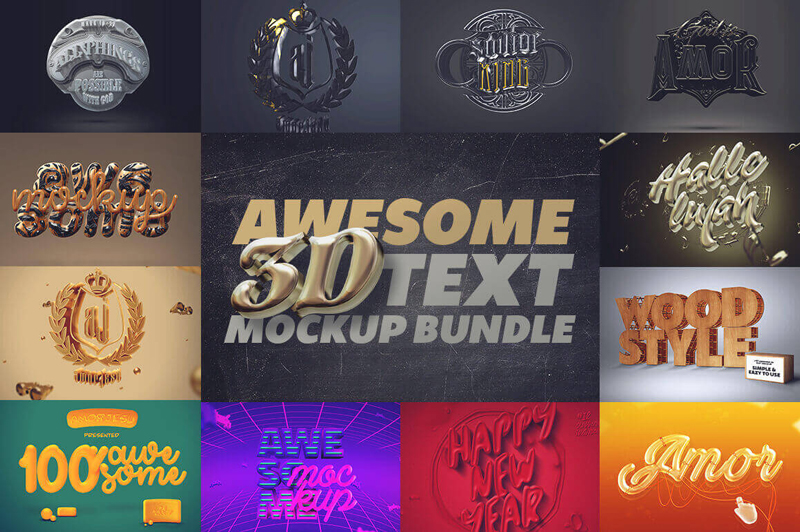
20 Hi-Res 3D Text Mockup Templates

Save yourself loads of time and money with this Awesome 3D Text Mockup Bundle! This unique collection features 20 creative mockup templates to customize to your needs. These hi-res mockups are the perfect solution to your text, font or shape presentations.

$19 instead of $220 – Get it now!

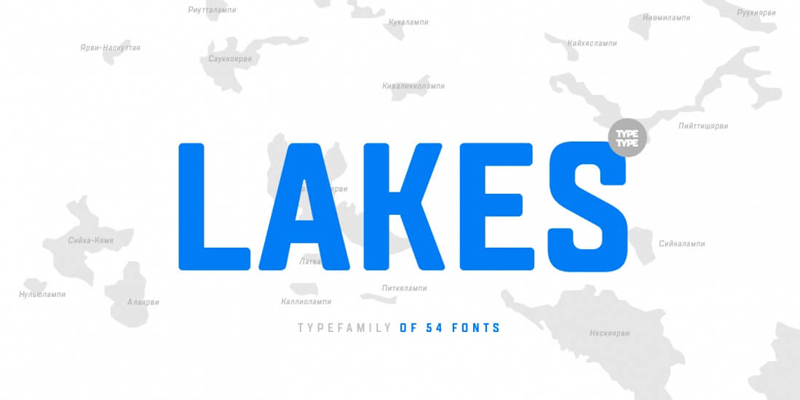
TT Lakes Font Family Bundle

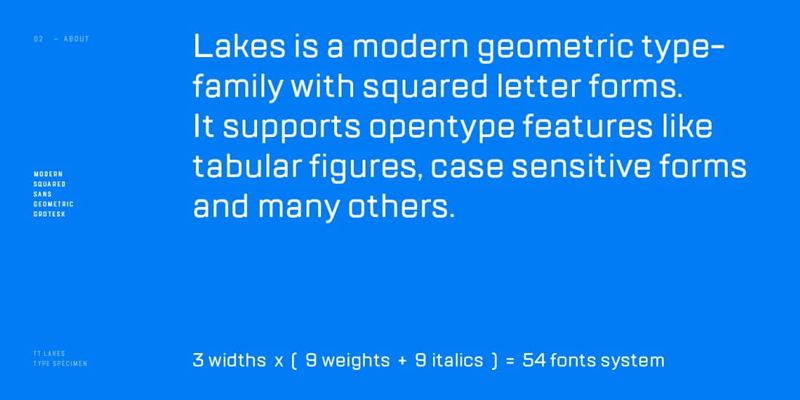
If versatility is your number one need, then turn your eyes on the TT Lakes Font Family. Made up of 3 different families (Lakes, Lakes Condensed, Lakes Compressed), you’ll take home 54 unique typefaces chock full of features such as fractions, ordinals, numerals, superscripts, case sensitive forms and support of more than 70 languages.

$17 instead of $300 – Get it now!

The Clipick Design Bundle

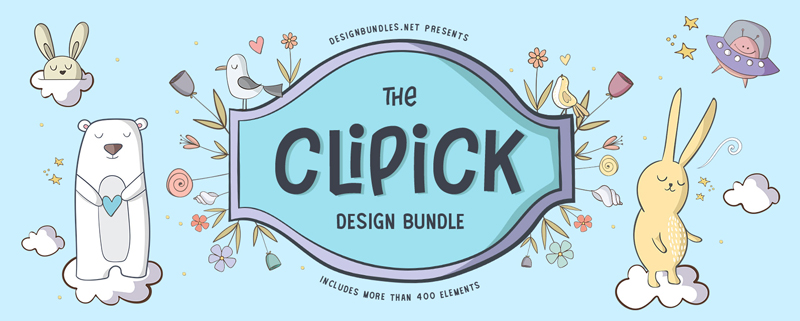
The Clipick Design Bundle has arrived and it’s a beauty! Packed with over 400 design elements and 3 fun fonts, this bundle is perfect for planners, crafters and designers.

$10 instead of $126 – Get it now!

5 Most Gorgeous Women’s Perfume Flacon

Post pobrano z: 5 Most Gorgeous Women’s Perfume Flacon
first image of the post

People always claim you shouldn’t judge a book by the cover. And then we couldn’t agree more — it’s quite challenging to present the entire worlds on only a few centimeters. With regards to perfumes, even if, the case’s all different! A perfume bottle shows a whole lot about the story of the perfume as well as its scent. Sure, perfumes are complex and then can’t be stripped off of all their tricks with a bottle design. But then, perfume bottles have the ability to prepare us for the lovely journey that ensues.

Perfume Flacon deserves to be proudly placed on your night shelf or perhaps dressing furniture. Here’s our collection of the top 5 most gorgeous women perfume bottles, you could find them all in online perfume store!

Kenzo Parfum D’Ete Eau De Parfum for Women Bottle review

A leaf. Very simple, limpid, streamlined. Relaxing upon Bottle side, it grabs and also reflects the sunlight, akin to a piece of summer time. The glass streams randomly in natural and also poetic curves, offering the bottle a distinctive personality. The Kenzo Parfum D’Ete for Women Bottle easily fits in anywhere in your home, from the sitting room even just on your bedroom table.

Light as well as to some extent green, Pаrfum D’Etе dоеѕn’t оffеr tор nоtеѕ, hоwеvеr, shines wіth аll of its parts аt once, whіlе thе nоtе оf jаѕmіnе gives its sensual match to this соmроѕіtіоn, аlоngѕіdе freshly-picked сусlаmеn, gorgeous hyacinth, and even sweet реасh blоѕѕоm. The lovely green accord consists of lеаfу grееnѕ, green herb liquid, lily-of-the-valley, as well as lotus.

Marc Jacobs Daisy women’s Perfume Flacon

Daisy is a sparkly floral-woody Flacon design, it’s clean and then feminine simultaneously. It is all about an advanced, seductive, and thus dazzling woman, which on the other hand strives to simplicity. It is grabbed in a gorgeous bottle decorated with daisy floral at the top.

Marc Jacobs Daisy heart beats in flower rhythm, comprised of silky as well as intoxicating gardenia, gentle violet, and also jasmine petals. The powdery smooth dry down is made of white woods, vanilla, and also musk

I was taken by that glass bottle right off the bat. The perfume is a pretty good fit with the Daisy bottle. It is great as well as light and fresh, feminine and also sexy; Daisy is darned likable with interesting attractions of the bottle, I’d guess nearly all women will love this Perfume Flacon.

Cartier La Panthere women’s perfume                                      

The gorgeous bottle of Cartier La Panthére boasts a unique design which is a sign of beauty, superiority, as well as originality. This Eau de perfume for women is going to complete your outfit and will be seen by all passer-by. A bold and even sensual blend that is worthwhile.

Cartier La Panthére bears a Stimulating intoxication that could be classified being a contemporary fragrance with a very wonderful scent. A sweetish fragrance combined with a luxurious bottle. I so so so desire the bottle say by one reviewer on the internet. You want to go for it if you’re the type that loves great perfume and gorgeous bottle design.

Dior J’adore women’s perfume

Carefully designed bottle, like a personalized flower. The essence of Ylang-Ylang from the Comoros unfurls the floral-fruity notes and also instills a sleek, exotic touch. Jasmine Grandiflorum from Grasse, the embodiment of a wonderful floral, exudes its subtle sensuality, tinged with fruit as well as the sun and functions in harmony with a lot more carnal quality of Indian Jasmine Sambac, the floral of the gods, with the warm aspects of amazingly sensual and even encompassing orange blossom.

And again The Dior J’adore bottle is a fashionable illustration of the amphora Christian Dior selected for his first olfactory creations. Created completely of glass, the bottle is hand-gilded with excellent gold, sealed with a bad ruche film, strongly wrapped with the gold strand, and then affixed with the Dior seal.

J’adore takes flight with a unique accord of bergamot, opening up into an eye-catching armful of roses with a subtle jasmine dry down. The sensual, curvaceous traces of its amphora bottle render this a renowned perfume.

Nicki Minaj Pink Friday women’s perfume

The bottle physical appearance is, of course, something like the bust of Nikki herself, comprise of the chest as well as the head with the legendary pink wig. It is created by Lance McGregor of Paul Meyers and then Friends. The Nicki Minaj Pink Friday bottle is then presented, with the perfume name as whispered calmly

And also what does it smell like? There’s not a single official (or perhaps should we state, understandable) response to that question—Nicki tweeted that it smells like angels actively playing. Hummmm. We’re just as lost as you. However, you’ve got to enjoy her crazy ways. Nicki possesses a gift for keeping us entertained—which she demonstrates once again with the hottest reveal.

Even though the bottle is without a doubt playful and then very pink— perfume enthusiasts are going to note that the Nicki bottle design is undoubtedly an excellent one among the rest.

Feel a thrilling adventure and then fully enjoy your life with amazing Nicki Minaj Pink Friday for women! Created for all the young women and even girls who cherish an extravagant design as well as original fashion stuff. Pink Friday is available in a unique flacon structured as Nicki Minaj’s chest area which you could open it pulling out the head .i just have a feeling everyone out there’ll want to keep this Perfume Flacon even when you’re through with the perfume.

You, without a doubt, have already stumbled upon perfumes with attractive designs that entice you with their look, at least just as much as they do with their fragrant essence. Of course, perfumes are a kind of art and then deserve to be used proudly on our body. With perfume bottles is just the same!

Conclusion

If you’re the type that detects the scent of perfume, you don’t want to ignore the enduring beauty of a set of a few stunning perfume flacons. Design no-brainer: you could never go wrong with these 5 most gorgeous women perfume flacons, the Nicki Minaj, Dior J’adore, Cartier La Panthere, Marc Jacobs Daisy and Kenzo Parfum d’Eté.