Say you have a <blockquote> and the design calls for a thick border along the left side. Well, you might not necessarily mean left side, but actually mean on the side of the start of the text.
That’s exactly what CSS logical properties are meant to address, and Hussein Al Hammad has a nice article laying out some use cases, including the blockquote thing I mentioned above.
By using logical properties, you don’t have to mess around with manually writing selectors including [dir="rtl"] or needing to be aware of writing modes and such. The box model stuff (borders, padding, margin…) will adjust where it needs to be.
Hussein’s blockquote is a good baby step example for understanding of all this:
This browser support data is from Caniuse, which has more detail. A number indicates that browser supports the feature at that version and up.
Desktop
Chrome
Opera
Firefox
IE
Edge
Safari
69
62*
41
No
76
12.1
Mobile / Tablet
iOS Safari
Opera Mobile
Opera Mini
Android
Android Chrome
Android Firefox
12.2-12.4
46*
No
76
76
68
One thing that threw me off in the article is the term „Horizontal Rules.” First I imagined the <hr> element. Then I imagined wanting to reverse the direction of the design with logical properties. Usually an <hr> is just a line so horizontal direction doesn’t matter, but let’s say it’s like a shorter line along the edge where new lines start after wrapping.
We could draw the shorter line with backgrounds that cover different parts of the box model, then use logical properties where the padding applies. This is a pretty unique edge case, but it’s fun to fiddle with:
I don’t track this stuff very well, but I get it. If you want a native app for Android and iOS, it sure would be nice to only have to write it once rather than two very different languages. Roughly double your reach without doubling the work. More and more of these things are reaching into desktop as well, meaning three targets for one.
Stuff like PhoneGap comes to mind. They say, „Reuse existing web development skills to quickly make hybrid applications built with HTML, CSS and JavaScript.” That’s obviously compelling for web developers who would have to learn minimal new things. My brain leans more toward, „Well if I’m going to write this thing in HTML, CSS, and JavaScript, why don’t I leave it at that?” Progressive Web Apps are doing great things. Still, I’m curious what the flagship PhoneGap apps are. Do I use any great ones and not even know it?
If you’re going to layer on a framework, but still stay in JavaScript-land, I’d think the biggest player is React Native. I hear it’s almost always used with Expo these days, which apparently has a thing to help React Native work on the web. Plus, there is literally React Native for Web.
In React-land, there is another new player: Ionic React. It targets all three platforms (iOS, Android, and Desktop) right out of the gate. Ionic isn’t new though — it’s long been a framework that does this in JavaScript (alternatively in Angular) and is apparently coming soon to Vue. Compelling. Nader Dabit has a first-look blog post that is pretty well done.
This all starts to get confusing to me as apparently Ionic ultimately uses Cordova under the hood… just like PhoneGap does? Or something? But now Ionic is moving to their own thing? I guess it makes sense that there are some low-level interpreter things that translate web primitives to native primitives and that people build developer tooling on top of that.
Google’s got a stake in this game with Flutter. Flutter is about hitting all three targets and helping you build the UI. Material design, animation and performance are all first-class citizens. It’s all in Dart though. Dart can compile to JavaScript (so it can be used for web stuff) but it also compiles to machine code. I imagine Flutter apps are compiled that way when they become native apps for bonus performance. I don’t have a good sense of how popular Dart is, but I’d assume web developers really won’t care what they’re writing in if great performance on all three targets is the outcome.
Ever further outside my wheelhouse is Xamarin, which is Microsoft’s take on unifying development on multiple platforms. The languages involved here are .NET and C#. It has all the same promises as everything else: build with this and it works everywhere! This is for developer convenience! It’s fast and you will make amazing things with it!
I’m always of two minds with all this stuff. Some part of me is envious of really nice native apps. Most of my favorite apps on my phone feel very native, although I’m not sure I could spot which framework created them, if any. For example, I have a Dribbble app on my phone and I quite like it. It’s simple and nice. I open it up and I’m logged in, which is usually not the case when I open a web app. It feels fast and has all the in-page animation stuff you expect from a native app. I totally wish we had an app like that for CodePen. Maybe if we were starting over today we’d write it in some cross-platform framework that targets all three platforms and maybe gives us some cool competitive advantage. Another part of me is like, meh, I’m a web guy on purpose. I think the native open web is the place to be and has the most longevity. A codebase that serves that well will be the least regrettable over time.
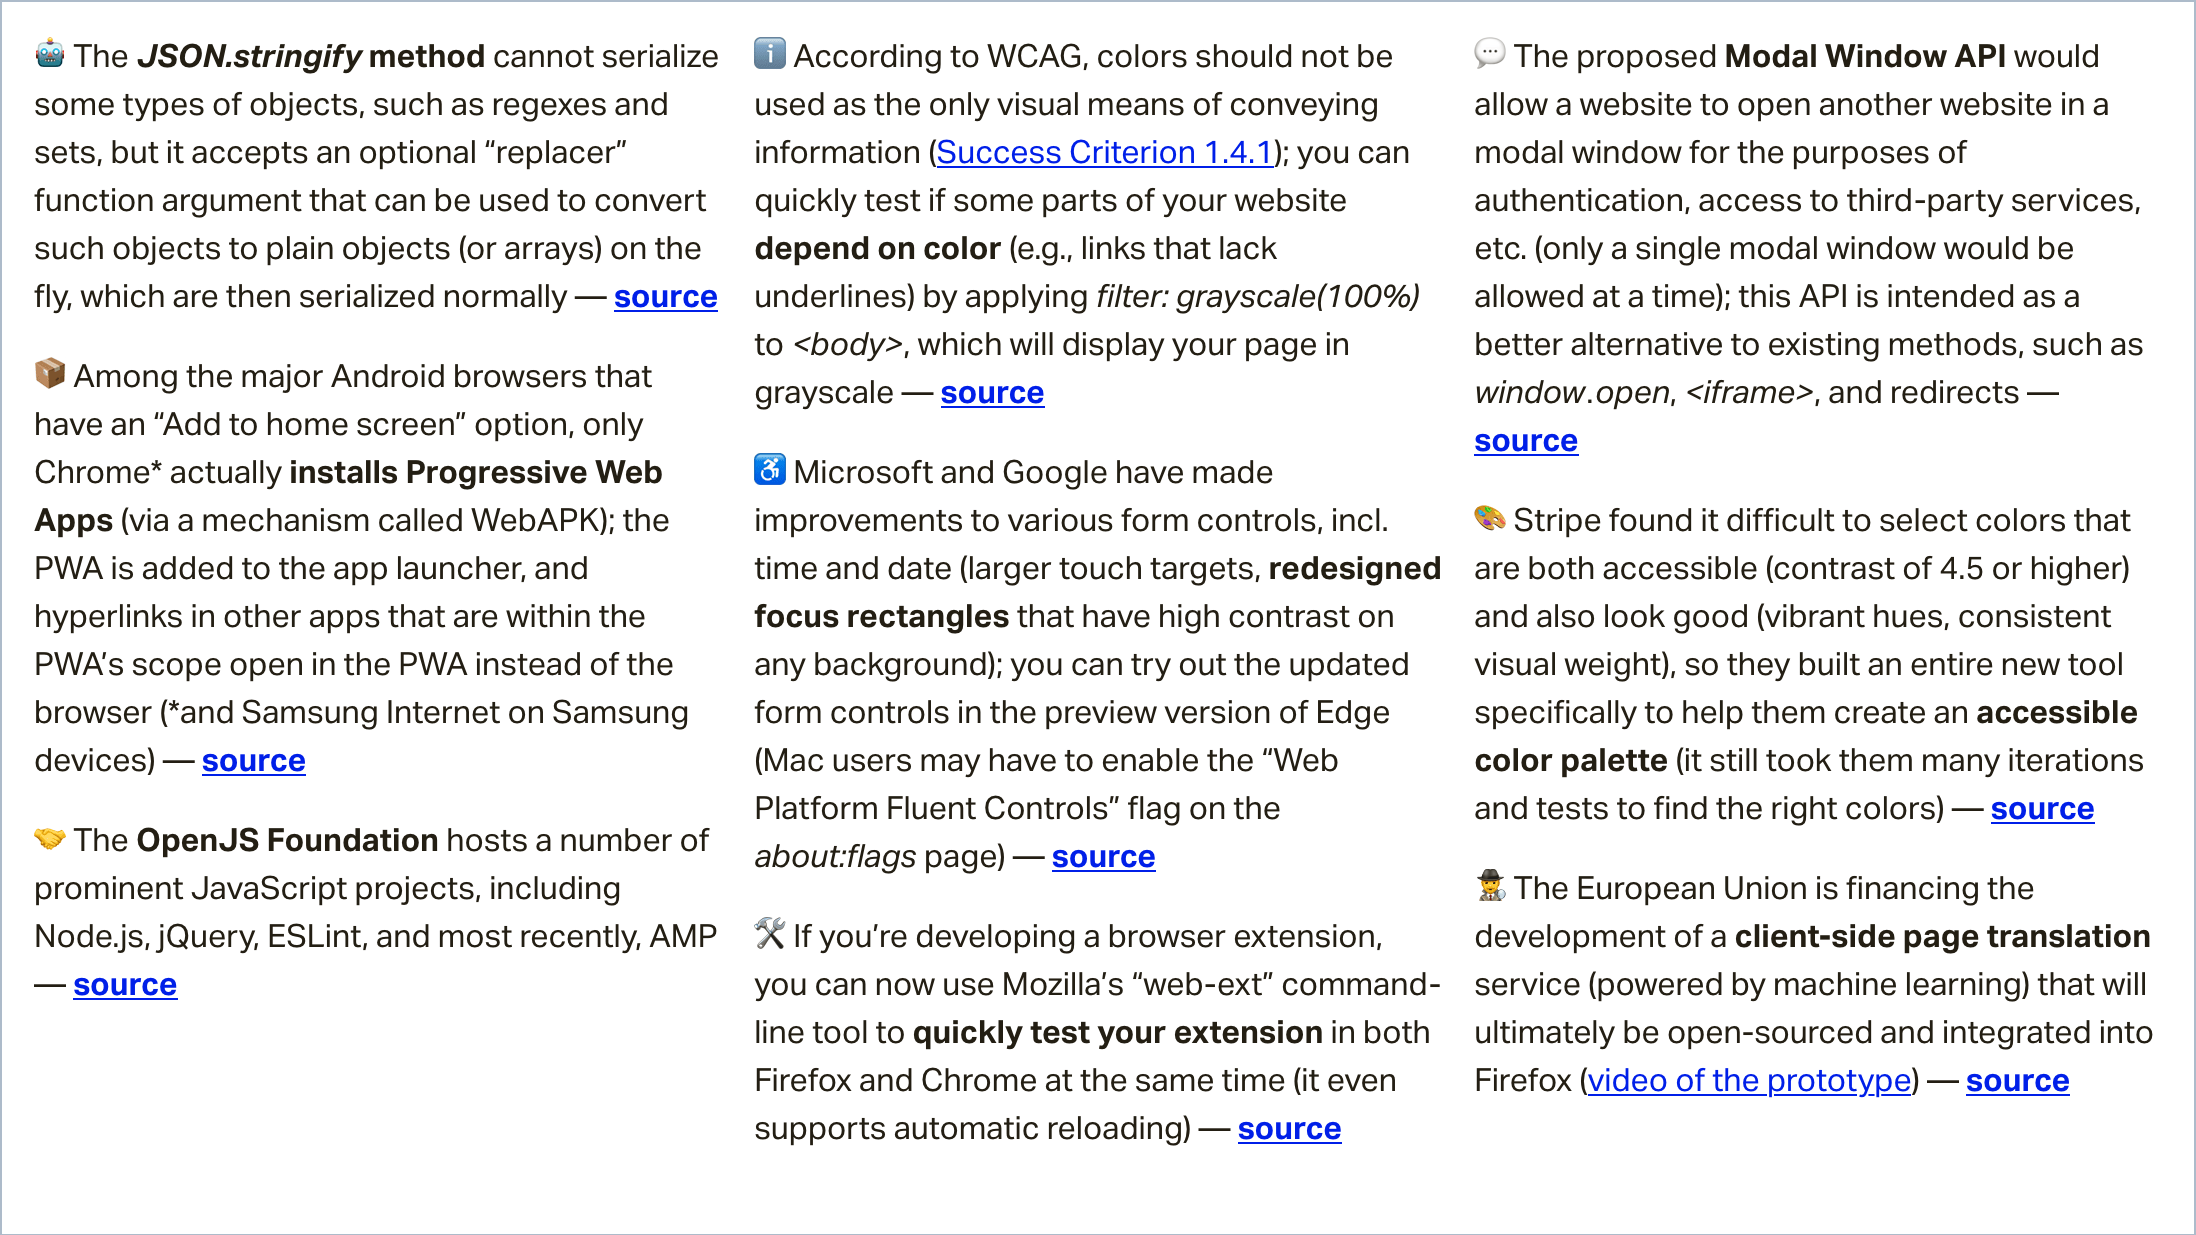
In this week’s roundup: „Add to home screen” has different meanings in Android, Chrome and Edge add some pop to focus rectangles on form inputs, and how third-party sites may be coming to a modal near you.
Let’s get into the news.
WebAPKs are not available to Firefox on Android
On Android, both Chrome and Firefox have an “Add to home screen” option, but while Firefox merely adds a shortcut for the web app to the user’s home screen, Chrome actually installs the web app (as long as it meets the PWA install criteria) via a WebAPK.
Progressive Web Apps installed in such a way are added to the device’s app drawer, and URLs that are within the PWA’s scope (as specified in its manifest) open in the PWA instead of the default browser.
Tiger Oakes who is implementing PWA-related features at Mozilla, explains why Firefox cannot install PWAs on Android: “WebAPK is not available to us since we don’t own an app store like Google Play and Galaxy Apps.”
More accessible focus rectangles are coming to Chrome and Edge
Microsoft and Google have made accessibility improvements to various form controls. The two main changes are the larger touch targets on the time and date inputs, and the redesigned focus rectangles that are now easily discernible on any background.
The updated form controls are available in the preview version of Edge. Mac users may have to manually enable the “Web Platform Fluent Controls” flag on the about:flags page.
A newly proposed API for loading third-parties in modal windows
The proposed Modal Window API would allow a website to load another website in a modal window (in a top-level browsing context) for the purposes of authentication, payments, sharing, access to third-party services, etc.
Only a single modal window would be allowed at a time, and the two websites could communicate with each other via message events (postMessage method).
This API is intended as a better alternative to existing methods, such as pop-ups, which can be confusing to users and blocked by browsers, and redirects, which cause the original context to be torn down and recreated (or completely lost in the case of an error in the third-party service).
I think those classifications are handy, and help conversations along. But there is a point where nuance is necessary and these classification buckets get a little leaky.
Note, these charts are just intended to paint a spectrum, not to be a comprehensive list of services.
Headless CMSs
A Headless CMS is a CMS that provides an admin area for creating and editing content, but offers no front-end to build the website from. All the content is accessed via APIs.
Imagine WordPress, which has an admin area, but it also has themes from which you build the website from on the server-side, with all kinds of PHP functions for you to use the content data. All that theming stuff is the „head”. So a headless CMS would be like WordPress with just the admin area. And indeed you can use it that way, as it offers APIs.
There is even more nuance here, as there are services that offer an admin area, but don’t actually store the data for you. Plus there is CMSs that are hosted for you, and CMSs where you have to bring your own hosting. Let’s have a peak.
This is tricky to talk about because literally, any web host will host static files, and probably do an OK job of it. I think it’s most useful to consider hosts that only do static hosting on purpose because it means they can optimize for that situation do other useful things.
Sometimes you’ll see people trying to use stuff like Dropbox or Google Drive to do static file hosting (for a website), but I’ve found these services generally ultimately don’t like that and prevent the use for that. If it works today, fine, but I wouldn’t count on any of them long term.
Static Site Generators
You would think this category would be straightforward, without much spectrum. A static site generator takes input and makes statically generated pages that can render without, say, needing to hit a database. But even here there is a spectrum.
The language the generator is in kinda matters. It affects speed. It affects installability on different local platforms. It affects your ability to write code to extend it and hack on it.
But perhaps more importantly, not all static site generators are only static site generators. Some can be run on the server as well, weirdly enough. And there are some that kinda look like static site generators, but are more correctly classified as flat-file CMSs.
Gatsby is truly a static site generator, but generally, the sites „hydrate” into SPAs, but remain static (nothing server-rendered). Big ecosystem of plugins to help with connecting data sources, handling images, etc.
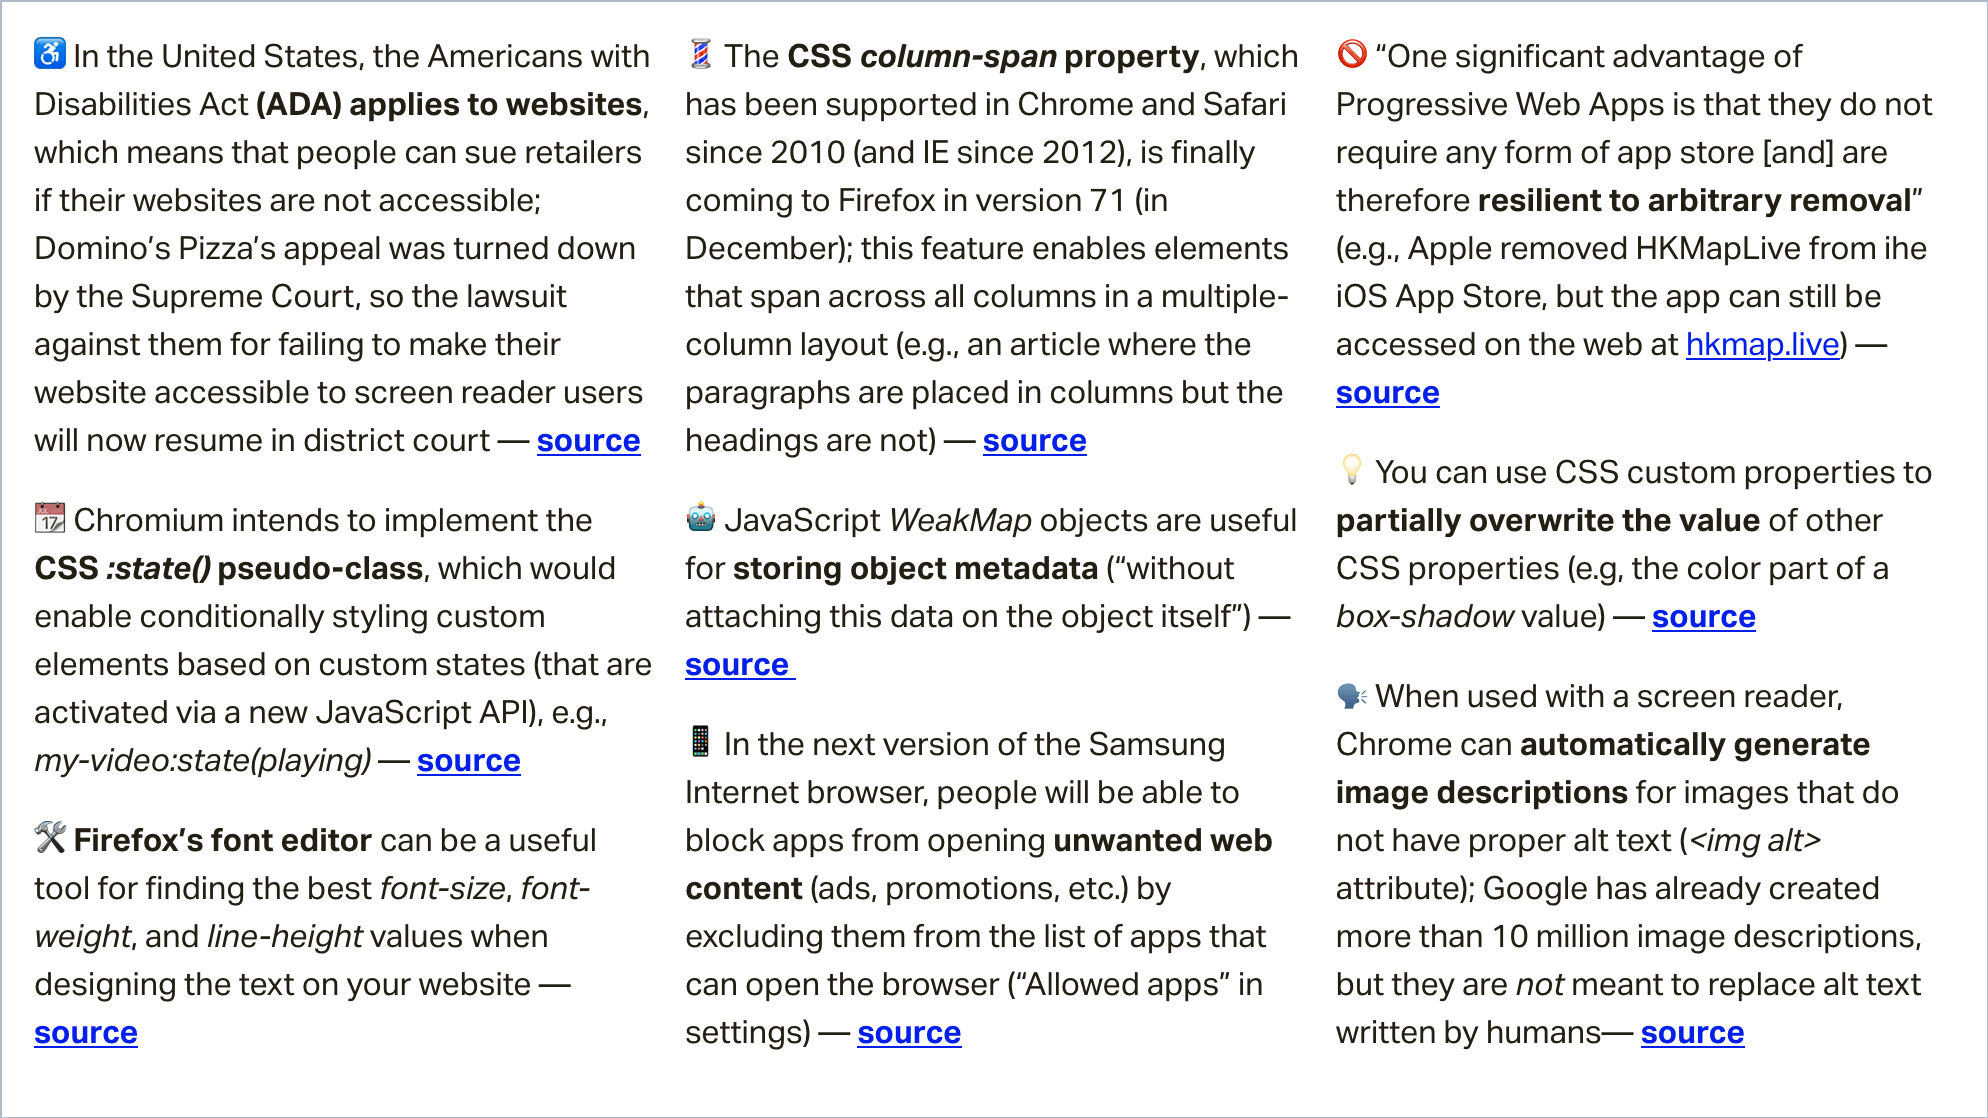
In this week’s roundup: multi-column layouts gain wide support, the ADA means more A11y for retailers, and Google is doing something about all the empty image alt attributes in the wild.
The CSS column-span property will soon be widely supported
The CSS column-span property, which has been supported in Chrome and Safari since 2010 (and IE since 2012), is finally coming to Firefox in version 71 (in December).
This feature enables elements that span across all columns in a multiple-column layout. In the following demo, the headings span across both columns.
The Americans with Disabilities Act applies to websites
In the United States, the Americans with Disabilities Act (ADA) applies to websites, which means that people can sue retailers if their websites are not accessible.
Domino’s Pizza’s appeal was recently turned down by the Supreme Court, so the lawsuit against them for failing to make their website accessible to screen reader users will now resume in district court.
Guillermo Robles, who is blind, filed suit in Los Angeles three years ago and complained he had been unable to order a pizza online because the Domino’s website lacked the software that would allow him to communicate. He cited the ADA, which guarantees to people with a disability “full and equal enjoyment of the goods and services … of any place of public accommodations.”
Google announces automatically generated image descriptions for Chrome
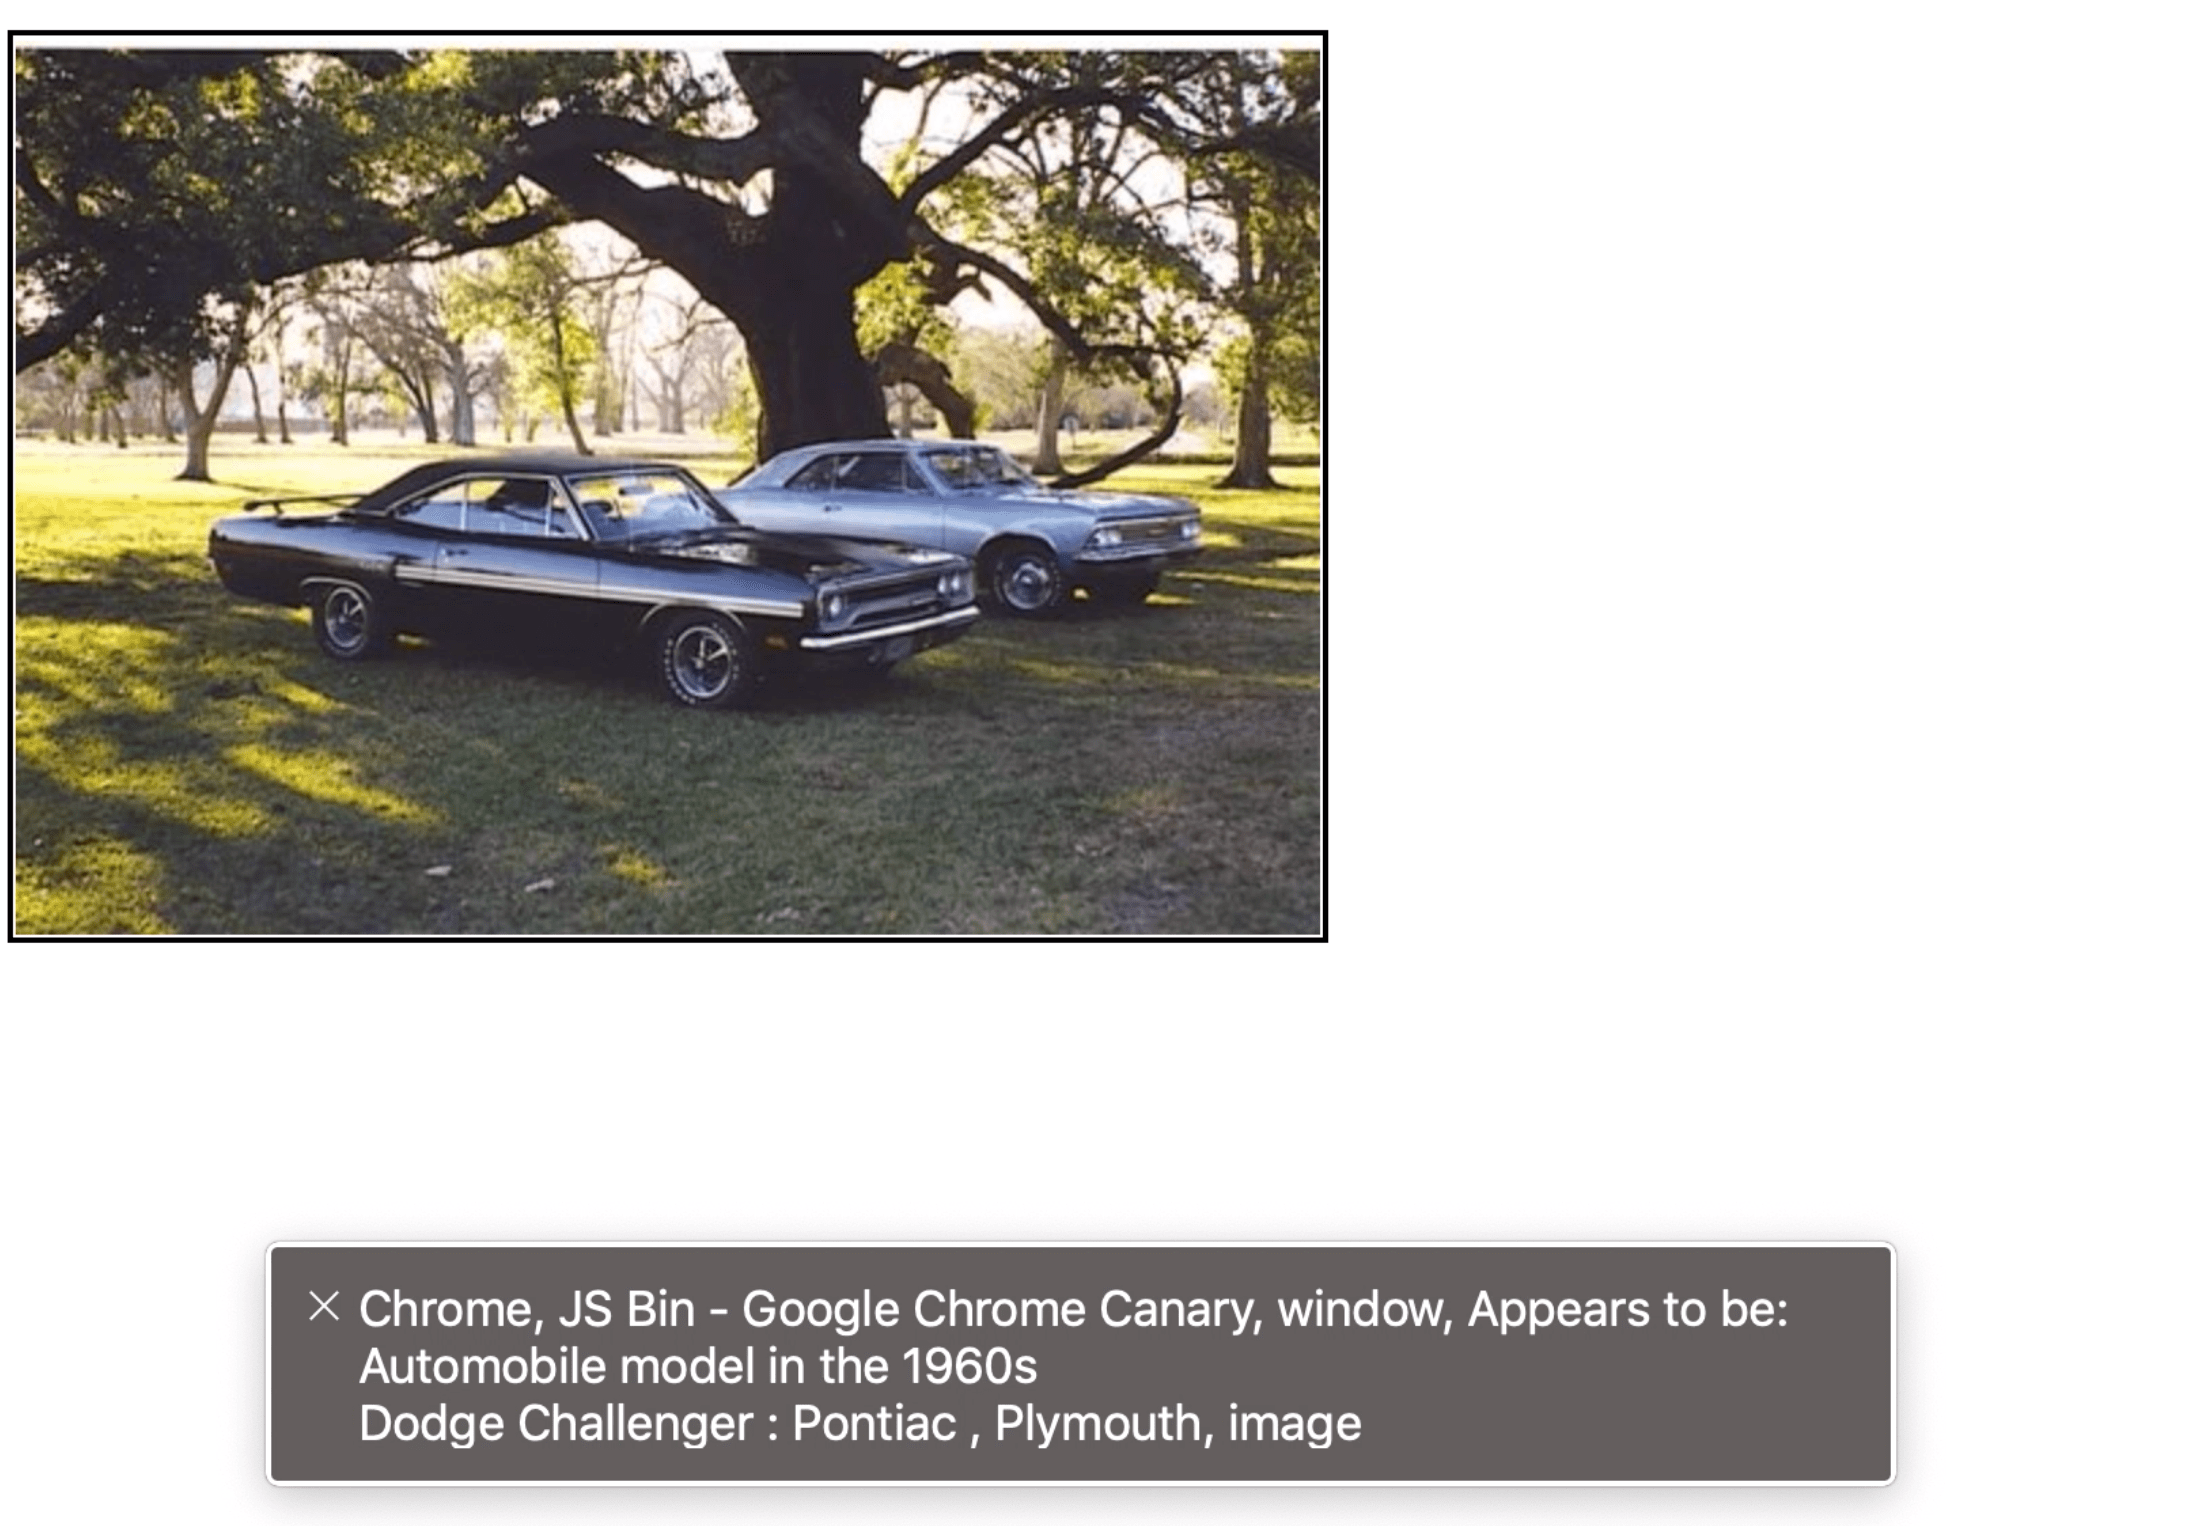
When used with the VoiceOver screen reader, Chrome can now automatically generate image descriptions for images that do not have proper alt text (<img alt> attribute). Google has already created more than 10 million image descriptions, but they are not meant to replace alt text written by humans.
Image descriptions automatically generated by a computer aren’t as good as those written by a human who can include additional context, but they can be accurate and helpful.
This new accessibility feature, called “Accessibility Image Descriptions,” may not be enabled by default in your version of Chrome, but you can enable it manually on the chrome://flags page.
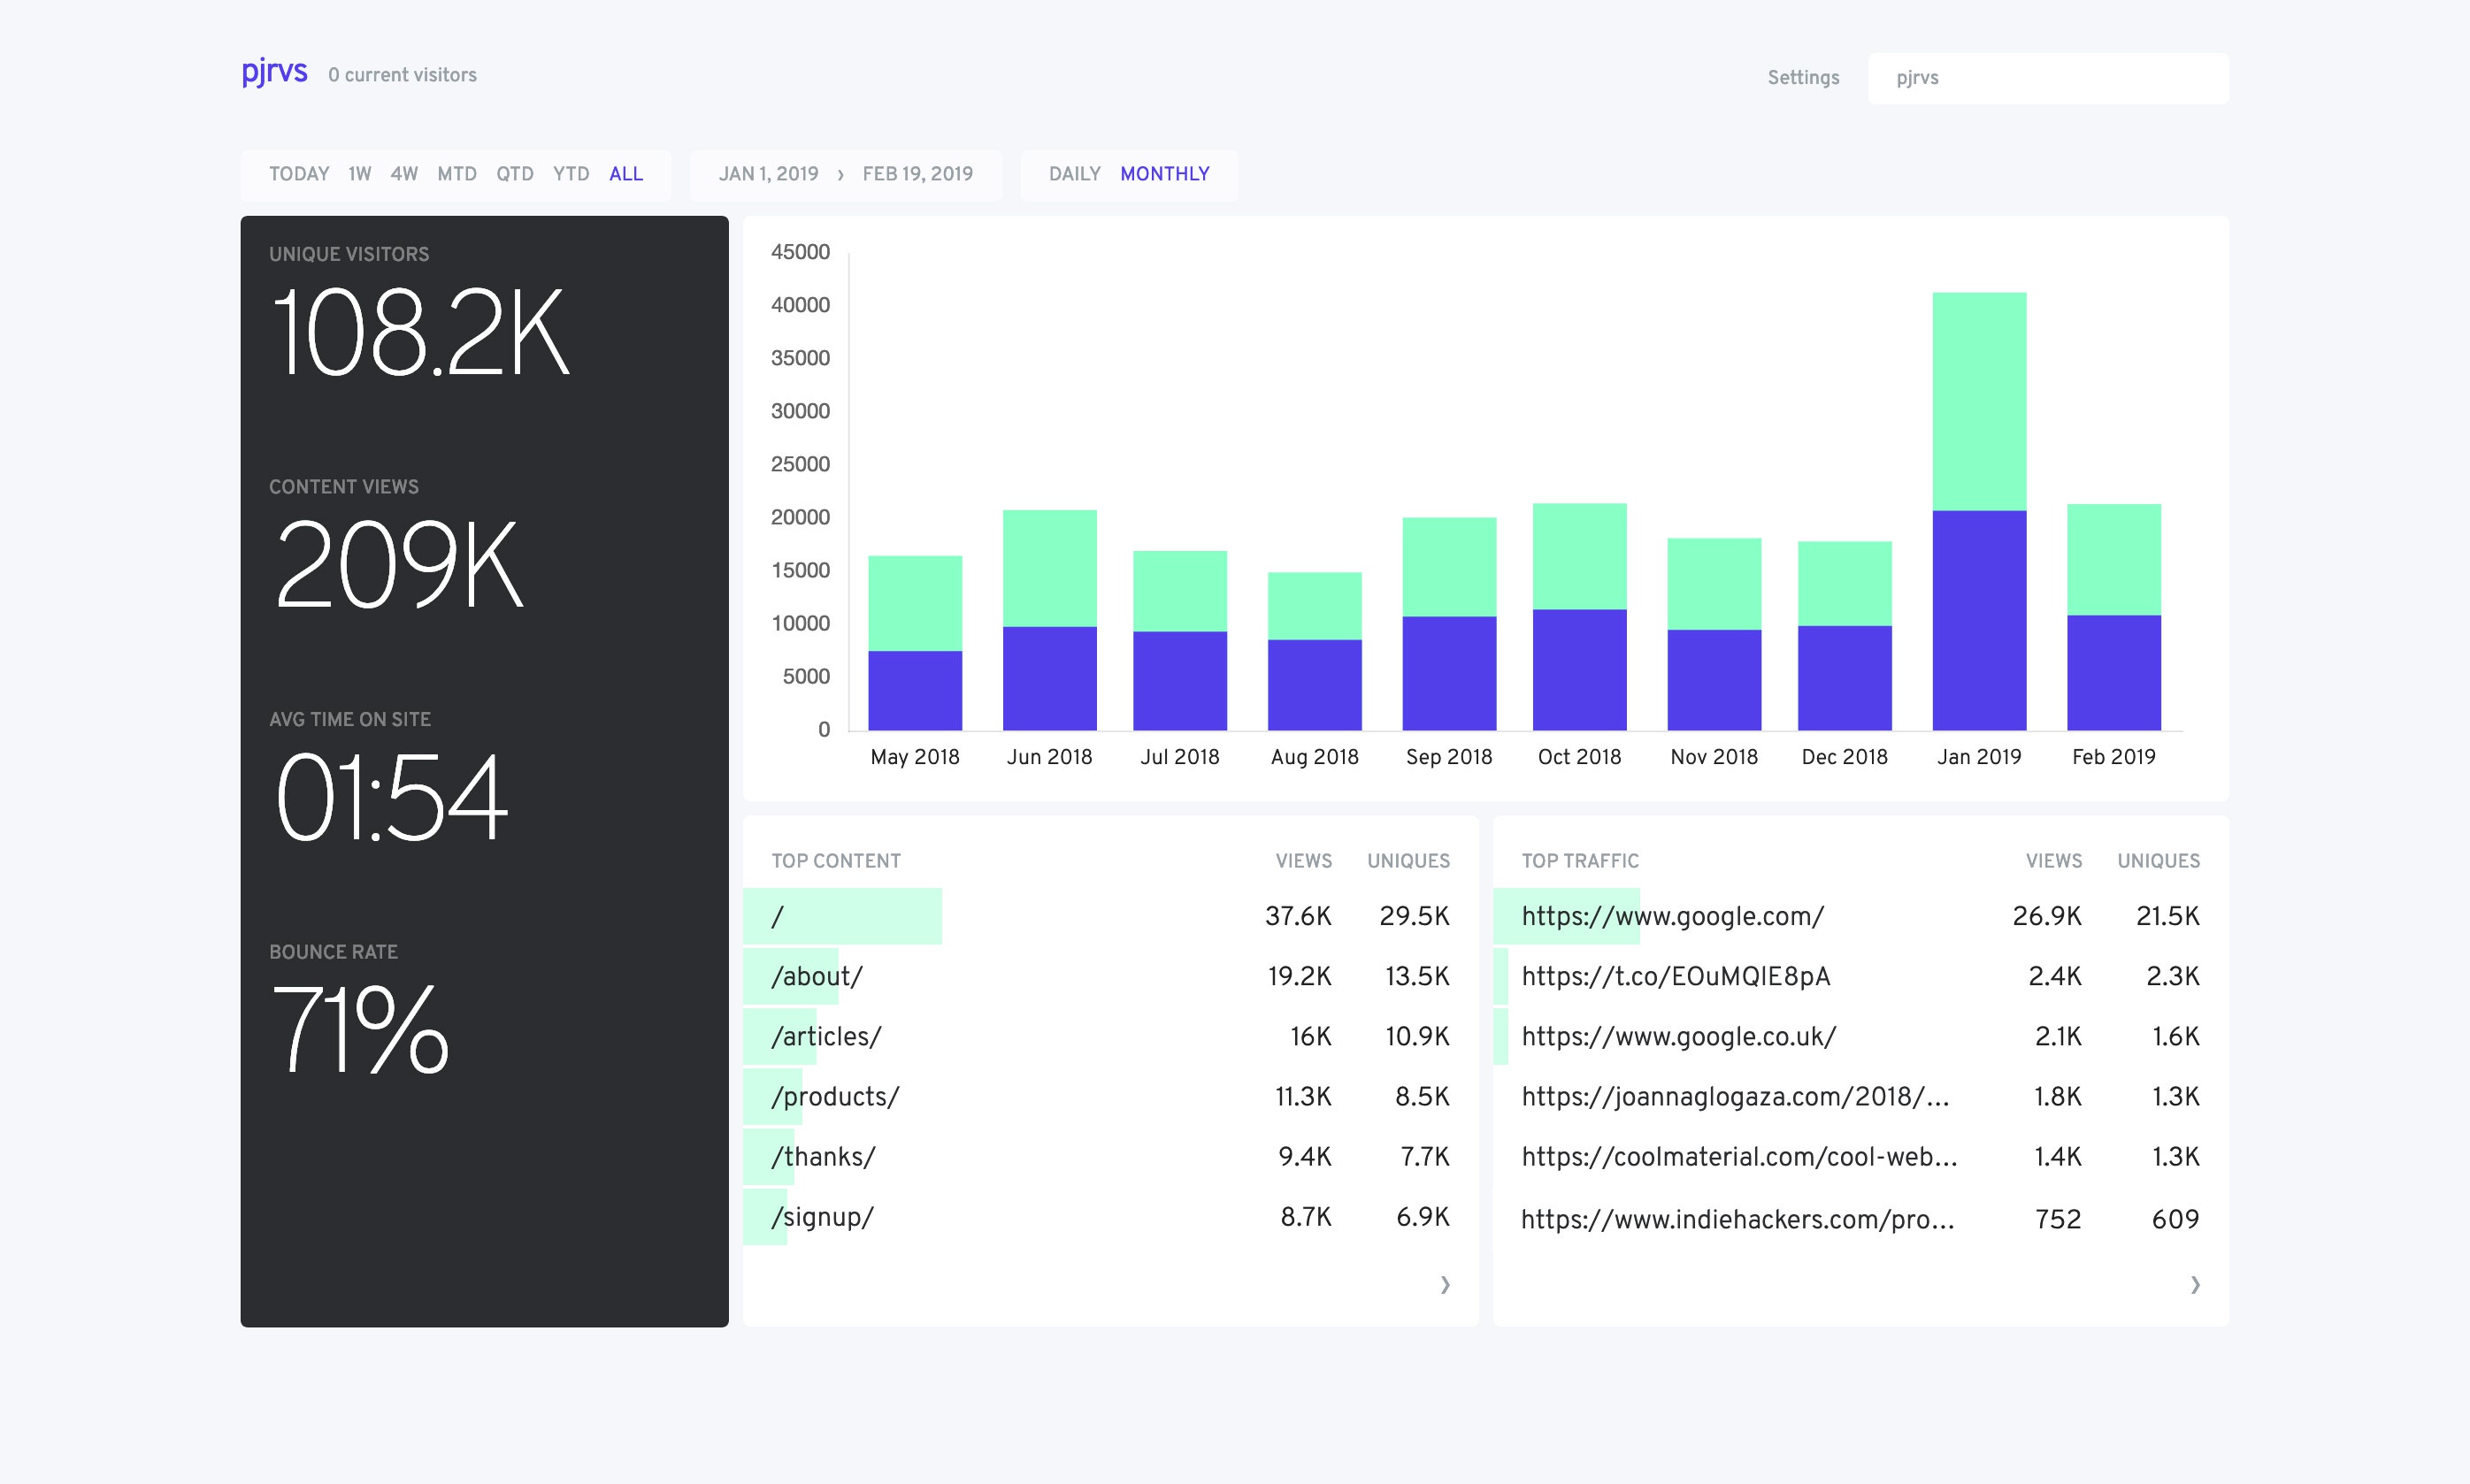
There are loads of analytics platforms to help you track visitor and usage data on your sites. Perhaps most notably Google Analytics, which is widely used (including on this site), probably due to it’s ease of integration, feature-richness, and the fact that it’s free (until you need to jump up to the enterprise tier which is some crazy six-figure jump).
I don’t take any particular issue with Google Analytics. In fact I quite like it, especially as I’ve learned more about customizing it, like we’ve done here on CSS-Tricks as well as on CodePen.
But there are other options. In particular, I wanted to look at some other options where:
You can self-host the analytics. Always something to be said for owning your own data.
Data collection doesn’t require JavaScript. That’s so often blocked these days, as wariness of third-party JavaScript grows. It’s interesting to consider the entirely unobtrusive server-log based analytics.
I didn’t find a sea of options to look at. The classic one I always think of in this category is Shaun Inman’s Mint, but Mint isn’t taking new customers anymore. Maybe I’m not looking in all the right places, and perhaps you can help with that. Please chime in with a comment if you know of more options — especially ones you have experience with.
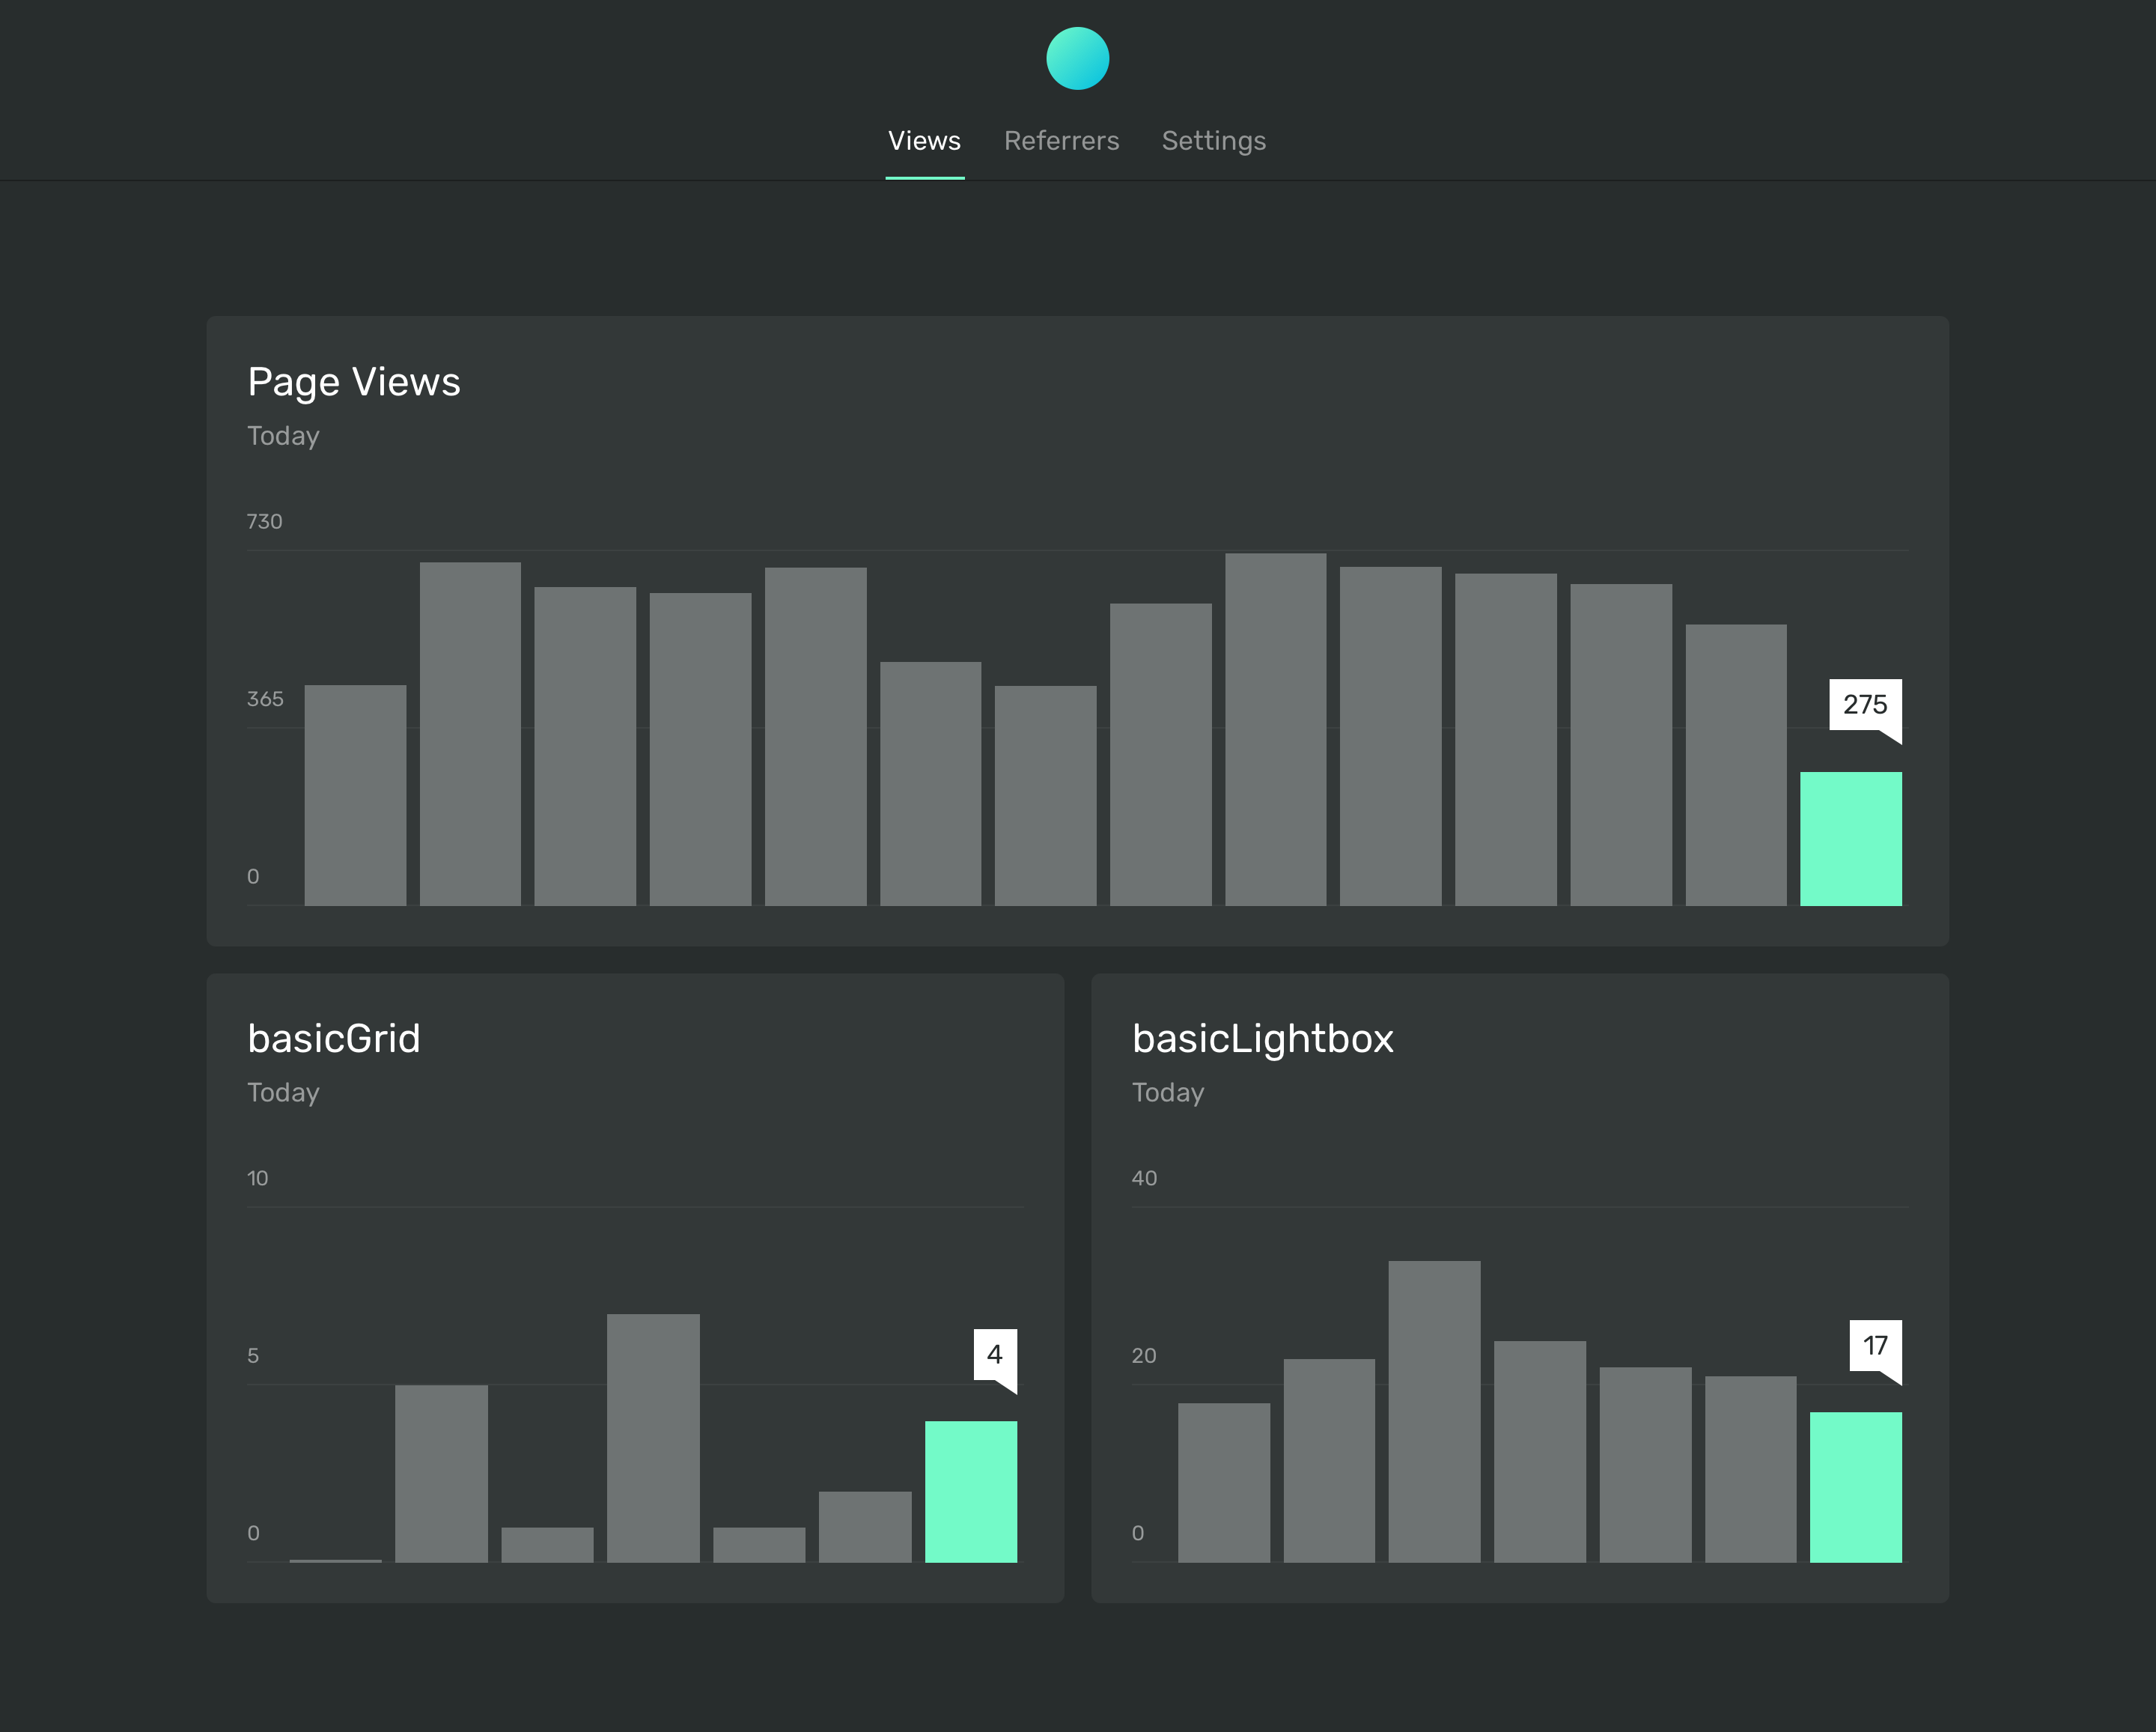
This is one Dave Rupert uses on his personal site and has written about. They have a paid hosted version, which is still focused on privacy in the sense that it does not track or store user data. But they also have a free self-hosted version you can run on your own. Actual data collection is done via a JavaScript snippet you put into your site.
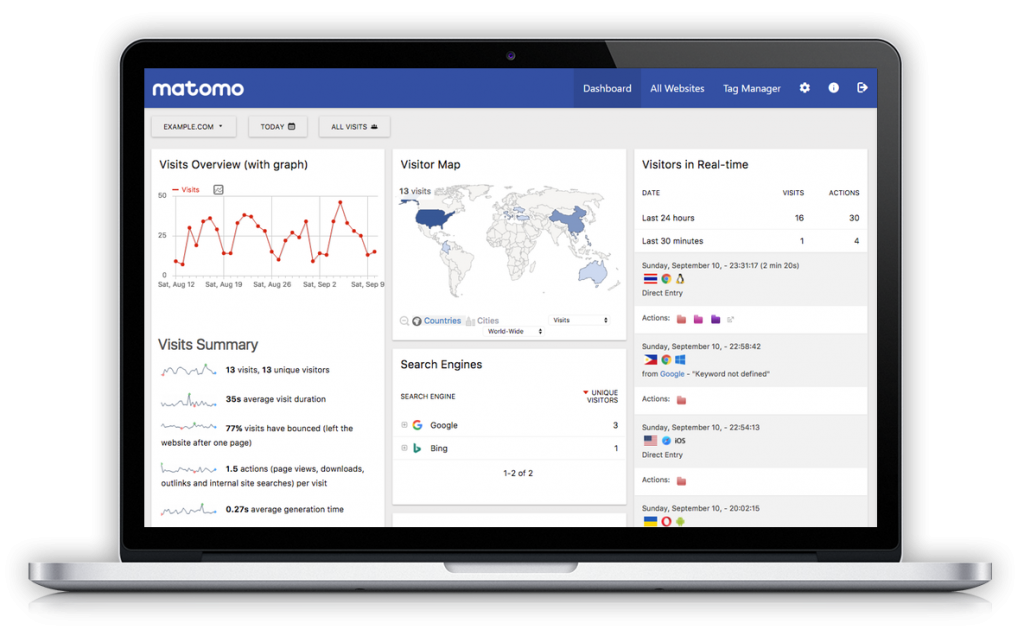
Matomo Cloud is their hosted version, and On-Premisis is the self-hosted version. The actual data collection is done via a JavaScript snippet you put into the site.
I personally use matomo for my side projects. Its vast and getten me fall into love. ✌
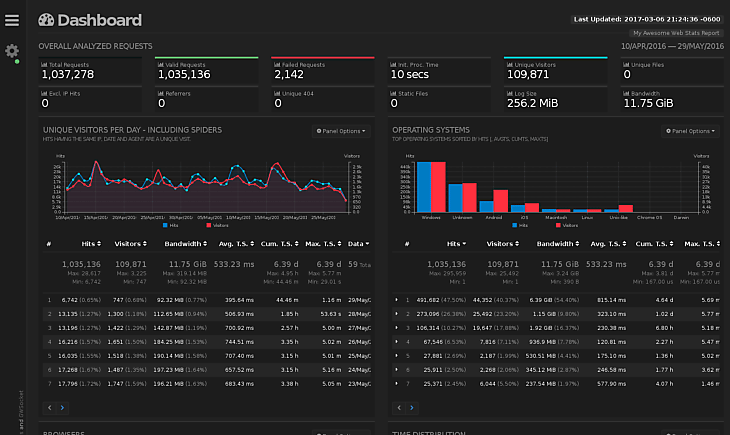
GoAccess is notable because it’s the first in the list that is a „web log analyzer” which means it looks at access logs that your web server creates rather than relying on JavaScript reporting from the client side. Theoretically, this should be more accurate since client-side JavaScript can be blocked. GoAccess generates reporting that can be viewed in the terminal, as well as browser-based charts and graphs.
I use GoAccess as a static site generated on a cronjob (https://t.co/yiQMev7NDu) which seems to work quite nicely for very basic site. Doesn’t (afaik) handle ignoring spiders etc
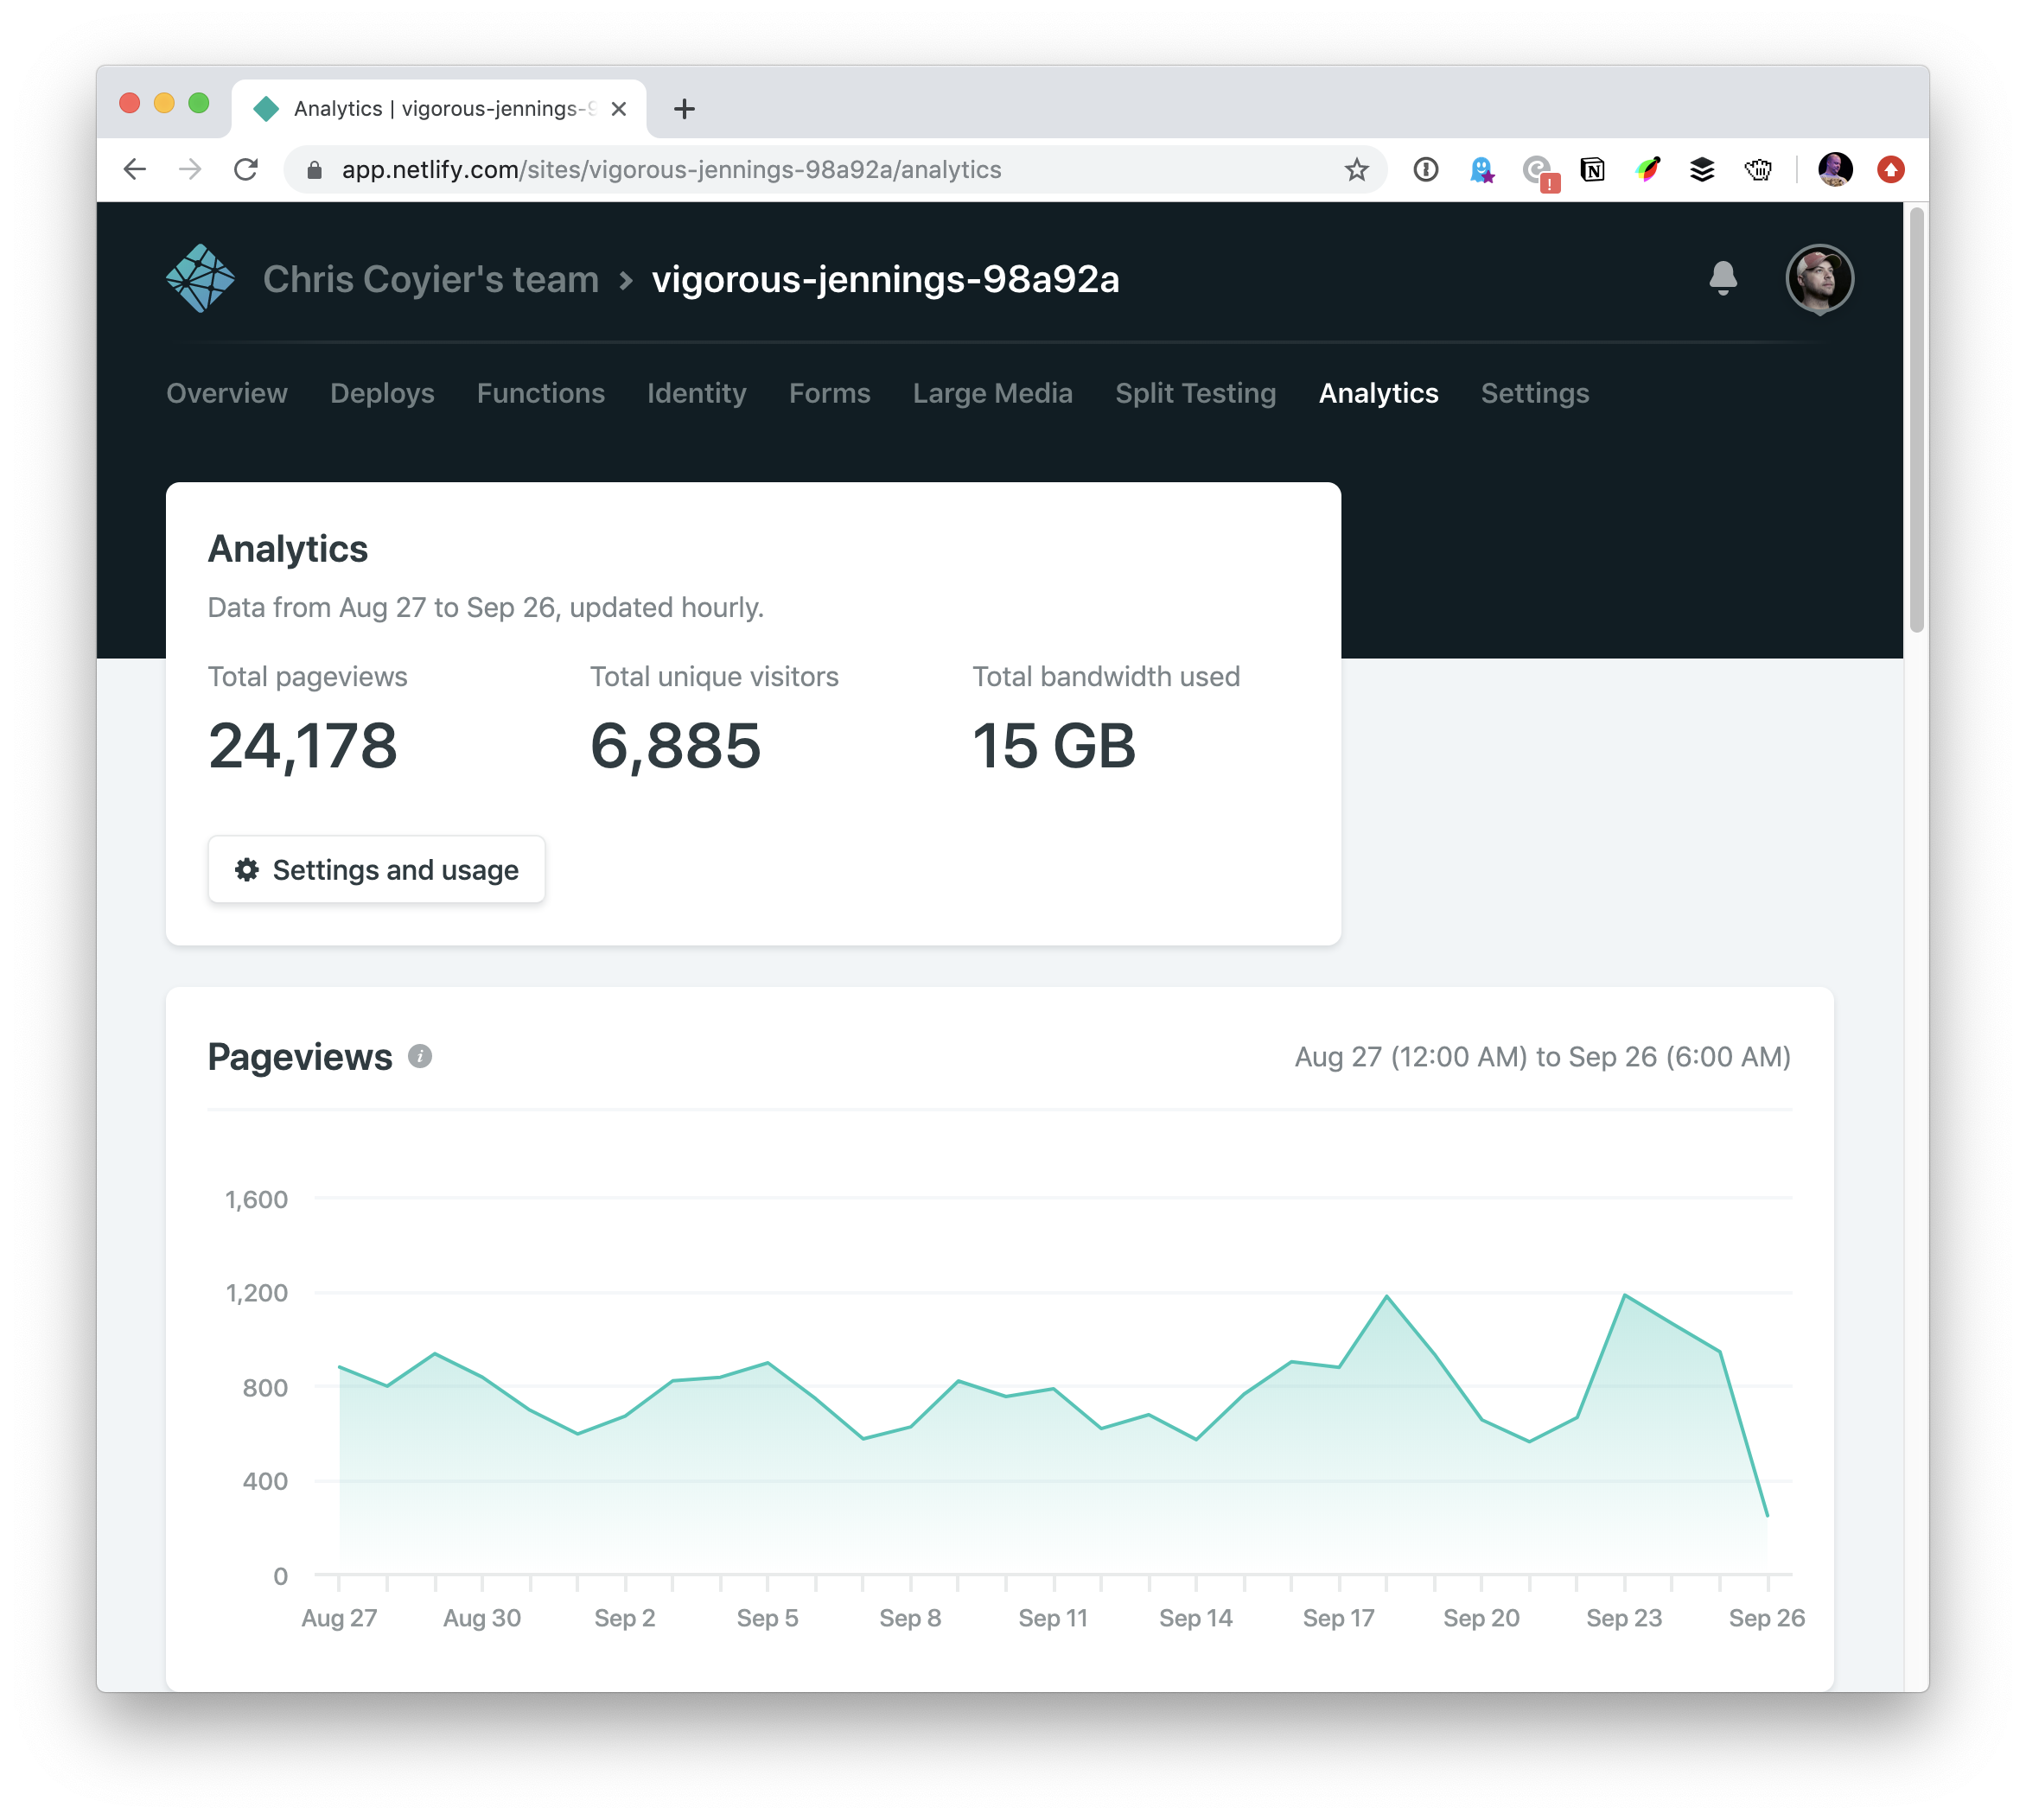
Netlify Analytics isn’t self-hosted in that you install it yourself on servers you rent. A big point of using Netlify is that it prevents you from dealing with your own servers. The analytics are server-log based rather than JavaScript which can be desirable as they are likely more accurate and don’t impact performance.
Web hosts are uniquely qualified to offer analytics to their users as they configure their own logging and such. For example, I also have analytics on this site through Flywheel, without installing anything, because they can analyze the traffic going through their servers. We wrote up an overview of the service when it was released.
AWStats is the oldest analytics tool on the block. When I started out on the web, all the web hosting providers touted AWStats dashboards as part of their offerings. It runs on Perl, and like the last two services above, it gets data from server logs.
It ain’t pretty but it’s free, open-source, and has the stability of being a software project nearly 20 years old.
There are loads of analytics platforms to help you track visitor and usage data on your sites. Perhaps most notably Google Analytics, which is widely used (including on this site), probably due to it’s ease of integration, feature-richness, and the fact that it’s free (until you need to jump up to the enterprise tier which is some crazy six-figure jump).
I don’t take any particular issue with Google Analytics. In fact I quite like it, especially as I’ve learned more about customizing it, like we’ve done here on CSS-Tricks as well as on CodePen.
But there are other options. In particular, I wanted to look at some other options where:
You can self-host the analytics. Always something to be said for owning your own data.
Data collection doesn’t require JavaScript. That’s so often blocked these days, as wariness of third-party JavaScript grows. It’s interesting to consider the entirely unobtrusive server-log based analytics.
I didn’t find a sea of options to look at. The classic one I always think of in this category is Shaun Inman’s Mint, but Mint isn’t taking new customers anymore. Maybe I’m not looking in all the right places, and perhaps you can help with that. Please chime in with a comment if you know of more options — especially ones you have experience with.
This is one Dave Rupert uses on his personal site and has written about. They have a paid hosted version, which is still focused on privacy in the sense that it does not track or store user data. But they also have a free self-hosted version you can run on your own. Actual data collection is done via a JavaScript snippet you put into your site.
Matomo Cloud is their hosted version, and On-Premisis is the self-hosted version. The actual data collection is done via a JavaScript snippet you put into the site.
I personally use matomo for my side projects. Its vast and getten me fall into love. ✌
GoAccess is notable because it’s the first in the list that is a „web log analyzer” which means it looks at access logs that your web server creates rather than relying on JavaScript reporting from the client side. Theoretically, this should be more accurate since client-side JavaScript can be blocked. GoAccess generates reporting that can be viewed in the terminal, as well as browser-based charts and graphs.
I use GoAccess as a static site generated on a cronjob (https://t.co/yiQMev7NDu) which seems to work quite nicely for very basic site. Doesn’t (afaik) handle ignoring spiders etc
Netlify Analytics isn’t self-hosted in that you install it yourself on servers you rent. A big point of using Netlify is that it prevents you from dealing with your own servers. The analytics are server-log based rather than JavaScript which can be desirable as they are likely more accurate and don’t impact performance.
Web hosts are uniquely qualified to offer analytics to their users as they configure their own logging and such. For example, I also have analytics on this site through Flywheel, without installing anything, because they can analyze the traffic going through their servers. We wrote up an overview of the service when it was released.
AWStats is the oldest analytics tool on the block. When I started out on the web, all the web hosting providers touted AWStats dashboards as part of their offerings. It runs on Perl, and like the last two services above, it gets data from server logs.
It ain’t pretty but it’s free, open-source, and has the stability of being a software project nearly 20 years old.
Here’s a new book by Andrew Couldwell all about design systems and I’m looking forward to reading the book because it looks like his experience will offer a bunch of insightful thoughts and advice.
From the book’s description:
This is real talk about creating design systems and digital brand guidelines. No jargon, no glossing over the hard realities, and no company hat. Just good advice, experience, and practical tips.
System design is not a scary thing — this book aims to dispel that myth. It covers what design systems are, why they are important, and how to get stakeholder buy-in to create one. It introduces you to a simple model, and two very different approaches to creating a design system. What’s unique about this book is its focus on the importance of brand in design systems and creating documentation. It’s a comprehensive, practical guide that’s simple to follow and easy on the eye.
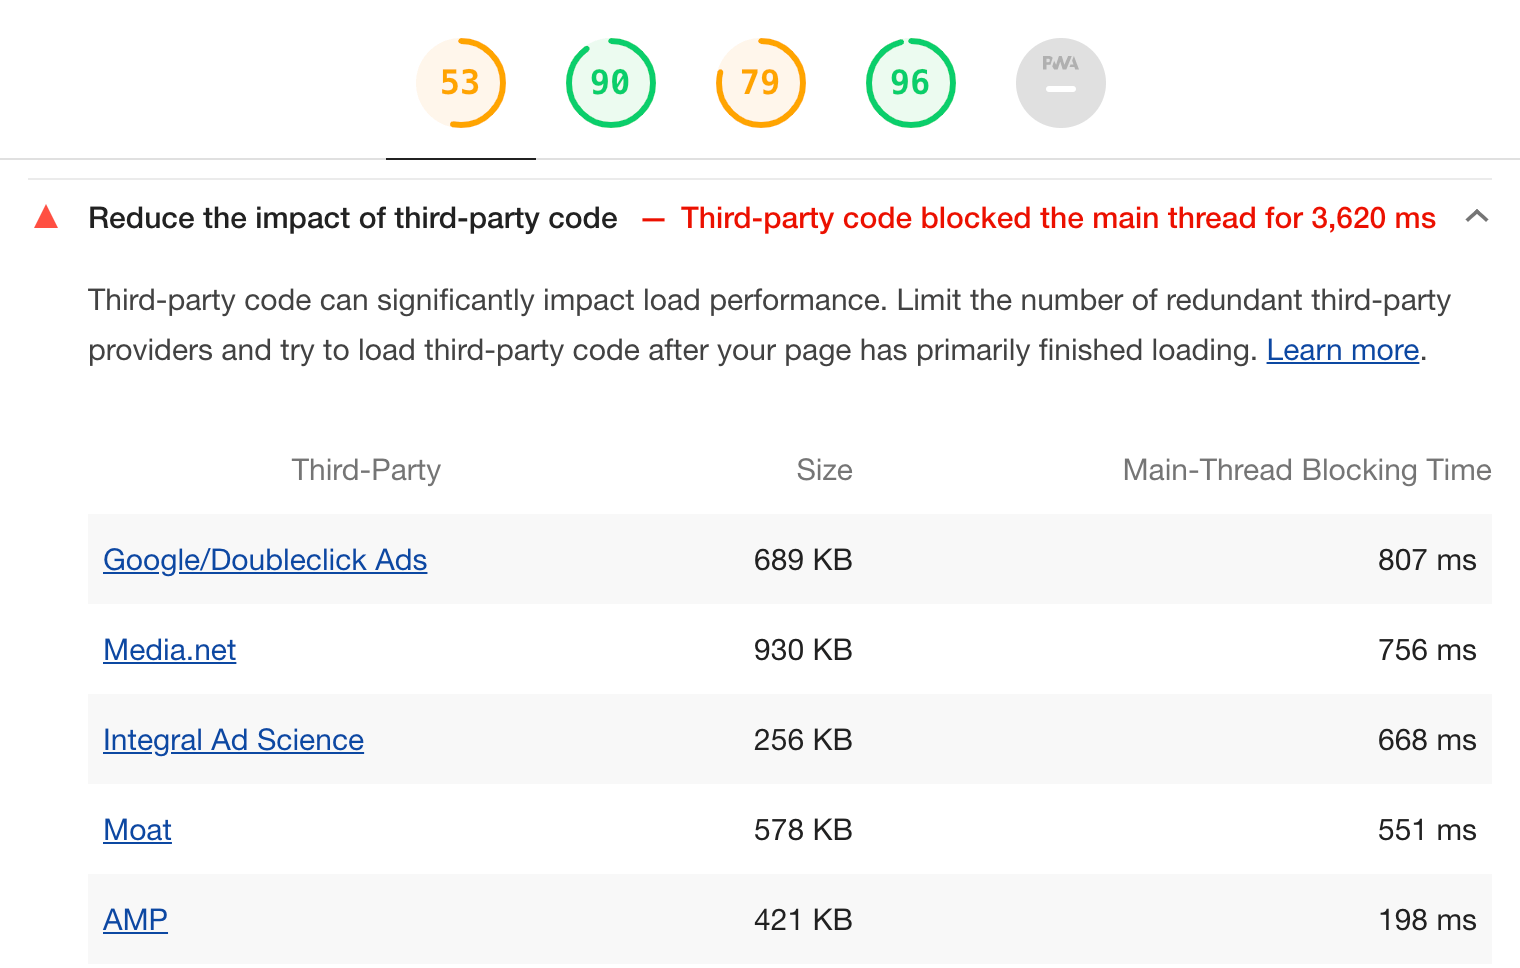
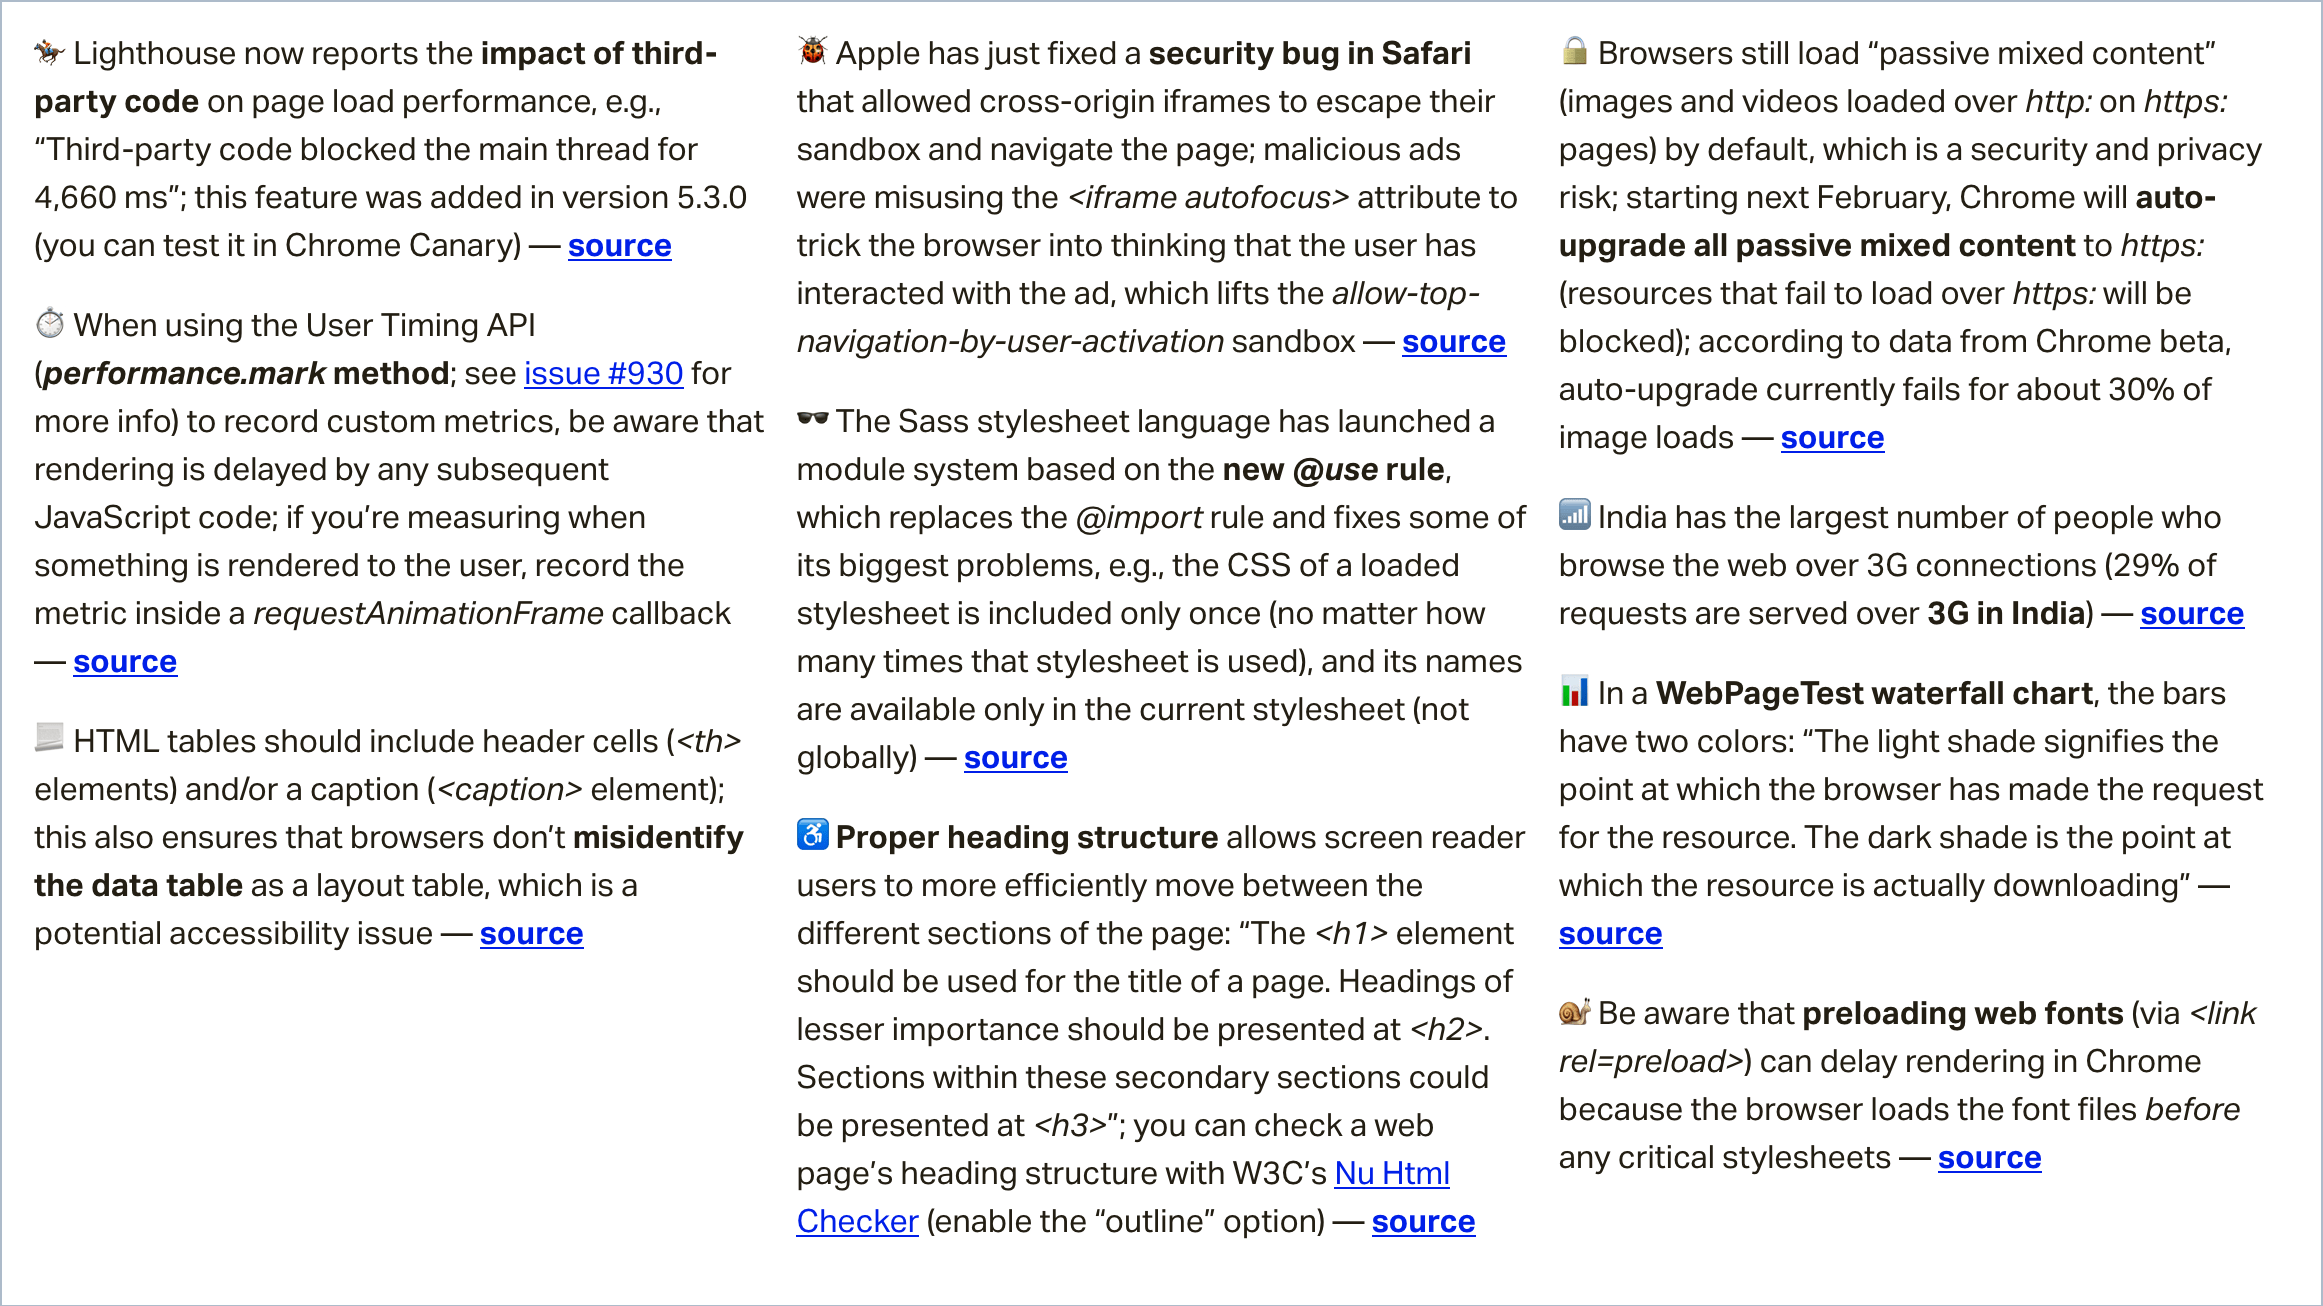
In this week’s roundup, Lighthouse sheds light on third-party scripts, insecure resources will get blocked on secure sites, and many country connection speeds are still trying to catch up to others… literally.
Measure the impact of third-party code during page load
Lighthouse, Chrome’s built-in auditing tool, now shows a warning when the impact of third-party code on page load performance is too high. The pre-existing “Third-party usage” diagnostic audit will now fail if the total main-thread blocking time caused by third-parties is larger than 250ms during page load.
Note: This feature was added in Lighthouse version 5.3.0, which is currently available in Chrome Canary.
Currently, browsers still allow web pages loaded over a secure connection (HTTPS) to load images, videos, and audio over an insecure connection. Such insecurely-loaded resources on securely-loaded pages are known as “passive mixed content,” and they represent a security and privacy risk.
An insecurely-loaded image can allow an attacker to communicate incorrect information to the user (e.g., a fabricated stock chart), mutate client-side state (e.g., set a cookie), or induce the user to take an unintended action (e.g., changing the label on a button).
Starting next February, Chrome will auto-upgrade all passive mixed content to https:, and resources that fail to load over https: will be blocked. According to data from Chrome Beta, auto-upgrade currently fails for about 30% of image loads.
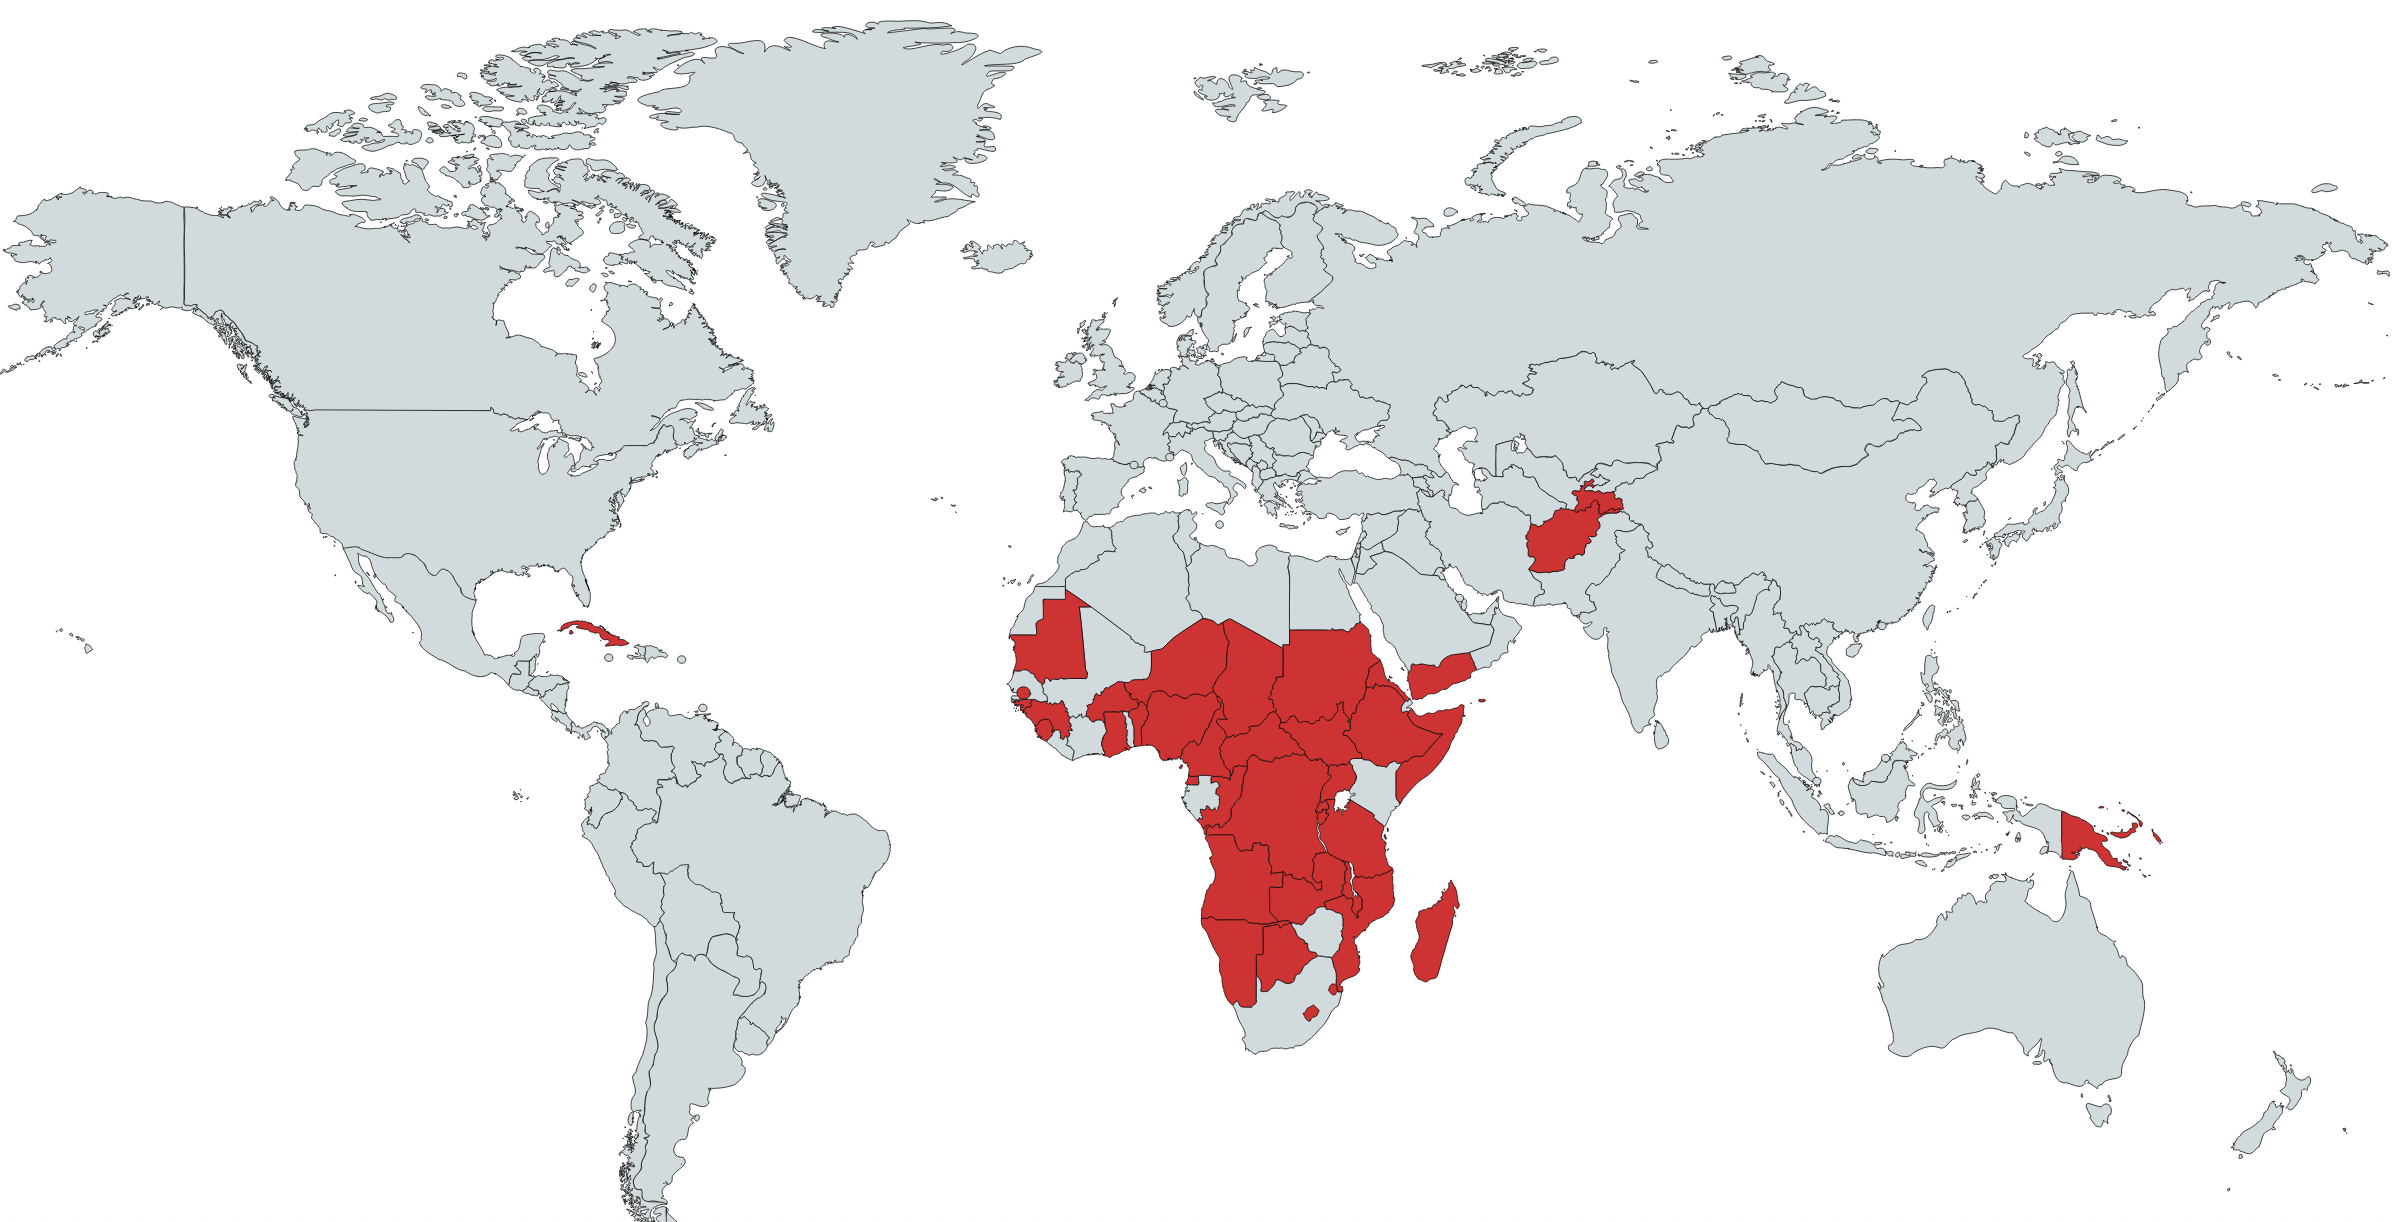
Fast connections are still not common in many countries
Data from Chrome UX Report shows that there are still many countries and territories in the world where most people access the Internet over a 3G or slower connection. (This includes a number of small island nations that are not visible on this map.)
WebPageTest is an online tool and an Open Source project to help developers audit the performance of their websites. As a Web Performance Evangelist at Theodo, I use it every single day. I am constantly amazed at what it offers to the web development community at large and the web performance folks particularly — for free.
But things can get difficult pretty quickly when dealing with Single Page Applications — usually written with React, Vue, Svelte or any other front-end framework. How can you get through a log in page? How can you test the performance of your users’ flow, when most of it happens client-side and does not have a specific URL to point to?
Throughout this article, we are going to find out how to solve these problems (and many more), and you’ll be ready to test the performance of your Single Page Application with WebPageTest!
Note: This articles requires an intermediate understanding about some of WebPageTest advanced features.
If you are curious about web performance and want a good introduction to WebPageTest, I would highly recommend the following resources:
Single Page Applications (SPAs) radically changed the way websites work. Instead of letting the back end (e.g. Django, Rails and Laravel) do most of the grunt work and delivering „ready-to-use” HTML to the browser, SPAs rely heavily on JavaScript to have the browser compute HTML. Such front-end frameworks include React, Vue, Angular or Svelte.
The simplicity of WebPageTest is what makes part of its appeal to developers: head to http://webpagetest.org/easy, enter your URL, wait a little, and voilà! Your performance audit is ready.
If you are building an SPA and want to measure its performance, you could rely on end-to-end testing tools like Selenium, Cypress or Puppeteer. However, I have found that none of these has the amount of performance-related information and easy-to-use tooling that WebPageTest offers.
But testing SPAs with WebPageTest can be complex.
In many SPAs, most of the site is protected behind a log in form. I often use Netlify for hosting my sites (including my personal blog), and most of the time I spend in the application is on authenticated pages, like the dashboard listing all my websites. As the information on my dashboard is specific to me, any other user trying to access https://app.netlify.com/teams/phacks/sites is not going to see my dashboard, but will instead be redirected to either a login or 404 page.
The same goes for WebPageTest. If I enter my dashboard URL into http://webpagetest.org/easy, the audit will be performed against the login page.
Moreover, testing and monitoring the performance of dynamic interactions in SPAs cannot be achieved with simple WebPageTest audits.
Here’s an example. Nuage is a domain name registrar with fancy animations and a beautiful, dynamic interface. When you search for domain names to buy, an asynchronous call fetches the results of the request and the results are displayed as they are retrieved.
As you might have noticed in the video above, the URL of the page does not change as I type my search terms. As a consequence, it is not possible to test the performance of the search experience using a simple WebPageTest audit as we do not have a proper URL to point to the action of searching something — only to an empty search page.
Some other problems can arise from the SPA paradigm shift when using WebPageTest:
Clicking around to navigate a webpage is usually harder than merely heading to a new URL, but it is sometimes the only option in SPAs.
Authentication in SPAs is usually implemented using JSON Web Tokens instead of good ol’ cookies, which rules out the option of setting authentication cookies directly in WebPageTest (as described here).
Using React and Redux (or other application state management libraries) for your SPA can mean that forms are harder to fill out programmatically, since using .innerText() or .value() to set a field’s value may not forward it to the application store.
As API calls are often asynchronous and various loaders can be used to indicate a loading state, those can „trick” WebPageTest into believing the page has actually finished loading when it has, in fact, not. I have seen it happen with longer-than-usual API calls (5+ seconds).
As I have faced these problems on several projects, I have come up with a range of tips and techniques to counter them.
The many ways of selecting an element
Selecting DOM elements is a key part of doing all sorts of automated testing, be it for end-to-end testing with Selenium or Cypress or for performance testing with WebPageTest. Selecting DOM elements allows us to click on links and buttons, fill in forms and more generally interact with the application.
There are several ways of selecting a particular DOM elements using native browser APIs, that range from the straightforward document.getElementsByClassName to the thorny but really powerful XPath selectors. In this section, we will see three different possibilities, ordered by increasing complexity.
Get an element by id, className or tagName
If the element you want to select (say, an „Empty Cart” button) has a specific and unique id (e.g. #empty-cart), class name, or is the only button on the page, you can click on it using the getElementsBy methods:
const emptyCartButton = document.getElementsById("empty-cart")[0];
// or document.getElementsByClassName(".empty-cart-button")[0]
// or document.getElementsByTagName("button")[0]
emptyCartButton.click();
If you have several buttons on the same page, you can filter the resulting list before interacting with the element:
Sometimes, the particular element you want to interact with does not present an interesting unicity property in either its ID, class or tag.
One way to circumvent this issue is to add this unicity manually, for testing purposes only. Adding #perf-test-empty-cart-button to a specific button is innocuous for your website markup and can dramatically simplify your testing setup.
However, this solution can sometimes be out of reach: you may not have access to the source code of the application, or may not be able to deploy new versions quickly. In those situations, it is useful to know about document.querySelector (and its variant document.querySelectorAll) and using complex CSS selectors.
Here are a few examples of what can be achieved with document.querySelector:
// Select the first input with the `name="username"` property
document.querySelector("input[name='username']");
// Select all number inputs
document.querySelectorAll("input[type='number']");

// Select the first h1 inside the <section>
document.querySelector("section h1");

// Select the first direct descendent of a <nav> which is of type <img>
document.querySelector("nav > img");
What’s interesting here is you have the full power of CSS selectors at hand. I encourage you to have a look at the always-useful MDN’s reference table of selectors!
Going nuclear: XPath selectors
XML Path Language (XPath), albeit really powerful, is harder to grasp and maintain than the CSS solutions above. I rarely have to use it, but it is definitively useful to know that it exists.
One such instance is when you want to select a node by its text value, and can’t resort to CSS selectors. Here’s a handy snippet to use in those cases:
// Returns the  that has the exact content 'Sep 16, 2015'
document.evaluate(
  "//span[text()='Sep 16, 2015']",
  document,
  null,
  XPathResult.FIRST_ORDERED_NODE_TYPE,
  null
).singleNodeValue;
I will not go into details on how to use it as it would have me wander away from the goal of this article. To be fair, I don’t even know what many of the parameters above even mean. However, I can definitely recommend the MDN documentation should you want to read on the topic.
Recipes for common use cases
In the following section, we will see how to test the performance in common use cases of Single Page Applications. I call these my testing recipes.
In order to illustrate those recipes, I will use the React Admin demo website as an example. React Admin is an open source project aimed at building admin applications and back offices.
It is a typical example of a SPA because it uses React (as the name suggests), calls remote APIs, has a login interface, many forms and relies on client-side routing. I encourage you to go take a quick look at the website (the demo account is demo/demo ) in order to have an idea of what we will be trying to achieve.
Authentication and forms
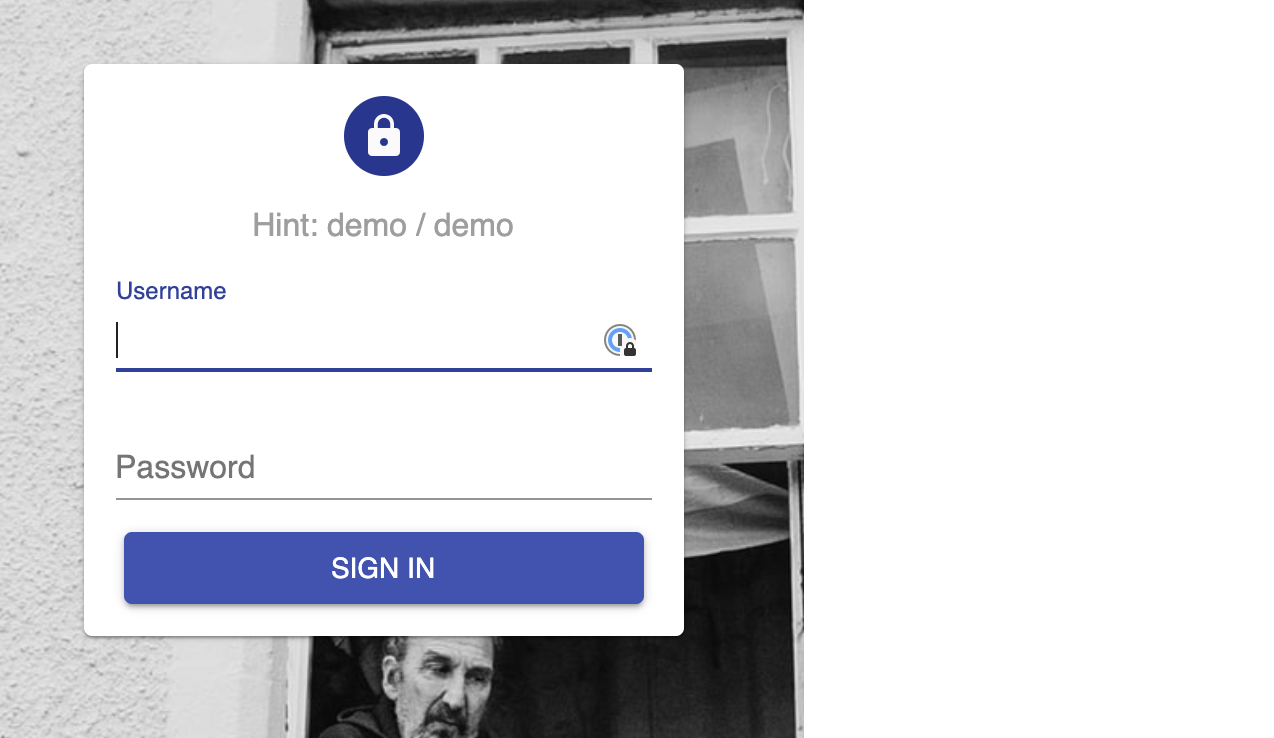
The authentication page of React Admin requires the user to input a username and a password:
The authentication screen of React Admin
Intuitively, one could take the following approach to filling in the form and submit:
const [usernameInput, passwordInput] = document.getElementsByTagName("input");
usernameInput.value = "demo"; // innerText could also be used here
passwordInput.value = "demo";
document.getElementsByTagName("button")[0].click();
If you run these commands sequentially in a DevTools console on the login page, you will see that all fields are reset and the login request fails upon submitting by clicking the button. The problem comes from the fact that the new values we set with .value() (or .innerText()) are not kicked back to the Redux store, and thus not „processed” by the application.
What we need to do then is explicitly tell React that the value has changed so that it will update internal bookkeeping accordingly. This can be achieved using the Event interface.
const updateInputValue = (input, newValue) => {
  let lastValue = input.value;
  input.value = newValue;
  let event = new Event("input", { bubbles: true });
  let tracker = input._valueTracker;
  if (tracker) {
    tracker.setValue(lastValue);
  }
  input.dispatchEvent(event);
};
setEventName    Go to Login

navigate    https://marmelab.com/react-admin-demo/

setEventName    Login

exec    const updateInputValue = (input, newValue) => {  let lastValue = input.value;  input.value = newValue;  let event = new Event("input", { bubbles: true });  let tracker = input._valueTracker;  if (tracker) {  tracker.setValue(lastValue);  }  input.dispatchEvent(event);};

exec    const [usernameInput, passwordInput] = document.getElementsByTagName("input")

exec    updateInputValue(usernameInput, "demo")
exec    updateInputValue(passwordInput, "demo")

execAndWait document.getElementsByTagName("button")[0].click()
Note that clicking on the submit button leads us to a new page and triggers API calls, which means we need to use the execAndWait command.
You can see the full results of the test at this address. (Note: the results may have been archived by WebPageTest — you can, however, run the test again yourself!)
Here is a short video (captured by WebPageTest) in which you can see that we indeed passed the authentication step:
Navigating between pages
For traditional Server Rendered pages, navigating from one URL to the next in WebPageTest scripting is done via the navigate <url> command.
However, for SPAs, this does not reflect the experience of the user, as client-side routing means that the server has no role in navigation. Thus, hitting a URL directly would significantly slow down the measured performance (because of the time it takes for the JavaScript framework to be compiled, parsed and executed), a slowdown that the user does not experience when changing pages. As it is crucial to simulate the user flow the best we can, we need to handle the navigation on the client as well.
Hopefully, this is a lot simpler to do than filling up forms. We only need to select the link (or button) that will take us to the new page, and .click() on it! Let’s follow through our previous example, although now we want to test the performance of the Reviews list, and of a single Review page.
A user would typically click on the Reviews item on the left-hand navigation menu, then on any item in the list. Inspecting the elements in DevTools may lead us to a selection strategy as follows:
document.querySelector("a[href='#reviews']"); // select the Reviews link in the menu
document.querySelector("table tr"); // select the first item in the Reviews list
As both clicks lead to page transition and API calls (to fetch the reviews), we need to use the execAndWait keyword for the script:
setEventName    Go to Login

navigate    https://marmelab.com/react-admin-demo/

setEventName    Login

exec    const updateInputValue = (input, newValue) => {  let lastValue = input.value;  input.value = newValue;  let event = new Event("input", { bubbles: true });  let tracker = input._valueTracker;  if (tracker) {    tracker.setValue(lastValue);  }  input.dispatchEvent(event);};

exec    const [usernameInput, passwordInput] = document.getElementsByTagName("input")

exec    updateInputValue(usernameInput, "demo")
exec    updateInputValue(passwordInput, "demo")

execAndWait document.getElementsByTagName("button")[0].click()

setEventName    Go to Reviews

execAndWait document.querySelector("a[href='#/reviews']").click()

setEventName    Open a single Review

execAndWait document.querySelector("table tbody tr").click()
Here’s the video of the complete script running on WebPageTest:
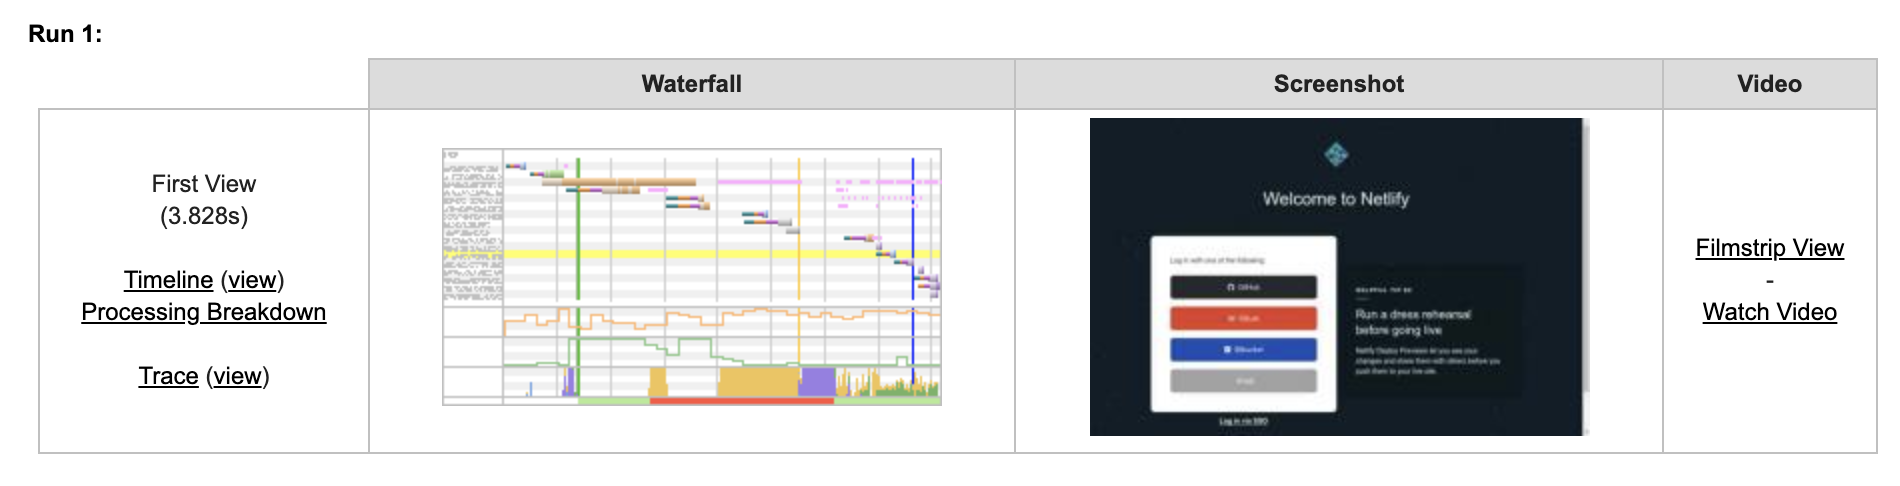
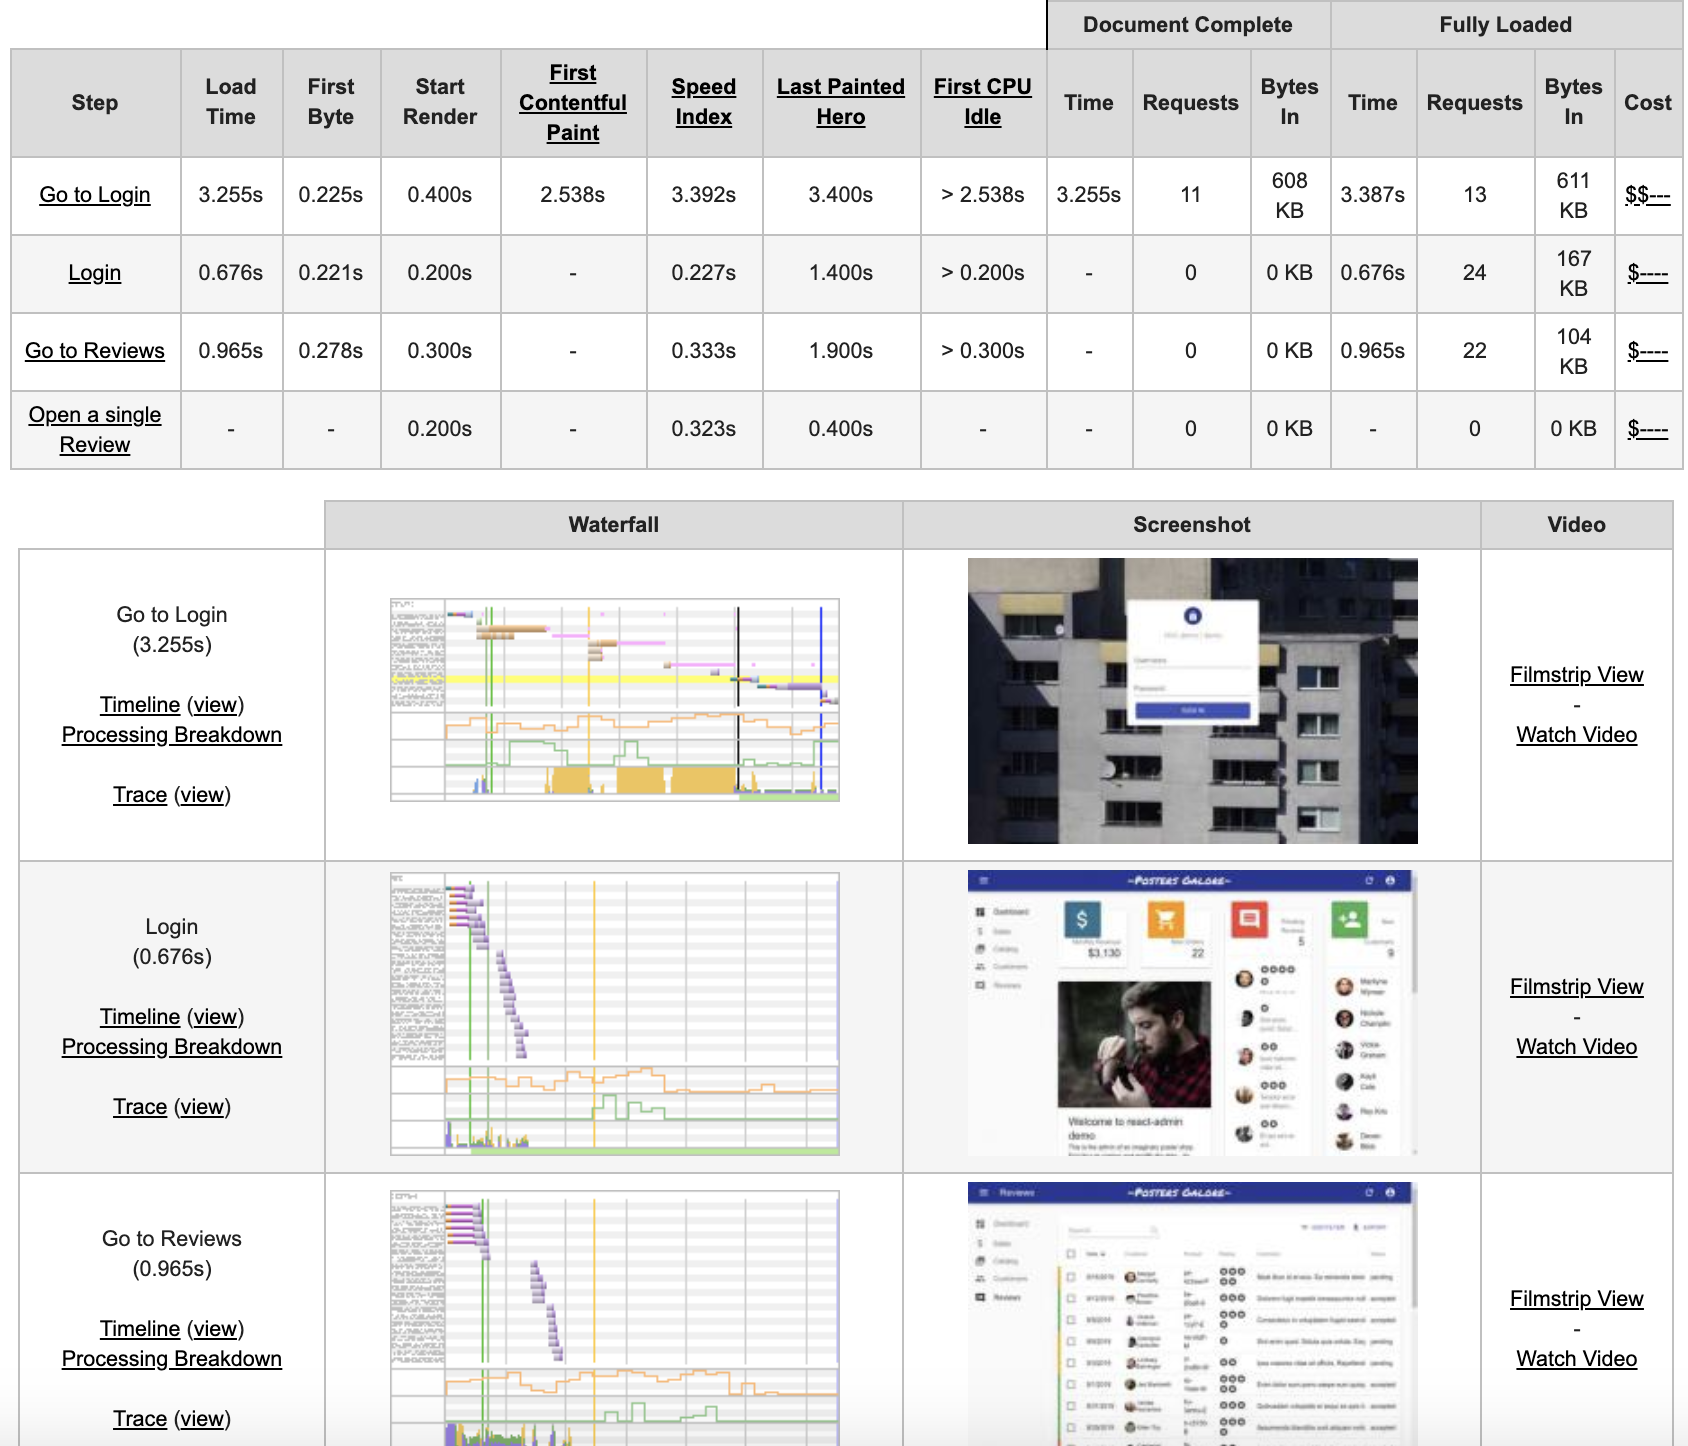
The audit result from WebPageTest shows the performance metrics and waterfall graphs for each step of the script, allowing us to monitor the performance of each API call and interaction:
What about Internet Explorer 11 compatibility?
WebPageTest allows us to select which location, browser and network conditions the test will use. Internet Explorer 11 (IE11) is among the available browser options, and if you try the previous scripts on IE11, they will fail.
The ES6 syntax problem can be overcome by translating our scripts to ES5 syntax (no arrow functions, no let and const, no array destructuring), which might look like this:
setEventName    Go to Login

navigate    https://marmelab.com/react-admin-demo/

setEventName    Login

exec    var updateInputValue = function(input, newValue) {  var lastValue = input.value;  input.value = newValue;  var event = new Event("input", { bubbles: true });  var tracker = input._valueTracker;  if (tracker) {    tracker.setValue(lastValue);  }  input.dispatchEvent(event);};

exec    var usernameInput = document.getElementsByTagName("input")[0]
exec    var passwordInput = document.getElementsByTagName("input")[1]

exec    updateInputValue(usernameInput, "demo")
exec    updateInputValue(passwordInput, "demo")

execAndWait document.getElementsByTagName("button")[0].click()

setEventName    Go to Reviews

execAndWait document.querySelector("a[href='#/reviews']").click()

setEventName    Open a single Review

execAndWait document.querySelector("table tbody tr").click()
In order to bypass the absence of CustomEvent support, we can turn to polyfills and add one manually at the top of the script. This polyfill is available on MDN:
We can then replace all mentions of Event by CustomEvent, set the polyfill to fit on a single line and we are good to go!
setEventName    Go to Login

navigate    https://marmelab.com/react-admin-demo/

exec    (function(){if(typeof window.CustomEvent==="function")return false;function CustomEvent(event,params){params=params||{bubbles:false,cancelable:false,detail:undefined};var evt=document.createEvent("CustomEvent");evt.initCustomEvent(event,params.bubbles,params.cancelable,params.detail);return evt}CustomEvent.prototype=window.Event.prototype;window.CustomEvent=CustomEvent})();

setEventName    Login

exec    var updateInputValue = function(input, newValue) {  var lastValue = input.value;  input.value = newValue;  var event = new CustomEvent("input", { bubbles: true });  var tracker = input._valueTracker;  if (tracker) {    tracker.setValue(lastValue);  }  input.dispatchEvent(event);};

exec    var usernameInput = document.getElementsByTagName("input")[0]
exec    var passwordInput = document.getElementsByTagName("input")[1]

exec    updateInputValue(usernameInput, "demo")
exec    updateInputValue(passwordInput, "demo")

execAndWait document.getElementsByTagName("button")[0].click()

setEventName    Go to Reviews

execAndWait document.querySelector("a[href='#/reviews']").click()

setEventName    Open a single Review

execAndWait document.querySelector("table tbody tr").click()
Et voilà!
General tips and tricks for WebPageTest scripting
One last thing I want to do is provide a few tips and tricks that make writing WebPageTest scripts easier. Feel free to DM me on Twitter if you have any suggestions!
Security first!
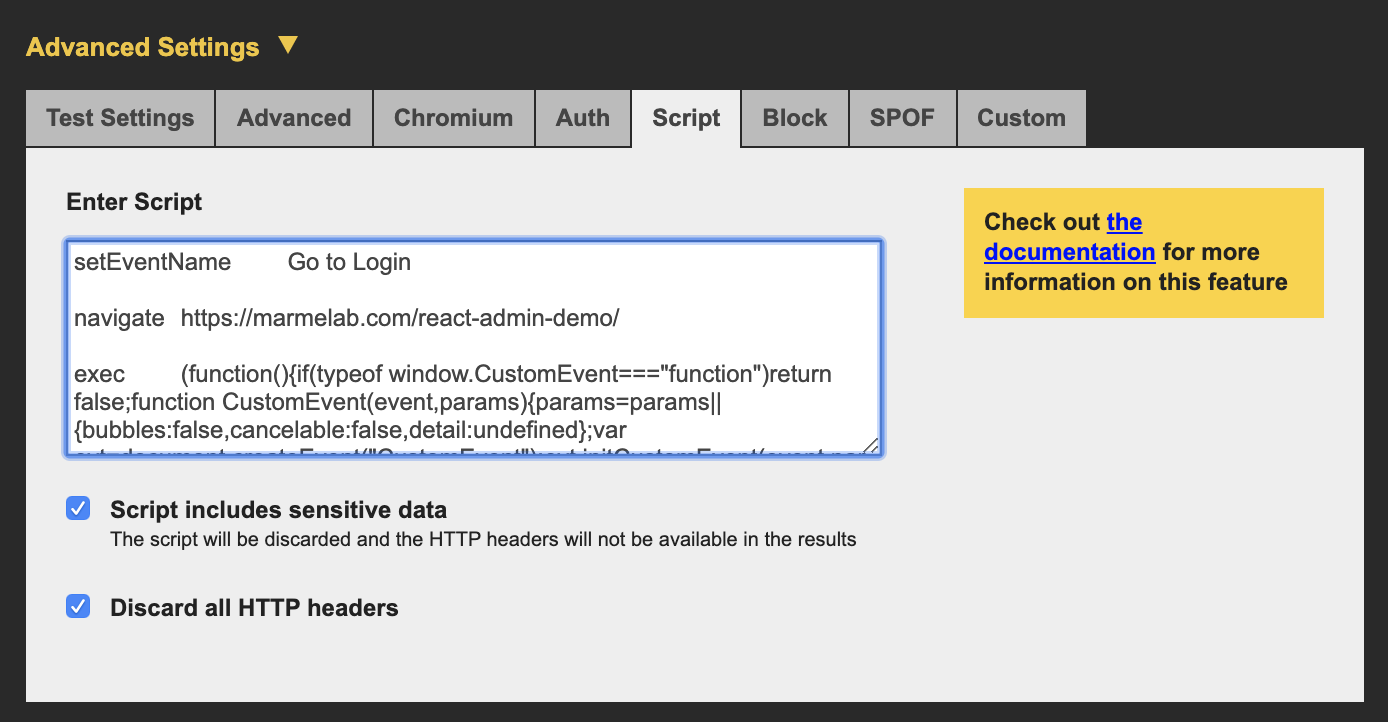
Remember to tick both privacy checkboxes if your script includes senstitive data, like credentials!
WebPageTest security controls
Browse the docs
The WebPageTest Scripting docs are full of features that I didn’t cover in this article, ranging from DNS Overriding to iPhone Spoofing and even if/else conditionals.
When you plan on writing a new script, I recommend to have a look at the available parameters first and see if any can help make your scripting easier or more robust.
Long loading states
Sometimes, a remote API call (say, for fetching the reviews) will take a long time. A loading indicator, such as a spinner, can be used to tell the user to wait a bit as something is happening.
WebPageTest tries to detect when a page has finished loading by figuring out if things are changing on the screen. If your loading indicator lasts a long time, WebPageTest might mistake it for an integral part of your page design and cut the audit before the API call returns — thus truncating your measures.
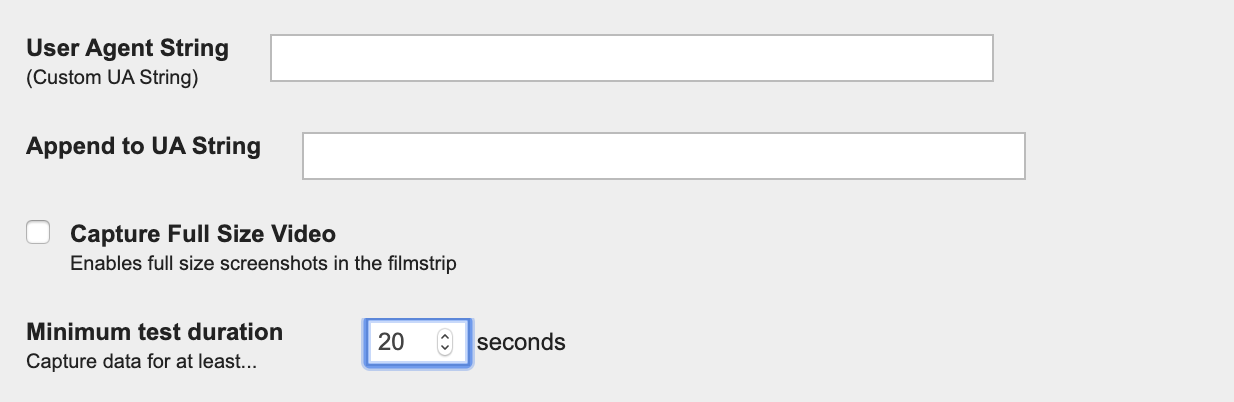
A way to circumvent this issue is to tell WebPageTest to wait at least a certain duration before stopping the test. This is a parameter available under the Advanced tab:
WebPageTest minimum test duration
Keeping your script (and results) human-readable
Use blank lines and comments (//) generously because single-line JavaScript commands can sometimes be hard to grasp.
Keep a multi-line version somewhere as your reference, and single-line everything as you are about to test. This helps readability. Like, a lot.
Use setEventName to name your different „steps.” This makes for more readable tests as it explicits the sequence of pages the audit goes through, and also appears in the WebPageTest results.
Iterating on your scripts
First, make sure that your script works in the browser. To do so, strip the WebPageTest keywords (the first word of every line of your script), then copy and paste each line in the browser console to verify that everything is working as expected at every step of the way.
Once you are ready to submit your test to WebPageTest, do it first with very light settings: only one run, a fast browser (cough — not IE11 — cough), no network throttling, no repeat view, a well-dimensioned instance (Dulles, VA, usually has good response times). This will help you detect and correct errors way faster.
Automating your scripts
Your test script is running smoothly, and you start getting performance reports of your Single Page App. As you ship new features, it is important that you monitor its performance regularly to catch regressions at the earliest.
To address this problem, I am currently working on Falco, a soon-to-be-open-sourced WebPageTest test runner. Falco takes care of automating your audits, then presents the results in an easy-to-read interface while letting you read the full reports when you need it. You can follow me on Twitter to know when it goes open source, and learn more about web performance and WebPageTest!