Archiwum kategorii: CSS

Creating Your Own Gravity and Space Simulator

Post pobrano z: Creating Your Own Gravity and Space Simulator

Space is vast. Space is awesome. Space is difficult to understand — or so people tend to think. But in this tutorial I am going to show you that this is not the case. Quite the contrary; the laws that govern the motion of the stars, planets, asteroids and even entire galaxies are incredibly simple. You could argue that if our Universe was created by a developer, she sure was concerned about writing clean code that would be easy to maintain and scale.

What we are going to do is create a simulation of the inner region of our solar system using nothing but plain old JavaScript. It will be a gravitational n-body simulation where every mass feels the gravity of all the other masses being simulated. To spice things up, I will also show how you can enable users of your simulator to add planets of their own to the simulation with nothing but a little bit of mouse drag action, and in doing so, cause all sorts of cosmic mayhem. A gravity or space simulator would not be worthy of its name without motion trails, so I will show you how to create some fancy looking trails, too, in addition to some other shenanigans that will make the simulator a little bit more fun for the average user.

See the Pen
Gravity Simulator Tutorial
by Darrell Huffman (@thehappykoala)
on CodePen.

You will find the complete source code for this project in the Pen above. There is nothing fancy going on there. No bundling of modules, or transpilation of TypeScript or JSX into JavaScript; just HTML markup, CSS, and a healthy dose of JavaScript.

I came up with the idea for this while working on a project that is close to my heart, namely Harmony of the Spheres. Harmony of the Spheres is open source and very much a work in progress, so if you enjoy this tutorial and got your appetite for all things space and physics related going, check out the repository and fire away a pull request if you find a bug or have a cool new feature that you would like to see implemented.

For this tutorial, it is assumed that you have a basic grasp of JavaScript and the syntax and features that were introduced with ES6. Also, if you are able to draw a rectangle onto a canvas element, that would help, too. If you are not yet in possession of this knowledge, I suggest you head over to MDN and start reading up on ES6 classes, arrow functions, shorthand notation for defining key-value pairs for object literals and const and let. If you are not quite sure how to set up a canvas animation, go check out the documentation on the Canvas API on MDN.

Part 1: Writing a Gravitational N-Body Algorithm

To achieve the goal outlined above, we are going to draw on numerical integration, which is an approach to solving gravitational n-body problems where you take the positions and velocities of all objects at a given time (T), calculate the gravitational force they exert on each other and update their velocities and positions at time (T + dt, dt being shorthand for delta time), or in other words, the change in time between iterations. Repeating this process, we can trace the trajectories of a set of masses through space and time.

We will use a Cartesian coordinate system for our simulation. The Cartesian coordinate system is based on three mutually perpendicular coordinate axes: the x-axis, the y-axis, and the z-axis. The three axes intersect at the point called the origin, where x, y and z are equal to 0. An object in a Cartesian space has a unique position that is defined by its x, y and z values. The benefit of using the Cartesian coordinate system for our simulation is that the Canvas API, with which we will visualize our simulation, uses it, too.

For the purpose of writing an algorithm for solving the gravitational n-body problem, it is necessary to have an understanding of what is meant by velocity and acceleration. Velocity is the change in position of an object with time, while acceleration is the change in an object’s velocity with time. Newton’s first law of motion stipulates that every object will remain at rest or in uniform motion in a straight line unless compelled to change its state by the action of an external force. The Earth does not move in a straight line, but orbits the Sun, so clearly it is accelerating, but what is causing this acceleration? As you have probably guessed, given the subject matter of this tutorial, the answer is the gravitational forces exerted on Earth by the Sun, the other planets in our solar system and every other celestial object in the Universe.

Before we discuss gravity, let us write some pseudo code for updating the positions and velocities of a set of masses in Cartesian space. We store our masses as objects in an array where each object represents a mass with x, y and z position and velocity vectors. Velocity vectors are prefixed with a v — v for velocity!

const updatePositionVectors = (masses, dt) => {
  const massesLen = masses.length;

  for (let i = 0; i < massesLen; i++) {
    const massI = masses[i];

    mass.x += mass.vx * dt;
    mass.y += mass.vy * dt;
    mass.z += mass.vz * dt;
  }
};

const updateVelocityVectors = (masses, dt) => {
  const massesLen = masses.length;

  for (let i = 0; i < massesLen; i++) {
    const massI = masses[i];

    massI.vx += massI.ax * dt;
    massI.vy += massI.ay * dt;
    massI.vz += massI.az * dt;
  }
};

Looking at the code above, we can see that — as outlined in our discussion on numerical integration — every time we advance the simulation by a given time step, dt, we update the velocities of the masses being simulated and, with those velocities, we update the positions of the masses. The relationship between position and velocity is also made clear in the code above, as we can see that in one step of our simulation, the change in, for example, the x position vector of our mass is equal to the product of the mass’s x velocity vector and dt. Similarly, we can make out the relationship between velocity and acceleration.

How, then, do we get the x, y and z acceleration vectors for a mass so that we can calculate the change in its velocity vectors? To get the contribution of massJ to the x acceleration vector of massI, we need to calculate the gravitational force exerted by massJ on massI, and then, to obtain the x acceleration vector, we simply calculate the product of this force and the distance between the two masses on the x axis. To get the y and z acceleration vectors, we follow the same procedure. Now we just have to figure out how to calculate the gravitational force exerted by massJ on massI to be able to write some more pseudo code. The formula we are interested in looks like this:

f = g * massJ.m / dSq * (dSq + s)^1/2

The formula above tells us that the gravitational force exerted by massJ on massI is equal to the product of the gravitational constant (g) and the mass of massJ (massJ.m) divided by the product of the sum of the squares of the distance between massI and massJ on the x, y and z axises (dSq) and the square root of dSq + s, where s is what is referred to as a softening constant (softeningConstant). Including a softening constant in our gravity calculations prevents a situation where the gravitational force exerted by massJ becomes infinite because it is too close to massI. This „bug,” if you will, in the Newtonian theory of gravity arises for the reason that Newtonian gravity treats masses as point objects, which they are not in reality. Moving on, to get the net acceleration of massI along, for example, the x axis, we simply sum the acceleration induced on it by every other mass in the simulation.

Let us transform the above into code for updating the acceleration vectors of all the masses in the simulation.

const updateAccelerationVectors = (masses, g, softeningConstant) => {
  const massesLen = masses.length;

  for (let i = 0; i < massesLen; i++) {
    let ax = 0;
    let ay = 0;
    let az = 0;

    const massI = masses[i];

    for (let j = 0; j < massesLen; j++) {
      if (i !== j) {
        const massJ = masses[j];

        const dx = massJ.x - massI.x;
        const dy = massJ.y - massI.y;
        const dz = massJ.z - massI.z;

        const distSq = dx * dx + dy * dy + dz * dz;

        f = (g * massJ.m) / (distSq * Math.sqrt(distSq + softeningConstant));

        ax += dx * f;
        ay += dy * f;
        az += dz * f;
      }
    }

    massI.ax = ax;
    massI.ay = ay;
    massI.az = az;
  }
};

We iterate over all the masses in the simulation, and for every mass we calculate the contribution to its acceleration by the other masses in a nested loop and increment the acceleration vectors accordingly. Once we are out of the nested loop, we update the acceleration vectors of massI, which we can then use to calculate its new velocity vectors! Whowie. That was a lot. We now know how to update the position, velocity and acceleration vectors of n bodies in a gravity simulation using numerical integration.

But wait; there is something missing. That is right, we have talked about distance, mass and time, but we have never specified what units we ought to use for these quantities. As long as we are consistent, the choice is arbitrary, but generally speaking, it is a good idea to go for units that are suitable for the scales under consideration, so as to avoid awkwardly long numbers. In the context of our solar system, scientists tend to use astronomical units for distance, solar masses for mass and years for time. Adopting this set of units, the value of the gravitational constant (g in the formula for calculating the gravitational force exerted by massJ on massI) is 39.5. For the position and velocity vectors of the Sun and planets of the inner solar system — Mercury, Venus, Earth and Mars — we turn to NASA JPL’s HORIZONS Web-Interface where we change the output setting to vector tables and the units to astronomical units and days. For whatever reason, Horizons does not serve vectors with years as the unit of time, so we have to multiply the velocity vectors by 365.25, the number of days in a year, to obtain velocity vectors that are consistent with our choice of years as the unit of time.
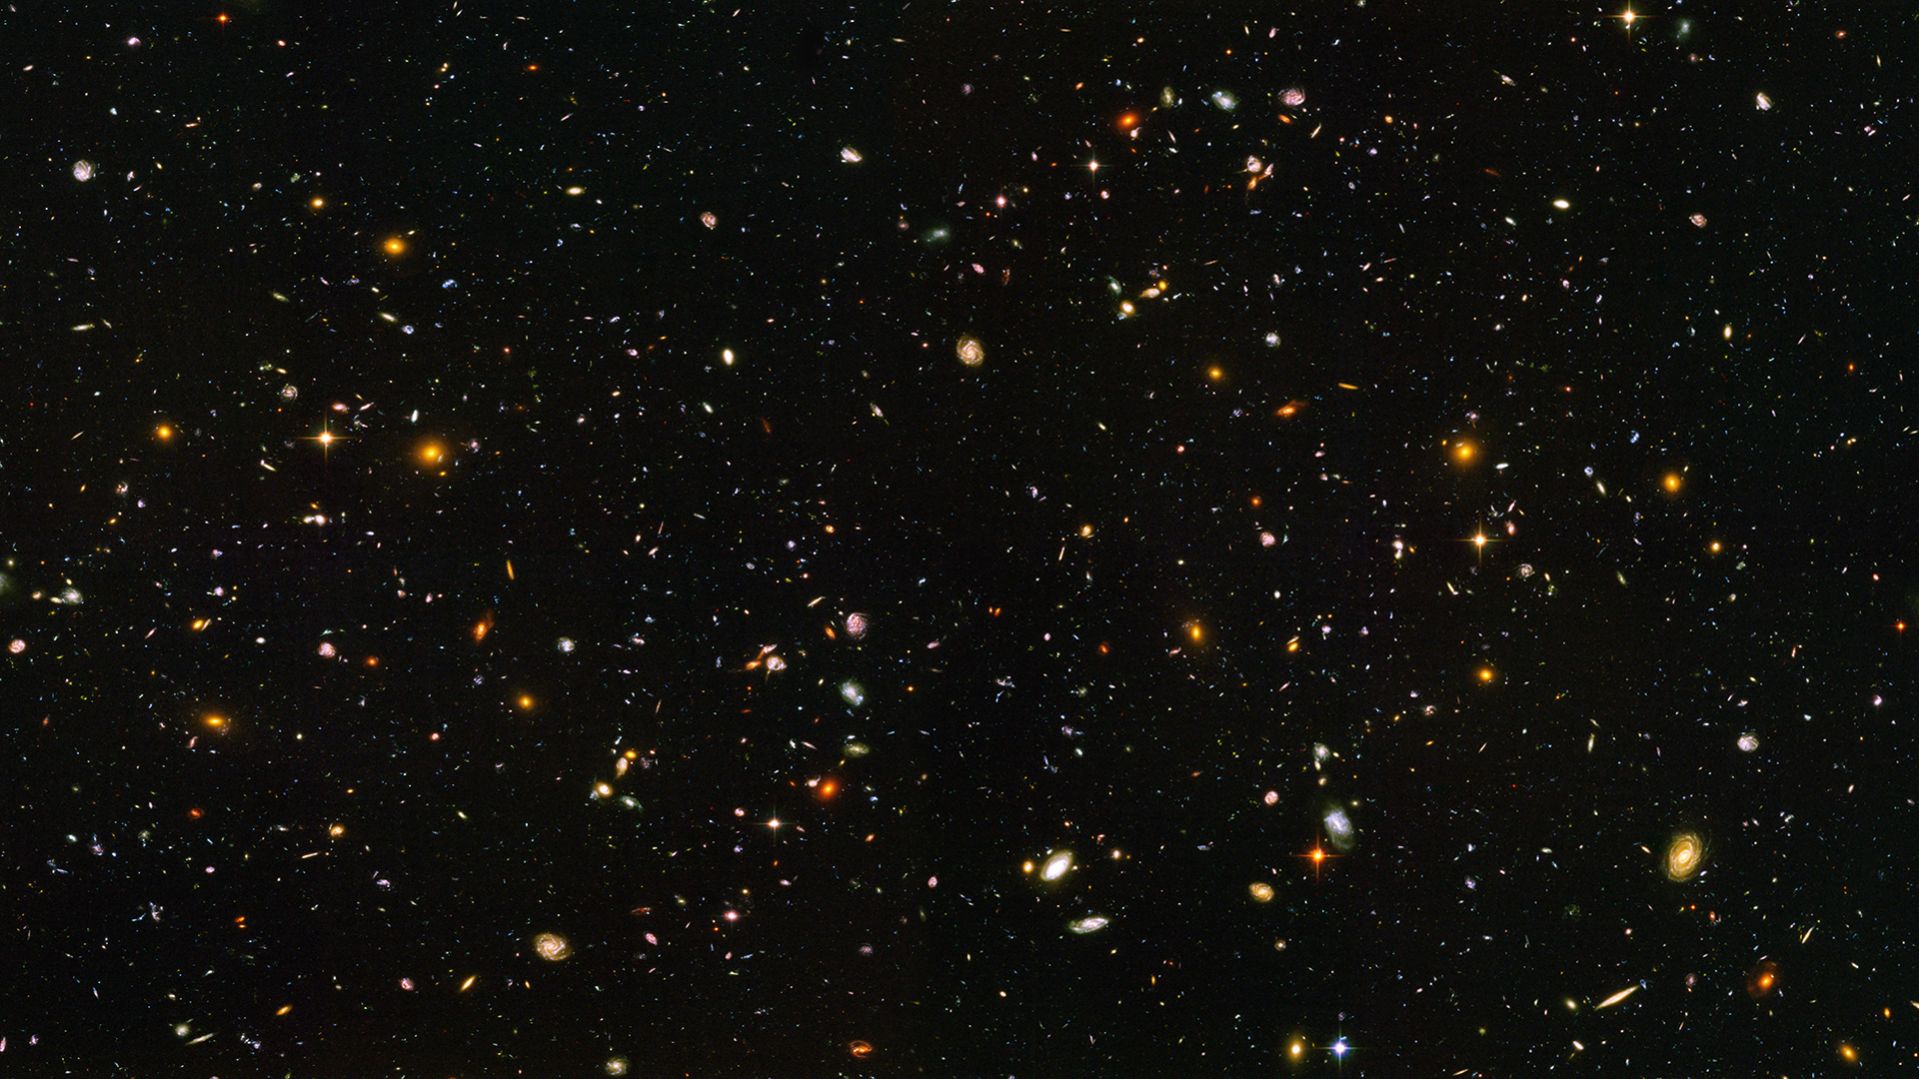
To think, that with the simple equations and laws discussed above, we can calculate the motion of every galaxy, star, planet and moon contained within this dazzling cosmic panorama captured by the Hubble Telescope, is nothing short of awe-inspiring. It is not for nothing Newton’s theory of gravity is referred to as „Newton’s law of universal gravitation.”

A JavaScript class seems like an excellent way of encapsulating the methods we wrote above together with the data on the masses and the constants we need for our simulation, so let us do some refactoring:

class nBodyProblem {
  constructor(params) {
    this.g = params.g;
    this.dt = params.dt;
    this.softeningConstant = params.softeningConstant;

    this.masses = params.masses;
  }

  updatePositionVectors() {
    const massesLen = this.masses.length;

    for (let i = 0; i < massesLen; i++) {
      const massI = this.masses[i];

      massI.x += massI.vx * this.dt;
      massI.y += massI.vy * this.dt;
      massI.z += massI.vz * this.dt;
    }

    return this;
  }

  updateVelocityVectors() {
    const massesLen = this.masses.length;

    for (let i = 0; i < massesLen; i++) {
      const massI = this.masses[i];

      massI.vx += massI.ax * this.dt;
      massI.vy += massI.ay * this.dt;
      massI.vz += massI.az * this.dt;
    }
  }

  updateAccelerationVectors() {
    const massesLen = this.masses.length;

    for (let i = 0; i < massesLen; i++) {
      let ax = 0;
      let ay = 0;
      let az = 0;

      const massI = this.masses[i];

      for (let j = 0; j < massesLen; j++) {
        if (i !== j) {
          const massJ = this.masses[j];

          const dx = massJ.x - massI.x;
          const dy = massJ.y - massI.y;
          const dz = massJ.z - massI.z;

          const distSq = dx * dx + dy * dy + dz * dz;

          const f =
            (this.g * massJ.m) /
            (distSq * Math.sqrt(distSq + this.softeningConstant));

          ax += dx * f;
          ay += dy * f;
          az += dz * f;
        }
      }

      massI.ax = ax;
      massI.ay = ay;
      massI.az = az;
    }

    return this;
  }
}

That looks much nicer! Let us create an instance of this class. To do so, we need to specify three constants, namely the gravitational constant (g), the time step of the simulation (dt) and the softening constant (softeningConstant). We also need to populate an array with mass objects. Once we have all of those, we can create an instance of the nBodyProblem class, which we will call the innerSolarSystem, since, well, our simulation is going to be of the inner solar system!

const g = 39.5;
const dt = 0.008; // 0.008 years is equal to 2.92 days
const softeningConstant = 0.15;

const masses = [{
    name: "Sun", // We use solar masses as the unit of mass, so the mass of the Sun is exactly 1
    m: 1,
    x: -1.50324727873647e-6,
    y: -3.93762725944737e-6,
    z: -4.86567877183925e-8,
    vx: 3.1669325898331e-5,
    vy: -6.85489559263319e-6,
    vz: -7.90076642683254e-7
  }
  // Mercury, Venus, Earth and Mars data can be found in the pen for this tutorial
];

const innerSolarSystem = new nBodyProblem({
  g,
  dt,
  masses: JSON.parse(JSON.stringify(masses)), 
  softeningConstant
});

At this moment, you are probably looking at how I instantiated the nBodyProblem class and asking yourself what is up with the JSON parsing and string-ifying nonsense. The reason for why I went about passing the data contained in the masses array to the nBodyProblem constructor in this way is that we want our users to be able to reset the simulation. However, if we pass the masses array itself to the constructor of the nBodyProblem class when we create an instance of it, and then set the value of the masses property of this instance to be equal to the masses array when the user clicks the reset button, the simulation would not have been reset; the state of the masses from the end of the previous simulation run would still be there, and so would any masses the user had added. To solve this problem, we need to pass a clone of the masses array when we instantiate the nBodyProblem class or reset the simulation, so as to avoid modifying the masses array, which we need to keep pristine and untouched, and the easiest way of cloning it is to simply parse a string-ified version of it.

Okay, moving on: to advance the simulation by one step, we simply call:

innerSolarSystem.updatePositionVectors()
                .updateAccelerationVectors()
                .updateVelocityVectors();

Congratulations. You are now one step closer to collecting a Nobel prize in physics!

Part 2: Creating a Visual Manifestation for our Masses

We could represent our masses with cute little circles created with the Canvas API’s arc method, but that would look kind of dull, and we would not get a sense of the trajectories of our masses through space and time, so let us write a JavaScript class that will be our template for how our masses manifest themselves visually. It will create a circle that leaves a predetermined number of smaller and faded circles where it has been before, which conveys a sense of motion and direction to the user. The farther you get from the current position of the mass, the smaller and more faded out the circles will become. In this way, we will have created a pretty looking motion trail for our masses.

The constructor accepts three arguments, namely the drawing context for our canvas element (ctx), the length of the motion trail (trailLength) that represents the number of previous positions of our mass that the trail will visualize and finally the radius (radius) of the circle that represents the current position of our mass. In the constructor we will also initialize an empty array that we will call positions, which will — quell surprise — store the current and previous positions of the mass that are included in the motion trail.

At this point, our manifestation class looks like this:

class Manifestation {

  constructor(ctx, trailLength, radius) {
    this.ctx = ctx;
    
    this.trailLength = trailLength;

    this.radius = radius;

    this.positions = [];
  }
  
}

How do we go about populating the positions array with positions and making sure that we do not store more positions than the number specified by the trailLength property? The answer is that we add a method to our class that accepts the x and y coordinates of the mass’s position as arguments and stores them in an object in the array using the array push method, which appends an element to an array. This means that the current position of the mass will be the last element in the positions array. To make sure we do not store more positions than specified when we instantiated the class, we check if the length of the positions array is greater than the trailLength property. If it is, we use the array shift method to remove the first element, which represents the oldest stored position of the positions array.

class Manifestation {

  constructor() { /* The code for the constructor outlined above */ }

  storePosition(x, y) {
    this.positions.push({ x, y });

    if (this.positions.length > this.trailLength) 
      this.positions.shift();
  }
  
}

Okay, let us write a method that draws our motion trail. As you have probably guessed, it will accept two arguments, namely the x and y positions of the mass we are drawing the trail for. The first thing we need to do is to store the new position in the positions array and discard any superfluous positions stored in it. Then we iterate over the positions array and draw a circle for every position and voilà, we have ourselves a motion trail! But it does not look very nice, and I promised you that our trail would be pretty with circles that would become increasingly smaller and faded out according to how close they were to the current position of our mass in time.

What we need is, clearly, a scale factor whose size depends on how far away the position we are drawing is from the current position of our mass in time! An excellent way of obtaining an appropriate scale factor, for our intents and purposes, is to simply divide the index (i) of the circle being drawn by the length of the positions array. For example, if the number of elements allowed in the positions array is 25, element number 23 in that array will get a scale factor of 23 / 25, which gives us 0.92. Element number 5, on the other hand, will get a scale factor of 5 / 25, which gives us 0.2; the scale factor decreases the further we get from the current position of our mass, which is the relationship we want! Do note that we need a condition that makes sure that if the circle being drawn represents the current position, the scale factor is set to 1, as we do not want that circle to be either faded or smaller, for that matter. With all this in mind, let us write the code for the draw method of our Manifestation class.

class Manifestation {

  constructor() { /* The code for the constructor outlined above */ }

  storePosition() { /* The code for the storePosition method discussed above */ } 

  draw(x, y) {
    this.storePosition(x, y);

    const positionsLen = this.positions.length;

    for (let i = 0; i < positionsLen; i++) {
      let transparency;
      let circleScaleFactor;

      const scaleFactor = i / positionsLen;

      if (i === positionsLen - 1) {
        transparency = 1;
        circleScaleFactor = 1;
      } else {
        transparency = scaleFactor / 2;
        circleScaleFactor = scaleFactor;
      }

      this.ctx.beginPath();
      this.ctx.arc(
        this.positions[i].x,
        this.positions[i].y,
        circleScaleFactor * this.radius,
        0,
        2 * Math.PI
      );
      this.ctx.fillStyle = `rgb(0, 12, 153, ${transparency})`;

      this.ctx.fill();
    }
  }
  
}

Part 3: Visualizing Our Simulation

Let us write some canvas boilerplate and bind it together with the gravitational n-body algorithm and the motion trails, so that we can get an animation of our inner solar system simulation up and running. As mentioned in the introduction to this tutorial, I do not discuss the Canvas API in any great depth, as this is not an introductory tutorial on the Canvas API, so if you find yourself looking rather bemused and or perplexed, make haste and change this state of affairs by heading over to MDN’s documentation on the subject.

Before we continue, though, here is the HTML markup for our simulator:

<section id="controls-wrapper">
  <label>Mass of Added Planet</label>
  <select id="masses-list">
    <option value="0.000003003">Earth</option> 
    <option value="0.0009543">Jupiter</option>
    <option value="1">Sun</option>
    <option value="0.1">Red Dwarf Star</option>
  </select>
  <button id="clear-masses">Reset</button>
</section>
<canvas id="canvas"></canvas>

Now, we turn to the interesting part: the JavaScript. We start by getting a reference to the canvas element and then we proceed by getting its drawing context. Next, we set the dimensions of our canvas element. When it comes to canvas animations on the web, I do not spare any expenses in terms of screen real estate, so let us set the width and height properties of the canvas element to the width and height of the browser window, respectively. You will notice that I have drawn on a peculiar syntax for setting the width and height of the canvas element in that I have declared, in one statement, that the width variable is equal to the width property of the canvas element which, in turn, is equal to the width of the window. Some developers frown upon the use of this syntax, but I find it to be semantically beautiful. If you do not feel the same way, you can deconstruct that statement into two statements. Generally speaking, do whatever you feel most comfortable with, or if you find yourself collaborating with others, what the team has agreed on.

const canvas = document.querySelector("#canvas");
const ctx = canvas.getContext("2d");

const width = (canvas.width = window.innerWidth);
const height = (canvas.height = window.innerHeight);

At this point, we are going to declare some constants for our animation. More specifically, there are three of them. The first is the radius (radius) of the circle, which represents the current position of a mass, in pixels. The second is the length of our motion trail (trailLength), which is the number of previous positions that it includes. Last, but not least, we have the scale (scale) constant, which represents the number of pixels per astronomical unit; Earth is one astronomical unit from the Sun, so if we did not introduce this scale factor, our inner solar system would look very claustrophobic, to say the least.

const scale = 70;
const radius = 4;
const trailLength = 35;

Let us now turn to the visual manifestations of the masses we are simulating. We have written a class that encapsulates their behavior, but how do we instantiate and work with these manifestations in our code? The most convenient and elegant way would be to populate every element of the masses array we are simulating with an instance of the Manifestation class, so let us write a simple method that iterates over these masses and does just that, which we then invoke.

const populateManifestations = masses => {
  masses.forEach(
    mass =>
    (mass["manifestation"] = new Manifestation(
      ctx,
      trailLength,
      radius
    ))
  );
};

populateManifestations(innerSolarSystem.masses);

Our simulator is meant to be a playful affair, so it is only to be expected that users will spawn masses left and right and that after a minute, or so, the inner solar system will look like an unrecognizable cosmic mess, which is why I think it would be decent of us to provide them with the ability to reset the simulation. To achieve this goal, we start by attaching an event listener to the reset button, and then we write a callback for this event listener that sets the value of the masses property of the innerSolarSystem object to a clone of the masses array. As we cloned the masses array, we no longer have the manifestations of our masses in it, so we call the populateManifestations method to make sure that our users have something to look at after having reset the simulation.

document.querySelector('#reset-button').addEventListener('click', () => {
  innerSolarSystem.masses = JSON.parse(JSON.stringify(masses));
  populateManifestations(innerSolarSystem.masses);       
}, false);

Okay, enough setting things up. Let us breathe some life into the inner solar system by writing a method that, with the help of the requestAnimationFrame API, will run 60 steps of our simulation a second and animate the results with motion trails and labels for the planets of the inner solar system and the Sun.

The first thing this method does is advance the inner solar system by one step and it does so by updating the position, acceleration and velocity vectors of its masses. Then we prepare the canvas element for the next animation cycle by clearing it of what was drawn in the preceding animation cycle using the Canvas API’s clearRect method.

Next, we iterate over the masses array and invoke the draw method of each mass manifestation. Moreover, if the mass being drawn has a name, we draw it onto the canvas, so that the user can see where the original planets are after things have gone haywire. Looking at the code in the loop, you will probably notice that we are not setting, for example, the value of the mass’s x coordinate on the canvas to massI times scale, and that we are in fact setting it to the width of the viewport divided by two plus massI times scale. Why is this? The answer is that the origin (x = 0, y = 0) of the canvas coordinate system is set to the top left corner of the canvas element, so to center our simulation on the canvas where it is clearly visible to the user, we must include this offset.

After the loop, at the end of the animate method, we call requestAnimationFrame with the animate method as the callback, and then the whole process discussed above is repeated again, creating yet another frame — and run in quick succession, these frames have brought the inner solar system to life. But wait, we have missed something! If you were to run the code I have walked you through thus far, you would not see anything at all. Fortunately, all we have to do to change this sad state of affairs is to proverbially give the inner solar system a kick in its rear end (no, I am not going to fall for the temptation of inserting a Uranus joke here; grow up!) by invoking the animate method!

const animate = () => {
  innerSolarSystem
    .updatePositionVectors()
    .updateAccelerationVectors()
    .updateVelocityVectors();

  ctx.clearRect(0, 0, width, height);

  const massesLen = innerSolarSystem.masses.length;

  for (let i = 0; i < massesLen; i++) {
    const massI = innerSolarSystem.masses[i];

    const x = width / 2 + massI.x * scale;
    const y = height / 2 + massI.y * scale;

    massI.manifestation.draw(x, y);

    if (massI.name) {
      ctx.font = "14px Arial";
      ctx.fillText(massI.name, x + 12, y + 4);
      ctx.fill();
    }
  }

  requestAnimationFrame(animate);
};

animate();
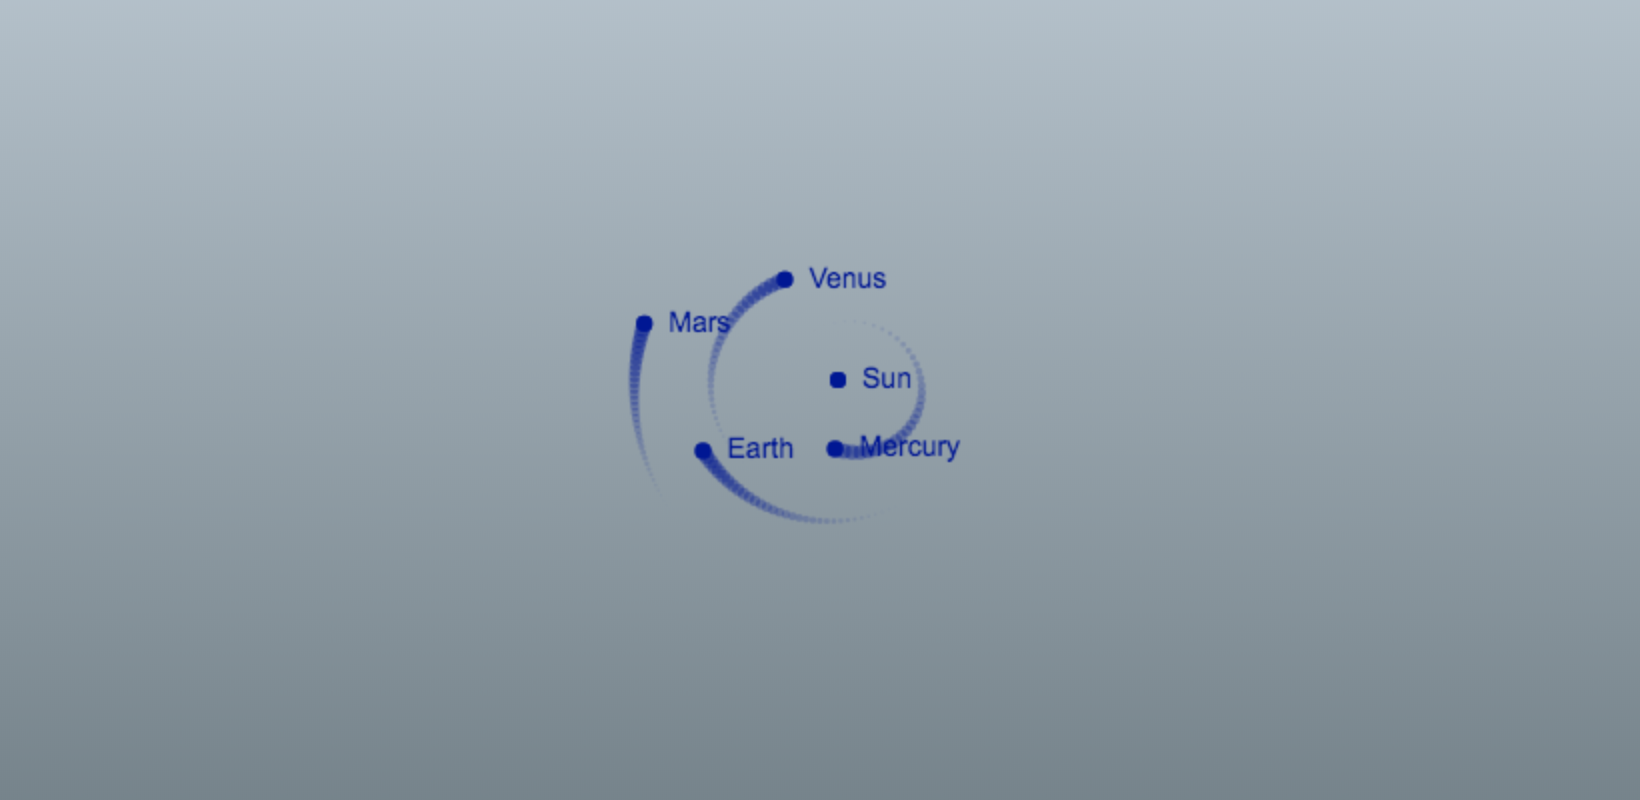
Our visualization of Mercury, Venus, Earth and Mars going about their day-to-day business of running circles around the sun. Looks pretty neat.

Woah! We have now gotten to the point where our simulation is animated, with the masses represented by dainty little blue circles stalked by marvelous looking motion trails. That is pretty cool in itself, if you were to ask me; but I did promise to also show how you can enable the user to add masses of their own to the simulation with a little bit of mouse drag action, so we are not done quite yet!

Part 4: Adding Masses with the Mouse

The idea here is that the user should be able to press down on the mouse button and draw a line by dragging it; the line will start where the user pressed down and end at the current position of the mouse cursor. When the user releases the mouse button, a new mass is spawned at the position of the screen where the user pressed down the mouse button, and the direction the mass will move is determined by the direction of the line; the length of the line determines the velocity vectors of the mass. So, how do we go about implementing this? Let us run through what we need to do, step by step. The code for steps one through six go above the animate method, while the code for step seven is a small addition to the animate method.

1. We need two variables that will store the x and y coordinates where the user pressed down the mouse button on the screen.

let mousePressX = 0;
let mousePressY = 0;

2. We need two variables that store the current x and y coordinates of the mouse cursor on the screen.

let currentMouseX = 0;
let currentMouseY = 0;

3. We need one variable that keeps track of whether the mouse is being dragged or not. The mouse is being dragged in the time that passes from when the user has pressed down the mouse button to the point where he releases it.

let dragging = false;

4. We need to attach a mousedown listener to the canvas element that logs the x and y coordinates of where the mouse was pressed down and sets the dragging variable to true.

canvas.addEventListener(
  "mousedown",
  e => {
    mousePressX = e.clientX;
    mousePressY = e.clientY;
    dragging = true;
  },
  false
);

5. We need to attach a mousemove listener to the canvas element that logs the current x and y coordinates of the mouse cursor.

canvas.addEventListener(
  "mousemove",
  e => {
    currentMouseX = e.clientX;
    currentMouseY = e.clientY;
  },
  false
);

6. We need to attach a mouseup listener to the canvas element that sets the drag variable to false, and pushes a new object representing a mass into the innerSolarSystem.masses array where the x and y position vectors are the point where the user pressed down the mouse button divided by value of the scale variable.

If we did not divide these vectors by the scale variable, the added masses would end up way out in the solar system, which is not what we want. The z position vector is set to zero and so is the z velocity vector. The x velocity vector is set to the x coordinate where the mouse was released subtracted by the x coordinate where the mouse was pressed down, and then you divide this number by 35. I will be honest and admit that 35 is a magical number that just happens to give you reasonable velocities when you add masses with the mouse to the inner solar system. Same procedure for the y velocity vector. The mass (m) of the mass we are adding is set by the user with a select element that we have populated with the masses of some famous celestial objects in the HTML markup. Last, but not least, we populate the object representing our mass with an instance of the Manifestation class so that the user can see it on the screen!

const massesList = document.querySelector("#masses-list");

canvas.addEventListener(
  "mouseup",
  e => {
    const x = (mousePressX - width / 2) / scale;
    const y = (mousePressY - height / 2) / scale;
    const z = 0;
    const vx = (e.clientX - mousePressX) / 35;
    const vy = (e.clientY - mousePressY) / 35;
    const vz = 0;

    innerSolarSystem.masses.push({
      m: parseFloat(massesList.value),
      x,
      y,
      z,
      vx,
      vy,
      vz,
      manifestation: new Manifestation(ctx, trailLength, radius)
    });

    dragging = false;
  },
  false
);

7. In the animate function, after the loop where we draw our manifestations and, before we call requestAnimationFrame, check if the mouse is being dragged. If that is the case, we’ll draw a line between the position where the mouse was pressed down and the mouse cursors current position.

const animate = () => {
  // Preceding code in the animate method down to and including the loop where we draw our mass manifestations

  if (dragging) {
    ctx.beginPath();
    ctx.moveTo(mousePressX, mousePressY);
    ctx.lineTo(currentMouseX, currentMouseY);
    ctx.strokeStyle = "red";
    ctx.stroke();
  }

  requestAnimationFrame(animate);
};
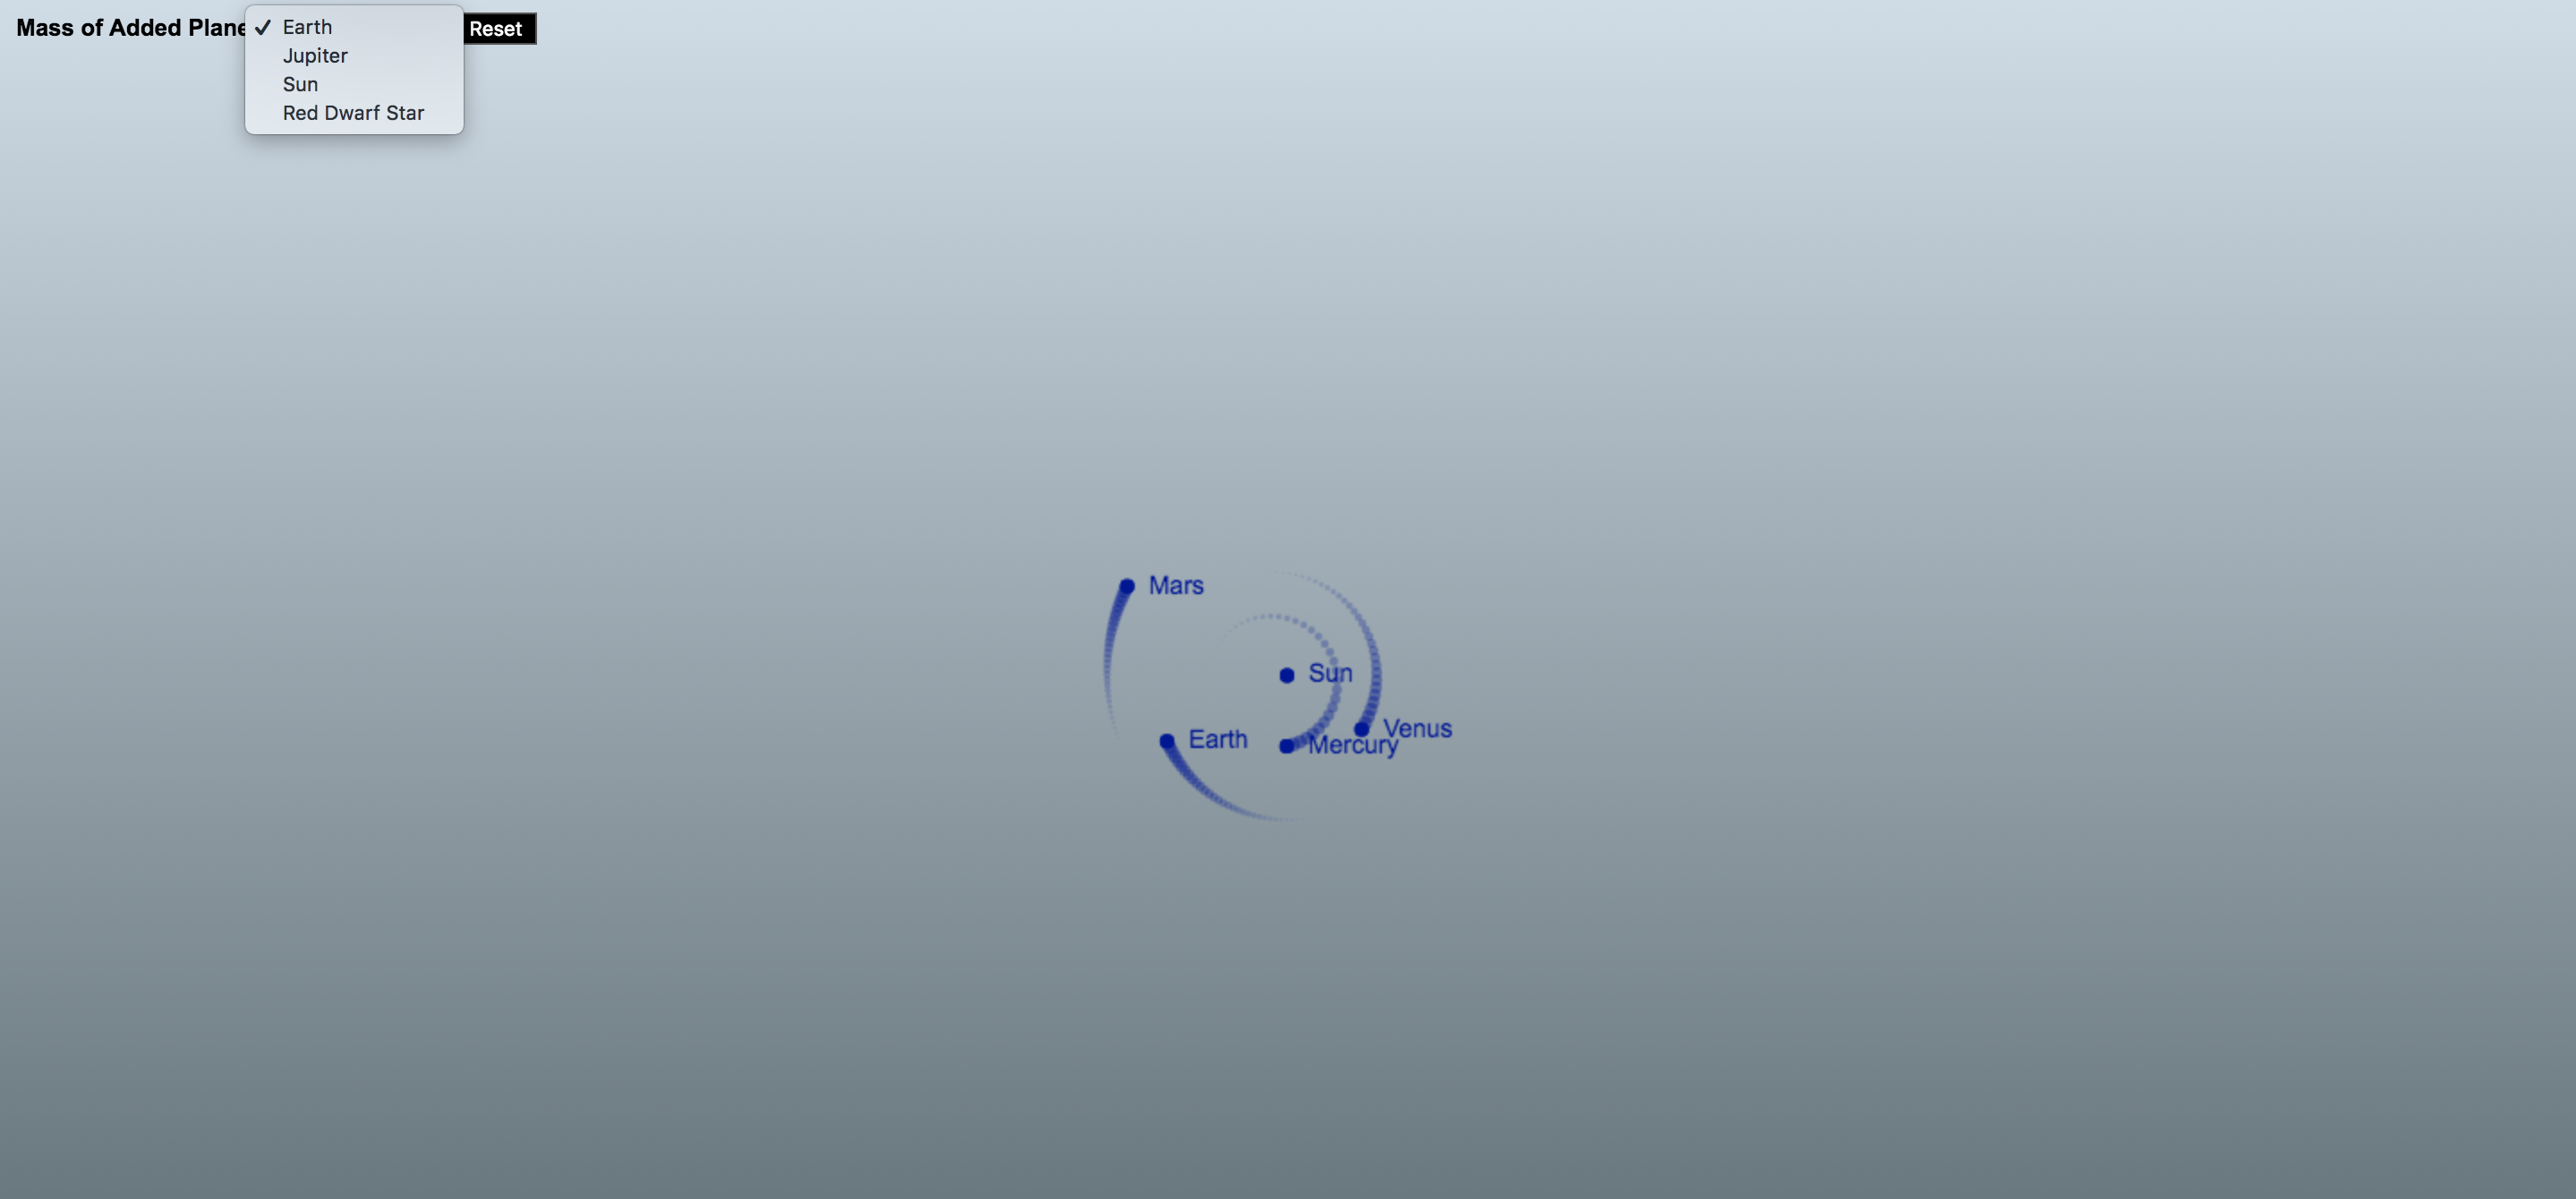
The inner solar system is about to get a lot more interesting — we can now add masses to our simulation!

Adding masses to our simulation with your mouse is not more difficult than that! Now, grab your mouse and unleash some mayhem on the inner solar system.

Part 5: Fencing off the Inner Solar System

As you will probably have noticed after adding some masses to the simulation, celestial objects are very shenanigan-prone in that they have a tendency to dance their way out of the viewport, especially if the added masses are very massive or they have too high of a velocity, which is kind of annoying. The natural solution to this problem is, of course, to fence off the inner solar system so that if a mass reaches the edge of the viewport, it will bounce back in! Sounds like quite a project, implementing this functionality, but fortunately doing so is a rather simple affair. At the end of the loop where we iterate over the masses and draw them in the animate method, we have insert two conditions: one that checks if our mass is outside the bounds of the viewport on the x-axis, and another that does the same check for the y axis. If the position of our mass is outside of the viewport on the x axis we reverse its x velocity vector so that it bounces back into the viewport, and the same logic applies if our mass is outside of the viewport on the y axis. With these two conditions, the animate method will look like so:

const animate = () => {
  // Advance the simulation by one step; clear the canvas

  for (let i = 0; i < massesLen; i++) {
  
    // Preceding loop code

    if (x < radius || x > width - radius) massI.vx = -massI.vx;

    if (y < radius || y > height - radius) massI.vy = -massI.vy;
  }

  requestAnimationFrame(animate);
};
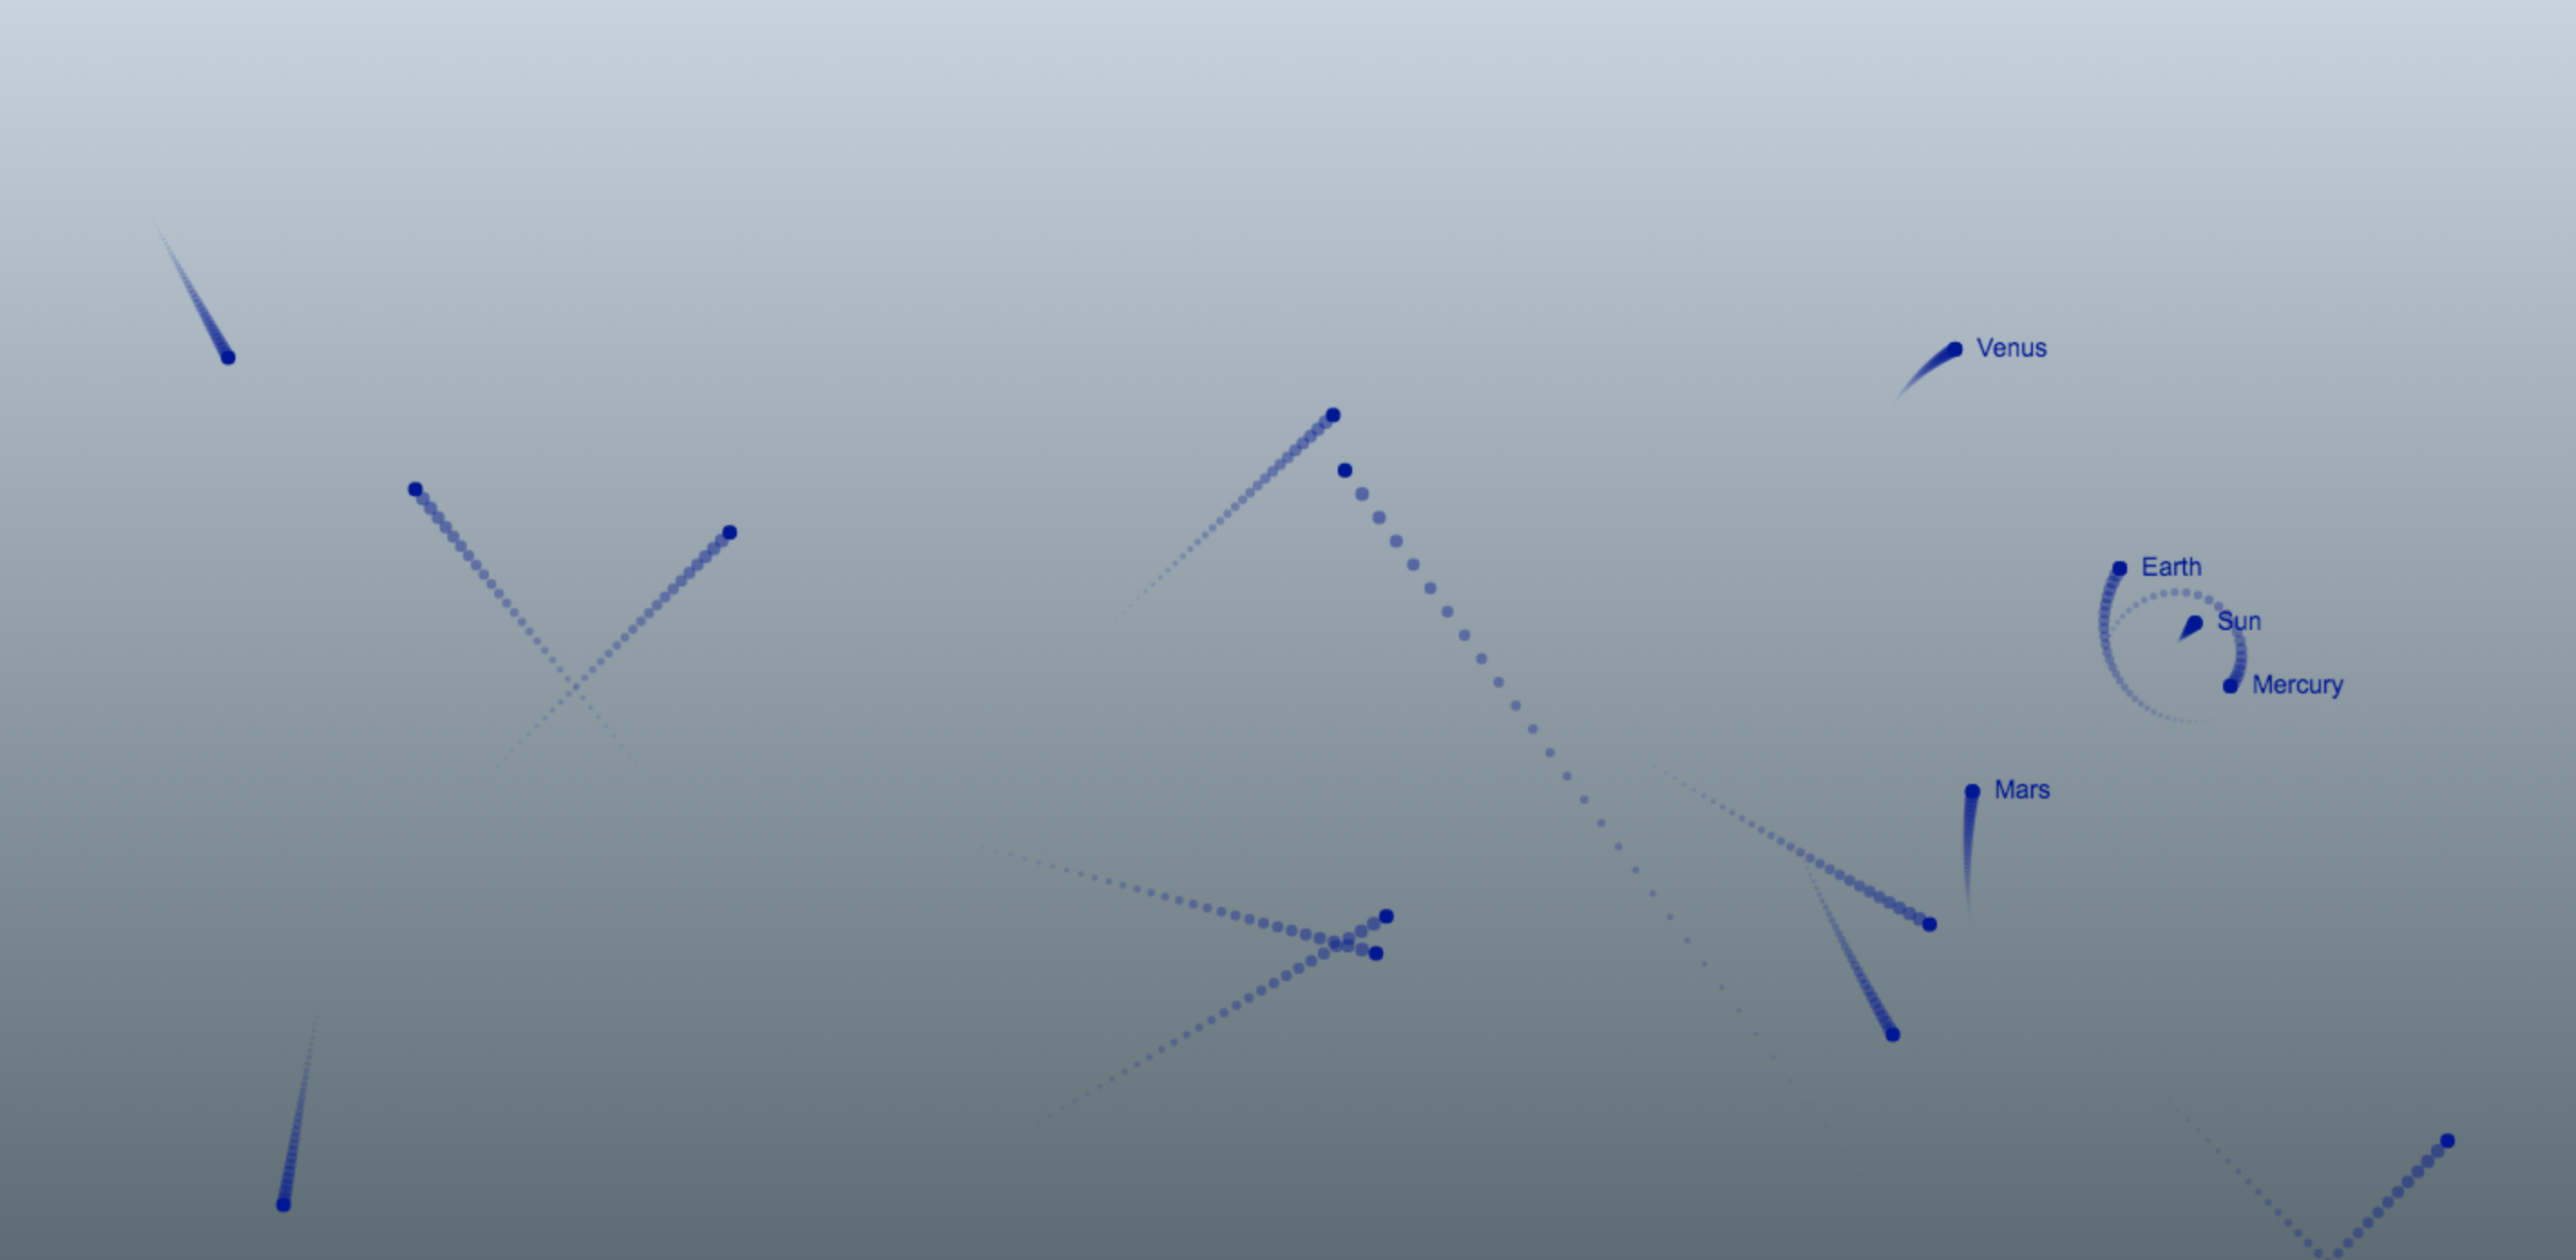
Absolute madness! Venus, you silly planet, what are you doing out there?! You are supposed to be orbiting the Sun!

Ping, pong! It is almost as though we are playing a game of cosmic billiards with all those masses bouncing off the fence that we have built for the inner solar system!

Concluding Remarks

People have a tendency to think of orbital mechanics — which is what we have played around with in this tutorial — as something that is beyond the understanding of mere mortals such as yours truly. Truth, though, is that orbital mechanics follows a very simple and elegant set of rules, as this tutorial is a testament to. With a little bit of JavaScript and high-school mathematics and physics, we have reconstructed the inner solar system to a reasonable degree of accuracy, and gone beyond that to make things a little bit more spicy and, therefore, more interesting. With this simulator, you can answer silly what-if questions along the lines of, „What would happen if I flung a star with the mass of the Sun into our inner solar system?” or develop a feeling for Kepler’s laws of planetary motion by, for example, observing the relationship between the distance of a mass from the Sun and its velocity.

I sure had fun writing this tutorial, and it is my sincere hope that you had as much fun reading it!

The post Creating Your Own Gravity and Space Simulator appeared first on CSS-Tricks.

Putting the Flexbox Albatross to Real Use

Post pobrano z: Putting the Flexbox Albatross to Real Use

If you hadn’t seen it, Heydon posted a rather clever flexbox layout pattern that, in a sense, mimics what you could do with a container query by forcing an element to stack at a certain container width. I was particularly interested, as I was fighting a little layout situation at the time I saw this and thought it could be a solution. Let’s take a peak.

„Ad Double” Units

I have these little advertising units on the design of this site. I can and do insert them into a variety of places on the site. Sometimes they are in a column like this:

Ad doubles appearing in a column of content

Sometimes I put them in a place that is more like a full-width environment:

Ad doubles going wide.

And sometimes they go in a multi-column layout that is created by a flexible CSS grid.

Ad doubles in a grid layout that changes column numbers at will.

So, really, they could be just about any width.

But there is a point at which I’d like the ads to stack. They don’t work side by side anymore when they get squished in a narrow column, so I’d like to have them go over/under instead of left/right.

I don’t care how wide the screen is, I care about the space these go in

I caught myself writing media queries to make these ads flop from side by side to stacked. I’d „fix” it in one place only to break it in another because that same media query doesn’t work in another context. I needed a damn container query!

This is the beauty of Heydon’s albatross technique. The point at which I want them to break is about 560px, so that’s what I set out to use.

The transition

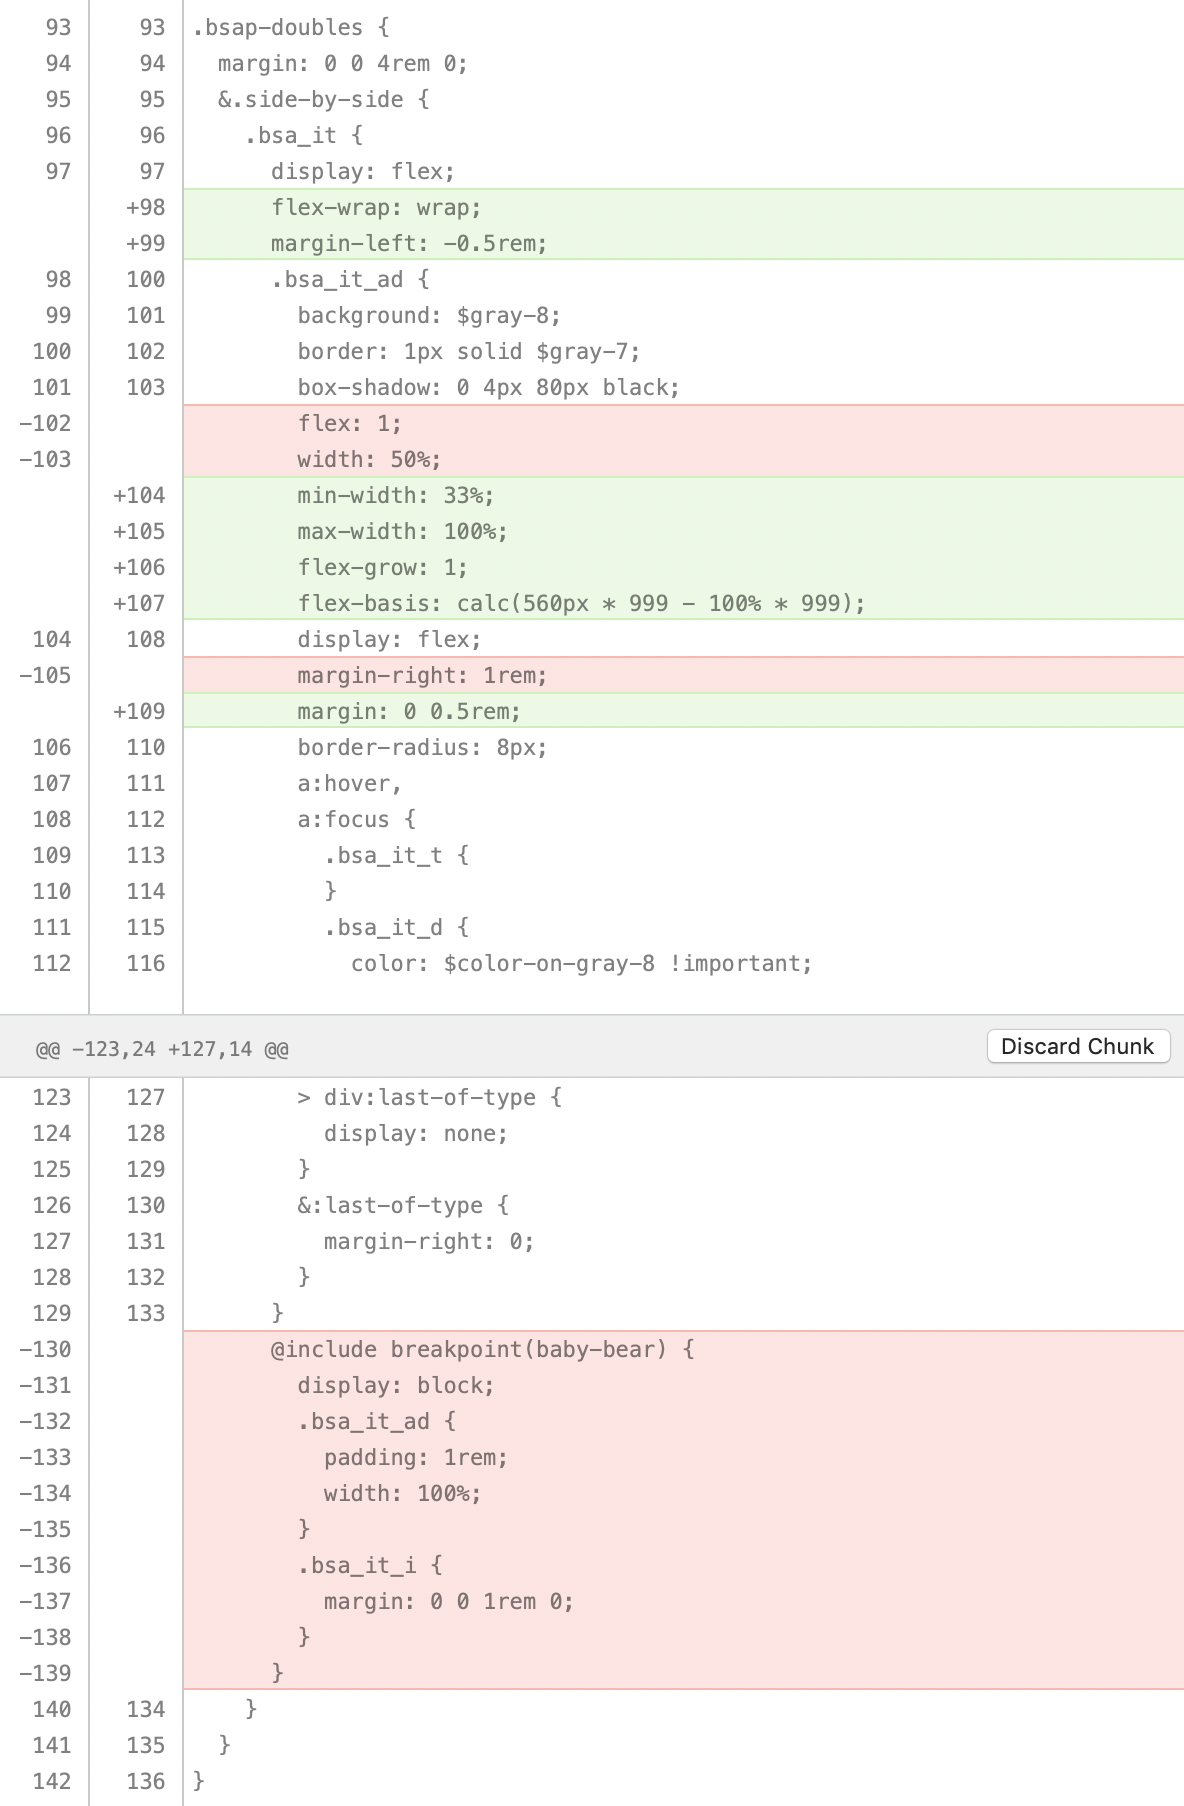
I was already using flexbox to lay out these Ad Doubles, so the only changes were to make it wrap them, put in the fancy 4-property albatross magic, and adjust the margin handling so that it doesn’t need a media query to reset itself.

This is the entire dif:

Screenshot of a GitHub commit showing the difference between the existing code and the new code using the albatross technique. Seven lines are highlighted in green, indication new code, and 13 lines are highlighted in red, indicating deleted code.

And it works great!

Peeking at it in Firefox DevTools

Victoria Wang recently wrote about designing the Firefox DevTools Flexbox Inspector. I had to pop open Firefox Developer Edition to check it out! It’s pretty cool!

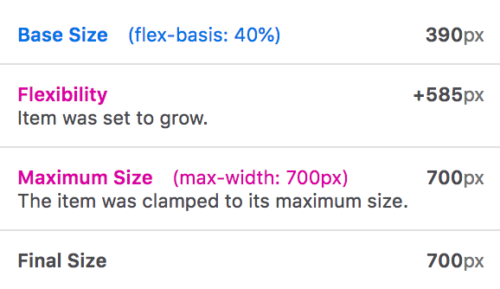
The coolest part, to me, is how it shows you the way an individual flex item arrives at the size it’s being rendered. As we well know, this can get a bit wacky, as lots of things can affect it like flex-basis, flex-grow, flex-shrink, max-width, min-width, etc.

Here’s what the albatross technique shows:

The post Putting the Flexbox Albatross to Real Use appeared first on CSS-Tricks.
STAR Apps: A New Generation of Front-End Tooling for Development Workflows

Post pobrano z: STAR Apps: A New Generation of Front-End Tooling for Development Workflows

Product teams from AirBnb and New York Times to Shopify and Artsy (among many others) are converging on a new set of best practices and technologies for building the web apps that their businesses depend on. This trend reflects core principles and solve underlying problems that we may share, so it is worth digging deeper.

Some of that includes:

Naming things is hard, and our industry has struggled to name this new generation of tooling for web apps. The inimitable Orta Theroux calls it an Omakase; I slimmed it down and opted for a simpler backronym pulled from letters in the tooling outlined above: STAR (Design Systems, TypeScript, Apollo, and React).

Czytaj dalej STAR Apps: A New Generation of Front-End Tooling for Development Workflows →

STAR Apps: A New Generation of Front-End Tooling for Development Workflows

Post pobrano z: STAR Apps: A New Generation of Front-End Tooling for Development Workflows

Product teams from AirBnb and New York Times to Shopify and Artsy (among many others) are converging on a new set of best practices and technologies for building the web apps that their businesses depend on. This trend reflects core principles and solve underlying problems that we may share, so it is worth digging deeper.

Some of that includes:

Naming things is hard, and our industry has struggled to name this new generation of tooling for web apps. The inimitable Orta Theroux calls it an Omakase; I slimmed it down and opted for a simpler backronym pulled from letters in the tooling outlined above: STAR (Design Systems, TypeScript, Apollo, and React).

Czytaj dalej STAR Apps: A New Generation of Front-End Tooling for Development Workflows →

Intro to React Hooks

Post pobrano z: Intro to React Hooks

Hooks make it possible to organize logic in components, making them tiny and reusable without writing a class. In a sense, they’re React’s way of leaning into functions because, before them, we’d have to write them in a component and, while components have proven to be powerful and functional in and of themselves, they have to render something on the front end. That’s all fine and dandy to some extent, but the result is a DOM that is littered with divs that make it gnarly to dig through through DevTools and debug.

Well, React Hooks change that. Instead of relying on the top-down flow of components or abstracting components in various ways, like higher-order components, we can call and manage flow inside of a component. Dan Abramov explains it well in his Making Sense of React post:

Hooks apply the React philosophy (explicit data flow and composition) inside a component, rather than just between the components. That’s why I feel that Hooks are a natural fit for the React component model.

Unlike patterns like render props or higher-order components, Hooks don’t introduce unnecessary nesting into your component tree. They also don’t suffer from the drawbacks of mixins.

The rest of Dan’s post provides a lot of useful context for why the React team is moving in this direction (they’re now available in React v16.7.0-alpha) and the various problems that hooks are designed to solve. The React docs have an introduction to hooks that, in turn, contains a section on what motivated the team to make them. We’re more concerned with how the heck to use them, so let’s move on to some examples!

The important thing to note as we get started is that there are nine hooks currently available, but we’re going to look at what the React docs call the three basic ones: useState(), useEffect, and setContext(). We’ll dig into each one in this post with a summary of the advanced hooks at the end.

Defining state with useState()

If you’ve worked with React at any level, then you’re probably familiar with how state is generally defined: write a class and use this.state to initialize a class:

class SomeComponent extends React.component {
  constructor(props)
  super(props);
  this.state = {
    name: Barney Stinson // Some property with the default state value    
  }
}

React hooks allow us to scrap all that class stuff and put the useState() hook to use instead. Something like this:

import { useState } from 'react';
    
function SomeComponent() {
  const [name, setName] = useState('Barney Stinson'); // Defines state variable (name) and call (setName) -- both of which can be named anything
}

Say what?! That’s it! Notice that we’re working outside of a class. Hooks don’t work inside of a class because they’re used in place of them. We’re using the hook directly in the component:

import { useState } from 'react';
    
function SomeComponent() {
  const [name, setName] = useState('Barney Stinson');
  
  return
    <div>
      <p>Howdy, {name}</p>
    </div>
}

Oh, you want to update the state of name? Let’s add an input and submit button to the output and call setName to update the default name on submission.

import { useState } from 'react'
    
function SomeComponent() {
  const [input, setValue] = useState("");
  const [name, setName] = useState('Barney Stinson');
  
  handleInput = (event) => {
    setValue(event.target.value);
  }
  
  updateName = (event) => {
    event.preventDefault();
    setName(input);
    setValue("");
  }
  
  return (
    <div>
      <p>Hello, {name}!</p>
      <div>
        <input type="text" value={input} onChange={handleInput} />
        <button onClick={updateName}>Save</button>
      </div>
    </div>
  )
}

See the Pen React Hook: setState Example by Geoff Graham (@geoffgraham) on CodePen.

Notice something else in this example? We’re constructing two different states (input and name). That’s because the useState() hook allows managing multiple states in the same component! In this case, input is the property and setValue holds the state of the input element, which is called by the handleInput function then triggers the updateName function that takes the input value and sets it as the new name state.

Create side effects with useEffect()

So, defining and setting states is all fine and dandy, but there’s another hook called useEffect() that can be used to—you guessed it—define and reuse effects directly in a component without the need for a class or the need to use both redundant code for each lifecycle of a method (i.e. componentDidMount, componentDidUpdate, and componentWillUnmount).

When we talk about effects, we’re referring to things like API calls, updates to the DOM, and event listeners, among other things. The React documentation cites examples like data fetching, setting up subscriptions, and changing the DOM as possible use cases for this hook. Perhaps the biggest differentiator from setState() is that useEffect() runs after render. Think of it like giving React an instruction to hold onto the function that passes and then make adjustments to the DOM after the render has happened plus any updates after that. Again, the React documentation spells it out nicely:

By default, it runs both after the first render and after every update. […] Instead of thinking in terms of “mounting” and “updating”, you might find it easier to think that effects happen “after render”. React guarantees the DOM has been updated by the time it runs the effects.

Right on, so how do we run these effects? Well, we start off by importing the hook the way we did for setState().

import { useEffect } from 'react';

In fact, we can call both setState() and useEffect() in the same import:

import { useState, useEffect } from 'react';

Or, construct them:

const { useState, useEffect } = React;

So, let’s deviate from our previous name example by hooking into an external API that contains user data using axios inside the useEffect() hook then renders that data into a list of of users.

First, let’s bring in our hooks and initialize the App.

const { useState, useEffect } = React

const App = () => {
  // Hooks and render UI
}

Now, let’s put setState() to define users as a variable that contains a state of setUsers that we’ll pass the user data to once it has been fetched so that it’s ready for render.

const { useState, useEffect } = React

const App = () => {
  const [users, setUsers] = useState([]);
  // Our effects come next
}

Here’s where useEffect() comes into play. We’re going to use it to connect to an API and fetch data from it, then map that data to variables we can call on render.

const { useState, useEffect } = React

const App = () => {
  const [users, setUsers] = useState([]);
  
  useEffect(() => {
    // Connect to the Random User API using axios
    axios("https://randomuser.me/api/?results=10")
      // Once we get a response, fetch name, username, email and image data
      // and map them to defined variables we can use later.
      .then(response =>
        response.data.results.map(user => ({
          name: `{user.name.first} ${user.name.last}`,
          username: `{user.login.username}`,
          email: `{user.email}`,
          image: `{user.picture.thumbnail}`
        }))
      )
      // Finally, update the `setUsers` state with the fetched data
      // so it stores it for use on render
      .then(data => {
        setUsers(data);
      });
  }, []);
  
  // The UI to render
}

OK, now let’s render our component!

const { useState, useEffect } = React

const App = () => {
  const [users, setUsers] = useState([]);

  useEffect(() => {
    axios("https://randomuser.me/api/?results=10")
      .then(response =>
        response.data.results.map(user => ({
          name: `{user.name.first} ${user.name.last}`,
          username: `{user.login.username}`,
          email: `{user.email}`,
          image: `{user.picture.thumbnail}`
        }))
      )
      .then(data => {
        setUsers(data);
      });
  }, []);
  
  return (
    <div className="users">
      {users.map(user => (
        <div key={user.username} className="users__user">
          <img src={user.image} className="users__avatar" />
          <div className="users__meta">
            <h1>{user.name}</h1>
            <p>{user.email}</p>
          </div>
        </div>
      ))}
    </div>
  )
}

Here’s what that gets us:

See the Pen React Hook: setEffect example by Geoff Graham (@geoffgraham) on CodePen.

It’s worth noting that useEffect() is capable of so, so, so much more, like chaining effects and triggering them on condition. Plus, there are cases where we need to cleanup after an effect has run—like subscribing to an external resource—to prevent memory leaks. Totally worth running through the detailed explanation of effects with cleanup in the React documentation.

Context and useContext()

Context in React makes it possible to pass props down from a parent component to a child component. This saves you from the hassle of prop drilling. However, you could only make use of context in class components, but now you can make use of context in functional components using useContext() . Let’s create a counter example, we will pass the state and functions which will be used to increase or decrease the count from the parent component to child component using useContext(). First, let’s create our context:

const CountContext = React.createContext();

We’ll declare the count state and increase/decrease methods of our counter in our App component and set up the wrapper that will hold the component. We’ll put the context hook to use in the actual counter component in just a bit.

const App = () => {
  // Use `setState()` to define a count variable and its state
  const [count, setCount] = useState(0);
  
  // Construct a method that increases the current `setCount` variable state by 1 with each click
  const increase = () => {
    setCount(count + 1);
  };
  
  // Construct a method that decreases the current `setCount` variable state by 1 with each click.
  const decrease = () => {
    setCount(count - 1);
  };

  // Create a wrapper for the counter component that contains the provider that will supply the context value.
  return (
    <div>
      <CountContext.Provider
        // The value is takes the count value and updates when either the increase or decrease methods are triggered.
        value={{ count, increase, decrease }}
      >
        // Call the Counter component we will create next
        <Counter />
      </CountContext.Provider>
    </div>
  );
};

Alright, onto the Counter component! useContext() accepts an object (we’re passing in the CountContext provider) and allows us to tell React exactly what value we want (`count) and what methods trigger updated values (increase and decrease). Then, of course, we’ll round things out by rendering the component, which is called by the App.

const Counter = () => {
  const { count, increase, decrease } = useContext(CountContext);
  return (
    <div className="counter">
      <button onClick={decrease}>-</button>
      <span className="count">{count}</span>
      <button onClick={increase}>+</button>
    </div>
  );
};

And voilà! Behold our mighty counter with the count powered by context objects and values.

See the Pen React hooks – useContext by Kingsley Silas Chijioke (@kinsomicrote) on CodePen.

Wrapping up

We’ve merely scratched the surface of what React hooks are capable of doing, but hopefully this gives you a solid foundation. For example, there are even more advanced hooks that are available in addition to the basic ones we covered in this post. Here’s a list of those hooks with the descriptions offered by the documentation so you can level up now that you’re equipped with the basics:

Hook Description
userReducer() An alternative to useState. Accepts a reducer of type (state, action) => newState, and returns the current state paired with a dispatch method.
useCallback() Returns a memoized callback. Pass an inline callback and an array of inputs. useCallback will return a memoized version of the callback that only changes if one of the inputs has changed.
useMemo() Returns a memoized value. Pass a “create” function and an array of inputs. useMemo will only recompute the memoized value when one of the inputs has changed.
useRef() useRef returns a mutable ref object whose .current property is initialized to the passed argument (initialValue). The returned object will persist for the full lifetime of the component.
useImperativeMethods useImperativeMethods customizes the instance value that is exposed to parent components when using ref. As always, imperative code using refs should be avoided in most cases. useImperativeMethods should be used with forwardRef.
useLayoutEffect The signature is identical to useEffect, but it fires synchronously after all DOM mutations. Use this to read layout from the DOM and synchronously re-render. Updates scheduled inside useLayoutEffect will be flushed synchronously, before the browser has a chance to paint.

The post Intro to React Hooks appeared first on CSS-Tricks.
Does it mutate?

Post pobrano z: Does it mutate?

This little site by Remy Sharp’s makes it clear whether or not a JavaScript method changes the original array (aka mutates) or not.

I was actually bitten by this the other day. I needed the last element from an array, so I remembered .pop() and used it.

const arr = ["doe", "ray", "mee"];
const last = arr.pop();
// mee, but array is now ["doe", "ray"]

This certainly worked great right away, but I didn’t realize the original array had changed and it caused a problem. Instead, I had to find the non-mutating alternative:

const arr = ["doe", "ray", "mee"];
const last = arr.slice(-1);
// ["mee"], arr is unchanged

Related: Array Explorer

Direct Link to Article — Permalink

The post Does it mutate? appeared first on CSS-Tricks.
Angular, Autoprefixer, IE11, and CSS Grid Walk into a Bar…

Post pobrano z: Angular, Autoprefixer, IE11, and CSS Grid Walk into a Bar…

I am attracted to the idea that you shouldn’t care how the code you author ends up in the browser. It’s already minified. It’s already gzipped. It’s already transmogrified (real word!) by things that polyfill it, things that convert it into code that older browsers understand, things that make it run faster, things that strip away unused bits, and things that break it into chunks by technology far above my head.

The trend is that the code we author is farther and farther away from the code we write, and like I said, I’m attracted to that idea because generally, the purpose of that is to make websites faster for users.

But as Dave notes, when something goes wrong…

As toolchains grow and become more complex, unless you are expertly familiar with them, it’s very unclear what transformations are happening in our code. Tracking the differences between the input and output and the processes that code underwent can be overwhelming. When there’s a problem, it’s increasingly difficult to hop into the assembly line and diagnose the issue and often there’s not an precise fix.

Direct Link to Article — Permalink

The post Angular, Autoprefixer, IE11, and CSS Grid Walk into a Bar… appeared first on CSS-Tricks.
Converting Color Spaces in JavaScript

Post pobrano z: Converting Color Spaces in JavaScript

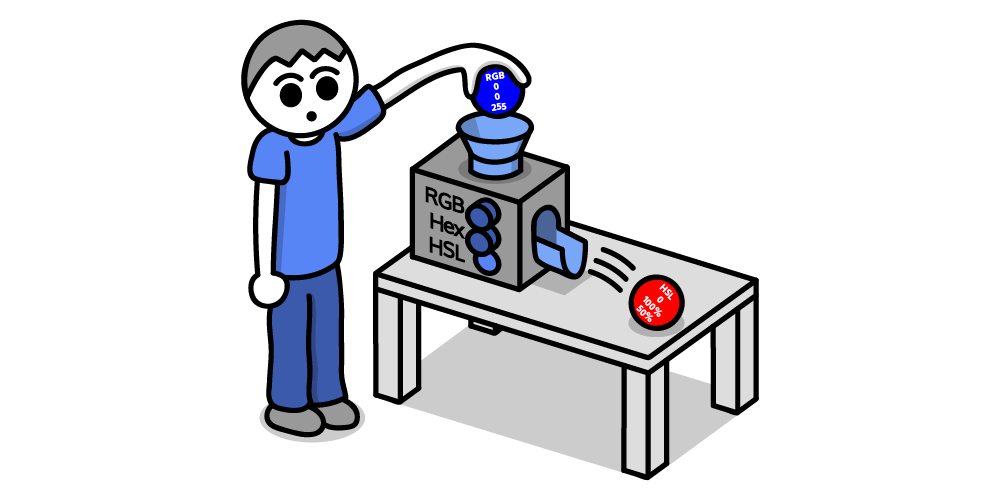
A challenge I faced in building an image „emojifier” was that I needed to change the color spaces of values obtained using getImageData() from RGB to HSL. I used arrays of emojis arranged by brightness and saturation, and they were HSL-based for the best matches of average pixel colors with the emojis.

In this article, we’ll study functions that will be useful for converting both opaque and alpha-enabled color values. Modern browsers currently support the color spaces RGB(A), hex, and HSL(A). The functions and notations for these are rgb(), rgba(), #rgb/#rrggbb, #rgba/#rrggbbaa, hsl(), and hsla(). Browsers have always supported built-in names like aliceblue as well.

Balls with color values being inserted into a machine and coming out as HSL

Along the way, we’ll encounter use of some color syntaxes provided by a new Level 4 of the CSS Colors Module. For example, we now have hex with alpha as we mentioned (#rgba/#rrggbbaa) and RGB and HSL syntaxes no longer require commas (values like rgb(255 0 0) and hsl(240 100% 50%) became legal!).

Browser support for CSS Colors Level 4 isn’t universal as of this writing, so don’t expect new color syntaxes to work in Microsoft browsers or Safari if trying them in CSS.

RGB to Hex

Converting RGB to hex is merely a change of radices. We convert the red, green, and blue values from decimal to hexadecimal using toString(16). After prepending 0s to single digits and under, we can concatenate them and # to a single return statement.

function RGBToHex(r,g,b) {
  r = r.toString(16);
  g = g.toString(16);
  b = b.toString(16);

  if (r.length == 1)
    r = "0" + r;
  if (g.length == 1)
    g = "0" + g;
  if (b.length == 1)
    b = "0" + b;

  return "#" + r + g + b;
}

RGB in String

Alternatively, we can use a single string argument with the red, green and blue separated by commas or spaces (e.g. "rgb(255,25,2)", "rgb(255 25 2)"). Substring to eliminate rgb(, split what’s left by the ), then split that result’s first item by whichever the separator (sep) is. r, g, and b shall become local variables now. Then we use + before the split strings to convert them back to numbers before obtaining the hex values.

function RGBToHex(rgb) {
  // Choose correct separator
  let sep = rgb.indexOf(",") > -1 ? "," : " ";
  // Turn "rgb(r,g,b)" into [r,g,b]
  rgb = rgb.substr(4).split(")")[0].split(sep);

  let r = (+rgb[0]).toString(16),
      g = (+rgb[1]).toString(16),
      b = (+rgb[2]).toString(16);

  if (r.length == 1)
    r = "0" + r;
  if (g.length == 1)
    g = "0" + g;
  if (b.length == 1)
    b = "0" + b;

  return "#" + r + g + b;
}

In addition, we can allow strings with channel values as percentages by adding the loop after redefining rgb. It’ll strip the %s and turn what’s left into values out of 255.

function RGBToHex(rgb) {
  let sep = rgb.indexOf(",") > -1 ? "," : " ";
  rgb = rgb.substr(4).split(")")[0].split(sep);

  // Convert %s to 0–255
  for (let R in rgb) {
    let r = rgb[R];
    if (r.indexOf("%") > -1)
      rgb[R] = Math.round(r.substr(0,r.length - 1) / 100 * 255);
      /* Example:
      75% -> 191
      75/100 = 0.75, * 255 = 191.25 -> 191
      */
  }

  ...
}

Now we can supply values like either of these:

  • rgb(255,25,2)
  • rgb(255 25 2)
  • rgb(50%,30%,10%)
  • rgb(50% 30% 10%)

RGBA to Hex (#rrggbbaa)

Converting RGBA to hex with the #rgba or #rrggbbaa notation follows virtually the same process as the opaque counterpart. Since the alpha (a) is normally a value between 0 and 1, we need to multiply it by 255, round the result, then convert it to hexadecimal.

function RGBAToHexA(r,g,b,a) {
  r = r.toString(16);
  g = g.toString(16);
  b = b.toString(16);
  a = Math.round(a * 255).toString(16);

  if (r.length == 1)
    r = "0" + r;
  if (g.length == 1)
    g = "0" + g;
  if (b.length == 1)
    b = "0" + b;
  if (a.length == 1)
    a = "0" + a;

  return "#" + r + g + b + a;
}

To do this with one string (including with percentages), we can follow what we did earlier. Also note the extra step of splicing out a slash. Since CSS Colors Level 4 supports the syntax of rgba(r g b / a), this is where we allow it. Alpha values can now be percentages! This removes the 0-1-only shackles we used to have. Therefore, the for loop cycling through rgba shall include a part to wipe the % from the alpha without multiplying by 255 (when R is 3 for alpha). Soon we can use values like rgba(255 128 0 / 0.8) and rgba(100% 21% 100% / 30%)!

function RGBAToHexA(rgba) {
  let sep = rgba.indexOf(",") > -1 ? "," : " ";
  rgba = rgba.substr(5).split(")")[0].split(sep);
                
  // Strip the slash if using space-separated syntax
  if (rgba.indexOf("/") > -1)
    rgba.splice(3,1);

  for (let R in rgba) {
    let r = rgba[R];
    if (r.indexOf("%") > -1) {
      let p = r.substr(0,r.length - 1) / 100;

      if (R < 3) {
        rgba[R] = Math.round(p * 255);
      } else {
        rgba[R] = p;
      }
    }
  }
}

Then, where the channels are converted to hex, we adjust a to use an item of rgba[].

function RGBAToHexA(rgba) {
  ...
    
  let r = (+rgba[0]).toString(16),
      g = (+rgba[1]).toString(16),
      b = (+rgba[2]).toString(16),
      a = Math.round(+rgba[3] * 255).toString(16);

  if (r.length == 1)
    r = "0" + r;
  if (g.length == 1)
    g = "0" + g;
  if (b.length == 1)
    b = "0" + b;
  if (a.length == 1)
    a = "0" + a;

  return "#" + r + g + b + a;
}

Now the function supports the following:

  • rgba(255,25,2,0.5)
  • rgba(255 25 2 / 0.5)
  • rgba(50%,30%,10%,0.5)
  • rgba(50%,30%,10%,50%)
  • rgba(50% 30% 10% / 0.5)
  • rgba(50% 30% 10% / 50%)

Hex to RGB

We know that the length of hex values must either be 3 or 6 (plus #). In either case, we begin each red (r), green (g), and blue (b) value with "0x" to convert them to hex. If we provide a 3-digit value, we concatenate the same value twice for each channel. If it’s a 6-digit value, we concatenate the first two for red, next two for green, and last two for blue. To get the values for the final rgb() string, we prepend the variables with + to convert them from strings back to numbers, which will yield the decimals we need.

function hexToRGB(h) {
  let r = 0, g = 0, b = 0;

  // 3 digits
  if (h.length == 4) {
    r = "0x" + h[1] + h[1];
    g = "0x" + h[2] + h[2];
    b = "0x" + h[3] + h[3];

  // 6 digits
  } else if (h.length == 7) {
    r = "0x" + h[1] + h[2];
    g = "0x" + h[3] + h[4];
    b = "0x" + h[5] + h[6];
  }
  
  return "rgb("+ +r + "," + +g + "," + +b + ")";
}

Output RGB with %s

If we want to return rgb() using percentages, then we can modify the function to utilize an optional isPct parameter like so:

function hexToRGB(h,isPct) {
  let r = 0, g = 0, b = 0;
  isPct = isPct === true;

  if (h.length == 4) {
    r = "0x" + h[1] + h[1];
    g = "0x" + h[2] + h[2];
    b = "0x" + h[3] + h[3];
    
  } else if (h.length == 7) {
    r = "0x" + h[1] + h[2];
    g = "0x" + h[3] + h[4];
    b = "0x" + h[5] + h[6];
  }
    
  if (isPct) {
    r = +(r / 255 * 100).toFixed(1);
    g = +(g / 255 * 100).toFixed(1);
    b = +(b / 255 * 100).toFixed(1);
  }
  
  return "rgb(" + (isPct ? r + "%," + g + "%," + b + "%" : +r + "," + +g + "," + +b) + ")";
}

Under the last if statement, using +s will convert r, g, and b to numbers. Each toFixed(1) along with them will round the result to the nearest tenth. Additionally, we won’t have whole numbers with .0 or the decades old quirk that produces numbers like 0.30000000000000004. Therefore, in the return, we omitted the +s right before the first r, g, and b to prevent NaNs caused by the %s. Now we can use hexToRGB("#ff0",true) to get rgb(100%,100%,0%)!

Hex (#rrggbbaa) to RGBA

The procedure for hex values with alpha should again be similar with the last. We simply detect a 4- or 8-digit value (plus #) then convert the alpha and divide it by 255. To get more precise output but not long decimal numbers for alpha, we can use toFixed(3).

function hexAToRGBA(h) {
  let r = 0, g = 0, b = 0, a = 1;

  if (h.length == 5) {
    r = "0x" + h[1] + h[1];
    g = "0x" + h[2] + h[2];
    b = "0x" + h[3] + h[3];
    a = "0x" + h[4] + h[4];

  } else if (h.length == 9) {
    r = "0x" + h[1] + h[2];
    g = "0x" + h[3] + h[4];
    b = "0x" + h[5] + h[6];
    a = "0x" + h[7] + h[8];
  }
  a = +(a / 255).toFixed(3);

  return "rgba(" + +r + "," + +g + "," + +b + "," + a + ")";
}

Output RGBA with %s

For a version that outputs percentages, we can do what we did in hexToRGB()—switch r, g, and b to 0–100% when isPct is true.

function hexAToRGBA(h,isPct) {
  let r = 0, g = 0, b = 0, a = 1;
  isPct = isPct === true;
    
  // Handling of digits
  ...

  if (isPct) {
    r = +(r / 255 * 100).toFixed(1);
    g = +(g / 255 * 100).toFixed(1);
    b = +(b / 255 * 100).toFixed(1);
  }
  a = +(a / 255).toFixed(3);

  return "rgba(" + (isPct ? r + "%," + g + "%," + b + "%," + a : +r + "," + +g + "," + +b + "," + a) + ")";
}

Here’s a quick fix if the alpha ought to be a percentage, too: move the statement where a is redefined above the last if statement. Then in that statement, modify a to be like r, g, and b. When isPct is true, a must also gain the %.

function hexAToRGBA(h,isPct) {
  ...
    
  a = +(a / 255).toFixed(3);
  if (isPct) {
    r = +(r / 255 * 100).toFixed(1);
    g = +(g / 255 * 100).toFixed(1);
    b = +(b / 255 * 100).toFixed(1);
    a = +(a * 100).toFixed(1);
  }

  return "rgba(" + (isPct ? r + "%," + g + "%," + b + "%," + a + "%" : +r + "," + +g + "," + +b + "," + a) + ")";
}

When we enter #7f7fff80 now, we should get rgba(127,127,255,0.502) or rgba(49.8%,49.8%,100%,50.2%).

RGB to HSL

Obtaining HSL values from RGB or hex is a bit more challenging because there’s a larger formula involved. First, we must divide the red, green, and blue by 255 to use values between 0 and 1. Then we find the minimum and maximum of those values (cmin and cmax) as well as the difference between them (delta). We need that result as part of calculating the hue and saturation. Right after the delta, let’s initialize the hue (h), saturation (s), and lightness (l).

function RGBToHSL(r,g,b) {
  // Make r, g, and b fractions of 1
  r /= 255;
  g /= 255;
  b /= 255;

  // Find greatest and smallest channel values
  let cmin = Math.min(r,g,b),
      cmax = Math.max(r,g,b),
      delta = cmax - cmin,
      h = 0,
      s = 0,
      l = 0;
}

Next, we need to calculate the hue, which is to be determined by the greatest channel value in cmax (or if all channels are the same). If there is no difference between the channels, the hue will be 0. If cmax is the red, then the formula will be ((g - b) / delta) % 6. If green, then (b - r) / delta + 2. Then, if blue, (r - g) / delta + 4. Finally, multiply the result by 60 (to get the degree value) and round it. Since hues shouldn’t be negative, we add 360 to it, if needed.

function RGBToHSL(r,g,b) {
  ...
  // Calculate hue
  // No difference
  if (delta == 0)
    h = 0;
  // Red is max
  else if (cmax == r)
    h = ((g - b) / delta) % 6;
  // Green is max
  else if (cmax == g)
    h = (b - r) / delta + 2;
  // Blue is max
  else
    h = (r - g) / delta + 4;

  h = Math.round(h * 60);
    
  // Make negative hues positive behind 360°
  if (h < 0)
      h += 360;
}

All that’s left is the saturation and lightness. Let’s calculate the lightness before we do the saturation, as the saturation will depend on it. It’s the sum of the maximum and minimum channel values cut in half ((cmax + cmin) / 2). Then delta will determine what the saturation will be. If it’s 0 (no difference between cmax and cmin), then the saturation is automatically 0. Otherwise, it’ll be 1 minus the absolute value of twice the lightness minus 1 (1 - Math.abs(2 * l - 1)). Once we have these values, we must convert them to values out of 100%, so we multiply them by 100 and round to the nearest tenth. Now we can string together our hsl().

function RGBToHSL(r,g,b) {
  ...
  // Calculate lightness
  l = (cmax + cmin) / 2;

  // Calculate saturation
  s = delta == 0 ? 0 : delta / (1 - Math.abs(2 * l - 1));
    
  // Multiply l and s by 100
  s = +(s * 100).toFixed(1);
  l = +(l * 100).toFixed(1);

  return "hsl(" + h + "," + s + "%," + l + "%)";
}

RGB in String

For one string, split the argument by comma or space, strip the %s, and localize r, g, and b like we did before.

function RGBToHSL(rgb) {
  let sep = rgb.indexOf(",") > -1 ? "," : " ";
  rgb = rgb.substr(4).split(")")[0].split(sep);

  for (let R in rgb) {
    let r = rgb[R];
    if (r.indexOf("%") > -1)
      rgb[R] = Math.round(r.substr(0,r.length - 1) / 100 * 255);
  }

  // Make r, g, and b fractions of 1
  let r = rgb[0] / 255,
      g = rgb[1] / 255,
      b = rgb[2] / 255;

  ...
}

RGBA to HSLA

Compared to what we just did to convert RGB to HSL, the alpha counterpart will be basically nothing! We just reuse the code for RGB to HSL (the multi-argument version), leave a alone, and pass a to the returned HSLA. Keep in mind it should be between 0 and 1.

function RGBAToHSLA(r,g,b,a) {
  // Code for RGBToHSL(r,g,b) before return
  ...

  return "hsla(" + h + "," + s + "%," +l + "%," + a + ")";
}

RGBA in String

For string values, we apply the splitting and stripping logic again but use the fourth item in rgba for a. Remember the new rgba(r g b / a) syntax? We’re employing the acceptance of it as we did for RGBAToHexA(). Then the rest of the code is the normal RGB-to-HSL conversion.

function RGBAToHSLA(rgba) {
  let sep = rgba.indexOf(",") > -1 ? "," : " ";
  rgba = rgba.substr(5).split(")")[0].split(sep);

  // Strip the slash if using space-separated syntax
  if (rgba.indexOf("/") > -1)
    rgba.splice(3,1);

  for (let R in rgba) {
    let r = rgba[R];
    if (r.indexOf("%") > -1) {
      let p = r.substr(0,r.length - 1) / 100;

      if (R < 3) {
        rgba[R] = Math.round(p * 255);
      } else {
        rgba[R] = p;
      }
    }
  }

  // Make r, g, and b fractions of 1
  let r = rgba[0] / 255,
      g = rgba[1] / 255,
      b = rgba[2] / 255,
      a = rgba[3];

  // Rest of RGB-to-HSL logic
  ...
}

Wish to leave the alpha as is? Remove the else statement from the for loop.

for (let R in rgba) {
  let r = rgba[R];
  if (r.indexOf("%") > -1) {
    let p = r.substr(0,r.length - 1) / 100;

    if (R < 3) {
      rgba[R] = Math.round(p * 255);
    }
  }
}

HSL to RGB

It takes slightly less logic to convert HSL back to RGB than the opposite way. Since we’ll use a range of 0–100 for the saturation and lightness, the first step is to divide them by 100 to values between 0 and 1. Next, we find chroma (c), which is color intensity, so that’s (1 - Math.abs(2 * l - 1)) * s. Then we use x for the second largest component (first being chroma), the amount to add to each channel to match the lightness (m), and initialize r, g, b.

function HSLToRGB(h,s,l) {
  // Must be fractions of 1
  s /= 100;
  l /= 100;

  let c = (1 - Math.abs(2 * l - 1)) * s,
      x = c * (1 - Math.abs((h / 60) % 2 - 1)),
      m = l - c/2,
      r = 0,
      g = 0,
      b = 0;
}

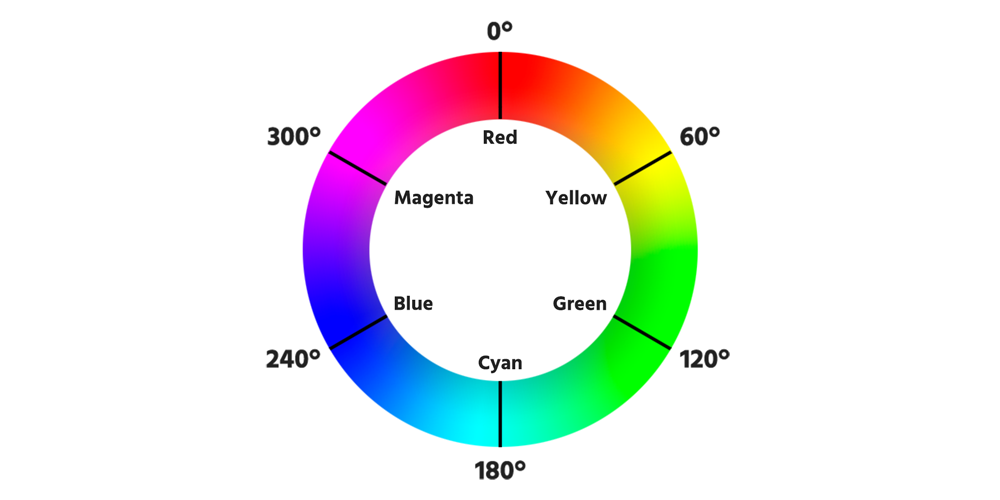
The hue will determine what the red, green, and blue should be depending on which 60° sector of the color wheel it lies.

Color wheel
The color wheel divided into 60° segments

Then c and x shall be assigned as shown below, leaving one channel at 0. To get the final RGB value, we add m to each channel, multiply it by 255, and round it.

function HSLToRGB(h,s,l) {
  ...

  if (0 <= h && h < 60) {
    r = c; g = x; b = 0;
  } else if (60 <= h && h < 120) {
    r = x; g = c; b = 0;
  } else if (120 <= h && h < 180) {
    r = 0; g = c; b = x;
  } else if (180 <= h && h < 240) {
    r = 0; g = x; b = c;
  } else if (240 <= h && h < 300) {
    r = x; g = 0; b = c;
  } else if (300 <= h && h < 360) {
    r = c; g = 0; b = x;
  }
  r = Math.round((r + m) * 255);
  g = Math.round((g + m) * 255);
  b = Math.round((b + m) * 255);

  return "rgb(" + r + "," + g + "," + b + ")";
}

HSL in String

For the single string version, we modify the first few statements basically the same way we did for RGBToHSL(r,g,b). Remove s /= 100; and l /= 100; and we’ll use the new statements to wipe the first 4 characters and the ) for our array of HSL values, then the %s from s and l before dividing them by 100.

function HSLToRGB(hsl) {
  let sep = hsl.indexOf(",") > -1 ? "," : " ";
  hsl = hsl.substr(4).split(")")[0].split(sep);

  let h = hsl[0],
      s = hsl[1].substr(0,hsl[1].length - 1) / 100,
      l = hsl[2].substr(0,hsl[2].length - 1) / 100;

  ...
}

The next handful of statements shall handle hues provided with a unit—degrees, radians, or turns. We multiply radians by 180/π and turns by 360. If the result ends up over 360, we compound modulus divide to keep it within the scope. All of this will happen before we deal with c, x, and m.

function HSLToRGB(hsl) {
  ...

  // Strip label and convert to degrees (if necessary)
  if (h.indexOf("deg") > -1)
    h = h.substr(0,h.length - 3);
  else if (h.indexOf("rad") > -1)
    h = Math.round(h.substr(0,h.length - 3) * (180 / Math.PI));
  else if (h.indexOf("turn") > -1)
    h = Math.round(h.substr(0,h.length - 4) * 360);
  // Keep hue fraction of 360 if ending up over
  if (h >= 360)
    h %= 360;
    
  // Conversion to RGB begins
  ...
}

After implementing the steps above, now the following can be safely used:

  • hsl(180 100% 50%)
  • hsl(180deg,100%,50%)
  • hsl(180deg 100% 50%)
  • hsl(3.14rad,100%,50%)
  • hsl(3.14rad 100% 50%)
  • hsl(0.5turn,100%,50%)
  • hsl(0.5turn 100% 50%)

Whew, that’s quite the flexibility!

Output RGB with %s

Similarly, we can modify this function to return percent values just like we did in hexToRGB().

function HSLToRGB(hsl,isPct) {
  let sep = hsl.indexOf(",") > -1 ? "," : " ";
  hsl = hsl.substr(4).split(")")[0].split(sep);
  isPct = isPct === true;

  ...

  if (isPct) {
    r = +(r / 255 * 100).toFixed(1);
    g = +(g / 255 * 100).toFixed(1);
    b = +(b / 255 * 100).toFixed(1);
  }

  return "rgb("+ (isPct ? r + "%," + g + "%," + b + "%" : +r + "," + +g + "," + +b) + ")";
}

HSLA to RGBA

Once again, handling alphas will be a no-brainer. We can reapply the code for the original HSLToRGB(h,s,l) and add a to the return.

function HSLAToRGBA(h,s,l,a) {
  // Code for HSLToRGB(h,s,l) before return
  ...

  return "rgba(" + r + "," + g + "," + b + "," + a + ")";
}

HSLA in String

Changing it to one argument, the way we’ll handle strings here will be not too much different than what we did earlier. A new HSLA syntax from Colors Level 4 uses (value value value / value) just like RGBA, so having the code to handle it, we’ll be able to plug in something like hsla(210 100% 50% / 0.5) here.

function HSLAToRGBA(hsla) {
  let sep = hsla.indexOf(",") > -1 ? "," : " ";
  hsla = hsla.substr(5).split(")")[0].split(sep);

  if (hsla.indexOf("/") > -1)
    hsla.splice(3,1);

  let h = hsla[0],
      s = hsla[1].substr(0,hsla[1].length - 1) / 100,
      l = hsla[2].substr(0,hsla[2].length - 1) / 100,
      a = hsla[3];
        
  if (h.indexOf("deg") > -1)
    h = h.substr(0,h.length - 3);
  else if (h.indexOf("rad") > -1)
    h = Math.round(h.substr(0,h.length - 3) * (180 / Math.PI));
  else if (h.indexOf("turn") > -1)
    h = Math.round(h.substr(0,h.length - 4) * 360);
  if (h >= 360)
    h %= 360;

  ...
}

Furthermore, these other combinations have become possible:

  • hsla(180,100%,50%,50%)
  • hsla(180 100% 50% / 50%)
  • hsla(180deg,100%,50%,0.5)
  • hsla(3.14rad,100%,50%,0.5)
  • hsla(0.5turn 100% 50% / 50%)

RGBA with %s

Then we can replicate the same logic for outputting percentages, including alpha. If the alpha should be a percentage (searched in pctFound), here’s how we can handle it:

  1. If r, g, and b are to be converted to percentages, then a should be multiplied by 100, if not already a percentage. Otherwise, drop the %, and it’ll be added back in the return.
  2. If r, g, and b should be left alone, then remove the % from a and divide a by 100.
function HSLAToRGBA(hsla,isPct) {
  // Code up to slash stripping
  ...
    
  isPct = isPct === true;
    
  // h, s, l, a defined to rounding of r, g, b
  ...
    
  let pctFound = a.indexOf("%") > -1;
    
  if (isPct) {
    r = +(r / 255 * 100).toFixed(1);
    g = +(g / 255 * 100).toFixed(1);
    b = +(b / 255 * 100).toFixed(1);
    if (!pctFound) {
      a *= 100;
    } else {
      a = a.substr(0,a.length - 1);
    }
        
  } else if (pctFound) {
    a = a.substr(0,a.length - 1) / 100;
  }

  return "rgba("+ (isPct ? r + "%," + g + "%," + b + "%," + a + "%" : +r + ","+ +g + "," + +b + "," + +a) + ")";
}

Hex to HSL

You might think this one and the next are crazier processes than the others, but they merely come in two parts with recycled logic. First, we convert the hex to RGB. That gives us the base 10s we need to convert to HSL.

function hexToHSL(H) {
  // Convert hex to RGB first
  let r = 0, g = 0, b = 0;
  if (H.length == 4) {
    r = "0x" + H[1] + H[1];
    g = "0x" + H[2] + H[2];
    b = "0x" + H[3] + H[3];
  } else if (H.length == 7) {
    r = "0x" + H[1] + H[2];
    g = "0x" + H[3] + H[4];
    b = "0x" + H[5] + H[6];
  }
  // Then to HSL
  r /= 255;
  g /= 255;
  b /= 255;
  let cmin = Math.min(r,g,b),
      cmax = Math.max(r,g,b),
      delta = cmax - cmin,
      h = 0,
      s = 0,
      l = 0;

  if (delta == 0)
    h = 0;
  else if (cmax == r)
    h = ((g - b) / delta) % 6;
  else if (cmax == g)
    h = (b - r) / delta + 2;
  else
    h = (r - g) / delta + 4;

  h = Math.round(h * 60);

  if (h < 0)
    h += 360;

  l = (cmax + cmin) / 2;
  s = delta == 0 ? 0 : delta / (1 - Math.abs(2 * l - 1));
  s = +(s * 100).toFixed(1);
  l = +(l * 100).toFixed(1);

  return "hsl(" + h + "," + s + "%," + l + "%)";
}

Hex (#rrggbbaa) to HSLA

There aren’t too many lines that change in this one. We’ll repeat what we recently did to get the alpha by converting the hex, but won’t divide it by 255 right away. First, we must get the hue, saturation, and lightness as we did in the other to-HSL functions. Then, before the ending return, we divide the alpha and set the decimal places.

function hexAToHSLA(H) {
  let r = 0, g = 0, b = 0, a = 1;

  if (H.length == 5) {
    r = "0x" + H[1] + H[1];
    g = "0x" + H[2] + H[2];
    b = "0x" + H[3] + H[3];
    a = "0x" + H[4] + H[4];
  } else if (H.length == 9) {
    r = "0x" + H[1] + H[2];
    g = "0x" + H[3] + H[4];
    b = "0x" + H[5] + H[6];
    a = "0x" + H[7] + H[8];
  }

  // Normal conversion to HSL
  ...
        
  a = (a / 255).toFixed(3);
                
  return "hsla("+ h + "," + s + "%," + l + "%," + a + ")";
}

HSL to Hex

This one starts as a conversion to RGB, but there’s an extra step to the Math.round()s of converting the RGB results to hex.

function HSLToHex(h,s,l) {
  s /= 100;
  l /= 100;

  let c = (1 - Math.abs(2 * l - 1)) * s,
      x = c * (1 - Math.abs((h / 60) % 2 - 1)),
      m = l - c/2,
      r = 0,
      g = 0,
      b = 0;

  if (0 <= h && h < 60) {
    r = c; g = x; b = 0;
  } else if (60 <= h && h < 120) {
    r = x; g = c; b = 0;
  } else if (120 <= h && h < 180) {
    r = 0; g = c; b = x;
  } else if (180 <= h && h < 240) {
    r = 0; g = x; b = c;
  } else if (240 <= h && h < 300) {
    r = x; g = 0; b = c;
  } else if (300 <= h && h < 360) {
    r = c; g = 0; b = x;
  }
  // Having obtained RGB, convert channels to hex
  r = Math.round((r + m) * 255).toString(16);
  g = Math.round((g + m) * 255).toString(16);
  b = Math.round((b + m) * 255).toString(16);

  // Prepend 0s, if necessary
  if (r.length == 1)
    r = "0" + r;
  if (g.length == 1)
    g = "0" + g;
  if (b.length == 1)
    b = "0" + b;

  return "#" + r + g + b;
}

HSL in String

Even the first few lines of this function will be like those in HSLToRGB() if we changed it to accept a single string. This is how we’ve been obtaining the hue, saturation, and lightness separately in the first place. Let’s not forget the step to remove the hue label and convert to degrees, too. All of this will be in place of s /= 100; and l /= 100;.

function HSLToHex(hsl) {
  let sep = hsl.indexOf(",") > -1 ? "," : " ";
  hsl = hsl.substr(4).split(")")[0].split(sep);

  let h = hsl[0],
      s = hsl[1].substr(0,hsl[1].length - 1) / 100,
      l = hsl[2].substr(0,hsl[2].length - 1) / 100;
        
  // Strip label and convert to degrees (if necessary)
  if (h.indexOf("deg") > -1)
    h = h.substr(0,h.length - 3);
  else if (h.indexOf("rad") > -1)
    h = Math.round(h.substr(0,h.length - 3) * (180 / Math.PI));
  else if (h.indexOf("turn") > -1)
    h = Math.round(h.substr(0,h.length - 4) * 360);
  if (h >= 360)
    h %= 360;

  ...
}

HSLA to Hex (#rrggbbaa)

Adding alpha to the mix, we convert a to hex and add a fourth if to prepend a 0, if necessary. You probably already familiar with this logic because we last used it in RGBAToHexA().

function HSLAToHexA(h,s,l,a) {
  // Repeat code from HSLToHex(h,s,l) until 3 `toString(16)`s
  ...

  a = Math.round(a * 255).toString(16);

  if (r.length == 1)
    r = "0" + r;
  if (g.length == 1)
    g = "0" + g;
  if (b.length == 1)
    b = "0" + b;
  if (a.length == 1)
    a = "0" + a;

  return "#" + r + g + b + a;
}

HSLA in String

Finally, the lines of the single argument version up to a = hsla[3] are no different than those of HSLAToRGBA().

function HSLAToHexA(hsla) {
  let sep = hsla.indexOf(",") > -1 ? "," : " ";
  hsla = hsla.substr(5).split(")")[0].split(sep);
    
  // Strip the slash
  if (hsla.indexOf("/") > -1)
    hsla.splice(3,1);
    
  let h = hsla[0],
      s = hsla[1].substr(0,hsla[1].length - 1) / 100,
      l = hsla[2].substr(0,hsla[2].length - 1) / 100,
      a = hsla[3];
            
  ...
}

Built-in Names

To convert a named color to RGB, hex, or HSL, you might consider turning this table of 140+ names and hex values into a massive object at the start. The truth is that we really don’t need one because here’s what we can do:

  1. Create an element
  2. Give it a text color
  3. Obtain the value of that property
  4. Remove the element
  5. Return the stored color value, which will be in RGB by default

So, our function to get RGB will only be seven statements!

function nameToRGB(name) {
  // Create fake div
  let fakeDiv = document.createElement("div");
  fakeDiv.style.color = name;
  document.body.appendChild(fakeDiv);

  // Get color of div
  let cs = window.getComputedStyle(fakeDiv),
      pv = cs.getPropertyValue("color");

  // Remove div after obtaining desired color value
  document.body.removeChild(fakeDiv);

  return pv;
}

Let’s go even further. How about we change the output to hex instead?

function nameToHex(name) {
  // Get RGB from named color in temporary div
  let fakeDiv = document.createElement("div");
  fakeDiv.style.color = name;
  document.body.appendChild(fakeDiv);

  let cs = window.getComputedStyle(fakeDiv),
      pv = cs.getPropertyValue("color");

  document.body.removeChild(fakeDiv);

  // Code ripped from RGBToHex() (except pv is substringed)
  let rgb = pv.substr(4).split(")")[0].split(","),
      r = (+rgb[0]).toString(16),
      g = (+rgb[1]).toString(16),
      b = (+rgb[2]).toString(16);

  if (r.length == 1)
    r = "0" + r;
  if (g.length == 1)
    g = "0" + g;
  if (b.length == 1)
    b = "0" + b;

  return "#" + r + g + b;
}

Or, why not HSL? 😉

function nameToHSL(name) {
  let fakeDiv = document.createElement("div");
  fakeDiv.style.color = name;
  document.body.appendChild(fakeDiv);

  let cs = window.getComputedStyle(fakeDiv),
      pv = cs.getPropertyValue("color");

  document.body.removeChild(fakeDiv);

  // Code ripped from RGBToHSL() (except pv is substringed)
  let rgb = pv.substr(4).split(")")[0].split(","),
      r = rgb[0] / 255,
      g = rgb[1] / 255,
      b = rgb[2] / 255,
      cmin = Math.min(r,g,b),
      cmax = Math.max(r,g,b),
      delta = cmax - cmin,
      h = 0,
      s = 0,
      l = 0;

  if (delta == 0)
    h = 0;
  else if (cmax == r)
    h = ((g - b) / delta) % 6;
  else if (cmax == g)
    h = (b - r) / delta + 2;
  else
    h = (r - g) / delta + 4;

  h = Math.round(h * 60);

  if (h < 0)
    h += 360;

  l = (cmax + cmin) / 2;
  s = delta == 0 ? 0 : delta / (1 - Math.abs(2 * l - 1));
  s = +(s * 100).toFixed(1);
  l = +(l * 100).toFixed(1);

  return "hsl(" + h + "," + s + "%," + l + "%)";
}

In the long run, every conversion from a name becomes a conversion from RGB after cracking the name.

Validating Colors

In all these functions, there haven’t been any measures to prevent or correct ludicrous input (say hues over 360 or percentages over 100). If we’re only manipulating pixels on a <canvas> fetched using getImageData(), validation of color values isn’t necessary before converting because they’ll be correct no matter what. If we’re creating a color conversion tool where users supply the color, then validation would be much needed.

It’s easy to handle improper input for channels as separate arguments, like this for RGB:

// Correct red
if (r > 255)
  r = 255;
else if (r < 0)
  r = 0;

If validating a whole string, then a regular expression is needed. For instance, this is the RGBToHex() function given a validation step with an expression:

function RGBToHex(rgb) {
  // Expression for rgb() syntaxes
  let ex = /^rgb\((((((((1?[1-9]?\d)|10\d|(2[0-4]\d)|25[0-5]),\s?)){2}|((((1?[1-9]?\d)|10\d|(2[0-4]\d)|25[0-5])\s)){2})((1?[1-9]?\d)|10\d|(2[0-4]\d)|25[0-5]))|((((([1-9]?\d(\.\d+)?)|100|(\.\d+))%,\s?){2}|((([1-9]?\d(\.\d+)?)|100|(\.\d+))%\s){2})(([1-9]?\d(\.\d+)?)|100|(\.\d+))%))\)$/i;

  if (ex.test(rgb)) {
    // Logic to convert RGB to hex
    ...

  } else {
    // Something to do if color is invalid
  }
}

To test other types of values, below is a table of expressions to cover both opaque and alpha-enabled:

Color Value RegEx
RGB /^rgb\((((((((1?[1-9]?\d)|10\d|(2[0-4]\d)|25[0-5]),\s?)){2}|((((1?[1-9]?\d)|10\d|(2[0-4]\d)|25[0-5])\s)){2})((1?[1-9]?\d)|10\d|(2[0-4]\d)|25[0-5]))|((((([1-9]?\d(\.\d+)?)|100|(\.\d+))%,\s?){2}|((([1-9]?\d(\.\d+)?)|100|(\.\d+))%\s){2})(([1-9]?\d(\.\d+)?)|100|(\.\d+))%))\)$/i
RGBA /^rgba\((((((((1?[1-9]?\d)|10\d|(2[0-4]\d)|25[0-5]),\s?)){3})|(((([1-9]?\d(\.\d+)?)|100|(\.\d+))%,\s?){3}))|(((((1?[1-9]?\d)|10\d|(2[0-4]\d)|25[0-5])\s){3})|(((([1-9]?\d(\.\d+)?)|100|(\.\d+))%\s){3}))\/\s)((0?\.\d+)|[01]|(([1-9]?\d(\.\d+)?)|100|(\.\d+))%)\)$/i
Hex /^#([\da-f]{3}){1,2}$/i
Hex (with Alpha) /^#([\da-f]{4}){1,2}$/i
HSL /^hsl\(((((([12]?[1-9]?\d)|[12]0\d|(3[0-5]\d))(\.\d+)?)|(\.\d+))(deg)?|(0|0?\.\d+)turn|(([0-6](\.\d+)?)|(\.\d+))rad)((,\s?(([1-9]?\d(\.\d+)?)|100|(\.\d+))%){2}|(\s(([1-9]?\d(\.\d+)?)|100|(\.\d+))%){2})\)$/i
HSLA /^hsla\(((((([12]?[1-9]?\d)|[12]0\d|(3[0-5]\d))(\.\d+)?)|(\.\d+))(deg)?|(0|0?\.\d+)turn|(([0-6](\.\d+)?)|(\.\d+))rad)(((,\s?(([1-9]?\d(\.\d+)?)|100|(\.\d+))%){2},\s?)|((\s(([1-9]?\d(\.\d+)?)|100|(\.\d+))%){2}\s\/\s))((0?\.\d+)|[01]|(([1-9]?\d(\.\d+)?)|100|(\.\d+))%)\)$/i

Looking at the expressions for RGB(A) and HSL(A), you probably have big eyes right now; these were made comprehensive enough to include most of the new syntaxes from CSS Colors Level 4. Hex, on the other hand, doesn’t need expressions as long as the others because of only digit counts. In a moment, we’ll dissect these and decipher the parts. Note that case-insensitive values (/i) pass all these.

RGB

/^rgb\((((((((1?[1-9]?\d)|10\d|(2[0-4]\d)|25[0-5]),\s?)){2}|((((1?[1-9]?\d)|10\d|(2[0-4]\d)|25[0-5])\s)){2})((1?[1-9]?\d)|10\d|(2[0-4]\d)|25[0-5]))|((((([1-9]?\d(\.\d+)?)|100|(\.\d+))%,\s?){2}|((([1-9]?\d(\.\d+)?)|100|(\.\d+))%\s){2})(([1-9]?\d(\.\d+)?)|100|(\.\d+))%))\)$/i

Because rgb() accepts either all integers or all percentages, both cases are covered. In the outmost group, between the ^rgb\( and \)$, there are inner groups for both integers and percentages, all comma-spaces or spaces only as separators:

  1. (((((1?[1-9]?\d)|10\d|(2[0-4]\d)|25[0-5]),\s?){2}|(((1?[1-9]?\d)|10\d|(2[0-4]\d)|25[0-5])\s){2})((1?[1-9]?\d)|10\d|(2[0-4]\d)|25[0-5]))
  2. ((((([1-9]?\d(\.\d+)?)|100|(\.\d+))%,\s?){2}|((([1-9]?\d(\.\d+)?)|100|(\.\d+))%\s){2})(([1-9]?\d(\.\d+)?)|100|(\.\d+))%)

In the first half, we accept two instances of integers for red and green from 0–99 or 111-199 ((1?[1-9]?\d)), 100–109 (10\d), 200-249 ((2[0-4]\d)), or 250–255 (25[0-5]). We couldn’t simply do \d{1,3} because values like 03 or 017 and those greater than 255 shouldn’t be allowed. After that goes the comma and optional space (,\s?). On the other side of the |, after the first {2} (which indicates two instances of integers), we check for the same thing with space separators if the left side is false. Then for blue, the same should be accepted, but without a separator.

In the other half, acceptable values for percentages, including floats, should either be 0–99, explicitly 100 and not a float, or floats under 1 with the 0 dropped. Therefore, the segment here is (([1-9]?\d(\.\d+)?)|100|(\.\d+)), and it appears three times; twice with separator (,\s?){2}, %\s){2}), once without.

It is legal to use percentages without space separators (rgb(100%50%10%) for instance) in CSS, but the functions we wrote don’t support that. The same goes for rgba(100%50%10%/50%), hsl(40 100%50%), and hsla(40 100%50%/0.5). This could very well be a plus for code golfing and minification!

RGBA

/^rgba\((((((((1?[1-9]?\d)|10\d|(2[0-4]\d)|25[0-5]),\s?)){3})|(((([1-9]?\d(\.\d+)?)|100|(\.\d+))%,\s?){3}))|(((((1?[1-9]?\d)|10\d|(2[0-4]\d)|25[0-5])\s){3})|(((([1-9]?\d(\.\d+)?)|100|(\.\d+))%\s){3}))\/\s)((0?\.\d+)|[01]|(([1-9]?\d(\.\d+)?)|100|(\.\d+))%)\)$/i

The next expression is very similar to the pervious, but three instances of integers (((((1?[1-9]?\d)|10\d|(2[0-4]\d)|25[0-5]),\s?){3})) or percentages ((((([1-9]?\d(\.\d+)?)|100|(\.\d+))%,\s?){3})), plus comma optional space are checked. Otherwise, it looks for the same thing but with space separators, plus a slash and space (\/\s) after the blue. Next to that is ((0?\.\d+)|[01]|(([1-9]?\d(\.\d+)?)|100|(\.\d+))%) where we accept floats with or without the first 0 ((0?\.\d+)), 0 or 1 ([01]) on the dot, or 0–100% ((([1-9]?\d(\.\d+)?)|100|(\.\d+))%).

Hex with Alpha

// #rgb/#rrggbb
/^#([\da-f]{3}){1,2}$/i
// #rgba/#rrggbbaa
/^#([\da-f]{4}){1,2}$/i

For both hex—with and without alpha—instances of numbers or letters a–f ([\da-f]) are accepted. Then one or two instances of this are counted for either short or longhand values supplied (#rgb or #rrggbb). As an illustration, we have this same short pattern: /^#([\da-f]{n}){1,2}$/i. Simply change n to 3 or 4.

HSL and HSLA

// HSL
/^hsl\((((((\[12]?[1-9]?\d)|[12]0\d|(3[0-5]\d))(\.\d+)?)|(\.\d+))(deg)?|(0|0?\.\d+)turn|(([0-6\\.\d+)?)|(\.\d+))rad)((,\s?(([1-9]?\d(\.\d+)?)|100|(\.\d+))%){2}|(\s(([1-9]?\d(\.\d+)?)|100|(\.\d+))%){2})\)$/i
// HSLA
/^hsla\((((((\[12]?[1-9]?\d)|[12]0\d|(3[0-5]\d))(\.\d+)?)|(\.\d+))(deg)?|(0|0?\.\d+)turn|(([0-6\\.\d+)?)|(\.\d+))rad)(((,\s?(([1-9]?\d(\.\d+)?)|100|(\.\d+))%){2},\s?)|((\s(([1-9]?\d(\.\d+)?)|100|(\.\d+))%){2}\s\/\s))((0?\.\d+)|[01]|(([1-9]?\d(\.\d+)?)|100|(\.\d+))%)\)$/i

After the \( in both expressions for HSL and HSLA, this large chunk is for the hue:

(((((\[12]?[1-9]?\d)|[12]0\d|(3[0-5]\d))(\.\d+)?)|(\.\d+))(deg)?|(0|0?\.\d+)turn|(([0-6\\.\d+)?)|(\.\d+))rad)

([12]?[1-9]?\d) covers 0–99, 110–199, and 210–299. [12]0\d covers 110–109 and 200–209. Then (3[0-5]\d) takes care of 300–359. The reason for this division of ranges is similar to that of integers in the rgb() syntax: ruling out zeros coming first and values greater than the maximum. Since hues can be floating point numbers, the first (\.\d+)? is for that.

Next to the | after the aforementioned segment of code, the second (\.\d+) is for floats without a leading zero.

Now let’s move up a level and decipher the next small chunk:

(deg)?|(0|0?\.\d+)turn|((\[0-6\\.\d+)?)|(\.\d+))rad

This contains the labels we can use for the hue—degrees, turns, or radians. We can include all or none of deg. Values in turn must be under 1. For radians, we can accept any float between 0–7. We do know, however, that one 360° turn is 2π, and it stops approximately at 6.28. You may think 6.3 and over shouldn’t be accepted. Because 2π is an irrational number, it would be too messy for this example to try to satisfy every decimal place provided by the JavaScript console. Besides, we have this snippet in our HSLTo_() functions as a second layer of security if hues 360° or over were to happen:

// Keep hue fraction of 360 if ending up over
if (h >= 360)
  h %= 360;

Now let’s move up a level and decipher the second chunk:

(,\s?(([1-9]?\d(\.\d+)?)|100|(\.\d+))%){2}

We’re counting two instances of comma-space-percentages for the saturation and lightness (space optional). In the group after the ,\s?, we test for values 0–99 with or without decimal points (([1-9]?\d(\.\d+)?)), exactly 100, or floats under 1 without the leading 0 ((\.\d+)).

The last part the HSL expression, before the ending (\)$/i), is a similar expression if spaces are the only separator:

(\s(([1-9]?\d(\.\d+)?)|100|(\.\d+))%){2}

\s is in the beginning instead of ,\s?. Then in the HSLA expression, this same chunk is inside another group with ,\s? after its {2}.

((,\s?(([1-9]?\d(\.\d+)?)|100|(\.\d+))%){2},\s?)

That counts the comma-space between the lightness and alpha. Then if we have spaces as separators, we need to check for a space-slash-space (\s\/\s) after counting two instances of space and a percentage.

((\s(([1-9]?\d(\.\d+)?)|100|(\.\d+))%){2}\s\/\s))

After that, we have this left to check the alpha value:

(((0?\.\d+)|[01])|(([1-9]?\d(\.\d+)?)|100|(\.\d+))%)

Matches for (0?\.\d+) include floats under 1 with or without the leading 0, 0 or 1 for [01], and 0–100%.

Conclusion

If your current challenge is to convert one color space to another, you now have some ideas on how to approach it. Because it would be tiresome to walk through converting every color space ever invented in one post, we discussed the most practical and browser-supported ones. If you’d like to go beyond supported color spaces (say CMYK, XYZ, or CIE L*a*b*), EasyRGB) provides an amazing set of code-ready formulas.

To see all the conversions demonstrated here, I’ve set up a CodePen demo that shows inputs and outputs in a table. You can try different colors in lines 2–10 and see the complete functions in the JavaScript panel.

See the Pen Color Conversion by Jon Kantner (@jkantner) on CodePen.

The post Converting Color Spaces in JavaScript appeared first on CSS-Tricks.
Re: Pleasing Color Palettes

Post pobrano z: Re: Pleasing Color Palettes

There are so many tools out there to help you pick colors. I totally get it! It’s hard! When colors are done well, it’s like magic. It adds a level of polish to a design that can really set it apart.

Let’s look at some, then talk about this idea some more.

Here’s one I just saw called Color Koala:

It spits out five colors at ya and you’re off to the races.

Hue will give you some too.

There’s a billion more, and they vary in approach and features, of course. Here’s a handful:

Then there are tools that focus on gradients, like UI Gradients, Web Gradients, and Shapy.

Oh! And a site that helps with text color while keeping accessibility in mind.

There are even native apps like Sip, ColorSnapper, and Frank DeLoupe that help you select colors and sometimes keep your palettes right within them.

Colors can be programatically generated.

There is no native JavaScript API for it, but it’s still basically a one-liner:

See the Pen Generate New Random Hex Color with JavaScript by Chris Coyier (@chriscoyier) on CodePen.

Pleasing colors can be as well.

Generating random colors won’t guarantee pleasing palettes, especially if a bunch of random colors are paired together. PleaseJS can help build color schemes that work together. You provide it a base color and other options (like what type of color scheme) and it spits out colors for you.

See the Pen Generate Pleasing Colors by Chris Coyier (@chriscoyier) on CodePen.

Similarly, randomColor.js…

gen­er­ates at­trac­tive col­ors by de­fault. More specif­i­cally, ran­dom­Color pro­duces bright col­ors with a rea­son­ably high sat­u­ra­tion. This makes ran­dom­Color par­tic­u­larly use­ful for data vi­su­al­iza­tions and gen­er­a­tive art.

It doesn’t claim to make multiple colors part of a cohesive theme aside from passing in a base hue or luminosity.

See the Pen Generate Pleasing Colors by Chris Coyier (@chriscoyier) on CodePen.

But the thing about just being handed colors is…

…they don’t exactly tell you how to use them. Steve Schoger makes a point of this, rather hilariously in a blog post. This is a perfectly lovely color palette:

But if you just pick those colors and plop them onto a design, you could end up with something like this:

You might like that, but you’d be in the minority. It’s not a refined design that gets out of the way and would be nice to use every day. Color usage is a bit more complicated than plopping five nice colors into a design. It’s variations on those and using them in tasteful ways, like this:

Picking up Steve Schoger and Adam Wathan’s book surely has some advice for you there!

The post Re: Pleasing Color Palettes appeared first on CSS-Tricks.
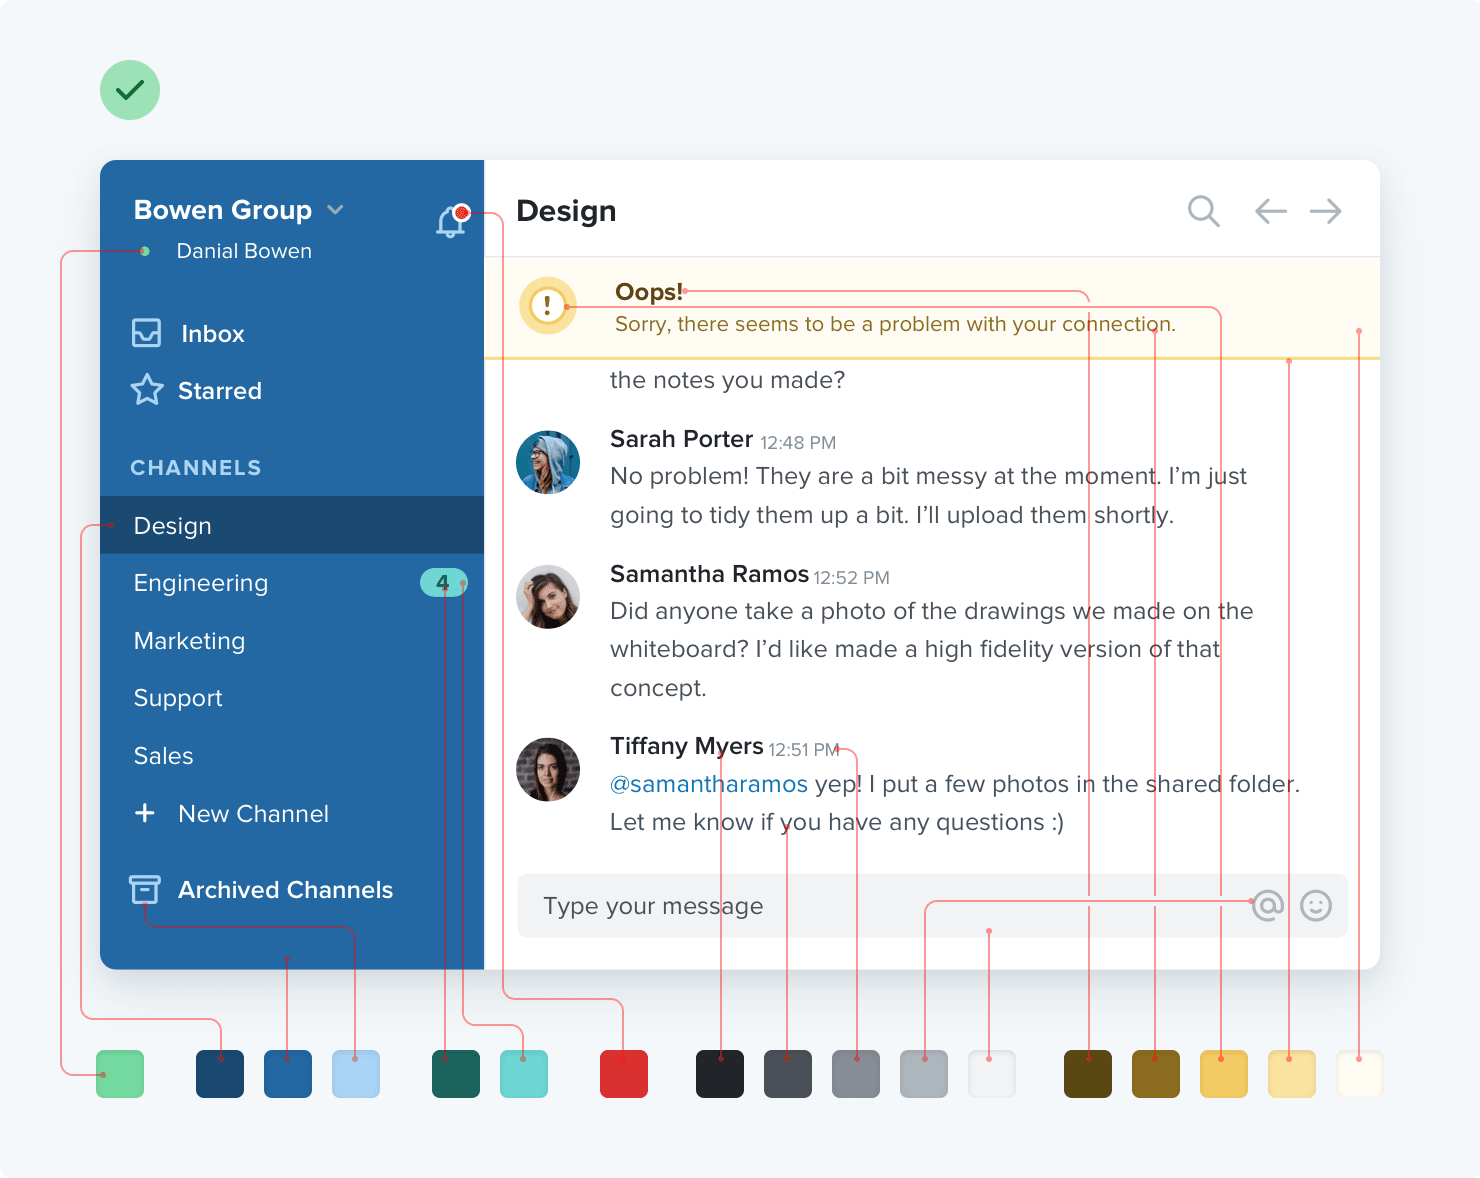
Re: Pleasing Color Palettes

Post pobrano z: Re: Pleasing Color Palettes

There are so many tools out there to help you pick colors. I totally get it! It’s hard! When colors are done well, it’s like magic. It adds a level of polish to a design that can really set it apart.

Let’s look at some, then talk about this idea some more.

Here’s one I just saw called Color Koala:

It spits out five colors at ya and you’re off to the races.

Hue will give you some too.

There’s a billion more, and they vary in approach and features, of course. Here’s a handful:

Then there are tools that focus on gradients, like UI Gradients, Web Gradients, and Shapy.

Oh! And a site that helps with text color while keeping accessibility in mind.

There are even native apps like Sip, ColorSnapper, and Frank DeLoupe that help you select colors and sometimes keep your palettes right within them.

Colors can be programatically generated.

There is no native JavaScript API for it, but it’s still basically a one-liner:

See the Pen Generate New Random Hex Color with JavaScript by Chris Coyier (@chriscoyier) on CodePen.

Pleasing colors can be as well.

Generating random colors won’t guarantee pleasing palettes, especially if a bunch of random colors are paired together. PleaseJS can help build color schemes that work together. You provide it a base color and other options (like what type of color scheme) and it spits out colors for you.

See the Pen Generate Pleasing Colors by Chris Coyier (@chriscoyier) on CodePen.

Similarly, randomColor.js…

gen­er­ates at­trac­tive col­ors by de­fault. More specif­i­cally, ran­dom­Color pro­duces bright col­ors with a rea­son­ably high sat­u­ra­tion. This makes ran­dom­Color par­tic­u­larly use­ful for data vi­su­al­iza­tions and gen­er­a­tive art.

It doesn’t claim to make multiple colors part of a cohesive theme aside from passing in a base hue or luminosity.

See the Pen Generate Pleasing Colors by Chris Coyier (@chriscoyier) on CodePen.

But the thing about just being handed colors is…

…they don’t exactly tell you how to use them. Steve Schoger makes a point of this, rather hilariously in a blog post. This is a perfectly lovely color palette:

But if you just pick those colors and plop them onto a design, you could end up with something like this:

You might like that, but you’d be in the minority. It’s not a refined design that gets out of the way and would be nice to use every day. Color usage is a bit more complicated than plopping five nice colors into a design. It’s variations on those and using them in tasteful ways, like this:

Picking up Steve Schoger and Adam Wathan’s book surely has some advice for you there!

The post Re: Pleasing Color Palettes appeared first on CSS-Tricks.