I find GraphQL extremely fun and empowering tech to work with, even as a novice just getting started. You’ve probably heard the elevator pitch before: it allows you to ask for exactly the data you need whenever you need it (probably at the component level), and it arrives as lovely JSON data for your usage.
I see it used as part of modern website builds all the dang time. The overall vibe is, „I want to do whatever I want on the front end, and that actually allows for more back-end choices as well.” And by „whatever” on the front end, that generally means a fancy SPA-ish JavaScript-powered thing or a static-site generator-ish thing.
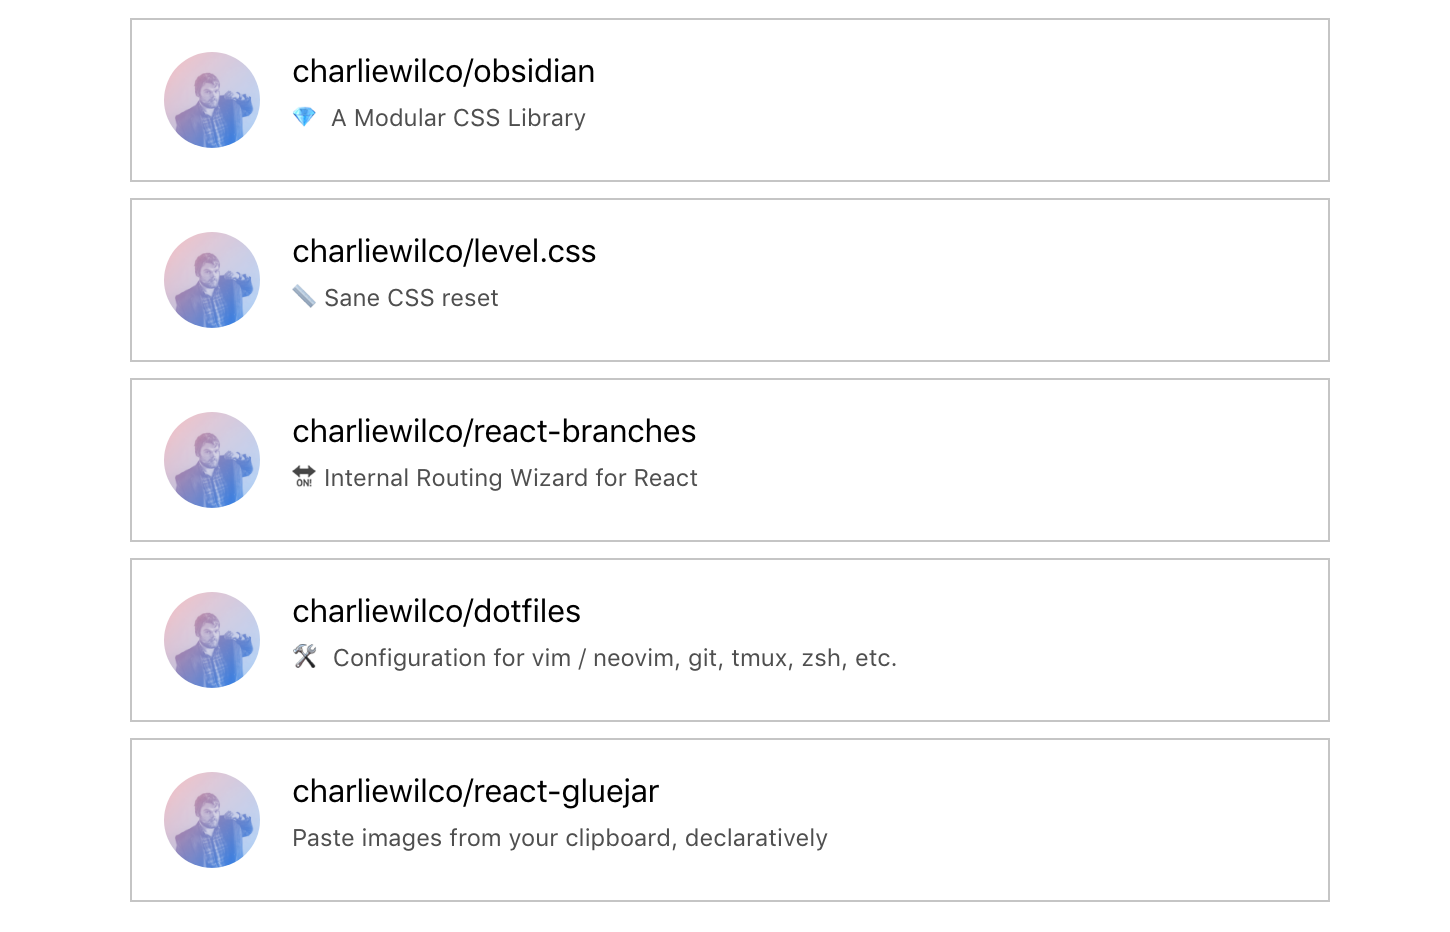
Here’s a quick smattering of articles that are everywhere these days. Instead of the actual article titles, I’ll rename with the stack parts.
Using render props in React is a technique for efficiently re-using code. According to the React documentation, „a component with a render prop takes a function that returns a React element and calls it instead of implementing its own render logic.” To understand what that means, let’s take a look at the render props pattern and then apply it to a couple of light examples.
The render props pattern
In working with render props, you pass a render function to a component that, in turn, returns a React element. This render function is defined by another component, and the receiving component shares what is passed through the render function.
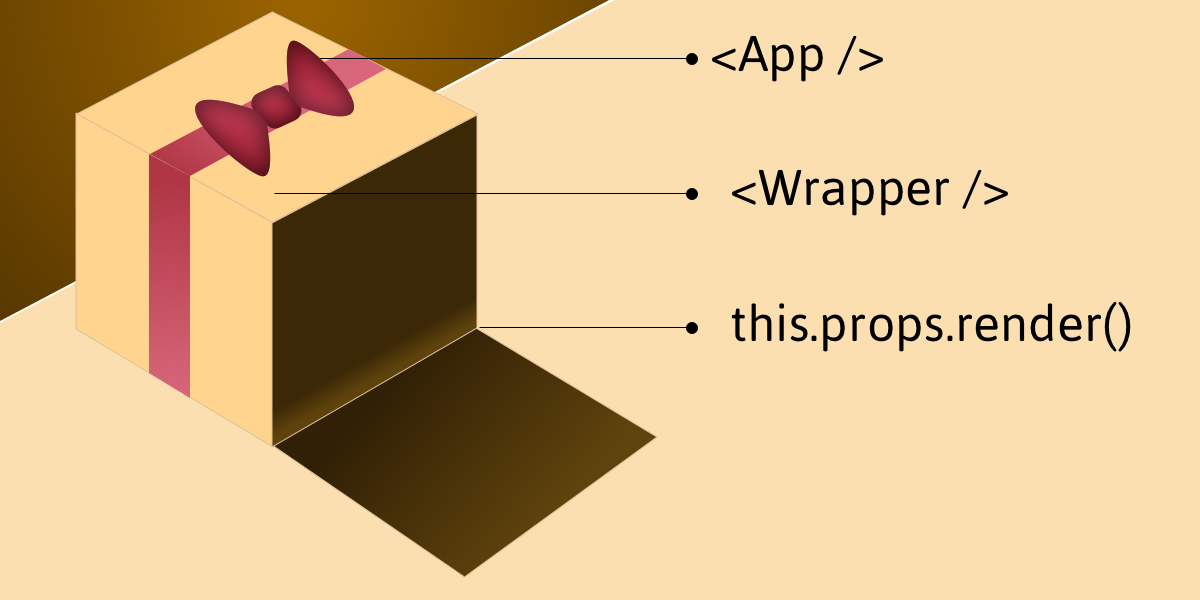
Imagine, if you will, that our App is a gift box where App itself is the bow on top. If the box is the component we are creating and we open it, we’ll expose the props, states, functions and methods needed to make the component work once it’s called by render().
The render function of a component normally has all the JSX and such that form the DOM for that component. Instead, this component has a render function, this.props.render(), that will display a component that gets passed in via props.
In the Wrapper component, we specify the methods and state what gets exposed to the wrapped component. For this example, we need the increment and decrement methods. We have our default count set as 0. The logic is to either increment or decrement count depending on the method that is triggered, starting with a zero value.
If you take a look at the return() method, you’ll see that we are making use of this.props.render(). It is through this function that we pass methods and state from the Wrapper component so that the component that is being wrapped by it will make use of it.
To use it for our App component, the component will look like this:
The gain lies in the reusable power of render props, let’s create a component that can be used to handle a list of data which is obtainable from an API.
What do we want from the wrapper component this time? We want to pass the source link for the data we want to render to it, then make a GET request to obtain the data. When the data is obtained we then set it as the new state of the component and render it for display.
The data link will be passed as props to the Wrapper component. When we get the response from the server, we update list using what is returned from the server. The request is made to the server after the component mounts.
You can see that we pass the link as a prop, then we use ES6 de-structuring to get the state of the Wrapper component which is then rendered. The first time the component loads, we display loading text, which is replaced by the list of items once we get a response and data from the server.
The App component here is a class component since it does not manage state. We can transform it into a functional stateless component.
We don’t generally think of CSS animations or transitions inside of email, or really any movement at all outside of an awkward occasional GIF. But there is really no reason you can’t use them inside HTML emails, particularly if you do it in a progressive enhancement-friendly way. Like, you could style a link with a hover state and a shaking animation, but if the animation (or even the hover) doesn’t work, it’s still a functional link. Heck, you can use CSS grid in email, believe it or not.
Jason Rodriguez just wrote Understanding CSS Animations in Email: Transitions and Keyframe Animations that covers some of the possibilities. On the supported list of email clients that support CSS transitions and keyframe animations is Apple Mail, Outlook, and AOL mail, among others.
I had to build a UI recently and (for the first time in a long while) I didn’t have the option of using React.js, which is my preferred solution for UI these days. So, I looked at what the built-in browser APIs had to offer and saw that using custom elements (aka Web Components) may just be the remedy that this React developer needed.
Custom elements can offer the same general benefits of React components without being tied to a specific framework implementation. A custom element gives us a new HTML tag that we can programmatically control through a native browser API.
Let’s talk about the benefits of component-based UI:
Encapsulation – concerns scoped to that component remain in that component’s implementation
Reusability – when the UI is separated into more generic pieces, they’re easier to break into patterns that you’re more likely to repeat
Isolation – because components are designed to be encapsulated and with that, you get the added benefit of isolation, which allows you scope bugs and changes to a particular part of your application easier
Use cases
You might be wondering who is using custom elements in production. Notably:
GitHub is using custom elements for their modal dialogs, autocomplete and display time.
To break this down further, we have a component that has its own state, which is the repo details. Initially, we set it to be null because we don’t have any of that data yet, so we’ll have a loading indicator while the data is fetched.
During the React lifecycle, we’ll use fetch to go get the data from GitHub, set up the card, and trigger a re-render with setState() after we get the data back. All of these different states the UI takes are represented in the render() method.
Defining / Using a Custom Element
Doing this with custom elements is a little different. Like the React component, our custom element will take a single attribute — again, the name of the repository — and manage its own state.
To start, all we need to do to define and register a custom element is create a class that extends the HTMLElement class and then register the name of the element with customElements.define().
class OurCustomElement extends HTMLElement {}
window.customElements.define('our-element', OurCustomElement);
And we can call it:
<our-element></our-element>
This new element isn’t very useful, but with custom elements, we get three methods to expand the functionality of this element. These are almost analogous to React’s lifecycle methods for their Component API. The two lifecycle-like methods most relevant to us are the disconnectedCallBack and the connectedCallback and since this is a class, it comes with a constructor.
Name
Called when
constructor
An instance of the element is created or upgraded. Useful for initializing state, settings up event listeners, or creating Shadow DOM. See the spec for restrictions on what you can do in the constructor.
connectedCallback
The element is inserted into the DOM. Useful for running setup code, such as fetching resources or rendering UI. Generally, you should try to delay work until this time
disconnectedCallback
When the element is removed from the DOM. Useful for running clean-up code.
To implement our custom element, we’ll create the class and set up some attributes related to that UI:
By calling super() in our constructor, the context of this is the element itself and all the DOM manipulation APIs can be used. So far, we’ve set the default repository details to null, gotten the repo name from element’s attribute, created an endpoint to call so we don’t have to define it later and, most importantly, set the initial HTML to be a loading indicator.
In order to get the details about that element’s repository, we’re going to need to make a request to GitHub’s API. We’ll use fetch and, since that’s Promise-based, we’ll use async and await to make our code more readable. You can learn more about the async/await keywords here and more about the browser’s fetch API here. You can also tweet at me to find out whether I prefer it to the Axios library. (Hint, it depends if I had tea or coffee with my breakfast.)
Now, let’s add a method to this class to ask GitHub for details about the repository.
Next, let’s use the connectedCallback method and the Shadow DOM to use the return value from this method. Using this method will do something similar as when we called Repository.componentDidMount() in the React example. Instead, we’ll override the null value we initially gave this.repoDetails — we’ll use this later when we start to call the template to create the HTML.
You’ll notice that we’re calling methods related to the Shadow DOM. Besides being a rejected title for a Marvel movie, the Shadow DOM has its own rich API worth looking into. For our purposes, though, it’s going to abstract the implementation of adding innerHTML to the element.
Now we’re assigning the innerHTML to be equal to the value of this.template. Let’s define that now:
class Repository extends HTMLElement {
  get template() {
    const repo = this.repoDetails;

    // if we get an error message let's show that back to the user
    if (repo.message) {
      return `<div class="Card Card--error">Error: ${repo.message}</div>`
    } else {
      return `
      <div class="Card">
        <aside>
          <img width="48" height="48" class="Avatar" src="${repo.owner.avatar_url}" alt="Profile picture for ${repo.owner.login}" />
        </aside>
        <header>
          <h2 class="Card__title">${repo.full_name}</h2>
          <span class="Card__meta">${repo.description}</span>
        </header>
      </div>
      `
    }
  }
}
That’s pretty much it. We’ve defined a custom element that manages its own state, fetches its own data, and reflects that state back to the user while giving us an HTML element to use in our application.
After going through this exercise, I found that the only required dependency for custom elements is the browser’s native APIs rather than a framework to additionally parse and execute. This makes for a more portable and reusable solution with similar APIs to the frameworks you already love and use to make your living.
There are drawbacks of using this approach, of course. We’re talking about various browser support issues and some lack of consistency. Plus, working with DOM manipulation APIs can be very confusing. Sometimes they are assignments. Sometimes they are functions. Sometimes those functions take a callback and sometimes they don’t. If you don’t believe me, take a look at adding a class to an HTML element created via document.createElement(), which is one of the top five reasons to use React. The basic implementation isn’t that complicated but it is inconsistent with other similar document methods.
The real question is: does it even out in the wash? Maybe. React is still pretty good at the things it’s designed to be very very good at: the virtual DOM, managing application state, encapsulation, and passing data down the tree. There’s next to no incentive to use custom elements inside that framework. Custom elements, on the other hand, are simply available by virtue of building an application for the browser.
In the grand tradition of every single poll question I’ve ever posted, the poll below has a has a fundamental flaw. In this case, there is no option between „In the last month” and „Never” but, alas, the results are interesting:
When's the last time you SFTP'd (or the equiv) into a server and changed a file directly?
What I was trying to get at with this poll is how many people do and don’t do any sort of editing of production files directly and instead work locally. I don’t think I need to launch a major investigation to know that it’s most people and more than in the past.
Most workflows these days have us working locally and pushing new and updated files through a version control system, and even through systems beyond that, perhaps continuous integration processes, testing processes, actions, deployment — it’s big world of DevOps out there! Rarely do we skip the line and dip our fingers into production servers and make live manipulations. Cowboy coding, they sometimes call it.
But just because you don’t generally code that way doesn’t mean you never do it, which is another flaw of this poll. I know DevOps nerds who are constantly SSH-ing into servers to manipulate configuration files. I personally still hop into Coda and will directly SFTP into servers sometimes to edit .htaccess files, which are sometimes on my production sites and dev sites and that I generally .gitignore.
Anyways, I think this is a fun thing to talk about, so feel free to have at it in the comments. I’d love to hear to what degree you cowboy code. Still do it all the time and love it? Do you do it because you haven’t learned another way or that’s how your workplace demands? Do you have a personal philosophy about it? Let the rodeo begin. 🤠
But how do we get our hands on individual bits of that HTML? We don’t exactly have references to anything, even the whole chunk we put in.
I just saw this little lib called Facon that looks to do just this. It makes use of tagged template literals, which is super cool:
import f from 'facon';

const data = {
  title: "Title",
  content: "Content"
};

let html = f`
  <div class="module">
    <h2>${data.title}</h2>
    <p>${data.content}</p>
  </div>
`;

document.body.appendChild(html);
This skips the need for our little getNodes function, but more importantly, we can yank out those references!
let html = f`
  <div class="module">
    <h2 ref="title">${data.title}</h2>
    <p ref="content">${data.content}</p>
  </div>
`;

let { title, content } = html.collect();
title.innerText = "Title Changed!";
You know how you open a „project” in a local code editor? I guess different editors have different terminology for it, but essentially what you are doing is opening a folder/directory and it shows you a sidebar full of files and folders you can navigate through and such.
Typically there is one parent folder, and everything else is within that folder. Right? Well, it doesn’t have to be! That’s where symbolic links come in.
Otherwise known as symlinks, they are like pointers to another place. While you don’t have to actually move the folder you are referencing, you can create a pointer to it that behaves as if you did.
You can create them right from the command line:
ln -s /path/to/original/ /path/to/link
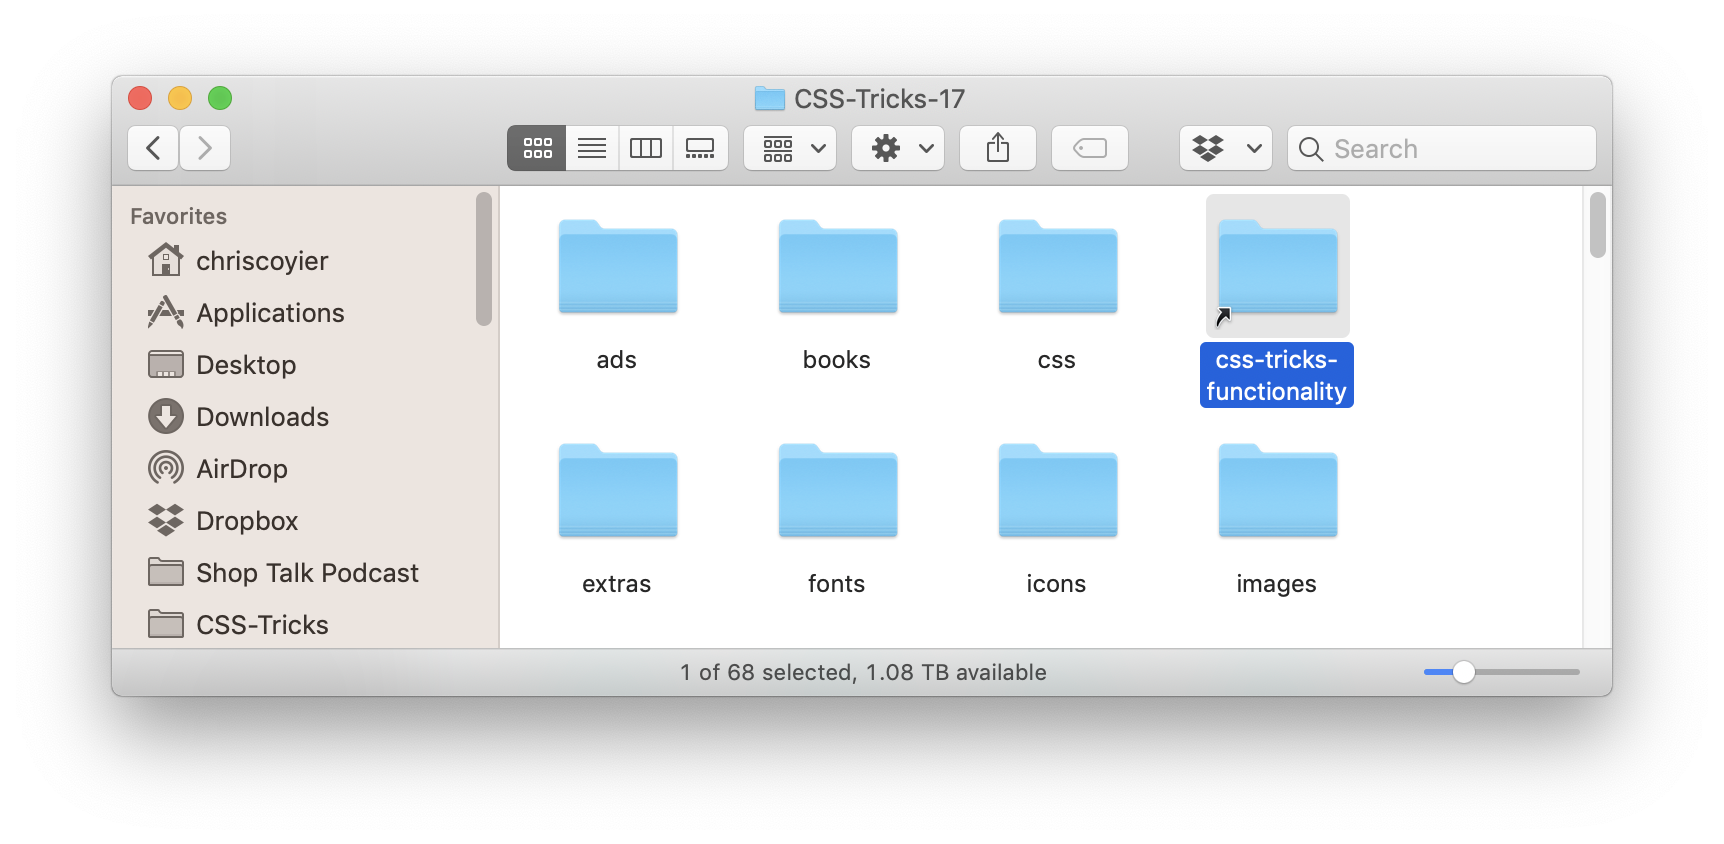
You’ll get a link that looks like an „alias” on macOS. Ya know, the things you can make by right-clicking an item or going File > Make Alias. But they are different. In my experience, aliases tend not to work in code editors, but symlinks do.
Looks like an alias, but it’s really a symlink.
I was actually lazy (hey, I prefer GUIs for just about everything) and used Nick Zitzmann’s symboliclinker context menu plugin to help make the link I wanted (and allow me to make other ones super easy).
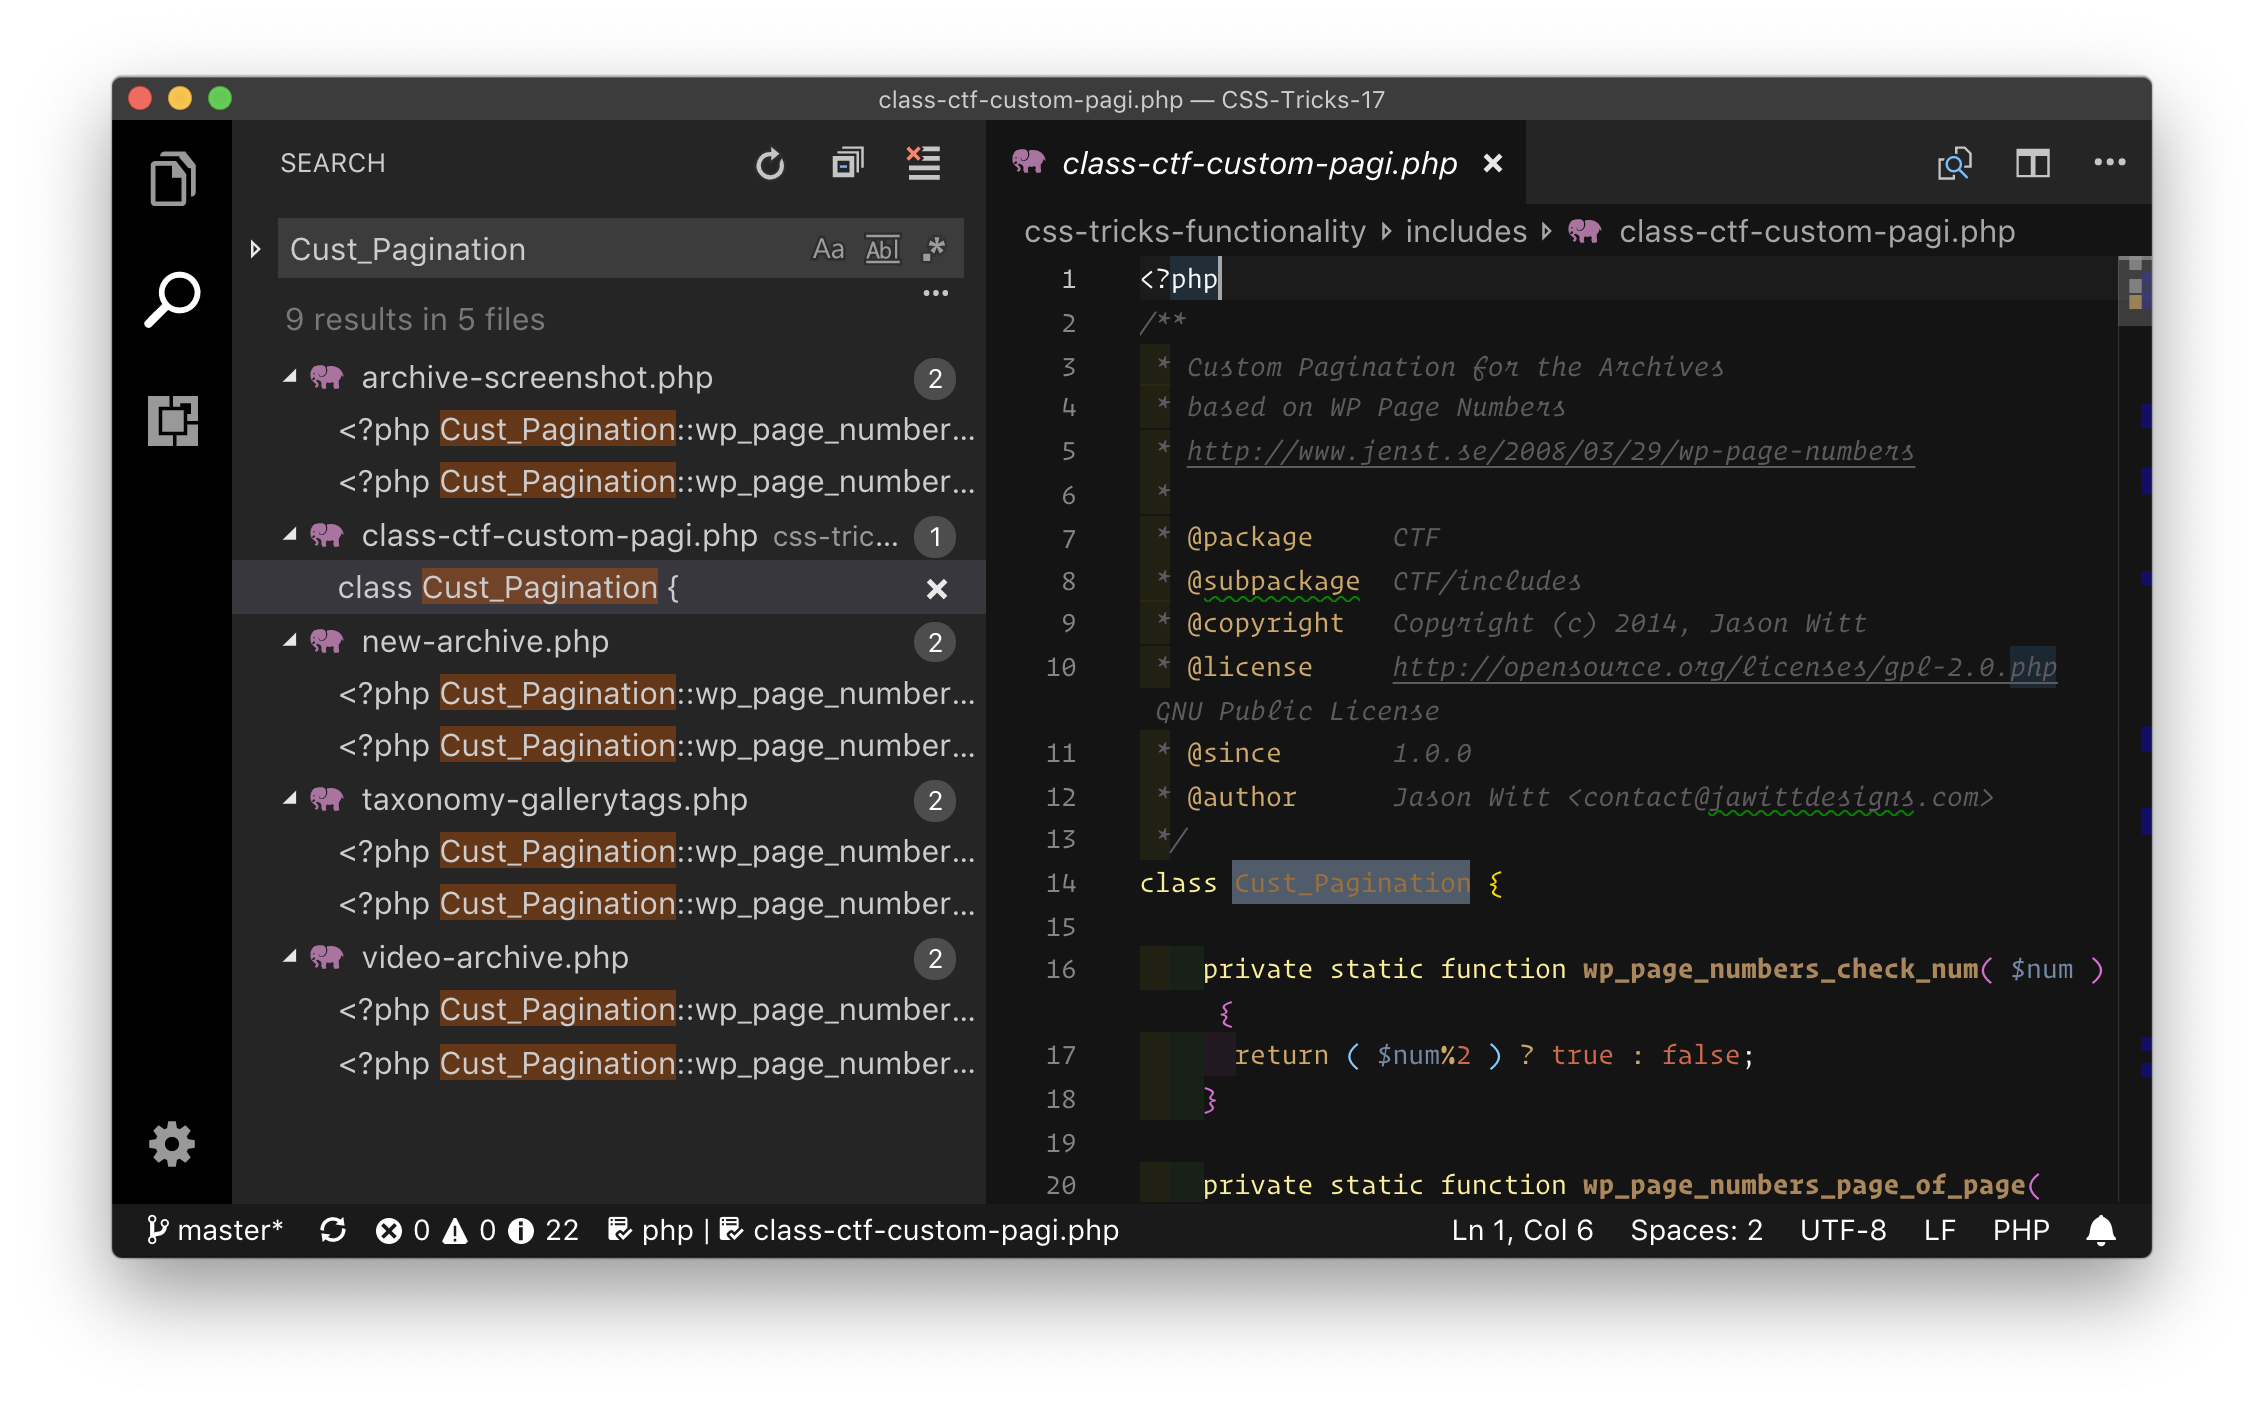
Why bother? I’ve had a handful of occasions over the years, but here’s one that just came up for me. I’m working on a WordPress theme, and there is a WordPress Functionality Plugin that goes with it. Ideally, I’d have just my theme folder open in my code editor (no need to have the entire WordPress root there, that would just slow my editor and make searching a mess). But I’d also like to have that plugin open at the same time, so in case I’m calling functions and such that the plugin controls, I can see both. But these folders are in totally different places…
No matter, I can put a symlink to the plugin in the theme. (You may want to .gitignore it, depending on your deployment setup and such.) Now I can search and find things in both places like I want:
I know that some editors have their own concept of this, like VS Code’s Multi-root Workspaces and how you can Project > Add Folder to Project in Sublime. But symlinks are a way to do the same thing but in a cross-editor and cross-system way that everyone can use!
monday.com is a centralized platform for teams to manage every detail of their work, from high-level roadmap planning to the specifics of day-to-day tasks, while building a culture of transparency. It is a tool for an any-sized team, which can start with two freelancers working together to thousands collaborating across the globe. The tool is really popular amongst non-tech teams, often replacing burdensome excel files, whiteboards, and excessively long meetings.
The main thing is that it’s not limited to tech companies, it is used by churches, construction companies, schools and universities, startups, fortune 500 companies including WeWork, Samsung, Discovery Channel, Wix, NBC, General Assembly, McDonalds, Uber, Wix, AOL, and Adidas. Currently, it has over 22,000 paying teams.
monday.com is a tool to help people work better together. monday.com is not a project management tool because it isn’t projects that need managing, it’s people. People are any company’s most valuable resource and as people, we all face the same workplace challenges; communicating with others, not feeling appreciated or motivated to do our jobs, a lack of understanding of how our work fits into the bigger picture, among so many others. Those are the essential problems Monday is trying to solve.
What can this app do?
Creating and managing project’s milestones
Creating and assigning task
Attaching files to any project’s tabhe projects on the go.
Using mobile applications to manage projects
Communicating with your team members
Updating team using the news feed
Possible to keep clients in the loop
Organizing the organization into teams
Creating detailed project’s charts and reports
Tracking the time your team members spend on tasks
Managing projects’ financials
Website as well as a desktop app for mac and windows
monday.com aims to make every user feel empowered and part of something bigger than their own individual tasks, and as a result, to boost collective productivity and transparency.
monday.com is a centralized platform for teams to manage every detail of their work, from high-level roadmap planning to the specifics of day-to-day tasks, while building a culture of transparency. It is a tool for an any-sized team, which can start with two freelancers working together to thousands collaborating across the globe. The tool is really popular amongst non-tech teams, often replacing burdensome excel files, whiteboards, and excessively long meetings.
The main thing is that it’s not limited to tech companies, it is used by churches, construction companies, schools and universities, startups, fortune 500 companies including WeWork, Samsung, Discovery Channel, Wix, NBC, General Assembly, McDonalds, Uber, Wix, AOL, and Adidas. Currently, it has over 22,000 paying teams.
monday.com is a tool to help people work better together. monday.com is not a project management tool because it isn’t projects that need managing, it’s people. People are any company’s most valuable resource and as people, we all face the same workplace challenges; communicating with others, not feeling appreciated or motivated to do our jobs, a lack of understanding of how our work fits into the bigger picture, among so many others. Those are the essential problems Monday is trying to solve.
What can this app do?
Creating and managing project’s milestones
Creating and assigning task
Attaching files to any project’s tabhe projects on the go.
Using mobile applications to manage projects
Communicating with your team members
Updating team using the news feed
Possible to keep clients in the loop
Organizing the organization into teams
Creating detailed project’s charts and reports
Tracking the time your team members spend on tasks
Managing projects’ financials
Website as well as a desktop app for mac and windows
monday.com aims to make every user feel empowered and part of something bigger than their own individual tasks, and as a result, to boost collective productivity and transparency.