Archiwum kategorii: Web Tools

How to Create Flat Design Headphones in Adobe Illustrator

Post pobrano z: How to Create Flat Design Headphones in Adobe Illustrator

Final product image
What You’ll Be Creating

I love headphones, and this tutorial is inspired by the Audiotechnica M50X. As you’ll see, we’ll be creating this with basic shapes in Adobe Illustrator. So if you’re a lover of headphones and good music, this tutorial is for you!

Get inspiration from the many flat design vector illustrations over on GraphicRiver.

Let’s start!

1. How to Create a New Document and Set Up a Grid

Press Control-N to make a New Document. Set the Units to Pixels, and enter 800 x 600 for the width and height of the document. Then in the Advanced options, select RGBScreen (72 ppi), and make sure to activate the Align New Objects to Pixel Grid box before clicking OK.

Activate the Grid (View > Show Grid) and Snap to Grid (View > Snap to Grid). You’ll need a grid every 10 px, so simply press Control-K to go to Preferences, and in Guides & Grid set Gridline every to 10 and Subdivisions to 4. Don’t worry—the grid will help you work in an easy way, and it can also be enabled or disabled by pressing the keyboard shortcut Control-„.

You can activate the Info panel (Window > Info) in order to have a preview of the size and position of your shapes. Remember to set the measuring unit to Pixels from Edit > Preferences > Units. This will greatly increase the speed of your work.

Set Up a new document of 800 x 600 px set the Grid and Units to Pixels

2. How to Create the Headphones

First things first—let’s start with one earpad so we can
duplicate it and then create the headband for our headphones. Make sure to turn on the Grid so that you can work with greater precision and ease.

Step 1

Start by creating the earpad with a 46 x 132 px rectangle using the
Rectangle Tool (M). Select #84EDFF as the fill color and no color for the stroke fill.

In the Transform panel, enter 14 px as the right-side corner
radius and 2 px as the left-side corner radius.
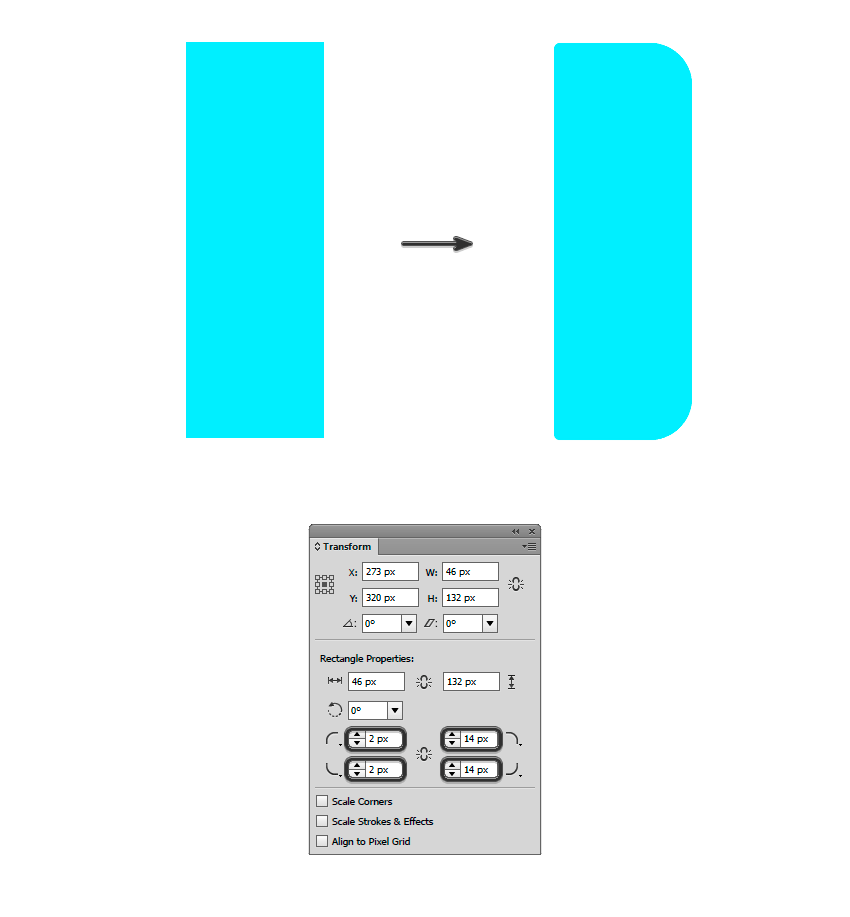
A 46 x 132 px rectangle with round corners in the Transform panel

Step 2

Duplicate the rectangle (Control-C > Control-F)
and change its Width to 36 px with the Selection Tool (V). Select #40BDD1 as the fill color and change the right-side corner radius to 10 px.

Setting the Width to 36 px with Selection Tool

Step 3

Duplicate the last rectangle (Control-C > Control-F) and change its Width to 24 px. Select #47D2E9 as the fill color and change the left-side corner radius to 6 px.

Duplicating the rectangle and changing its width

Step 4

Next to the earpad, create the speaker base
using a 4 x 128 px rectangle, and use #5B5B5F as the fill color; then set the right-side corner radius to 2 px.

Adding a base for the earpad using a 4 x 128 px rectangle

Step 5

Now create the housing using a 24 x 80 px rectangle. Select #363434 as the fill color and change
the left-side corner radius to 2 px

Adding a housing of 24 x 80 px rectangle

Step 6

Add some depth to the housing duplicating
(Control-C > Control-F) the previous rectangle and changing its Height to 58 px.
Change the fill color to #3B3939.

Duplicating the rectangle and changing its width from Transform panel

Step 7

Repeat the previous step and change the
rectangle’s Height to 50 px. Change the fill color to #444242.

Repeating the previous step

Step 8

Now create the support for the speaker’s hinge
using a 20 x 16 px rectangle. Select #4D4A4A as the fill color and change the left side radius to 8 px.

Duplicate the rectangle (Control-C > Control-F)
and move 2 px downwards using the arrow of your keyboard. Change the fill color
to #3B3B3B and send it backwards
(Object > Arrange > Send Backward).

Adding the support for the speakers hinge with a 20 x 16 px rectangle

Step 9

Create a 8 x 42 px rectangle for the small headband on the speaker/housing.
Set the lower corner radius to 4 px and select #5B5B5F as the fill color. 

Duplicate it (Control-C > Control-F) and change
the fill color to #3B3B3B. Move the rectangle
downwards 2 px, and send it backwards (Object > Arrange > Send Backward).

And now a small headband on the speaker with 4 px corner radius

Step 10

Continue with the small headband using a 8 x 10
px
rectangle. Select #444242 as the fill color and place
the rectangle as shown in the image below.

Another piece small over the headband using a 8 x 10 px rectangle

Step 11

Now create a hinge using a 16 x 16 px ellipse
with the Ellipse Tool (L). Select #5B5B5F as the fill color and place the ellipse as shown in the image below.

Duplicate the ellipse and change its size to
12 x 12 px from the Transform panel. Change the fill color to #444242.

Adding a hinge with a 16 x 16 px ellipse and another of 12 x 12 px

Step 12

Continue drawing the headband’s support using
a 16 x 18 px rectangle. Change the fill color to #444242. Select chamfer corners for the lower corners and set the
radius to 4 px. Send the rectangle to the back (Object > Arrange > Send
to Back
).

The headbands support with a 16 x 18 px rectangle over the hinge

Step 13

Create a new 12 x 20 px rectangle, and select #5B5B5F as the fill color. Set the lower corner’s radius to 6 px.

Duplicate (Control-C > Control-F) the rectangle
and change the fill color to #3B3B3B. Send it backwards
(Object > Arrange > Send to Back) and move it downwards 2 px.

Another support over the hinge with a 12 x 20 px rectangle

Step 14

Create two rectangles, one of 4 x 26 px (#D8D9DD) for
the headband strap, and another one of 12 x 20 px (#5B5B5F) as the strap support.

Duplicate the first rectangle (Control-C > Control-F) and change its Height to 2 px. Change the fill color to #AEADB3

Select everything and group it together
(Control-G).

And adding a headband strap of 4 x 26 px and another support of 12 x 20 px

Step 15

Now, we’ll draw our headphones headband. Let’s begin by creating a 252 x 252 px ellipse and selecting 20 px as the stroke width.
Select #84EDFF as the stroke color and delete the ellipse’s lower anchor point with
the Direct Selection Tool (A).

Expand the stroke (Object > Expand…) and
then slightly round the headband’s lower edges with the Direct Selection Tool
(A)
.

Adding a 252 x 252 px ellipse for the headphones headband

Step 16

Duplicate the headband (Control-C > Control-F).
Set the scale to 93% (Object > Transform > Scale..). Use #47D2E9 as the fill color.

Move the duplicated headband 6 px downwards, and then select both headbands and remove the lower remaining part with the Shape
Builder Tool (Shift-M)

Some depth for the headband duplicating and change its Scale

Step 17

We are about to finish the headphones!

Now select the left speaker, duplicate it
(Control-C > Control-F) and reflect it vertically (Object > Transform >
Reflect…
). Put it just on the right side of the headband.

Duplicating the speaker on the right side of the headband

3. How to Create a Plug Cord

Now that we have finished the headphones, it’s time to draw the plug cord.
Moving on!

Step 1

Let’s start with the cable entry in the right
speaker. Draw it using a 14 x 20 px rectangle, and select #2B2A2A as the fill color.

Add another 8 x 16 px rectangle for the cable connector. Use #545252 as the fill color.

Drawing the cable entry in the right speaker for the plug cord

Step 2

Now, draw the cable with the Pen Tool (P), using 4 px as the stroke thickness. Use #47D2E9 as the stroke color.

Round all corners with the Direct Selection
Tool (A)
. Then expand the stroke shape (Object > Expand…) and press OK.

Turn off Snap to Grid for a moment
(Shift-Control-„) to align the cable with the connector.

And now drawing the cable for the headphones with the Pen Tool

Step 3

Let’s draw the jack using a 8 x 22 px rectangle
and #545252 as the fill color. Add another 2 x 8 px rectangle (#8A8686).

Add a third rectangle, this one of (#B4B5B8) 4 x 20
px,
and set 2 px chamfers in the upper corners from the Transform panel.

Finally, add two 4 x2 px rectangles (#8A8686) and
place them over the jack.

Drawing the jack connector using rectangles

4. How to Create a Background

And we are done with the plug cord, so now let’s
finish the design by creating a nice background for our headphones.

Step 1

Let’s start by creating a musical note. To do
this, use a 22 x 12 px rectangle, a 4 x 40 px rectangle and finally a 20 x 20 px
ellipse. Use #003E57 as the fill color.

Link all forms and merge them together using the
Unite button from the Pathfinder panel. Slightly round all corners with the
Direct Selection Tool (A).

Creating a musical notes for the background

Step 2

Duplicate (Control-C > Control-F) the
musical note four times, and rotate the copies and change their scales using the Selection Tool (V).
Place them as shown in the picture below.

Then group them together and flip them
vertically (Object > Transform > Reflect…) to place them on the right side of the headphone.

Duplicating musical notes in the background with Selection Tool

Step 3

Finally, create an 800 x 600 px rectangle, the same
size as the canvas. Apply a radial gradient from the Gradient panel, using the
following fill colors:

  • Color A: #1F3B54
  • Color B: #182D40

Remember to send the rectangle to the back of
the canvas (right click > Arrange > Send to Back).

Setting a radial gradient for the background of 800 x 600 px

Awesome Work, You’re Finished!

Yaaaay! We’re done! You have finished this
amazing headphones illustration! It’s an incredible result, another example
that you can achieve fun illustrations without much difficulty by using basic forms.

I hope you enjoyed this tutorial as much as I
did; hopefully, it was full of new knowledge for you. I’d like to see your
design—I’ll be waiting!

Final result

Color variations

How to Create a Grass Action Text Effect in Adobe Photoshop

Post pobrano z: How to Create a Grass Action Text Effect in Adobe Photoshop

Final product image
What You’ll Be Creating

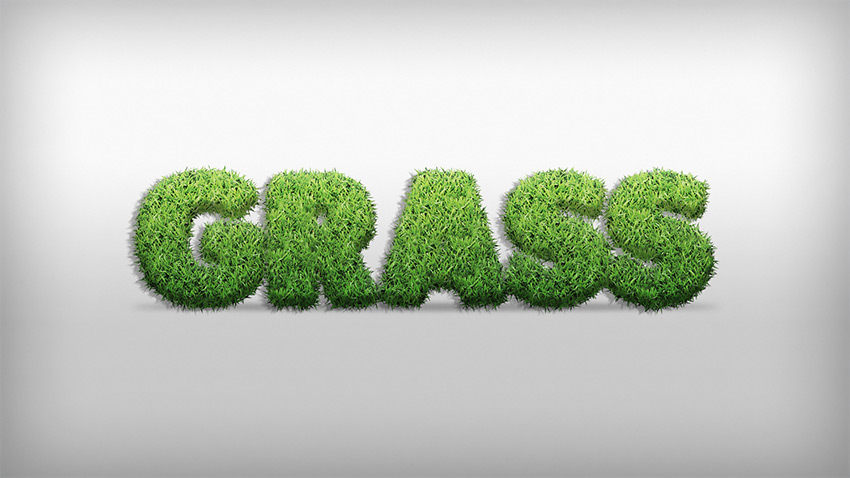
In this tutorial I will show you how to create a grass action in Adobe Photoshop using two brushes, and a layer style with a grass pattern. At the end of the tutorial you will have an action that lets you perform almost the entire process with a single click.

If you’d like to skip this tutorial but still wish to buy the action, you can head over to GraphicRiver and buy Grass Generator. The complete action has additional features, it works with 72 dpi and 300 dpi, and it also works with shapes.

promo image
Grass Generator

Tutorial Assets

The following assets were used during this tutorial:

1. How to Create the Brushes

Step 1

Open Photoshop and create a new 350 x 460 px document.

Creating a new document

Step 2

Press D on your keyboard to reset the Foreground and Background colors. Then pick the Ellipse Tool (U), and change its mode to shape.

Ellipse tool settings

Step 3

Start by drawing a long and thin oval shape.

Drawing the oval shape

Step 4

Now pick the Convert Point Tool and Control-Click on the center of the shape.

Convert Point Tool

Step 5

Now click on the anchor point at the top to make it pointy. Do the same thing on the anchor point at the bottom.

Converting anchor point

Step 6

Control-Click on the thumbnail of the Ellipse 1 layer to create a selection around the shape. Then go to Edit > Define Brush Preset…, name it Base Brush and click OK.

Creating the brush

Step 7

Pick the Brush Tool (B), and then Right-Click on the document and select the brush that we just created (Base Brush).

Choosing the brush

Step 8

Go to Window > Brush to open the Brush panel. Then set these settings in Brush Tip Shape:

  • Size: 27 px
  • Flip X: Unchecked
  • Flip Y: Unchecked
  • Angle:
  • Roundness: 100%
  • Spacing: 130%
Brush Tip Shape settings

Step 9

Select Shape Dynamics with these settings:

  • Size Jitter: 32%
  • Control: Off
  • Minimum Diameter: 7%
  • Angle Jitter: 35%
  • Control: Off
  • Roundness Jitter: 26%
  • Control: Off
  • Minimum Roundness: 100%
  • Flip X Jitter: Unchecked
  • Flip Y Jitter: Unchecked
  • Brush Projection: Unchecked
Shape Dynamics settings

Step 10

Select Scattering with these settings:

  • Scatter: 62%
  • Both Axes: Unchecked
  • Control: Off
  • Count: 5
  • Count Jitter: 100%
  • Control: Off
Scattering settings

Step 11

Select Color Dynamics with these settings:

  • Apply Per Tip: Checked
  • Foreground/Background Jitter: 100%
  • Control: Off
  • Hue Jitter: 2%
  • Saturation Jitter: 13%
  • Brightness Jitter: 11%
  • Purity: -1%

Color Dynamics makes no difference to the final result of this tutorial, but it’s important if you want to use the brush with other things.

Color Dynamics settings

Step 12

Now click on the icon in the top right corner of the Brush panel and choose New Brush Preset. Then name it Grass Brush 1 and check the Capture Brush Size in Preset box. After that, click OK.

Saving the Brush Preset

Step 13

Now let’s create a new preset. Go back to Brush Tip Shape in the Brush panel and make these changes:

  • Size: 18 px
  • Flip X: Unchecked
  • Flip Y: Unchecked
  • Angle:
  • Roundness: 100%
  • Spacing: 339%
Second Brush Tip Shape settings

Step 14

Don’t change the Shape Dynamics settings; just leave it selected. Then select Scattering and make these changes:

  • Scatter: 50%
  • Both Axes: Unchecked
  • Control: Off
  • Count: 8
  • Count Jitter: 0%
  • Control: Off
Second Scattering settings

Step 15

Leave Color Dynamics selected and save the preset as before, but this time name it Grass Brush 2.

Saving the second Brush Preset

2. How to Create the Text and Install the Pattern

Step 1

Go to File > Open…, and open the background that you downloaded (Background-Grass.jpg). 

Background image

Step 2

Pick the Type Tool (T) and write „GRASS”. Choose the Plump font, and then set the Size to 300 pt.

Type Tool and its settings

Step 3

Go to Edit > Presets > Preset Manager. In the Preset Type, select Patterns, click load…, and choose Grass Pattern.pat. After that, click Done.

Installing the Grass Pattern

3. How to Create the Action

Step 1

Go to Window > Actions to open the Actions panel.

Opening the Actions Panel

Step 2

Let’s create a new set of actions. To do so, click the Create New Set icon, name it Grass Set, and click OK.

Creating a new set of actions

Step 3

Click the Create New Action icon, name it Grass Text, and click Record.

From this point on, everything you do will be recorded, so keep an eye on the Actions panel. If you make a mistake, click the Stop Playing/Recording icon, and delete the unnecessary step from the action Grass Text. Then click the Begin Recording icon to continue.

Creating a new action

Step 4

With the text layer selected, go to Layer > Rename Layer… and rename it 1.

Renaming the text layer

Step 5

Create a new layer by clicking on the Create a New Layer icon, name it Grass 1, and click OK.

Creating a new layer

Step 6

Select the layer 1 and go to Type > Create Work Path.

Creating the work path

Step 7

Now select the layer Grass 1. Then pick the Brush Tool (B) and select the Grass Brush 1 with these settings.

  • Mode: Normal
  • Opacity: 100%
  • Flow: 100%
  • Pen Related Options: Unchecked
Selecting the brush

Step 8

Go to Window > Paths to open the Paths panel. Then right-click the Work Path and choose Stroke Path. Choose Brush with Simulate Pressure unchecked, and then click OK.

Creating the border

Step 9

Select layer 1. Then create a new layer and name it Grass 2.

Creating the second brush layer

Step 10

Now pick the Brush Tool (B) with these settings:

  • Brush: Grass Brush 2
  • Mode: Normal
  • Opacity: 100%
  • Flow: 100%
  • Pen Related Options: Unchecked
Selecting the second brush

Step 11

Go back to the Paths panel. Right-click the Work Path and choose Stroke Path. Just like before, choose Brush with Simulate Pressure unchecked, and then click OK. After that, delete the Work Path.

Creating the second border

Step 12

Now select the layer 1 again. Then hold down the Shift key and click on the layer Grass 1 to select all layers (except the Background layer).

Selecting the layers

Step 13

Right-click on the layer Grass 1 and choose Convert to Smart Object.

Convert to Smart Object

Step 14

Now double-click on the layer Grass 1 to open the Layer Style window. Let’s start with Bevel & Emboss:

  • Style: Inner Bevel
  • Technique: Smooth
  • Depth: 100%
  • Direction: Up
  • Size: 26 px
  • Soften: 0%
  • Use Global Light: Unchecked
  • Angle: 90º
  • Altitude: 30º
  • Gloss Contour: Linear
  • Anti-Aliased: Unchecked
  • Highlight Mode: Screen
  • Highlight Mode Color: #ffffff
  • Highlight Mode Opacity: 16%
  • Shadow Mode: Multiply
  • Shadow Mode Color: #000000
  • Shadow Mode Opacity: 30%
Bevel and Emboss settings

Step 15

Add an Inner Shadow with these settings:

  • Blend Mode: Multiply 
  • Color: #000000
  • Opacity: 22%
  • Use Global Light: Unchecked
  • Angle: -90º
  • Distance: 14 px
  • Choke: 16%
  • Size: 4 px
  • Contour: Linear
  • Anti-aliased: Unchecked
  • Noise: 0%
Inner Shadow settings

Step 16

Add a Gradient Overlay with these settings:

  • Blend Mode: Overlay
  • Dither: Unchecked
  • Opacity: 46%
  • Reverse: Unchecked
  • Style: Linear
  • Align with Layer: Checked
  • Angle: 90º
  • Scale: 89%

Click on the Gradient Bar and make a gradient with these settings:

  • First Stop Color: #000000
  • First Stop Position: 0%
  • Second Stop Color: #FFFB9C
  • Second Stop Position: 100%
Gradient Overlay settings

Step 17

Add a Pattern Overlay with these settings:

  • Blend Mode: Normal
  • Opacity: 100%
  • Pattern: Choose the Grass Pattern that you installed at the beginning of the tutorial.
  • Scale: 25%
  • Link with Layer: Checked
Pattern Overlay settings

Step 18

Add a Drop Shadow with these settings:

  • Blend Mode: Multiply
  • Color: #000000
  • Opacity: 31%
  • Use Global Light: Unchecked
  • Angle: 23º
  • Distance: 12 px
  • Spread: 0%
  • Size: 1 px
  • Contour: Linear
  • Anti-Aliased: Unchecked
  • Noise: 0%
  • Layer Knocks Out Drop Shadow: Checked

After that, click OK.

Drop Shadow settings

Step 19

Rename the layer Grass 1 to Grass Text. After that, click on the Stop Playing/Recording icon in the Actions panel.

Finishing the action

And the result is:

Final Result image

Congratulations, You’re Now Done!

In this tutorial, you learned how to create a grass action in Adobe Photoshop.

We started out by creating our brushes, then we created the text, and while recording an action, we added a border to it using the brushes and a Path, then finally a Layer Style to make it look like grass.

Things to Remember Before Playing the Action:

  • Make sure that you have installed the Pattern.
  • Make sure that the Brush Opacity and Flow are set to 100%.
  • Make sure that you are playing the action with the text layer selected.

To play it, you need to select the action Grass Text and click Play on the Actions panel. I hope you have enjoyed this tutorial, and feel free to leave your comments below. This action we just created is part of Grass Generator

promo image
Grass Generator

How to Create a Vintage Doily Frame With Flowers in Adobe Illustrator

Post pobrano z: How to Create a Vintage Doily Frame With Flowers in Adobe Illustrator

Final product image
What You’ll Be Creating

If you’re into retro flower illustrations, this tutorial will definitely
catch your attention.

Today we’ll create a vintage frame by using basic
shapes, the Warp Tool, and a Scatter Brush. You will learn how to create pansies and the laced doily. In the end, you’ll get a
very romantic illustration!

Have you ever had a chance to visit GraphicRiver? I love their collection of pansies—they are adorable.

1. How to Create the Pansy Flower

Step 1

After creating a New Document 850 x 850 px Width and Height, we will start by drawing the petals for our pansy.

First, we’ll draw an ellipse and then stretch it out as if you were stretching out a piece of pizza dough. Use
the Ellipse Tool (L) to make an ellipse. On the Tools panel (Window
> Tools
), double-click on the Warp Tool (Shift-R)

In the new
dialogue window, enter the options presented below. The Width and Height
on the Global Brush Dimensions can be different from the ones I used. It
depends on the petal size for the one you’re making. Then, click OK

Once
you’ve entered the necessary options, grab the Warp Tool (Shift-R) and
pull the mouse in different directions, as shown by the arrows in the
image below.

the Warp Tool options window
stretching the ellipse and creating the petal

Step 2

Add another darker ellipse on top of the shape you’ve created. Change the
options for the Warp Tool: double-click on the Warp Tool (Shift-R and
Enter
), and in the section for Global Brush Dimension, decrease the Width
and Height values. Then, hit OK. Now, by using the Warp Tool (Shift-R),
stretch this darker ellipse to create the shadow on the petal.

creating the shadow on the petal

Step 3

Let’s continue. Create a violet ellipse and stretch it out again with
the Warp Tool (Shift-R). Don’t worry—it may look weird now, but once we
put everything together, it’ll be cute. Just you wait!

finishinf creating the petal

Step 4

Select all details of the petal and group them together
(right-click > Group). Make two more copies of the petal (Control-C,
Control-V
) and arrange them as shown below.

creating 2nd and 3rd petals

Step 5

To create the fourth petal, make a copy of the first one, and then slightly
expand its size and rotate it to the right. Change the colors of this
petal as shown in the image below. 


The fifth petal peeps shyly from behind, so we’ll place it behind and slightly tilted to the left. This one will have the darkest color.

creating 4th and 5th petals

Step 6

In the middle of the flower, create two yellow circles (Ellipse Tool
(L)
) and stretch them with the Warp Tool (Shift-R) to make the pistil
and stamens for our pansy. Keep up the good work!

creating pistil and stamens

2. How to Create the Leaf

Step 1

This process will be very similar to the way we created the petals.
We’ll start with the Ellipse Tool (L) and draw two ellipses, and then
stretch out both ellipses in different directions by using the Warp Tool
(Shift-R)

When transforming the smaller, darker ellipse, change the
Width and Height in the Warp Tool options (double-click on the Warp Tool and
set the necessary values). Using the changed Warp Options (Shift-R),
warp the smaller ellipse to create a leaf-like shape.

creating the leaf

Step 2

In this step, we will add the veins of the leaf.

Using the Pencil Tool (N), draw a bunch of veins throughout the leaf.
Remember to remove the fill color and choose a dark green stroke color.
Before drawing, be sure to check the Round Cap button on the Stroke
panel. 


When you are done with the lines, expand them. Select
one vein and press Select > Same > Fill color. This will select
all the lines you just outlined. Now go to Object > Expand and hit
OK
. 


Keeping all veins selected, unite them by pressing the Unite button
on the Pathfinder panel (Window > Pathfinder). Still keeping them
selected, make a small touch with the Warp Tool (Shift-R). The veins
will now look more realistic.

creating the veins of the leaf

Step 3

Make another copy of this leaf. You can make a mirror reflection of the
existing one. While keeping the leaf selected, right-click your mouse
and select Transform > Reflect

Once you get a dialogue box, select
Axis Vertical, Angle 90 degrees, and press Copy. Make this copy slightly
smaller. If you want more changes, you can stretch the new one with the
Warp Tool (Shift-R) (optional).

creating another leaf

3. How to Create the Background

Step 1

Let’s make a light cream square for our background. Using the Rectangle
Tool (M)
, click on the artboard and create a square 850 x 850 px with no
stroke and the fill color presented below.

creating the background

Step 2

Draw a circle with the Ellipse Tool (L) while holding the Shift button.
Place this circle in the middle of the square. To do this, open the Align
panel (Window > Align). Set the alignment to Artboard (open the
fly-out menu and go to Show Options if you don’t see the Align To
section shown here), make sure that your shapes are selected, and click
the Horizontal Align Center and Vertical Align Center buttons. In the
end, your circle should be in the middle of the square.

Using the same method, align the square.

creting the background 2

Step 3

In this step, we’ll create a Scatter brush that we can use to make our
doily. Delete the fill color and set the stroke color of your choice.

Using
the Ellipse Tool (L), hold down the Shift key to make one circle with
relatively large stroke weight and no fill. On top of this circle, add a
smaller one with a thinner stroke weight.

To make a copy of the
smaller circle, select it, and then while holding the Shift and Alt keys,
drag it down. Select these two small circles and group them:
right-click > Group

While keeping them selected, press the Rotate
Tool (R)
and the Enter key. In the pop-up window, enter 45 degrees and hit Copy. Press
Control-D and you’ll get a copy of these circles rotated in 45-degree increments. 

Continue pressing Control-D until you get the whole flower
made from small circles and one large circle in the middle. Expand this
image: select all circles and go to Object > Expand.

creating the Scatter brush

Step 4

After expanding the image, the stroke color will automatically change to
the fill color. Change this fill color to white and drag the entire set
of circles to the Brushes panel. Select the Scatter Brush and enter the options for Scatter Brush presented below.

dragging the Scatter brush to the Brushes panel
New Brush options window
Scatter Brush Options window

Step 5

Now we will use this brush to design our doily. Select the white circle
in the middle of the artboard which you created before, and hit the
newly created brush. Tadaa—you just made a doily! You can also change
the stroke Weight on the Stroke panel if you’d like to adjust the size
of the side lace ornaments.

creating the doily lace

4. Place All the Elements Together

Step 1

Now return to your pansy. Make two more copies of it and arrange them together; feel free to change the size.

placing flowers on the background

Step 2

Let’s not forget our leaves! Make as many copies of the leaves as you want
and place them behind the flowers, but over the background. Congratulations!
You’re done!

placing leaves on the background

Awesome Work, You’re Done!

A round of applause for a job well done! I hope you enjoyed learning
some of the processes and shortcuts during the creation of this image in
the Adobe Illustrator. As always, feel free to share your project and
ask questions in the comments section below. Happy designing!

final image

20 Elegant Wedding Program Templates

Post pobrano z: 20 Elegant Wedding Program Templates

An effective wedding program shows the schedule of your ceremony while adhering to the overall design of your theme. And with premium wedding program templates, you can achieve professional results right at home! Check out this collection of 20 elegant wedding programs to make your special day even better!

20 Stunning Wedding Program Templates

Your wedding day shouldn’t be a time of worry. Take the hassle out of wedding planning with premium-level designs.

Achieve the same high-quality results you would get from any professional by using a pre-made template. Enjoy this collection
of 20 amazing assets curated from GraphicRiver and Envato Elements.

Use these designs to set the pace of your wedding, or enlist the help of a design professional by contacting the good folks at Envato Studio for custom wedding programs.

Rustic Wedding Program

Rustic designs give you that great charm of simplistic elements while elevating your prints with elegance. And in this package, you’ll get access to a lovely rustic design you can print easily at home! Download today to enjoy this high-quality design inspired by the creator’s very own wedding! 

Rustic Wedding Program

Rose Wedding Invitation Set

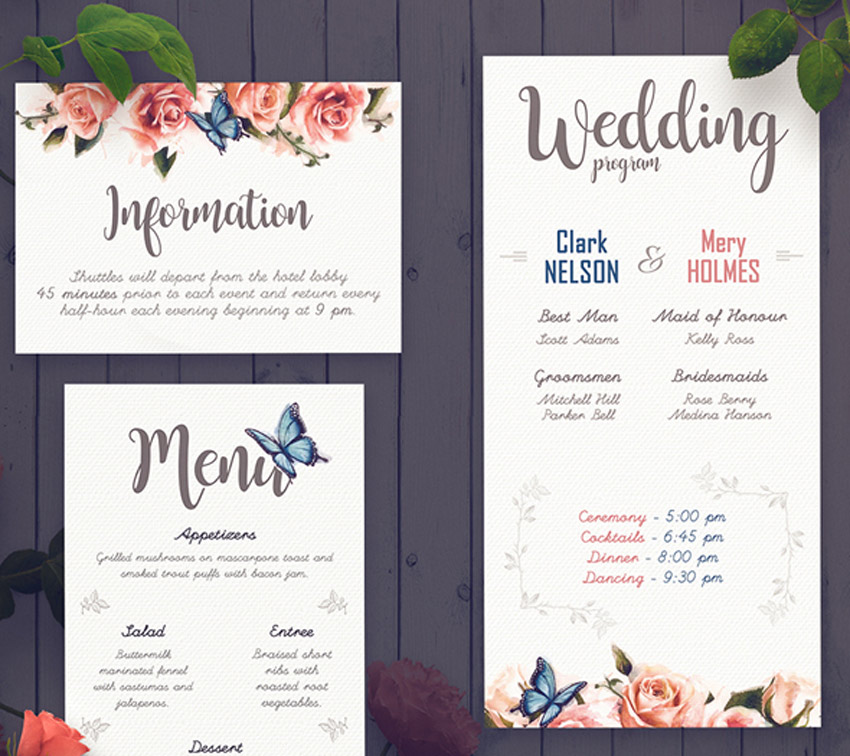
Floral prints always work well with any wedding. And this gorgeous package features five Photoshop files with a unique rose-inspired design. Enjoy access to a charming information card, wedding program, and simplistic menu for a stunning flower-themed wedding.

Rose Wedding Invitation Set

Wedding Invitation Package

Incorporate a sleek, minimalist look into your wedding program design. This package features three fully layered Photoshop files with free fonts already included. Download this set today to get access to a unique design for your special day!

Wedding Invitation Package

Black & White Wedding Invitation Pack

Running short on time? Wedding invitation packs are a great way to get premium level designs with all the resources you need. Easily edit and customize this set, for instance, featuring a charming black and white design and seven unique Photoshop files.

Black  White Wedding Invitation Pack

Burlap and Lace Wedding Invitation Suite Template

Spring and summer are the ideal seasons for any wedding. But beautiful weather can also bring uncomfortable heat. So download this fun package and let your wedding program double as a unique fan, bringing a refreshing breeze to all your wedding guests.

Burlap and Lace Wedding Invitation Suite Template

Wedding Invitation Package – Vintage Old Style

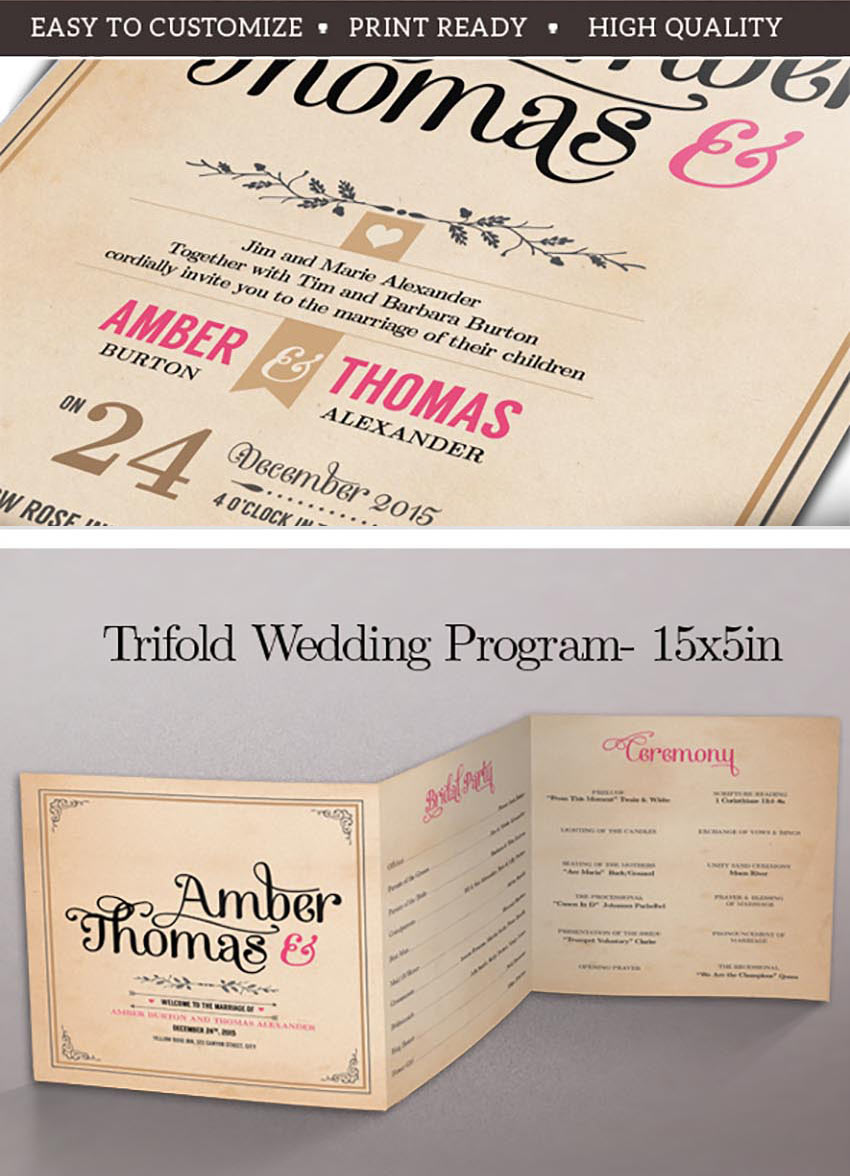
Does your wedding have a vintage theme? Then we’re sure you’ll love this massive wedding invitation pack. Inspired by an old vintage style, this package includes 16 Photoshop files with all the designs you need to celebrate your special day.

Wedding Invitation Package - Vintage Old Style

Confetti Wedding Pack

Bold colors make any wedding stand out! And you can achieve that clean, elegant look with this fun confetti wedding pack. This package features eight total files that are print ready and easily editable. Change any feature you’d like easily with this one-of-a-kind package.

Confetti Wedding Pack

Elegant Wedding Invitation Set

Enjoy the delicate and sublime colors of this elegant wedding invitation set. Included in this remarkable package are several Photoshop files available in both light and dark versions for further customization. Get access to a clean ceremony program, invitation cards, and so much more!

Elegant Wedding Invitation Set

Vintage Glam Wedding Package

Show off the glamorous style of your wedding with this vintage inspired design. Included in this package are nine different print files with an awesome tri-fold wedding program design that will set your wedding apart from the rest. Download this package today to get access to print-ready, high-quality files.

Vintage Glam Wedding Package

Rustic Floral Wedding Program

Do you love the look of traditional watercolor paintings? Then incorporate that gorgeous fluid look into your wedding designs with this inspiring package. Included in this package are 12 unique items perfectly set up for your invites, wedding program, and more. Download today to also enjoy the free fonts included with this package.

Rustic Floral Wedding Program

Wedding Invitation Stationery – Rose Garden

There are so many aspects to wedding stationery that you can easily forget. So download this complete package featuring over 10 different print files with several color options to choose from. Enjoy this lovely rose-inspired design for an elegant wedding ceremony.

Wedding Invitation Stationery - Rose Garden

Chalkboard Wedding Invitations

Get the elegant look of chalkboard design with this charming invitation package. This package features nine total files with three different color schemes to choose from. Enjoy a bi-folded wedding program that is sure to impress guests by downloading these files today!

Chalkboard Wedding Invitations

Flora – Wedding Pack

Combine your love of traditional paintings and flowers into your special day with this elegant package. This package features 13 files you can easily edit with Adobe InDesign. Some of the designs include basic invitations, a wedding program, and so much more to personalize your wedding with style.

Flora - Wedding Pack

In the Air – Wedding Pack

Walk down the aisle with class with this awesome wedding package. Included in this package are five amazing Photoshop files with a charming heart-themed design. Enjoy an elegant ceremony program, table numbers, and so much more in this awesome set!

In the Air - Wedding Pack

Wedding Package – Watercolor Flower

Customize your theme to fit the spring season with this elegant rose-inspired wedding template package. This package features 11 print-ready files that are easy to customize. Enjoy the colorful watercolor details and elegant free fonts included in this design.

Wedding Invitation Package - Watercolor Flower

Flowery Wedding Program

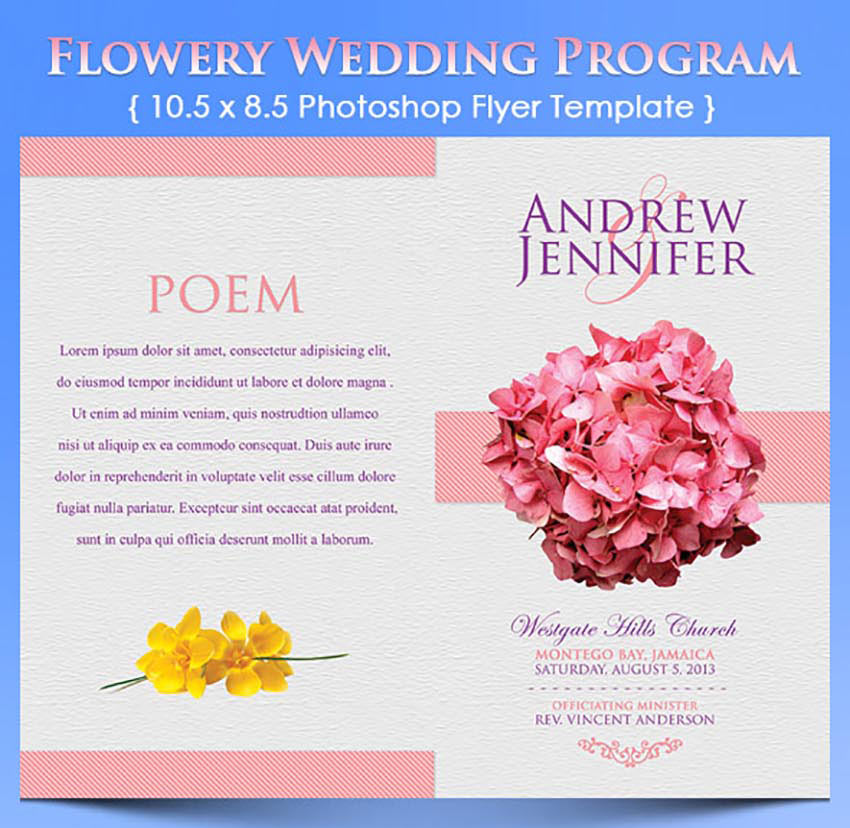
Get ready to throw the bouquet with this flower-inspired wedding program. This template features a 10.5 x 8.5 Photoshop document with plenty of room for your ceremony details. Easy to edit with completely organized layers, this program is simply ready to go!

Flowery Wedding Program

Wedding Template Pack

Template packs provide high-quality designs for all of your wedding needs. And with this package, you’ll get access to four unique items designed for your special day. Created with a lovely lace design, these prints are perfect for incorporating into your wedding ceremony.

Wedding Template Pack

Wedding Program Template Bundle

Need an all-in-one wedding bundle that packs a punch? Then check out this awesome wedding program package. Included in this bundle are four different print files, a clean reception program, and additional designs to make your wedding unique. With four color presets also included, the design possibilities are truly limitless with this amazing package.

Wedding Program Template Bundle

Floral Rustic Wedding Invitation Set

Flowers and vintage design are a perfect match for any wedding theme. And in this package, you can enjoy access to ten unique files including a wonderful ceremony program. Each file is fully layered and editable, and even the banners and flowers can be changed to your specific preferences!

Floral Rustic Wedding Invitation Set

Wedding Invitation & Program Pack

There’s nothing more elegant than a clean black and white design. And this wedding package features 14 awesome Photoshop files with all the necessary prints you need. Included in this set are an invitation card, ceremony program, and so much more!

Wedding Invitation  Program Pack

Conclusion

This list is jam-packed with amazing wedding program resources for the
avid designer familiar with Adobe Photoshop and Illustrator. But with hundreds of wedding program templates
available at your fingertips, chances are we’ve missed a few to add to your
personal collection. If you need a more hands-on approach, however,
consider enlisting the help of a design professional from Envato Studio.

Be sure to browse GraphicRiver and Envato Elements for more resources and let us know your favorites in the comments below!

How to Create a Super Easy Liquid Metal Text Effect in Adobe Photoshop

Post pobrano z: How to Create a Super Easy Liquid Metal Text Effect in Adobe Photoshop

Final product image
What You’ll Be Creating

This tutorial will show you a very quick and easy way of creating a liquid metal text effect, using a couple of textures, patterns, and layer styles. Let’s get started!

This text effect was inspired by the many Layer Styles available on GraphicRiver.

Tutorial Assets

The following assets were used during the production of this tutorial:

1. How to Add Default Patterns

Step 1

Go to Edit > Presets > Preset Manager, and choose Patterns from the Preset Type drop-down menu.

Then, click the little arrow to the right of the Preset Type drop-down menu, and click the Nature Patterns set. When the dialog box appears after that, just click Append.

Load Default Patterns

Step 2

Open the Metal scales seamless texture 1 image in Photoshop, go to Edit > Define Pattern, name the pattern Metal Scales, and click OK.

Define Pattern

2. How to Create a Textured Background

Step 1

Create a new 1000 x 600 px document. Then click the Create new fill or adjustment layer icon at the bottom of the Layers panel and choose Gradient.

Add a Gradient Adjustment Layer

Step 2

Create the gradient fill using the colors #301e14 to the left and #0d0909 to the right.

Set the Style to Radial and the Scale to 250.

Gradient Fill Settings

Step 3

Place the Texture 555 image on top of the Gradient layer, and rename its layer to BG Texture.

Change the BG Texture layer’s Blend Mode to Soft Light, and resize it as needed.

The Background Texture Settings

Step 4

Add a Gradient Map adjustment layer, and clip it to the BG Texture layer. Use the gradient fill below, and check the Dither box. Then, change the Gradient Map layer’s Blend Mode to Color and its Opacity to 75%.

Gradient Map Settings

3. How to Create Text Layers

Step 1

Create the text using the font Skyoval. Set the Color to #7f7b78 and the Size to 350 pt.

Create the Text

Step 2

Duplicate the text layer and change the copy’s Fill value to 0.

Duplicate the Text Layer

Step 3

Duplicate the copy text layer.

Create Another Copy Text Layer

4. How to Style the Original Text Layer

Double-click the original text layer to apply the following layer style:

Step 1

Add a Bevel and Emboss with these settings:

  • Size: 18
  • Uncheck the Use Global Light box
  • Angle: 112
  • Altitude: 32
  • Gloss Contour: Cove – Deep
  • Check the Anti-aliased box
  • Highlight Mode: Linear Light
    • Color: #f3d6b7
  • Shadow Mode: Linear Burn
    • Color: #7a7a7a
Bevel and Emboss

Step 2

Add a Contour with these settings:

  • Contour: Half Round
  • Check the Anti-aliased box.
Contour

Step 3

Add a Texture with these settings:

  • Pattern: Clouds
  • Scale: 25%
  • Depth: 5%
Texture

Step 4

Add an Inner Shadow with these settings:

  • Blend Mode: Screen
  • Color: #4e9d86
  • Opacity: 50%
  • Uncheck the Use Global Light box
  • Angle: 90
  • Distance: 8
  • Size: 9
  • Contour: Half Round
Inner Shadow

Step 5

Add an Inner Glow with these settings:

  • Blend Mode: Difference
  • Opacity: 35%
  • Color: Use the Bronze Bz55 gradient fill
  • Source: Center
  • Size: 29
Inner Glow

Step 6

Add a Satin effect with these settings:

  • Blend Mode: Hard Light
  • Color: #deb7a7
  • Opacity: 50%
  • Angle: 90
  • Distance: 13
  • Size: 15
  • Contour: Rolling Slope – Descending
  • Check the Anti-aliased box
  • Check the Invert box
Satin

Step 7

Add a Color Overlay with these settings:

  • Color: #653739
  • Blend Mode: Color Burn
Color Overlay

Step 8

Add a Drop Shadow with these settings:

  • Color: #010101
  • Opacity: 85%
  • Distance: 15
  • Size: 10
Drop Shadow

This will style the first text layer.

Styled Text Layer 1

5. How to Style the First Copy Text Layer

Double-click the first copy text layer to apply the following layer style:

Step 1

Add a Bevel and Emboss with these settings:

  • Size: 10
  • Uncheck the Use Global Light box
  • Angle: 69
  • Altitude: 42
  • Gloss Contour: Cone – Inverted
  • Check the Anti-aliased box
  • Highlight Mode: Linear Light
    • Color: #f3d6b7
  • Shadow Mode:
    • Opacity: 0%
Bevel and Emboss

Step 2

Add a Contour with these settings:

  • Contour: Cone
  • Check the Anti-aliased box.
  • Range: 100%
Contour

Step 3

Add a Texture with these settings:

  • Pattern: Blue Daisies
  • Scale: 25%
  • Depth: 5%
Texture

Step 4

Add an Inner Shadow with these settings:

  • Blend Mode: Linear Burn
  • Color: #a5a7cb
  • Opacity: 50%
  • Uncheck the Use Global Light box
  • Angle: 90
  • Distance: 5
  • Choke: 10
  • Size: 9
Inner Shadow

Step 5

Add an Inner Glow with these settings:

  • Blend Mode: Overlay
  • Opacity: 11%
  • Color: Use the stove pipe 100 gradient fill
  • Technique: Precise
  • Source: Center
  • Size: 18
  • Contour: Cone – Inverted
Inner Glow

This will style the second text layer.

Styled Text Layer 2

6. How to Style the Second Copy Text Layer

Double-click the second copy text layer to apply the following layer style:

Step 1

Add a Bevel and Emboss with these settings:

  • Size: 32
  • Uncheck the Use Global Light box
  • Angle: -30
  • Altitude: 48
  • Gloss Contour: Cone
  • Check the Anti-aliased box
  • Highlight Mode: Vivid Light
Bevel and Emboss

Step 2

Add a Contour with these settings:

  • Contour: Ring – Double
  • Check the Anti-aliased box.
  • Range: 100%
Contour

Step 3

Add a Texture with these settings:

  • Pattern: Metal Scales
  • Scale: 50%
Texture

Step 4

Add an Inner Glow with these settings:

  • Blend Mode: Linear Light
  • Opacity: 35%
  • Color: #e5d2b2
  • Size: 29
  • Contour: Cone – Asymmetrical
Inner Glow

Step 5

Add a Satin effect with these settings:

  • Blend Mode: Linear Light
  • Color: #93c0f7
  • Opacity: 50%
  • Angle: 5
  • Distance: 51
  • Size: 65
  • Contour:
  • Check the Anti-aliased box
  • Un-check the Invert box
Satin

Step 6

Add a Pattern Overlay with these settings:

  • Blend Mode: Lighten
  • Opacity: 35%
  • Pattern: Metal Scales
  • Scale: 50%
Pattern Overlay

This will style the final text layer.

Styled Text Layer 3

7. How to Adjust the Coloring

Add a Gradient Map adjustment layer on top of all layers, use the gradient fill below, and check the Dither box.

Then, change the Gradient Map layer’s Blend Mode to Soft Light and its Opacity to 20%.

Gradient Map

Congratulations! You’re Done

In this tutorial, we created a background using a gradient fill and a texture. Then, we created a couple of text layers, and styled each one of them to achieve the liquid metal effect.

Please feel free to leave your comments, suggestions, and outcomes below.

Final Result

New Short Course: How to Shade Animals in Perspective

Post pobrano z: New Short Course: How to Shade Animals in Perspective

Final product image
What You’ll Be Creating

Do you struggle to create convincing shading in your artwork? If you take our new course, How to Shade Animals in Perspective, you’ll learn some fantastic techniques for creating realistic-looking shading in all your future work.

What You’ll Learn

When you draw, you use lines. When you paint, you use light and shadow. To paint realistic, 3D looking forms, you need to understand how various shades create the illusion of depth.

Sketch of animal with perspective lines

The basic principles are easy—you can probably tell the difference between light, shadow, and reflected light. But the real question is: how do you predict the shape of the shadow? How do you guess whether the surface should be bright, dark, or somewhere in between? 

To create convincing shading from imagination, you must be able to answer these questions. In this course, Monika Zagrobelna will teach you some rules you can use to predict shading accurately, and how to simplify them to shade animals quickly and intuitively.

Watch the Introduction


Take the Course

You can take our new course straight away with a free 10-day trial of our monthly subscription. If you decide to continue, it costs just $15 a month, and you’ll get unlimited access to our full library of hundreds of courses.

Build on your knowledge and learn how to draw animals in our course How to Draw Animals in Perspective.

30 Best Stylish Cursive Fonts

Post pobrano z: 30 Best Stylish Cursive Fonts

The key to great design is to know your way around different typefaces. And one of the quickest ways to elevate your designs is with a stylish, cursive font. Check out
this collection of 30 incredible script fonts you’ll want to incorporate into your next creative project!

30 Stylish Cursive Fonts

Whether you love handwritten fonts, vintage-inspired scripts, or squiggly typefaces, we’ve got unique cursive styles just for you!

Explore the amazing collection
of 30 cursive fonts hand-picked from the inspiring sections on GraphicRiver and Envato Elements.

Create phenomenal designs with these fonts or enlist the help of a design professional by contacting the good folks at Envato Studio for custom typography work.

Bromello Typeface

Let’s kick things off with this delicious, curvy typeface. This beautiful modern script features a cool handmade design that is certain to make any poster stand out. Included in this package are a full set of characters, numbers, and convenient stylistic alternatives.

Bromello Typeface

Salma Script Font

Feast your eyes on this gorgeous fresh font. Inspired by a trendy, natural design, this font can be used to highlight any special day in your life. Download this font to get access to several font files that work perfectly with any design software.

Salma Script Font

Martila Font

Explore endless design possibilities with this dreamy Martila font. This wavy typeface is inspired by traditional calligraphy styles and features a simple modern aesthetic that will work perfectly with your next design. Incorporate this font into logos, print work, and so much more!

Martila Font

Marchy Script Font

March into the cursive spirit with this fun script. This modern typeface features a handmade calligraphy style with decorative characters and a dancing baseline. It also comes complete with over 430 glyphs, alternative characters, and all the standard letters you need!

Marchy Script Font

Montic Font

Modern design should always have a nice balance of clean, fluid aesthetics, and this Montic font is a great pick for your calligraphy needs. Created by hand, this wavy font is perfect for any celebration including weddings, engagement parties, and so much more!

Montic Font

Brushgyo Typeface

Perfectly suited for logo design, or any design catering to typography, this stunning typeface features uppercase and lowercase letters, numbers, and all the punctuation you need. Download today to enjoy what this unique font has to offer!

Brushgyo Typeface

Truvaway Script

This delicate font has an interesting mix of beautiful cursive strokes along with a natural handwritten feel. Designed with a clean and classy aesthetic in mind, this signature script is packed with loads of great features and plenty of different options for additional customization.

Truvaway Script

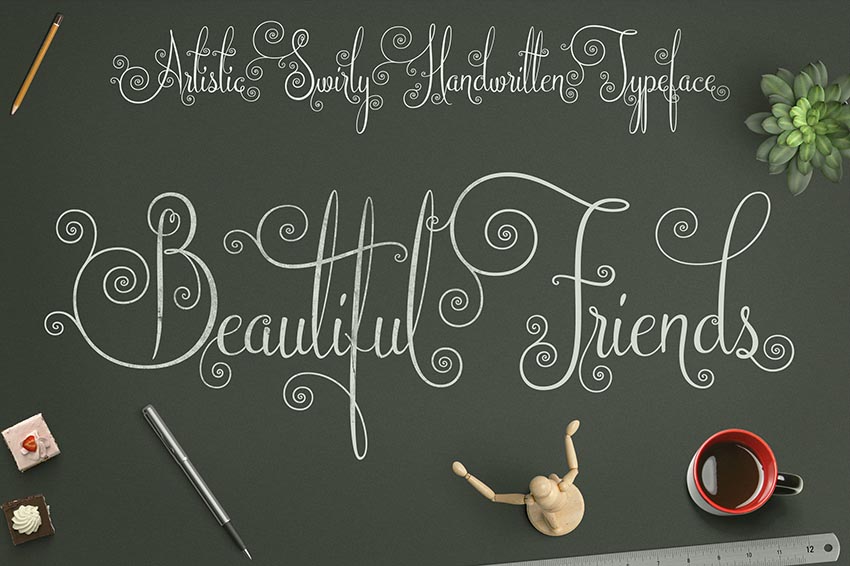
Beautiful Friends Font

We think all our friends are beautiful here at Envato Tuts+! And with this swirly font, you’ll create cute and exciting designs full of fun energy. Make anything you touch adorable with this unique style full of pretty swirls and over a thousand extra glyphs!

Beautiful Friends Font

Leviafan Script Font

Handmade fonts are always the way to go if you want to create showstopping creative designs! And this beautiful cursive font certainly takes the cake! Enjoy the incredible handcrafted design inspired by vintage hand lettering. Incorporate this font into your next creative project for amazing results!

Leviafan Script Font

Risthi Script Font

Show off your awesome and unique point of view with this modern calligraphy typeface. Inspired by stylish copperplate calligraphy fonts, this handwritten typeface is perfect for any modern design. Included in this download are several font files and even a web font version for your convenience.

Risthi Script Font

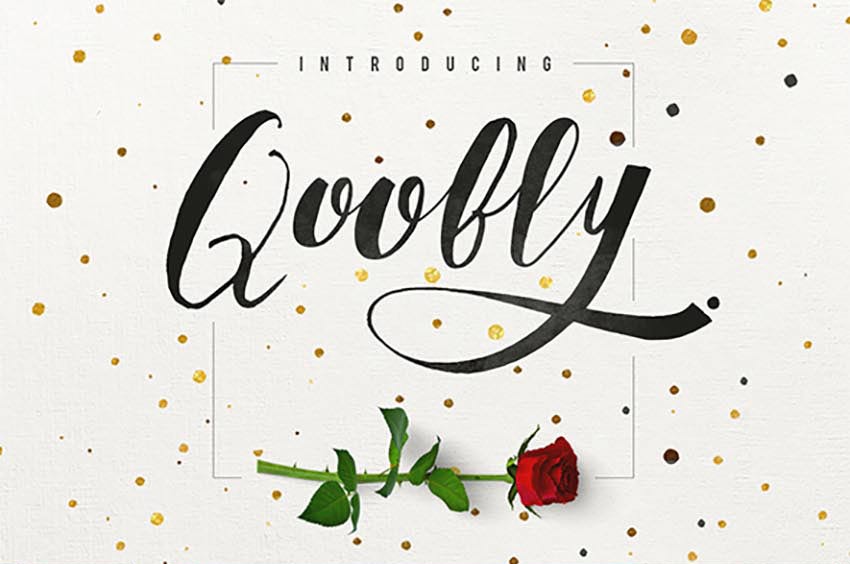
Qoobly Typeface

Get that authentic handcrafted feel with this amazing script font. It’s designed with thick curvy lines that are accented by much daintier ones, and we’re sure you’ll definitely find a use for this beautiful typeface. Included in this package are two different font files you can use with either Macs or PCs.

Qoobly Typeface

Afrile Script Font

A gentle font with gorgeous fluid curves, the Afrile script is certainly a stunner! This elegant typeface features a smooth calligraphy design packaged with all the letters, numbers, and punctuation you need for outstanding logos and prints!

Afrile Script Font

Evelyn Script Font

We can hear the wedding bells ringing for this stunning script font. Evelyn is a modern calligraphy typeface that makes any design look incredible. Included in this download is a full set of letters and numbers, along with over 300 glyphs for more creative options.

Evelyn Script Font

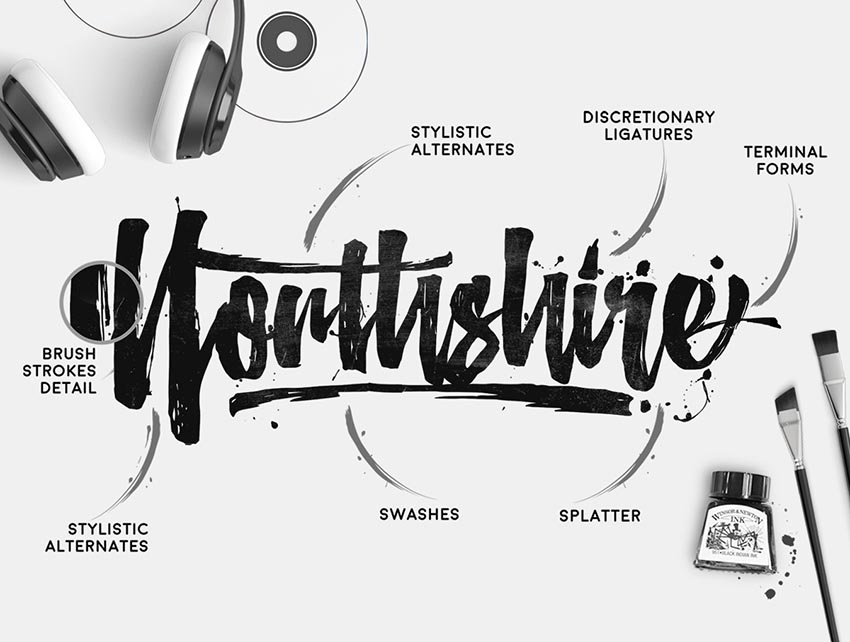
Northshire Script Family

If you’re looking for a font with a little edge then you’ll definitely love this Northshire script. A dual-purpose font inspired by messy brush lettering, this script features a full set of capital and lowercase letters, numbers, and extra glyphs to help elevate your designs.

Northshire Script Family

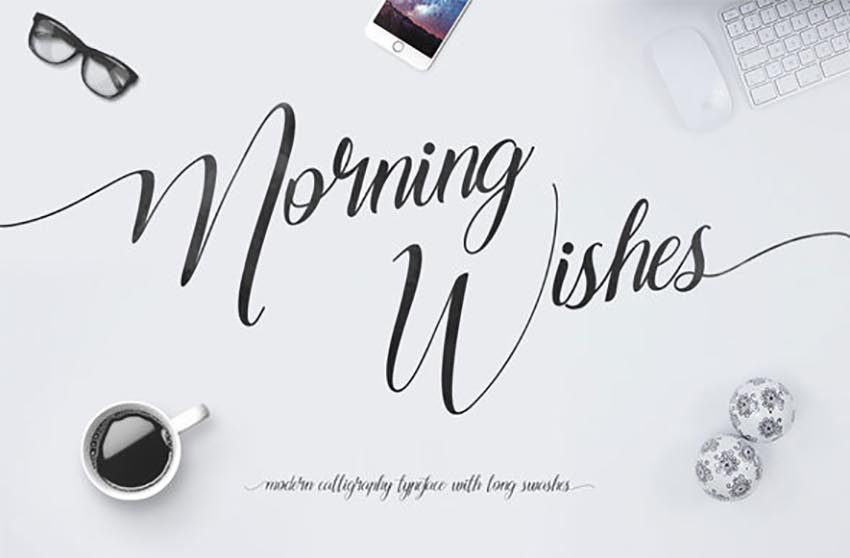
Morning Wishes Font

Inspired by traditional handwritten styles, this cursive font features a beautiful calligraphy style you’ll wish was your own handwriting. Included in this download are several font files and all the letters you need for gorgeous typography designs.

Morning Wishes Font

Olivia Sand Typeface & Flowers Set

Need a charming typeface with a dainty design? Then you’ll definitely love this Olivia Sand font. This incredible package features all the basic characters and numbers you need along with 21 additional PNG files of beautiful watercolor flowers for stunning handmade designs.

Olivia Sand Typeface  Flowers set

Ilana Bloom Font

This gorgeous font will have you feeling as if you’re walking through a gorgeous spring meadow. And this package comes complete with regular font files, scripts, and even decorative swashes for additional creative designs.

Ilana Bloom Font

DrusticDialy Font

There’s nothing quite like the charm of old vintage style to add a certain rustic quality to your custom designs. And with this unique typeface, you can enjoy that weathered vintage look for all your logos or print designs. This package features several stylistic alternatives including serif, script halftone, and condensed italic versions.

DrusticDialy Font

Brandine Font

Sometimes all you need for a great design is a little feminine touch. And with this thin typeface, you’ll get access to a unique cursive font created from skinny watercolor brushes. Download this file to enjoy all your basic characters along with ligatures and accented glyphs.

Brandine Font

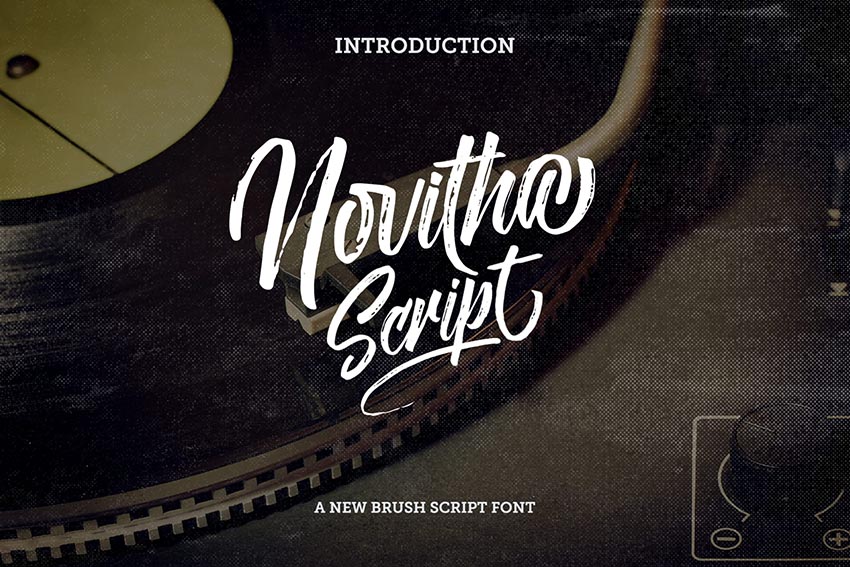
Novitha Script Font

Enjoy the beautiful, high-quality resolution of this unique brush font. Created by hand using a brush pen, this font features a full set of characters, numbers, and even full support for over 30 different languages!

Novitha Script Font

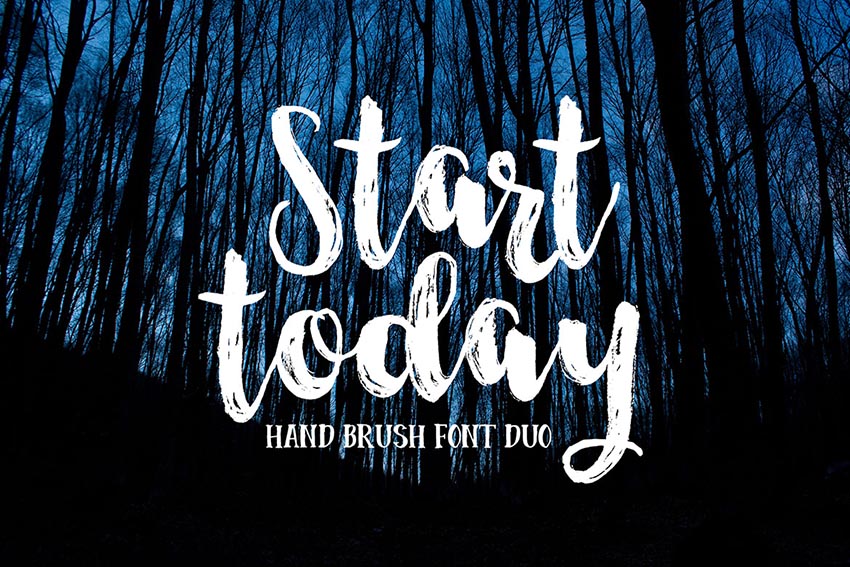
Start Today Script

Get inspired by this fun script to create something awesome today! This hand brush font duo features a casual design with incredible texture. Download this package today to get access to a full set of letters, alternative characters, and international support.

Start Today Script

Margot & Margery Typeface

Handmade fonts always have their own personality and style, and this fun typeface is certainly no different! Included in this package is a unique brush typeface available in several font files, with additional ligatures and glyphs for your convenience.

Margot  Margery Typeface

Shellahera Font Pack

Originally created by hand with a brush pen, this font was later scanned in at a high resolution and transformed into a remarkable digital font. With so much personality and a beautiful dancing baseline, this font offers a basic script version for download, along with a unique sans version and additional creative ornaments.

Shellahera Font Pack

Honeycomb Font

One of the amazing benefits to font packages is all of the incredible goodies you get with each download. And with this Honeycomb typeface, you’ll love the flirty script font shown below, as well as the amazing gold foil patterns included in this package.

Honeycomb Font

Destiny Font

It may just be your destiny to download this elegant font. This modern typeface features a curvy calligraphy style developed from traditional cursive handwriting. Elevate your wedding invitations and so much more with this multipurpose typeface.

Destiny Font

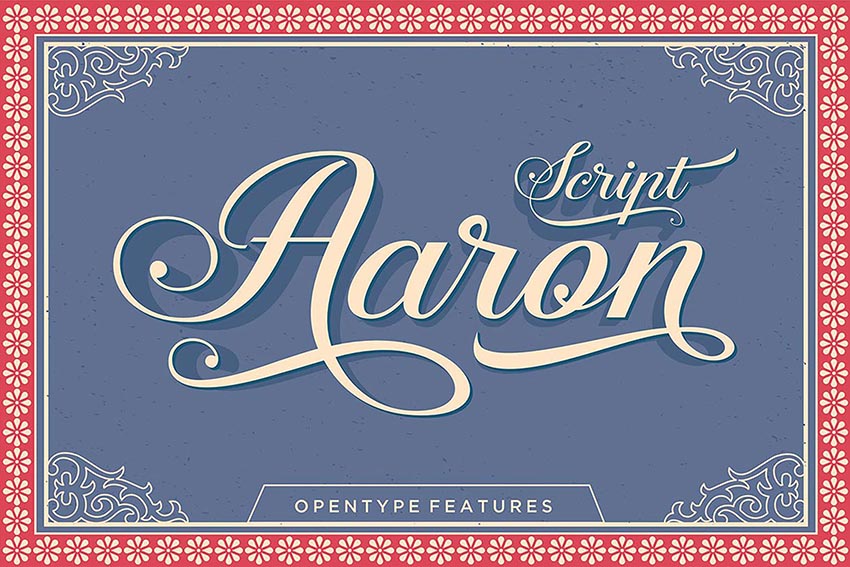
Aaron Script Font

A calligraphy font featuring a contemporary design, this Aaron script works perfectly for elegant creations. Use it for wedding stationery or letterheads, or adorn your t-shirts with its unique design. With over 400 glyphs and 190 alternate characters to choose from, you’ll definitely want to add this one to your graphic design kit!

Aaron Script Font

Florence Brush Font

This delicious handwritten font features an awesome handmade brush style with thick, curvy letters. It’s perfect for letterheads, apparel design, and so much more! Download this package today to get access to alternate letters, ligatures, and awesome splashes!

Florence Brush Font

Adorabelle Font

We think this flirty, pretty font is simply adorable! A modern script typeface with a uniquely fresh design, this font would work perfectly on branding materials, greeting cards, and more! Included in this package are decorative characters and over 500 glyphs for outstanding creative designs.

Adorabelle Font

La Venice Font

You’ll be missing all the sights and scenes of the LA boardwalk with this vintage-inspired font. Designed after the incredible details of vintage LA signs, this font features several font files with a bonus pack of watercolor flowers.

La Venice Font

Keyline Script Font

Get in line with this stunning Keyline script. A unique typeface featuring a thick, marker pen style, this package includes all the letters you need as well as glyphs and multilingual support. Download this font today to take your designs to a whole new level!

Keyline Script Font

Conclusion

This list is jam-packed with exciting resources for the avid designer
familiar with different typeface formats. For additional help with all your font needs, enlist the skills of a talented
professional by choosing one of the amazing designers from Envato Studio.

And with hundreds of cursive fonts available at your fingertips, chances are we’ve missed a few to add to your personal collection. Be sure to browse GraphicRiver and Envato Elements for more resources, and let us know your favorites in the comments below!

How to Draw Fabric: Silk and Wool

Post pobrano z: How to Draw Fabric: Silk and Wool

Final product image
What You’ll Be Creating

Fabrics are tricky to draw because of all the folds and complicated shading. In this tutorial I will show you how to go about drawing two different types of fabric: smooth and flowing, like silk, and rough and thick, like wool. You can follow me step by step to achieve the same results, or use the techniques I present in your own projects.

What You Will Need

  • Some sheets of paper
  • HB pencil
  • 2B pencil
  • 4B pencil
  • 6B pencil
  • Blending stump/tortillon/cotton swab
  • Eraser
  • Pencil sharpener
drawing tools

1. How to Draw Silk Fabric

Step 1

Start with an oval—this will be the top of the cylinder the fabric is laid upon. Use the HB pencil for this.

start a drawing

Step 2

Draw another, bigger oval below. This will create a smooth edge of fabric dragged down by gravity, but not stuck to the edge of the cylinder.

edge of a cylinder

Step 3

Draw the direction of the fabric going down the cylinder. The stiffer the fabric, the wider the angle.

fabric pulled down by gravity

Step 4

Draw the edge of the fabric and plan its folds. You can be creative here—just don’t cross the line.

folds of fabric

Step 5

Draw the edges of the fabric as suggested by the fold line. The more acute the angle of the fold, the clearer the line.

detailed fabric folds

Step 6

Add more guide lines near the top to finish defining the flow of the fabric.

how to sketch fabric folds

Step 7

Take the eraser and clean up the unwanted lines.

clean up fabric drawing

Step 8

Tilt your pencil and subtly shade the top. We’re going to leave some shine near the edge.

shading the top of the fabric

Step 9

Use the blending stump (or other blending tool) to soften the shading.

how to blend pencils

Step 10

Shade the edge subtly.

shade the edge of cylinder

Step 11

Take the 2B pencil and accentuate the shading. Silk is all about contrast!

shade silk top

Step 12

Take the eraser and give shine to a part of the edge.

shiny edge of cylinder

Step 13

Go back to the HB pencil, tilt it, and shade the surface of the fabric. Be careful not to remove the lines in the process—you can press harder in the shadows to keep the folds visible.

shading fabric

Step 14

Use the blending stump to soften the shading.

blending shading

Step 15

Take the 2B pencil and shade the folds one by one. No matter if the fold is convex or concave, always leave a stripe of shine in the middle—this is characteristic for silk. Use the blending stump when finished.

shading shiny fabric

Leave the directly illuminated part with less contrast. Also, notice how the shiny stripes connect in arcs near the top, where there are no folds.

shading silk

Step 16

Take the 4B pencil and increase the contrast even more. Don’t forget about blending!

how to draw silk with pencils
pencil silk drawing

Step 17

Finish the drawing by dragging your eraser along the shiny stripes to make them stand out even more. Feel free to use the 6B pencil in the darkest crevices, but use it sparingly. If your fabric is supposed to be darkly colored, darken the whole picture, keeping only the highlights white.

how to draw realistic silk fabric

2. How to Draw a Woollen Sleeve

Step 1

Start with something to put in the woollen cloth. This can be a simple elbow. Use the HB pencil for this phase.

sleeve dummy

Step 2

Envelop the arm in curvy lines. The more there are, the looser the cloth will seem. Keep them tight where the material bends.

how to plan fabric folds

Step 3

Use the curves as a suggestion for the flow of the material. First draw one side…

how to draw folds on the side

… then the other…

how to draw folds outline

… then fill the middle.

how to draw folds in the middle

This technique helps you see the folds as what they really are—the bending of a single piece of material, not something separate stuck to the material.

folding drawing

Step 4

Work out the folds the guide lines are suggesting. Draw their edges, just like with the silk.

how to draw woolen folds

Step 5

Darken the shaded part with a side of the HB pencil. Don’t blend it!

how to shade folds on a sleeve

Step 6

Include the folds in the shading.

how to draw sleeve

Step 7

Take the 2B pencil and create more detailed shading.

how to draw sweater

Step 8

Take the HB pencil again and draw the rows of the thread. You can make them narrower if you want a softer look.

how to draw woolen texture

Step 9

Add the details to every row. Simple 'V’s all along the row are all you need.

how to draw detailed woolen texture

Step 10

Take the 6B pencil to accentuate the darkest part of the picture. This will be a point of reference for contrast.

how to shade wool

Step 11

Take the 4B pencil and darken the shaded part some more, including the rows in the border between light and shadow. This will make the texture more 3D.

how to shade woolen sleeve
how to draw realistic wool

Step 12

Finally, take the 6B pencil and subtly add detail to the shaded parts. Simple dark dots along the rows will give them depth and a detailed look. Don’t leave any wide bright surfaces—”break” them with some irregular shadow.

how to draw wool sweater sleeve with pencils

Good Job!

Now you know how to draw fabrics, no matter what their physical properties are. If you want to keep learning about drawing various textures, check out my other tutorials from this series:

  • How to Draw Fur

    Fur can be very simple to draw, if you just learn one secret of it! In this tutorial I will show you how to draw long and short fur, but you can use these…
  • How to Draw Glass

    Transparent glass is incredibly hard to draw from imagination. That’s because we know it’s "invisible", so what is there to draw? But the correct…
how to draw fabric texture with pencils

The Mac Photo Editor That Adapts to Your Style and Skill Level

Post pobrano z: The Mac Photo Editor That Adapts to Your Style and Skill Level

As an online professional, you no doubt spend a portion of your time working with photo content. Clients may provide some photo material, and some may come from stock photo resources. The quality may vary; but even when it’s good, you often wish it would be better, or have greater eye-catching appeal. The problem is, […]

The post The Mac Photo Editor That Adapts to Your Style and Skill Level appeared first on Web Resources Depot.

Best of the Design Web: January 2017

Post pobrano z: Best of the Design Web: January 2017

2017 is already underway! So kick off the new year with amazing tutorials featuring the latest trends in graphic design and illustration. Tackle some new and exciting projects by checking out the following tutorials from across the web!

10 Amazing Tutorials From Across the Web

  • Horse Animation TUtorial by Monika Zagrobelna

    Drawing and Animating Horses: A Flipbook Tutorial

    In this tutorial, our very own Monika Zagrobelna teaches you how to draw and animate horses using Sketchbook. Learn how to create your own amazing animal animations while getting a complete anatomy breakdown.

    Visit Tutorial

  • Headphones Illustrator tutorial

    How to Create a Pair of Headphones in Adobe Illustrator

    In this tutorial, our very own Envato Tuts+ instructor, Hector Heredia, breaks down the steps for creating a minimalist pair of headphones in Adobe Illustrator. Learn how to create this cool design using simple shapes and gradients.

    Visit Tutorial

  • Calendar 2017 tutorial

    Create a 2017 Calendar in Just 10 Steps

    Need a new calendar? In this tutorial, Jo Gulliver shows you how to create a 2017 calendar with charming minimalist elements in Adobe InDesign. Learn how to create the calendar from scratch before adding your own unique design.

    Visit Tutorial

  • Geometric Animals Tutorial

    Illustrating Animals With 13 Circles

    You can make all sorts of animals using simple geometric shapes. And in this tutorial, Dorota Pankowska shows you how to make 13 different animals in Adobe Photoshop and Illustrator before finally editing them with cool animations in After Effects.

    Visit Tutorial

  • Photo manipulation tutorial

    Photoshop Tutorial: Advanced Photo Collage Techniques

    In this tutorial, Mike Harrison shows you how to blend multiple photos together for a powerful photo manipulation. Learn simple photo collage techniques, how to apply realistic lighting, and more in this thorough tutorial.

    Visit Tutorial

  • 2017 Color Trend Photoshop TUtorial

    Change Colors to Match 2017’s Visual Trends in Photoshop

    The bold theme for 2017 is to use bright, contrasting colors. And in this tutorial, Tigz Rice shows you how to transform the boring background of a photo into a clean, and vibrant color.

    Visit Tutorial

  • Vintage Text Effect Tutorial

    How to Create a Vintage Film Text Effect in Photoshop

    Relive the classic film styles of the 30s and 40s with this fun project. In this tutorial, Chris Spooner shows you how to create a vintage themed text effect using Photoshop’s 3D tools.

    Visit Tutorial

  • Winter Background Illustrator Tutorial

    How to Create a Winter Background in Adobe Illustrator

    Snuggle up with a warm cup of hot chocolate and dig into this fun project. In this tutorial, Laura Martin walks you through the process of creating a simple winter-themed background in Adobe Illustrator.

    Visit Tutorial

  • Tiger Manipulation Tutorial

    How to Create an Intense Composite of a Stone Tiger With Blue Flames

    In this tutorial, Moustafa Sharaf shows you how to create an incredible fantasy photo manipulation in Adobe Photoshop. Learn how to use basic adjustments, textures, and masks to create this intense tiger photo manipulation.

    Visit Tutorial

  • Sunset Photoshop Tutorial

    Create Sensational Sunsets in Adobe Photoshop

    Nothing is more beautiful than a photo taken capturing a sunset. And you can create your own magical sunsets with this tutorial. Instructor James Paterson will show you how to create beautiful sunset scenes by stitching several photos together.

    Visit Tutorial

Top 5 Tutorials from Envato Tuts+ Design & Illustration

Our experts have provided you with many great tutorials this month! Here are five of our most tried and tested tutorials from the Design and Illustration section here at Envato Tuts+.

Be sure to check out this month’s Love Week, featuring tutorials dedicated to all things love and wedding related. And see entries from our latest Envato Tuts+ Community Challenge: Created By You, celebrating the incredible efforts of our talented community.

10 Incredible Premium Design Assets

Before you go, be sure to pick up some amazing premium design assets from GraphicRiver and Envato Elements. Browse the incredible selections of design graphics, fonts, and so much more for high-quality design.

Gif Animated Ephemera Photoshop Action

Create a stunning animated GIF with this incredible Photoshop action. This action allows you to apply billowing smoke onto your photos for a cool double exposure effect. Save the final result as a static image or enjoy the animation as a GIF in all its beautiful wonder.

Gif Animated Ephemera Photoshop Action

Valentinum – Sweethearts Photoshop Action

Celebrate your love with this lovely Photoshop action. This action allows you to turn your photos into a sweet Valentine’s Day greeting card with one professional watercolor action. Download this action to enjoy 20 color presets and more!

Valentinum - Sweethearts Photoshop Action

25 Abstract Line Waves Photoshop Brushes

Enjoy this incredible package of 25 abstract Photoshop brushes. This pack features incredible line wave designs that you can incorporate into any creative project. With high-resolution shapes, you’ll definitely want to add this set to your collection!

25 Abstract Line Waves Photoshop Brushes

30 Stroke Photoshop Brushes

Or try your hand at our incredible digital painting tutorials with this huge Photoshop brush pack. Included in this set are 30 Photoshop brushes inspired by traditional art strokes. They’re suitable for any painting or decorative element, so have fun using these brushes for your designs.

30 Stroke Photoshop Brushes

50 Adobe Illustrator Brush Set

Create amazing illustrations with this huge Adobe Illustrator brush set. Included in this set are over 50 Illustrator brushes to make your art stand out. Enjoy the calligraphic styles that are fully editable and 100% handmade.

50 Adobe Illustrator Brush Set

Snow and Winter Brushes for Adobe Illustrator

Get out of the cold and create some stunning art with this brilliant Illustrator brush set. Inspired by natural snow and ice textures, this set features over 30 powerful brushes for a range of effects. Simply draw over your graphics to apply wintry effects instantly!

Snow and Winter Brushes for Adobe Illustrator

Realistic Embroidery Layer Styles

Create instant embroidered text effects with this amazing Photoshop action. This package features four different actions with three realistic materials and nine different styles. Enjoy this insanely realistic embroidery effect, and transform virtually any text or shape in no time!

Realistic Embroidery Layer Styles

Game Logo Text Styles

Create your own video game-inspired text effects with this amazing package. This package features 12 different styles that are 100% vector and fully editable for easy customization. Download this package to enjoy the free vector backgrounds also included!

Game Logo Text Styles

Raleigh Font

Enjoy the sleek design of this brilliant sans-serif font. Developed to inspire your inner epicness, this font features a futuristic stencil design that’s great for logos, headers, and more. Download this font to enjoy the multiple style options.

Raleigh Font

Leviafan Font

Handmade-styled graphics are a huge hit in the design industry. And this beautiful handlettering typeface features a stylish brush design perfect for apparel, posters, and more. Included in this package is a full set of letters, numbers, and additional style options.

Leviafan Font