Archiwum kategorii: Web Tools

40 Free Photoshop Actions for Black and White Photography (And How to Make Your Own)

Post pobrano z: 40 Free Photoshop Actions for Black and White Photography (And How to Make Your Own)

Everyone loves a freebie, so we’ve made a roundup of 40 of the best black and white Photoshop actions available for free.

Vintage Black & White Retro Photoshop ActionVintage Black & White Retro Photoshop ActionVintage Black & White Retro Photoshop Action
Create amazing vintage black and white photography using PSD actions like this one.

Do you love black and white vintage photography? Start experimenting with different actions and create the effect you want with your own photos. We’ll also share some useful resources below. 

Top Black and White Photoshop Actions From Envato Elements for 2022 

Before you browse our extensive list of Photoshop action freebies, here are some of our favorite black and white actions for Photoshop CC from Envato Elements. Subscribing to Elements means you have unlimited access to these and much more, so you can download to your heart’s content. 

Black and White Photoshop Actions on Envato ElementsBlack and White Photoshop Actions on Envato ElementsBlack and White Photoshop Actions on Envato Elements

Now, let’s take a look at the premium black and white Photoshop presets:

1. Pinhole Photography Photoshop Actions (ATN)

Pinhole Photography Photoshop ActionsPinhole Photography Photoshop ActionsPinhole Photography Photoshop Actions
Pinhole available on Envato Elements

Are you a fan of vintage black and white photography? Recreate pinhole color grading techniques with this carefully crafted set of matte black Photoshop actions, created by a team of award-winning photographers.

2. Black White Photoshop Actions (ATN)

Black White Photoshop ActionsBlack White Photoshop ActionsBlack White Photoshop Actions
Black White available on Envato Elements

This set includes 31 black and white Photoshop actions for professional photographers or graphic designers. Bring your images to life using powerful tools and professional methods. This pack also works perfectly for vintage black and white portraits.

3. Carbonium Black & White PS Actions (ATN)

Carbonium - Black  White PS ActionsCarbonium - Black  White PS ActionsCarbonium - Black  White PS Actions
Carbonium available on Envato Elements

Try this collection of 16 non-destructive, black and white Photoshop actions, from vintage to contemporary. Play with these black and white Photoshop presets and create stunning black and white action photos.

4. Black and White Professional Actions for Photoshop (ATN)

Black and White Professional Actions for PhotoshopBlack and White Professional Actions for PhotoshopBlack and White Professional Actions for Photoshop
Black and White Pro available on Envato Elements

Create professional-looking black and white action photos with plenty of punch, and save time while you’re doing it. These black and white actions for Photoshop CC are what you need.

5. Charcoal Matte Black Photoshop Action (ATN)

Charcoal Matte Black Photoshop ActionCharcoal Matte Black Photoshop ActionCharcoal Matte Black Photoshop Action
Charcoal available on Envato Elements

Charcoal is a set of three black and white Photoshop presets that give your images the retro/vintage look of black and white photography.

How to Install Black and White Photoshop Actions

Are you just getting started with Photoshop actions? Practice makes perfect. The more you work with black and white Photoshop actions, the best results you’ll get.

Check out this full guide to Photoshop Actions by David Appleyard. Learn more tricks and tips from all our Photoshop tutorials on our Envato Tuts+ YouTube channel. Start with the basics and learn How to Install Photoshop Actions:

Obsessed with black and white vintage photography? We’ve got plenty of black and white actions and tutorials for you: 

40 Free Black and White Adobe Photoshop Actions

After some useful tutorials on how to make black and white photos pop, it’s time to explore some free Photoshop resources. Looking for black and white Photoshop actions for free to download? Here’s a selection for you:

1. 5 Free Black & White Photo Actions

A pack of five actions, including a high-contrast black and white Photoshop action and faded effects. You’ll get five black and white Photoshop actions in one download.

2. Old Black and White

Get a stark and effective black and white treatment in this black and white preset Photoshop. 

3. Free Black and White Photoshop Actions 

A free sample from a set of 10, quickly convert your images to black and white action photos.

Free Black and White Photoshop ActionFree Black and White Photoshop ActionFree Black and White Photoshop Action
Free Black and White Photoshop Action

4. Six Free Black and White Photoshop Actions

A set of six actions, including effects with a blue tinge and a white glow. A color pop black and white Photoshop action.

5. Black and White Effect

A high-contrast black and white converter with a matte black Photoshop effect. Create fashion vintage black and white photos with this action.

6. Vintage Black and White

Looking for a retro vintage black and white photography effect? To get a matte black Photoshop effect, this action gives a retro look to your photographs. A nice black and white preset for Photoshop.

7. Bold Black and White

This Photoshop action will turn your color photos into bold and impressive black & whites with its high-contrast black and white Photoshop action.

8. Free Photoshop Action: Silver

Perfect for giving your landscapes a beautiful, silvery tone. A nice color pop black and white Photoshop effect.

9. Old Black and White 

An aged, black and white effect with a subtle matte finish. Try this matte black Photoshop effect.

10. 37 Free Photoshop Actions

Among this pack are some cracking black and white Photoshop actions, including an ultra-matte effect and a high-contrast black and white Photoshop action.

37 Free Photoshop Actions37 Free Photoshop Actions37 Free Photoshop Actions
37 Free Photoshop Actions

11. Pure Black and White 

An adjustable, clean black and white action to help you learn how to make black and white photos pop.

12. Black and White 

A solid black and white converter, which is a nice black and white preset for Photoshop.

13. Black and white action set

If you like vintage black and white photography, you’re going to love this pack. 

14. The Classic Black and White

Try this high-contrast black and white Photoshop action that comes with three awesome tones.

15. Veiled Monochrome

Looking for black and white Photoshop actions with a twist? Get a matte black Photoshop vintage look with this download. 

Free Veiled Monochrome Photoshop ActionFree Veiled Monochrome Photoshop ActionFree Veiled Monochrome Photoshop Action
Free Veiled Monochrome Photoshop Action

16. Great Black and White Effect

A stylized black and white effect. Try this one out and start experimenting with black and white photos with a touch of color.

18. Black and White Effect

Do you love black and white vintage photography? Try this action. Get a low-contrast, matte look in this black and white preset for Photoshop.

17. Black N White Tones

Photoshop action freebies with seven different black and white tones.

19. Blackwhite Effect

A matte look with focused areas of high contrast.

20. Free Black and White Effect

Looking for a retro vintage black and white photography effect? This is a stylish, monochrome converter.

Free Black and White EffectFree Black and White EffectFree Black and White Effect
Free Black and White Effect

21. NoiseLess Black and White

High-contrast effect with the option to add grain. This is one of the best free black and white Photoshop actions you’ll find online.

22. Detailed B-n-W

A set of actions designed to pop detail from your photograph.

23. HolgaRoid Generator BW

Mimics the look of a black and white Polaroid so you can create vintage black and white portraits.

24. Black and White Retro

A retro, film look, great for vintage black and white portraits.

25. Black and White Effect

Get low-key matte effect in this black and white action.

26. Black and White Noisy, High Key Effect

A black and white action with a high-key look and added noise. This is perfect if you’re looking for fashion vintage black and white photos.

Black And White Noisy High Key Photoshop ActionBlack And White Noisy High Key Photoshop ActionBlack And White Noisy High Key Photoshop Action
Black And White Noisy High Key Photoshop Action

27. White and Black

A pack of actions including subtle color overlays, a nice color pop black and white Photoshop effect.

28. Cold Tones

A pack of free black and white Photoshop actions designed to convert to black and white with the option of added cool tones. These are good free black and white actions for Photoshop CC.

29. Black and White Action

A high-contrast black and white effect. You could even start creating black and white photos with a touch of color.

30. Black and White Actions

A pack of six free black and white Photoshop actions to convert your images to black and white.

31. BW Photoshop Actions

Three actions of varying tones and contrast. Try these black and white actions for Photoshop CC. A great choice to create retro vintage black and white photography.

BW Photoshop ActionsBW Photoshop ActionsBW Photoshop Actions
BW Photoshop Actions

32. Black and White Action

Obtain a high-contrast or matte finish in this black and white preset for Photoshop.

33. Photoshop Action #09

A simple, high-contrast black and white preset for Photoshop.

34. Free Shifted Photoshop Action

Looking for cool and free black and white Photoshop actions? This one’s for you. Convert your photos to black and white with a hint of color tone.

Free Shifted Photoshop ActionFree Shifted Photoshop ActionFree Shifted Photoshop Action
Free Shifted Photoshop Action

35. Black and White Effect

A set of four options, including a greyscale effect.

36. Free Black and White Studio Actions

This pack of free black and white actions for Photoshop CC is perfect for vintage black and white portraits.

37. Vintage

A vintage look with a sepia tone for your vintage black and white portraits.

38. The Dark Jungle Effect

A dark, grainy effect with plenty of atmosphere.

Dark Jungle Effect Photoshop ActionDark Jungle Effect Photoshop ActionDark Jungle Effect Photoshop Action
Dark Jungle Effect Photoshop Action

39. Black and White

A simple color pop black and white Photoshop action with an optional touch of blue.

40. Noir Black & White Free Photoshop Actions

This is one of the best free black and white Photoshop actions you’ll find online. Easily create retro vintage black and white photography.

Explore More Awesome Photoshop Tutorials

I hope you’ve enjoyed discovering these Photoshop black and white actions free to download. This article shares some of our favorite Photoshop action freebies, but if you’d like to get more actions or just learn about Photoshop in general, here are some links you might find useful.

Envato Elements has a wealth of Photoshop actions for you to enjoy. We have a fantastic learning guide dedicated to this topic: Learn Photoshop Actions.

If you have a little more time to spare, we have some great courses to help you become a Photoshop expert in no time.

Looking for Lightroom Presets? Why not check out the following articles and recommendations to learn more:

Editorial Note: This post has been updated with contributions from Janila Castañeda. Janila is a staff writer with Envato Tuts+.

How to Create a Chinese Ink Brush in Illustrator

Post pobrano z: How to Create a Chinese Ink Brush in Illustrator

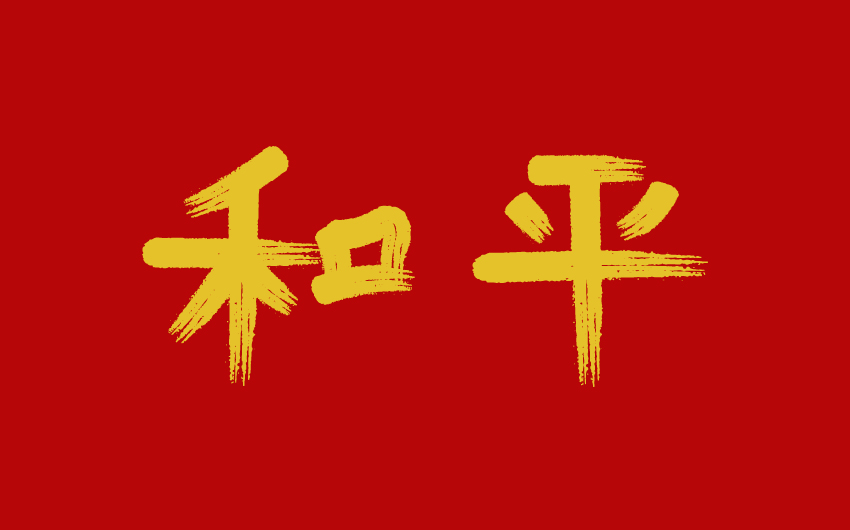
Final product imageFinal product imageFinal product image
What You’ll Be Creating

In the following tutorial, you will learn how to create a Chinese ink brush in Illustrator and how to draw Chinese characters.

If you don’t have the time to learn how to create a Chinese ink brush in Illustrator, you can always try Envato Elements where you can download calligraphy brushes for Illustrator. You will find anything from Chinese vector brushes to Chinese brush fonts. Besides Illustrator resources, you will also find Chinese brush Photoshop packs.

illustrator calligraphy brushesillustrator calligraphy brushesillustrator calligraphy brushes

What You’ll Learn in This Chinese Ink Brush Illustrator Tutorial

  • How to create a Chinese ink brush in Illustrator
  • How to save and use Illustrator brushes
  • How to draw Chinese characters using Chinese vector brushes

1. How to Create the Chinese Ink Brush Design

Step 1

Hit Control-N to create a new document. Select Pixels from the Units drop-down menu, set the Width to 850 px and the Height to 530 px, and then click that Advanced Options button. Select RGB for the Color Mode and set the Raster Effects to High (300 ppi), and then click the Create button. Now that you’re set, let’s see how you can create a Chinese ink brush in Illustrator.

illustrator new documentillustrator new documentillustrator new document

Step 2

Pick the Rectangle Tool (M) and simply click on your artboard to open the Rectangle window. Set the Width to 200 px and the Height to 30 px, and then click OK to create your rectangle.

Keep it selected, remove the stroke color, and select the fill. Open the Gradient panel (Window > Gradient) and click that Linear Gradient button to apply the default white to black linear gradient. Double-click the black gradient slider and switch to RGB color mode, and then replace the existing color with a pure black (R=0 G=0 B=0).

rectangle linear gradientrectangle linear gradientrectangle linear gradient

Step 3

Switch to the Direct Selection Tool (A) so you can adjust the corners radius of this rectangle. All you have to do is move to the control panel and enter 15 px in that Corners box.

rounded corners rectanglerounded corners rectanglerounded corners rectangle

Step 4

Focus on the Appearance panel (Window > Appearance) to select the existing fill and go to Effect > Stylize > Inner Glow. Enter the settings shown in the following image and click OK.

inner glowinner glowinner glow

Step 5

Keep focusing on the Appearance panel and add a second fill for your shape using the Add New Fill button.

Select this new fill and focus on the Gradient panel to edit the gradient that’s already applied. Double-click the left gradient slider, replace the existing color with black (R=0 G=0 B=0), and don’t forget to lower the Opacity to 0%.

add fill transparent gradientadd fill transparent gradientadd fill transparent gradient

Step 6

Make sure that the top fill is still selected and again go to Effect > Stylize > Inner Glow. Enter the settings shown below and click OK.

illustrator inner glowillustrator inner glowillustrator inner glow

Step 7

Focus on the Appearance panel and click that Path section to select the entire path, thus making sure that the effects which you’re about to add will be applied to the entire path, not just a fill.

First, go to Effect > Texture > Grain. Drag both sliders to 100 and set the Grain Type to Horizontal, click OK to apply the effect, and then go to Effect > Sketch > Stamp. Set the Balance to 15 and the Smoothness to 5, and then click OK to apply this second effect.

illustrator grain stamp effectillustrator grain stamp effectillustrator grain stamp effect

2. How to Create a Chinese Ink Brush in Illustrator

Step 1

Make sure that your shape is still selected and go to Object > Expand Appearance, and then move to the control panel and click the Image Trace button.

expand image traceexpand image traceexpand image trace

Step 2

Keep focusing on the control panel and click the Image Trace Panel button. Drag the Threshold slider to 150 and then click that Advanced arrow button to get access to the rest of the settings. Set the Paths to 60%, Corners to 0%, and Noise to 1 px, keep the Fills box checked and the Strokes box unchecked, disable the Snap Curves To Lines box, and don’t forget to enable the Ignore White setting.

image trace panelimage trace panelimage trace panel

Step 3

Once you’re done adjusting the settings from the Image Trace panel, return to the control panel and click that Expand button. It’s not mandatory, but you can turn the resulting group of shapes into a compound path (Object > Compound Path > Make or Control-8).

image trace expandimage trace expandimage trace expand

Step 4

Make sure that your compound path is still selected and focus on the Brushes panel (Window > Brushes). Click that New Brush button, check the Art Brush box, and click OK to open the Art Brush Options window.

Select Tints from the Colorization Method drop-down menu, which will allow you to change the color of the brush once it’s applied, and then click OK to add your art brush to the Brushes panel.

save art brushsave art brushsave art brush

3. How to Create Chinese Characters Using a Chinese Vector Brush

Step 1

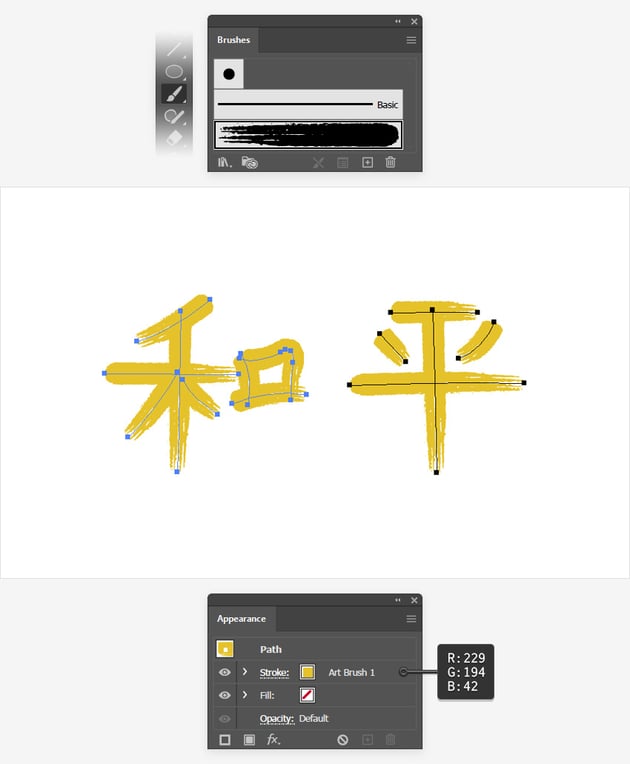
Pick the Brush Tool (B) from the toolbar, select your art brush from the Brushes panel, and simply click and drag to draw the Chinese brushstrokes which will make up your Chinese characters.

Select all of these paths and set the stroke color to R=229 G=194 B=42, which will change the color of your brush.

chinese brush strokechinese brush strokechinese brush stroke

Step 2

Finally, let’s add a simple background. Pick the Rectangle Tool (M), create a shape that covers your entire artboard, fill it with R=183 G=6 B=8, and don’t forget to send it to the back (Shift-Control-[).

chinese characters backgroundchinese characters backgroundchinese characters background

Congratulations! You’re Done!

Here is how your design should look. I hope you’ve enjoyed this tutorial and can apply these techniques in your future projects.

Feel free to adjust the final Chinese vector brushes or draw your own characters. You can find some great sources of inspiration at Envato Elements, where you can download professional calligraphy brushes for Illustrator.

Now that you’re familiar with Illustrator brushes, why not continue and learn how to create Adobe Illustrator hair brushes? This amazing tutorial by Sharon Archer-Thomas could be a perfect start: How to Create Vector Hair Brushes in Adobe Illustrator.

Chinese Ink Brush IllustratorChinese Ink Brush IllustratorChinese Ink Brush Illustrator

Popular Illustrator Brushes and Chinese Brush Fonts From Envato Elements

Envato Elements is an excellent resource for Chinese brush Photoshop kits, Chinese brush script fonts, or Illustrator brushes. Here’s a short list of some of the most popular assets that you can find.

Ink Age Illustrator Brushes (AI)

Here’s a massive collection of Illustrator brushes that can help you to decorate and style your designs in so many different ways.

chinese Ink Brushchinese Ink Brushchinese Ink Brush

Dry Paint Brushes for Illustrator (Ai)

If you’re in a hurry or you simply can’t be bothered to put together your own Chinese vector brushes, this small pack of dry paint brushes for Illustrator might be the perfect solution.

chinese Ink Brushchinese Ink Brushchinese Ink Brush

Chinese Calligraphy Photoshop Brushes (ABR)

This massive Chinese calligraphy Photoshop brush kit is the perfect solution if you’re looking to draw Chinese characters in Photoshop.

photoshop chinese calligraphy brushphotoshop chinese calligraphy brushphotoshop chinese calligraphy brush

Dry Paint Brush Procreate

Looking for Procreate brushes? Cut the hassle of learning how to create your own paint brushes and try this amazing set.

dry paint brushdry paint brushdry paint brush

Photoshop Calligraphy Brushes

Check out this set of brushes if you want to save some time drawing as you put together your own Chinese brush font.

calligraphy photoshop brushcalligraphy photoshop brushcalligraphy photoshop brush

How to Adjust Kerning in Photoshop

Post pobrano z: How to Adjust Kerning in Photoshop

When finishing off a design project, adjusting a logo, creating headlines, or editing typographic compositions, kerning is a part of the design process that designers take into consideration. Today we are going to explore the meaning of the term „kerning”, discover how adjusting kerning improves design, and learn how to adjust kerning in Photoshop.

kerning in adobe photoshop mriya groteskkerning in adobe photoshop mriya groteskkerning in adobe photoshop mriya grotesk
Mriya Grotesk Sans-Serif Typeface available on Envato Elements

What You’ll Learn in This Kerning Photoshop Tutorial

  • What is the meaning of kerning in typography?
  • What are the types of kerning?
  • Why do you need to adjust kerning?
  • How to adjust font kerning in Photoshop

1. What Is Kerning?

Before we go into what kerning is in Photoshop, let’s first define the term. What is kerning? Kerning defines both the typography term as well as a design process.

In typography, kerning is the name given to the spacing between individual characters and letterforms, to achieve eye-pleasing results and better readability.

Kerning is also the design process of manually adjusting this space between characters to make the text look uniform, legible, and visually better.

Kerning helps improve the appearance and design of your text, which might look awkward if left unadjusted. If you were to equally space the letters of a word, you’d be shocked how your text wouldn’t actually look spaced. An example is shown below. 

For example, if the letters 'c’ and 'l’ are too close to one another, at a distance they might mistakenly be read as the letter 'd’. Since letters are not structured and designed with equal curves and shapes, you will sometimes need to manually adjust the distance between two specific letters to make the text legible and match the rest of the letters in the design. Some challenging pairs of letters to kern include ll, rn, wa, ya, yo, tr, ol, li, and cl.

Text with and without kerning effect Text with and without kerning effect Text with and without kerning effect
Representation of Kerning effect
Mriya Grotesk Font and Mauren font With and without KerningMriya Grotesk Font and Mauren font With and without KerningMriya Grotesk Font and Mauren font With and without Kerning
Mriya Grotesk and Mauren fonts available on Envato Elements

2. Why Do You Need to Adjust Kerning?

Kerning is about creating the perception of an equal space between letters, according to the human eye. It is mostly applied when designing logos, adjusting headlines, and creating typographic compositions. While you may count on modern software to create kerning of fonts, and some typefaces have their own built-in glyph pairs, your role as a designer is to have more control over the matter and a keen eye for evenly spaced type. Kerning is pretty much an optical adjustment and a visual exercise of manipulating the space between two specific glyphs to create the illusion of a well-balanced space.

Kerning matters. It is a very powerful tool that plays a huge difference in improving your designs. The simple step of separating or minimizing the space between letters can turn something ordinary into something unique, creating impact at first sight. Many brands use typography for their logos, but instead of using the font as it is, they alter its kerning to turn it into something unique. Below are some brilliant examples of how kerning creates an impact in design.

Having good kerning helps make logotypes and text readable and adaptable on different screen sizes, such as tablets, smartphones, and laptops. Legibility is vital in making the text clear and convenient. If words are too close-knit, they may appear messy, and if the characters are too far apart, the words may be slower to read. Adjusting kerning helps the reader focus on the text and makes it easier and faster to read. 

Brands logotype kerning samples: FedEx, Zara, eBay, Spotify, Balmain, Balenciaga, Versace, Netflix

3. What Are the Types of Kerning?

Each typeface you encounter will have different spaces between its individual letters, so you will have to adjust the kerning to each one differently, especially when it comes to logotypes and headlines, where spacing is more apparent. To have more control over the type, it’s better to kern the letters yourself as you cannot rely on the font software to kern them correctly for you.

Graphics software programs like Photoshop, InDesign, or Illustrator usually include two default auto-kerning tools: Metric and Optical kerning. 

Metric kerning, also known as Auto, is basically the default setting in which built-in kerning pairs are used. These built-in kerning pairs have adjusted spacing suggested by the typeface designer.

Optical kerning, on the other hand, overrides a font’s built-in kern tables. Optical kerning adjusts the kerning between letters based on their shape. It is useful when using fonts with no built-in kern pairs or when adjusting different type sizes and combining different fonts.

Below is an example of Metric vs Optical vs Manual kerning, and the results of these three kerning methods overlayed.

types of kerning styles metric optical and manualtypes of kerning styles metric optical and manualtypes of kerning styles metric optical and manual
Types of Kerning: Metric, Optical and Manual kerning sample

4. How to Adjust Kerning in Photoshop

Step 1

Now that we know what kerning is in Photoshop designs, let’s learn more about kerning in Photoshop. Spending some time kerning type will help your design look more professional. Let’s learn how to manually adjust kerning in Photoshop, using the Old Movie Night Flyer PSD file from Envato Elements.

Using Photoshop to adjust kerning (or Photoshop text spacing) is easy. To kern your type, you will need to open the Character panel (Window > Character).

adjusting kerning in Photoshop Old Movie Night Flyer PSD from Elementsadjusting kerning in Photoshop Old Movie Night Flyer PSD from Elementsadjusting kerning in Photoshop Old Movie Night Flyer PSD from Elements

Step 2

Select the Horizontal Type Tool (T) and make sure the cursor is between two letters whose spacing you want to change. In this case, we will adjust the white space between the letters VI, NI, and HT in the „MOVIE NIGHT” title.

old movie postern kerning using type tool cursor between lettersold movie postern kerning using type tool cursor between lettersold movie postern kerning using type tool cursor between letters

Step 3

Within the Character panel, you will see a V/A kerning icon. You can either change the number values in the kerning tool by choosing a value from the dropdown menu or type in the value.

adjust kerning from V/A kerning tool ico on character paneladjust kerning from V/A kerning tool ico on character paneladjust kerning from V/A kerning tool ico on character panel

Step 4

You can experiment by increasing and decreasing the space between a pair of letters. A useful keyboard shortcut is to click between the two letters and hold down the Option/Alt key then use the right arrow key (to increase) or left arrow key (to reduce) to adjust the kerning.

In Photoshop text spacing, a positive value means you are adding white space between letters, and a negative value means you are decreasing the space between the letters.

Manual kerning helps in achieving control and readability. So take the time to practice kerning on your logos, banners, headlines, and signs.

photoshop adjust kerning flyer poster deisng

Want to Gain More Typography Skills? 

I hope you liked this quick tip tutorial on what kerning is in Photoshop and how to adjust kerning in Photoshop. If you are looking for more Photoshop resources, check out these articles:

19 Best Baseball Fonts

Post pobrano z: 19 Best Baseball Fonts

Set up your team to win. Baseball fonts are known for their vintage charm. They have lots of great movement and look great on a new jersey. Whether you like serif typefaces or unique baseball script fonts, this selection includes the best authentic styles from professional designers.

Download the Best Baseball Fonts From Envato Elements

Looking for inspiration and design references can take a while. If you want to find the best fonts created by professional designers in one place, you should check out Envato Elements. You’ll get tons of vintage and baseball fonts for inspiration.

The Best Baseball Fonts From Envato ElementsThe Best Baseball Fonts From Envato ElementsThe Best Baseball Fonts From Envato Elements

With a small monthly fee, you can also have access to all kinds of fonts, templates, and design resources. Here’s a tiny selection of some of our favorite baseball fonts:

Auckland Baseball Font (OTF, TTF)

Looking for something similar to the Dodgers font? Clean and pretty straight to the point, the Auckland baseball font is a stunner. This font has an elegant and minimalist design, looks wonderful on fabrics and apparel, and it’s great for a team logo. Download it to get five alternates, ligatures, and swashes.

Auckland - Baseball FontAuckland - Baseball FontAuckland - Baseball Font

Cosmoball Baseball Font (OTF, TTF)

Or check out this next baseball typeface, the Cosmoball font. Created by designer wacaksara, this baseball script font is bold and fluid. The font similar to the Atlanta Braves font has a handwritten style that gives it a nice casual flair, so it’ll pair wonderfully with eBooks, headlines, and so much more. You won’t find a free baseball font as good as this one. Give it a try!

Cosmoball Baseball FontCosmoball Baseball FontCosmoball Baseball Font

Megattor Script (OTF, TTF)

Looking for a quirky script font? Try out the Megattor Script font. Designed by Letterhend Studio, this cheeky font will add a flirty touch to any traditional sports theme. Create perfect hand-lettering posters with a natural handwriting feel. Try it out!

Megattor ScriptMegattor ScriptMegattor Script

Agistha Baseball Jersey Font Style (OTF, TTF)

Some modern baseball fonts feature a unique graffiti vibe. The Agistha baseball font, for instance, is our next example. Easily create creative logotypes or typography by simply installing this font. Use it for graphics, websites, and posters.

Agistha Baseball Jersey Font StyleAgistha Baseball Jersey Font StyleAgistha Baseball Jersey Font Style

Battams Jersey Font (OTF, TTF)

Many designers use sports fonts for video game titles, movie intros, and marketing campaigns. The Battams jersey font is made by using a constant line weight with an oval tip line. Customize your titles even further with additional perks like swashes and alternates. This is an ideal cursive varsity font for your team.

Battams Jersey FontBattams Jersey FontBattams Jersey Font

Flanders Baseball Jersey Font Style (OTF, TTF)

This next font is a magnificent script typeface with lots of charisma. If you’re a baseball fan, you might’ve noticed it almost looks like the Dodgers font. Use it for an official logotype or just try it out as a quick test. Bold and modern, this baseball script font is easy to install. Use it on both Macs and PCs. A great choice if you’re looking for a baseball jersey font.

Flanders Baseball Jersey Font StyleFlanders Baseball Jersey Font StyleFlanders Baseball Jersey Font Style

Marsmello Baseball Script Font (OTF, WOFF)

Looking for a cursive varsity font? Make unique 3D typography with the Marsmello baseball. This script is clean and subtle, with a casual appearance that mimics old cartoon graphics. Use it by itself or add a quick shadow like the graphic below. With this font, you won’t need a baseball font generator. Add it to your collection today!

Marsmello Baseball Script FontMarsmello Baseball Script FontMarsmello Baseball Script Font

Marttabuck Script (OTF, TTF)

Our next bold script font is the Marttabuck typeface. Created by Letterhend Studio, this vintage baseball font has a full and energetic appearance. Use this baseball cursive font to announce your brand with a special handwritten look. Try out the regular and special font styles for different effects.

Marttabuck ScriptMarttabuck ScriptMarttabuck Script

Mourbout: NFC Font Family (OTF, TTF)

Here’s another superb corporate font inspired by college logos and lettering. The Mourbout font family would look stunning as a monogram or logo. An exclusive display typeface with elegant serif details, this typeface features regular and italic versions. It’ll be hard to find a free baseball font as cool as this one.

Mourbout - NFC Font FamilyMourbout - NFC Font FamilyMourbout - NFC Font Family

Pipetton Font Duo (OTF, TTF)

This next font duo includes sans-serif and script typefaces. Pipetton is a classic retro font with an incredible baseball feel. A complete set of characters are included, as well as alternates, ligatures, and cool swashes. Give it a try!

Pipetton Font DuoPipetton Font DuoPipetton Font Duo

Frankey Baseball Vintage Font (OTF, TTF)

Or make a long-lasting brand with this incredible vintage typeface. Frankey is an extraordinary baseball cursive font with lots of charm. A mix of old and new, this set includes letters, numbers, and accented characters. Create beautiful designs for web or print work without using a baseball font generator.

Frankey Baseball Vintage FontFrankey Baseball Vintage FontFrankey Baseball Vintage Font

Download Vintage Baseball Fonts From GraphicRiver

Amazing vintage baseball fonts from Envato Market Amazing vintage baseball fonts from Envato Market Amazing vintage baseball fonts from Envato Market 

If you’re looking for a pay-as-you-go alternative, then you should grab one of the amazing vintage baseball fonts from Envato Market. Find thousands of fonts, mockups, and templates available for single purchase. 

Slugger Baseball Font (OTF)

Batter up, slugger! This next baseball font features a classic retro design, similar to the Atlanta Braves font as well. Just type out your team name or logo into the font tester to see how it fits. Simple and effective, this modern typeface includes condensed, regular, and even script styles. Try it out!

Slugger - Baseball FontSlugger - Baseball FontSlugger - Baseball Font

Vintage Party: Bold Retro Script (TTF)

Mix and match unique design elements for the best combination of vintage label designs. Create typographic designs using this baseball letter font. This vintage-inspired font will bring the 80s back to the game.

Vintage Party Bold Retro ScriptVintage Party Bold Retro ScriptVintage Party Bold Retro Script

Bon Voyage Baseball Font With Tail (TTF, OTF, WOFF)

Bon voyage! Set up your next flyer with the fantastic Bon Voyage baseball jersey font. Featuring a classic sports look, this retro font duo lets you customize the style with ease. Create limitless combinations for a refreshed sports logo with this baseball letter font. 

Bon Voyage Baseball Font With TailBon Voyage Baseball Font With TailBon Voyage Baseball Font With Tail

Montheim Vintage Baseball Font (OTF, TTF)

Do you like the Atlanta Braves font style? The Montheim vintage script is a stunning baseball lettering retro font with a full, medium weight. Included in this download is a complete set of letters, numbers, and punctuation. Inspired by retro typography movements, this font looks good on just about any vertical or horizontal layout.

Montheim Vintage Baseball FontMontheim Vintage Baseball FontMontheim Vintage Baseball Font

Vanitha Font (OTF, TTF)

This font is definitely a bold baseball script font. Made with hand drawings, this baseball font represents all the elegance and dynamism of the sport. Create a typographic design for logos, merch, stickers, and posters with this baseball jersey font. 

Vanitha - Vintage Baseball FontVanitha - Vintage Baseball FontVanitha - Vintage Baseball Font

Seren Baseball Script Font (OTF, TTF)

A retro font with over 400 glyphs, the Seren baseball script font looks great with added texture. Customize your logos with additional brush effects to make the most of this font. Letters, numbers, and basic punctuation are all included.

Seren Baseball Script FontSeren Baseball Script FontSeren Baseball Script Font

Milestone Jersey Font (OTF, TTF)

Complete your jersey with an awesome quote. The Milestone jersey font includes all the standard letter characters along with additional ornaments. Add a quick tail to the end of your brand or customize a team name. Enjoy regular and script versions in this set.

Milestone Jersey FontMilestone Jersey FontMilestone Jersey Font

Claiborne Baseball Font With Tail (OTF, TTF)

Here’s another fantastic baseball font with a classic tail. Perfect for restaurants or modern corporations, this Atlanta Braves font alternative can be used with clean or rough aesthetics. Add a touch of grit for a grunge feel or keep it regular for a nice result. Add it to your collection!

Claiborne Baseball Font With TailClaiborne Baseball Font With TailClaiborne Baseball Font With Tail

Feeling Inspired? 

Find more font inspiration. Whether you’re looking for a classic baseball font or a more modern aesthetic, these retro typefaces are the best baseball fonts around. Remember to bookmark this post to rediscover your favorites.

Looking for more inspiration? Check out these articles:

Editorial Note: This post has been updated with contributions from Janila Castañeda. Janila is a staff writer with Envato Tuts+.

How to Create a Chalkboard Sign With Chalk Text in Adobe Photoshop

Post pobrano z: How to Create a Chalkboard Sign With Chalk Text in Adobe Photoshop

Final product imageFinal product imageFinal product image
What You’ll Be Creating

Learn how to make a chalkboard sign with a chalk text effect in Photoshop using textures and layer styles. This is a great option if you want to make a „first day of school” chalkboard sign, for example. 

But if you’re looking for more chalkboard sign ideas or if you need to make a welcome chalkboard sign or a customizable chalkboard sign, you should visit Envato Elements as well. This complete subscription-based marketplace offers you unlimited resources to quickly make chalkboard signs. Find chalk fonts, chalk effect Photoshop add-ons, and more! 

Make customizable chalkboard signs with this chalk effect Photoshop kit!Make customizable chalkboard signs with this chalk effect Photoshop kit!Make customizable chalkboard signs with this chalk effect Photoshop kit!
Make customizable chalkboard signs with this chalk effect Photoshop kit!

And if you prefer video tutorials instead, the Envato Tuts+ YouTube channel is the place to go. There you can watch this new video to learn how to make a chalk effect in Photoshop: 

What You’ll Learn in This Chalkboard Sign Tutorial

  • How to create the background
  • How to create a speech bubble shape using the Pen Tool
  • How to create a chalkboard texture
  • How to create a chalkboard shape
  • How to create a wooden texture
  • How to create a chalkboard with a wooden frame
  • How to add a chalk text effect
  • How to add chalk pieces

What You’ll Need

The following assets were used during the production of this tutorial on how to make a chalkboard sign:

All the textures that we are going to use in this tutorial (wood and chalk) are made using Photoshop filters.

1. How to Create the Background

Create a new 1000 x 1000 px document. Make a new layer and press Shift-F5 to fill it with #62c3c9 or any other color that you like.

Fill Layer with Color in PhotoshopFill Layer with Color in PhotoshopFill Layer with Color in Photoshop

2. How to Create the Speech Bubble Shape Using the Pen Tool

Choose the Pen Tool (P) and draw the speech bubble shape. 

Draw a Vector Shape in Photoshop Using the Pen ToolDraw a Vector Shape in Photoshop Using the Pen ToolDraw a Vector Shape in Photoshop Using the Pen Tool

To create a curved line, click and hold down the mouse and drag. 

To turn a smooth anchor to a sharp point, Alt-Click on the anchor point.

3. How to Create the Chalkboard Texture

Step 1

Set the Foreground color to #1a1a1a and the Background color to #ffffff

Create a new layer and call it Chalkboard Texture. Press Shift-F5 to fill it with the color #1a1a1a.

Fill Layer with ColorFill Layer with ColorFill Layer with Color

Step 2

Go to Filter > Noise > Add Noise and set the Amount to 50%.

Noise Filter in PhotoshopNoise Filter in PhotoshopNoise Filter in Photoshop

Step 3

Go to Filter > Blur > Motion Blur and set the Angle to 50 and the Distance to 19 pixels.

altaltalt

Step 4

Go to Layer > New Adjustment Layer > Levels and use these settings.

Levels Adjustment Layer in PhotoshopLevels Adjustment Layer in PhotoshopLevels Adjustment Layer in Photoshop

Step 5

Select the Chalkboard Texture layer and the Levels adjustment, right-click, and choose Merge Layers. Rename the new layer Chalkboard Texture.

Merge Layers in PhotoshopMerge Layers in PhotoshopMerge Layers in Photoshop

Step 6

Press Control-J to duplicate the Chalkboard Texture layer and call it Chalkboard Text Texture.

Duplicate Layer in PhotoshopDuplicate Layer in PhotoshopDuplicate Layer in Photoshop

4. How to Create the Chalkboard Shape

Step 1

Hide the Chalkboard Text Texture layer.

Right-click on the Chalkboard Texture layer and choose Create Clipping Mask.

Create Clipping Mask in PhotoshopCreate Clipping Mask in PhotoshopCreate Clipping Mask in Photoshop
Clipping Mask in PhotoshopClipping Mask in PhotoshopClipping Mask in Photoshop

Step 2

Press Control-J to duplicate the Speech Bubble Shape layer and call it Chalkboard. Rename the initial layer Wooden Frame.

Duplicate Layers in PhotoshopDuplicate Layers in PhotoshopDuplicate Layers in Photoshop

Step 3

Set the Fill of the Wooden Frame layer to 0% and add a Stroke layer style, color #000000.

Stroke Layer StyleStroke Layer StyleStroke Layer Style

Right-click on the layer and choose Convert to Smart Object

Convert to Smart ObjectConvert to Smart ObjectConvert to Smart Object

5. How to Create the Wooden Texture

Step 1

Press Shift-Control-N to create a new layer. Name the layer Wooden Texture.  

Press Shift-F5 to fill the layer with color #1a1a1a

Fill Layer with ColorFill Layer with ColorFill Layer with Color

Step 2

Go to Filter > Render > Fibers to create the wood texture.

Fibers Filter in PhotoshopFibers Filter in PhotoshopFibers Filter in Photoshop

Step 3

Right-click on the Wooden Texture layer and choose Create Clipping Mask.

Create Clipping MaskCreate Clipping MaskCreate Clipping Mask

Step 4

Select the Wooden Frame and the Wooden Texture layers and move them above all the other layers.

Move Layers in PhotoshopMove Layers in PhotoshopMove Layers in Photoshop

Step 5

Add these layer styles to the Wooden Frame layer: 

  • Drop Shadow (color #000000)
  • Inner Shadow (color #000000)
  • Bevel and Emboss (color #ffffff and #000000)
  • Color Overlay (color #c86800)
Add Layer Styles in PhotoshopAdd Layer Styles in PhotoshopAdd Layer Styles in Photoshop
Wooden FrameWooden FrameWooden Frame

6. How to Create a Chalkboard With a Wooden Frame

Add this layer style to the Chalkboard layer: 

  • Drop Shadow (color #000000)
  • Inner Shadow (color #000000)
  • Inner Glow (color #ffffff)
  • Color Overlay (color #393838)
Add Layer Styles in PhotoshopAdd Layer Styles in PhotoshopAdd Layer Styles in Photoshop
Chalkboard with Wooden FrameChalkboard with Wooden FrameChalkboard with Wooden Frame

7. How to Add the Chalk Text Effect

Step 1

Add the Back To School text layer using the color #ffffff.

Text Layer in PhotoshopText Layer in PhotoshopText Layer in Photoshop

Step 2

Add this layer style to the Back to School text layer: 

  • Inner Shadow (color #000000)
  • Outer Glow (color #ffffff)
  • Inner Glow (color #000000)
  • Stroke (color #000000)
Add Layer Style in PhotoshopAdd Layer Style in PhotoshopAdd Layer Style in Photoshop

Step 3

Also add a Color Overlay, blend mode Normal, opacity 100%, using a color that you like. I will use this green color tone #d1ff6e.

You can also change the color of the Stroke using any color you like.

Chalk Effect Text StyleChalk Effect Text StyleChalk Effect Text Style

Step 4

Right-click on the Back to School text layer and choose Convert to Smart Object. Set the blend mode to Screen.

Chalk Effect Text Style in PhotoshopChalk Effect Text Style in PhotoshopChalk Effect Text Style in Photoshop

Step 5

To create a more realistic chalk effect, make the Chalkboard Text Texture layer visible. Right-click on the layer and choose Create Clipping Mask for the Back to School text layer.

Also set the blend mode to Multiply.

Chalk Texture Text EffectChalk Texture Text EffectChalk Texture Text Effect

Step 6

To make the colors more vibrant, let’s add a Levels adjustment. Right-click on the adjustment layer and choose Create Clipping Mask.

Add Levels Adjustment in PhotoshopAdd Levels Adjustment in PhotoshopAdd Levels Adjustment in Photoshop

8. How to Add Pieces of Chalk

Step 1

Use the Pen Tool to create a piece of chalk. 

Chalk Piece ShapeChalk Piece ShapeChalk Piece Shape

Step 2

Add this layer style to make the piece of chalk look realistic: 

  • Drop Shadow (color #000000)
  • Inner Shadow (color #000000)
  • Bevel and Emboss (colors #ffffff and #000000)
  • Color Overlay (color #f2f2f2 for the white chalk and #c1e053 for the green chalk)
Chalk Piece Layer StyleChalk Piece Layer StyleChalk Piece Layer Style

Congratulations! You’re Done!

In this tutorial, you’ve learned how to make a chalk effect in Photoshop from scratch using filters and adjustment layers. I hope you’ve enjoyed it and can now make your own „first day of school” chalkboard sign!  

Chalk and Chalkboard Effect in PhotoshopChalk and Chalkboard Effect in PhotoshopChalk and Chalkboard Effect in Photoshop

5 Top Chalk Effect Photoshop Resources From Envato Elements

Now you know how to make a chalkboard sign from scratch in Photoshop. But if you’re in a hurry and want to save time, Envato Elements is the best option. With a subscription, you can download as many assets as you need.

Looking for more chalkboard sign ideas? On Envato Elements you can find chalkboard sign mockups, chalk fonts, and even wedding chalkboard signs and templates!

You can make a customizable chalkboard sign with these resources in a fraction of the time! Here’s a selection of our favorites: 

1. Chalk Lettering Photoshop Action (ATN, ABR, PAT)

Chalk Lettering Photoshop Action (ATN, ABR, PAT)Chalk Lettering Photoshop Action (ATN, ABR, PAT)Chalk Lettering Photoshop Action (ATN, ABR, PAT)

Want to make a „first day of school” chalkboard sign in a few clicks? Check out this chalk effect Photoshop kit.

You’ll get 28 single effects like chalk fills and outlines, as well as three complex chalk effects. It’s a complete kit to make customizable chalkboard signs with actions, patterns, brushes, and more!

2. Chalkboard Sign Generator (PAT, ATN, PSD, SKETCH, PNG, PDF)

Chalkboard Sign Generator (PAT, ATN, PSD, SKETCH, PNG, PDF)Chalkboard Sign Generator (PAT, ATN, PSD, SKETCH, PNG, PDF)Chalkboard Sign Generator (PAT, ATN, PSD, SKETCH, PNG, PDF)

If you need to make wedding chalkboard signs, this is the kit for you. It comes with 14 actions, three layer patterns, three chalk brushes, and two backgrounds. You can easily make welcome chalkboard signs, wedding chalkboard signs, and more with this one!

3. Chalkboard Text Effects (PSD)

Chalkboard Text Effects (PSD)Chalkboard Text Effects (PSD)Chalkboard Text Effects (PSD)

This chalk effect Photoshop kit is specially made for text. If you need a unique welcome chalkboard sign, then this is for you. The download includes 12 fully layered PSD files that work with smart object layers.

4. Chalk Shapes Photoshop Stamp Brushes (ABR)

Chalk Shapes Photoshop Stamp Brushes (ABR)Chalk Shapes Photoshop Stamp Brushes (ABR)Chalk Shapes Photoshop Stamp Brushes (ABR)

If free-hand drawing is more your style, then you’ll benefit from this pack of chalk brushes. The download includes 15 brushes at a size of 2500+ pixels, and they work with any Photoshop version.

5. Chalk and Charcoal Photoshop Styles (ASL, PAT, PNG)

Chalk and Charcoal Photoshop Styles (ASL, PAT, PNG)Chalk and Charcoal Photoshop Styles (ASL, PAT, PNG)Chalk and Charcoal Photoshop Styles (ASL, PAT, PNG)

Do you want to achieve a nice and realistic chalkboard sign look? This kit answers the question of how to make a chalk effect in Photoshop with a realistic look.

Create your customizable chalkboard sign with these 15 chalk and 15 charcoal effects in a variety of formats.

Discover More Cool Resources

You may also enjoy these tutorials and resources: