Post pobrano z: The Confidante (Directors Cut)


Post pobrano z: How to Create a 3D Stuffed Letters Text Effect in Adobe Photoshop

This tutorial will show you how to use Adobe Photoshop’s 3D tools and settings, along with a couple of patterns and stock images, to create a lovely stuffed letters text effect. Let’s get started!
This text effect was inspired by the many Layer Styles available on GraphicRiver.
The following assets were used during the production of this tutorial:
Go to File > Open to open the Free EPS file Vector set of floral seamless pattern 01 file. This will bring up the Rasterize EPS Format box, where we’ll change the Mode to RGB Color, and uncheck the Anti-aliased box.
Unchecking the Anti-aliased box will give us crisp results, so that we can easily select the patterns without having to deal with blurry edges.

Once the file opens, zoom in a bit to the top left corner, and you can see that the first pattern has some transparent parts, which will create discontinuity issues if used as it is.
So the next couple of steps will be only to fix this pattern’s issue. For the other patterns, you’ll just need to select and save them as images.

Pick the Rectangular Marquee Tool, and create a selection around the first pattern’s image. The selection doesn’t have to be precise as we’ll fix it in the next step.

Right-click the selection and choose Transform Selection. Zoom in to each edge and drag the selection on top of it, so that you have an exact selection of the pattern image.
Once you’re done, hit the Return key to accept the changes, and go to Edit > Copy.

Create a new file with the Clipboard dimensions, and go to Edit > Paste.
Pick the Move Tool, press-hold the Shift key, and drag the pasted image down to the center of the document.

Duplicate the pattern image’s layer, and drag the copy upwards to the center of the document, so that its bottom edge touches the original image’s top edge.

Use the Rectangular Marquee Tool to create a selection over the empty areas, and use the Paint Bucket Tool to fill it with the pink color around it.

Select both layers and press Command-E to merge them.
Go to File > Save, and save the pattern as an image (jpg) file. It’s better to give each pattern a number to make it easier to use them later on.

For the rest of the patterns, just select, copy and paste, and save them as images.
Create a new 1000 x 626px document with a White Background.
Then, create the text in All Caps using the font HWT Artz. Set the Size to 350 pt and the Tracking to 50.

Rename the text layer to Text, right-click it, and choose Convert to Shape.

Duplicate the Text layer, and rename the copy to Back Piping.

Pick the Direct Selection Tool (A). In the Options bar, change the Fill to None, the Stroke Color to #e9e7e2, and its Size to 5.
Click the Set shape stroke type icon to change the Align to Outside.

Duplicate the Back Piping layer twice. Rename the first copy to Sides, and the second to Front Piping. Then, change the Sides’ Stroke Size to 2.5.

Pick the Rectangle Tool, click anywhere in the document, and type in 5 for the Width and 600 for the Height.

Pick the Add Anchor Point Tool, and click somewhere near the middle of each of the rectangle’s vertical sides, to add two anchor points.
Rename the shape layer to Back as we will use it for the back shadows.

Click-drag to select both anchor points, and use the Right Arrow key to nudge them a little bit to the right.

For each shape layer you have, select it, and go to 3D > New 3D Extrusion from Selected Path.

Select all 3D layers you have, and then go to 3D > Merge 3D Layers.

To access the 3D mesh settings and properties, you’ll need to open two panels: the 3D panel and the Properties panel (both found under the Window menu).
The 3D panel has all the components of the 3D scene, and when you click the name of any of those, you’ll be able to access its settings in the Properties panel. So make sure to always select the tab of the element you want to modify in the 3D panel before you change its settings in the Properties panel.

If you select the Move Tool, you’ll find a set of 3D Modes for it to the right of the Options bar.
When you choose one of those, you can then click and drag to perform changes (on the selected element in the 3D panel).
Use those modes to change the Current View into an angle you like.

Select the Text and Sides mesh tabs in the 3D panel, and change their Extrusion Depth in the Properties panel to 30.

Select the Back Piping and Front Piping mesh tabs, and change their Extrusion Depth to 3.

Select the Text mesh tab, and click the Cap icon at the top of the Properties panel.
Change the Sides to Front and Back, the Bevel Width to 1, the Contour to Half Round, the Inflate Angle to 90, and the Strength to 7.

Select the Back Piping and Front Piping mesh tabs, and click the Cap icon again.
Change the Sides to Front and Back, the Bevel Width to 15, the Contour to Half Round, and the Inflate Strength to 10.

Pick the Move Tool, and use the 3D Axis to move the Back Piping mesh to the back of the text.
The arrows at the ends of the axis move the mesh, the part below them is used for rotation, and the cubes are used for scaling. The cube in the center is used to scale the object uniformly. All you need to do is click and drag the part you want.

You can change the Current View to better see what you’re doing, by choosing a preset from the View menu in the Properties panel.

Select all the Text Mesh Material tabs.
In the Properties panel, change the Specular Color to (24, 15, 7), and the Shine to 100%.

Select the Text mesh tab, and go to 3D > Split Extrusion. This will separate the letters.
Select and split all the other meshes you have, except for the Back mesh.

Select the first Text Front Inflation Material tab, click its Diffuse texture icon, choose Replace Texture, and open the first pattern image you want to use from the ones you saved at the beginning of this tutorial.

Click the Diffuse texture icon again, and choose Edit UV Properties.

Adjust the Tile and Offset values to get a result you like.

Click the Bump folder icon and choose New Texture.

Set the Width and Height values to 512, and the Resolution to 300.

This will open the new texture file. If it does not, click the Bump texture icon and choose Edit Texture.
When the file opens, duplicate the Background layer.

Double-click the copy layer to apply a Pattern Overlay effect with these settings:
Save and close the file to go back to the 3D Scene.

Edit the Bump texture’s UV Properties, and zoom in to better see the effect.

Change the Bump value to 5, or any other value you like.

With the Front Inflation Material tab still active, click the Material Picker box, click the pop-up menu icon, and choose New Material.

Type in a name for the material, and then click OK.

Select the rest of the first Text Material tabs except for the Extrusion. Then, open the Material Picker, scroll down to the material icon you’ve just saved, and click it to apply it to the selected materials.

Apply the saved material to the second Text Front Inflation, Front Bevel, Back Bevel, and Back Inflation Materials.

Select the second Text Front Inflation Material tab, click its Diffuse texture icon, and choose Replace Texture to open another pattern image.

Select the second Text Front Bevel, Back Bevel, and Back Inflation Material tabs, click the Diffuse texture icon, and choose the name of the pattern used from the list you get, instead of replacing it separately for each material.
You might need to change the UV Properties for the new texture, so just keep that in mind after adding each new one.

Repeat the same steps for the rest of the letters you have.

Select the Front Inflation Material tab of the first Front Piping mesh, click the Diffuse texture icon, and choose Remove Texture.

Change the Diffuse Color to (233, 231, 226).

Click the Bump folder icon, and choose the Text Front Inflation Material – Bump texture from the list.
Zoom in to edit the UV Properties, and change the Bump value to 2.

Save the material and apply it to the rest of the Piping Materials.
In order to tile the Extrusion Material, you need to select all the Piping mesh tabs, and set the Texture Mapping to Tile.

Go back to any of the Piping Extrusion Material tabs, edit its UV Properties, save the material, and apply it to the rest of the Piping Extrusion Materials you have.

Select the Text, Front Piping, Sides, and Back Piping mesh tabs of the first letter.
Use the 3D Axis or the Coordinates values in the Properties panel to rotate and move the letter.

Repeat that for the other letter meshes you have. You can always go back to any letter and adjust it.

Select the first letter’s mesh tabs again, click the 3D panel menu icon, and choose Move Object to Ground Plane.
Repeat that for the rest of the letters.

Select all the mesh group tabs, and nudge them just a little bit downwards along the Y Axis. This will help create the illusion of the letters’ weight on the sofa, by pushing them into the ground plane.

Go to File > Place Linked, and open the Empty clean white room with branches decor 3D rendering image.
Resize it as needed, and rename its layer to Background Image.

Place the Plant (Epipremnum pinnatum) image on top of the Background Image layer, and rename its layer to Plant.
Hide the 3D layer to focus on the background elements if you like.

Resize, rotate, and move the plant image to place it over the vase’s sticks in the Background Image. You can stamp-clone the sticks, but we are going to blur the background anyway, so you can skip that.

Select the Background Image layer, go to Filter > Blur > Gaussian Blur, and set the Radius to 5.

Repeat that to blur the Plant image.

Open the White sofa isolated on white image, pick the Quick Selection Tool, and you can check the Auto-Enhance box in the Options bar if you like. It might slow down the process a bit, but can create cleaner selections.
Click-drag slightly to select the sofa.

You can press-hold the Option key, and click-drag to deselect any unwanted areas. Just make sure to drag slightly over small areas to get the best result.

Once the sofa is selected, click the Select and Mask button in the Options bar.
Change the View to On Black, and increase the Opacity to 100%.
Play around with the Smooth and Shift Edge values under the Global Refinements tab to get the best selection.

Click OK when you’re done, and go to Edit > Copy.

Go back to the 3D document, go to Edit > Paste, and rename the layer to Sofa.
Right-click the Sofa layer, choose Convert to Smart Object, and resize the sofa to fit within the scene.

Make the 3D layer visible, and adjust the Camera View to place the letters on top of the sofa.

Select the Infinite Light 1 tab, and change the Intensity to 45% and the Shadow Softness to 30%.

Use the Move Tool or the Coordinates values to move the light to the window in the background image.

Click the Add new Light to Scene icon at the bottom of the 3D panel, and choose New Infinite Light.

Change the Infinite Light 2’s Intensity to 30%, and uncheck the Shadow box.

Move the light so that it illuminates the upper part of the text.

Click the Environment tab, click the IBL texture icon to choose Replace Texture, and open the Bedroom image.

Change the Intensity to 90%, and move the light around to get a lighting you like.

Show the Back mesh, rotate it -90° around the Y Axis, and scale it until it fills the sofa’s back.

Move and rotate the Back mesh until it touches all the letters.

Make sure to set the Current View to the final angle you want to render.
Select the Back mesh tab, uncheck its Cast Shadows box, and check the Invisible box. This will help create a surface that catches the shadows without being visible in the scene.

Once you’re done modifying the 3D scene, go to 3D > Render to render it. The rendering might take a while, but you can stop it any time by pressing the Esc key.
You can also stop the rendering to adjust the lighting, the meshes, or anything else you think needs tweaking, and render again, until you get a result you like.
When you’re done rendering, convert the 3D layer into a smart object to avoid making any accidental changes.

Right-click the 3D layer, and choose Create Clipping Mask. This will clip the Back mesh shadows to the sofa.

Click the Add layer mask icon at the bottom of the Layers panel.
Set the Foreground Color to Black, pick the Brush Tool, choose a soft round tip, and paint over any unwanted areas to hide them.

Create a new layer below the 3D layer, call it Back Shadow, and change its Blend Mode to Linear Burn.
Set the Foreground Color to #848285, and start painting shadows where the letters touch the sofa’s back to intensify the effect.

Change the Back Shadow layer’s Opacity to a value you like, and use the Eraser Tool to get rid of any unwanted parts of the shadow.

Create a new layer under the Back Shadow layer, call it Drop Shadow, and change its Blend Mode to Linear Burn.
Add shadows where the letters touch the sofa. Then, press Command-T to enter the Free Transform Mode, scale them down vertically, and place them right below the letters.
Hit the Return key to accept the changes, and repeat if necessary.

Place the Bokeh – Golden Lights 5184 x 3456 Pixels image on top of the Plant layer, and rename its layer to Bokeh.
Change the Bokeh layer’s Blend Mode to Screen, and resize it as needed to fit within the scene.
Go to Filter > Blur > Gaussian Blur, and set the Radius to 3.

Click the Create new fill or adjustment layer icon at the bottom of the Layers panel, and choose Gradient Map.
Create the gradient fill using the colors #44386e to the left, #716d7c in the middle, and #d4a987 to the right.
Check the Dither box, and change the layer’s Blend Mode to Soft Light, and its Opacity to 35%.

Select the Plant layer, and go to Image > Adjustments > Vibrance.
Change the Vibrance to -35 and the Saturation to -10.

If the sofa looks very sharp, apply a Gaussian Blur with a Radius value around 0.25.

In this tutorial, we saved pattern images, created a bunch of shape layers, converted them to 3D meshes, and created their materials.
Then, we started adding background elements and adjusting the 3D scene’s lighting and camera view accordingly, to render the final result.
Finally, we added some more shadows and adjusted the coloring of the final result.
Please feel free to leave your comments, suggestions, and outcomes below.


Post pobrano z: PWA Directory
The other day I was watching an interview with Ade Oshineye where he discussed his work on the PWA Directory at Google, a showcase of progressive web apps. And it’s pretty neat!
It lists a whole bunch of PWAs out there and you can filter them by Lighthouse metrics – that’s the auditing tool from Google that scores a web app and gives us developers the ability to improve them.
Direct Link to Article — Permalink
PWA Directory is a post from CSS-Tricks
Post pobrano z: 40 Professional Real Estate Flyer Templates
Need a winning combination for your next open house? Check out this selection of 40 amazing real estate flyers for clean, professional designs.
Rule the area in your local real estate market with an exceptional flyer. Feature your gorgeous listings with a phenomenal print design to match!
In this collection of incredible premium assets, we’re showcasing 40 professional real estate flyers curated from both GraphicRiver and Envato Elements.
Use these flyers to sell your next house, or enlist the help of a talented professional from Envato Studio for all your creative needs.
Let’s kick things off with this stunning and sophisticated real estate flyer. This flyer includes a unique square-based design, with easily editable text and smart objects. An alternative design is also included for when you want to change things up!

Enjoy a sleek and professional flyer design with this awesome Griyo template. This template features a print-ready design created in A4 format, with four photo placeholders you can easily modify with your own images.

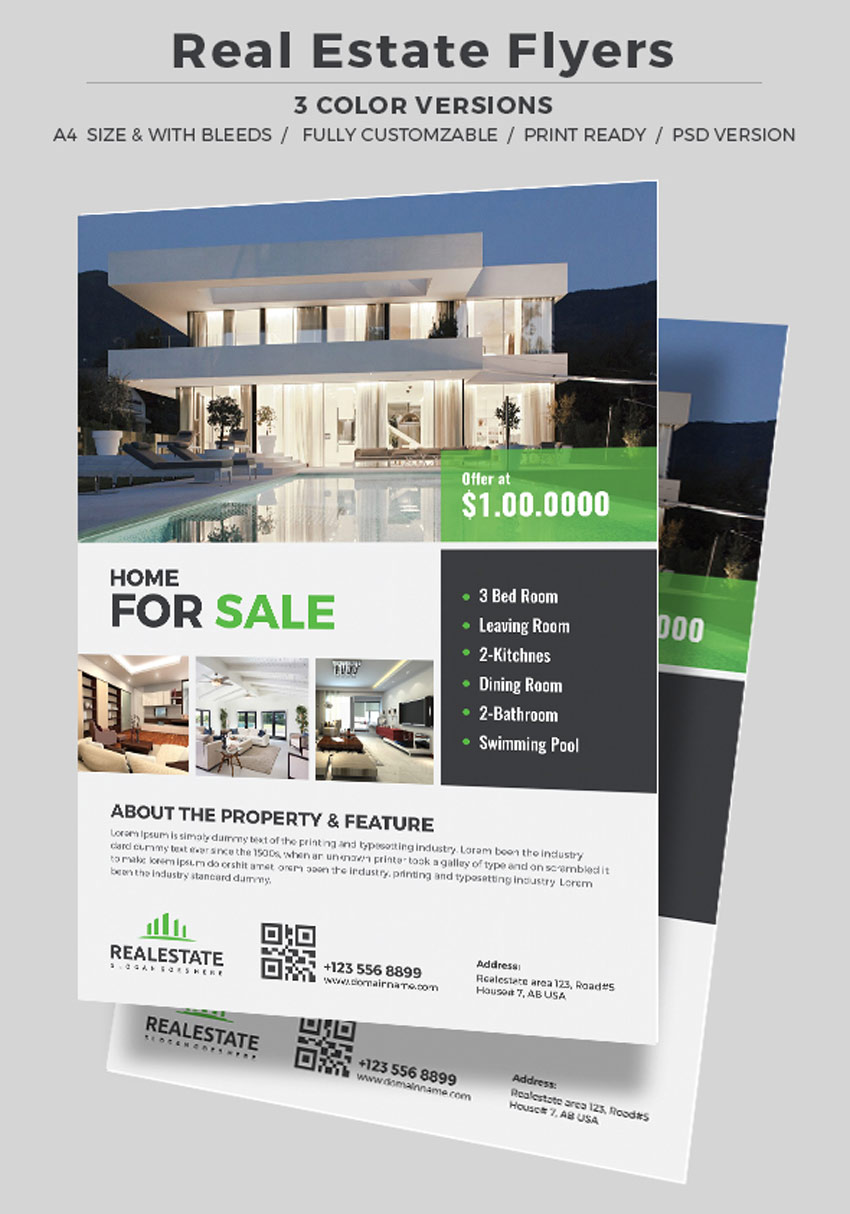
Make your properties the star of your next flyer! This gorgeous template features a clean, modern design with plenty of room to highlight your listing’s most important information. Select from three distinct color versions to put your business on the map!
Impress your future clients with this stunning flyer design. This template features a clean, minimalist theme with three unique layouts to choose from. Available in both Photoshop and Illustrator formats, this template works perfectly in standard design software.

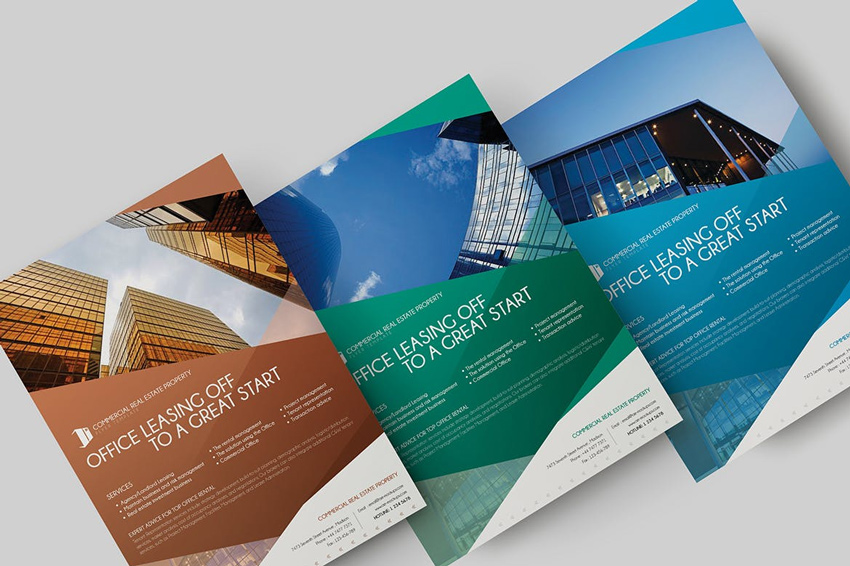
Be the king or queen of real estate in your town with this amazing real estate flyer. Great for commercial companies, this template features a bold, colorful design with stylish details and fully editable layers. Create the success you want with a winning flyer design.
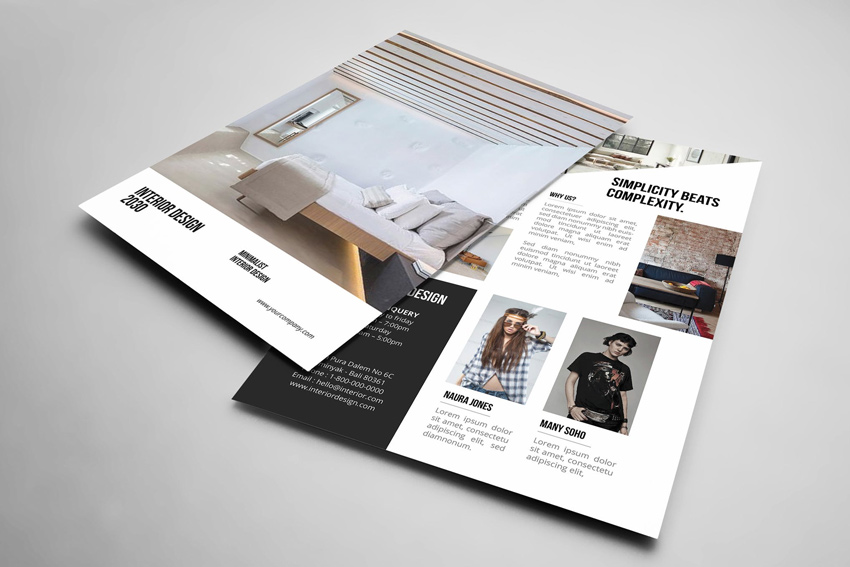
Calling all interior decorators! Put your creativity and craft on display with this awesome flyer template. This template features a sleek, modern style with plenty of white spacing for text and more. Showcase your best work and gain new clients with this extraordinary template.
Need a quick solution for your next listing? Then check out this awesome flyer set! This set includes five beautiful layout options to make your flyers shine! A great choice for when you’re on a budget, this set gives you five amazing flyers that are ready to go whenever you are.
Download a trendy flyer design to promote your property in style. Designed in the US Letter size with plenty of bleed, this template features a clean, modern design with fully editable vector elements. It’s also available in both Photoshop and Illustrator formats for your convenience.

Are you in the construction business? Meet the clients and contractors that need you with this awesome set of real estate flyers. This simple template is easy to use and perfect for beginners to Adobe Illustrator. Find fully editable vector and text elements with two design alternatives for more options.

Ready to sell your first home? Then feast your eyes on this gorgeous pack of three unique flyers. Inspired by trendy geometric design, these flyers show your listings in a whole new light! Included in this download are three A4 format templates, designed with a high resolution and in CMYK mode.
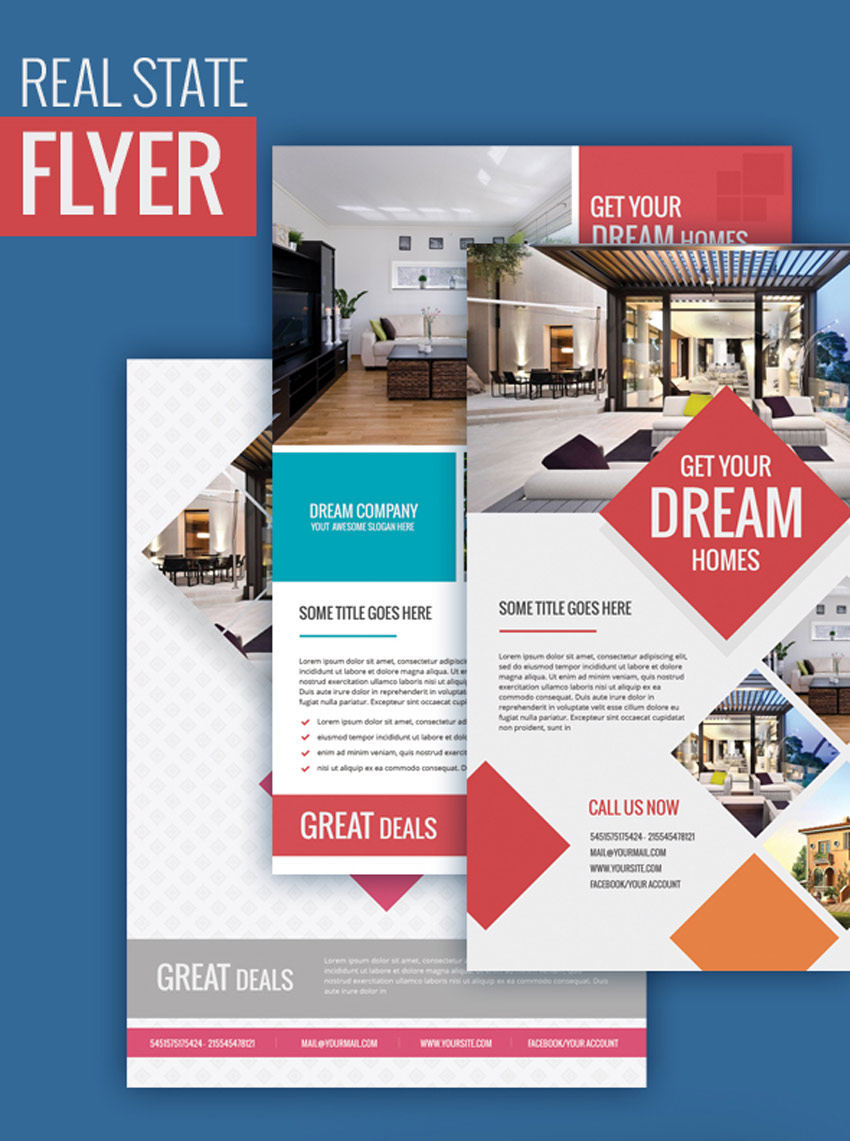
Enjoy a beautiful and elegant flyer that screams sophistication! This premium flyer design features a minimalist theme with eight total Photoshop files. It’s great for beginners to design—you can let this flyer do all the selling for you!

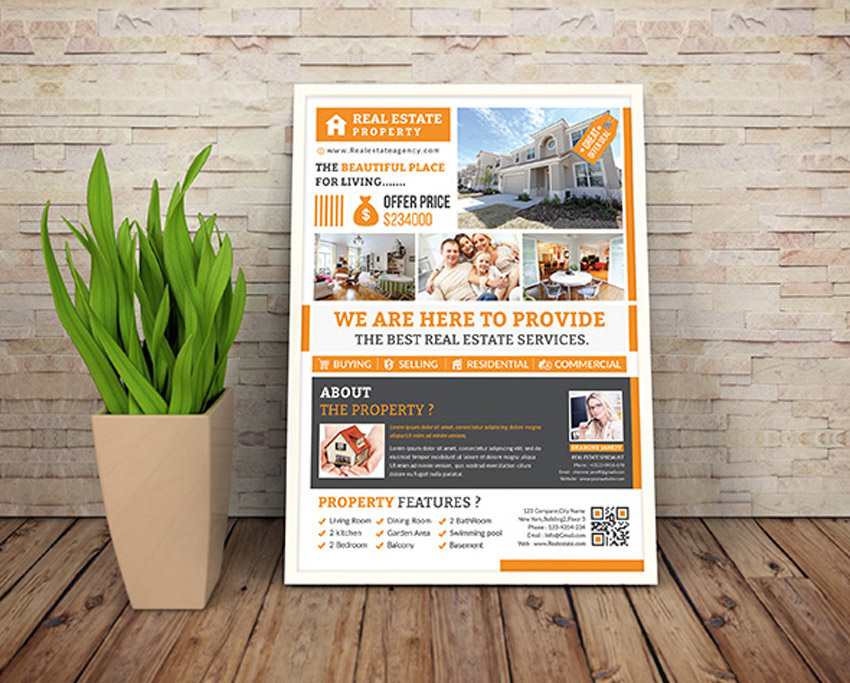
Your beautiful listings should have equally beautiful flyers to match! And with this template you’ll get just that! Included with this stunning design are three color variations in orange, green, and magenta. Find this file easy to edit with completely organized layers.

Promote your real estate with this stylish minimalist design. This design was created in the standard US Letter format, with fully editable text and images. Replace the placeholder images with favorites from your listings and get ready for endless business!

Get three incredible designs all in one simple download! This awesome template pack features three professional real estate flyers with bold, vibrant colors. Choose a template according to your mood or listing, and customize it with just a few short clicks!
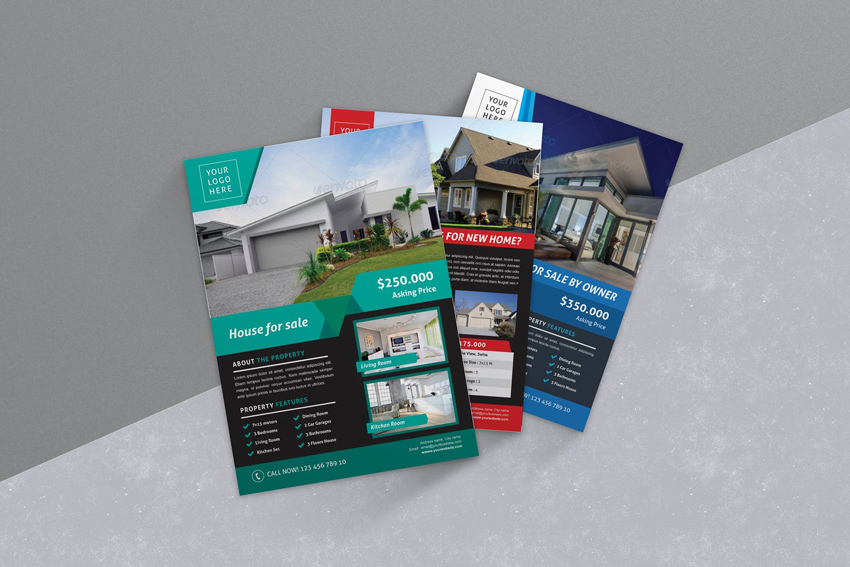
Why look like every other listing when you can make them your own? This unique business flyer features an exquisite circular design with room for your company details, contact, and listing information. With a help file also included, you can edit any text or design element easily in this simple download.

Create the perfect flyer for your real estate business. This impeccably designed flyer features your real estate front and center followed by a selection of important information. Expand your business and enjoy access to three alternate colors in an easy-to-use A4 file.

There’s nothing more beautiful than an elegantly designed flyer. And you’re sure to knock the socks off any client with this incredible template. Volume five of this set was designed exclusively for corporate and small scale companies and features fully layered files that are easy to customize.

Real estate flyers are the perfect companion to your marketing campaigns. This modern design features a polaroid-like photo scheme with plenty of room for your listing’s details. Enjoy fully editable vector elements and three alternative designs to find one that fits your needs.

Help your buyers find the perfect home with this awesome flyer design. This flyer features a professional design that highlights your real estate business with style. Enjoy the beautiful blue color scheme or choose from three others to match to your official brand.

Show your buyers that they’re in the right hands with a professional flyer! This template features a beautiful minimalist design with two color variations, all within an easy-to-edit file. Download this file to get access to this clean, modern design with an additional help file included.

Provide the best home shopping experience for your buyers with this professional real estate flyer. This template features a curvy design with unique vector banners and a modern color scheme. Plug in the images and customize the text to get started with this flyer today!

Sell your best listings fast with this set of premium flyer designs. These templates feature two different style options with a unique layout that is sure to grab buyers’ attention. Edit the text easily or change the colors to fit your business.
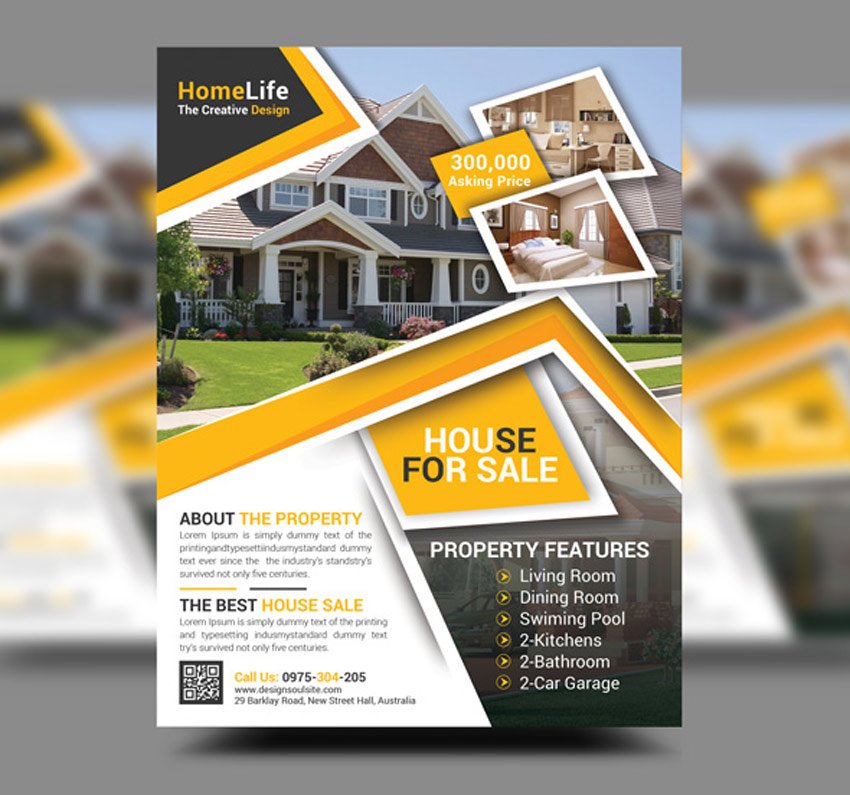
Sell stunning high-rises and premiere luxury condos with this exquisite set of real estate flyers. Replace the main image with one of your own before editing the text easily in this fully customizable template. Enjoy additional colors for more lovely options.

Get ready to sell your next listing with this awesome real estate flyer. This flyer features a simple box-themed design, with two separate layout options available. And not only is it very easy to edit but you’ll also find six incredible designs to choose from!

Take on a beautiful modern perspective with this set of real estate flyers. This template includes an amazing geometric-inspired design that frames your listings perfectly. Take your marketing to the next level with this super stylish design.
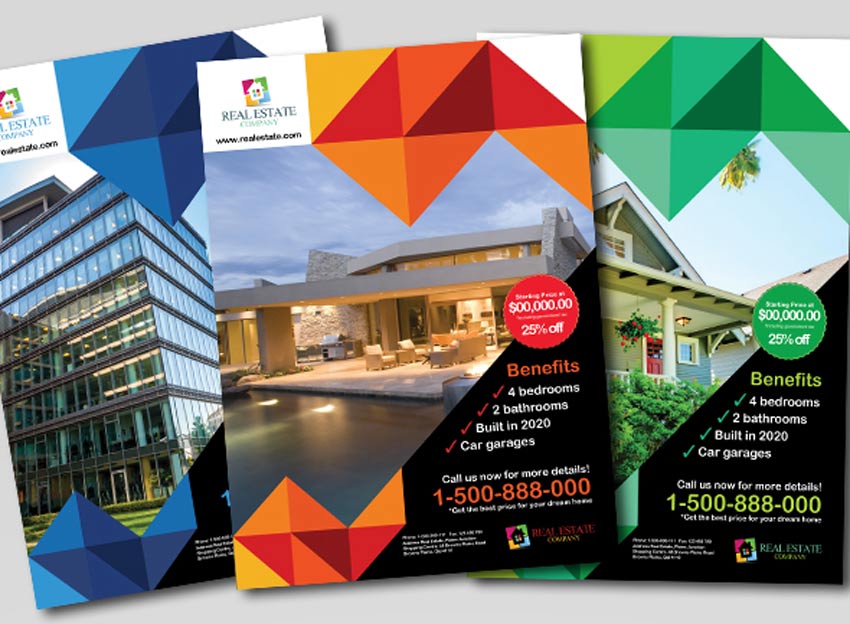
Attract prospective clients with this gorgeous real estate flyer. This flyer features a modern, professional design that can be used to highlight a listing or your entire business. Download this package to get access to fully layered Photoshop and InDesign files with easily editable vector elements.

This real estate flyer just might be the perfect match for your business! This template includes a clean, professional design in a high-resolution format. Great for users of Adobe InDesign, this template is print-ready for immediate use!

Rock the industry like the professional you are with this modern flyer template. This design features a fully editable file with room for four unique images. Find links to free fonts within your download before updating this template with your own amazing copy.

Be a smart shopper with incredible design bundles. This bundle features three exquisite flyer designs that are completely print-ready for your immediate use. Choose from multiple color variations and three creative layout options to sell your properties.
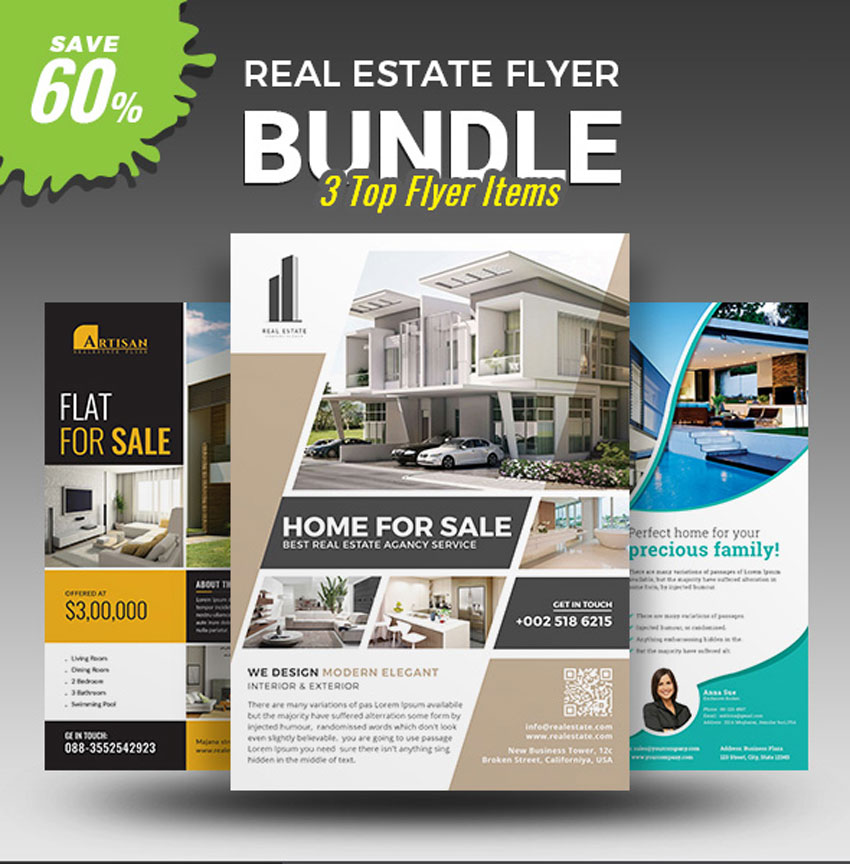
Here’s another great bundle you definitely don’t want to miss! In this selection of premium flyers, you’ll find four Photoshop files with plenty of smart objects to change the images easily. They’re compatible with Photoshop CS2 and later versions, so download these templates today!
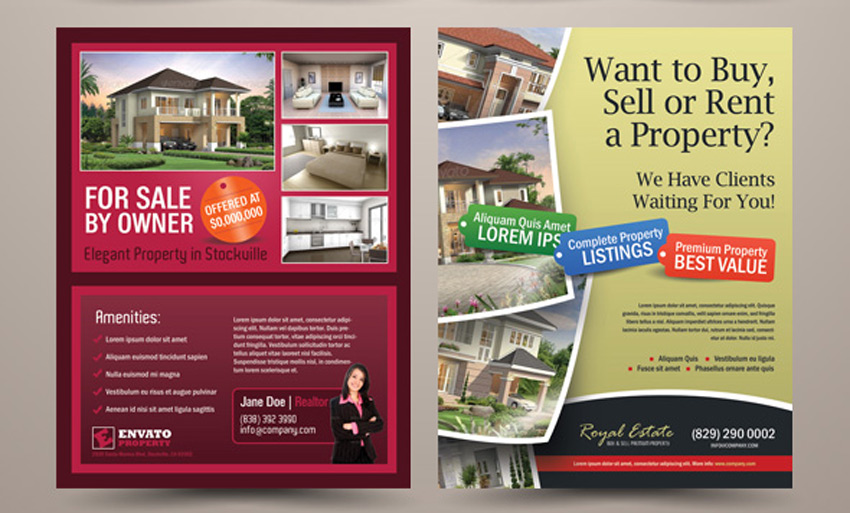
For more incredible deals, check out this set out of two sophisticated flyer designs. These flyers include two creative layouts that highlight your gorgeous properties. Great for waterfront properties and more, these awesome flyers will help you feature the best points of your listings.

Give your open house the most stylish flyer in the neighborhood. With this flyer template, you will enjoy a vibrant and sophisticated design that is simple and straight to the point. Easily edit the tagline and property details, or choose from four different color schemes to fit your individual style.

If you’re a realtor or agent in need of a new flyer then check out this fabulous design. This template features a detailed flyer designed in a print-ready A4 format. With room for the listing’s most important details, you can even add a short bio of yourself to connect with potential buyers.
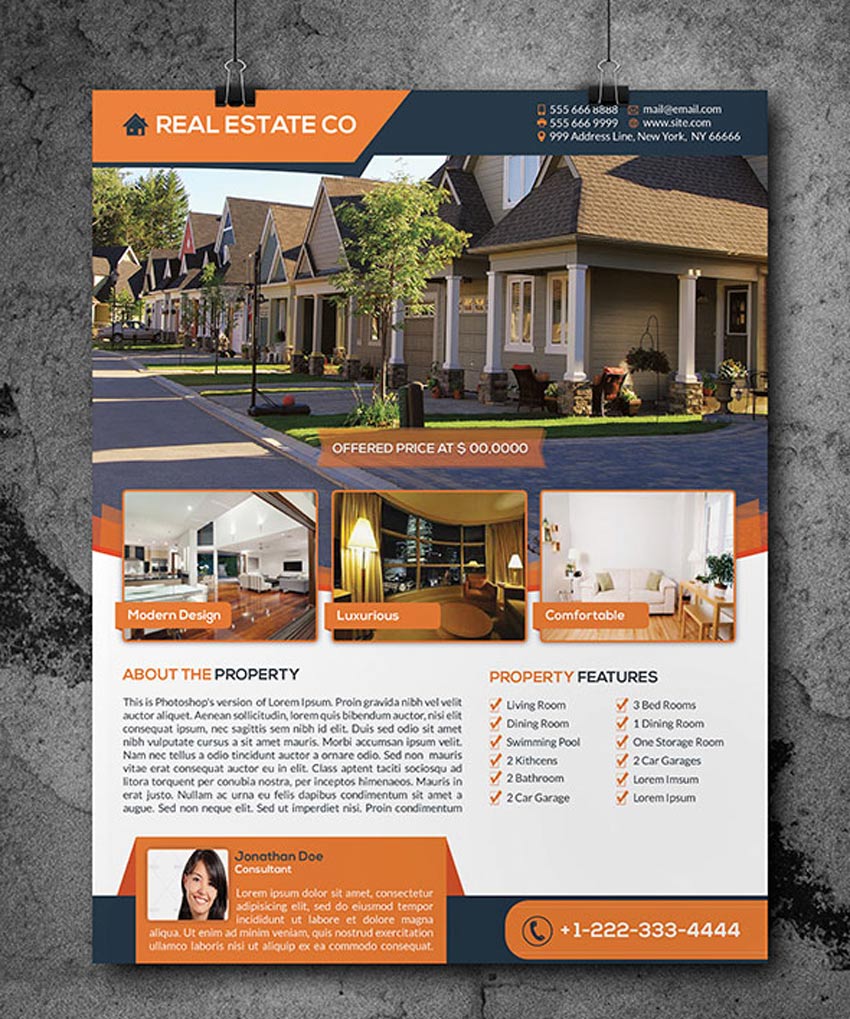
Sell any condo or apartment fast! Use this simple real estate flyer with all the elements you need for the perfect flyer design. Included in this template are two layout versions with three separate color options and a quirky sales tag to make your flyer stand out.
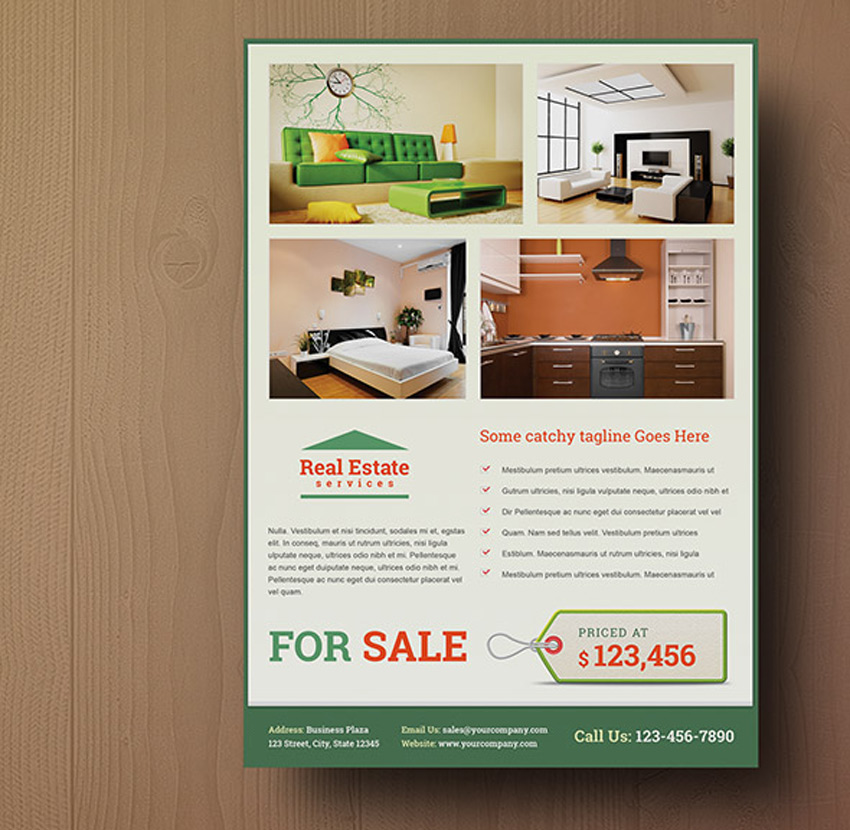
Sell your buyers their dream home with this simple real estate flyer. A flyer that also doubles as a quick and easy magazine ad, this template features a high-quality minimalist design with room to display several listings.

Choose a flyer that complements your professional business. This set of flyers features designs created in A4 format that are completely compatible with all Adobe Illustrator CS versions. Download this file today to enjoy three creative versions.

Kick start your new job as a realtor with a minimalist real estate flyer. This sophisticated design features simple rectangular elements that are super easy to use. Customize the text to your needs and replace the images with your favorite listings.

The real estate industry is not an easy business, but maybe it can get a little better with the perfect flyer template. This flyer features a modern design aesthetic, with 3D-like vector elements and great sections to feature your listing. Highlight the best parts of your property with this awesome real estate template!

Who says pink is too girly? Feature an incredible apartment listing for students and young professionals with this modern real estate flyer. This flyer template includes two layered Photoshop files that are easily customizable and also come print-ready!

Love minimal, elegant designs? Then you’ll definitely love this flyer set! This set features four unique layouts all for the price of one. Get the most out of your money with these easily customizable templates, featuring the latest industry trends in print design.

This list features exciting resources for the avid designer
familiar with Adobe Illustrator, Photoshop, and InDesign. For additional help with all your flyer needs, enlist the skills of a talented
professional by choosing one of the amazing designers from Envato Studio.
And with loads of real estate flyer templates available at your fingertips, chances are we’ve missed a few to add to your personal collection. Be sure to browse GraphicRiver and Envato Elements for more resources, and let us know your favorites in the comments below!

Post pobrano z: Easter Surprise – The Real Easter Bunny
German food retailer Netto Marken-Discount has launched “Die Oster Überraschung — Der Wahre Osterhase,” (The Easter Surprise — The True Easter Bunny). The Easter Surprise commercial explores the question, “Where did the Easter Bunny come from?” The concept of a hare or rabbit distributing decorated eggs on Easter Sunday can be traced back to customs found in Lutheran Germany. This animated film provides a fantasy take on the custom. The Easter Bunny’s origins are explained in a marital union between a hen and rabbit who give life to a bunny that can lay coloured eggs. After his egg-laying skills are ridiculed by other forest creatures, the bunny runs away to the human city in the distance, leaving his worried parents behind with nothing more than a newly laid easter egg on his bed. He is soon picked up by a young girl and made famous in the human world, making headlines with the uniqueness that had previously left him feeling isolated. However, before long, he begins to miss his parents and his old world, leading him back to his family and providing the viewer with a fairytale, perfect ending. The Easter Surprise campaign is online at www.netto-online.de/ostern.

“I have a love of old fairy tales and spent a lot of time watching animated features with my kids, so when Jung von Matt approached us with this quirky script, I knew we could make something special,” says Mill+ director Jimmy Kiddell. “We knew the characters would be created in CG, but their location provided a different challenge,” Kiddell continues. “I have a fondness for puppetry and worlds with unusual scales, so the thought of building the interiors and a forest in a studio was too hard to resist. The plethora of characters, settings and story points meant this project resembled the scope of a short film.”
The Easter Surprise campaign was developed at Jung Von Matt by executive creative director Dörte Spengler-Ahrens, creative director Andreas Hilbig, senior art director Andreas Ristau, junior copywriters Adel Abouelfetouh and Clemens Wolff, junior art director Vlad Tarziu, senior project managers Julia Matczak and Alexandra Schöne, managing director Stephan Giest, producers Dennis Wendt, Christopher Kehrhahn, account directors Natalie Hoffmann and Natalie Martens.
The Easter Surprise commercial was produced at Mill+ by director Jimmy Kiddell, director of photography Tim Green, head of content Josh Davies, producer Terri Wood, production manager Jo Coombes, 1st assistant director Marc Wilson, production designer Dan Betteridge, and lead model maker Kate McConnell.
VFX, design, editing and colour were produced at Mill+ and The Mill by creative director/concept artist Jimmy Kiddell, executive producer Reece Ewing, producers Rebecca Perry, Justin Stiebel, head of animation Jorge Montiel, 2D lead artist Pete Hodsman, 3D Lead/VFX Supervisor: Jonathan Wood, 3D lead animator Alberto Lara, art director Melanie Climent, 2D artists Gianluca Di Marco, Jorg Schulz-Gerchow, Rafael Vormittag, Eleanor Risdon, Charles Dockerill, 3D artists Ashley Reemul, Jasmine Ghoreishi, Sauce Vilas, Antoine Mariez, Philippe Moine, Aziz Kocanaogullari, Luca Cantani, Ashley Tilley, Clement Granjon, Margaux Huneau, Jacob Gonzales, Nico Domerego, Anthony Bonnard, Antonio Filippin, Pavel Mamichev, Vladamir Venkov, Hugo Jackson, Jacques Leyreloup, Josh Docherty, Andreas Graichen, Thomas Bourret, Lucie Martinetto, Perrine Renard, Alain Thay, Walter How, Francesco Pelosi, Andrew Bartholomew, Lavan Kumar, Vittal Kuntla, Sivasubramanian, concept artists Melanie Climent, Andrew Brooks, Grant Berry, matte painter Cameron Johnson, R&D officer Craig Davies, colourist Seamus O’Kane, editor Hugo Vaughan-Hughes.
Music is “Beautiful, Always”, composed by Stephan Altman, Roisin Malone, Simon Heeger, Christian Vorländer at 2WEI with executive producers Simon Heeger & Christian Vorländer, sung by Tal Altman. Sound was designed by Thomas Muis at 2WEI.
Post pobrano z: Havaianas Made of Brazilian Summer
Havaianas, the footwear brand, has launched “Made of Brazilian Summer”, a global campaign designed to bring a little of Brazil to the rest of the world. When you think of Havaianas, you think of everything that best represents the Brazilian summer, such as happiness, rhythm, energy, friendship, spontaneity, good vibes and free spirit. That is why AlmapBBDO decided to turn the packaging for Havaianas into packaging for all that. The packages — designed in the shape of various products — will both contain the products at stores around the world and promote the campaign’s message, “Made of Brazilian Summer.” The Havaianas Made of Brazilian Summer message is creatively presented on posters, print ads, vignettes, gifs, shop windows and decorations. The packages will also be used throughout the year in activations, press kits for influencers and direct marketing actions. The brand’s social network channels will bring foreigners to Brazil to experience the things that make the Brazilian summer, like Havaianas.


The Havaianas Made of Brazilian Summer campaign was develop at AlmapBBDO, Sao Paulo, by chief creative officer Luiz Sanches, executive creative director Bruno Prosperi, art director/2D illustrator Keka Morelle, copywriter Pedro Corbett, art assistant/2D illustrator Felipe Antonioli, copywriter Daniel Oksenberg, art buyers Tereza Setti and Ana Cecília da Costa, 2D illustrator/typographer Motor Niveo, 2D illustrators Adelmo Barreira and Black Madre Atelier, 3D illustration studio Gelmi Estudio de Arte, photographers Alê Catan and Mariana Valverde, planners Cintia Gonçalves, Sergio Katz, Vanessa Sakamoto, Beatriz Scheuer, media team Carla Durighetto, Maria Eugenia e Flavio Padilha, account team Cristina Chacon, Flavia Fusco, Renata Carvalho, Italo Vetorazzo, and Sâmia Reiter, working with Alpagartas marketing team Carla Schmitzberger, Rui Porto, Eliana Vilches, Marcelo Vecchi, Maria Fernanda Candeloro.
Post pobrano z: David Lynch Foundation Sounds of Trauma
The David Lynch Foundation is raising awareness of its programs for war veterans with post traumatic stress disorder, with “Sounds of Trauma”. The “Sounds of Trauma” commercial is designed to help families and friends of returned veterans get a sense of what it’s like to have memories triggered by everyday sounds. Sudden noises, such as balloon pops, can be startling for any of us. But for a returned veteran those sounds can take them back immediately to the battlefield. The David Lynch Foundation uses transcendental meditation to help those suffering from post-traumatic stress disorder get back to a happy, healthy, productive life. Sounds of Trauma illustrates, in a poignant way, how difficult it is to get rid of the disorder and how necessary and valuable all of our support and the Foundation’s work is.


The Sounds of Trauma campaign was developed at Herezie Group, Paris, by executive creative director Baptiste Client, digital creative director Aurélie de Villeneuve, creatives Joseph Dubruque, Axel Didon, and Raphael Stein, agency producer Barbara Vaira, COO Pierre Callegari, CEO Andrea Stillacci, managing partners Edouard De Pouzilhac, Thomas Couteau, associate director Arno Pons.
Filming was shot in Montreal and New York by director Yan Dal Santo via Morrison, Toronto, (a Mile Inn boutique) with producer Leanne McLellan, production manager/colourist Mike Kircsh, and director of photography Adam Crosby. Post production was by Daniel J Kelly at The Faculty. Sound was designed and mixed at Apollo Studios by Pascal Desjardin and Yan Dal Santo.
Post pobrano z: Allegro Costume Party – what do you wish for?
Polish auction website Allegro has released “Costume Party”, the latest commercial asking the question, “Czego szukasz?” (What are you looking for?). The Allegro Costume Party commercial shows a mother discovering that her devotion to her daughter has made a deeper impact than she knew. When the young girl goes shopping with her mother in preparation for a costume party she realises that her chosen outfit has already been picked by a classmate. The mother proceeds to stretch the bounds of her creativity to craft a unique ensemble. The little girl remains fickle with the wide array of options, turning down thoughtfully handmade getups ranging from a dinosaur, rain cloud, bumblebee, mummy and astronaut. The mother is perplexed when the little girl requests a simple red dress and a string of pearls until she realizes that it was she that her daughter was idolizing all along.

The Allegro Costume Party commercial was developed at Bardzo by creative director Hubert Stadnicki, copywriter Tomasz Szewczyk, art director Wiktor Pietrzak, graphic designer Rafał Kuźma, agency producer Bartek Now.
Filming was shot by director Rodrigo García Saiz via Central Films with director of photography Mateo Londono, producer Tomek Hryniszyn (Baltica Film), production manager Artur Kotowski, wardrobe artist Malwina Wędzikowska, production designer Janusz Mazurczak.
Sound was produced at Juice, Poland, by Kuba Pietrzak and Michał “Jurgen” Jaroszewicz.
Post production was by editor Kuba Pietrzak, online artist Bartek Przybytek and colourist Fred van Eeden.
Guitar, Dog and English For Beginners, each provide a different take on the relationship between adult wishes and the aspirations of children.
Post pobrano z: Ghost in the Shell Reel

Post pobrano z: Extrapolate
